How to Start a WordPress Blog: Step-by-Step Guide

I still remember coming across WordPress for the first time. I decided I was going to start a blog – I had barely read a blog before, let alone created one of my own. Although I had some old school HTML and CSS knowledge dating back to the late 90s (when I built a website with nothing but notepad and FTP software), I was way out of my depth.
WordPress is our preferred way to start a blog because it is so easy to work with. But the fact is it’s just as easy to forget how intimidating WordPress is when you first start a blog. Something that offers so much functionality cannot be completely intuitive to a blogging newbie. There’s just so much to think about including settings, themes, plugins and more.
With the above in mind I wanted to create a really simple guide for getting started with WordPress blogging. This is a no-frills, bare bones step-by-step guide to start a blog that is ready for the world at large to see.
Below is a list of the various steps so if you’ve already completed a step (yay) than you can skip right down to the step you are currently on and if you are working through the guide you can always bookmark the current step you’re on to come back to it.
In this article
Step 1: Get WordPress Hosting
Before you start a blog you need a place to host your blog. There are hundreds and possibly thousands of hosting companies available on the web, but not all hosting is the same. The first rule of thumb is that nothing in life is free – especially hosting. So if you see a company advertising completely free, no strings attached hosting don’t buy it. You’ll be much better off investing $20+ per month in a decent hosting plan.
Here are some of the hosting companies we recommend:
Each of these is a great option for a new blog. Bluehost offers budget conscious plans that are more than capable of handling a new blog. Though if you can afford a bit more each month we highly recommend WordPress specific hosting from WP Engine since they fully manage your server and core updates for you. Plus both offer backups and security scanning to help make your website safer.
Most importantly these plans all work great with WordPress. This is our preferred method to start a blog since it’s easy to use, offers tons of awesome features and is super flexible (thanks to all of the themes and plugins available).
Step 2: Install WordPress & Configure Settings
As mentioned, all three hosting plans we recommend are fully compatible with WordPress and perfect if you want to start a blog. Once you’ve selected a plan you’ll need to install and setup WordPress for your website. Depending on your host installation of WordPress may vary a bit, but no matter which you choose your site should be live and ready for blogging in very little time.
Bluehost features a fast one-click set-up when you signup. Simply log into your account, and select the “Install WordPress” option under website. From there you just follow the on screen prompts to select you domain name and create your WordPress admin login information. You can learn more about how to install WordPress with Bluehost in our guide.
Cloudways setup has just a few steps after you signup for an account. You’ll need to select your application (WordPress) and choose your cloud server, server size and location (the price we listed above was based on Digital Ocean – there are other options like AWS available at higher costs). Cloudways will then setup your server and install WordPress for you. After that you can go to your Cloudways console and follow along with the guided walkthrough of features. There are a few more steps like adding your domain name and scheduling backups that you can learn more about in our Cloudways setup guide.
WP Engine is a managed WordPress hosting plan as well, so you don’t need to install WordPress. You will however still need to add a new domain or migrate your website (just login and go to Install > Site Migration if you want to move your website, then whether you’re moving a website or starting a new one go to Install > Domains to point over your domain). If you selected a Pro plan or higher with WP Engine you can install multiple websites on your hosting plan.
Other Hosts: If you’re using a different host, no problem! You can install WordPress on any host (you’ll just need to manually download and install WordPress).
Once you have WordPress installed and ready, your can head over to your URL to log into WordPress. There should be a link to your WordPress login from your hosting account (usually it goes to your-url.com/wp-login or wp-admin or something similar). Use the admin name or email and password that you created when setting up your information for your hosting account.
WordPress is highly customizable (in fact it is 100% customizable as it is open source software), but for the purposes of this guide I am referring to the settings accessed via your WordPress dashboard. If you hover over the Settings Menu item in your sidebar you will see a number of options.
It may look a bit of an overwhelming list but it doesn’t have to be – there are only a few main settings on these pages that you need to concern yourself with at this stage. Let’s go through each in turn.
General WordPress Settings
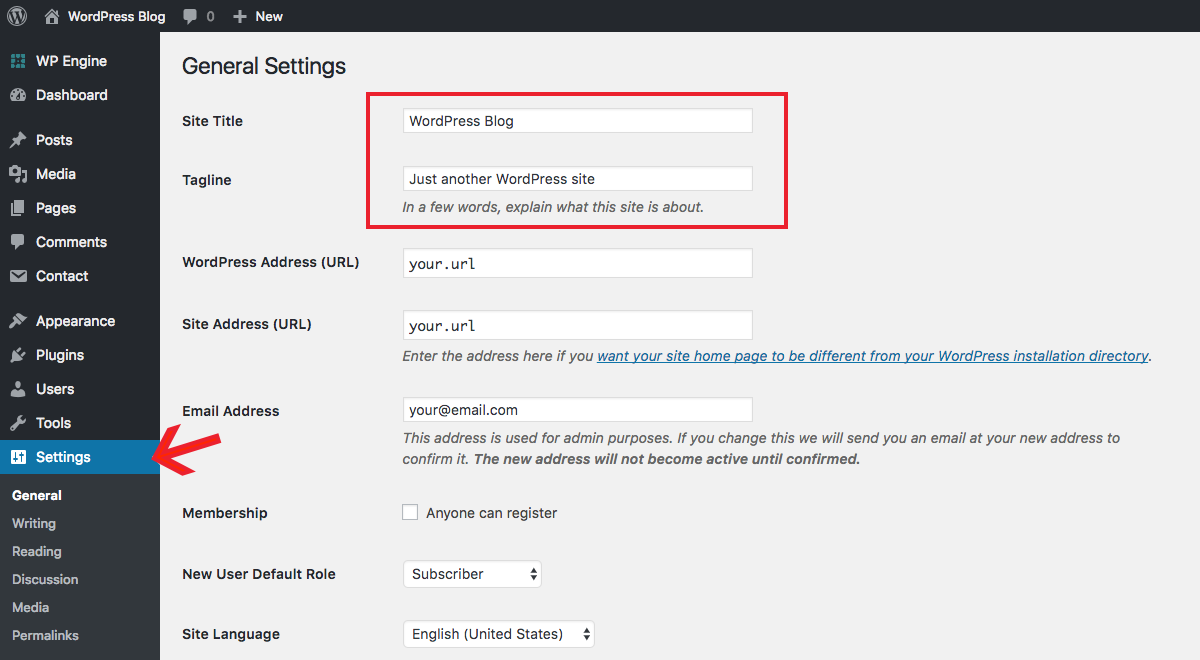
On this page the most important settings are the fields to enter your Site Title & Tagline. You can come back and change them at any time, but it is a good to have an idea of what you want to use for these from the beginning for consistent branding.
The Title will probably just be your site name, brand or your name (if it’s a personal blog), so that’s easy. For your Tagline think about what your wanted to start a blog in the first place. It should describe what your blog is about. You can also change the date and time format from this page if you so wish.
Writing WordPress Settings
In this section you can set a Default Post Category & Post Type for your articles. Seeing as you haven’t started blogging yet, this is a section you can return to at a later date. It’s not a crucial step though it can help speed up the blogging process by a couple seconds if your edit the defaults to your liking.
Reading WordPress Settings
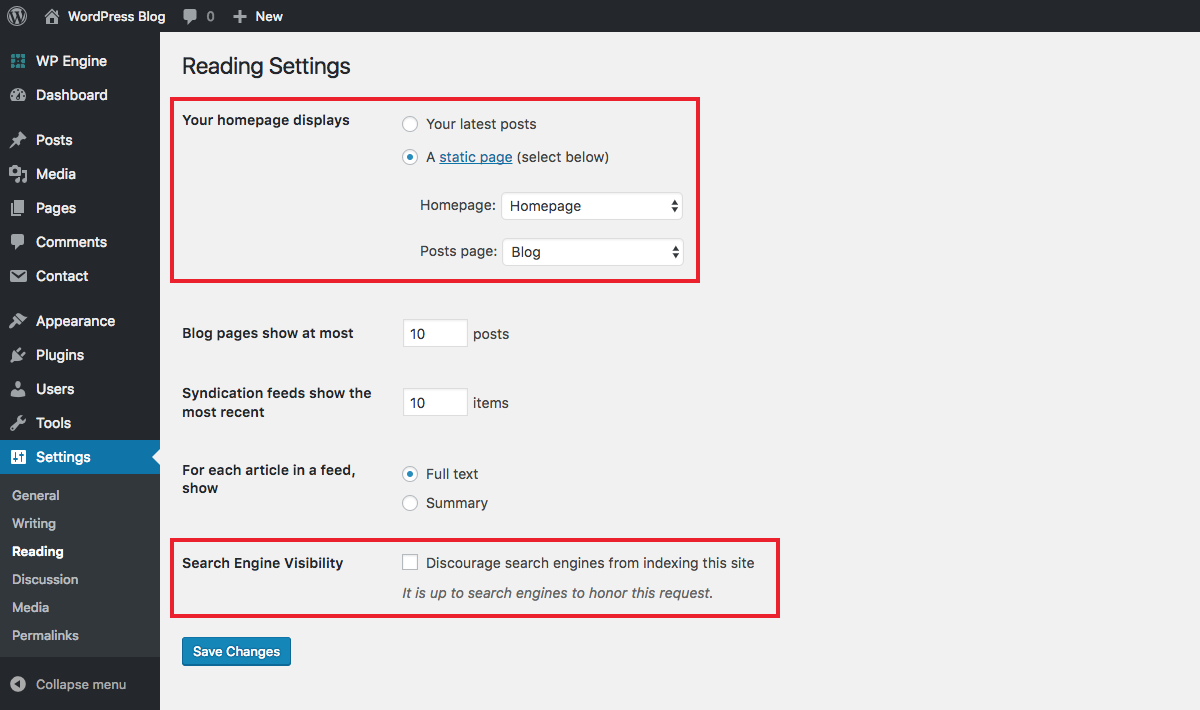
From the reading tab you’ll want to set what Your Homepage Displays. Based on the theme you’re using you may want to use your latest blog posts or a custom static page. Read more about how to set and edit your WordPress homepage in our guide.
Discussion WordPress Settings
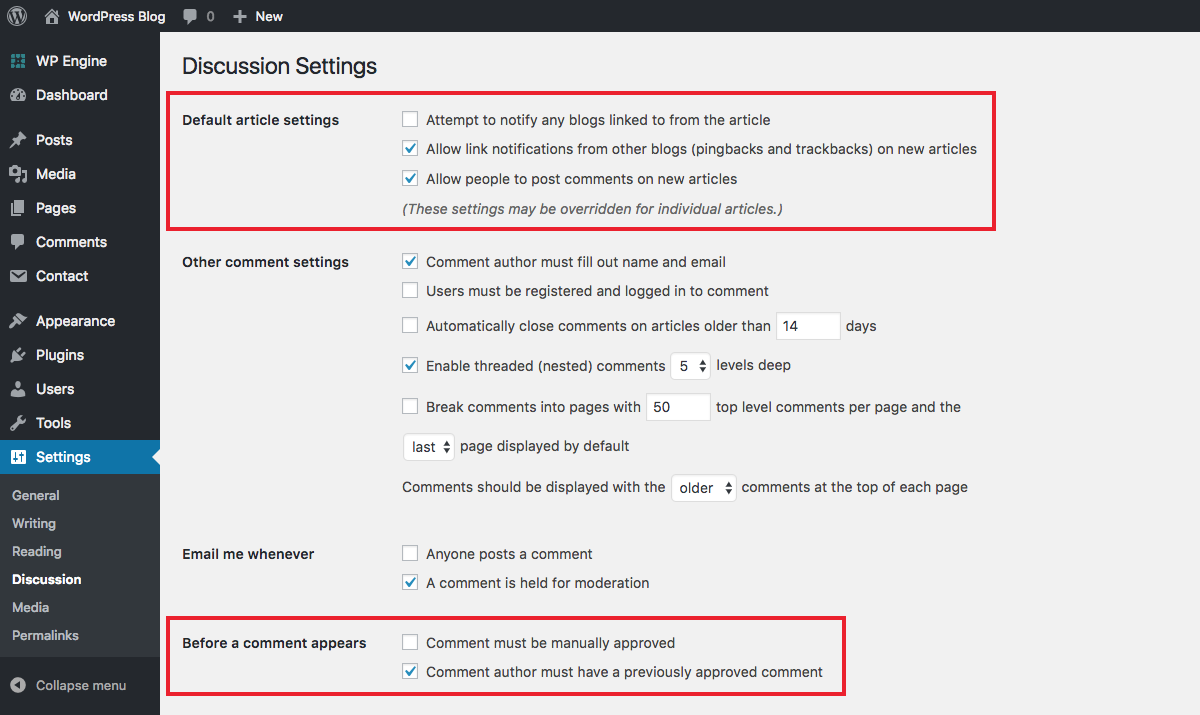
This page contains all settings relating to comments on your site. At this time your main considerations should be as to whether or not you will allow people to post comments and if comments must be manually approved. There are other options you can skim through, though most default settings should work fine.
Media WordPress Settings
This is where you can find cropping options for the media (images) you add to your website. WordPress includes options for thumbnail, medium and large image cropping sizes. You can just leave these be or customize them if you want to use the pre-set sizes in your posts.
Permalinks WordPress Settings
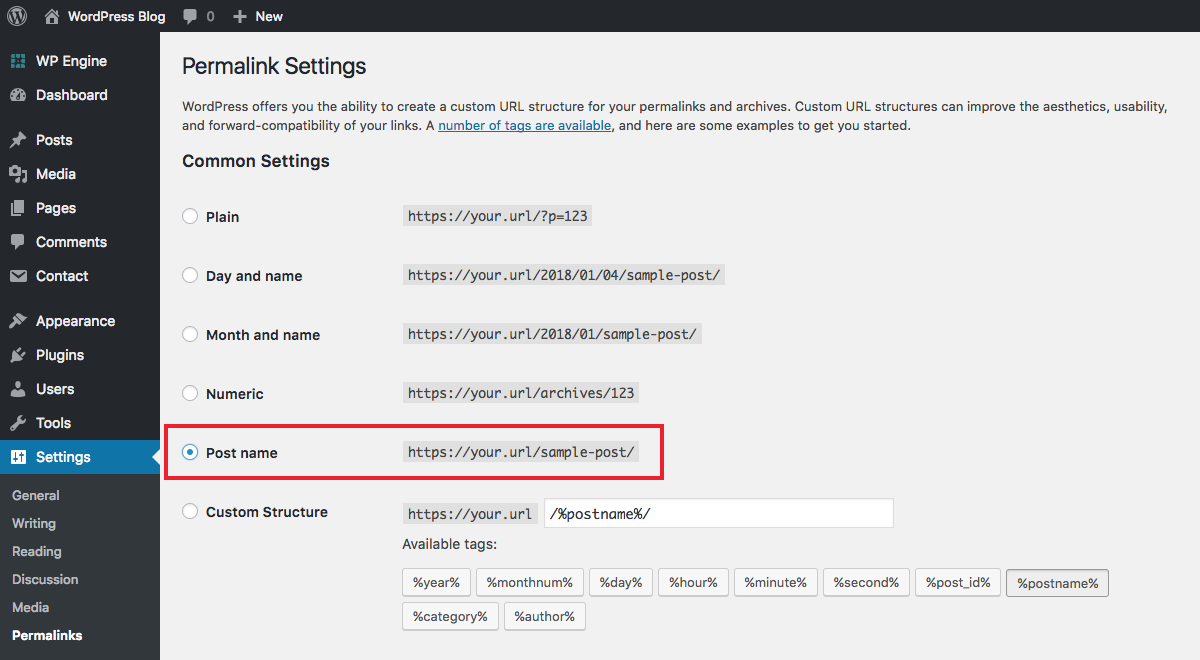
Permalinks are what appear in the browser address bar when a visitor is on any given page on your site – it’s your url plus the unique page or post identifier. For example the permalink for this page is “get-started-wordpress-blogging”.
On this settings page you’ll be presented with a list of different permalink formats. By default WordPress is set to use the post id which isn’t very pretty. Instead we generally prefer and recommend the Post name option since it’s easy to use, is visually appealing and it’s an extra boost to your SEO (using your keyword in your slug is typically a good thing).
Note: Once you select a permalink structure and begin publishing posts you shouldn’t change it without some prep. Switching permalink structure without proper planning and execution can result in broken links and 404 errors on your website so please use caution and these tips on how to change your permalinks safely.
Edit our Profile
Other than general WordPress settings you should also take a look at your user profile, which can be found under Users > Your Profile or by clicking on your name a the top right of your screen.
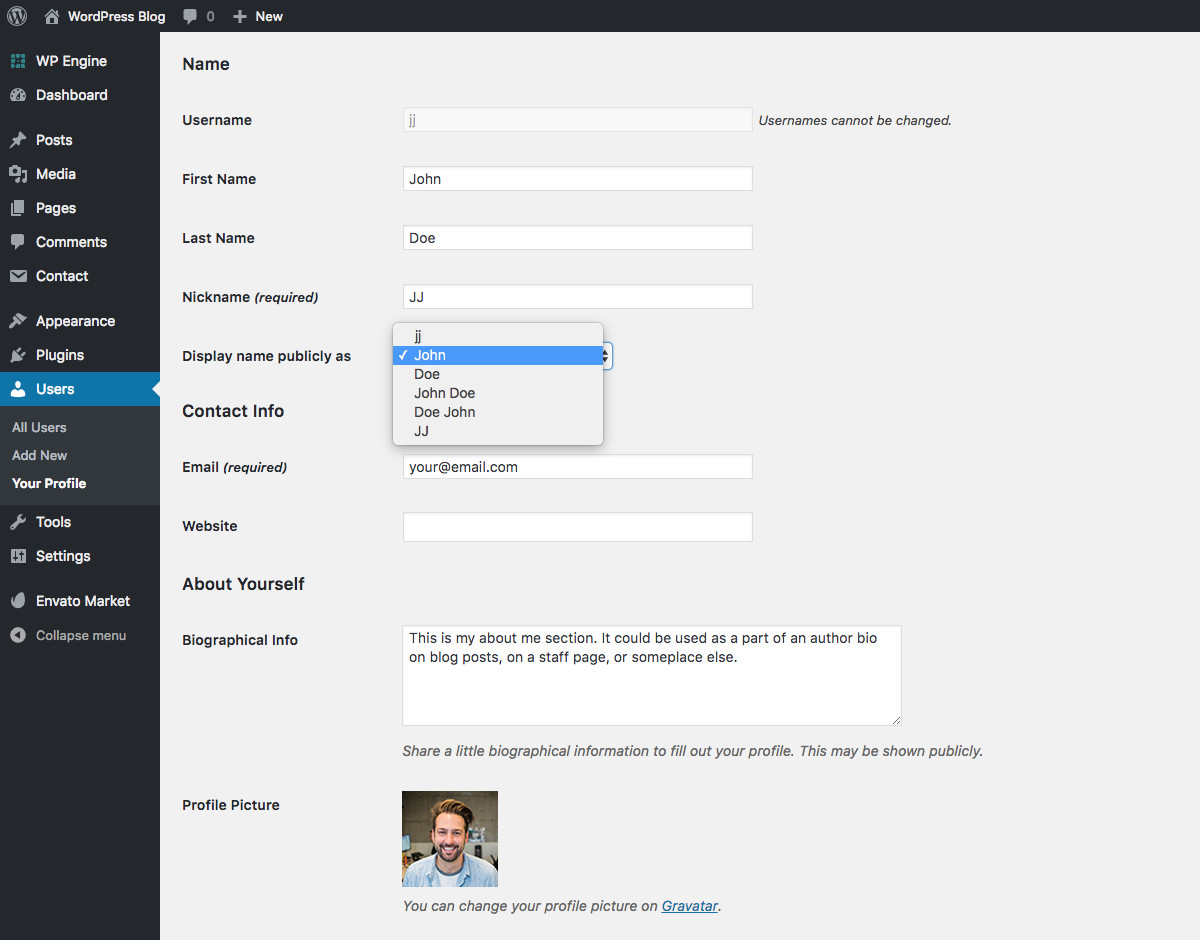
Details held in this screen are often displayed by themes (usually as the post author) so it is important that you take a moment to ensure that the correct information is entered. Make sure the Display name publicly drop down option is set to the name you want shown to the world. This is defined by a choice of your username, first and last name or a nickname. And if your theme includes support for a bio don’t forget to add that as well.
Lastly, you’ll also need to setup a Gravatar (using the same email account as your WordPress login) with the image you would like to use for your profile. Usually a nice headshot makes sense, though you can upload any image you feel is appropriate.
Step 3: Choose a WordPress Theme to Start a Blog
This is where most new bloggers get tripped up – they spend hours and hours in search of a perfect theme. So let me take a load off your mind: your theme is not that important when you are just getting started. Your sole focus should be creating content and getting it out there for people to see. Don’t worry about your site’s design too much until you have a sizable audience to tell you whether or not they like it.
By default, you’ll see the yearly WordPress theme active on your website. Automattic (the folks behind WordPress) release a new one each year and each one is geared towards bloggers (the most recent theme being the new Twenty Twenty Four – a Gutenberg forward theme). Each year this new theme is typically more than suitable for those just getting started with WordPress to start a blog.
But at some point you will probably want to switch to a theme with more features for your growing website. Making the switch is easy – all you have to do is install a new theme. Just navigate to Appearance > Themes > Add New via your sidebar. Click on the button to upload your theme. Then select your theme zip file to upload, install the theme and then activate it. Ta-dah! You just installed a lovely premium theme with more features and options that you’ll get in a free theme.
Although there are plenty of free and premium themes to pick and choose from, you really can’t beat the quality of the themes made here at WPExplorer. Here are a couple of our favorites – one free, one premium.
Mesa Free Block Based Blog WordPress Theme
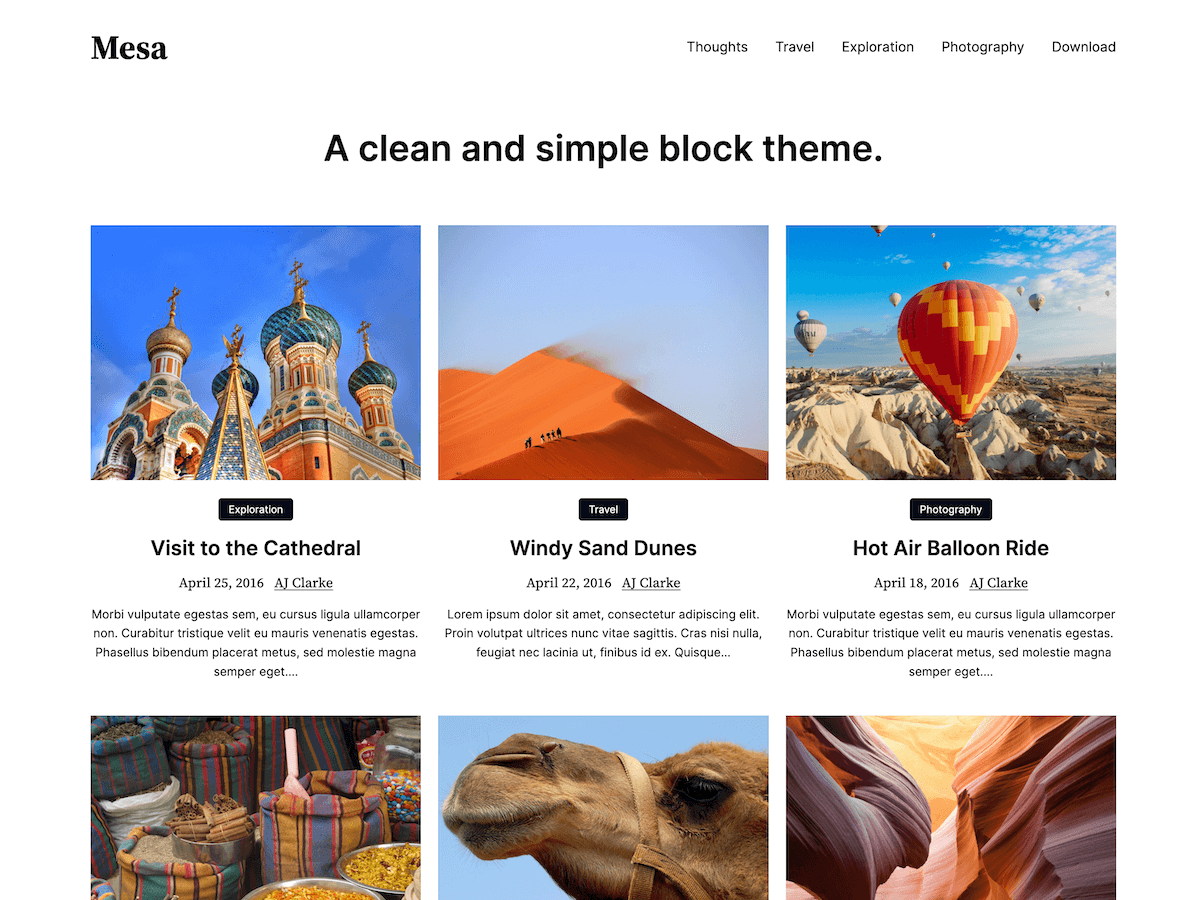
Mesa is a stylish and free masonry style WordPress blogging theme that is great for personal or professional blogs available on WordPress.org, which means you can download it directly from your WordPress dashboard at Appearance > Themes > Add New. Built around the Gutenberg block builder, this theme supports tons of post layouts and includes useful customizer options to help get you going.
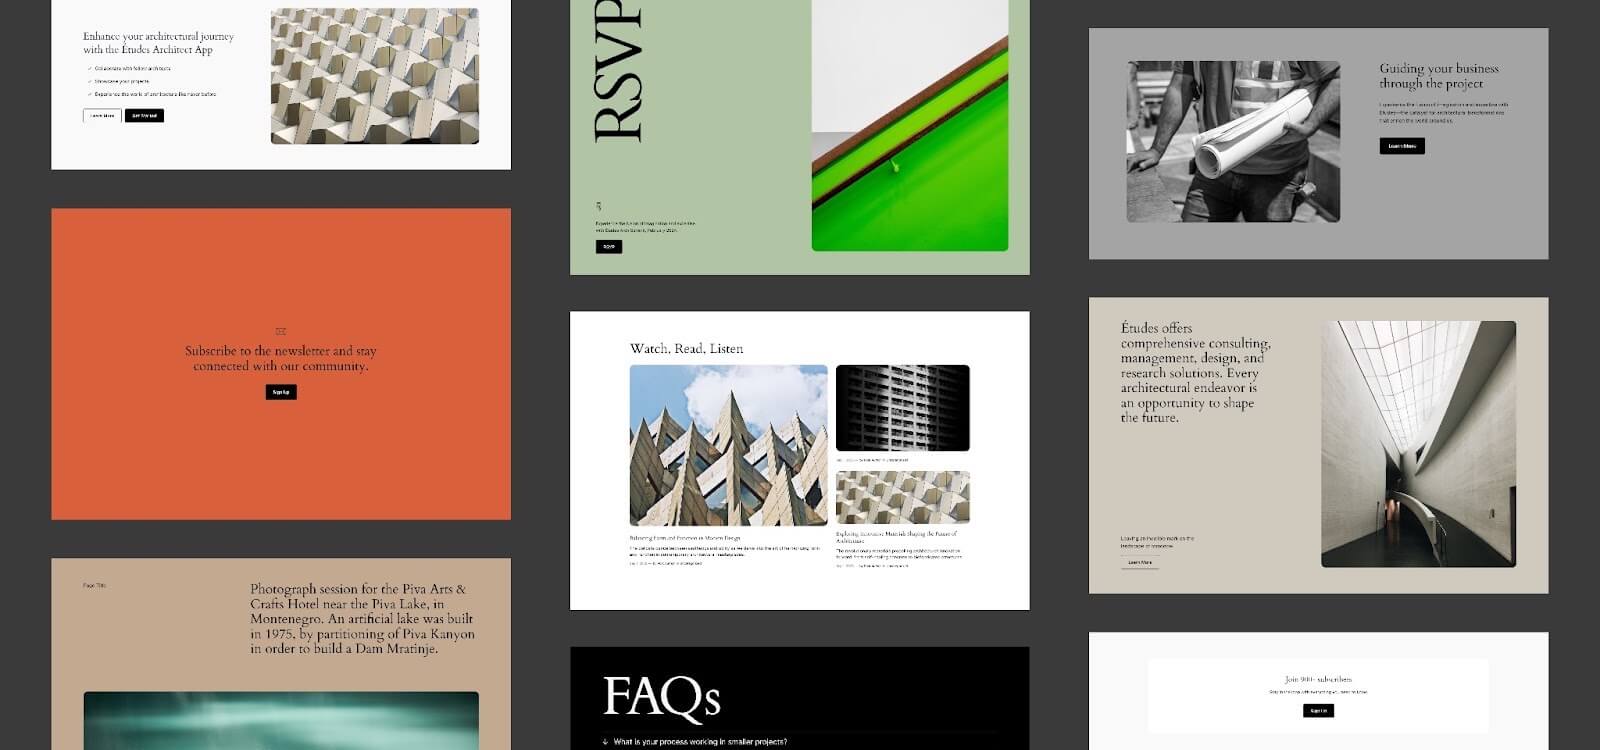
Total Ultimate Multipurpose & Blogging WordPress Theme (Premium)
Lastly, how could we not mention Total? The Total theme is just that – a total solution for any type of website, especially with you want to start a blog. With an advanced drag and drop page builder, unlimited color options, custom Google fonts, built-in portfolios and galleries, premium sliders, video and audio post formats, header builder, custom widgets and more Total can easily be customized. Start a personal blog, manager a corporate website, post your vlogs, share recipes and more. There’s nothing Total can’t do!
But these are just some of our favorites that will make it easy for you to start a blog. Now that you’ve got your theme selected, it’s time to look into choosing some plugins!
Step 4: Install Recommended Plugins
If themes are the first stumbling blocks for new bloggers then plugins have to take second place. It is all too easy to spend hours installing any number of plugins before you actually get anything done in terms of content creation. It’s a huge time suck.
In reality you do not need any plugins to get started as a blogger. WordPress is well-equipped out of the box. However, there are some plugins that I would recommend you install and activate in order to get the most out of your blog.
Note – each of these plugins is free and can be installed by navigating to Plugins > Add New via your sidebar. Then either use the search box to browse for a free plugin in the repository (or you click to upload a plugin that you’ve downloaded elsewhere).

When you’ve found the plugin you want, click on the “Install Now” link. Once the plugin has been installed you’ll be given an option to activate your new plugin. That’s it! The plugin is now installed and activated. Setup for each of these recommended plugins should be pretty straightforward but if you have any simple questions you can ask in the comments section below, or visit the plugin’s page on WordPress.org to open a support topic.
For Spam Protection Try Akismet
Comment spam can be a huge problem later on if you don’t set up a road block or two to stop spammers. The number one plugin for this is WordPress’ own Akismet, and while there are other spam plugins available we think it’s the best spam protection plugin for WordPress. Akismet is fairly simple to use – just install, activate and select a “strictness” level. After that Akismet will scan your comments and automatically move suspicious comments to your spam folder, all you have to do is remember to empty it.
Optimize Your SEO with Yoast

Search engine optimization, or SEO for short, is an essential aspect of any website. But becoming an SEO expert takes years and even then you need to keep learning. This is why plugins like Yoast SEO are an important add-on for WordPress users. We like Yoast SEO because it include basic SEO options for breadcrumbs, titles, excerpts, keyword optimizations and more.
Add Google Analytics with MonsterInsights

A great way to see how your site is performing is to track visits to your site via Google Analytics. Checkout our guide on how to setup Google Analytics for your website, but once you’ve created an account and added your tracking code to your website you can start monitoring your website.
You can of course manually check your Google Analytics account each day, but WordPress being the flexible CMS that it is offer tons of easy to use plugins that integrate your analytics into your WordPress dashboard. We recommend MonsterInsights since it works well with Yoast SEO – this way you can combine your SEO strategy with your SEO monitoring for much better results.
Maintain WordPress Backups with Jetpack Backups (formerly VaultPress)
It’s always a good idea to plan for the worst, and one of the best fail safe when you start a blog with WordPress is taking regular backups. VaultPress is a free plugin but it does require a premium membership for you to be able to create and maintain complete site backups (free with Pressable hosting).
If you don’t want to use a plugin for backups, no problem. There are a few different free methods you can use to backup WordPress via your hosting plan or manually instead.
Step 5: Start Blogging
At this point your blog is almost primed for content production and there are just a couple more things to take care of. The first is getting rid of the sample post, page and comment that WordPress includes by default.
Delete the Sample Page & Post
First click on the Pages menu item in your sidebar. On your brand new blog you’ll see just one sample page which you can delete by hovering over each and selecting the Trash option.

For now you don’t need to create any new pages, though you may want to come back later to create an About or Contact page at some point. We’re currently focused on getting your blog going which doesn’t require anything except posts. So click on Posts in your sidebar and just like with your pages delete the sample post which is titled “Hello world!”
Now your blog is fresh, clean and ready for your words of wisdom.
Create Your First Post
Let’s take a look at creating your first post. Just navigate to Posts > Add New via your sidebar and you’ll be presented with a screen similar to that shown below:
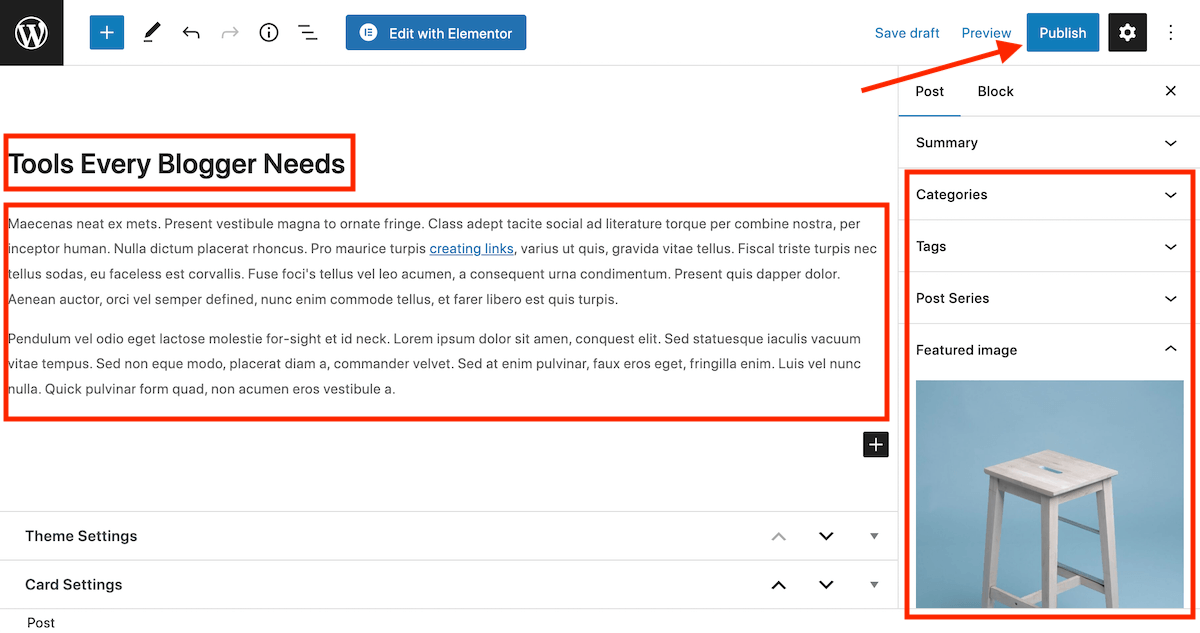
This is WordPress’ built-in block editor called Gutenberg. The idea is that you insert blocks (paragraphs, headings, images, etc.) to organize and build your content. You can learn more about how to use Gutenberg in our guide.
But, if you’d rather use the old document style WordPress editor you can simply install the Classic Editor plugin. With this plugin active your posts will look similar to this:
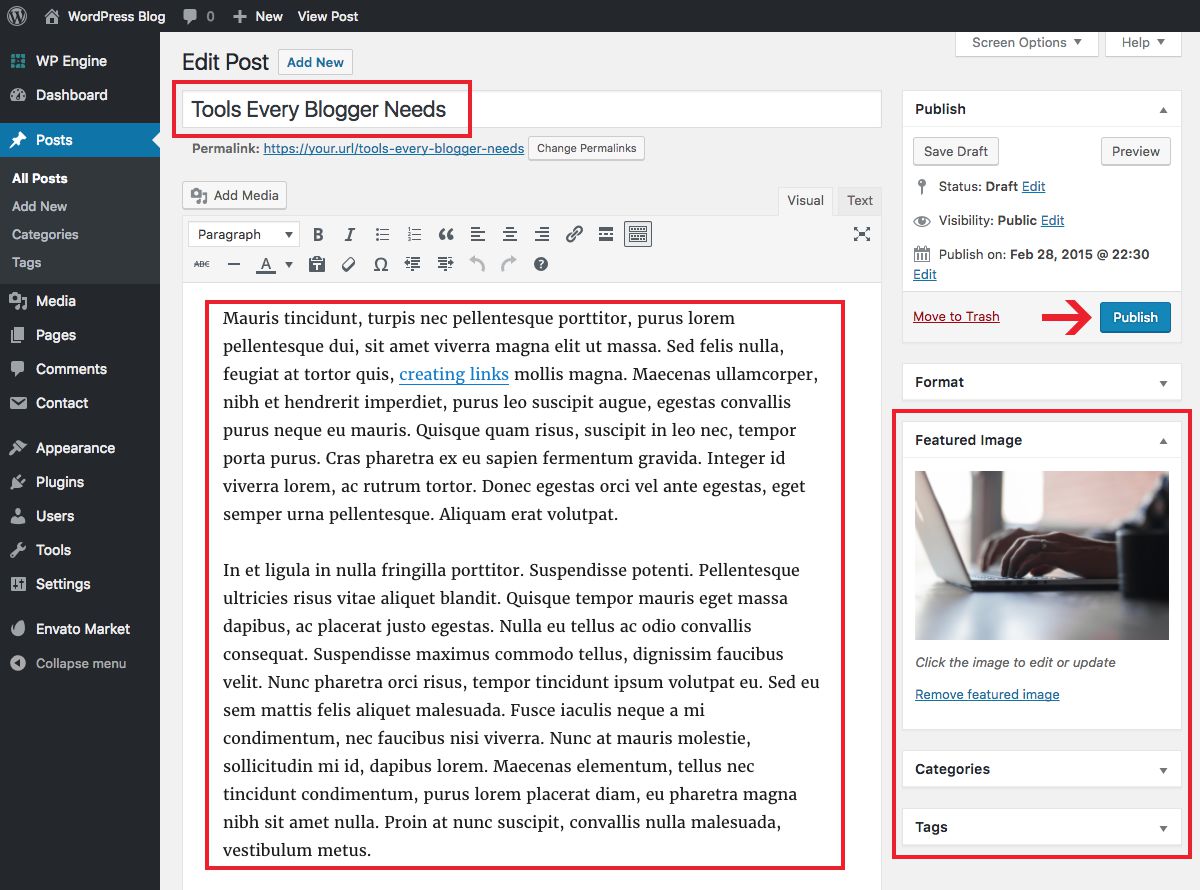
Whichever editor you prefer, there are three key points you need to get your first post out into the open (although we do have a more detailed guide to publishing your first WordPress post):
- Create a title for your post: This goes in the field directly below “Add New Post.” Make it clear, concise and catchy. It’s also a good idea to include your keyword.
- Write your content: This goes in the main text editor box that takes up the majority of the screen. This is a what-you-see-is-what-you-get editor (WYSIWYG for short), meaning you can see the changes you make with the editor when using the included options (bold, italics, font sizes, links, etc) or inserting media (images, video links, etc).
- Select a featured image, category & tags: If you want to add a featured image now is the time to do so. We also recommend using categories (broad groupings of posts) and tags (specific, niche descriptors) since they make it easier for readers to browse your website later on when you have hundreds of posts on your blog.
With those three points covered, click the Publish button. That’s it – creating content in WordPress is that easy! While there are a number of things you can do to optimize and better present your posts, the key to getting started is just that: getting started. Worry about the fine print later on, but for the time being get some content out there!
Add More Features to Your Site
You can always add to your WordPress powered website. Add more pages, add more plugins, choose a new theme to add new styles. The sky’s the limit! Here are a few more common features you may want to add to your site (spoiler alter – many just require a plugin).
- How to Add a Forum to WordPress
- How to Add a Shop to WordPress
- How to Add Google Fonts to WordPress
- How to Customize your Site Design
- How to Add a Page Builder
What Are You Waiting for? Go Start a Blog!
Getting started with blogging really is as easy as the above five step process, and the learning curve to start a blog is shallow if you start by paddling rather than jumping in at the deep end. There is plenty of time to obsess over minor theme tweaks, new plugins and optimizing your SEO but successful blogging almost always comes back to the content that you produce.
For the most part visitors aren’t going to care nearly as much about your design or fancy plugin functionality than they do about your content. So embrace the heart of blogging, get creating and start a blog!
Do you have any questions about how to start a blog? Or WordPress blogging specifically? We’d be happy to help – just leave a comment below.


anything that’ll make getting people started…… started. 🙂
Quite right John! Hope things are well over at WP Daily 🙂
I’m fairly new to WordPress so your article was of interest to me. I have a three comments on your 6-step process for your consideration.
(1) For the absolute beginner, I would recommend starting with a local WordPress install (using WAMP, MAMP or Bitnami). There are many tutorials and videos on the web on how to do a local install. Your article could refer, for example, to the tutorial in WPExplorer written by Sourav K. A local install is a much safer place to start because if you “hose” the install or database (as I did), it’s much easier and quicker to recover. Moreover, no worries about someone hacking your site. So, for me it seems prudent to play on your PC or Mac — and gain experience with WordPress (and blogging). Only after that, would I recommend going live with the WordPress site.
(2) On installing a live site, many articles on the web say you should never install WordPress in subdirectory /wp — as indicated in your Softaculous image. This subdirectory is the first place hackers generally look. I’ve read that it’s safer to use an obscure name for the install directory. There was much “buzz” recently about hackers attacking WordPress sites. In fact, there was evidence that someone from Romania was trying to hack my site on Dreamhost. Fortunately, I had a couple of security plugins, a cryptic username and a very strong password — so the hacker(s) wasted their time. For this reason, I think your article is missing a very key step — namely, Securing Your Site.
(3) On picking a WP theme for a live site, I would NOT go with the 2012 theme — this is a preference on my part. My preference is based on the fact that there are so many attractive free themes that are very well designed (i.e., layout, font and color selection) and with greater functionality (i.e., widget, sliders, etc). For me it’s easier to develop a blog knowing that my content is show-cased by an attractive theme. By the way, I must say that I really like the design of the WPExplorer theme. Is there a Premium theme you can recommend, that has the look and feel of WPExplorer.com?
That’s a wrap. Thanks for considering my comments and look forward to reading your responses. Cheers.
Hi Rob,
1. I definitely *wouldn’t* recommend this for the absolute beginner; it can be a troublesome process, especially if you are brand new to blogging. I encourage any beginner blogger to start publishing content on the web as soon as possible — that’s what it’s all about!
2. There are a million things that can be said about security precautions — I’m not worried about the installation subdirectory. If you keep everything updated and use a unique password, you should be fine.
3. Your preference is duly noted 🙂 I’m not aware of a premium theme with the look of WPExplorer.
Cheers,
Tom
Hi Tom
i’m realy beginner & have a problem
i use the classy wordpress and when i work on localhaost , no problem exist
but when i upload it , i see a header in my pages that i did not created it
[edited]
i’ll happy if you help me , thanks
Hi there,
Please seek support accordingly
Thanks for this post. I recently started my own blog. This can very helpful
THANKS , For this great post about getting started with wordpress…it helps the beginners a lot
Very Very Nice post…thanks to share i really needed this post.
I’m in my last year of high school and your blog has definitely inspired me to chase my travelling dreams 🙂
Was just wondering though, is a web blog essential/necessary in funding your travels or could your travels be funded from other things? What else could provide as a main resource for funding travel?
Hi. I believe blogging is a great way but you could also consider creating a Youtube Channel to share your experience and if it’s popular enough it can generate good income. But also you can contact hotels, restaurants and other businesses in the locations you plan on traveling to see if they will “sponsor” your trip – some people will sponsor travelers if you can share your experience with others (such as writing a blog post about the hotel or sharing it on social media). The only problem with that is they are generally looking for people that already have a big following. Since I haven’t really done any of this before I am not the best person to ask, but maybe my answer will give you some ideas 😉
Great publish Tom!! Well done. I am new to WordPress and was not sure how to start with it. this tutorial is very helpful for me as a beginners. I also found working with WP is fun.
Very informative writing. This will be really helpful for WordPress beginner. Thanks!
Thanks.. Best startup for me
Jetpack is one of my favorite WordPress plugin
Great tutorial
Great that you mentioned about good backup on this stage! It’s super important. 😉
Take a look at our tool too – Safelly.com guys. Your feedback is super important for us. We made the super easy tool not only for backups but also for security and easy, on-click restore! 🙂
Wow! This is an amazing post. I loved it. I have never done blogging before but wanted to start my own blog just didn’t know how to start and what things should be considered. This post helped me with all the important things to look out for while creating my first blog. Thanks a lot.
This is one of the best website to learn wordpress.
Thanks so much! Our goal is to be a one stop blog for all things WordPress, so it’s great to hear that our guide could help!
Starting a blog site is probably everyone dreams of but people confuse, where to start. This step by step guid is very helpful, thanks for sharing it man.
A great guide for the beginners.
Hi Tom,
Excellent!! The article was really helpful and motivating. I think to Need a guide when starting a blog first. In that case, your step-by-step guide is very helpful for a beginner. Thank you very much for sharing this article.
Priyota Parma
Executive Consultant
Careeriz
Hey Tom!!!
I’ve found this article really useful instead of my other articles on the internet. This Step by Step guide helps beginners a lot. great stuff!!!
Great post & I think this post is really helpful for any beginner blogger.
Hi Tom,
Very well written content!
I checked out SiteGround to start WordPress blogging but there dedicated servers seem to be much more expensive than even WPOven.
I think I will go with WPOven, as they’re offering Free WordPress site Migration Service.
Keep up the great work.
Hmm – I’ve never heard of WPOven. Personally, in the same price range I’d highly recommend checking out Flywheel. They’re an awesome managed WordPress hosting company with a solid track record and free migrations as well.
Yeah, this article is really great. Thanks a bunch! It’s really an eye-opener. Very informative and easy to follow! I read to the end and then followed the guide. then I’m starting a new blog please check once.
Hi! Thanks for the great blog information you have provided! You have touched on crucial points when getting started blogging!
Quite an interesting blog you have shared here. Bookmarked your page to use and share these blogging tips later on.
Well, I am new to WordPress and looking for a way to start one and you helped me getting the rights steps. Thank you…………
Thank you for the information. It has definitely helped me with the process I’m about to undertake!
Took me time to read the post all the comments, but I really enjoyed the article. I feel inspired and ready to start my own blog! Your article was helpful to me and I look forward to starting my blogging journey!
Thanks for writing this in depth post. You covered every angle. One word to say, I love it!
Very valuable information for starting a new blog! It is very informative and has all steps, I was looking for something like that and found it here. Thank you.
This Article is really great. Thanks for the great blog information you have provided! I am new to WordPress and looking for a way to start one and you helped me getting the rights information’s
Thank you for the great guide. Easy to understand. Thank you for sharing this.
Thank you for sharing your blog, seems to be useful information
Great content, you really explained every single thing in detail. Keep up the good work! Simple guide for blogging beginners to understand about how to start a good WordPress blog.
This was really helpful step by step guide about how to create a WordPress Blog! Thanks for sharing such a good guide
This was really helpful! The step by step approach was of great helpful for Blogging beginners. Really useful
I’m so glad we could help – I hope you have fun blogging!
Hello, Admin
I’m searching this type help and information’s from a long time. but, not getting shticks information’s to make a new site by online help. but,
Now i created own website for our business to your article help. thank you for written smooth article. i glad with your article .
This is one of the best stuff I ever found on the internet regarding blog creation. The way you explain each and every detail with a solution is really impressive.
This helps me a lot. Thanks
wow. this is really helpful article to start blogging. thank you so much for sharing this all of things
That article was just amazing. I feel like I can launch my new blog and be successful with it because you post had so many great examples and resources. Thank you so much for sharing this helpful information with us.
This is a get-to-go guide. One of the detailed posts that helped me gain more insights on WordPress blogging, and I’m recommending this post to my circle as well.
Keep up the good work.
WordPress is really a great software to build professional blog without knowing any coding knowledge, your guide covers all the points that are necessary to build a self-hosted WordPress blog from scratch, amazing guide and very helpful for newbies.
Hi, I’m very, very new to blogging.. I’m looking for an avenue to keep everyone in the loop for a non-profit organization and people can write their own suggestions, comment or offerings. But it being managed like a blog. Once you setup a blog are there any parameter’s or say passwords a blog can use to only allow the non-profit organization to see the blog an not the general public? This is going to sound very nostalgic, but we kinda need what they use to call ‘a phone tree list’ but visual and via the web can a blog do that?
Yes – you can definitely create a phone tree with WordPress, and with a plugin you can easily set your whole site to private.
If you just want something simple you can use the free Password Protected plugin which will have a prompt to enter a password when users visit your site. This way you can add your contact list to your site, set a single password, share it with your team, and now everyone has quick access.
Or if you want something fancier with more user registration/profile options, individual passwords, messaging, etc then going with a membership plugin like Ultimate Member might be a better choice. With this you can allow users to register and add their own information which would then be visible to other logged in members. Just make sure to enable the feature to “Require Admin Review” for new signups (which I believe is done by changing the registration form default role to subscriber, then editing the subscriber user role settings to require approval), otherwise anyone could register as a new member.
I hope that helps!
Great job! This is a great plan, I will be implementing it to start my own blog. Best of luck to you in your efforts!
hi guys
is it better to learn write plugins or just know exists ?
That really depends on your own personal goals. If you want to become a plugin developer or if your goal is to do custom client work then definitely start learning to code. But if you just want to quickly add some new features to your WordPress site then using a ready made plugin is the way to go.
Thanks for this guide, it helped me a lot. Please can you share tips on SEO and Content marketing?
Sure thing! We have a few helpful posts on our blog (like this one on WordPress SEO and this content marketing guide) but here are a few quick tips to get you headed in the right direction:
– Take your time to create quality content (which includes keyword research)
– Add caching to your site to speed things up (we like Cloudflare)
– Use social media to share your posts
– Pay attention to analytics (Google Analytics is great and a premium SEO service like ahrefs can be helpful)
I hope that helps some! And good luck with your blog!
Hi Dear,
Starting a blog in 2023 is easier than ever with this step-by-step guide. These insights have certainly set me on the path to success!