How To Safely Change Your WordPress Theme

On the surface, changing a theme, might seem harmless. It’s so easy, it’s hard to imagine it can do any harm. You can even do it from within the dashboard these days, without any manual FTP upload required. It’s quick, painless and perfectly safe, right? Depends on how you’ve set up your site.
The thing about WordPress sites is that they often become more of a puzzle, or jenga tower, over time. You have your theme, added plugins and any small (or major) edits you might have done. These all come together to create a beautiful functional site that suits your needs.
And that’s why it’s important to be careful when you change your theme (or even update WordPress on your site for that matter). If you pull out the wrong piece, the whole structure might collapse. And then you’ll end up having to go through a long (and with some webhosts, costly) retrieval process. Or you may end up having to replace many of the plugins you’ve grown to know and love.
But, there is a way you can make changing the theme a 0% risk endeavor, and luckily, it’s covered in detail below. Let’s get started!
Step 1. Select A New WordPress Theme
If you haven’t already, find a new theme you love. If you’re not a developer, try to find a theme that looks more or less how you want it to. A great place to look for premium themes is Themeforest. Here you’ll find lots of WordPress themes that have plenty of color options, added features, and even drag & drop page builders (like our Total WordPress Theme) to make it easy for even non-coders to customize their WordPress theme.
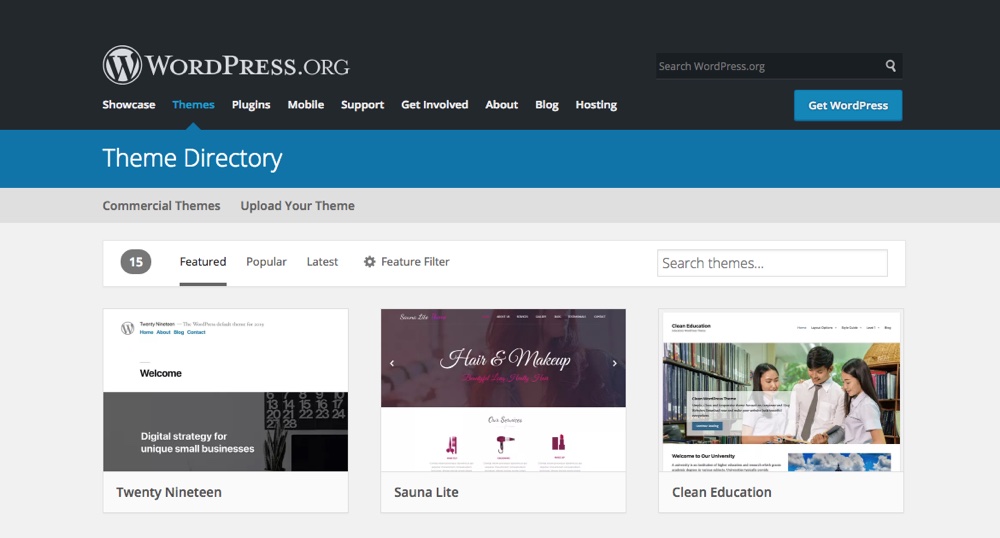
Of course if your budget doesn’t allow for a premium theme, have a look at our WPExplorer Free WordPress Themes or at WordPress.org’s massive repository where new free themes are added all the time.
When selecting a new theme it’s important to make sure that your new theme supports the plugins you deem necessary. If you’ve built an entire store with WooCommerce, you’ll probably want to continue using WooCommerce with your new theme. So just double check plugin compatibility and main theme features before committing.
Of course, if you’re a developer you don’t have to worry about finding the “perfect” theme. You probably have the knowledge to create or customize a theme yourself. Once you find a theme that meets your needs, move on to step two.
Step 2. Create A Backup Of Your WordPress Site
It’s a good idea to backup your WordPress website before changing your theme, and there are quite a few ways to go about it. In this post we’re going to focus on two different methods: using backup plugins, and backing up your WordPress site manually. Both are fairly easy processes (even for new users).
Method 1: Using A Plugin To Backup WordPress
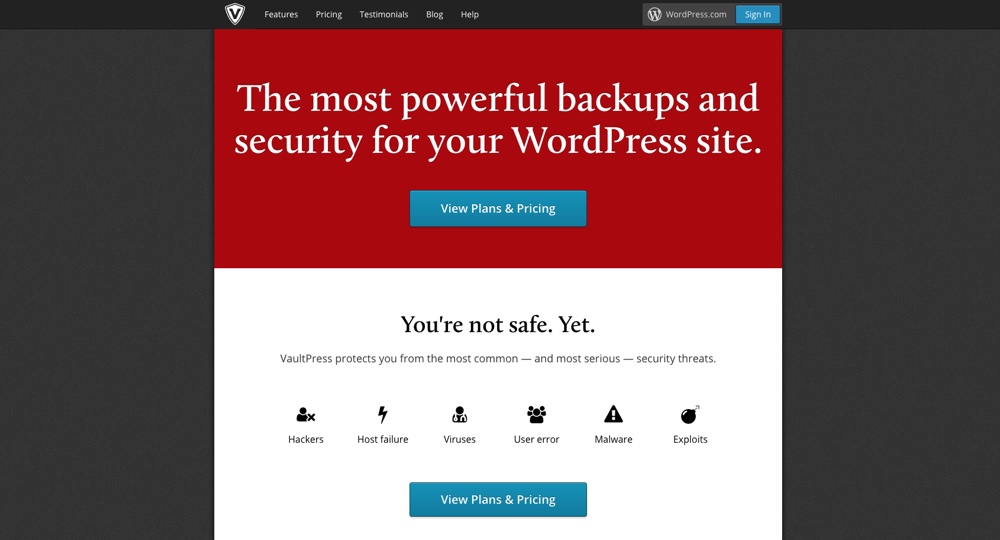
The best backup plugin (in our opinion) is VaultPress. It’s easy to use and takes a complete backup of your website. Plus it starts at just $39 per year (for a JetPack Personal plan). A low price considering it offers automated backups, 30 day backup archive, and 1-click restoration. But wait… there’s more! Because VaultPress is a part of JetPack plans, you’ll also have the option to enable Akismet and JetPack premium features on your site.
The biggest benefit of having a plugin do your backups, is that you don’t have to worry about it.
A couple other solid premium options are WPvivid and Solid Backups. If you want to learn more about either, checkout our full WPvivid review and BuddyPress review.
And if your budget is limited, a standout free alternative is Updraft Plus. Updraft not only backs up your site, but uploads it to multiple locations “in the cloud”, all with a single click. And it also lets you to do a simple 1 click restore if something has gone horribly wrong.
That said, if your website is a big part of how you make your income, or incredibly important to you in other ways, you would do good to make a manual backup as well every now and again. Just to cover all your bases.
Method 2: Manually Backup WordPress
While backing up your WordPress site manually might seem like a big, complicated, even, overwhelming task to a newer user, it’s really quite straight forward.
#1 Log into your webhosts control panel for your site (whether that’s cPanel or something else).
Most webhosts have the option to either log into your account, or into the control panel through their website, so go to your webhosts site and log in.
#2 Find FTP login information, or create a new account.
To do this, click one of the options inside the control panel menu that says something like “FTP users/accounts” or “FTP access” or “FTP settings”. If you don’t see any users, or you don’t know the password, you can quickly create a new user by clicking “add new user”, then creating one.

#3 Login, and copy all relevant files from the right directory.
Now, at this point many people would advise you to get an FTP client like FileZilla, but you can actually access your site through ftp with your web browser, or even good old Windows Explorer (or finder/nautilus if you don’t use Windows).
![]()
To do this, simply type “”ftp://yoursite.com” into explorer, or the other one, and log in with information you found, or the user you just created. I like to use my file browser because it makes backing up as easy as copying and pasting into the desired location, then making the folder into a zip archive.

#4 Go back to the control panel, and open up phpMyAdmin.
For many control panels this involves a fair bit of scrolling downwards (look for the logo pictured below).
![]()
#5 Choose the right database.
If you have a lot of WordPress sites running on the same hosting a lot of databases will be in the same phpMyAdmin. So you need to double check that you’re choosing the right table to back up. One way of doing that, is simply going into the databases and checking what’s written in the posts under the “wp_posts” section.

Another way to find out, is by checking your wp-config.php file on the relevant site. You can do this either through the WordPress Dashboard, or by opening the backup copy of the file in a text editor. (Be careful not to edit it.) Simply search for ‘db_name’ and you’ll find it instantly.
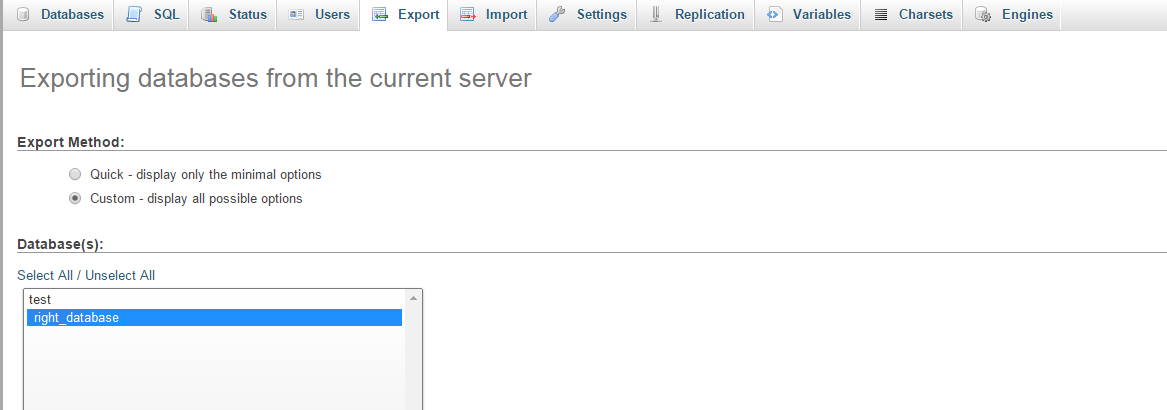
#6 Export the database
Simply click custom, and select the right database when choosing which one to export, scroll past the other custom options, and click go. It’s exactly as simple as it sounds. Another piece of good news is that it’s just as easy to import a table. If something goes wrong… and you already know how to do it!
Step 3. Clone Your Website For Testing
There are two easy ways to clone your website for testing, either by using a staging site that comes with your hosting plan, or by setting up a local server.
Cloning Your WordPress Website To A Staging Site
Many WordPress hosting plans include access to one-click staging such as GoDaddy and WPEngine. These are great options since they’re online, so you can login to test the theme on various devices (something you can’t do with your localhost since it’s confined to your computer).
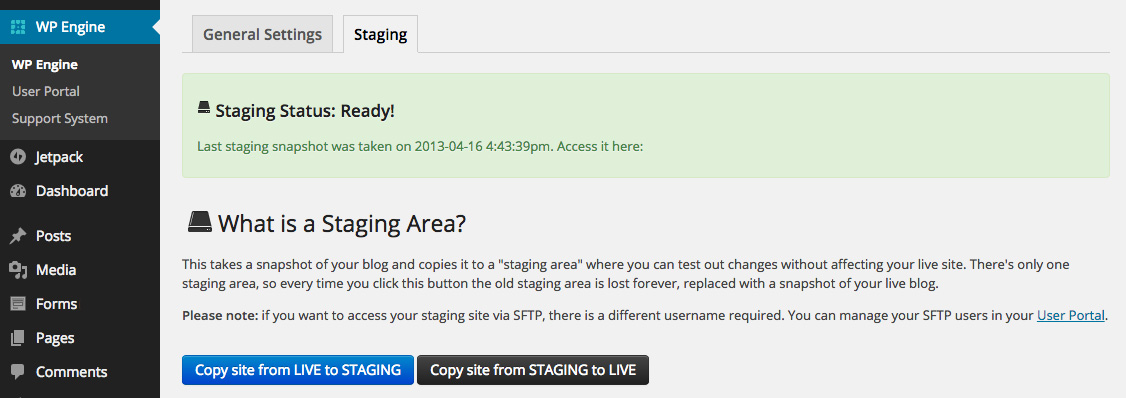
If you’re using WPEngine this process is extremely simple (as it is with most hosts). All you have to do is log into the WordPress website you want to duplicate, click on the WPEngine menu item at the top of your dashboard, click on the staging tab and the click the big blue button to “Copy site from LIVE to STAGING.” And that’s it (another reason why we love WPEngine so much).
Cloning Your WordPress Website To A LocalHost
Setting up a localhost is also a great option, since a local version is accessible even without an internet connection (making it extra useful). And just like backing up your website, you can either use a plugin to help or manually clone your website.
Method 1: Using A Plugin To Clone Your WordPress Site
Depending on your desktop operating system there are a few options to setup a localhost server.
#1 Install local server software & WordPress.
You can choose from XAMPP, WAMP, MAMP and others. What this software does, is recreate the environment of a webserver on your very own computer. Not only does this allow you to test new themes, plugins, and WordPress updates out on your WordPress site. It allows you to make completely ready-to-post drafts in WordPress, when you don’t have an internet connection.
Remember to activate Apache and mySQL after installation is complete. Once your localhost is ready, you’ll also need to install WordPress locally.
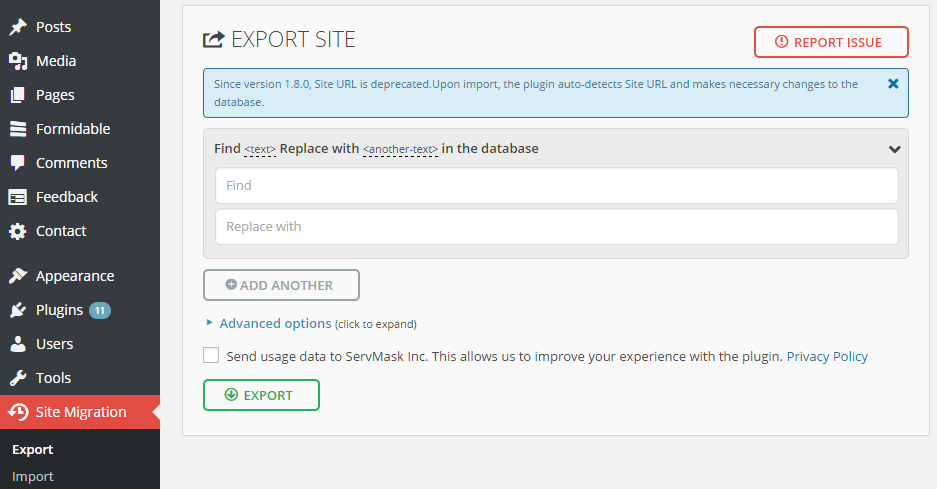
#2 Install plugin on original site and export.
As an example, we’re going to be using All-in-one-migrate here. But you can use any plugin that you prefer. Among the other free plugins, Duplicator seems to be the most raved about. Simply add and activate your plugin of choice, and then export your website accordingly.
#3 Install plugin on local hosted WordPress and import.
This is fairly straight forward. Log into your locally hosted WordPress site, install and activate the plugin, then import.
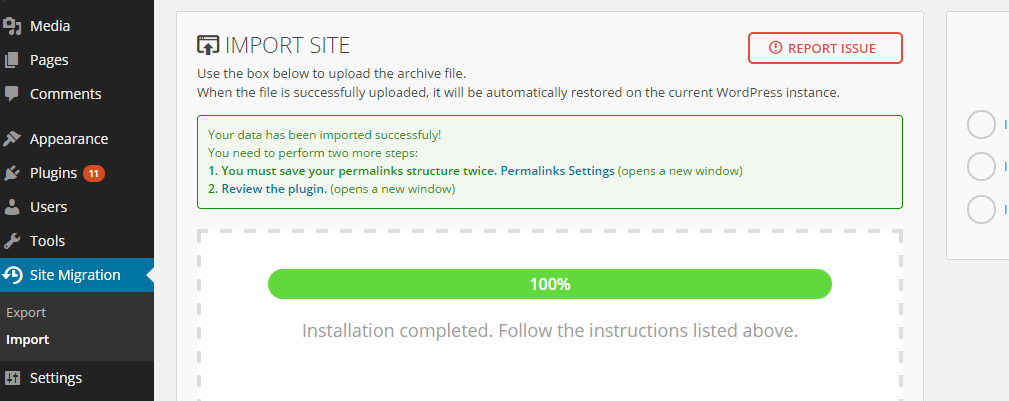
#4 Wait and enjoy your new clone.
Wait a while as the plugin imports the copy of your site (this can take a quite a while, depending on the size of your site). Then open it up and enjoy once it’s finished. It’s that easy.
Method 2: Manually Cloning Your WordPress Site
Manually copying your live site just includes a few extra steps.
#1 Prepare your local server or staging site.
Whether you’re using a plugin or not, this step is still the same. You will still have to setup your localhost and install WordPress locally.
#2 Copy and paste backup copy of WordPress
If you plan on creating the local clone manually (and you’re already halfway there) you just need to copy the backup copy of the files you took earlier. Just paste them into the appropriate folder ( ampps/www/ folder if using AMPPS, or the mamp/htdocs if you’re using MAMP). Make sure to place the files in a separate folder. This is to avoid trouble with the ‘server simulator’ software (should be placed in for example ampps/www/wpclone/ if using AMPPS). If you didn’t take a manual backup copy already, follow the steps laid out above.
#3 Open up phpMyAdmin and import the database.
First open up the local server dashboard. From here open the phpMyAdmin (if you’re using AMPPS you could also simply enter ‘localhost/phpmyadmin’ into your web browser instead). Click import. Then select the sql backup file you saved earlier, during the manual backup (again, if you didn’t do the manual backup, follow the steps listed above).

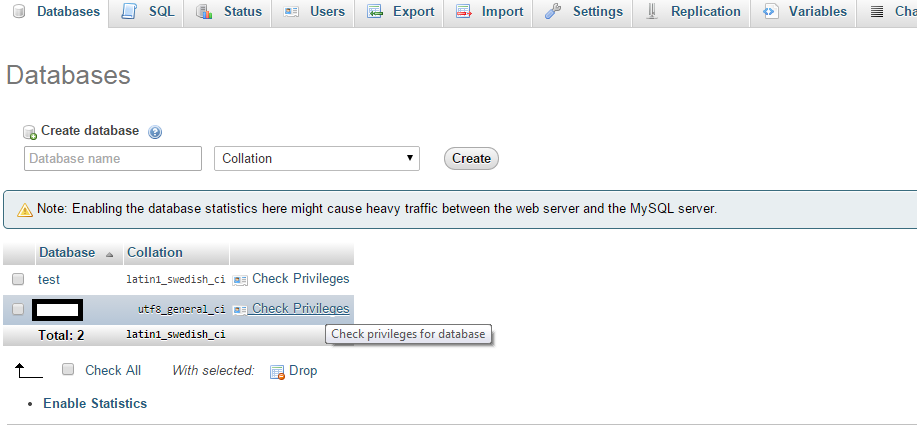
#4 Find correct database user/password info and create a user in phpMyAdmin.
First, open up your backed up wp-config.php file in a text editor, like notepad, and search for DB_USER and DB_PASSWORD. Then take those values (located where I blacked out), and make a new user with that username and password by going to databases in phpMyAdmin, and then clicking check privileges next to the right database,then finally clicking add user.
#5 Replace Some Urls
So your new local site doesn’t go crazy thinking it’s located somewhere else, you need to edit two fields in the database. The siteurl and home, under wp_options (if it’s only displaying 25 rows per page, home will be shown on the 2nd page). Edit them to https://localhost/wp or whatever you chose to name your folder, and your cloned site will be ready to use.
![]()
Step 4. Testing & Troubleshooting Your WordPress Theme On Your Clone Site
This is as easy as logging into the admin area on your local clone or staging site. Install and activate the theme to see what happens. All of these steps are not required. They are just some of the many theme features you might want to test if you switched themes.
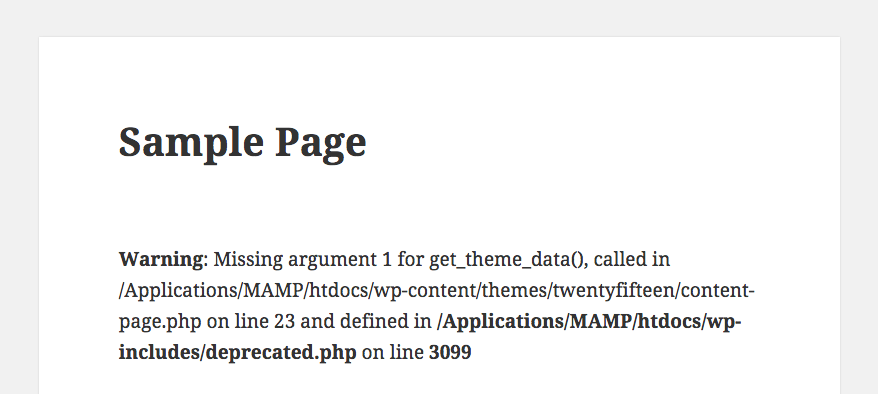
Enable wp_debug
This is a great way to test if there are any errors in your theme. To enable wp_debug , open up your wp-config.php file and set wp_debug to true, like so:
define('WP_DEBUG', true);
This will show all of your php errors and notices on the front end of your WordPress site. Keep in mind that not every notice displayed will break your site, but it’s still a good idea to fix them.
Custom Post Types
If your old theme used one or more built-in custom post types and your new theme doesn’t have theme it may look like you lost all your content. But don’t worry, it’s still in your database.
You can use a third party plugin, like Post Types Unlimited, to register your old custom post types in your new theme. If you aren’t sure what the names of your custom post types are you can ask the old theme developer, or search the old theme for the register_post_type function and locate the names of your old custom post types.
Widgets
It’s a good idea to look over the widget options, ad spots, footer columns and the sidebar width in addition to any other widget ready areas. This way there are no surprises later.
Missing a must have widget? You can always adda plugin. For example Social Candy for social links, or the More Widgets plugin for ads, about section, newsletter, maps and more.
Menus
Double check the menu locations and formats in your new theme. Perhaps there are more menu locations, or a vertical navigation. Just look the theme over so you know where all of your menus will be when you activate the theme on your live site.
Post Formats
A lot of themes use custom fields. So if you’re using one to define a specific video/audio/gallery/etc you might have to alter the output of your post formats in your new theme. This can be done via child theme so you can continue using the old meta on old posts, or you might be able to use the add_post_meta( )
Plugins
We mentioned before that if you’re not a developer you should find a new theme that’s compatible with all of your required WordPress plugins. Just to be sure it’s a good idea to test your plugins to make sure they really do work with your theme.
If you are a developer who has created or customized a theme, now is also a good time to make sure that your tweaks haven’t effected plugin compatibility.
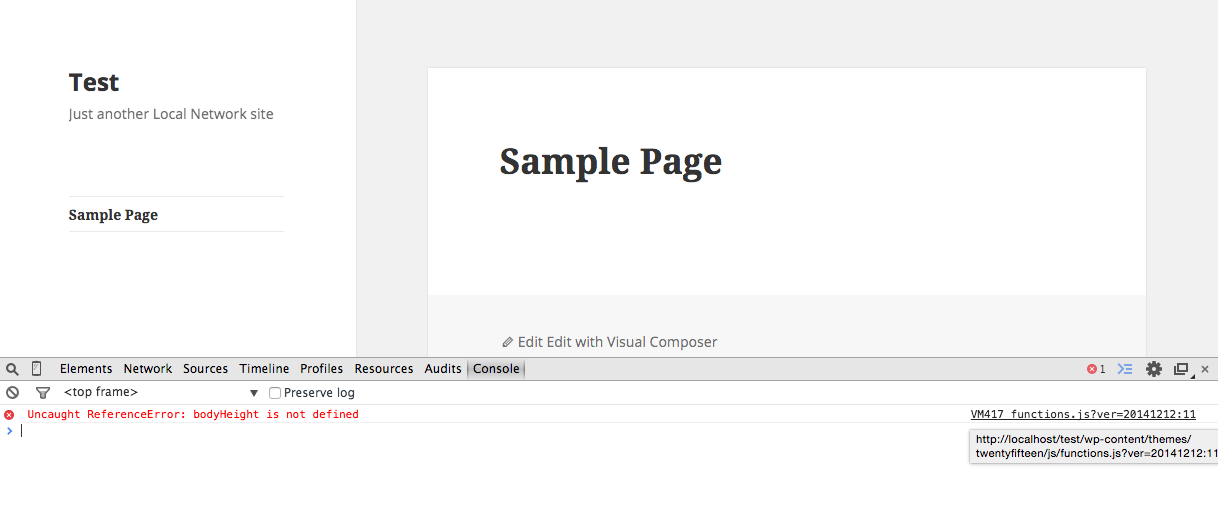
Check Browser Console
Open up your browser to check for javascript errors. If some things aren’t working correctly (javascript related), such as sliders, drop-down menus, carousels, etc. you can check the browser console for errors. Just open your console to see your javascript errors, and hover on them to see exactly where the error is located.
Here are links to where you’ll find your console for various browsers:
Check Featured Image Sizes
You might have to upload or tweak your featured images when you switch over to your new theme. Once you’ve cleaned house, you’ll want to re-crop all of your images with their correct dimensions.
Some themes like Total crop images dynamically, so you don’t have to do anything. But, if you theme doesn’t do this for you, use the Regenerate Thumbnails WordPress Plugin to regenerate all your images in the proper sizes.
SEO Check
Unfortunately there are themes with built-in SEO options, and if you are currently using them you most likely will not be able to carry them over to your new theme. Instead you should install an SEO plugin on your live site and fill out the options before updating.
Mobile/Browser Testing
If you chose to create an online staging site via your WordPress host then you have the option to do some real mobile testing of your own. Grab your tablet and phone to see how your new theme looks. Or, if you chose to install your new theme on your local host, you can try an online responsive simulator like the Responsinator or Cross Browser Testing.
Make sure to visit your posts, pages, and check that everything is in working order. Once you’ve confirmed that there are no issues, it’s time to move on to the final step.
Step 5. Install & Activate Your New WordPress Theme On Your Live Site
Now that you’ve thoroughly tested your new WordPress theme, login to your WordPress dashboard install it on your live site. Before you activate the theme just do a quick double check using the Live Preview option. You can use this to click through a few of your pages just to be sure that everything looks good.
An optional step would be to install a coming soon plugin on your site before activating your new theme. This way if you have to make any tweaks to your live site after activating your new theme, your visitors will see a pretty under construction or coming soon page. Two plugins we really like are WP Maintenance Mode and the Coming Soon Plugin by SeedProd.
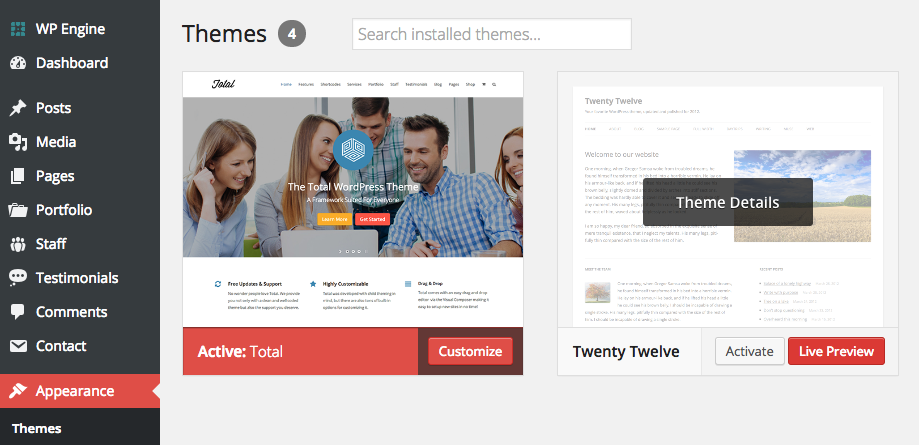
Once you’re ready to go, simply navigate to Appearance > Themes and click the button to “Activate” your new WordPress theme.
Wrapping Up
To someone who hasn’t experienced the nightmare of a website train wreck, this might seem like overkill. A complete over-complication of something that’s supposed to be simple. Trust me – it’s not. Think of this like having great health insurance on top of eating healthy and exercising, but for your WordPress site. Working hard to troubleshoot your theme locally minimizes your risk of something bad happening on your live site.
Did you find this guide helpful? Or do you have anything to add? Let us know in the comments section!


Awesome complete detailed and no fluff post about moving from a present to a new.one.
Im moving from thesis 1.x that has a miserable looking skin and full of errors from fourblogger.com to a professional non thesis fantastic looking Novelty Theme by TeslaTheme.com guys…
Thank you for the great post!
I seem to be missing the part about how to import the theme from local host to the live site.
Install new theme on live site then import through All in one Migrate or Duplicator?
Thank you!
Fantastic article!!! Thank you!! I do however, have the same question as Leonardo, do you use one of the migration tools to import to a live site?
I think i read this article again when I first launched my blog. Thanks for the great post.
This is, by far, one of the most complete, extensive documentations on the subject of migrating WordPress themes on the Internet. All WordPress users should bookmark this page to reference when a theme migration is necessary. Thank you for sharing this valuable resource.
how to restore (just in case)
You can restore the site using the backup we recommend you create (we have another guide on How to Create a WordPress backup that has more info if needed). However, when you switch themes you should be able to easily switch back without ever having to restore a backup. The only times when you would have to restore a backup is if you go in and edit all your pages after making the switch. But generally most people won’t do this. Also, it’s probably best to create a “stagging” site to test a new theme before deciding to use it on your own live site.
Thanks for sharing this wonderful and knowledgeable article with Readers!
It is complete tutorial to teach about changing wordpress Theme.
Actually I am using Free theme and just planning to change it to Pro.
My question is-
Still I have to take precautions just changing the same theme fro free to Pro?
Thanks.
It depends on the theme. Some developers may tweak the way things work in the Pro version so that after switching you still need to go in and make some tweaks. Some developers basically keep the theme exactly the same but add on a few things like more options, updates, support, etc. But before you upgrade your theme please have a look at our best selling theme Total. You may or may not be interested…but a lot of people love it (over 18,000 sales) and it includes a page builder so you can build your pages very easily. We know there are a lot of premium theme’s out there available but sometimes if you aren’t looking closely you may choose 1 and miss out on another one that could be better 😉 Thank you for considering! And if you have any questions about our theme just let me know.
I love this article. I am just in a middle of transfering my website to new theme and this has cleared up so much questions I’ve had. And it is easy to understand even to the noob like me 🙂 Thanks
Wow! I simply followed this tutorial step by step and to my surprise the process on migration was as easy as 1-2-3. Great tutorial..Keep writing, keep helping. We will keep you motivating.
Thank you so much for this article. It’s all clear now!! 🙂
Very well Explained. And The Thing I Like The Most About Your Article Is To Test Theme on Clone Site Before Applying on Main Site.
Regards.
I found this article because I’m experiencing a dilemma where we need to update a wordpress site that someone created to be very unfriendly for any changes or new pages, etc etc.
If I backup my current site and create a local staging site to see how it’s going to be – can I backup my staging site when I get it where I want it to look and then replace it with my current site? (Because I know it’s not going to be anywhere near a clean process of changing themes)
You can definitely do that. My recommendation would be to create a secondary database on your server instead. This way after you modify things on your localsite you can just import the database to your server, upload any images used in the local site to your live site uploads folder, search and replace any domain names like localhost to point to your actual server and any wp-content/uploads/ url’s to make sure any images inserted in the localhost are calling images correctly from the live site, then update you wp-config.php file to link to the new database. This way if there are any issues you can switch it back to the old one easily as opposed to deleting everything and migrating the local site. But of course it all really depends on how large the site is and how much is being changed. If you are only changing 5-10 pages, do it manually on the live site and just put a coming soon page for a couple days.
Great article thank you. Just wondering: once the new theme is live, do you find that you have to rework on all the pages and posts so they look good? To me, the theme is just one small layer and each page/post requires attention. Would appreciate your feedback on this as a client has asked me to do a new theme for her and I’m not sure how far to take it. Thanks.
It really depends on the two themes and if there are major differences in how they work. Typically you shouldn’t have too much trouble if the bones are the same (blog, portfolio etc). But we highly recommend testing on a staging or local site to see how the content layout looks and to be sure all your plugins are still working as they should.
Hello,
to make the local copy of wordpress work, I had to change the line under:
/ ** MySQL Hostname * /
to
define (‘DB_HOST’, ‘localhost’); ”
in
wp-config.php
bye
Mauro
Hey, it’s an old article but any tips in 2018 for moving WP site? Would you add something on this article?
Moving or migrating a WordPress site is very different from changing your theme. In this guide we’re just covering key points before changing themes (find your theme, take a full site backup, setup a local or live staging site, test the theme then finally implement the new theme on your actual website).
If you want to migrate your WordPress site, you should still take a full backup (we highly recommend VaultPress). But you’ll need to also find new hosting, install WordPress, upload your site content, fix URLs and point over your domain name to your new host (here’s our full guide for how to migrate WordPress).
Great to see this has been updated in 2019. 1 major burning concern I have always had is – if I clone the site on my own staging domain (like I create another domain and clone the site on to it, not using any hosting service’s cloning tools etc), will the original site get hit by a duplicate content penalties? Should i put up the clone behind a password protected gateway so bots can’t crawl it? Is that logic even right – or am I overthinking this?
Hmm… if you have a live site you want to use for staging I think there are a few options. One is to password protect the entire site as you mentioned. A second is to use a coming soon plugin, so only logged in users can see your site (so same idea). And for a third option, you could also use our Total WordPress theme which has a built-in coming soon function as well as the option to redirect all non-logged-in traffic to the page of your choosing 😉
Hi,
is there a way to copy the plugins when you install a new theme?
Or do these need to be installed and all the set up again?
If you change themes, your plugins should all stay in tact. Unless there is a compatibility issues between one of your existing plugins and your new theme you shouldn’t need to do anything with them 🙂
Thanks for the heads up. Never knew how useful backup is until I encounter a huge challenge.
Thanks for explaining step by step. It’s really very useful for us and i appreciate your efforts.
If I want new everything from content to pics to Pages (parent/child names and URLS) plus get rid of current plug in problems, will switching themes accomplish this? And if so, would I skip any of your steps (or not)?
Switching your theme will not remove any content (note – you might not see some of your old content if your new theme doesn’t support the same custom post types, but it’ll likely still be in your database). If you want to start over completely from scratch I would suggest using a WordPress reset plugin or taking the time to completely reinstall WordPress for a fresh start since it sounds like that’s what you’re looking for.
I feel foolish for saying this–I’m not familiar with the meaning of ‘webhosts.’ So I don’t know how to begin Step 2, Method 2 of manually backing up, “Log into your webhosts control panel.” As far as I can remember, the only entities I have a relationship with are WordPress and Google. So… could my webhosts be Google?
Your webhost is how you host your own website with WordPress (the self-hosted version from WordPress.org). Google does offer cloud hosting, so it’s possible that you’re using them. But think back to when you created your website – how did you create your website? Did you purchase a hosting plan from Google or another web host (Bluehost, Kinsta, WPEngine, etc)? This would be your hosting company. Or did you signup for a free blog at WordPress.com? In which case I don’t know how to backup your site since WordPress.com is not the same as WordPress.org.