The Ultimate WordPress DNS Guide

DNS stands for domain name system which, you guessed it, is a system used for controlling your domains.
DNS can be an intimidating topic if you are not a developer, I should know, years ago I used to dread having to make changes to DNS! There are lots of different records with numbers, names and values and the system can be a bit overwhelming if you are new to it.
But never fear, DNS man is here! Here to demystify the never ending tangle of A records, nameservers and MX values which can cause a headache for so many of you.
What is DNS?
I know I said that it stands for domain name system, but this probably still doesn’t mean much for a beginner, so here’s a simple analogy. DNS is like the phonebook of the internet. Domain names are stored in the phonebook, and converted into IP addresses using the DNS system to serve up websites to those visiting them.
As far as working with WordPress goes, DNS is typically used to refer to what your domain displays when someone visits it, and how it interacts with different services. For example, your A record determines where your website is hosted and your MX records manage your emails.
If your A record points to the IP address of your WP Engine hosting account (and your website files and database are there) your domain will display your WP Engine website when visited, unless no other rules are in place.
Registering a Domain
To manage DNS, firstly you need to have a domain, so let’s start with the domain registration process which is super simple.
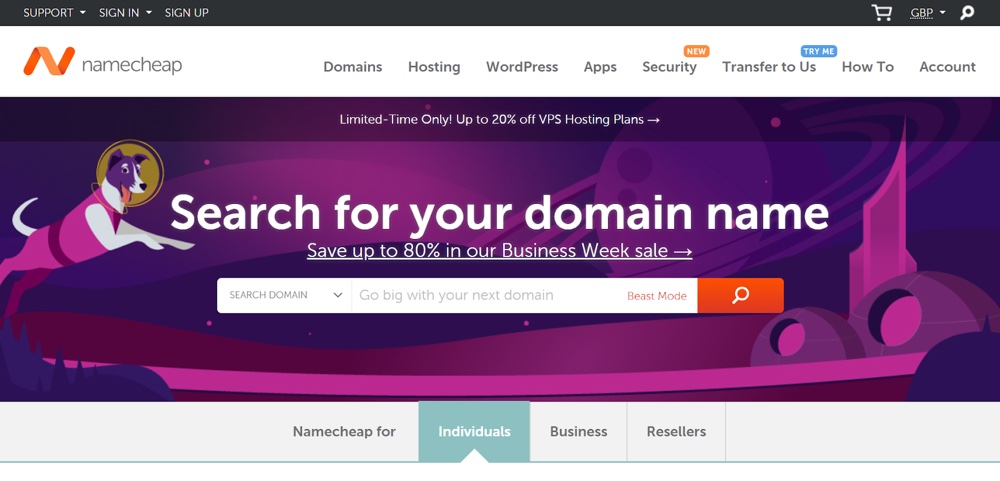
To register a domain, you need to visit someone who sells them, like Namecheap. Namecheap offer free privacy protection on all domains, so are the natural choice if you don’t mind keeping your domains separate from your hosting.
When it comes to registering domains, you can do one of two things:
- Register your domains with someone like Namecheap and host your website elsewhere.
- Register your domain the same place you purchased hosting.
Some people recommend that you host your websites one place and store your domains elsewhere, for security purposes. It would then be difficult for someone to gain control of both your website and domain at the same time, in theory.
I have clients that prefer to keep everything under one roof for ease of use. It really is down to personal preference, and what layers of security are necessary depending on the amount of people who will have access to your accounts, and in what capacity.
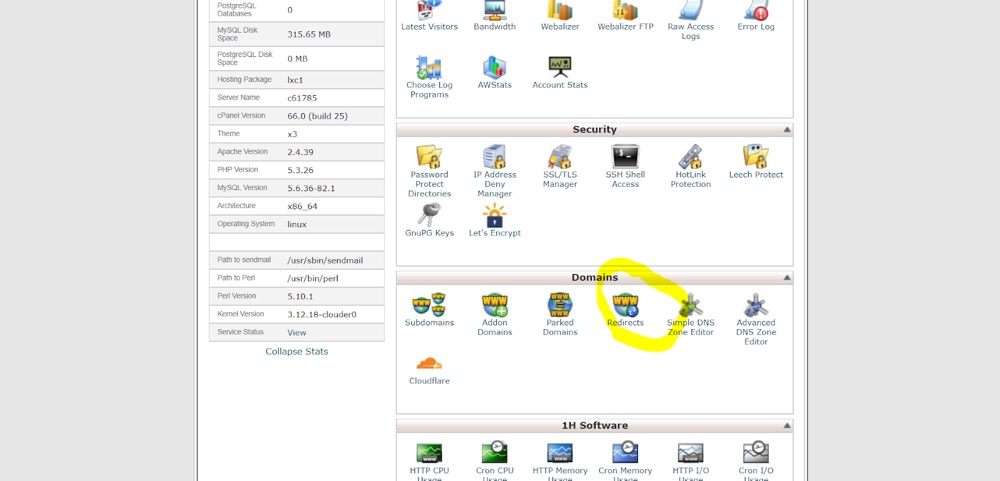
Managing DNS
DNS management is handled from wherever the nameservers reside. If your nameservers reside with your domain registrar, simply login and access the Domains section, or edit DNS for a particular domain.
If you don’t know what nameservers are yet and haven’t edited them, then you can log into where your registered your domain to edit your DNS.
Wherever you purchase your domain, make sure you have full domain control. Some of the cheaper providers on the market do not provide full domain control so you are will be unable to manage all elements of your DNS. This is something to clarify with support before making a purchase if you can’t verify this from the sales website.
When it comes to managing WordPress DNS, there are 4 primary records you will likely work with.
A Records
A Records control where your website is pointed. Pointing a domain tells the domain to display the website found at the location IP address. You can use the A record to point your domain to a website hosted elsewhere, without altering the rest of the records.
Nameservers
Nameservers control which provider is responsible for domain DNS. In other words, if you change your nameservers you are allowing another provider to manage your DNS. Changing nameservers will allow another provider to manage all associated records.
Depending on how you change nameservers, some of your DNS records may break, but it is possible to keep your records the same whilst switching nameservers to another provider. Always exercise great caution when changing nameservers for this reason and if you are still in doubt, ask for help.
CNAME Records
CNAME records are commonly used to alias one IP address to another, for example when you want your WWW A record to point to your @ A record. In other words, make www.yourwebsite.com point to yourwebsite.com.
MX Records
MX records manage your domains email, where it comes from and how it is received. Using G Suite for email is a popular email trend for example, that would require you set your MX records to those necessary for G Suite.
Pointing Domains
Pointing a domain name is the most common DNS related task that I undertake. This involves changing the domain A Record to a different IP address, so that the domain will load a website stored somewhere else.
Some examples of when you might need to point a domain are:
- Your domain name is stored in a different location to your website
- You want to move your website to another hosting provider
- You have multiple domain names that you all want to point to one place
How to Point a Domain
Here are step by step instructions for pointing a domain:
- First of all, understand what will happen if you change the IP address of your A record, which will point your domain. Your existing website will stop showing to users, and after your DNS has propagated (updated), the website you have at the new IP address will show to your users.
- You need the IP address, or shared IP address from the destination hosting account. This can be accessed by logging into cPanel and checking the stats displayed on the left typically.
- There must be a correctly configured WordPress website set up in the new hosting account, with the files stored using your domain as the sub folder, or in public_html if it is only the domain on the account.
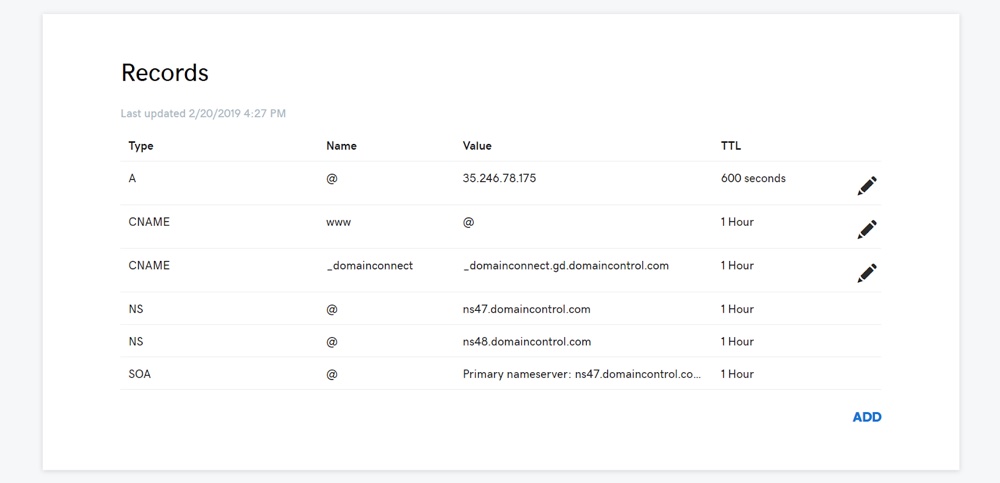
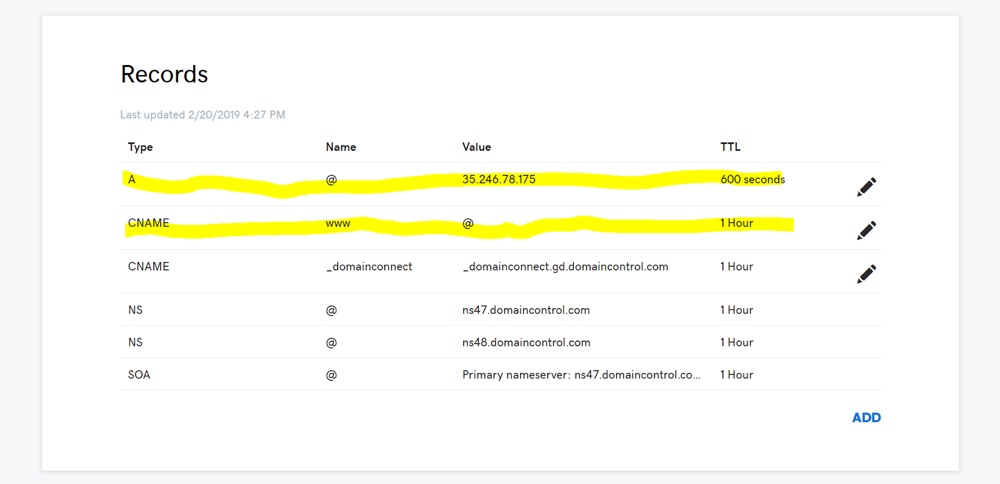
- Access the DNS for the domain you want to point, and change the A Record for @ and WWW. Set the value for @ and WWW to the shared IP address you got from your hosting cPanel. Alternatively, if there is a CNAME alias for WWW and its value is equal to @, just change the @ record and the WWW will update automatically.
Redirecting a Domain
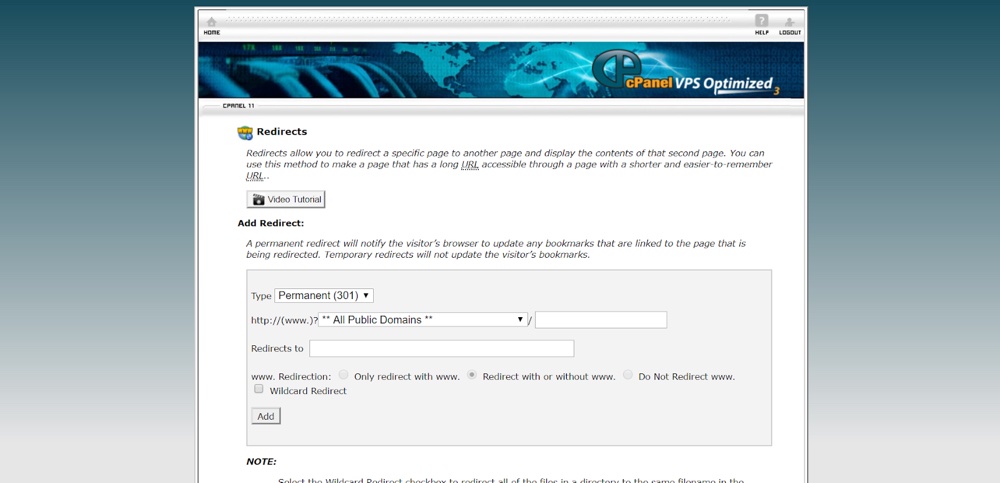
Not quite the same as pointing a domain, redirecting a domain involves using a 301 permanent redirect setup within your cPanel.
The effect is the same, in that if a user visits old-domain.com they will be sent to new-domain.com, but the difference lies in the way this is achieved.
This is something to discuss with your SEO specialist, if SEO is a concern for you when managing your redirects.
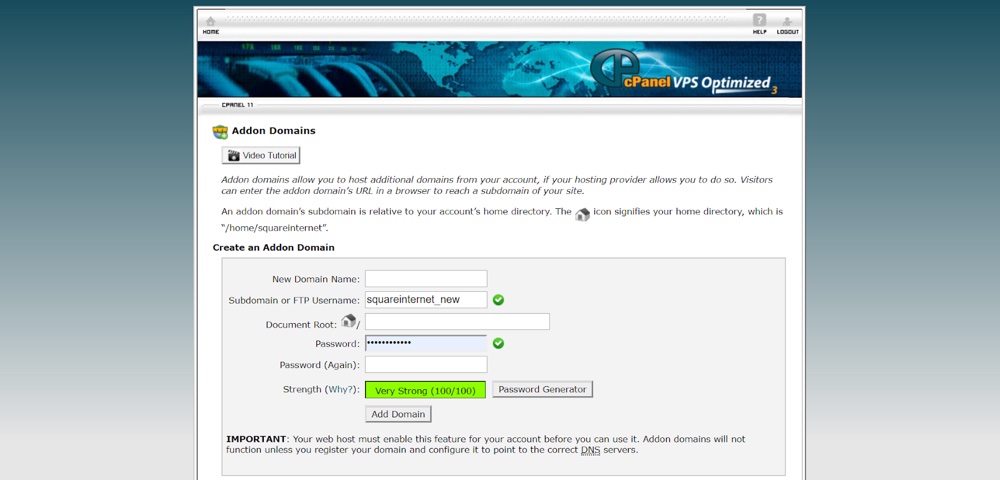
Managing Add-on Domains
Did you know that you can host multiple websites on one hosting plan? If you didn’t, you’re in for a treat!
An add-on domain is any domain that has been added to your hosting plan that isn’t the primary domain, which is the domain you opened the account with.
Add-on domains have their own sub folders within your hosting account, so they exist independently from your primary website, which has its files at the root of your account in public_html.
To manage the DNS of an add-on domain, you will need to follow these steps
- Add-on a domain to your hosting plan. This can be done by accessing your cPanel then clicking into the Add-on Domains section. For subdomain, if you don’t plan to use one, set it to ‘test’ or something similar.
- Set the A record for the add-on domain so that its value is equal to the shared IP address of your hosting plan
- Make sure there is a CNAME alias in place for the WWW A record, or create an A record for WWW and make that value equal to the shared IP address of your hosting plan also
Nice and simple right? Remember earlier that we discussed the different ways of changing DNS records. The A record manages what displays when your domain is visited, so this is a simple method of hosting a website as an add-on domain when the domain is managed elsewhere.
Changing your Nameservers
As we found out earlier, your nameservers assign control of your DNS to a provider. Changing the nameservers for a domain gives another provider the ability to manage the DNS.
So let’s walk through the steps for changing the nameservers of a domain, in the event that you wish to do this.
- Access your domain DNS by logging in to wherever the domain is stored and clicking ‘manage domain/manage DNS’ or by clicking into the domain if it is in a list of domains
- Find the nameservers section.
- Input the nameservers of the destination provider and then click update.
If possible, select the option that allows you to keep your DNS the same when switching nameservers, so that all will happen in this instance is you are giving another provider the ability to make DNS changes in the future.
Please note that changing nameservers can take up to 24 hours to change in some instances and during this time your DNS will be unmanageable.
DNS Propagation
The first time you call your host in when your site goes down, you will likely hear the word ‘propagates’ or ‘propagation’ thrown at you a lot when they are suggesting solutions or fixes for why your website has dropped.
Propagation is a technical word for ‘update’. What your hosting provider is saying is that your DNS is ‘updating’, because a change was made to your DNS (if the problem is DNS related, which it often is).
For a DNS change to be reflected by Internet Service Providers around the world, it takes time to ‘propagate’. It takes time for ISP’s in different countries to ‘check in’ with your website and then update their nodes to resolve the new version of your website for people visiting it, flushing their cache which contains the old version of your site.
Hosting companies will tell you that DNS propagation can take up to 48 hours. The real story is it almost never takes this long. In my experience DNS propagation is usually either instant or occurs within a few minutes. Sometimes it can take hours for your DNS to update everywhere around the globe, but the process usually starts happening within minutes in most locations.
As a rule of thumb if you change your DNS and aren’t seeing anything using a DNS propagation tool within an hour, I would suggest you double check with your hosting provider to see if there is any issue.

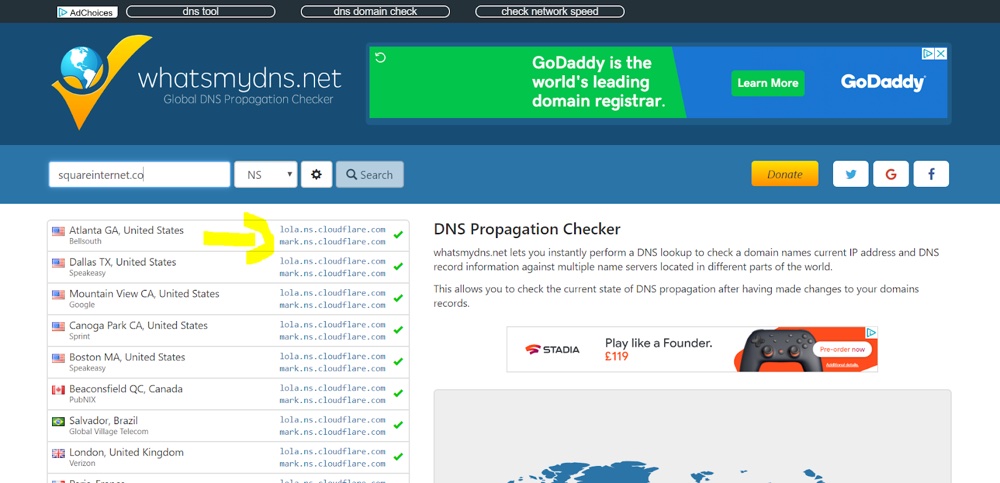
But never fear, there is a simple tool called What’s My DNS you can use to check the status of your DNS propagation at any given time. Simply type in your domain name and select the record you want to check using the dropdown.
So if you wanted to check on the A record for your domain, you’d type in your-website.com then click Search, as the A record is selected by default.
You can use this tool to check A records, MX records, nameservers you name it.
The Relationship Between Domains and Email
Earlier I explained that MX records manage email for a domain, which is simple enough.
However, one thing that people often overlook is the fact that your MX records can be overwritten by a change in nameservers, which can break your emails.
MX record breakage most commonly occurs when switching nameservers or when transferring a domain. When doing either of the above, it’s essential that you ensure that the DNS of your domain remains the same, specifically the MX records if you are watching emails. In many instances when switching nameserver or making a domain transfer, you are given the option of maintaining the DNS from the transfer account.
As a precaution, always take a screenshot of domain DNS when switching nameservers or transferring a domain so that you can restore it manually if something breaks or doesn’t work as intended.
When changing nameservers your DNS can snap to the default DNS for a hosting company. For example, recently I dealt with an issue where a domain had its nameservers managed through a hosting company but was registered with GoDaddy., We had to switch the nameservers back over to GoDaddy so that the DNS could be managed once again from there.
As I had previous experience of this process, I knew that the DNS would be set to GoDaddy’s default DNS once the nameservers updated to use GoDaddys nameservers. I knew this would in effect bring the website down and break the emails because the A record would be set to parked and the MX records set to the default GoDaddy ones, rather than G Suite. So, I had to manually recreate the A and MX records I copied from the old host. Thankfully this is a very quick process and can usually be done before your DNS propagates if you are on the ball.
The Relationship Between Cache and DNS
Caching is a double edged sword, it can yield great speed increases for your website but also be a cause of frustration when it comes to DNS and viewing the ‘true live version’ of your website.
WordPress caching stores a version of your website and displays it to your visitors, speeding up the process as it already has a preloaded version of your site to display.
The problem with this is when you make changes to your website that are not consistent with the cached version, you end up displaying an old version of your website.
This can be frustrating when dealing with DNS in instances where you need to see what your website looks like when being loaded from a different location, i.e a new host.
Let’s say you’ve just changed your A record and pointed your website to a new host. It may appear that everything is all good, but you could be viewing a cached version of your website and there could be errors displaying to users who have not visited your website before, as they won’t have accessed the cached version.
This is why it’s important to understand cache, and how to flush your cache. Flushing your cache means emptying your cache, so a new current version of your website can be cached (preloaded) and served to visitors. This should result in the new current version of your website showing to both you, and anyone who visits it.
To clear your cache you’ll need to follow these steps:
- Figure out how many cache’s you need to clear. If you have a caching plugin, that’s one cache. You might have a server cache, for example many hosts cache at the server level. There could also be a CDN cache through Cloudflare if your website is using Cloudflare. Checkout our full guide on how to clear your WordPress cache for more details.
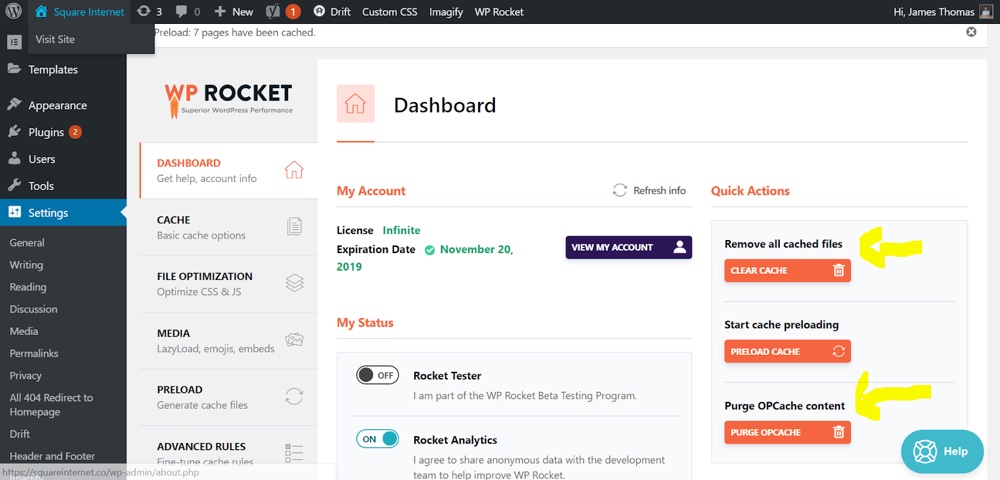
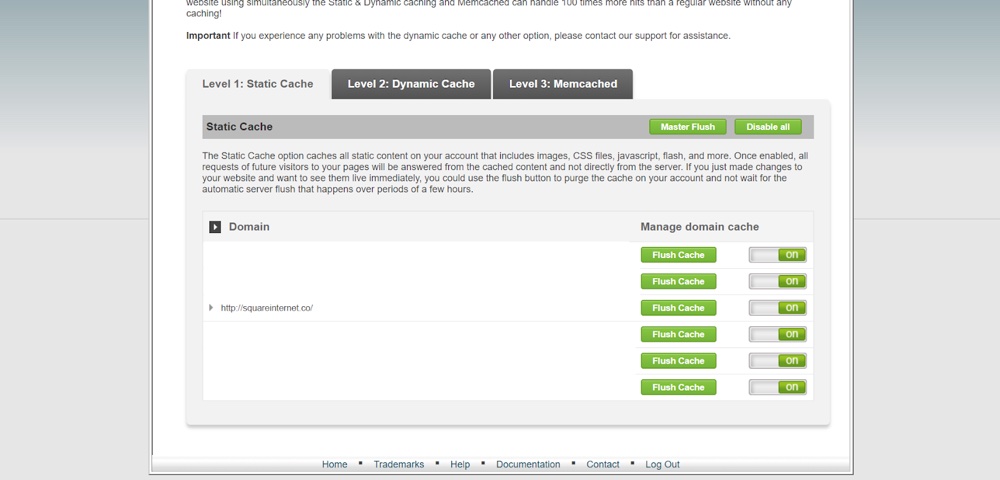
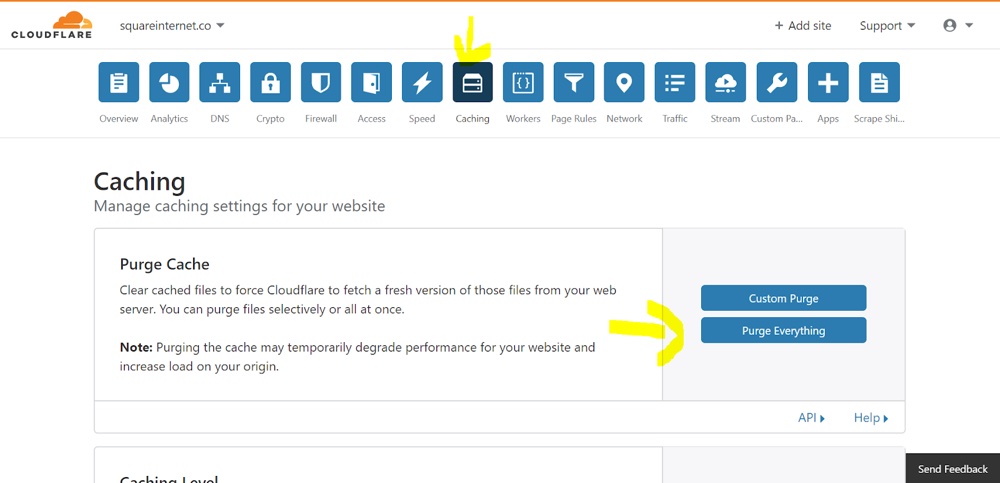
- Flush each of your caches. If you are using a plugin, there will be an option in the CMS within Settings/Tools or within a WordPress dashboard. section for that plugin. For your server cache, do this within your cPanel and for Cloudflare, it can be done via the ‘Caching’ section.
- Hard refresh your website. A hard refresh for Google Chrome is done by holding CTRL then clicking the refresh button. This will load your website without the cache and should in most instances show you the current state of your website. If it’s a particularly important DNS change you’re trying to monitor, I would recommend also clearing your cache and cookies and perhaps trying to view the website on a device it’s never been viewed on before just to be safe, in addition to all the steps above.
Managing DNS Through a CDN
A content delivery network, or CDN for short, is a network of servers and data centers spread out across the globe that serve your visitors a version of your website from the closest data center to them.
Let me explain. Let’s say for example your website is hosted on a server based in London. If a visitor from the USA lands on your website, they have to access a server based in London that will send them back the data they need for your website to load.
If your website is using a CDN like Cloudflare, this visitor will instead be directed to a server closer to them based in the USA. This means your website loads quicker and they don’t have to wait for the data to reach them from London.
This sounds brilliant, and in the main it is, but it does add an extra layer of complexity to managing your DNS. As services like Cloudflare have become very popular, I often find myself helping my customers navigate DNS issues where Cloudflare is involved, which is why I’ve included this section for you to solve your CDN related DNS headaches.
How Does it Work?
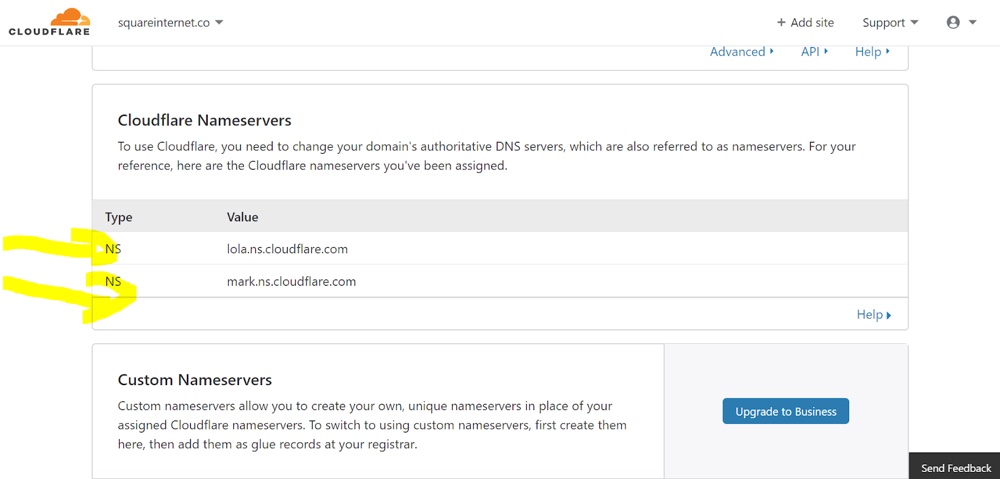
Basically, to make Cloudflare work, you need to let them manage your nameservers. Remember earlier we talked about nameservers determining who manages the DNS of a domain?
What this means is that if you make changes to your DNS outside Cloudflare they won’t take effect. This is the cause of many headaches for those who can’t wrap their head around how nameservers work.
Because Cloudflare is in charge of your DNS while you use it, you need to edit your DNS within Cloudflare for changes to take effect.
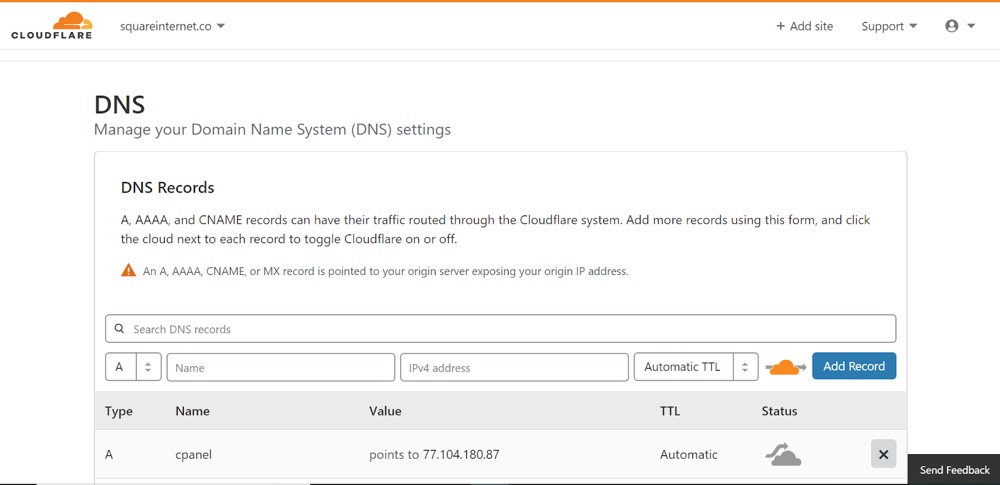
If you change your nameservers back to your host or domain registrar Cloudflare will cease to work and you can again make DNS changes from either of these locations.
If you’re unsure what’s going on with your nameservers, you can use What’s My DNS to check. Simply select NS in the dropdown shown in the image below.
Pro Tip: Preview DNS Changes
And now it’s time for a pro tip that your developers and hosting companies know about, but don’t often share with you.
Using the hosts file you are able to preview changes to the DNS before you actually make them. This is particularly useful when moving your website to a new host.
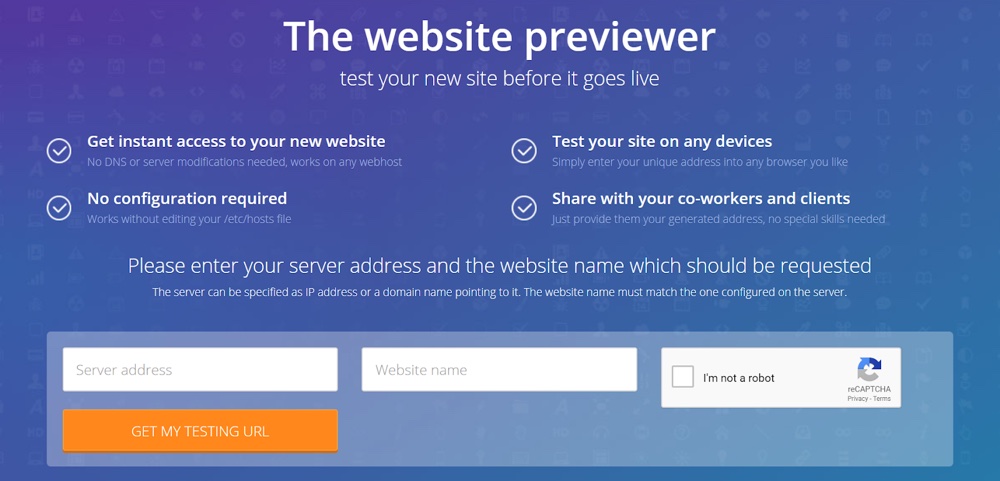
Your hosts file maps a host to IP addresses, it can be used to make your computer view a website as if its A record was set to something its not.
DNS At A Glance
To summarize, here are the most important points to take away from this article and apply when working with WordPress DNS.
- The A record is most commonly used to ‘point’ your website to a hosting provider to display a website there.
- If in doubt when changing DNS that you are not viewing the expected result,, clear your cache at the server, plugin and CDN level (if you have one).
- Most DNS propagation occurs within minutes to an hour. Guidelines state it can take up to 24 hours, but if you haven’t seen any changes within the hour flush all your caches and double check with your hosting support that everything is working as intended and nothing is preventing the process.
- Don’t forget to reissue SSL certificates using Let’s Encrypt when switching to a new host.
Do you have any questions about changing or managing your DNS? Or maybe you have a few tips to add? Leave a comment below!


