Ultimate WPBakery Drag & Drop Page Builder Guide
The WPBakery Page Builder (formerly Visual Composer) has become one of the top selling page building plugins for WordPress. Since it’s release in May 2011 the plugin has exploded with more than 150,000+ customers (and that’s not counting the hundreds of thousands of users who received a copy bundled with a theme), 200+ add-ons & extensions and hundreds of positive review across the web.
If you don’t already own your own copy of the plugin, perhaps you’ve seen it bundled with a premium WordPress theme in the past. Or maybe you’ve come across an old Visual Composer guide (because that was the plugin’s original name – a bit confusing, we know) somewhere on the web. A lot has changed since the original Visual Composer now named WPBakery Page Builder was first released so we wanted to guide you through all of the awesome features that make up this powerful plugin.
Meet The WPBakery Page Builder
If you’re not familiar, the WPBakery Page Builder is a drag & drop page builder plugin for WordPress. This handy dandy plugin takes the hard part out of creating custom looking WordPress posts and pages. There is not coding knowledge required. Simply install the plugin and you can get to work creating your posts and pages. It’s also compatible with most free themes and many premium ones, plus it’s fully compatible with popular plugins like Contact Form 7, Slider Revolution and many others ( which we’ll touch on later).
Installing The WPBakery Page Builder
Before you can build your own pages you’ll need to download and install the WPBakery Page Builder. There are two ways to secure a copy of the plugin: either purchase your own copy or purchase a premium theme with the plugin included. The plugin works exactly the same no matter which route you choose, the only difference in these two methods is how you install it.
Option 1: Purchase Your Own Copy To Use On Your WordPress Site
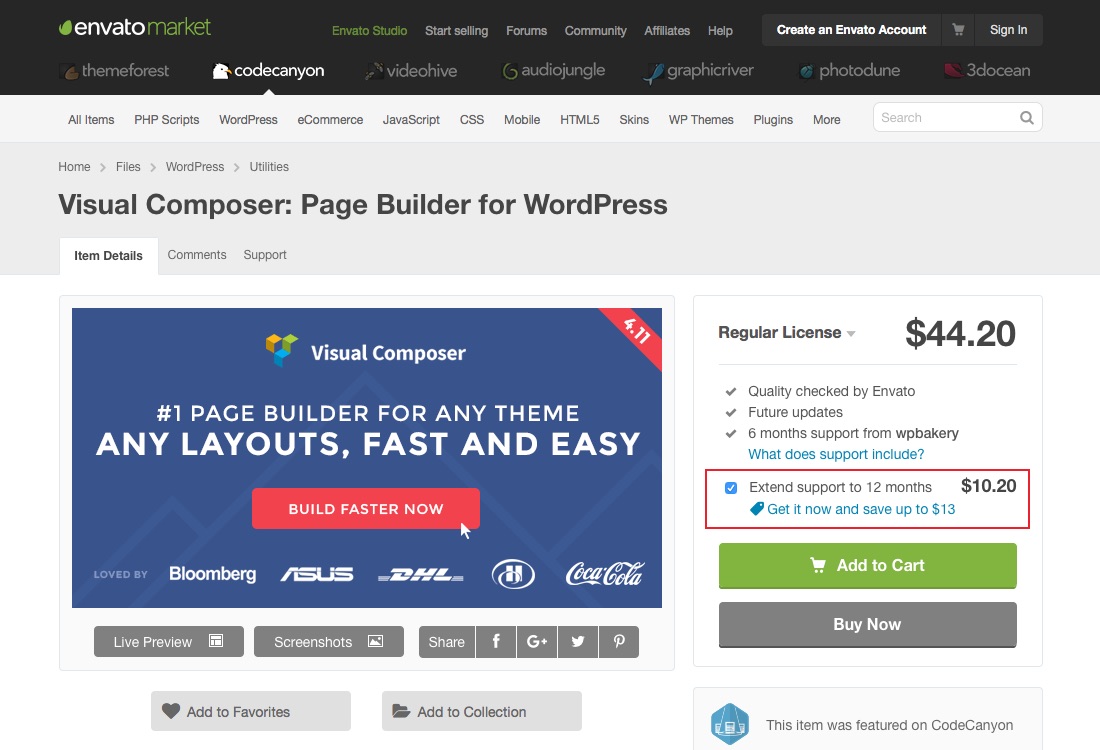
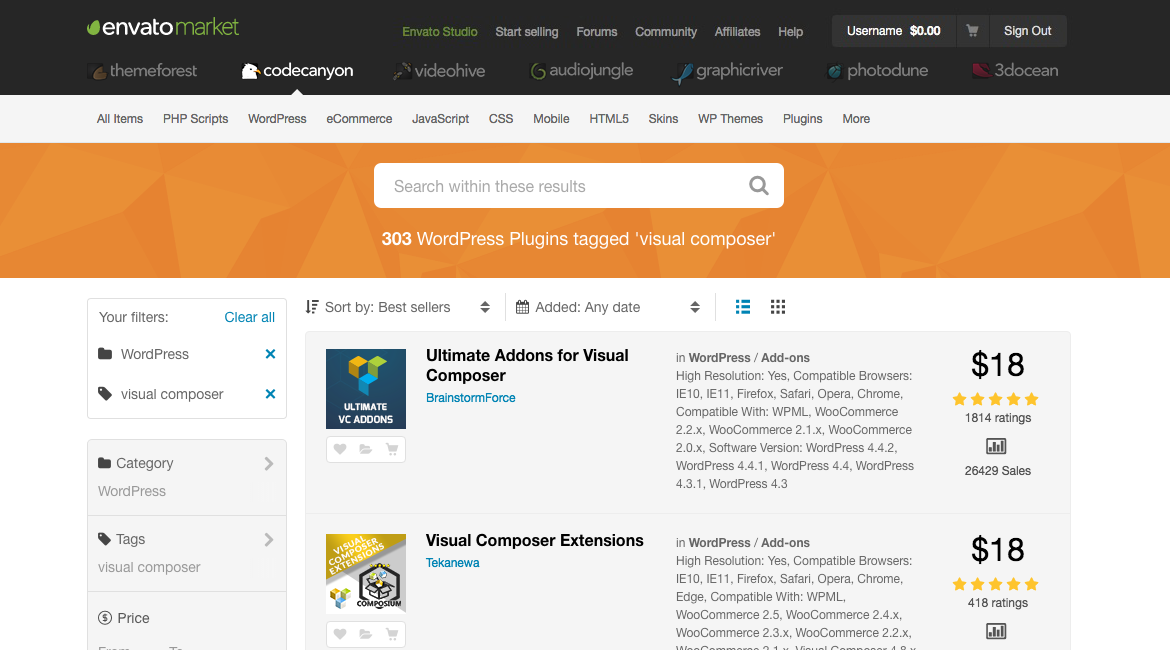
The first way to get your hands on a copy of the WPBakery Page Builder is to purchase the plugin for yourself. Simply go to CodeCanyon, add a copy of the WPBakery Page Builder to your basket (we recommend adding the extra support so you’ll have a full year of assistance from the plugin author at your disposal) and complete your purchase.
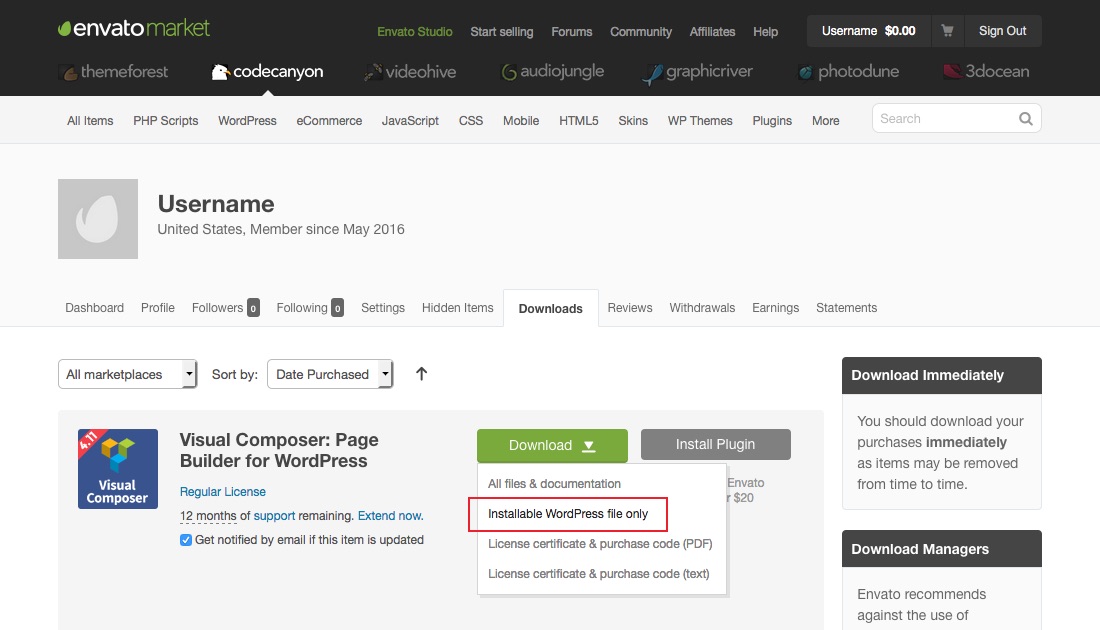
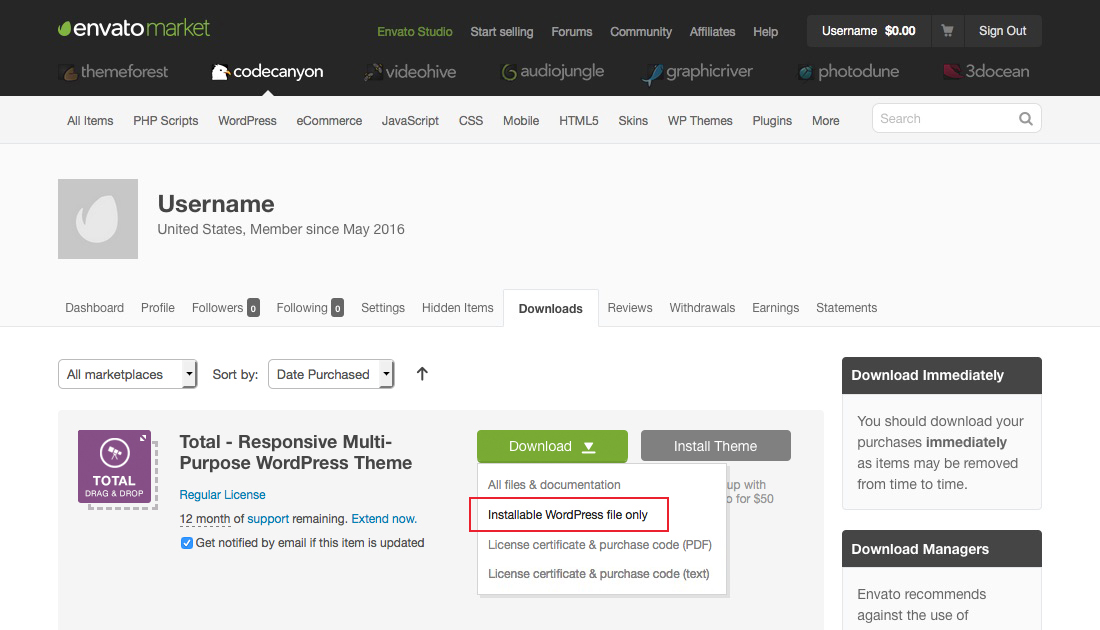
Next navigate to your downloads page. Click on the green Download button next to the WPBakery Page Builder plugin you just purchased and select the Installable WordPress File Only.
Now, log into your WordPress dashboard and navigate to Plugins > Add new. Click on the Upload Plugin button at the top of the screen.
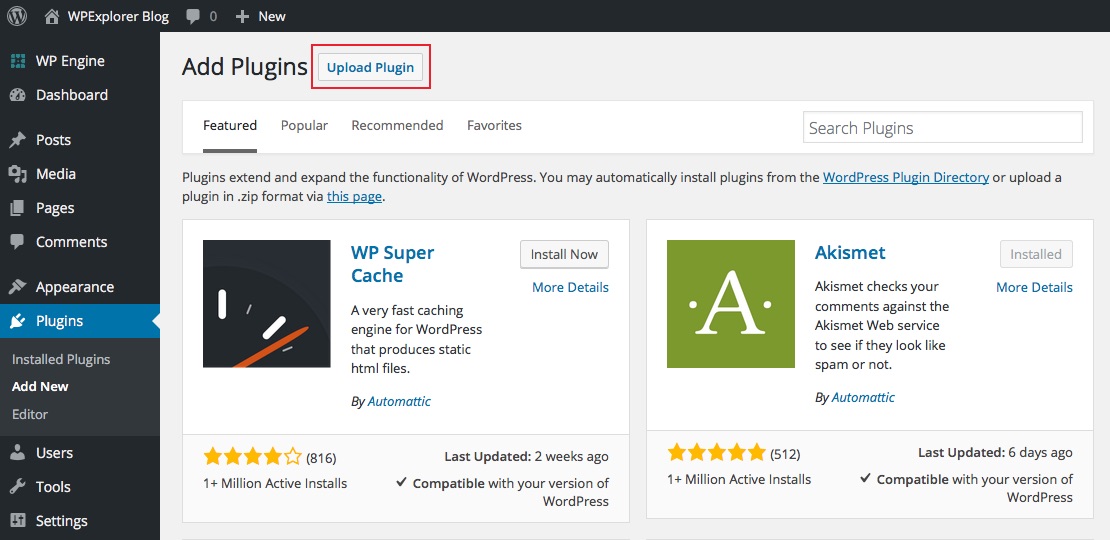
Select the WPBakery Page Builder zip file you downloaded from CodeCanyon. Then just click to install and activate the plugin.
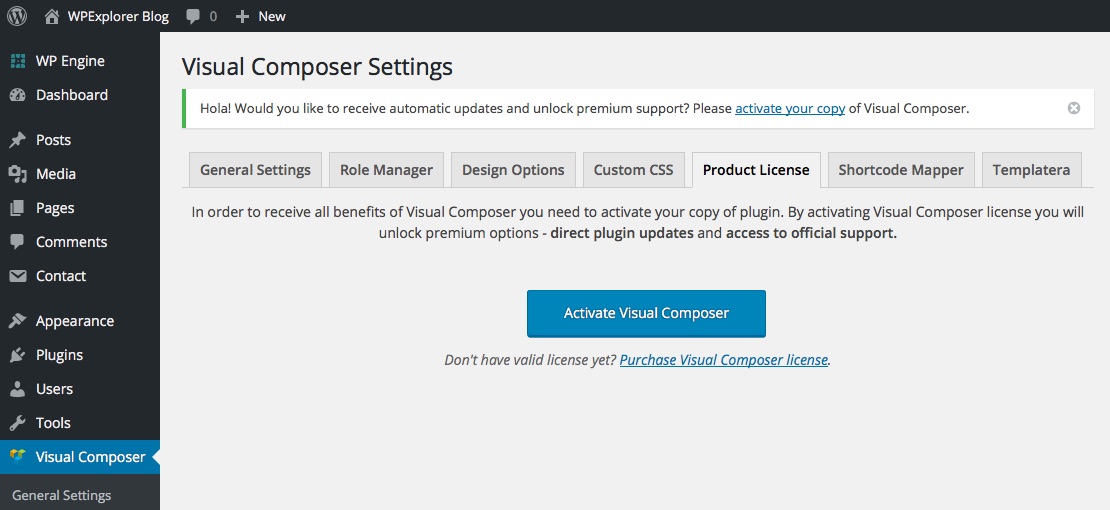
Because you purchased the plugin you will also need to add your license code to finish the activation process. Just click on the link at the top of your screen and then on the giant blue button to activate your copy of WPBakery Page Builder.
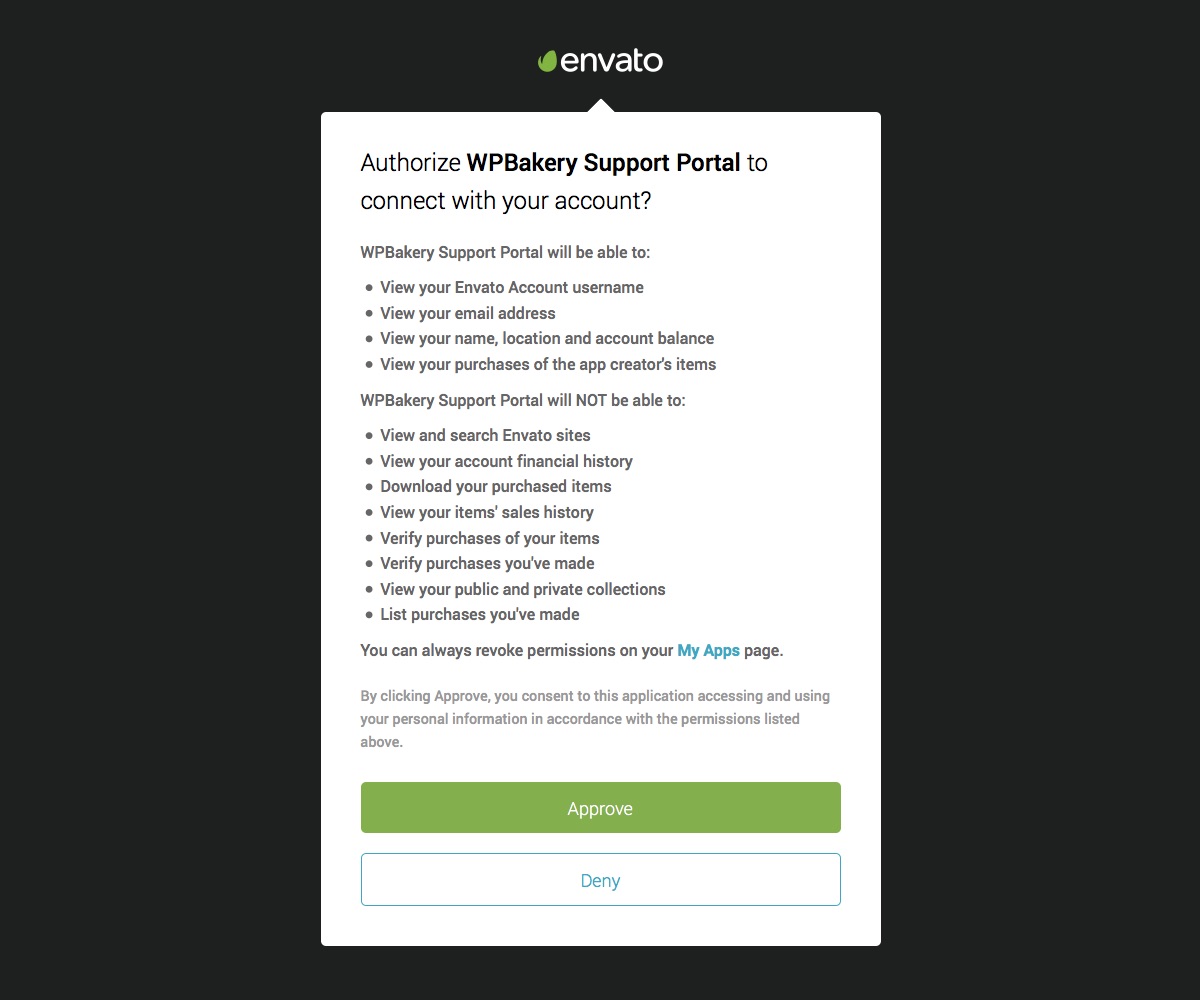
This will open a portal for you to allow WPBakery to verify your purchase. Click the big green Approve button. Don’t worry – you’re only giving WPBakery permission to confirm that your username/email really did purchase a copy of the WPBakery Page Builder.
Just follow the prompts to complete activation and return to your WordPress dashboard. Now you’re ready to start building!
Option 2: WPBakery Page Builder (formerly Visual Composer) Was Bundled With Your WordPress Theme
If you purchased a theme with the WPBakery Page Builder or the older Visual Composer included installation is different, and it can also vary by author. We’ll show you how to install the plugin if you’re using a WPExplorer theme like Total (and it should be pretty similar with most other premium themes).
First you will need to download and install your WordPress theme. If you purchased your theme from Themeforest it’s the same process as downloading the WPBakery Page Builder. Log into your Themeforest account and go to your downloads page. Then locate your theme, click on the download button and select the installable WordPress file only.
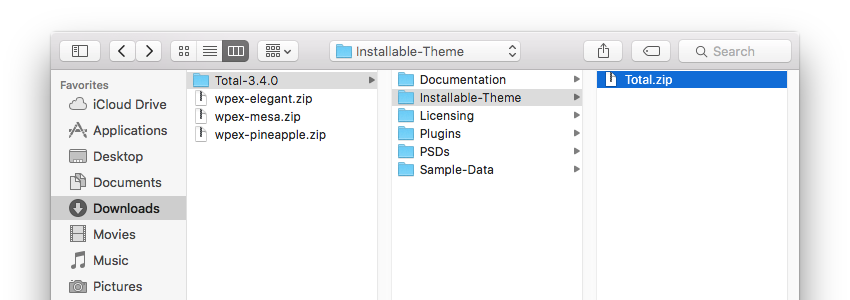
Next log into your WordPress installation and click on Appearance > Themes > Add New. Then click on the Upload Theme option at the top of the page. You will have to open the downloaded zip file to locate the installable WordPress file. This is because the Total theme is bundled with added features like premium plugins, sample data and PSD files.
Once you’ve located the file you can upload, install and activate the theme. After activation Total will prompt you to install recommended plugins – including the WPBakery Page Builder.
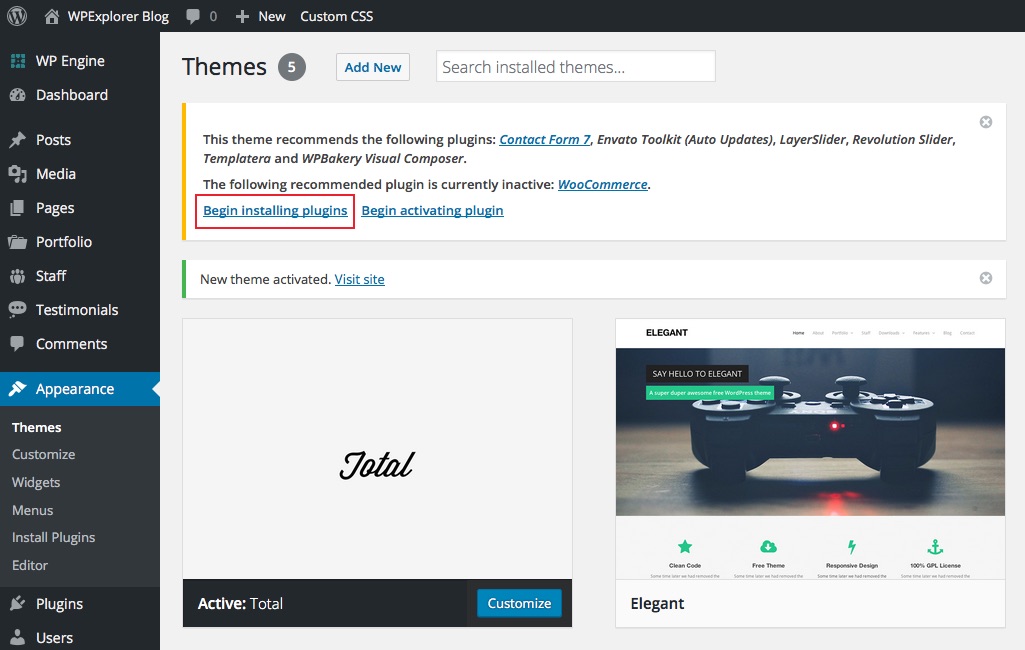
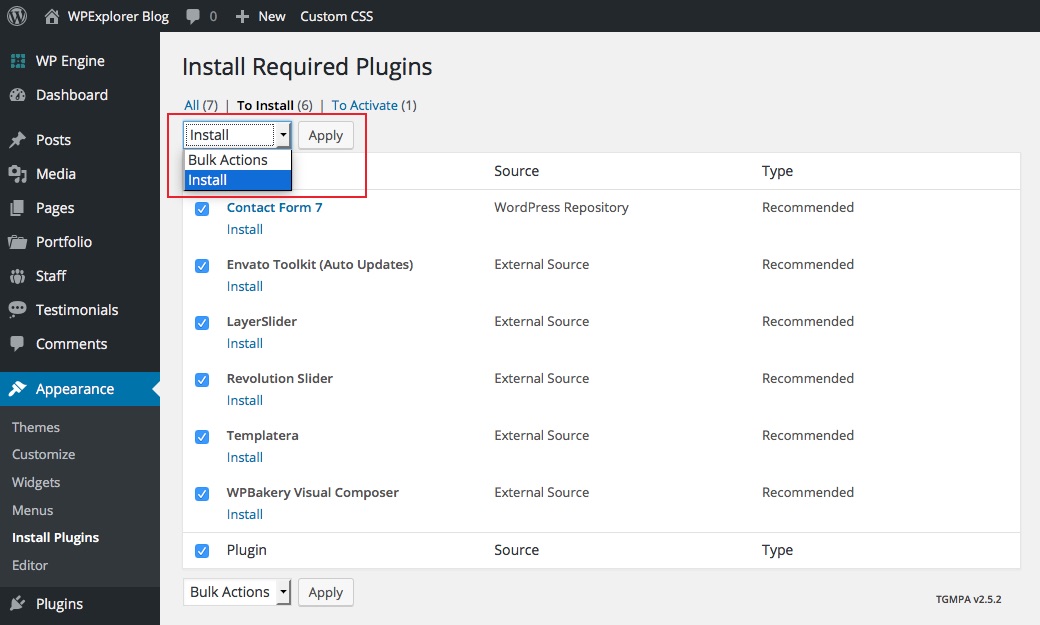
Just click the link to Begin Installing Plugins. Select Install from the bulk actions dropdown, check all the plugins that you want to install and then click Apply.
That’s all you have to do! No need to activate the WPBakery Page Builder via Envato. Because you purchased a theme instead of your own copy of the plugin you do not have a license code to verify and you will not have access to plugin updates until they are provided to you by the theme author.
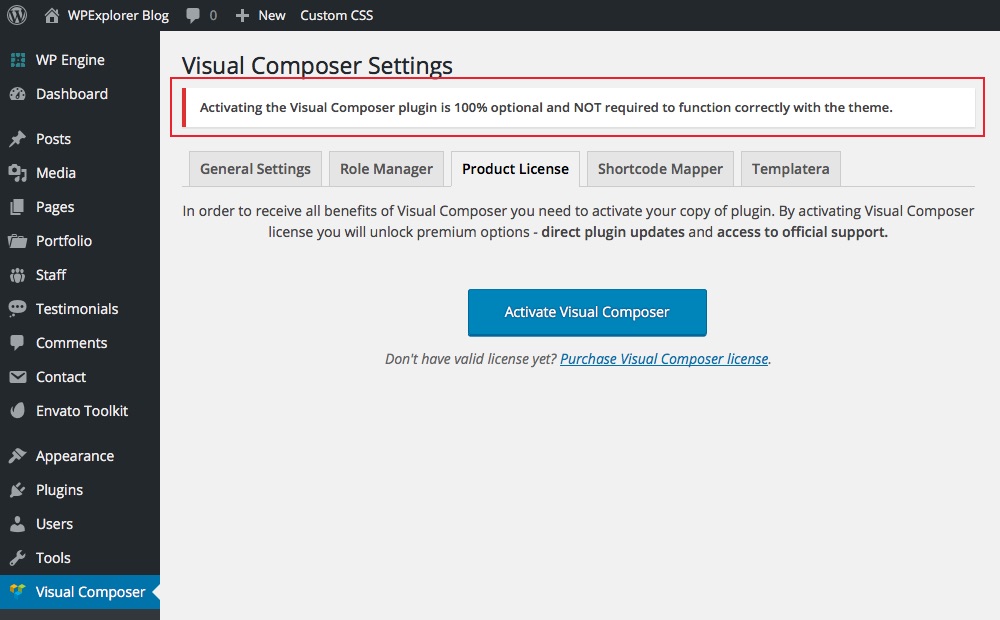
Of course if you want to purchase your own copy to receive updates faster you certainly may, but it is not required to use the WPBakery Page Builder with your theme. With that one, you can move on to actually using the plugin.
Getting Started With The WPBakery Page Builder
Now that you have the WPBakery Page Builder installed it’s time to get started with your plugin settings. In your WordPress dashboard you should now see a Visual Composer option. Click on it to open your settings page.

The General Settings tab contains simple options for enabling/disabling responsive elements from stacking on small screens (so you can have a standard three column row become three single column rows vs. shrinking the three column row on mobile), selecting a Google font subset and a rest button for turning the WPBakery Page Builder guided tours back on.
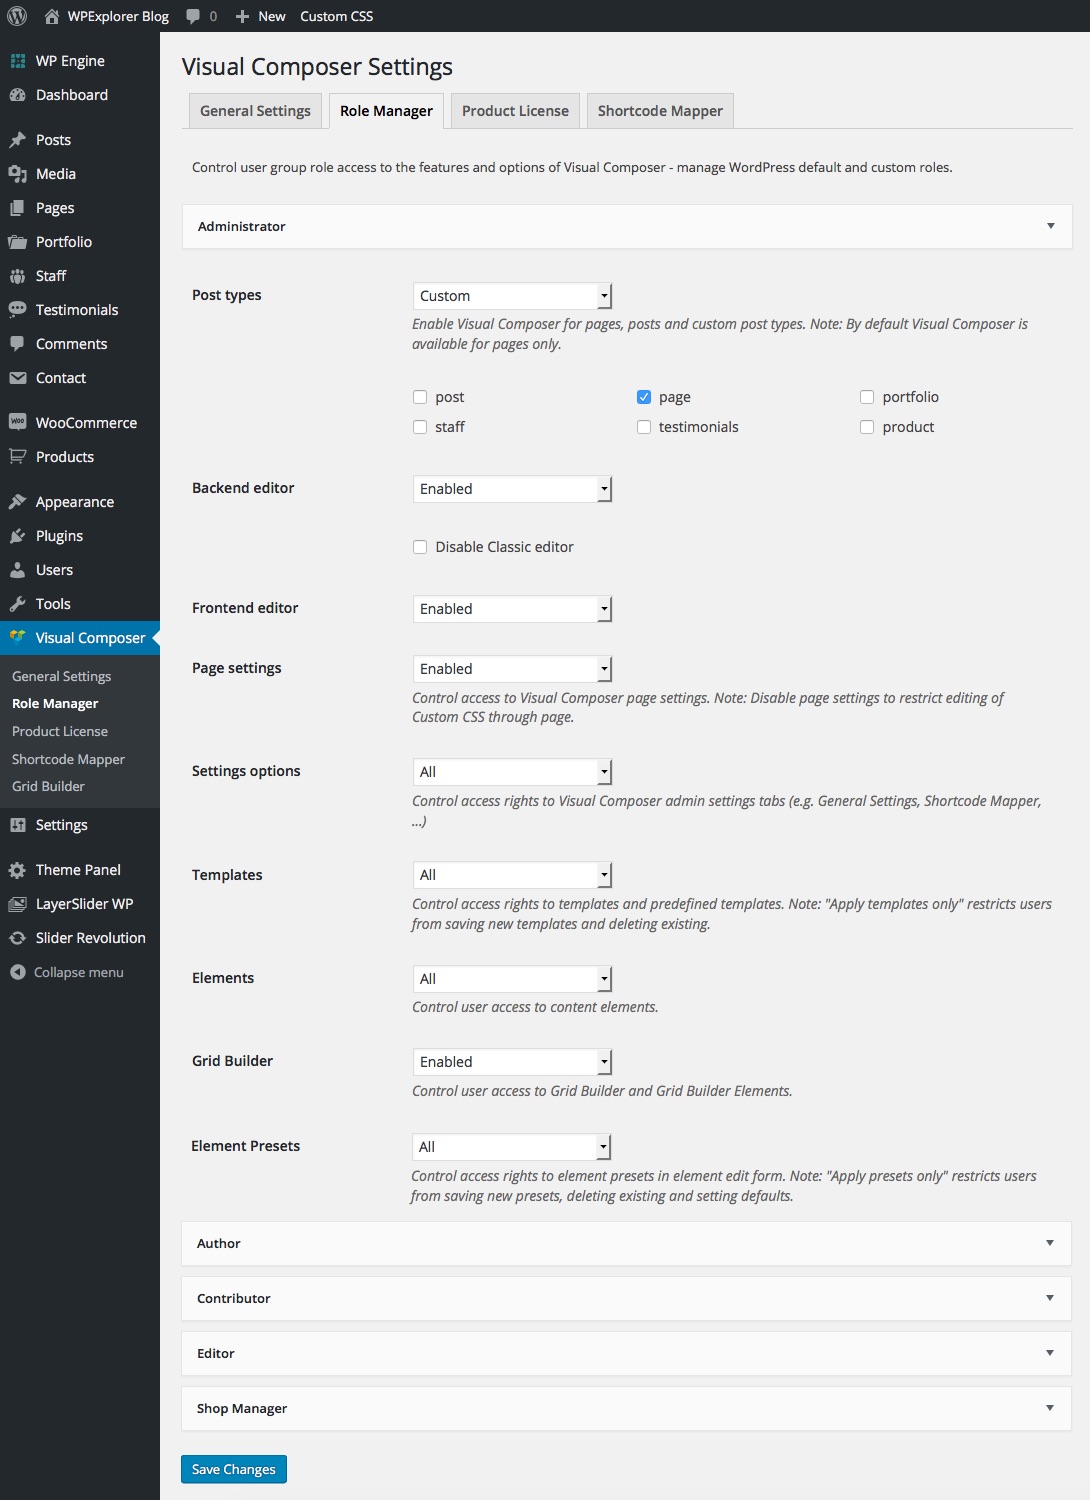
If you’re website uses multiple user roles then the WPBakery Page Builder Role Manager will certainly come in handy. This setting page allows your to restrict user access to various Visual WPBakery Page Builder features based on role. This way you can allow admins access to all features while limiting editors to only blog pages and contributors to nothing at all.
We mentioned this earlier during installation, but the Product License tab is where you can verify your license code if you purchased your own copy of the plugin. If your copy of WPBakery Page Builder came bundled with a theme you can ignore this section.
Page Builder Elements
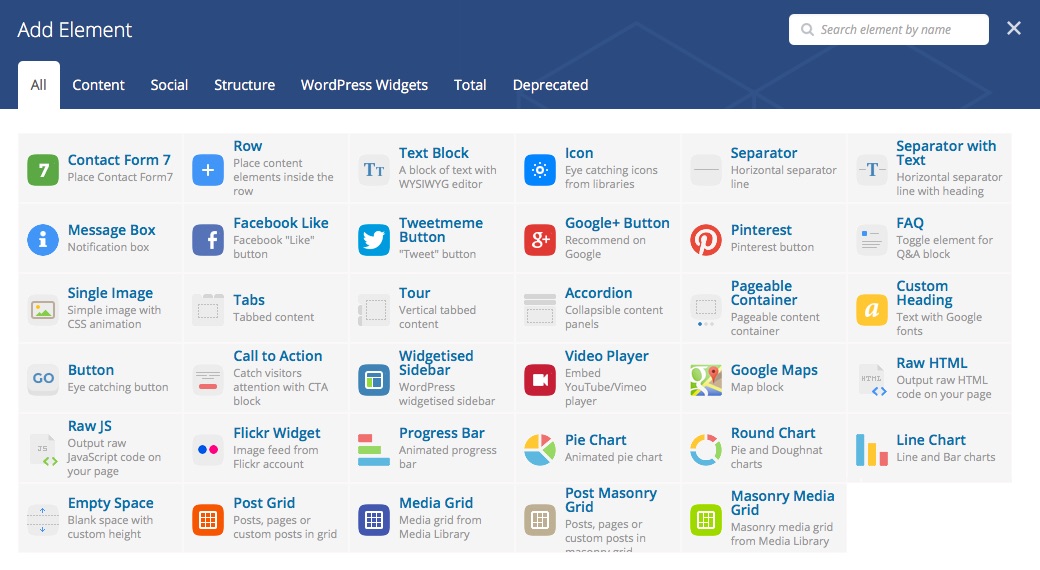
The WPBakery Page Builder comes with 34+ standard page builder elements for many features you’d want to add to your pages (the screenshot above shows them all, plus the Contact Form 7 element which we talk about later). Many of the elements include added options for colors, borders, padding, margins, custom CSS, animations and more. Here’s a quick rundown of what’s included:
- Rows are the page of your pages. You’ll use the row element to create columns and to insert all of your other page elements.
- Text Blocks are exactly what they sound like – blocks of text. using the standard WordPress WYSIWYG editor you can add and format text with this module.
- Icons include font icons from the following icon libraries: FontAwesome, Open Iconic, Typicons, Entypo, Linecons and Mono Social.
- Separator & Separator With Text are ways to create line (and or text) breaks between sections you create on your pages.
- Message Boxes are great for adding notes, alerts or other boxed massages.
- Facebook, Tweet, Google+ and Pinterest are all simple social sharing buttons you can add for users to share the page you are creating.
- FAQs are toggles that can be used for adding hidden content users can reveal as they read through your page.
- The Single Image is just that – a simple image with added options for sizing, animation, link and more.
- Tabs, Tours & Accordions are similar to the FAQs in that they contain hidden or collapsable content but with the first section open.
- A Pageable Container is a basic content slider (but you can insert just about any page builder element into each container “page”).
- Custom Headings make it easy to add your own headings to sections using custom fonts, sizing, colors and more.
- Buttons allow you to add links to other pages or external websites.
- A Call to Action is a callout box with an added button that catches users attention and allow you to add a bit of convincing content.
- The Widgetised Sidebar allows you to insert your own custom sidebar anywhere on the page.
- The Video Player makes it easy to insert different video formats supported by WordPress.
- Google Maps is another straightforward option – just paste in your Google Map code to insert a map on your page.
- Progress Bars, Pie Charts, Round Charts and Line Charts are all ways to graph or display data or skills.
- Empty Space makes it simple to add a vertical break between elements.
- Post, Media, Post Masonry and Media Masonry Grids are all custom grids you can add to pages (with the option to mix and match post or media types).
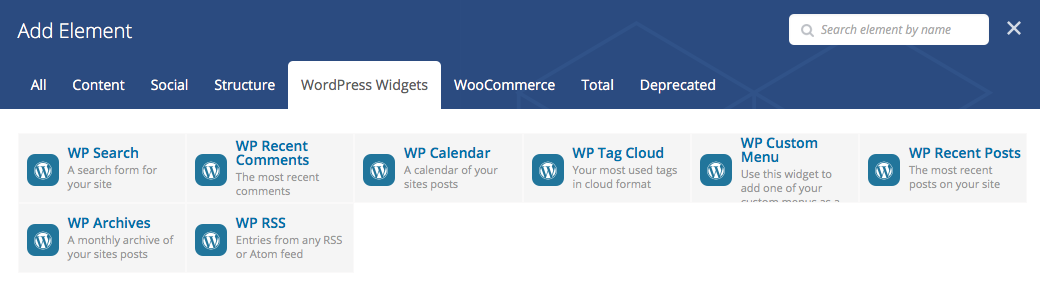
The plugin also includes 8 widget elements that can be used to build your own sidebar if you choose to do so. These become helpful when creating custom landing pages where your sidebar might not be in a typical page location, or if your entire website is a large network of landing pages with no two using the same sidebar.
WPBakery Page Builder Extensions
The basic Visual Compose elements are great for getting started, but eventually you’ll want or need more to create your custom page layouts. This is possible via extensions. There are a few different sources for WPBakery Page Builder extensions.
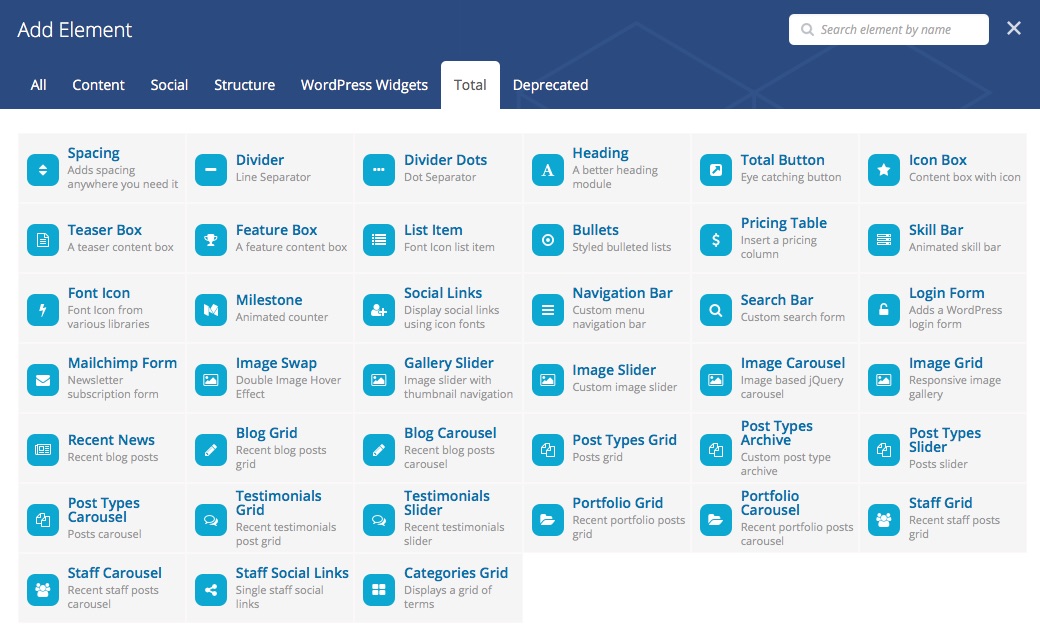
The first way to extend your WPBakery Page Builder is via your theme. A great example is our Total WordPress theme which includes 39 added page builder elements. These are included exclusively with Total to work with it’s features, so you must have the theme installed and active to use them. Total includes extensions for custom post types (testimonials, staff, portfolios), custom galleries, simple sliders, social and much more. This makes it easier for you to add the content you want where you want it.
If your theme doesn’t include any extensions you can install third party WPBakery Page Builder Extensions. These can range from free to $55 and are available from a variety of authors on CodeCanyon and around the web. If you’re looking to add a few extra features like pricing tables and social then the free Symple Shortcodes plugin is the way to go (we created it here at WPExplorer after all). If you want to add a boatload more options then a premium plugin such as Ultimate Add-on’s might be right for you. There are literally hundreds of options – you can see a full list of compatible add-ons on WPBakery.
However you choose to extend your WPBakery Page Builder we recommend that you don’t use all the theme and plugin extensions at the same time. More is not always better – especially in this case. Not only will this create a lot of overlap and duplicate options but it will also significantly slow down your site (a ton of code goes into each page builder element). So pick the extension that works best for you and stick with it.
Backend & Frontend Editing
With the WPBakery Page Builder you aren’t limited on how you can build and edit your pages. With this powerful plugin you have the option to makes changes from the modular backend or from the visual frontend.
Builder Backend Editor
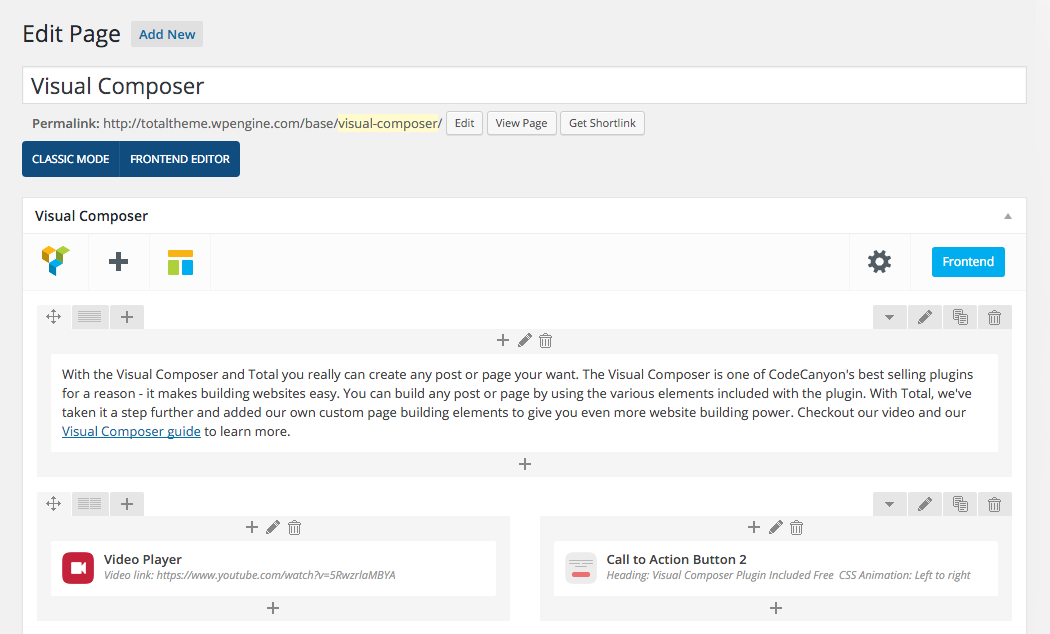
If you choose to use the backend editor each element is displayed as a modular element that you can insert, drag and drop into place. This method is great if you want to quickly layout a wireframe of what you want your page to look like and can also be faster than the frontend if you have a slower server or internet connection.
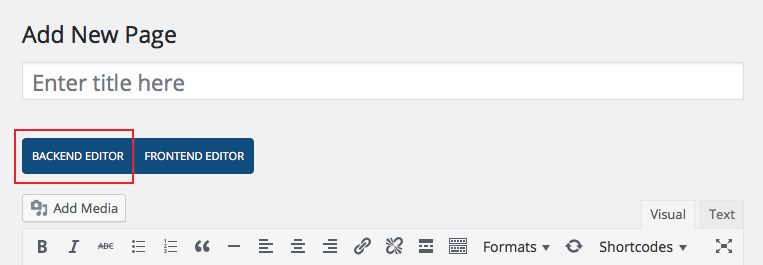
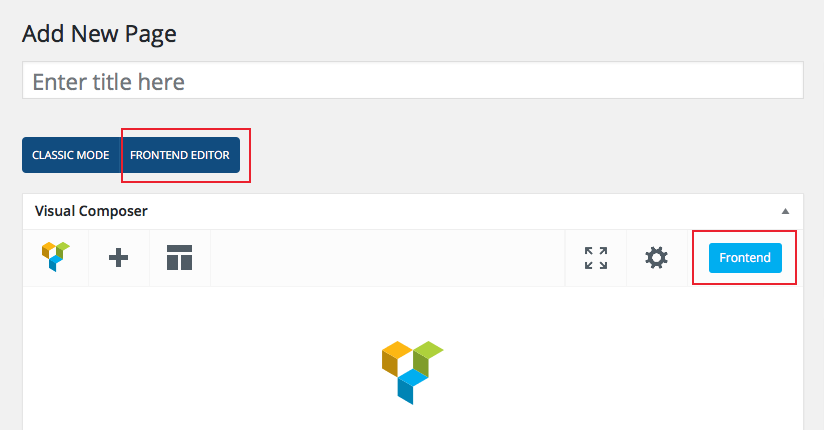
The backend editor is fairly easy to use. Simply click on the blue button for the Backend Editor to enable the page builder for the page or post you are editing.
Then click on the turquoise button to +Add Elements.
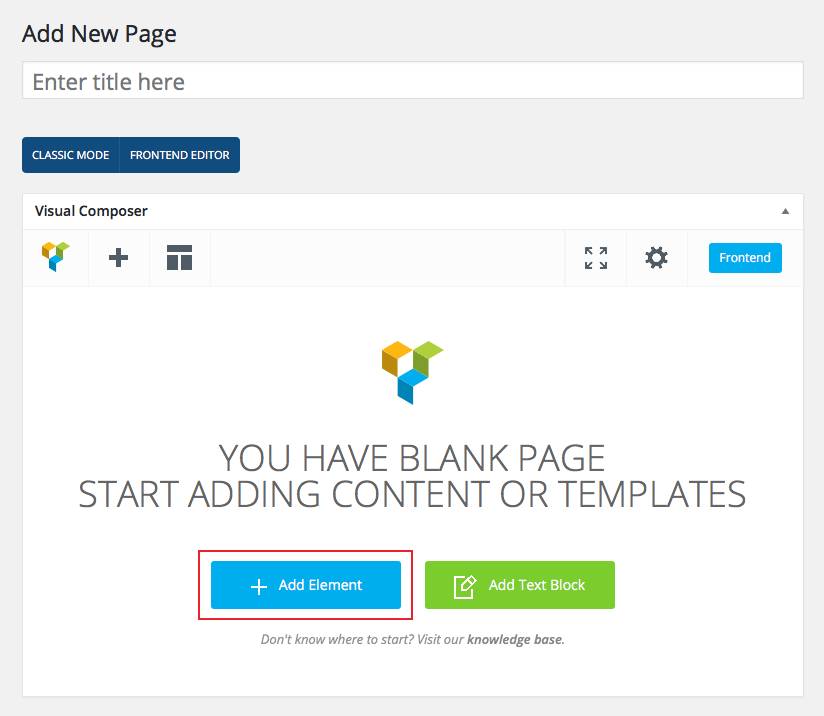
From here you can start inserting any and all page elements you wish!
Frontend Editor
The frontend editor offers a much better view of what your final page will look like since it’s essentially a real-time visual editor. It allows you to insert all of the same page builder elements as the backend editor with the added benefit of being able to actually see them instead of a module. You can see how big a 300px image really looks, or if a purple button with a #6e2f93 hex value really pops.
To enable frontend editing click on either of the two Frontend Editor options for your page or post.
This will refresh your screen and take you to a live frontend preview of your post or page with all the same page building options as the backend editor.
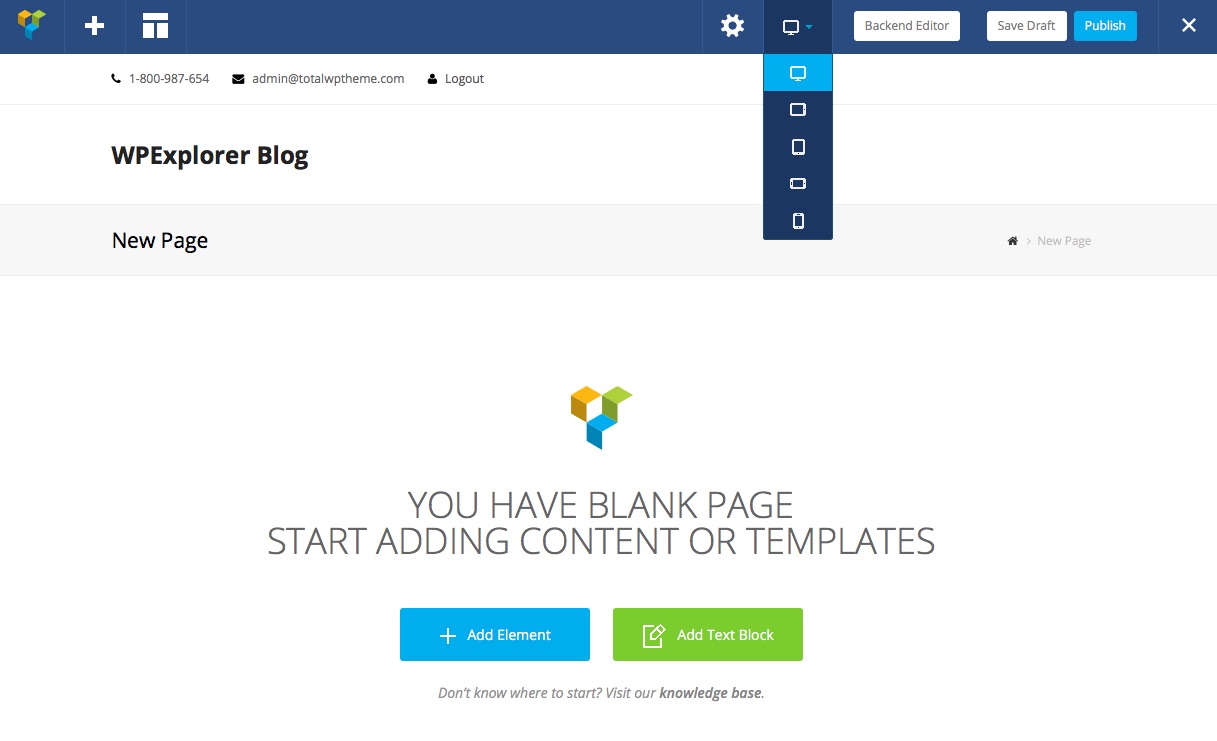
Just click to start adding elements. The main difference here is that you can now see elements as you insert them and you can use the preview options in the top bar to get an idea of how your page will look like on desktops, laptops, tablets and phones.
Adding & Editing Page Elements
Whether you use the back or front -end editor you’ll have the same options for customizing your various page builder elements. While options do vary between elements there are a few key features to be aware of after inserting your element.
Row Options
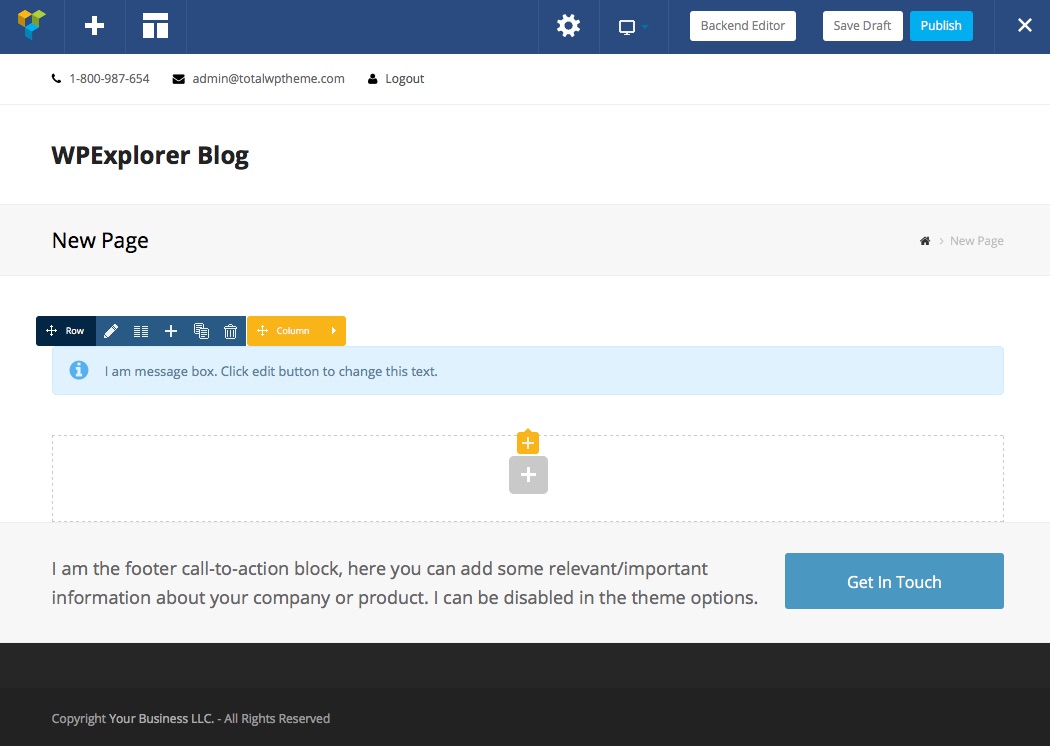
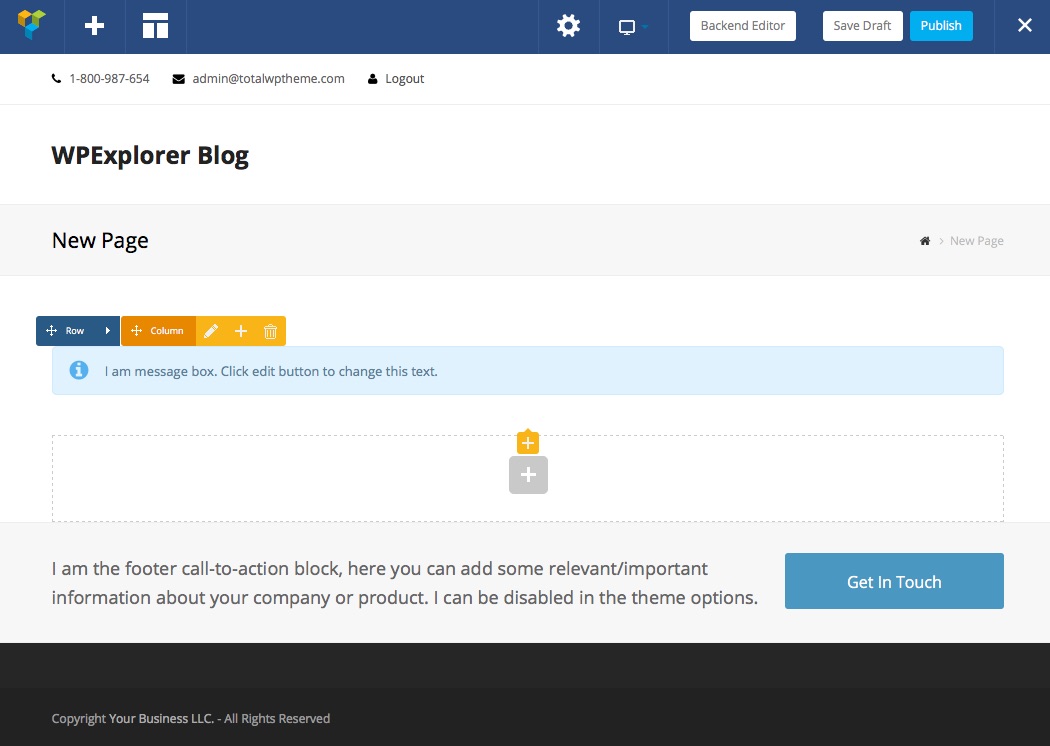
No matter what you want to add to your page you must insert a row first. Once inserted you can hover on the frontend element to reveal the blue row options (in the backend these are always visible at the top of each row).
- The first Row icon is where you can click to drag & drop the row to a new position on your page.
- The Pencil icon opens options for your row settings. These may vary based on your theme. With the Total theme you will see options for local scroll ID, row stretch (for full-width rows), full height row, minimum height, visibility on mobile, centered content, equal heights columns, animation, typography, max width, column spacing, background video or parallax and design options (margin, border, padding, background color/image).
- Columns are to define the number of columns in your row. There are default options for up to 6 columns, but you can also define your own custom column layout if you wish.
- Plus adds a new row beneath the one you are editing.
- The Duplicate icon will clone your current row and all its contents (aka all the elements you’ve inserted into the row). This is great if you want to reuse a row layout multiple times on the same page.
- Trash is simply to delete an entire row and its contents.
Column Options
When you hover on a row in the frontend editor you will also see yellow column options (in the backend you will find the same options & icons displayed above each column).
- The first Column icon is the same as rows – click on it to drag & drop and rearrange columns within their row.
- The Pencil is general column settings. Similar to rows, column options may vary based on the theme you are using. With Total the following options are available: visibility on mobile, animation, typography, minimum height, design options (margin, border, padding, background), and responsiveness settings (custom offset, width or hidden options based on device).
- For columns the Plus icon will add an element to the top of the column, above any other element already inserted.
- Again, the Trash icon is to delete the entire column plus its contents. After deleting a column the remain columns maintain their dimensions (if you delete 1 of 3 columns, the remaining 2 columns will still be 1/3 sized columns) so remember to edit your column widths after deleting.
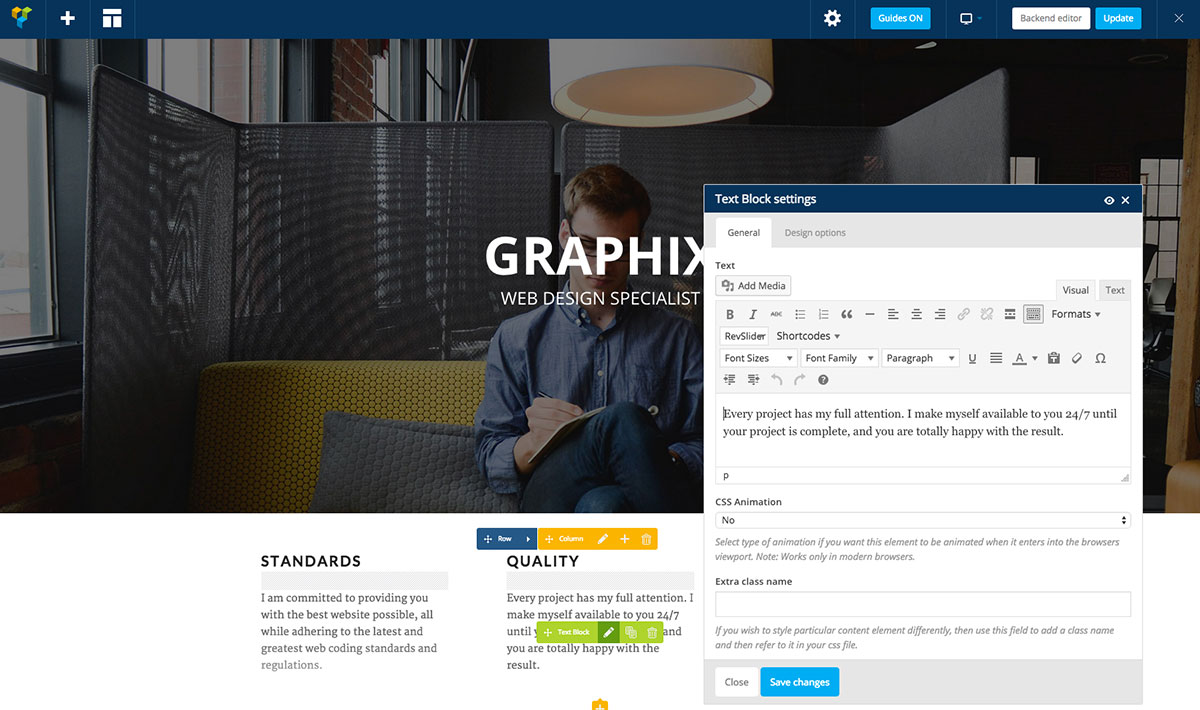
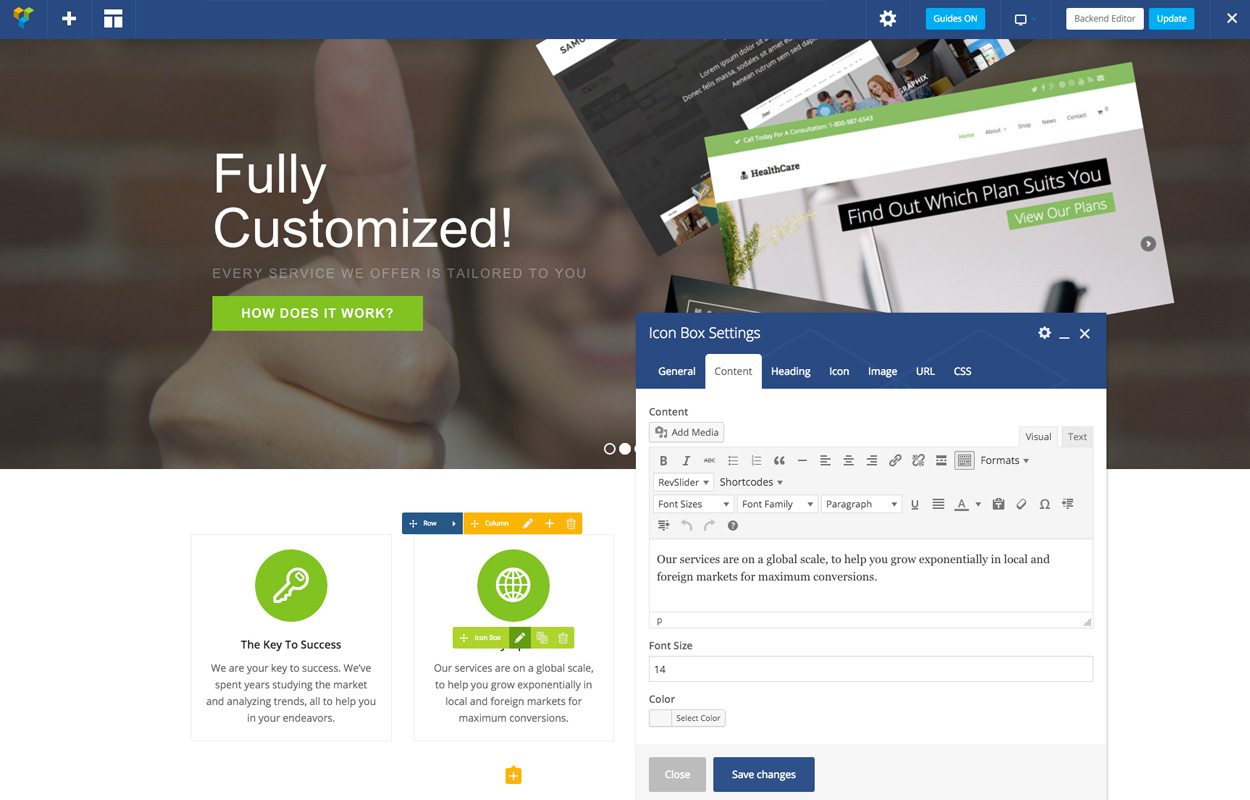
Page Element Options
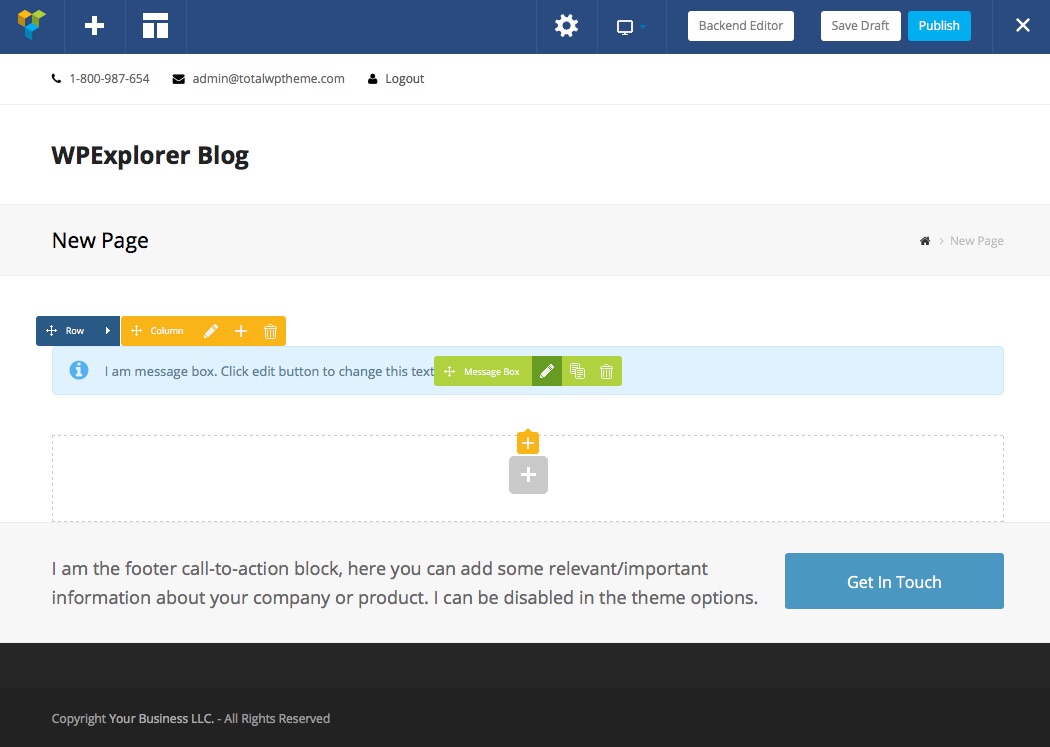
Within your row or columns you will use the plus icon to insert a page element. In the screenshot above we’ve added a Message box. When you insert an element the settings will automatically open. To edit an element that you’ve already added simply hover on the element in the front or back -end editor to reveal the following options:
- The Pencil Icon will open the settings (which are described below).
- The Duplicate icon will clone your page element exactly as you have it (settings and all).
- Lastly the Trash will delete only your page builder element. from the row or column where you inserted it, leaving all other elements in tact.
Page Element General Options
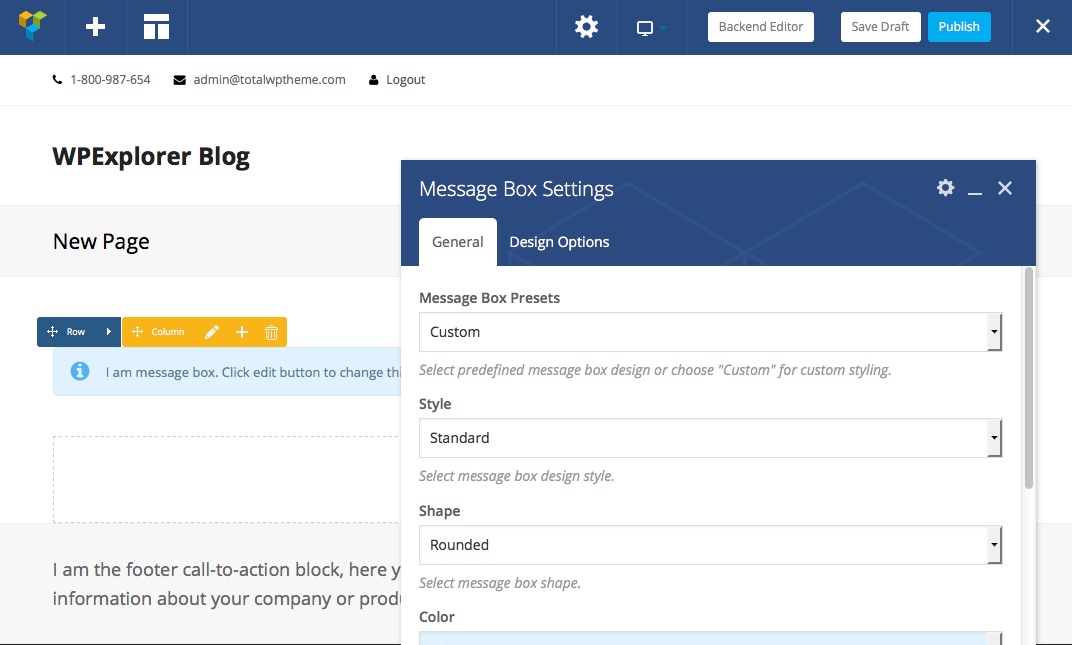
When you insert a new element or click on the Pencil icon for an element you will open the page builder element settings. These are (for the most part) split into multiple tabs to make it easier for you to see all the customization options available to you. In addition to the settings tab, there is a gear icon in the top right corner that you can use to save your selected settings as a preset to be reused later or as a default to be automatically used each time you insert this specific element.
The General tab includes general options for your page element. These will vary based on which element you insert (but in every case editing is as simple as using a dropdown, color picker, check or text box). For example the Message Box in the screenshot above includes options for a style, shape, color, icon, text and animation. But if you insert a Button instead you would find options for text, url, style, shape, color, size, alignment, icon and animation.
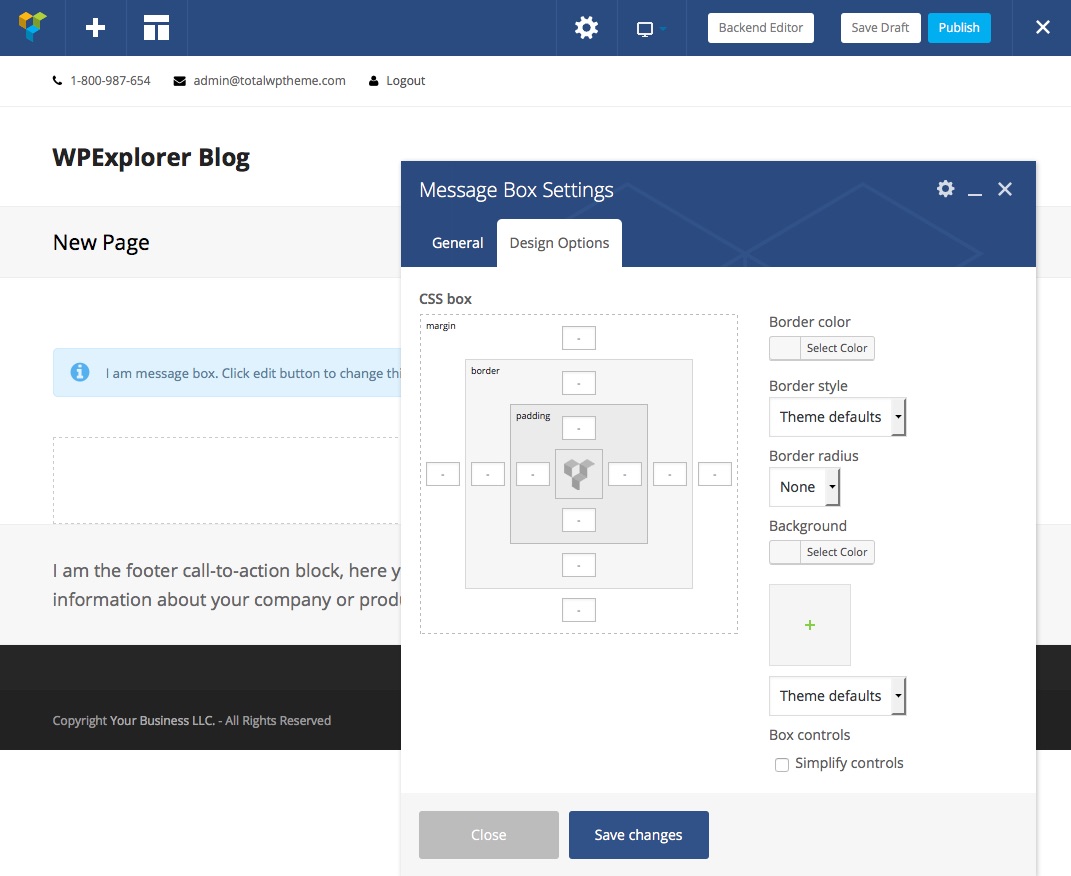
Page Element Design Options
The Design Options tab is the second standard tab you’ll see on just about every page builder element. From here you can add a custom background (color or image), border, padding and margin to your element. The options to Simplify Controls reduces the CSS box options so you can enter one universal value for each options (margin, border and padding). One note to remember: when you apply a background it is contained within your border. So increasing your padding will increase the visible background your added around your element, but if you increase your margin you will increase the empty space around your page element (revealing the row/page behind it)
Of course depending on the module you insert your page element may have many more tabs. For example the builder’s Post Grid has added option tabs for Data Settings and Item Design. And if you are using custom page elements via an extension like the Total Staff Grid there can be even more options built-in (such as query options, custom image cropping, meta, social links, excerpts, etc.) depending on what the extension author has included.
Note: You can checkout a comprehensive list of elements in our Total Builder Modules Guide. However, the best way to learn what every module does is to play around with the the builder. Create a test page and practice inserting and editing elements. You’ll quickly get the hang of it and be building pages like a pro!
Popular Compatible Plugins
In addition to WPBakery Page Builder extensions many popular plugins are compatible with the builder and add their own page building element automatically. Here are a few of the many plugins you’ll be happy to hear will work seamlessly with the WPBakery Page Builder plugin for even better page building.
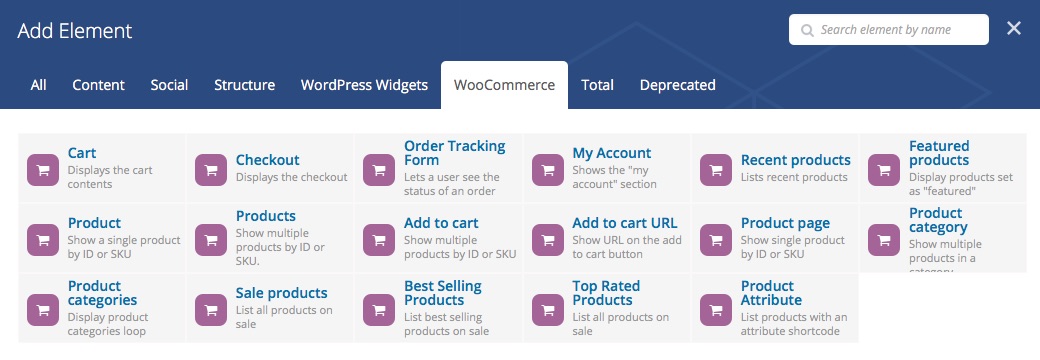
WooCommerce: If you want to build a store with WordPress then WooCommerce is the way to go. Not only is this plugin free and full of awesome features but it’s fully compatible with WPBakery Page Builder. Once installed and activated WooCommerce will not only add its own settings & options, but it also adds 17 new page builder elements for your to play with.
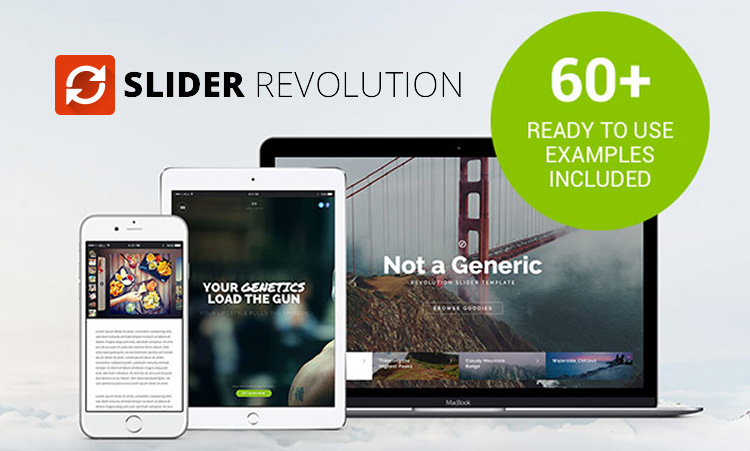
Slider Revolution: Sliders are a great way to add an attention grabbing and content packed section to any page and Slider Revolution is a perfect plugin to do just that. With this plugin you can drag and drop elements like text, buttons, images and even videos all with added animations & effects to create impressive sliders. See it in action on many of our Total demos!
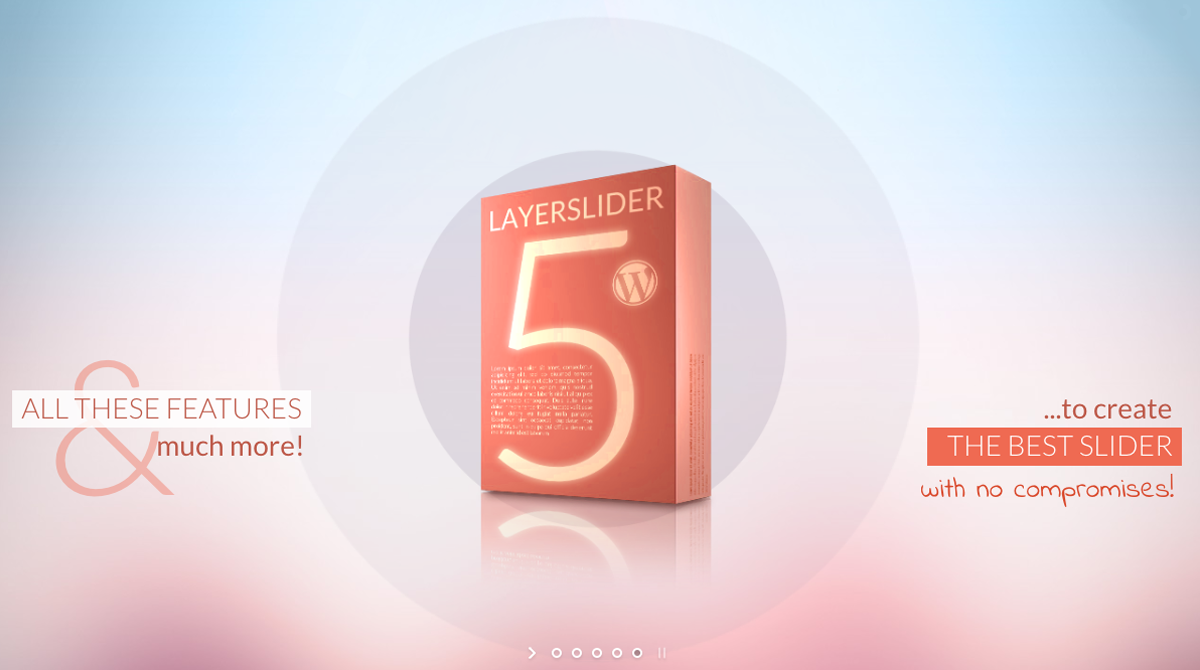
LayerSlider: Another great option for sliders is the LayerSlider plugin. It’s just as awesome as Slider Revolution but with a slightly different interface and options. It even includes a custom transition builder so you can create one of a kind animations. It’s also one of the two premium sliders bundled with our Total WordPress theme so your know it’s pretty great.

Contact Form 7: Contact forms are an important part of any website – whether you’re a blogger with a form for business inquiries or a dentist with an appointments form. Contact Form 7 is completely free, flexible and with the WPBakery Page Builder inserting your contact forms is easy with the custom form element.
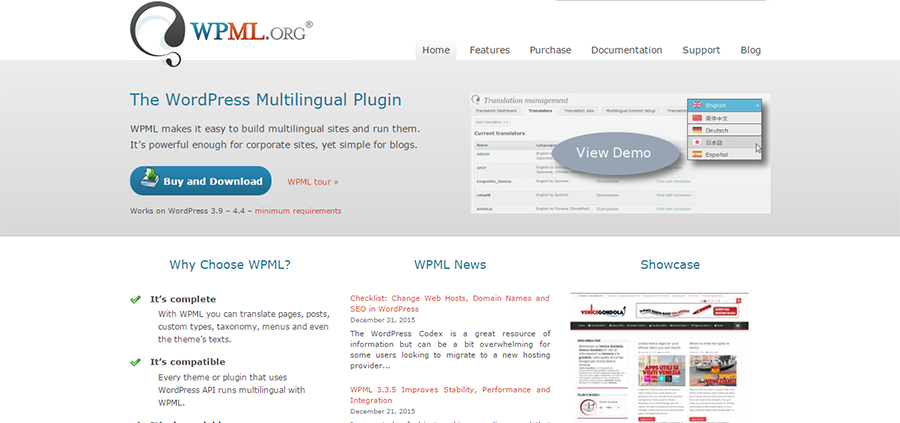
WPML: If you need to create a multi-lingual website WPML is one of the premier options for translating your posts and pages. Plus WPML is fully compatible with the WPBakery Page Builder so it’s possible to translate each and every custom page you build.

Polylang: If you don’t want to invest in WPML, Polylang is a great free option that is fully compatible with the WPBakery Page Builder (it’s one of the free plugins we recommend to make your WordPress site multilingual).

Yoast SEO: Yoast makes it easy for any user to improve onsite SEO. There are many important SEO functions including sitemaps, meta descriptions, breadcrumbs and more. Best of all – Yoast SEO plays nice with pretty much every builder so you can worry about creating better pages instead of researching SEO.
Templatera: This plugin isn’t just compatible – it was created by WPBakery to extend the functionality of their page builder. Templatera makes it possible to save and reuse templates so building repeat pages is easy. Once installed the plugin adds it’s own option within the WPBakery Page Builder settings in your WordPress dashboard so it’s simple to import, export and reuse your templates (which we thought was such an awesome feature that we bundled this plugin with Total too).
And we’re sure there are many more great compatible plugins! If you’re in doubt about a new plugin’s compatibility with the WPBakery Page Builder just contact the author of your new plugin and ask.
Advanced Options For The WPBakery Page Builder
For more advanced users there are a couple extra options within the WPBakery Page Builder you can use to add custom shortcodes to your page builder and to create custom media grids.
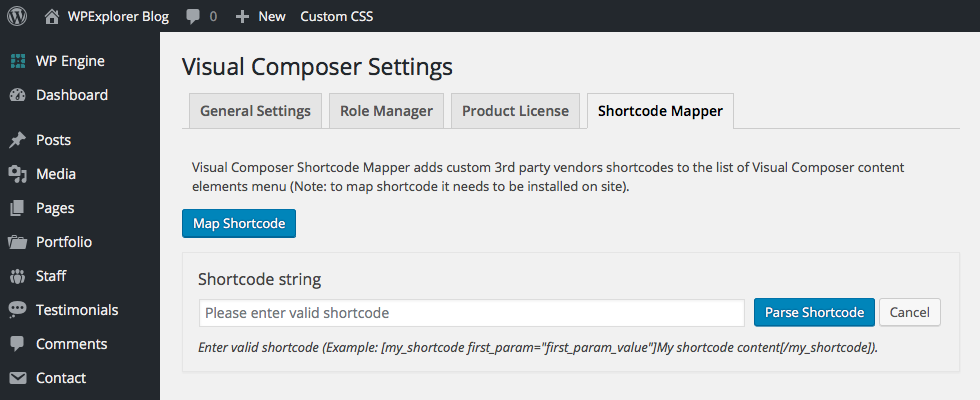
First is the Shortcode Mapper. This option is found within the WPBakery Page Builder settings and can be used to map your own custom shortcodes to the builder. This is great if you have a shortcode that you love (like maybe one for a pricing table) that isn’t included with the Visual Composer by default.
The second advanced option is the included Grid Builder. With this features you can create custom grids (similar to the media and post grids) with your own custom layouts for your content. For example, you can create a custom blog post grid with round images, post author’s name in a bold custom font, custom excerpt length, a read more button and a second button linking to a recommended product. Get the idea? You can build any grid layout you want with tons of options for elements, colors, margins, borders and more.
Wrapping Up
There is tons you can do with WordPress and the WPBakery Page Builder (formerly Visual Composer). If you want to see the page builder at work just take a look at any of our Total theme demos where we’ve tried to showcase the variety of styles and layouts that can be created using the builder.
And if we missed something just ask us. We’d be happy to tell you anything you want to know about the WPBakery Page Builder (formerly Visual Composer) and how it works – leave a comment below. Thanks for reading!


Wow great overview of visual composer plugin, I hope you’re planning on doing follow-up article about using addons and speed and caching issues related to using a complex plugin like this
Keep up the good work!
Hi Kyla, I have read your blog and got good information about Visual-Composer…
Awesome post, its very helpful, explained details.
Thank you so much for such a nice post
Hi Kyla, great article and cheers from the Visual Composer team.
Aww thanks 🙂 And double thanks for making Visual Composer more awesome with each update 🙂
Hi Kyla, great article and cheers!
I am theme author, I really want to have the addon like this for our customer.
Do they have plan to convert this addon to Kingcomposer page builder?
This is a page builder in itself (just like Kingcomposer) you don’t need to convert anything. Basically both plugins accomplish the same task so you would choose one or the other.
Hi, I use Visual Composer that came with the Salient template. There is no “Frontend” button. Are there special versions that don’t have it? Or does it need to be activated somewhere? Thanks!
Unfortunately some themes edit the Visual Composer and so all the features are not available. It’s very unfortunately that popular themes do this such as Salient 🙁 If you look at a well coded theme, such as our Total theme, the Visual Composer hasn’t been modified in this way so you will still have access to the Visual Composer front-end builder. The front-end builder is so much nicer to work with and I do believe it speeds up development quite a bit!
Hello,
Someone created my website for me and now I am having trouble editing anything because I am no way a graphic designer or website designer. How do edit the actual material that is in the visual composer? For example, if I want to simply edit wording how would I do that? I am using the Alone Charity theme on word press and having a very difficult time maintaining this new website. Help!
The Visual composer is used to insert custom elements with in posts, pages and custom post types. To edit these sections you simply open up the post or page from your WordPress dashboard. From here you can either edit the post from the dashboard by clicking on an element block to edit, or if your theme supports it you can click on the Visual Composer front-end editor button to make changes using the live editor (this is often easier, since you can see the changes as you make them). Unfortunately I’m not familiar with the Alone theme, so I can’t tell you for sure if the theme developer has made any changes to the way the Visual Composer works. I hope this helps!
Hello Kyla, Visual composer is very nice plugin and things makes it the best are developers, who makes addons. We also made one amazing addon called ThePlus Addons which not only extends possibilities of visual composer, It’s like a charm for moderate or non technical people to create websites on a easy go with lots of features and functionalities.
We are also improving that day by day and comments from our buyers will give you proof of our work.
Warm Regards,
Sagar Patel