ARForms Professional WordPress Form Builder

If you’re looking for a plugin to create and display forms in WordPress, you’re sure to run into a number of quality plugins, among them the ARForms WordPress Form Builder. ARForms is an all-in-one form builder plugin that helps you build forms with absolutely no coding knowledge or prior design experience whatsoever. Not just typical contact forms, it helps build all kinds of form and display them wherever you want, including in a popup.
The plugin can be purchased on CodeCanyon for $39. But before you put down the money for the plugin, you can test drive it to have a feel of the user experience that the latest version offers.

In this post, we’ll first take a quick look at the full range of features that come with the plugin. Next, we’ll build and publish a form, taking a look at the settings and options available along the way. Lastly, we’ll see how the form functions can be expanded with add-ons.
Let’s start:
ARForms WordPress Form Builder Plugin Features
ARForms includes pretty much every feature you’ll ever need to create a form and display it on your website. There’s not much that you cannot accomplish using the plugin. It offers a varied selection of fields using which you can customize form functions precisely, and get it to appear just as you want. You’ll be able to duplicate, import, export, manage and analyze forms and data. You can set up email notification for form entries, integrate it with third-party plugins, facilitate email marketing, enable analytics and more. Using the plugin you can create just about any kind of form, right from the usual contact form to the more complex order form and everything in between.
Here’s a quick rundown of the features:
- Real-Time Visual Editor that helps you see what you’re creating even as you build a form, and allows an instant preview
- Ability to create any type of form from the very simple to the highly complex, including popup forms
- 12 ready-made form templates for different types of forms, each of which can be minutely customized
- Multi-step forms with a progress bar, so you don’t scare away users with one never-ending form
- 25+ Form Elements available at a click to choose from and add to your form
- Drag and drop ease to add elements and fields, and reorder them any way you like
- Multiple pre-made color schemes to choose from
- Choose fonts from Google fonts vast library of fonts
- Font Awesome icons to enhance your forms with professional vector icons, fonts and logos
- Three form styles – material, rounded or standard
- To resize columns, you simply have to drag the borders
- Add radio buttons or checkboxes and make them attractive with custom image upload
- Embed different media elements such as videos and maps
- Tooltips that appear on hover or click to prompt users
- Masking options to ensure users enter valid data in some fields like phone number
- Save time by duplicating previous forms and re-use them as templates
- If you wish, use custom CSS, for enhanced customization
- Conditional logic for smart forms that adapt even as users input data
- AJAX for form submission, so there’s no need to reload the page
- Control form behavior after submission
- Users get to edit entries even after submission
- Automatically prevent duplicate entries
- Math logic to do calculations based on user input and arrive at totals, averages and more
- Powerful analytics using graphs, maps and charts
- Import or export data, entire forms or form settings
- Save users progress on forms and allow them to resume where they left off
- Built-in popup options, saving you an extra plugin
- Password strength indicator as a security measure
- Automatic email notification on receipt of entries
- Supports multiple email marketing systems like MailChimp and AWeber
- Loads Java CSS only when required on the page, so there’s no drag on speed
Besides the plugin is fast, responsive (including multi-step and popup forms) and cross-browser compatible. It supports SMTP for email, RTL and a number of useful free and paid add-ons. Working from the dashboard you’ll get full control over the style, position, and settings of the form. The plugin aims to be as feature-rich as possible, yet remaining easy to use.
Setting Up ARForms
Now that you have a snapshot of the features offered by ARForms, let’s proceed to put them to work to create and display forms. Installation of the plugin itself is a breeze and on activation, it leads you to a clean interface with user-friendly tools. Working within the plugin dashboard is a highly intuitive experience. It’s different from the usual WordPress dashboard, but once you’re familiar with it, you’ll see how easy it is to use the interface.
A new item, ARForms added to the menu and you can start your form building from here.
1. Creating and Customizing a Form
To create a form, start with ARForms > Add New. You’ll find there are 12 form templates to choose from –
- Blank
- Contact
- Subscription
- Feedback
- RSVP
- Registration
- Survey
- Job Application
- Donation
- Request A Quote
- Member login
- Order form
While that covers pretty much any form you may want, there’s also a blank form that you can use to create a custom form and get it to function in any way you need.
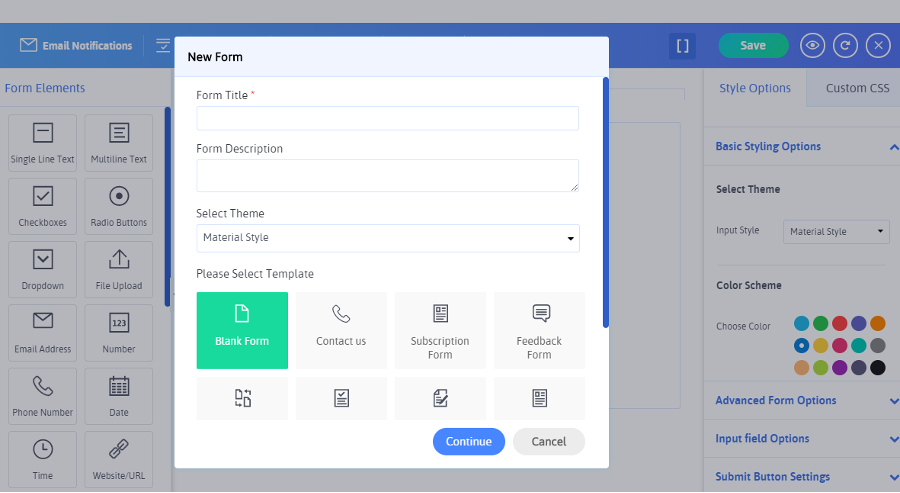
Choose any template to start with and then start customizing the form using custom CSS or the ton of customization options available. Your form can retain the trendy default material style or switch to rounded or standard styles. Whatever be the style you choose you’re assured of crisp, flat and neat forms.
Every aspect of form creation and display can be customized. The form dimensions can be adjusted by specifying the width of the form. Don’t forget to title the form and add a description to it.
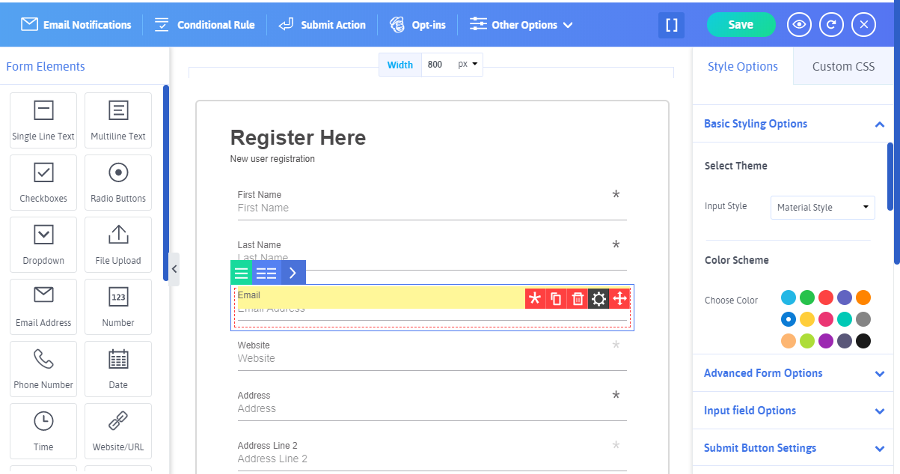
For each field on the form, you’ll be able to adjust the number of columns, specify if it’s mandatory, drag to reorder them, and copy or delete the field. That’s not all, you can set up the number of characters, the message for tooltip, default values and more. Multiple color schemes and styling options are available to match the form with your branding requirements. And to give it all a nice setting, you can add a background image to form.
Fonts, margins, borders, alignment can all be modified. You get 25+ form elements to choose from, including checkboxes, radio buttons, file upload, dropdown, email address, phone number, time, website and image URLs, password, smiley, autocomplete, like or star rating. Simply click on the element to add it to your form.
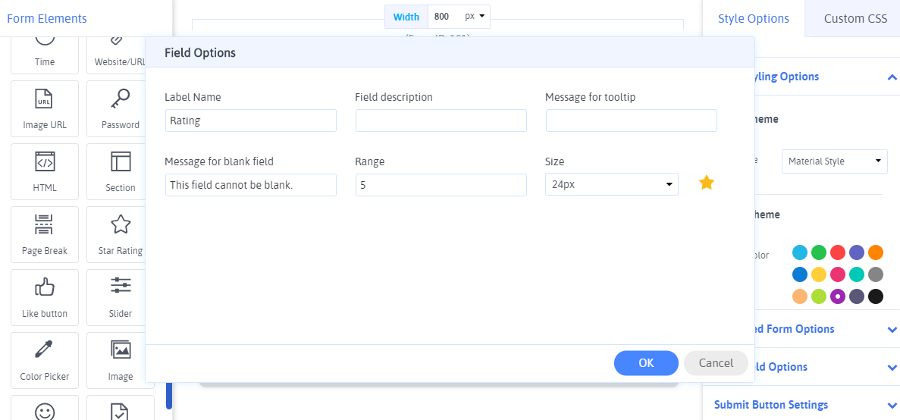
What’s even better is that after adding elements to your form, you can open the settings on each element and pick options that you like. This gives you enormous scope to customize each element, without touching any code. In the image above, you can check out the options that open up for the Star Rating element.
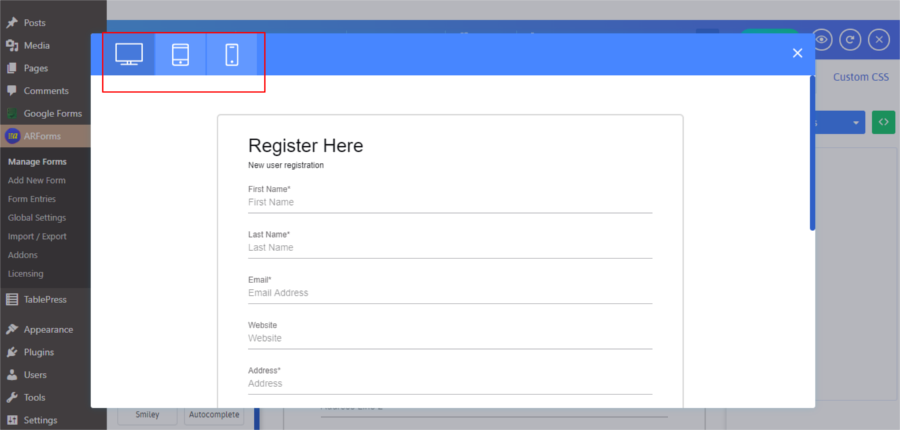
Even as you create your form, you can preview it to see if it’s taking shape the way you want. Check out how the form will appear on different devices.
2. Settings to Improve User Experience
ARForms allows you a great deal of control over how users can react with your form. Not only will they be able to fill up the form easily and submit it on the website, they can leave a partially filled form and return to complete it from where they left off.
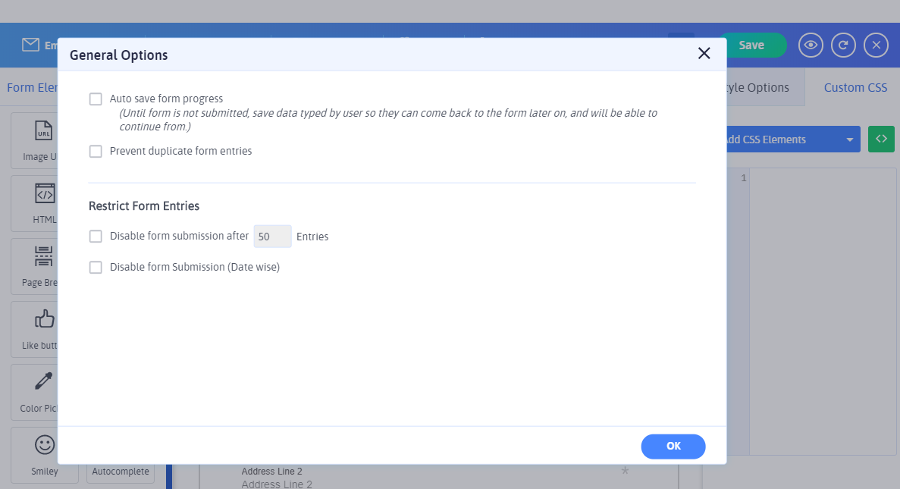
Users can also edit their entries. On your part, you can configure tooltips to help out with form filling and skip captcha requirements for a better frontend experience. Or prepopulate all possible fields to save them the bother of filling in each field. The plugin anyway offers protection from spam without relying on annoying captchas.
If you wish, you can restrict form entries beyond a specified number and prevent duplicate entries. This is particularly useful when you’re running limited campaigns, discount offers and the like. It’s ideal for volume or time-sensitive campaigns and is effective to control form availability.
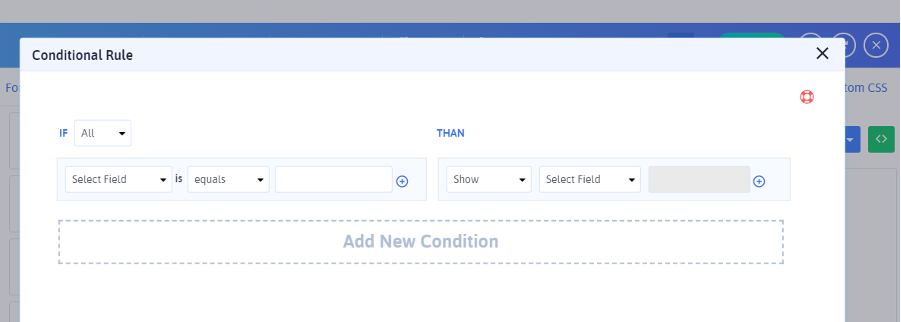
Best of all is the use of conditional logic that makes for truly smart forms. It cuts down on the number of fields a user has to fill based on the response to some fields. For instance, if a child enters age on the form as ten, you can show the field for Parents’ names, whereas if a user fills in age as twenty-two, you can hide the field for parents’ names. Similarly, you can allow different fields to be shown to new and returning visitors.
3. Form Display
Once you’re done with building and creating your form, you can go on to configuring how it’ll display at the frontend. Preview your form, and Save it. Thereafter, you’ll notice that a shortcode is generated for your form. Each form generates a unique shortcode which you can copy/paste into any post or page you like.
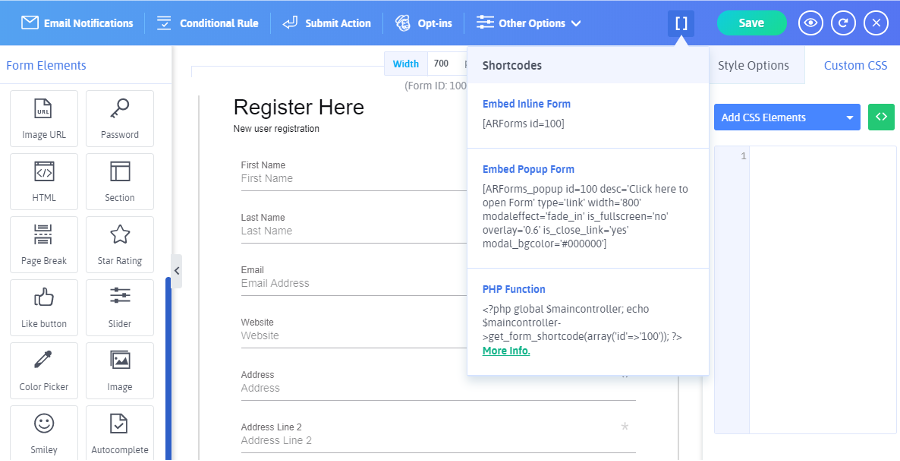
You can access the shortcodes from multiple places – from the Editor on individual posts or pages or from the ‘Manage Forms’ submenu. Displaying forms by inserting shortcodes has an advantage – it allows all instances of the form to be updated whenever you edit a form.
From the tab that’s added by to the Editor, you can choose to display forms inline in a post or page…
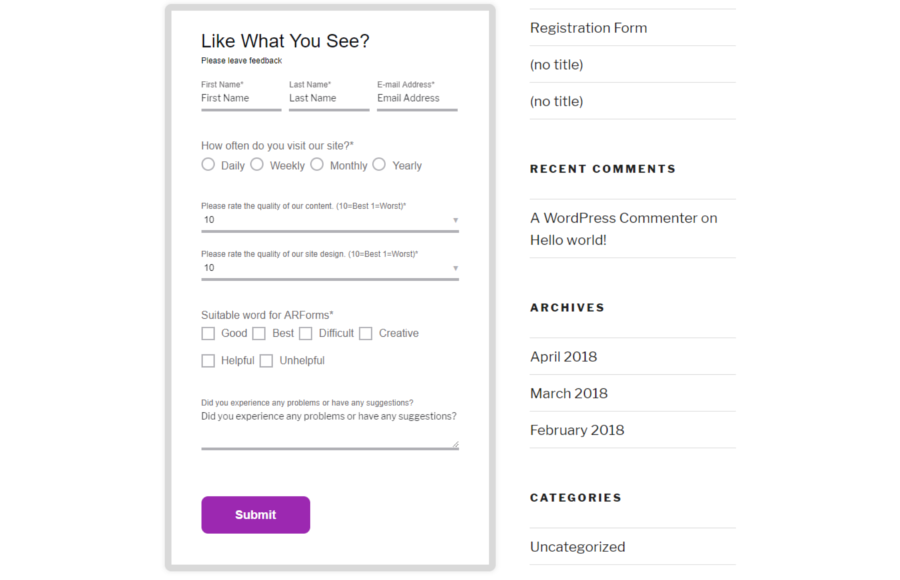
… or in a modal popup window.
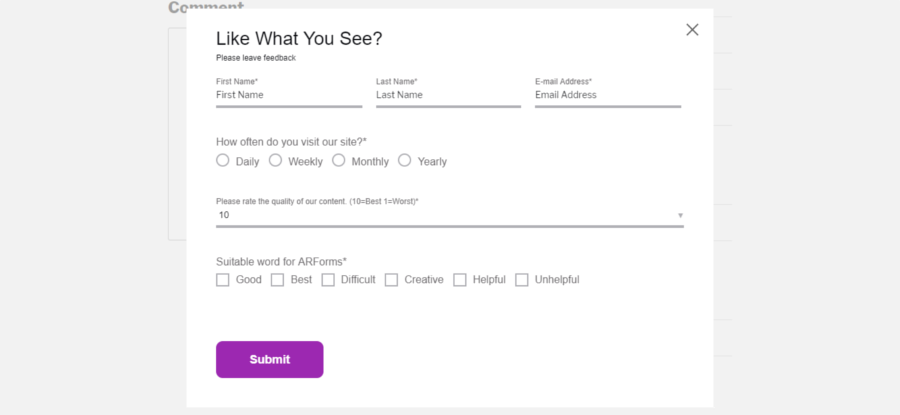
Many aspects of the popup can be customized – the dimensions, color and content of the window, opacity of the popup and the extent of overlay. You can also select the background color of the popup, whether or not to show the Close button and opt for full-screen popup and fade-in animation. Besides, there’s also an option for full page popup as well as to open the popup by clicking on a menu item in the navigation.
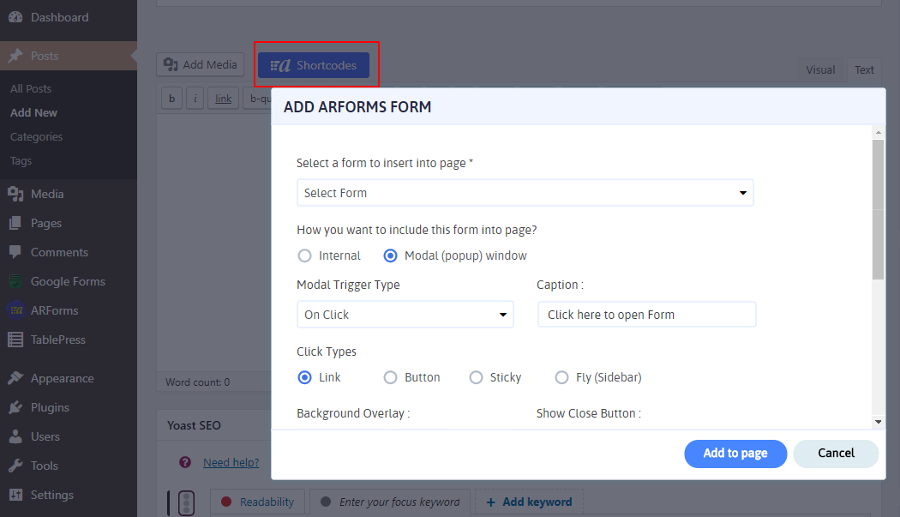
You also get to pick the triggers that can set off the popups – percentage of scroll, time delay, on clicking a link, exit intent, or on idle. Popups are a great way to catch a readers attention, provided they are not annoying or intrusive.
4. Actions After Form Submission
What happens after a user has hit the Submit button on the form? You can tackle this from two places: Working from the Global Settings tab, you can let users know that the form has been submitted successfully or set it up for conditional submission. You’ll also be able to redirect submission for date range, hide form after submission and prevent duplicate entries.
Another useful feature is the option to define a confirmation step, requiring a user to confirm their info before the form is submitted. You can also display a submission summary for the user to print for their records.
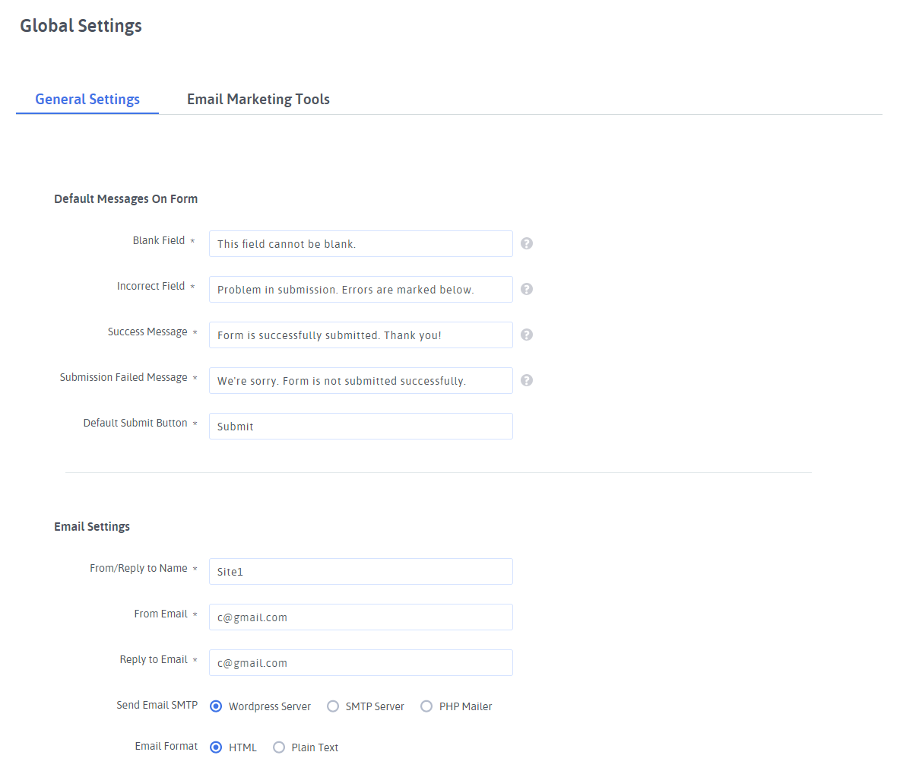
Global settings also help with pointing out fields that cannot be left blank, errors in submission, displaying submission success/ failure message, email settings and global CSS. From this settings page, you can also set the display of other default messages that help users with form-filling. The actions you specify here will be applicable to all the forms.
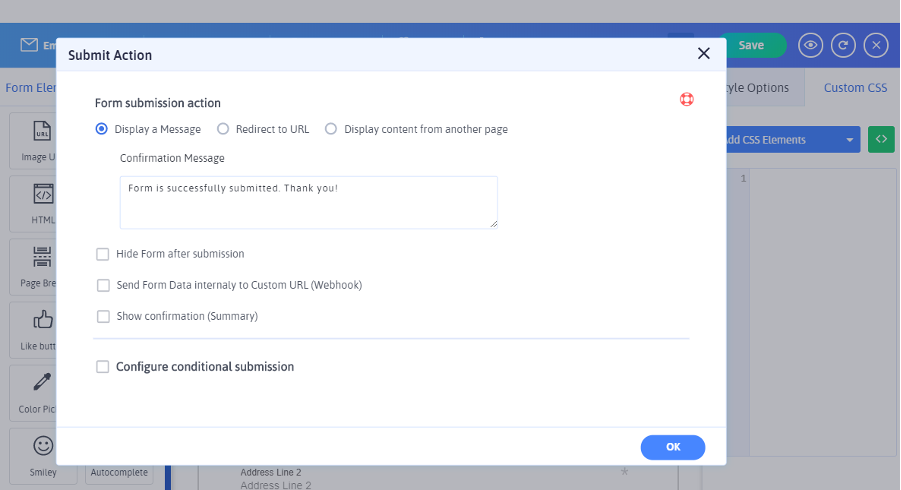
Or, you can decide what happens after submission for each form on the individual form itself. You’ll be able to display any message or content from another page, redirect to another URL or hide the form after submission. This way you can get them to explore more areas of your website.
You can also set up email notification to direct the responses to appropriate members of your team. Again, shortcodes help to pull values form certain fields in the form so that your automated emails are dynamic. Conditional logic can help here as well, by routing forms to team members based on the responses by users.
5. Email marketing
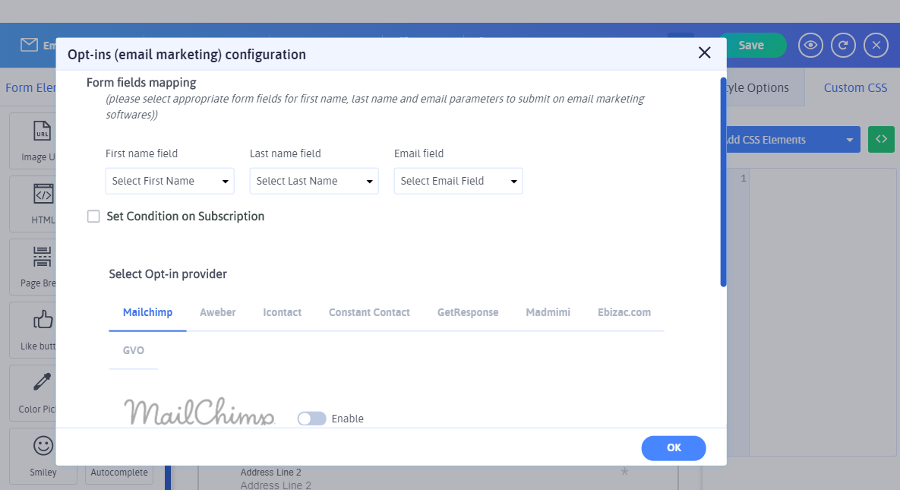
Setting up the form for efficient email marketing workflow and integration with your favorite email marketing third party tools is a major strength of ARForms. The plugin automatically adds new contacts to contact list of your opt-in tools such as AWeber, MailChimp, GetResponse, ActiveCampaign, iContact, Constant Contact, Mad Mimi, GVO Campaign and eBizac.
6. Form Management
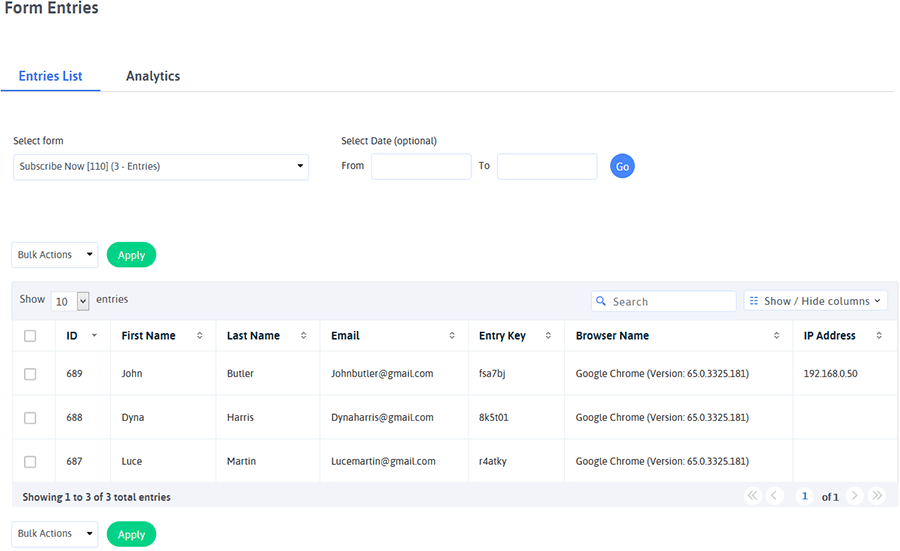
ARForms allows you to view all entries and submissions from a single screen. You can view the form submissions after filtering them by form or any data range and apply bulk actions. You’ll also be able to visit individual entries right from the dashboard and view all the details pertaining to each entry, as well as edit entries manually from the admin section.
The form analytics is useful to check if the forms are working for you. It helps in analyzing form entries and plotting it on charts and graphs for better visualization and easy understanding. An appealing world map shows which part of the world your submissions have come from.
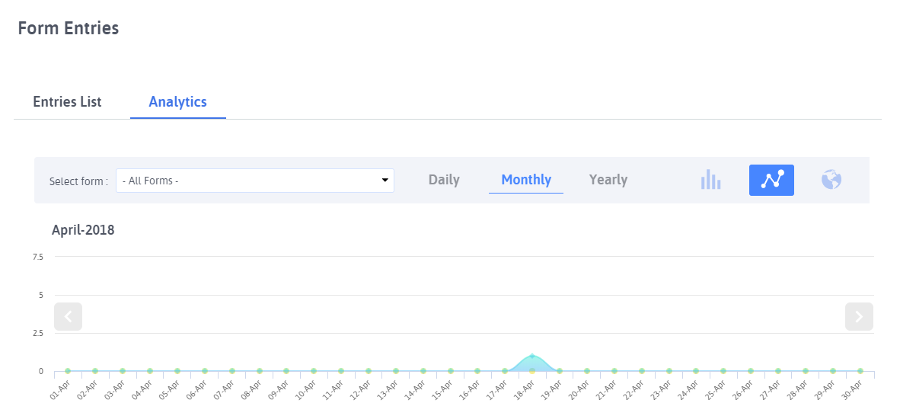
By monitoring the form entries at the backend, you’ll be able to identify areas where there’s room for improvement. The numerous metrics accessible to you under analytics can help you understand user behavior and gear website performance towards making it better for users.
Another helpful feature to manage your forms is the ability to import and export forms, with or without the entries.
ARForms Add-ons & Extensions
A number of useful add-ons are available to enhance the functionality of your forms. They are priced between $12 – $17 each, the first two on the list being available for free.
- Active Campaigns: To create a list of subscribers immediately on submission of forms
- reCAPTCHA: To add an extra layer of security for your forms
- Zapier: To streamline your workflow by connecting and integrating your forms with apps that you use regularly
- Post Creator: To create WordPress pages, posts and custom posts using data captured on the forms
- Advanced MailChimp: To send additional field’s data to Mailchimp conditionally rather than just basic fields
- PayPal: To integrate form entries and payments as a single process. You can then accept all kinds of payment, including donations
- User Signup: Allow users to sign up from the frontend, and retrieve / change their password and manage profiles
- PDF Creator: To generate PDFs based on user-submitted forms and save them for future reference
- Mailster: To add subscribers to your Mailster mailing list directly from form submissions
- MailPoet: To add subscribers to your MailPoet mailing list directly from form submissions
- Stripe: So you can process credit cards securely without users having to leave your site
- PayPal Pro: To permit additional modes of PayPal payment, including recurring payments
- Authorize.net: To collect payments securely without redirecting to an external payment gateway
- Signature: To collect users signatures
- Digital download: For secure digital download option upon form submission
- SMS: To send SMS via Twilio, Nexmo and Clickatell
Wrapping Up
ARForms comes with an impressive list of features out of the box. After seeing how they play out in action, there remains no doubt that it’s a great tool to build just about any form on your website. And, while the feature set may go beyond what’s necessary for new WordPress users, in no way does it have a negative impact on ease of use. The extensive documentation can help out with any issue and the support team is at hand responding to ticket submission quickly. For advanced users too developer api documentation is available.
Get ARForms WordPress Form Builder
If all you need is a simple, basic, bare-bones contact form to add to your website, Contact Form 7 is adequate. But if you’re looking to get a great deal done by using complex, detailed and attractive forms, whose behavior you can control precisely, ARForms more than fits the bill. It keeps the focus on building powerful forms, at the same time allowing users an intuitive and enjoyable experience.


Thank you for the good writeup. It in fact I may get ARForms now from your account of it. Look forward to more recommendations from you!
Don’t waste your money on this. I have had it since November, 2022 and still don’t have it working. It won’t send messages. I purchased 6 months extra support on it. Support is worthless as far as I am concerned. They sent me some suggestions to try and then went silent, no response from them.
Thank you for sharing your experience! Can I ask what type of messages you’re referring to? When we tested the plugin, the default email notifications worked fine but we did not have the chance to try SMS messages (as that requires a premium add-on as well as a subscription to an SMS provider).
Can you provide insights into the support and documentation available for ARForms users? How can users seek assistance if they encounter issues or have questions?
For ARForms you can find documentation here on their website, support for the premium version (purchased on their website or on Themeforest) on their ticket site and support for the free version in the plugin forum on WordPress.org. I hope that helps!