5 Essential WooCommerce Accounting Tips

Accounting may be painful, but we all know it’s a necessity. If you want your business to grow (or even continue running) you need to have your numbers in order and prepare for every tax season.
Does the thought of tax season cause you stress and anxiety? Are you dreading preparing those tax forms for your online WooCommerce store? Do you feel like you’re not seeing your business insights like you should because you’re running your accounting in a spreadsheet?
If the answer is yes, then these 5 essential WooCommerce accounting tips might be just what you need! Implement these tips, and you’ll be perfectly prepared next time tax season comes around!
Before you get overwhelmed, let us just preface this by saying that the tips we have outlined below will not add extra work onto your already busy schedule. In fact, they will probably reduce your workload! Implement our suggestions below and next tax season you’ll by kicking your feet up with a glass of vino in hand.
Ready to dive in? We’ll get started with the basics!
1. Determine Sales Tax Rules and Nexus
When setting up your online store and preparing to sell your products or services, one of the first things you need to think about is taxes. While it’s not the most attractive topic, it needs to be covered. It may feel like a hurdle at first, but WooCommerce provides you with numerous resources to support your tax set up. The good news is that once you have your sales tax rules figured out, you will be able to configure WooCommerce to charge sales tax automatically!
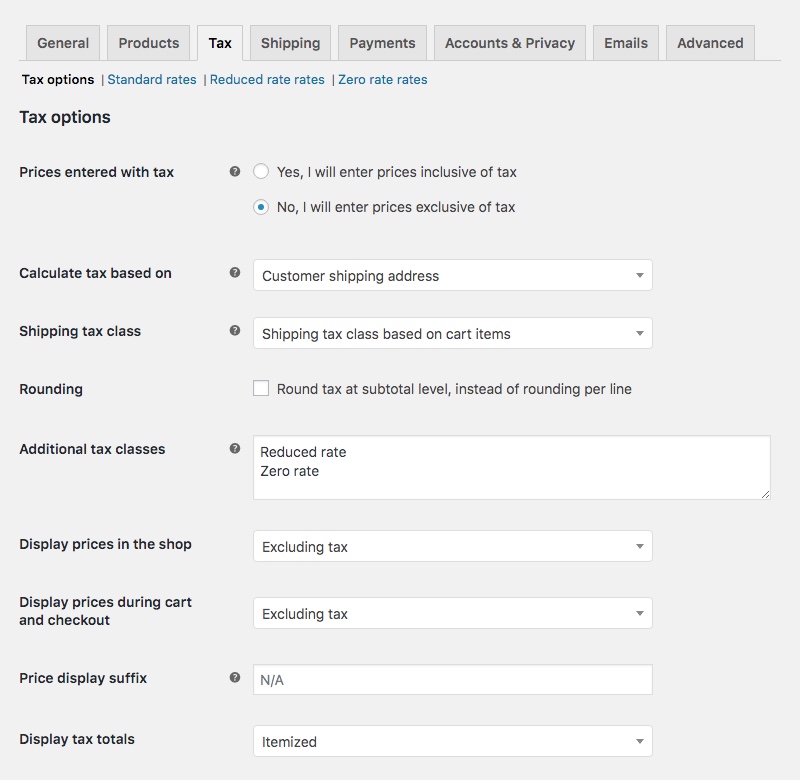
Note – you must check the box to “enable tax rates and calculations” under General settings first to enable the Tax settings tab.
We recommend meeting with an accountant to ensure that you fully understand your tax obligations. Your business location, the products you sell, and tax nexus will determine the tax rates you need to charge. Keep in mind that these may vary by county, state, and country.
Maybe you don’t have to collect sales tax, or maybe you’re one of the lucky ones who charges all customers a set rate. If you’re not, you may find yourself having to calculate and collect tax based on the customer’s shipping address. If this is the case, we strongly suggest taking the time to review and set up your taxes.
… and that brings us to the next step!
2. Setup Tax Rules in WooCommerce or Use a Tax Management Plugin
Once you have determined your business tax obligations, it’s time to configure your taxes in your online store. WooCommerce itself offers the ability to charge sales tax for every order automatically. It can automatically calculate and charge taxes based on the customer’s products, shipping address, and/or your tax zones. This means that every time that you sell something, WooCommerce can automatically charge the appropriate sales tax.
If your business’ tax nexus requires you to charge sales tax based on the customer’s shipping address or in multiple states or countries, you may find yourself needing to setup hundreds of tax rules (as well as ensuring that these are all up to date at all times). If this is the case, an automatic tax calculation plugin may prove immensely useful.
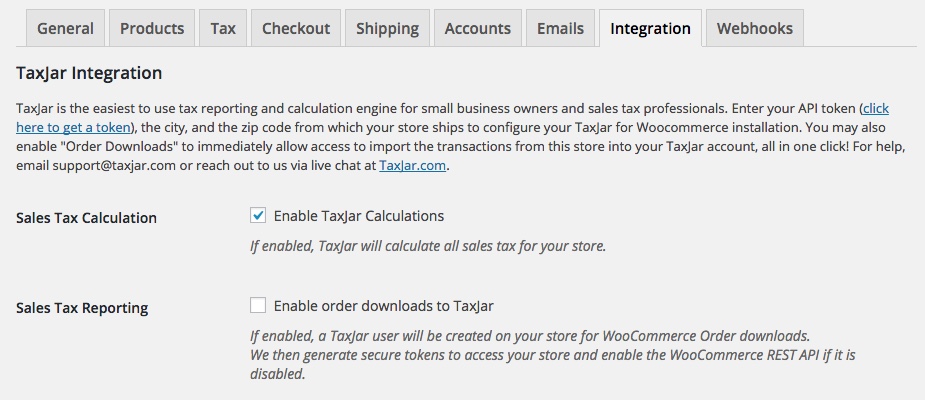
Plugins such as TaxJar and Avalara AvaTax will automatically manage all of your tax calculations – and they even help with reporting and filing these taxes. They will then pass that info along to ensure that sales tax is correctly charged in your WooCommerce order.
So which tax calculation plugin should you choose? TaxJar and Avalara are the most popular options. We suggest you evaluate the two in terms of pricing and features to find what works best for your business. You may find that TaxJar’s prices are lower, but Avalara offers more features.
3. Sync WooCommerce Data to an Accounting Platform
Now that you’re set up to charge your sales tax, the next question is: how will you keep track of it? You’ll need to be able to present and turn in your sales tax charged, and you’ll have to be sure that the numbers given are accurate. Our top tip to keep track of your sales tax, along with other notable figures such as your sales revenue, is to sync your data to an accounting platform.

WooCommerce is an e-commerce platform, not an accounting platform. It doesn’t provide the level of accounting data collection that you need to prepare for tax season or to view crucial insights on your business performance. However, you may enter all of your WooCommerce data into an accounting platform in order to closely track your finances as well as have all of your data in one place.
The most popular accounting platform is QuickBooks. There are several different versions of QuickBooks, and the most popular is QuickBooks Online. You may access this platform from any device, at any time. QuickBooks offers incredibly useful features, such as easy expense tracking (just snap a photo of a receipt!) as well as invoicing options.
QuickBooks will cost you between $40-$70 a month, and will quickly pay for itself in the amount of time and work that it saves you. In fact, it may end up automating a lot of the work that you would need to pay an accountant for.
Setting up your QuickBooks company will usually take around 30 minutes, and we suggest meeting with an accountant for best practices while setting up.
Once you have set QuickBooks up, you may begin to enter your WooCommerce sales data into QuickBooks. Although you technically could enter your WooCommerce sales manually, it could take quite a bit of time if you have more than a handful of orders. Luckily, there are ways to automate this process!
Quickbooks Sync by MyWorks
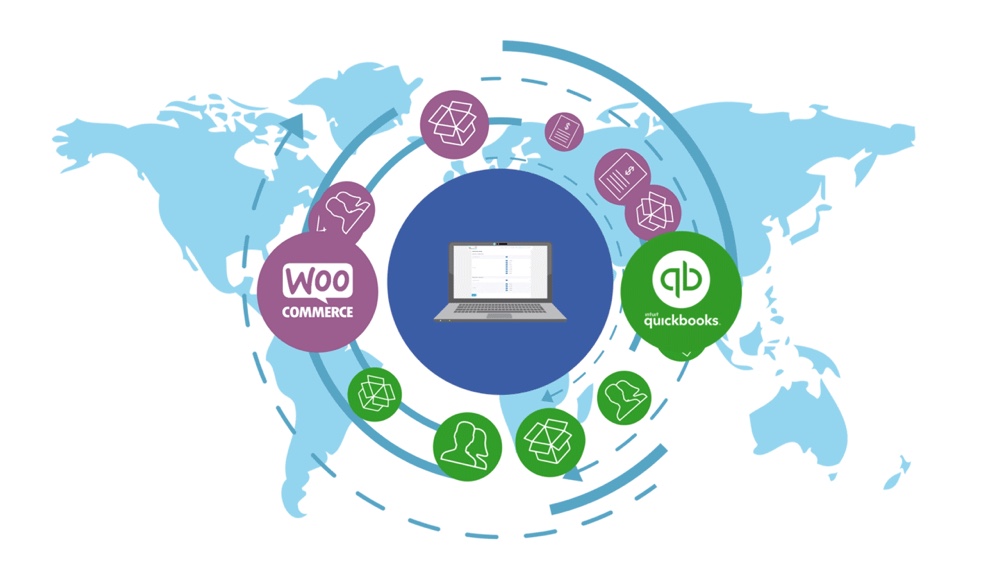
One option is to sync your WooCommerce data with QuickBooks automatically using the QuickBooks Sync for WooCommerce by MyWorks Software. The sync will take all of your sales, customer, product, inventory, payment data and more, and sync it over to QuickBooks. It will all happen automatically and in real-time, requiring no additional time of effort on your part.
The result? All of your sales data will sync to QuickBooks automatically and get categorized correctly! You can then track your revenue, expenses, cost of goods and more! Inventory levels will even stay up to date between WooCommerce and QuickBooks!
WooCommerce Invoice Sync for Quickbooks by BizSwoop

Another great option is WooCommerce Invoice Sync for Quickbooks. This powerful plugin helps to streamline your accounting workload by connecting your WooCommerce store to your Quickbooks online account. This way as you generate invoices, receive payments and make shipments in WooCommerce your Quickbooks will be automatically updated to reflect changes. Just use the one-click sync feature or schedule regular syncs during your store’s downtime.
With WooCommerce Invoice Sync there are options to choose which meta data is synced, including product, category, attributes, price, taxes and shipping. You can even sync customers so you don’t have to manually add their information to your Quickbooks account. And you’re not limited to a set amount of data – feel free sync an unlimited number of orders as your store grows. Still not sure? BizSwoop offers a 7 day trial – so why not check it out to see for yourself?
4. Track and Report Key Figures
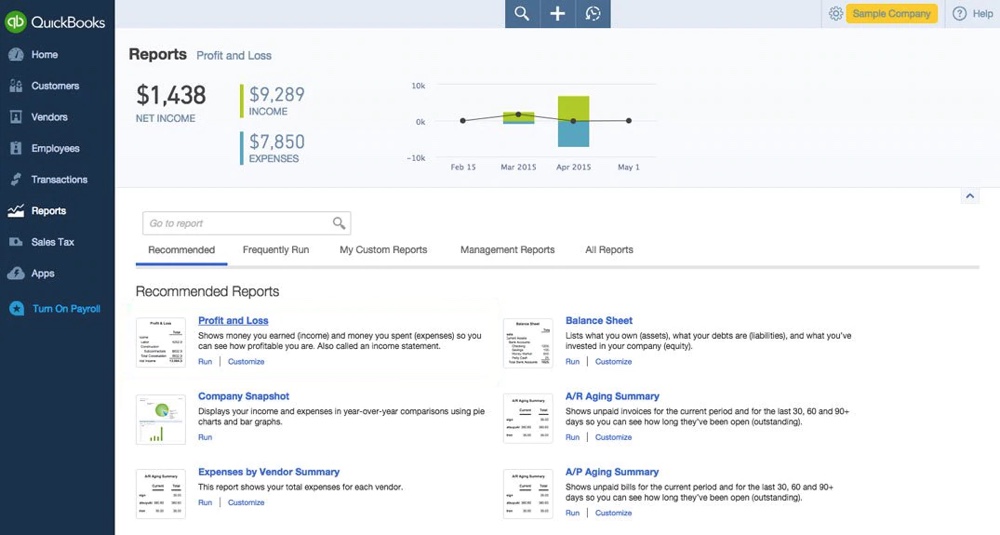
Once you sync your WooCommerce store to an accounting platform such as QuickBooks, you will be able to more closely monitor your business health by tracking important figures. These key figures include your revenue, expenses, cost of goods sold, and profits.
Accounting platforms make it incredibly easy to run these reports, and QuickBooks even creates overview dashboards that allow you to monitor your business’ health at a glance. As we said before, by syncing your WooCommerce sales data into your accounting platform, you will have accurate numbers at all times, and will consequently be able to monitor your business’ health at any time!
We recommend running reports and reconciling your accounts often. Doing so is like going to the doctor – it’s best to check in regularly and catch any issues before they develop!
One of the most important figures to monitor is your cashflow. If you don’t already have a separate business account, we suggest creating one. Keeping your business finances separate from your personal finances will make everything much easier. The easiest way to make sure that your business is making money is to watch your cashflow. Track what comes in, and track what comes out to be sure you can meet all financial obligations on time.
Next, we also suggest tracking your inventory and Cost of Goods Sold. This is a key figure to understand what you’re actually making off of each product sold. You might even find that you’re losing money with some product sales! QuickBooks can easily calculate this for you, so you’ll just have to keep an eye on the figures.
Another important one is expenses! Your accounting platform will also be able to categorize your expenses – so pay attention to the total numbers, as well as the individual numbers. We also suggest categorizing your expenses as fixed or as variable.
Next, be sure to track your total sales and profits, even before tax season. You’ll need to consider your tax expenses come tax season and set money aside to cover them.
5. Know Your Deadlines

Missing a deadline is like missing a birthday – except the tax offices will never forget the wrong you did! Look up your deadlines, add them to your calendar, set alarms, do anything you need to remember. There are even premium services, like the LegalZoom Compliance Calendar that you can use to keep on top of your reporting schedule. Just don’t forget to file on time!
Keep in mind that you may even need to file quarterly taxes. If you’re unsure, check with your accountant. They’re your best friend when it comes to numbers!
While you can outsource your accounting, if you prepare ahead of time and put automated systems into place, you’ll have nothing to worry about next time that tax season comes around! Now you can say goodbye to those accounting headaches and shoeboxes full of receipts, and say hello to seamless and worry free accounting.


Thank you for sharing. It is very interesting and helpful as most WooCommerce guides are just related to plugins and not the accounting.