ProfileGrid Review: The Easy Way to Create User Profiles

Do you dream of building an incredible social network on WordPress? If so, you will love today’s review of ProfileGrid, a fantastic user profile and community plugin.
It’s clear that creating a formidable community site on WordPress is as difficult as grasping a shadow, and I honestly feel for you. However, worry no more as ProfileGrid takes the challenge out of building the membership site you want.
Thanks to an extensive list of fantastic features, ProfileGrid changes how you think of WordPress community sites. The plugin completely destroys the old way of creating social sites. To make up for it, you get a modern framework to forge community websites that rock your world.
In this review, I highlight why ProfileGrid blows the competition completely out of the water. But you know me; I won’t stop there. I install the plugin and show you how the whole thing works, so you can start building your dream community right away.
How does that sounds? If you like what you’re reading, let’s weigh the anchor and set sail since there’s a ton to cover.
ProfileGrid Review: Molding WordPress User Profiles & Communities Like a Pro

Whether you’re a beginner or power WordPress user, ProfileGrid helps you to build exceptional community sites in minutes. Instead of wasting days configuring your social network, you’ll be up and running as soon as you install the plugin.
Yep, ProfileGrid works straight out of the box. And the best part? The core plugin is completely free and open-source at WordPress.org. That means you can start the party right from inside your WordPress admin dashboard. The free version offers you a generous number of features, but you can always purchase premium add-ons when the need arises.
Primarily, ProfileGrid helps you to create beautiful and customizable user profiles on your WordPress site. However, this beauty ships with additional community/social networking options that could possibly rival the likes of BuddyPress.
ProfileGrid makes you feel like a tech ninja; a design wizard of sorts. In other words, the plugin enables you to build community sites out of this galaxy without writing a line of code.
To activate social networking features, you simply need to toggle buttons and your work is done. People who view your social site will be wondering, “How the hell did they do that?”
And it gets better: Your users will never know you’re using WordPress, even if and when they login.
Why is that so? ProfileGrid comes with exceptional front-end and back-end functionality.
The former allows you to offer an incredible user experience while keeping users out of your WordPress admin area. The latter makes managing your community site a breeze, without bogging you down with nasty options.
ProfileGrid is fully compatible with bbPress and WooCommerce, allowing you to enhance your forums and e-commerce stores without breaking a sweat.
ProfileGrid Features
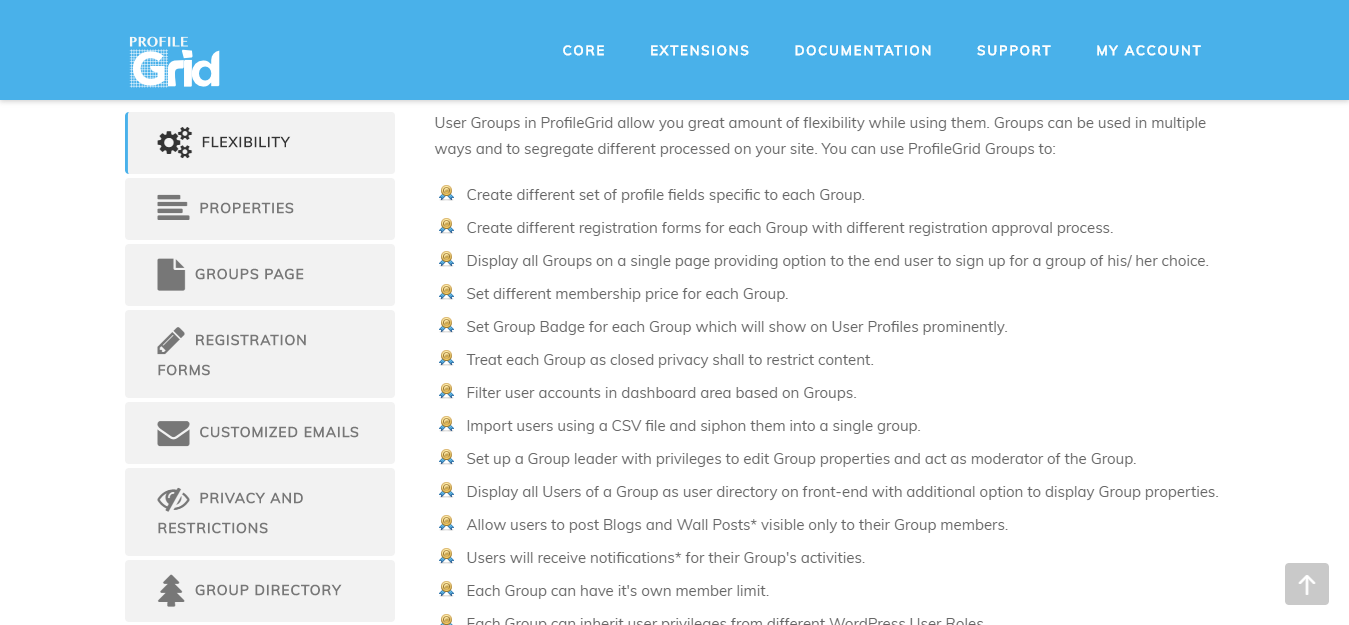
I always chirp that a plugin is only as good as the features it offers, and ProfileGrid doesn’t disappoint one bit. The plugin packs quite a punch, offering you all the features you need to create outstanding user profiles and communities.
While we cover most of the features when we install the plugin, I thought it would be nice to list what ProfileGrid has to offer should we miss something later on. That way, you will have an all-rounded idea of what to expect from a user profile plugin like no other.
Features At A Glance
The ProfileGrid WordPress plugin commands a unique set of features such as:
- Multiple types of user profiles
- User groups with separate registration forms
- Group managers and moderators
- Membership limits for groups
- User profile filtering
- Public or private groups
- Members can send friends request
- Private live chat just like Facebook
- User Notifications
- Messages
- Users can join multiple groups
- Custom fields to enrich use profiles
- Shortcodes
- An amazing and user friendly admin dashboard
- Plenty of global settings
- Pre-made default pages: Account, login, registration, password recovery and so on
- Customizable email templates
- Customizable profile and cover photos
- Powerful restrict content features
- Front-end user blogs – Users can create blogs without access to your WordPress admin dashboard
- Wait, is the list becoming too long?
- Custom redirection after user registration, login and logout
- Security features such as reCAPTCHA
- Free PayPal payment integration
- SEO-friendly code
- Okay, let’s stop at that or this entire post will be one long list of features 🙂
The point is ProfileGrid comes with more features than you will ever need. And this is just the free version; you should see the extensive list of premium add-ons.
That’s right, you probably won’t use all the available features, but you know what they say; better have it and not need it than need it and…you know how it goes. The plugin offers you a complete system to create a social network/membership/community site that you and your users love.
Don’t sweat it if much of the above feature list doesn’t make sense to you. After installation, you’ll have a better understanding of how you can use the auspicious tool that’s ProfileGrid.
How to Install ProfileGrid
With the intro and features out of the way, let us install ProfileGrid. The plugin is available at WordPress.org, meaning you don’t have to leave your WordPress admin dashboard. Here’s what to do.
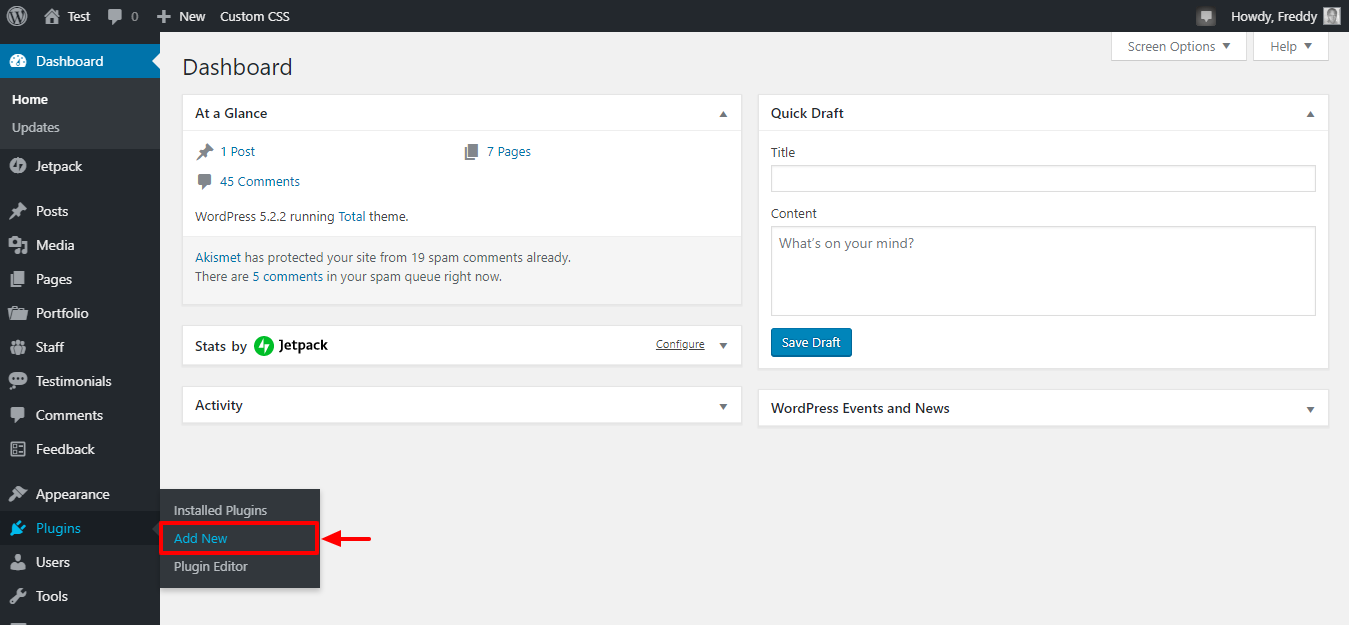
On your WordPress admin menu, navigate to Plugins > Add New as we highlight below.
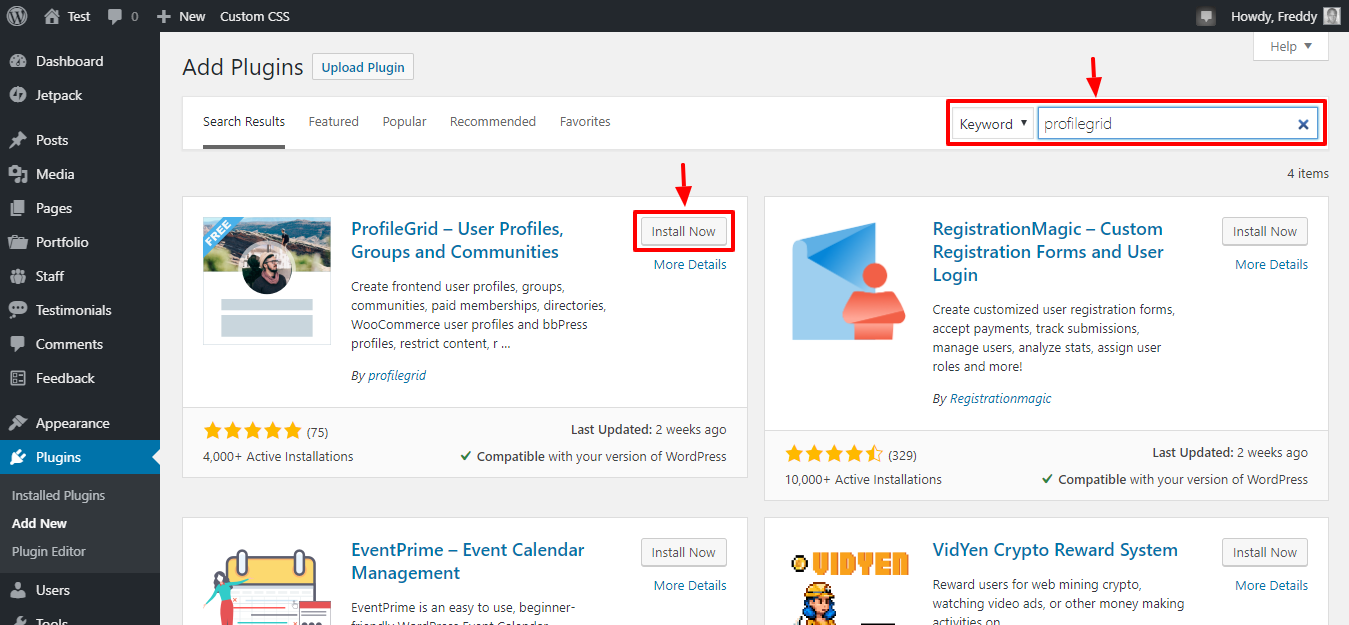
On the next screen, enter “ProfileGrid” in the search box and click the Install Now button as shown below.
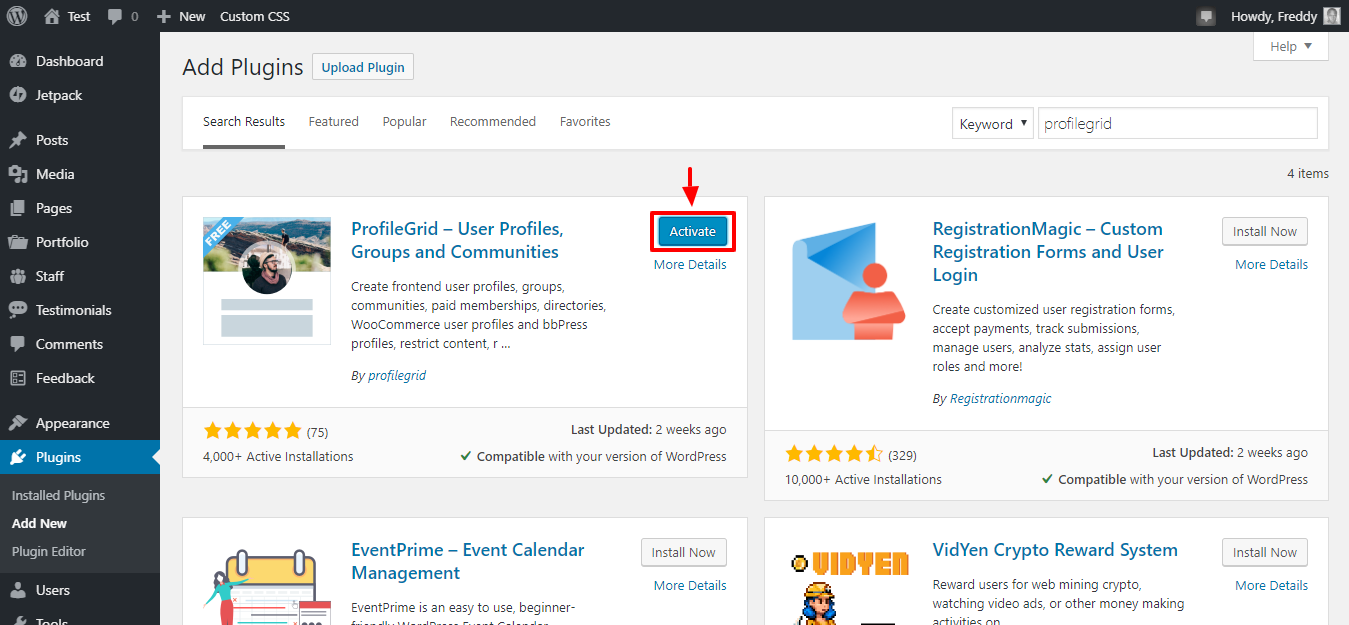
After that, activate the plugin by clicking the button we highlight in the screengrab below.
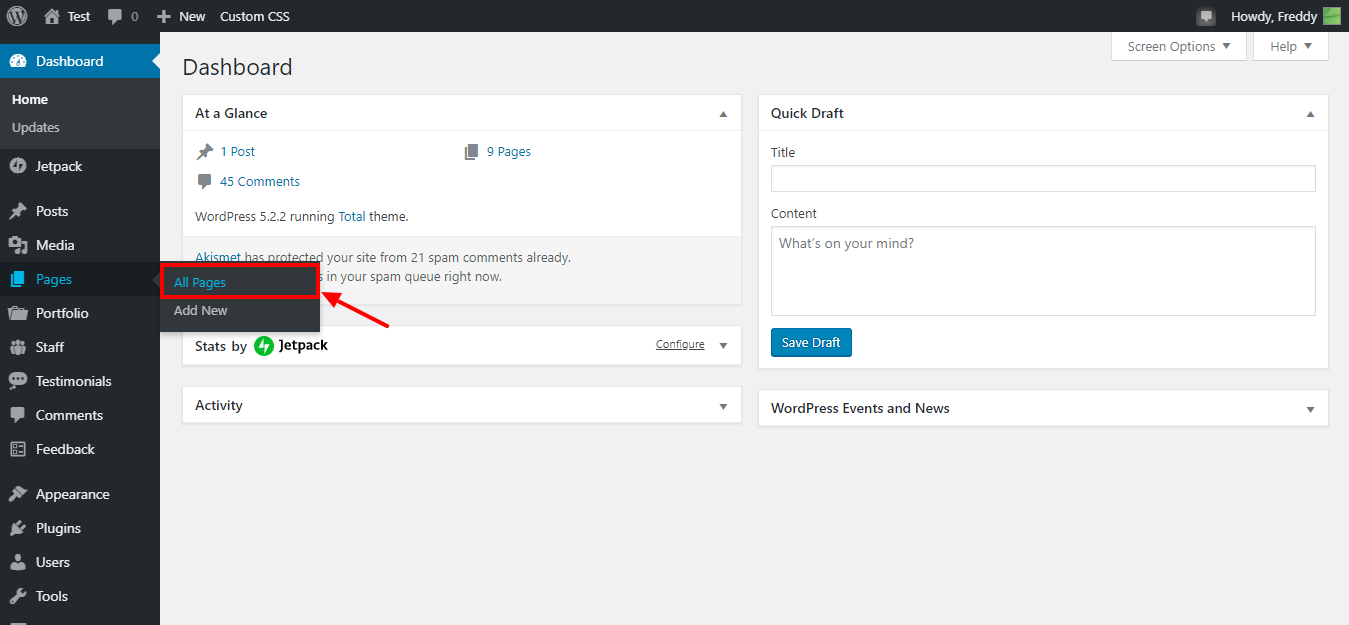
As soon as you activate ProfileGrid, the plugin creates default pages automatically, which you can view by navigating to Pages > All Pages as shown in the image below.
You should see all ProfileGrid pages as shown below.
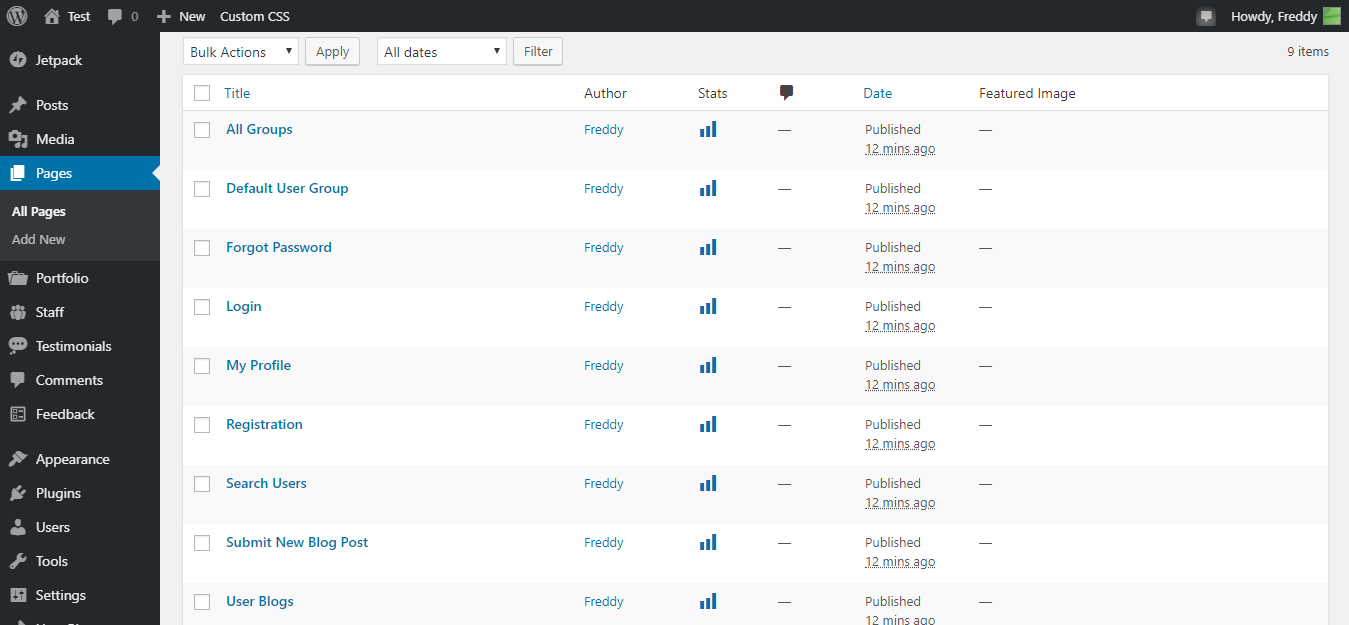
There are nine pages in total namely:
- All Groups, which lists all of your groups
- Default User Group, which is the default group for all users. Note that you can create additional groups at will
- Forgot Password where users can recover lost passwords
- Login so that users can login from the front-end
- My Profile, which is the user’s profile page on your community website
- Registration, which allows users to register on your site from the front-end
- Search Users so that users can find each other on your site easily
- Submit New Blog Post, which allows users to create blog posts on the front-end
- User Blogs – the page that displays user blogs on your site
The pages are already published, and all you have to do is add them to your navigation menus as you deem fit. For instance, below is how the registration page looks on my test site, which uses the Total WordPress theme.
Note: I haven’t edited a single thing; these are the default pages with default settings.
Registration Page
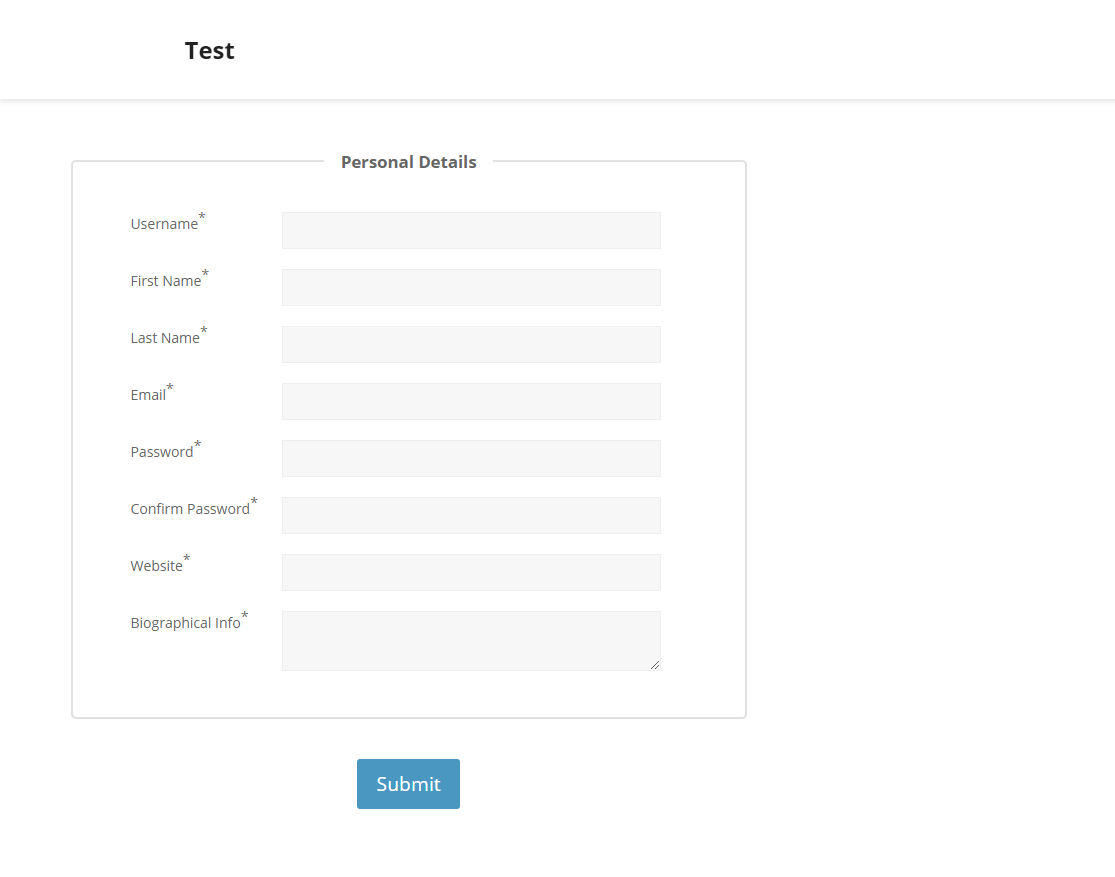
Here, users can register on your community site easily. The above registration form is fully functional; you don’t need to do anything to start accepting user registrations.
You can redirect users to any custom page in ProfileGrid admin settings, as we will learn later on in the post.
Login Page
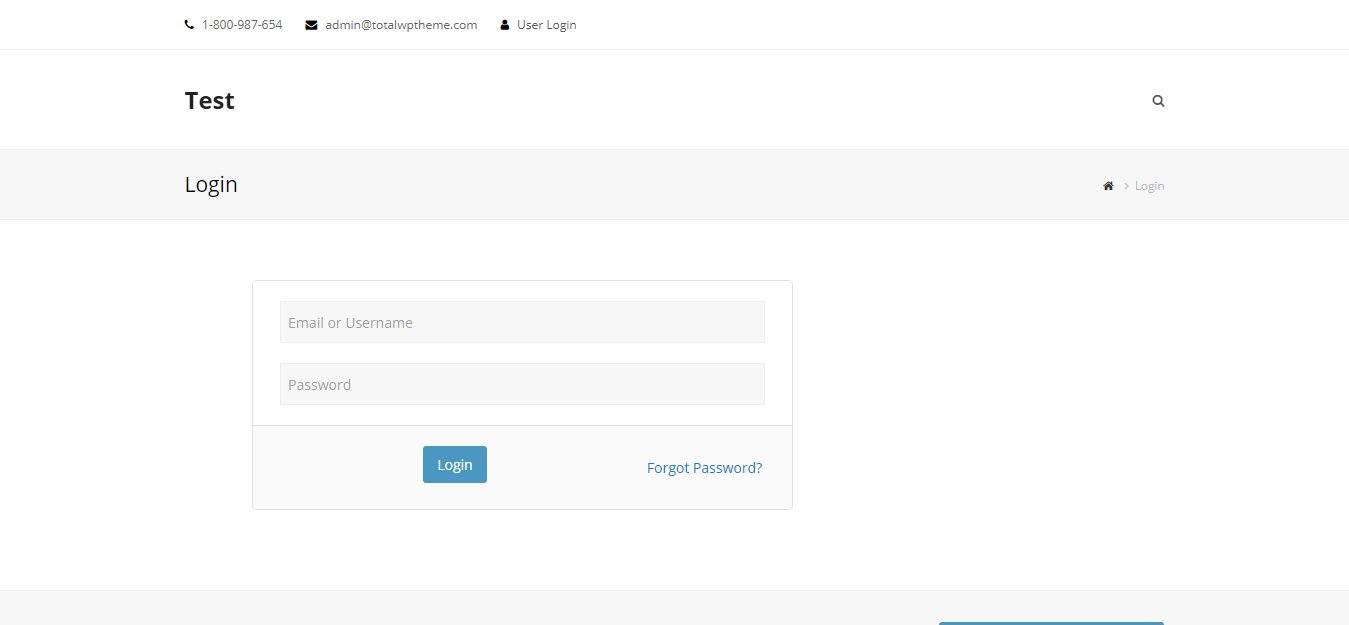
Users can easily login to your community website using the above front-end page. The default WordPress login page is hidden to users.
Profile Page
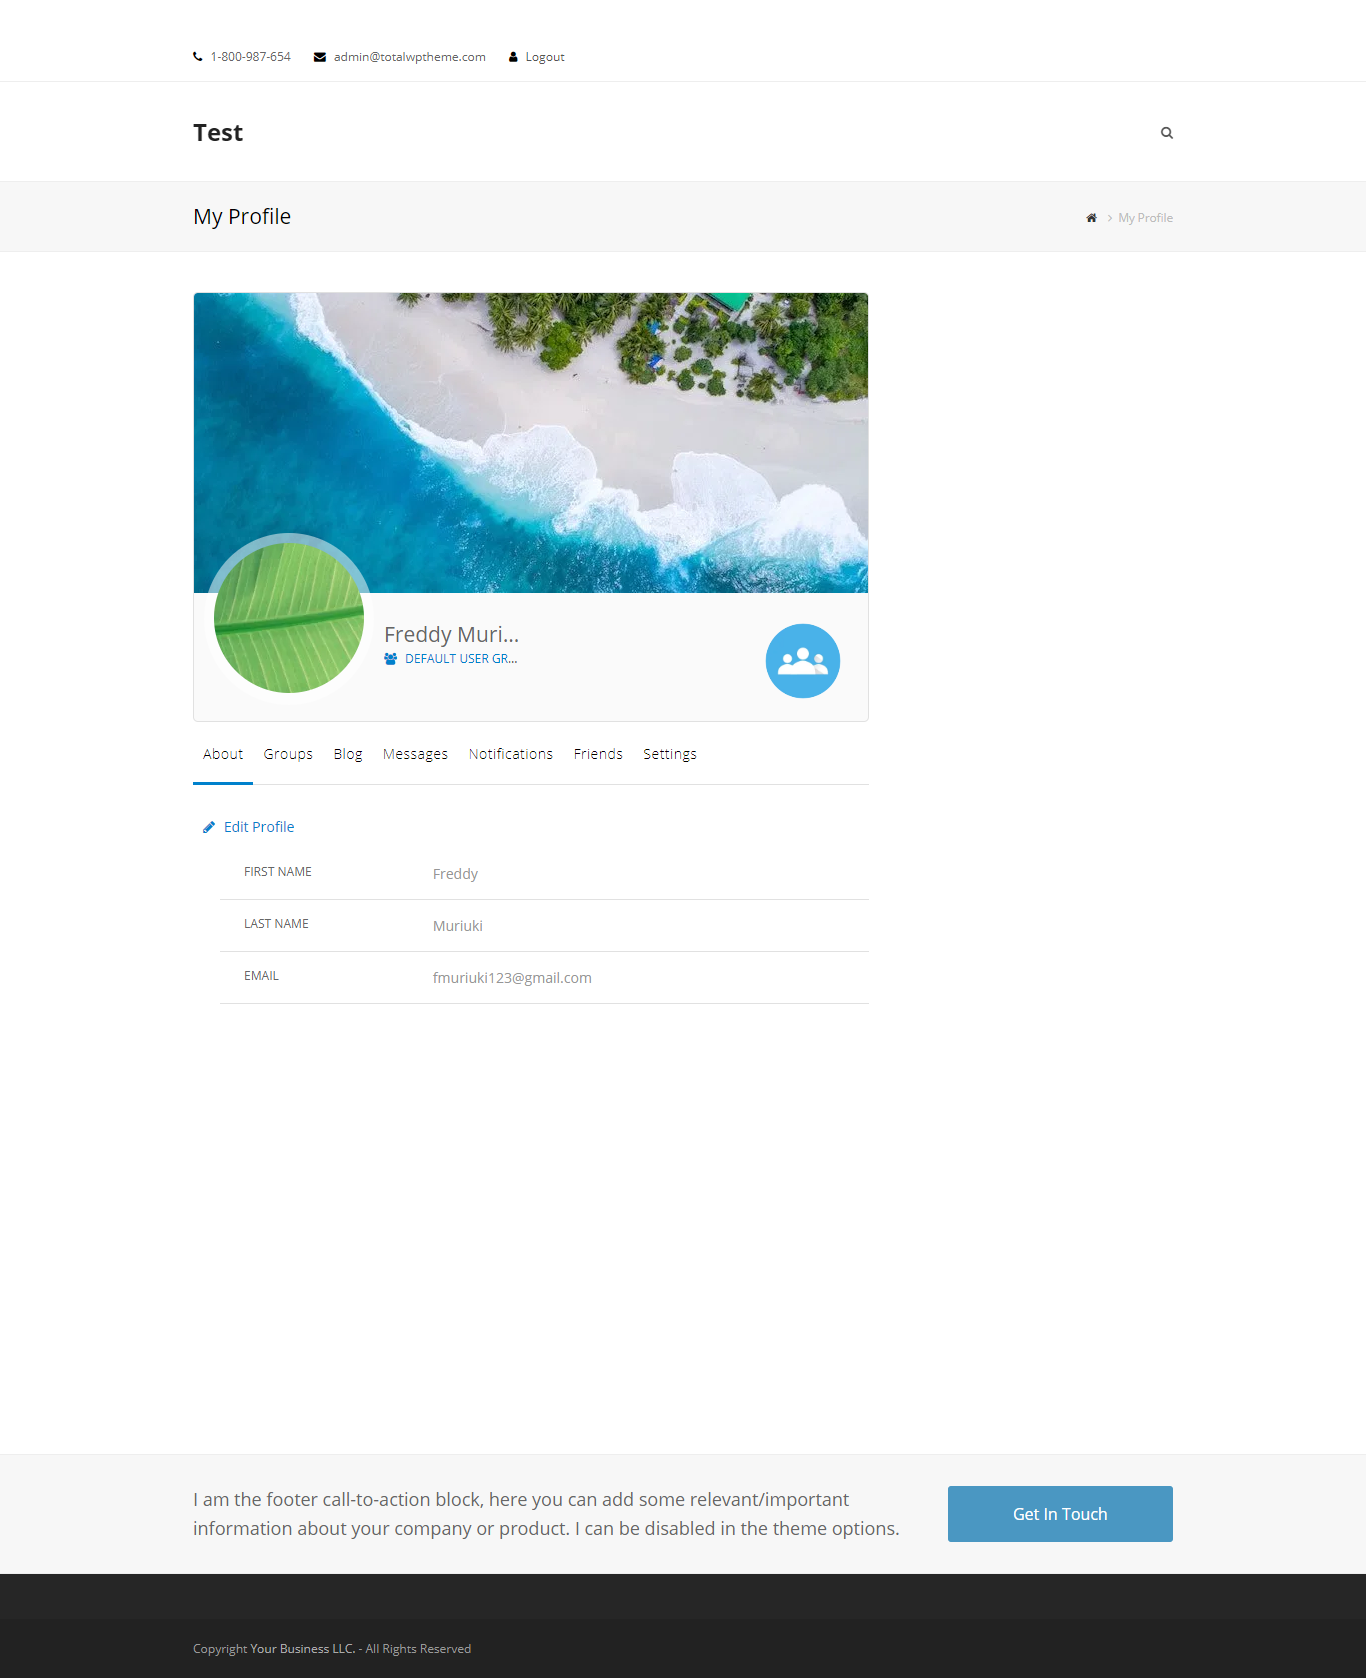
After a user logs into your website, they are redirected to the profile page by default, although you can set a different page in ProfileGrid General settings. Further, you can customize the default profile page shown above easily.
But as it stands, you can clearly see it features a couple of AJAX-powered tabs. As such, you don’t have to wait for the page to load to view various tabs, which include About, Groups, Blogs, Messages, Notifications, Friends and Settings.
ProfileGrid also comes with an option to change the profile and cover photos in a matter of clicks. Additionally, you can default all profile photos to Gravatar avatars in ProfileGrid General Settings.
Forgot Password Page
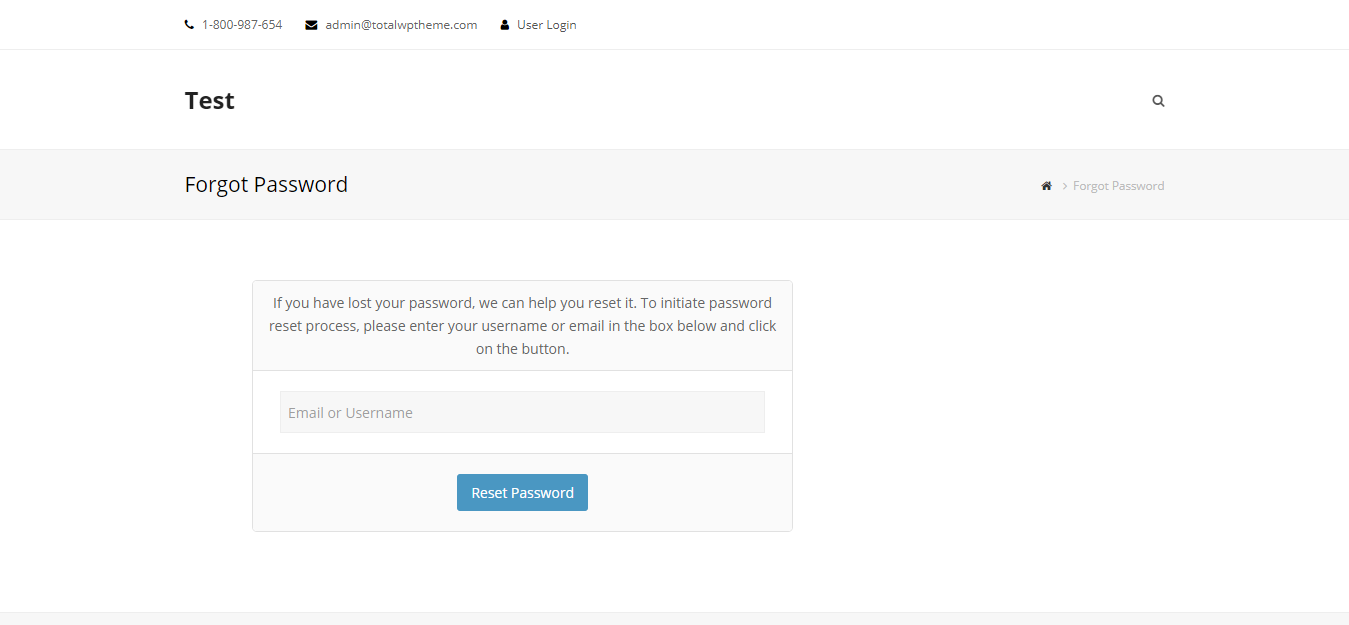
If a user forgets their password, they can easily reset it via the forgot password page shown in the image above. All the user needs to do is provide their email address or username and hit the Reset Password button.
Default User Group Page
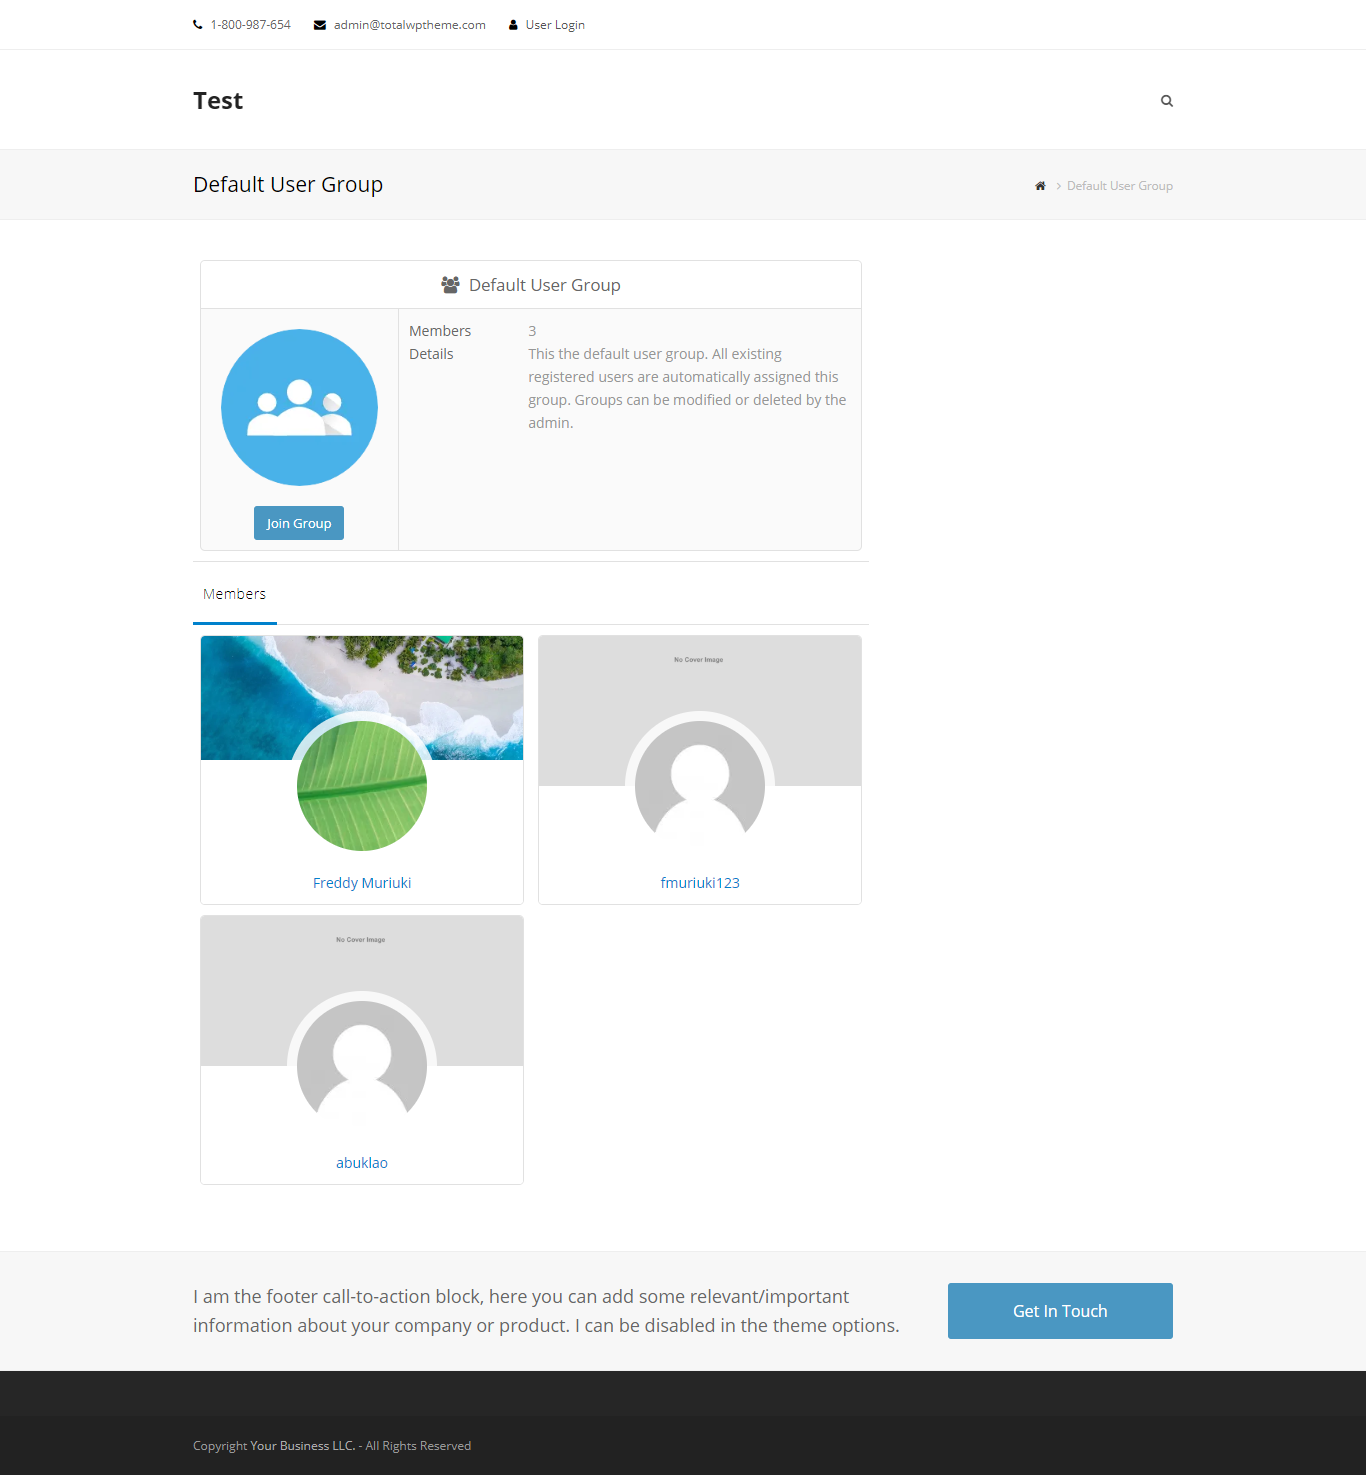
Every user who registers on your website is automatically assigned to the group you set as default. Don’t worry, admins can easily delete or modify groups.
As you can see in the above image, the page also lists all the group members. There is also a button to join the group.
Submit New Blog Page
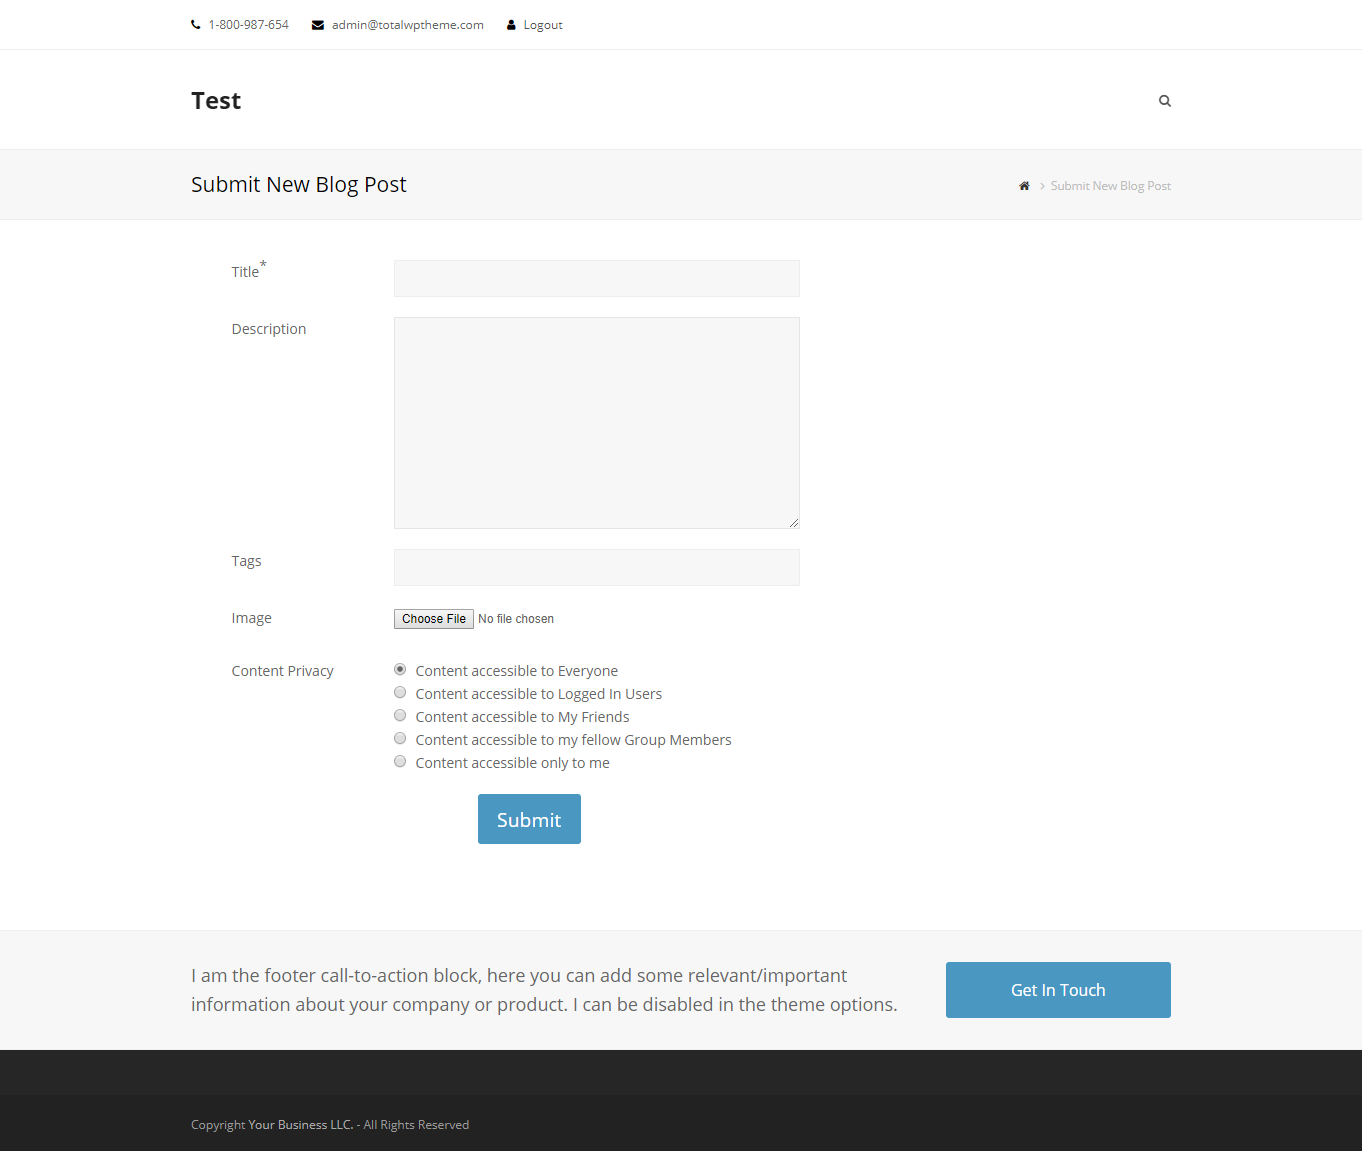
Would you like to offer users the chance to submit blog posts via the front-end? If so, ProfileGrid provides just the feature you need.
Via the Submit A New Blog Post page, logged-in users can submit rich-media blog posts to your site, without accessing your WordPress admin dashboard.
The user can attach images, add tags and set content privacy easily. On top of that, user blog posts are stored in a different location away from your WordPress posts.
Now that you understand what some of the default pages do (and how they look), let us cover some of ProfileGrid admin settings so we can call it a day. After all, this is becoming a lengthy post already.
ProfileGrid Admin Settings
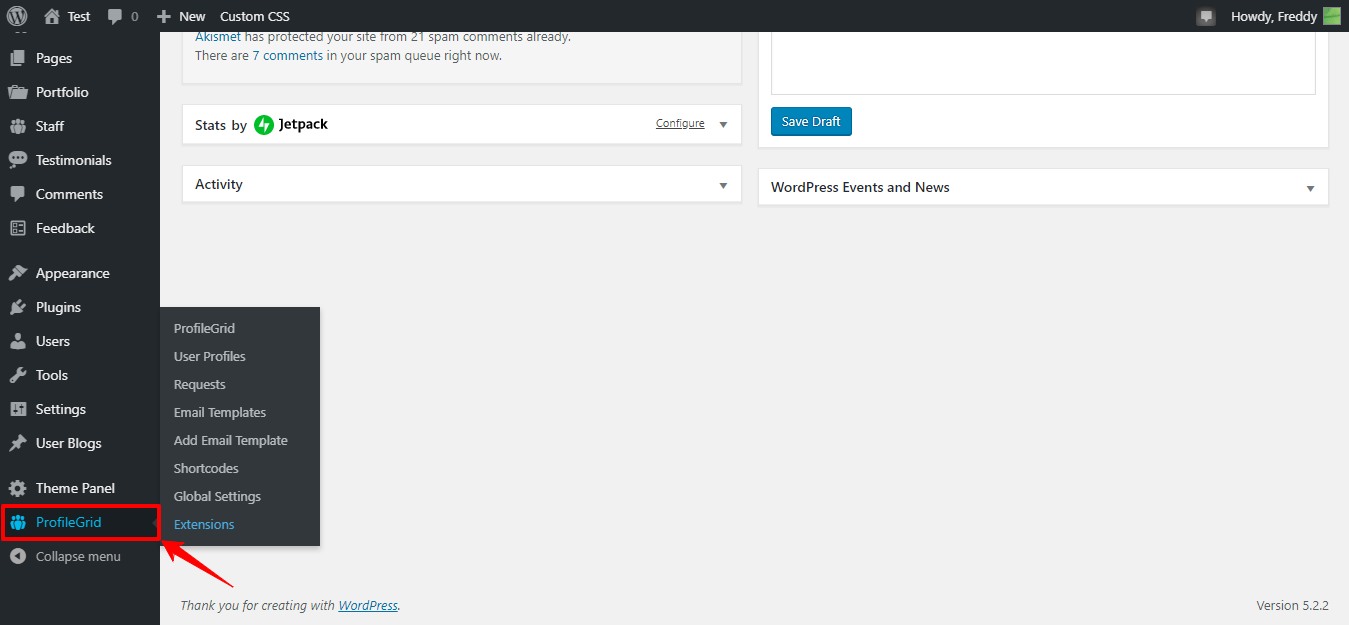
The ProfileGrid admin settings section is where you get all the sweet features to turn your community site whichever way you desire. Once you activate the plugin, you get a ProfileGrid item on your WordPress admin menu as shown in the image above.
Let’s begin with ProfileGrid global settings.
ProfileGrid Global Settings
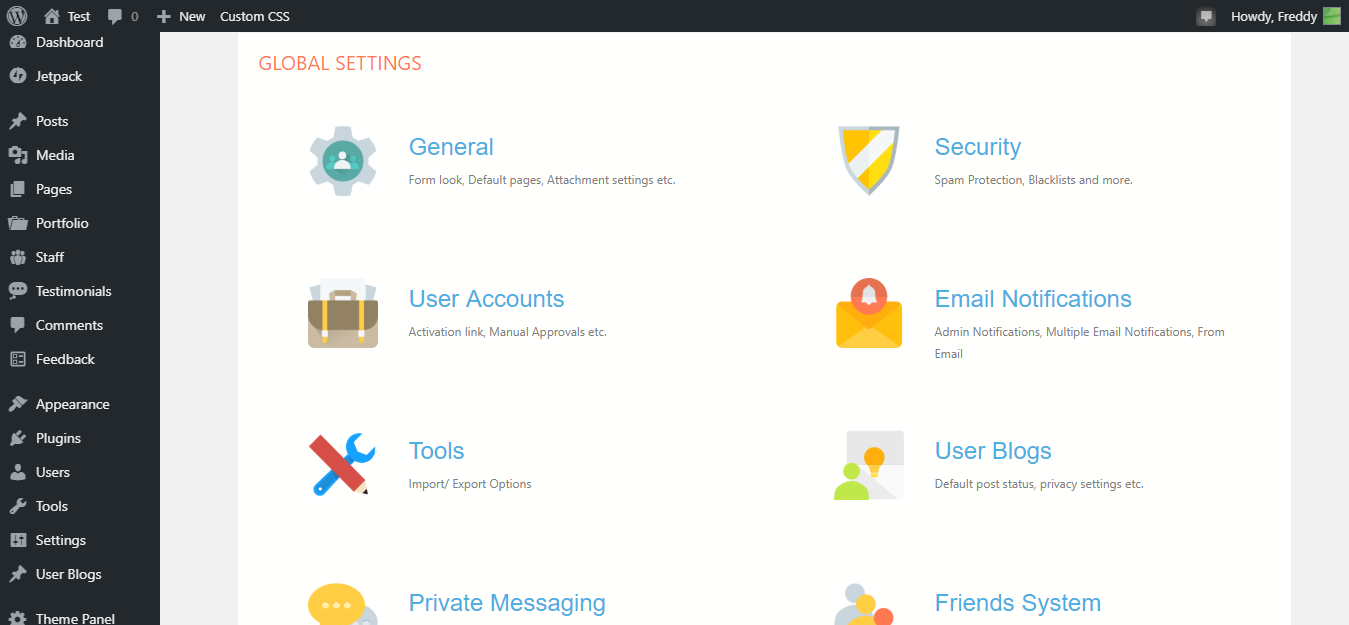
ProfileGrid global settings help you to manage your community site without writing code. You can access the global settings by navigating to ProfileGrid > Global Settings as shown in the image below.
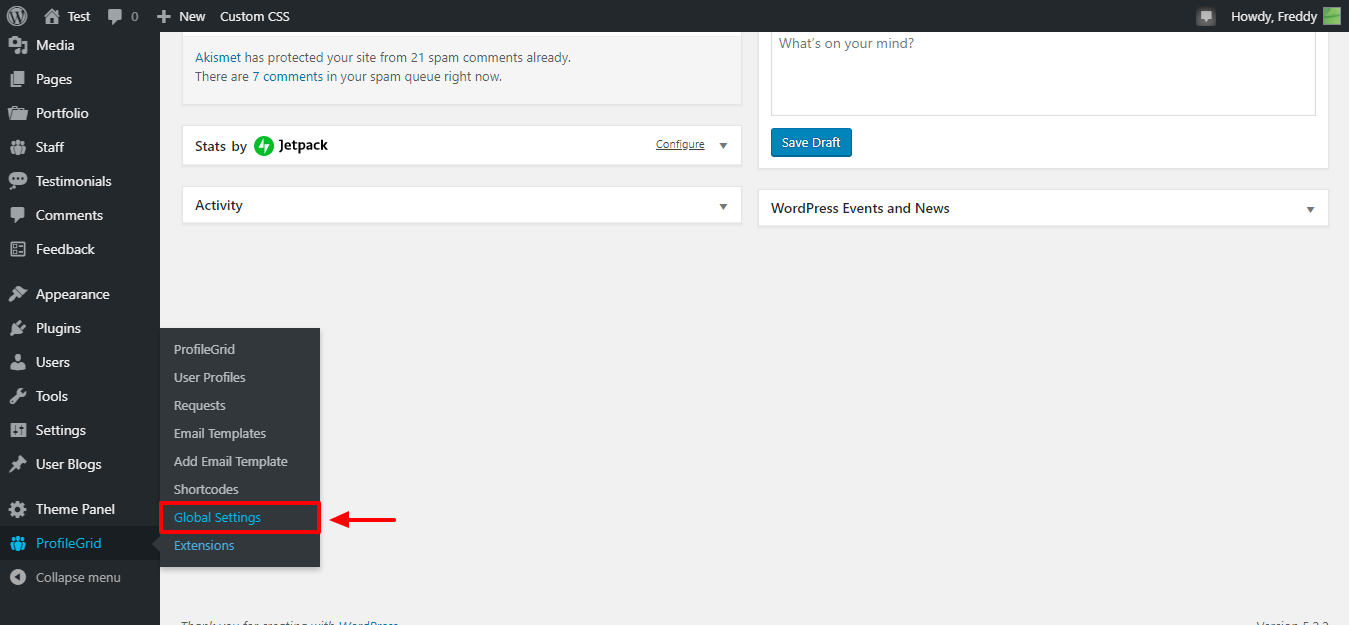
The global settings screen has a couple of sections namely:
- General
- Security
- User Accounts
- Email Notifications
- Tools
- User Blogs
- Private Messaging
- Friends System
- Uploads
- SEO
- Content Restrictions
- Registration Forms
- Profile Notifications
- Payments
- Extensions
I shall go over each section briefly. Let’s begin with the General section.
General
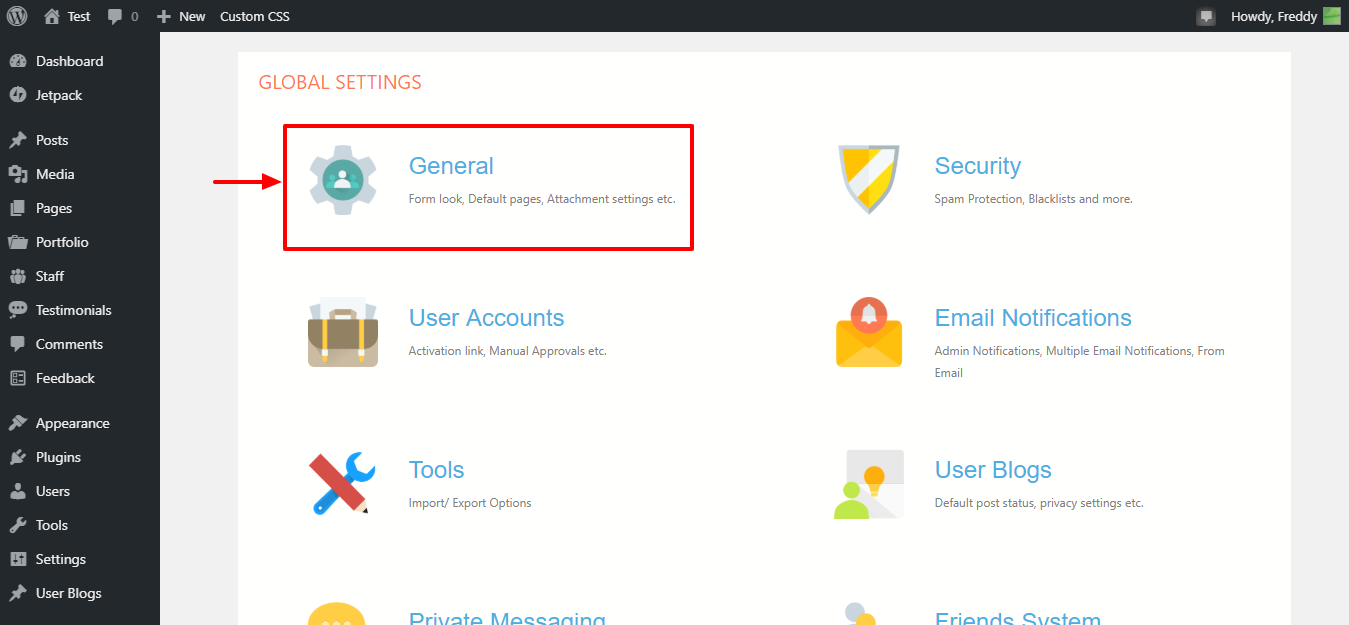
To access the general section under global settings, navigate to ProfileGrid > Global Settings and click the General tab as shown in the image above.
Doing so leads you to the general settings screen shown in the image below.
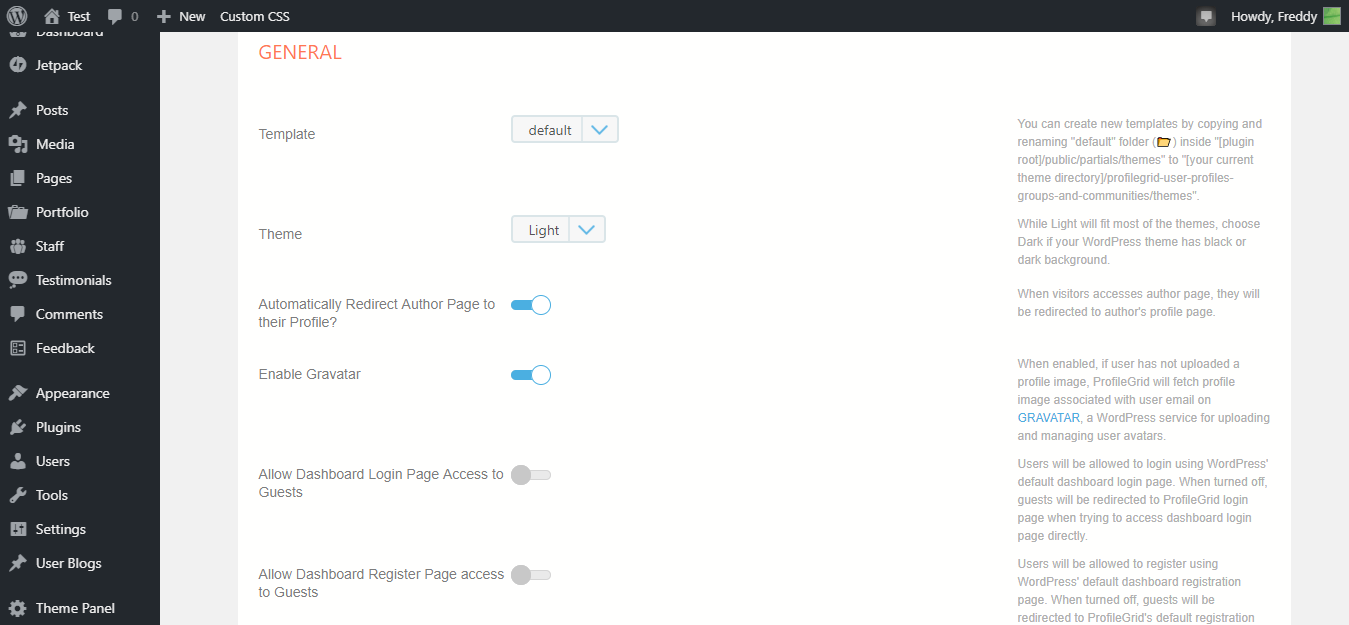
Whoa! The above screen carries a lot of nice settings. On top of that, the developer provides clear instructions meaning you can make changes without racking your brains. You can activate/modify a couple of features including:
- Template – You can create and define your own templates, which means you can extensively customize how your community/membership/social site looks
- Theme – You can choose a light or dark theme. Most people will go for the light theme, but the developer recommends the dark theme if your WordPress theme has a black or dark background
- Automatically Redirect Author Page to their profile – If you activate this feature, visitors who access the author page will be redirected to the author’s profile page automatically
- Enable Gravatar – Isn’t this obvious?
- Allow Dashboard Login Page Access to Guests – Turn off this feature to redirect guests to ProfileGrid login page. If you turn it on, guests will use the default WordPress login page
- Allow Dashboard Register Page Access to Guests – Turn off this feature to redirect guest to ProfileGrid register page. If you turn it on, guests will use the default WordPress register page
And there’s even more…
- Hide WordPress Toolbar – You can easily hide the WordPress admin toolbar for logged-in users. You can keep it visible for the admin if you so wish
- Set Limit for Password Reset Tries – You can define the number of times a user can reset their password
- Allow Multiple Attachments – You can let your users attach multiple files
- Default WP Registration Page – Here, you can set your default user registration page. You want to set this to the ProfileGrid registration page
- After Login Redirect User to – Isn’t this obvious?
- After Logout Redirect User to – This, too, obvious…duh
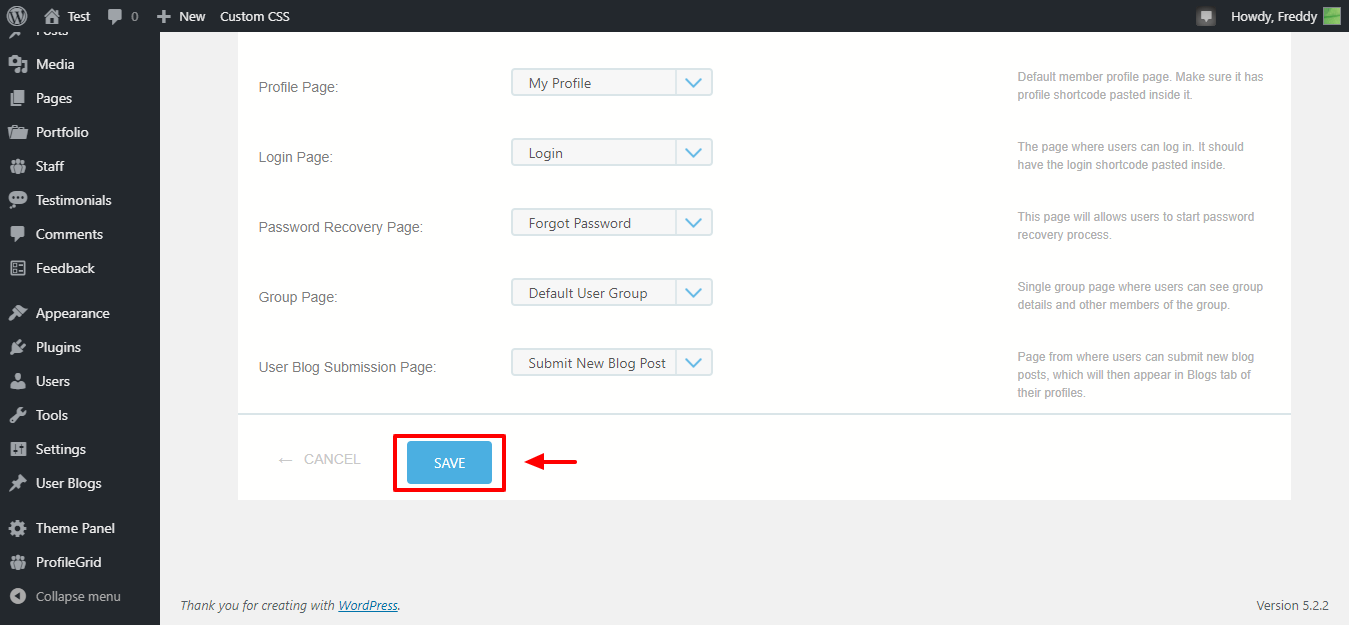
- The rest of the settings involve setting the default pages for all groups, registration, profile, login, password recovery, group, and user blog submission.
After you have defined your settings, scroll to the bottom of the page and hit the Save button as shown below.
Let’s move on to the next part of ProfileGrid global settings: security.
Security
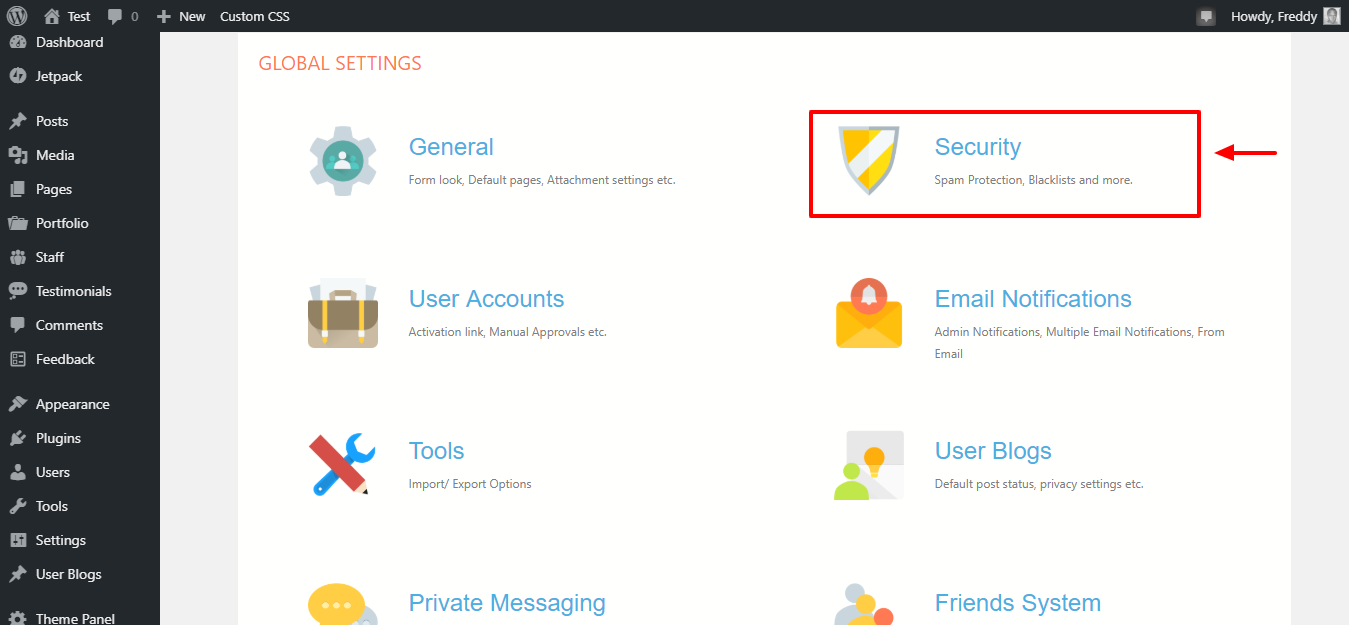
Navigate to ProfileGrid > Global Settings and click the Security tab as shown in the image above. Doing so leads you to the security page we highlight below.
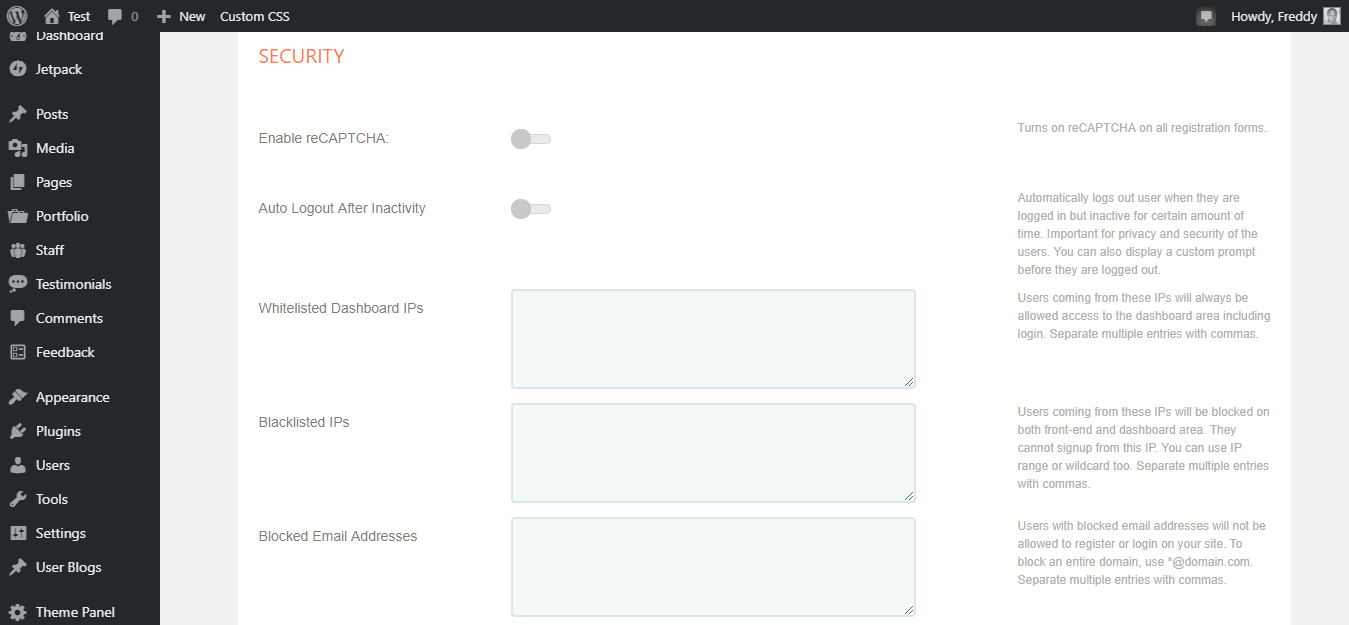
The security page allows you to fortify your site’s security. Wondering what’s in store ,i.e. if the above image didn’t give it all away? Well, you can enable reCAPTCHA, logout users automatically after a period of inactivity, whitelist/blacklist IPs, as well as block email address and profanity.
After defining your settings, don’t forget to click the Save button at the bottom of the page. Next, we have user accounts.
User Accounts
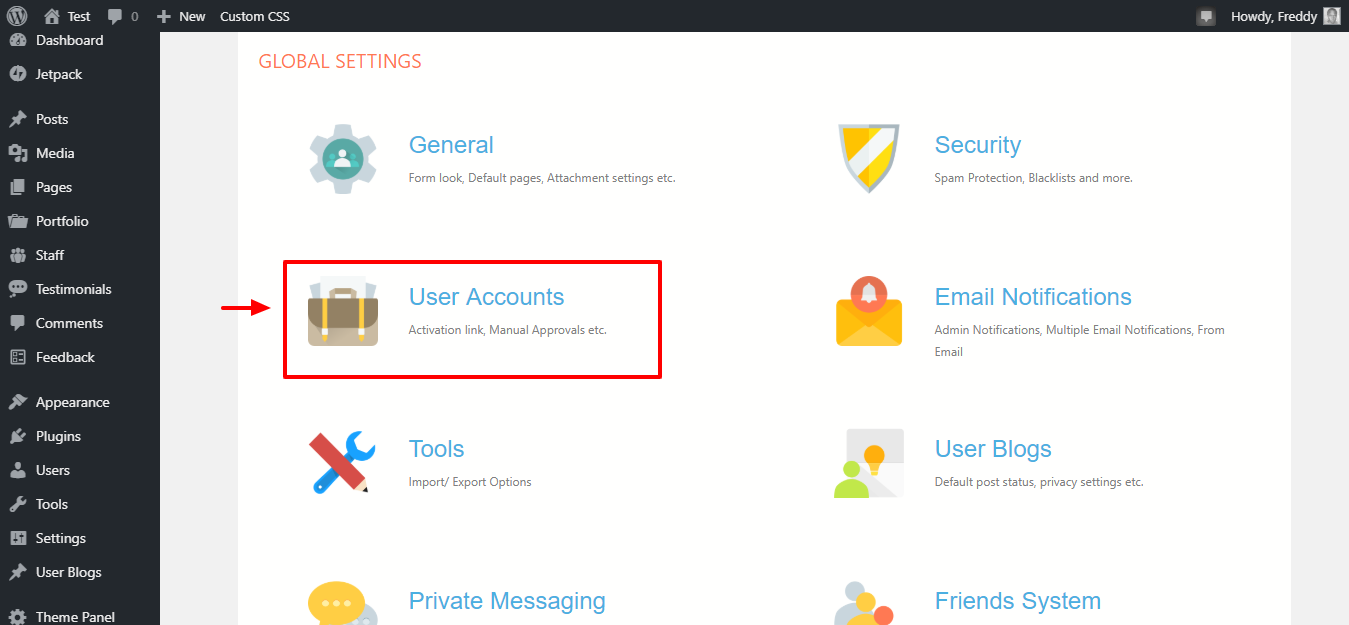
Click the User Accounts tab shown above to access the user account settings screen shown in the image below.
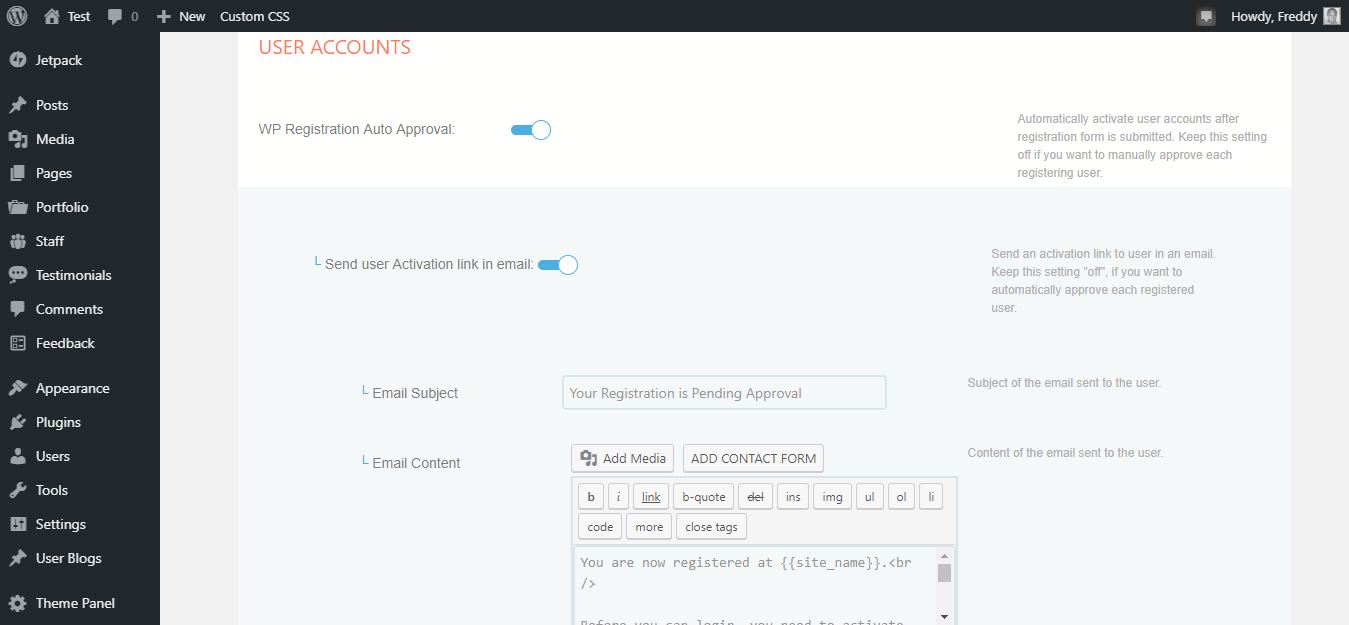
On the above page, you have full control over user registration approvals, profile & cover photos, account activation emails, profile deletion, profile privacy and email changes among other things.
Email Notifications
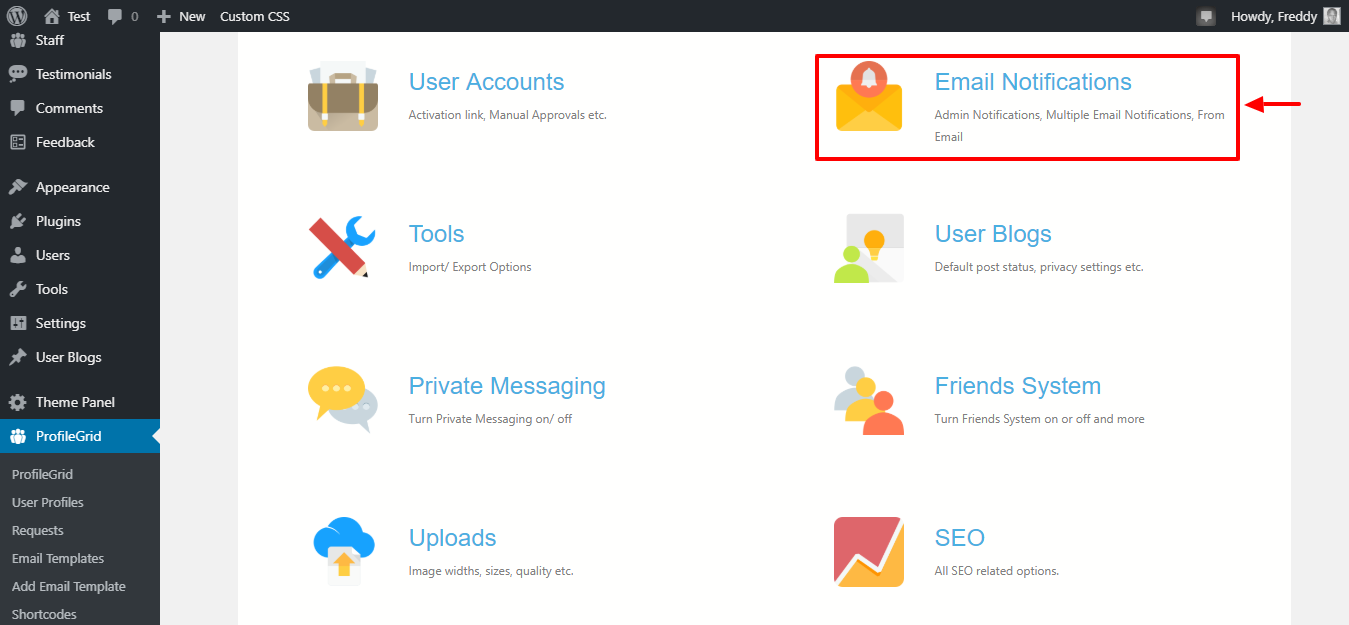
Next we have email notifications. Damn, I feel like we are really killing this review. I sure do hope you’re having fun. Clicking the Email Notifications tab above leads you to the following page.
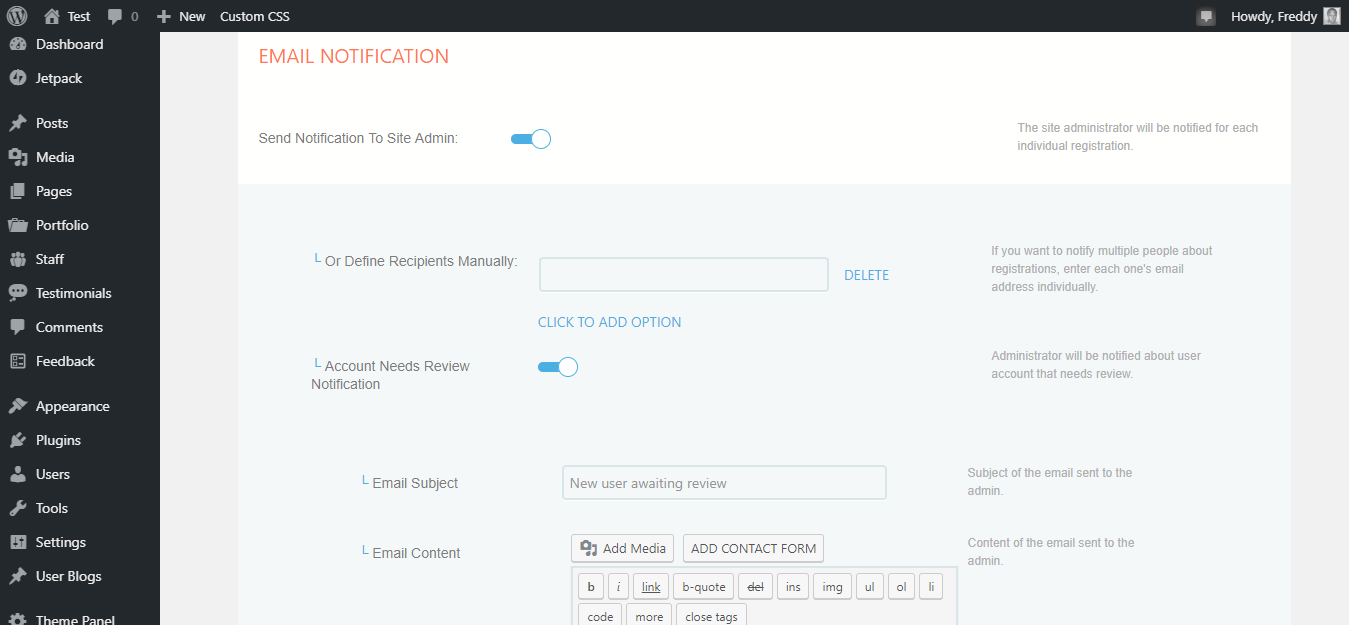
On the above page, you can do several things such as:
- Send user registration notifications to the site admin
- Notify the admin if an account needs reviewing
- Customize email notifications for accounts that need reviewing
- Let the admin know when a user deletes an account
- Enable SMTP, so you can send email notifications from an external email provider instead of your servers
Tools
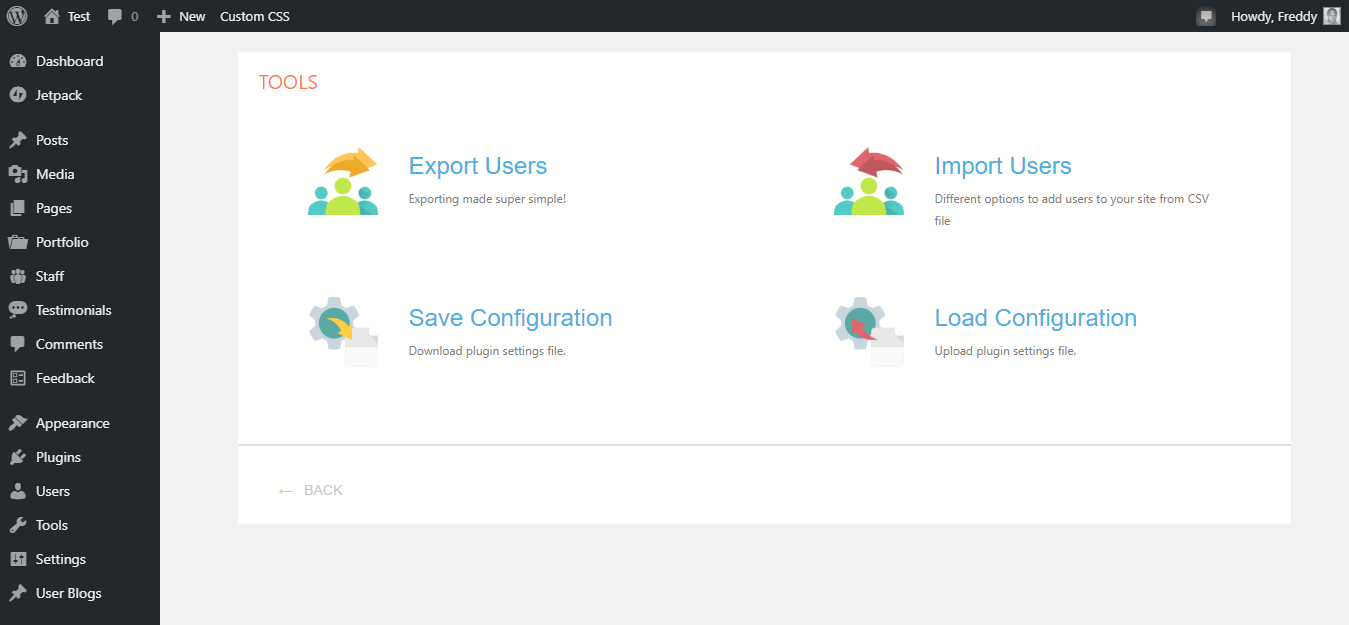
Under ProfileGrid tools, you can import and export users. Additionally, you can save your current ProfileGrid configuration or upload a plugin settings file.
User Blogs
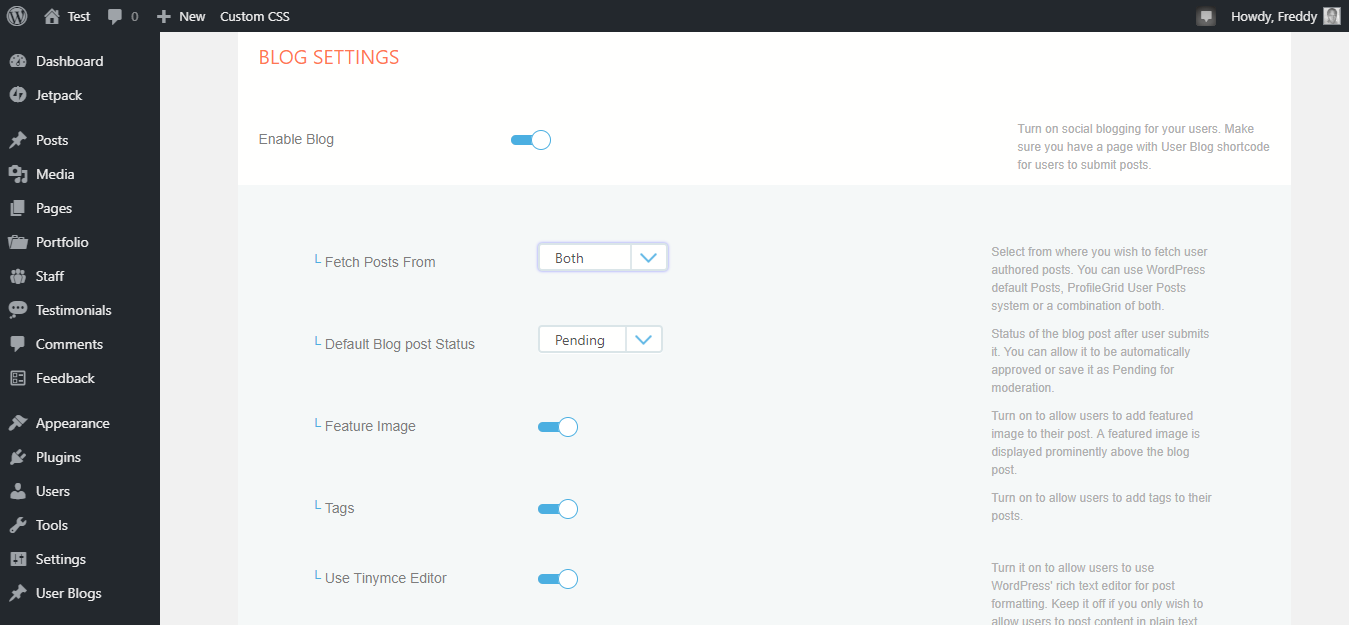
Under the User Blogs tab, you will find the Blog Settings page shown above. On this page, you can activate user blogs and activate/modify a number of blog settings.
For instance, you can set the default blog post status, as well as enable featured image, tags, Tinymce editor and content privacy. On top of that, you can notify the:
- admin when a user submits a new post
- user when the admin publishes the post
How suave?
Private Messaging
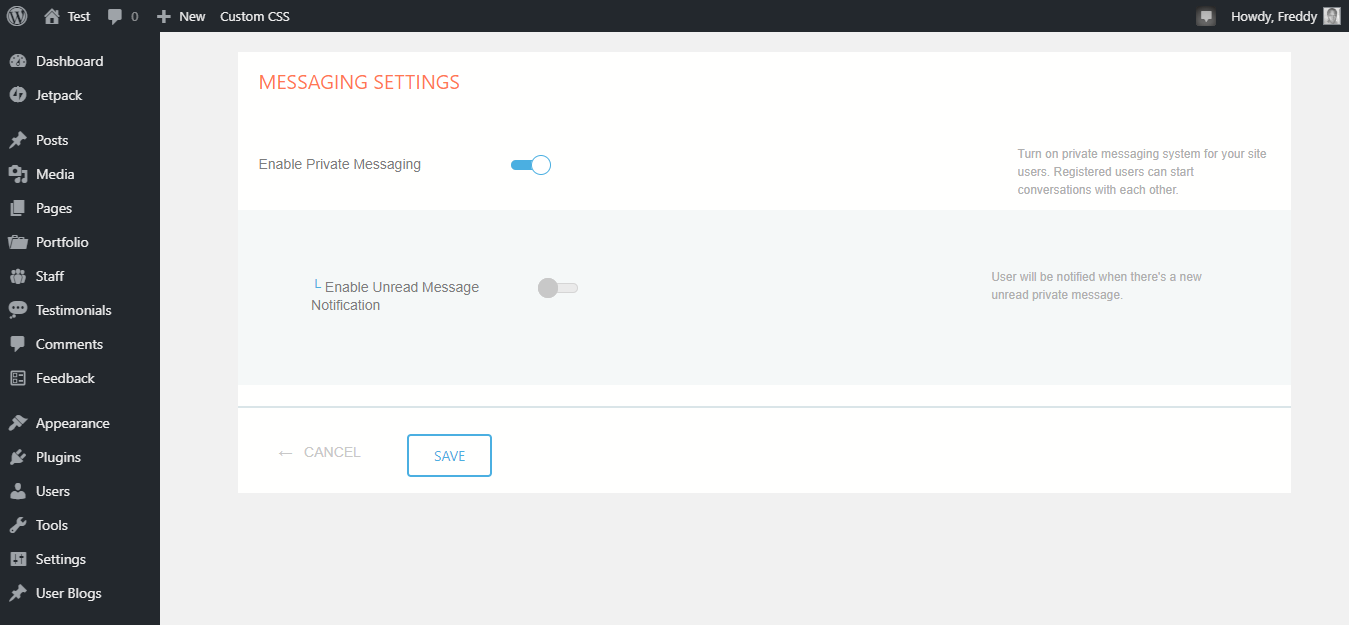
Under Private Messaging, you can enable the private messaging feature as shown in the image above. Moreover, you can enable notifications for unread messages.
Friends System
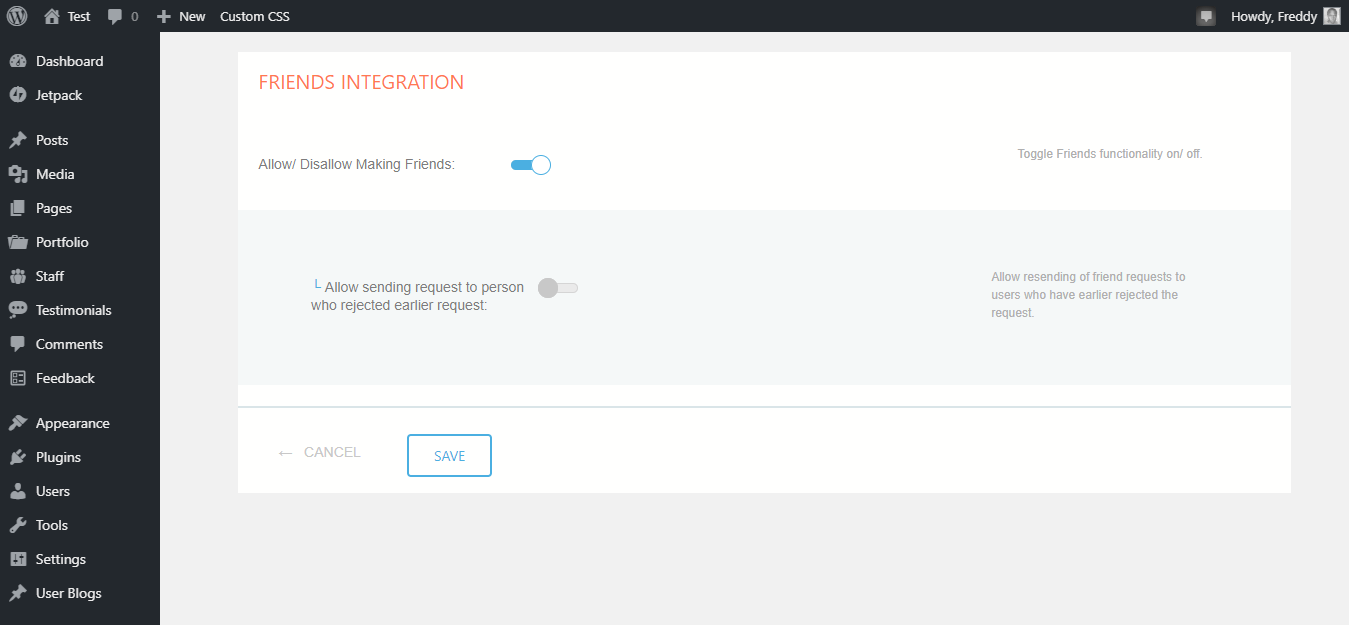
Under Friends System, you can allow or disallow making friends on your WordPress community website. Further, you can allow members to send subsequent friend requests to a person who rejected earlier request(s).
Uploads
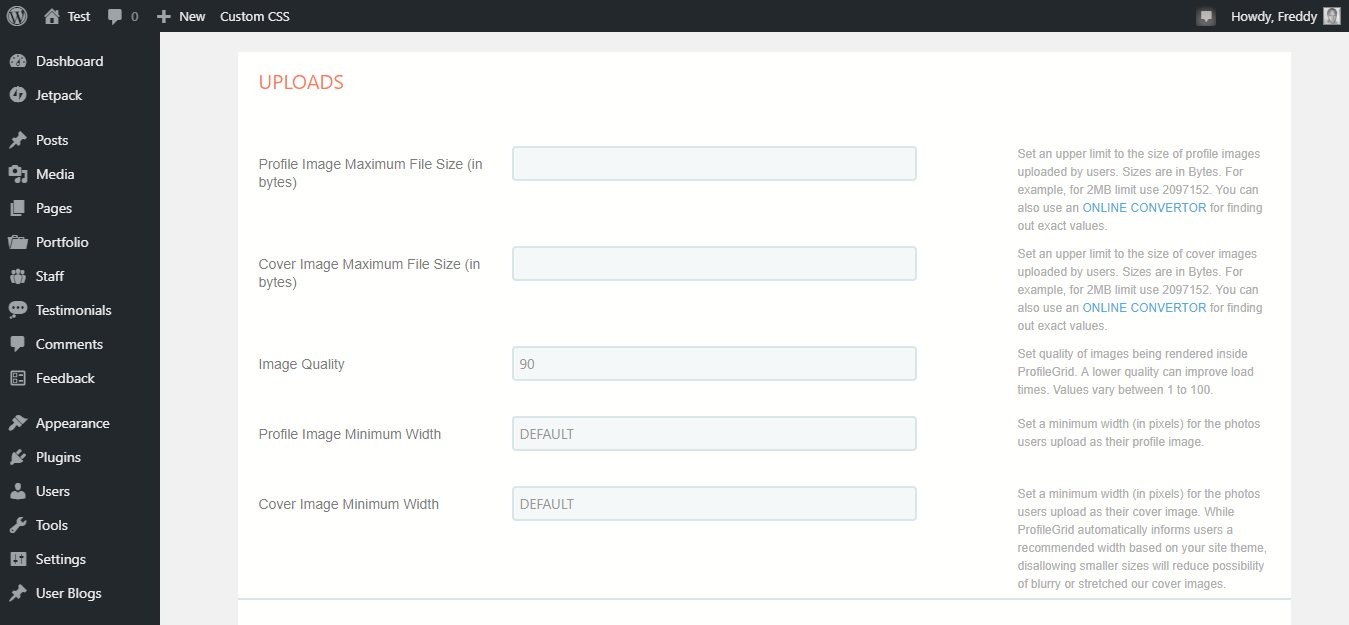
Images are an important part of any website, more so a social site. At the same time, you can’t allow users to upload images in whatever size as that might affect your page speeds negatively. The developer behind ProfileGrid understands this fact pretty well.
On the Uploads screen shown above, you can specify maximum file sizes for profile and cover photos. Additionally, you can define the image quality on a scale of 1 to 100, with 1 being the lowest quality (but faster performance), and 100 being the highest quality (with reduced performance). If you choose good WordPress hosting, this shouldn’t be a problem.
On top of that, you can set the minimum width of profile and cover images to provide a uniform experience across your site.
SEO

You cannot ignore the value of SEO for WordPress as far as driving organic traffic to your social site goes. To set up SEO page titles and meta description, ProfileGrid offers you the SEO settings page shown in the image above. You can use ProfileGrid placeholders e.g. {{display_name}} and {{site_name}} among others to enrich your user profiles SEO-wise.
Content Restrictions
In ProfileGrid global settings, there is nothing to do in terms of restricting content.
What to do?
ProfileGrid allows you to restrict content on a per-page or per-post basis. When creating a page or post, scroll down to ProfileGrid Options Box and choose your content restriction rules as shown in the image below.
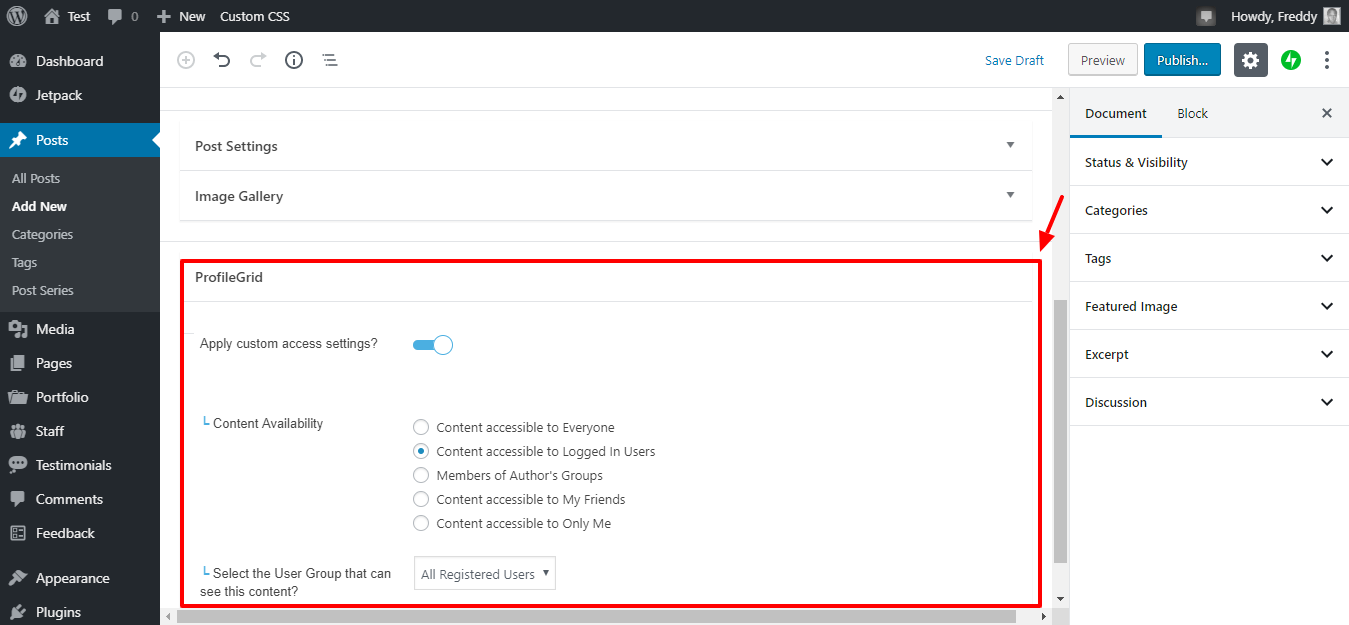
You have a couple of content restriction rules. You can have content that is accessible to:
- Everyone
- Logged-in Users
- Members of the author’s groups
- A user’s friends
- Only You
Further, you can make content accessible to certain groups, which is great if you’d like to serve premium content to, say, paying members only.
Profile Notifications
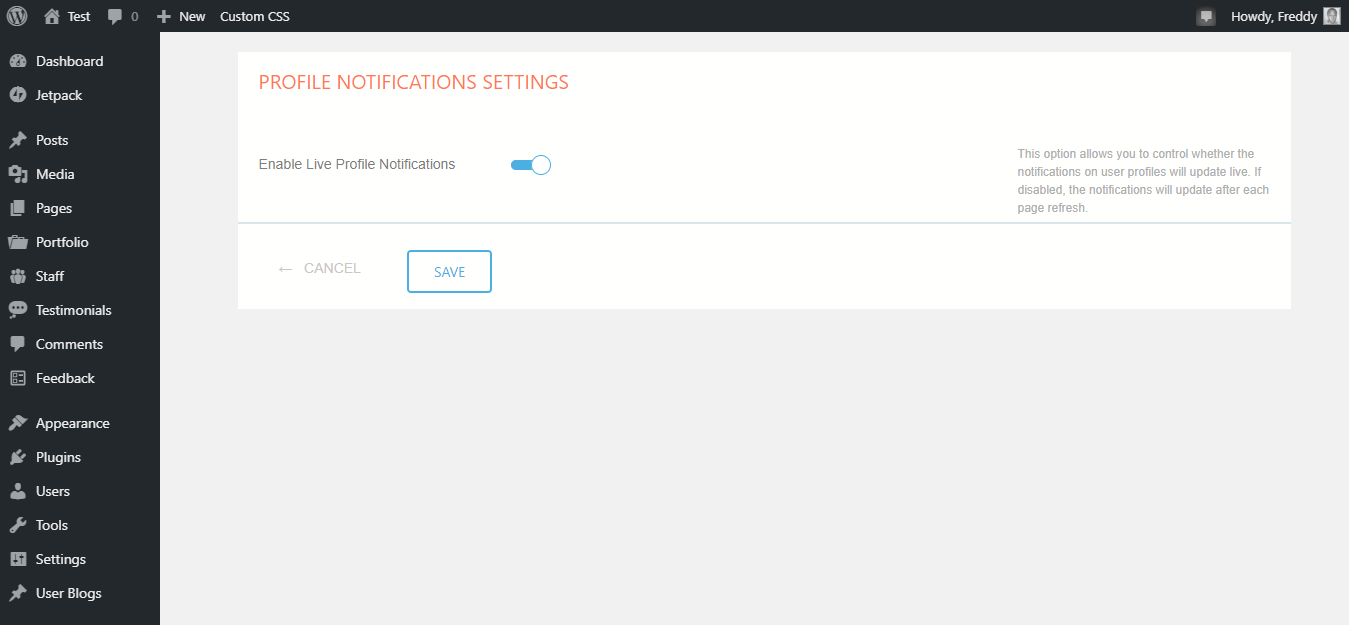
Did you know you can activate live profile notifications in ProfileGrid? Well, if you had no idea, the plugin offers you this option too, meaning you can have live profile notifications just like Facebook!
Payments
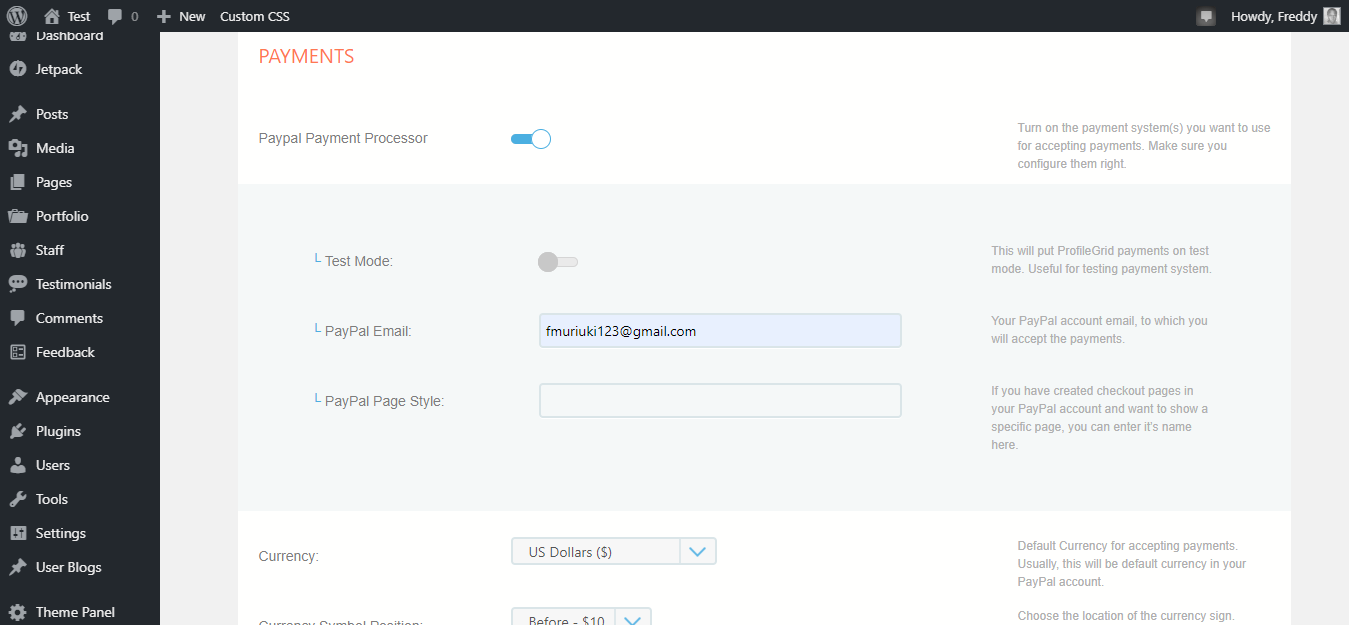
You might think you need god-level coding skills to start receiving payments via ProfileGrid. Nothing could be further from the truth. Thanks to the above easy-to-use Payment Settings page, you can quickly set up PayPal on your community website.
For additional payment gateways, you will need ProfileGrid premium add-ons.
ProfileGrid Free & Premium Add-ons
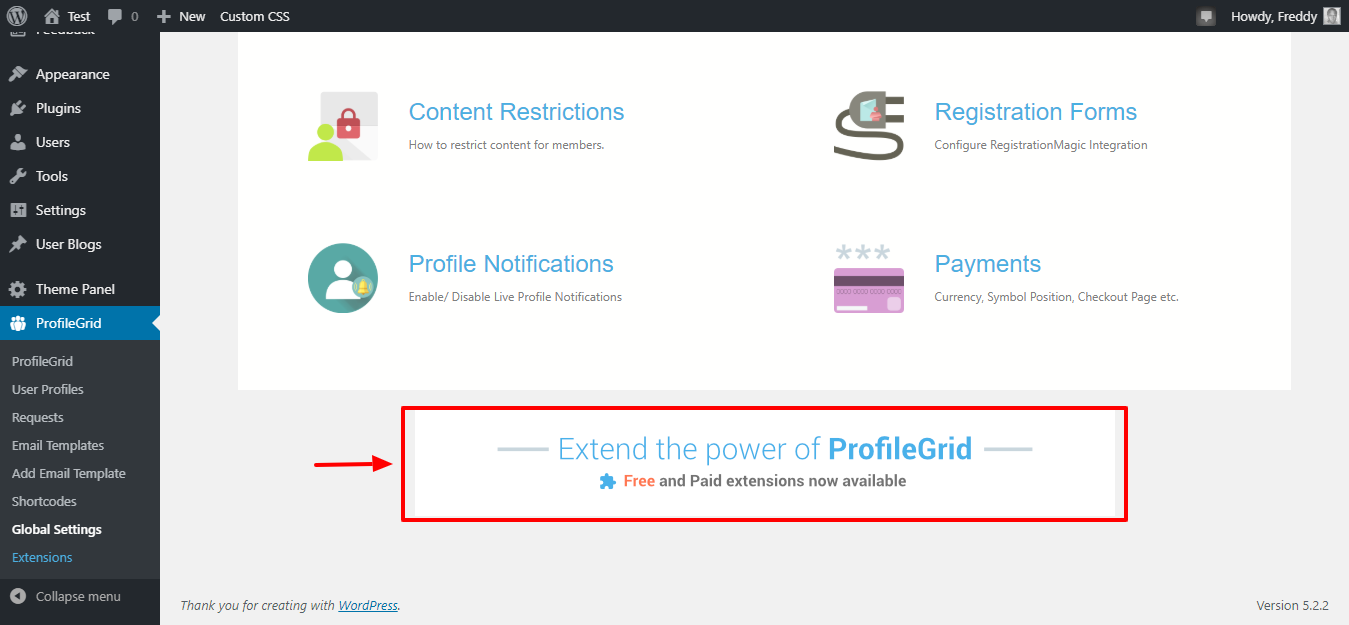
At the bottom of the ProfileGrid Global Settings page, you will find a tab (see image above) that leads you to a long page of free and premium add-ons as shown below.
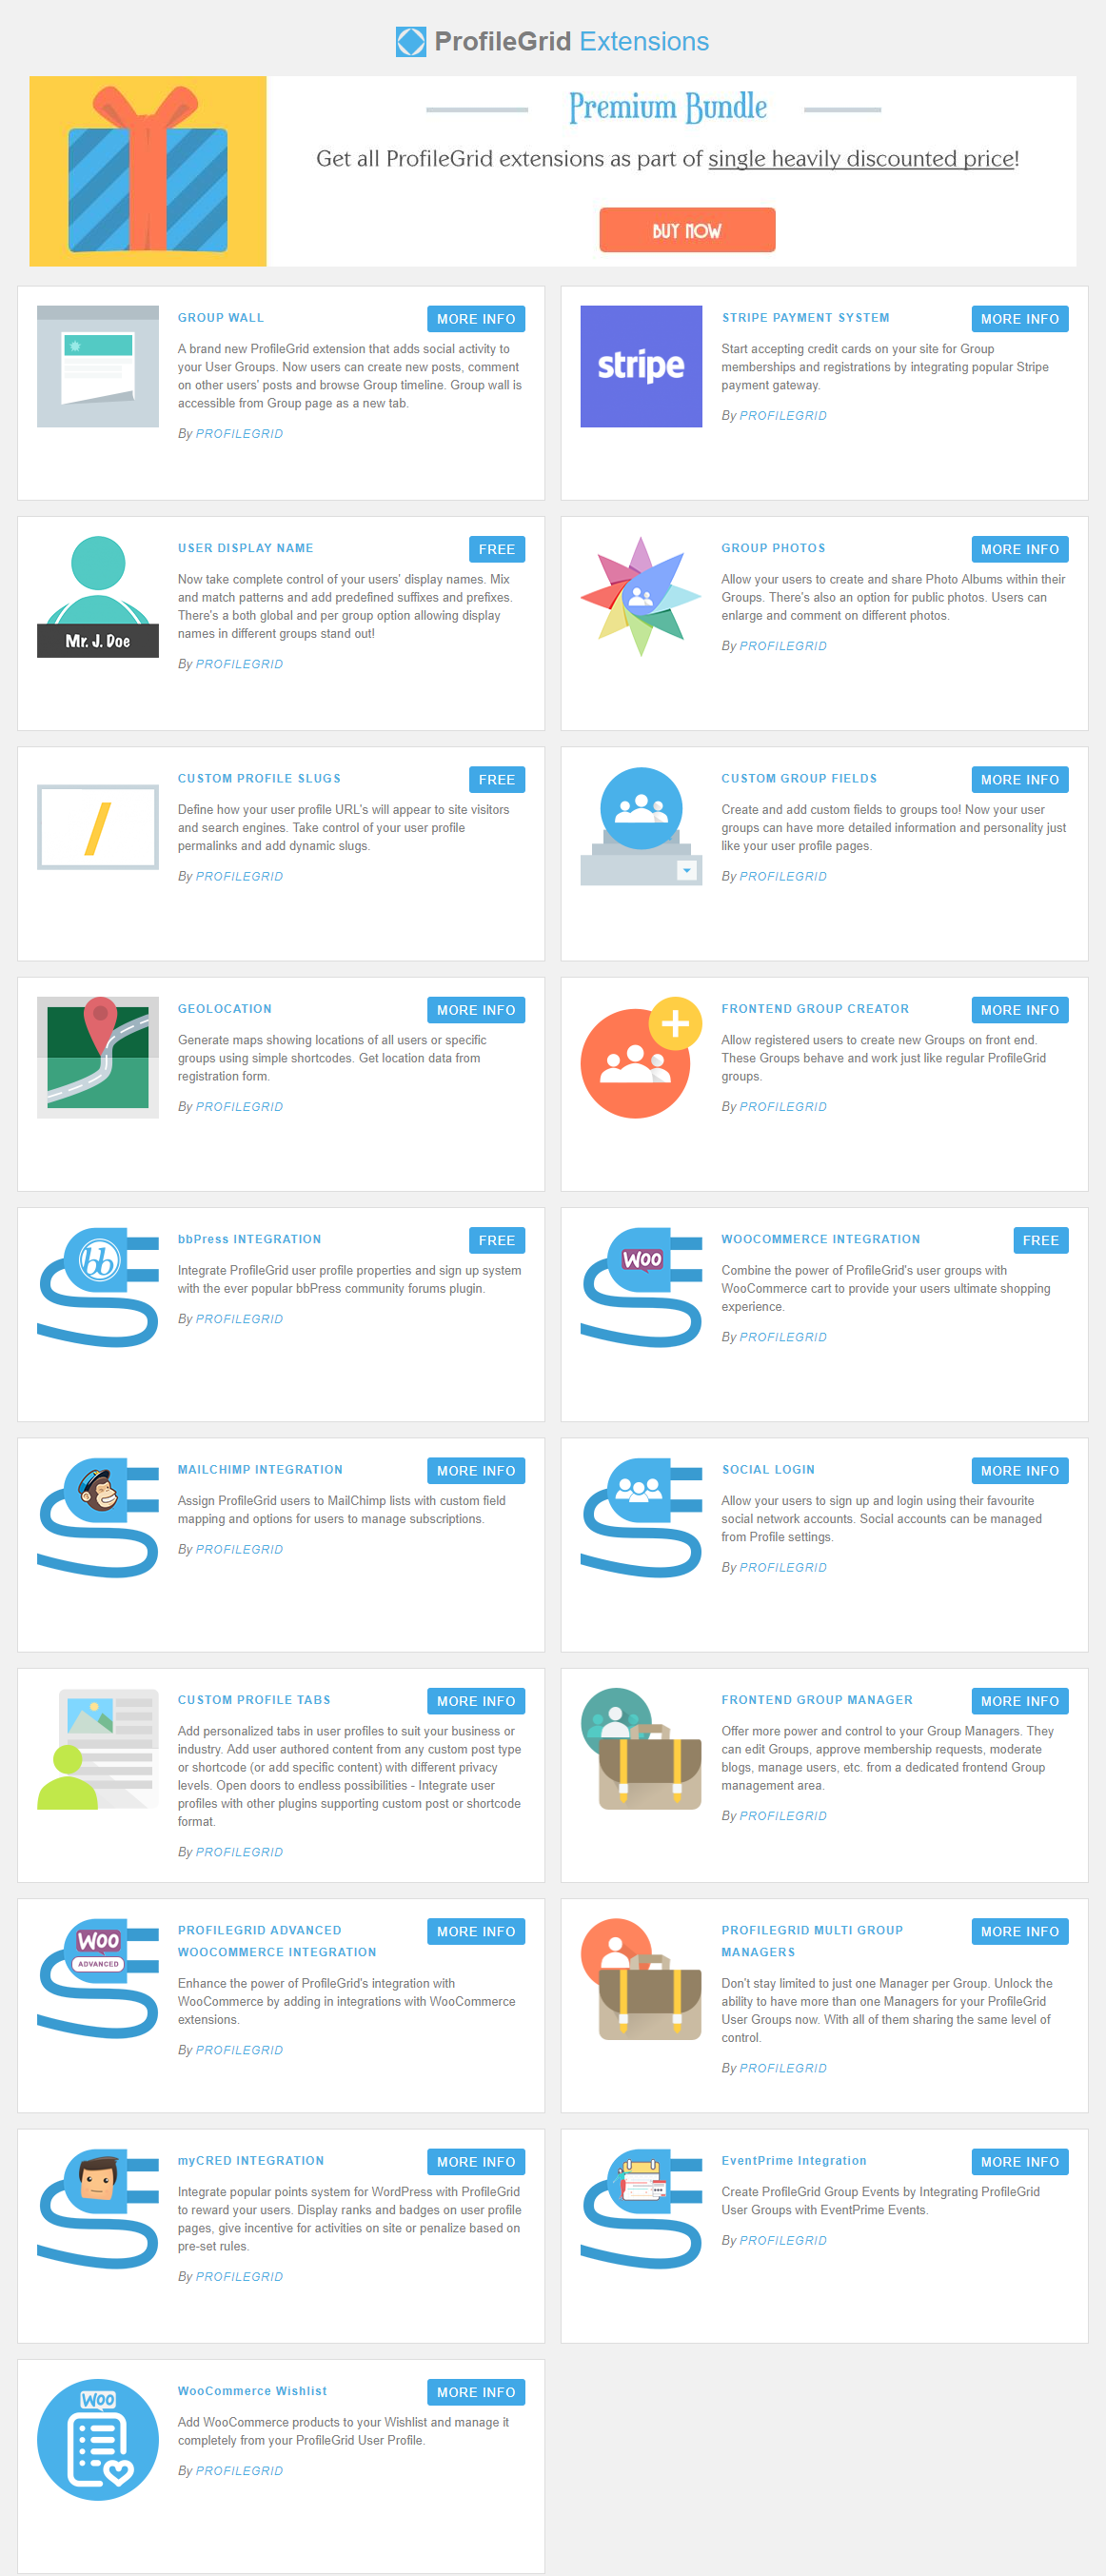
Alternatively, you can access the above page by navigating to ProfileGrid > Extensions.
Note that the above extension page loads within your WordPress admin. Honestly though, this is just a tiny sample of the available add-ons.
With ProfileGrid global settings out of the way, let us cover the other available features.
Other ProfileGrid Settings
Group Manager
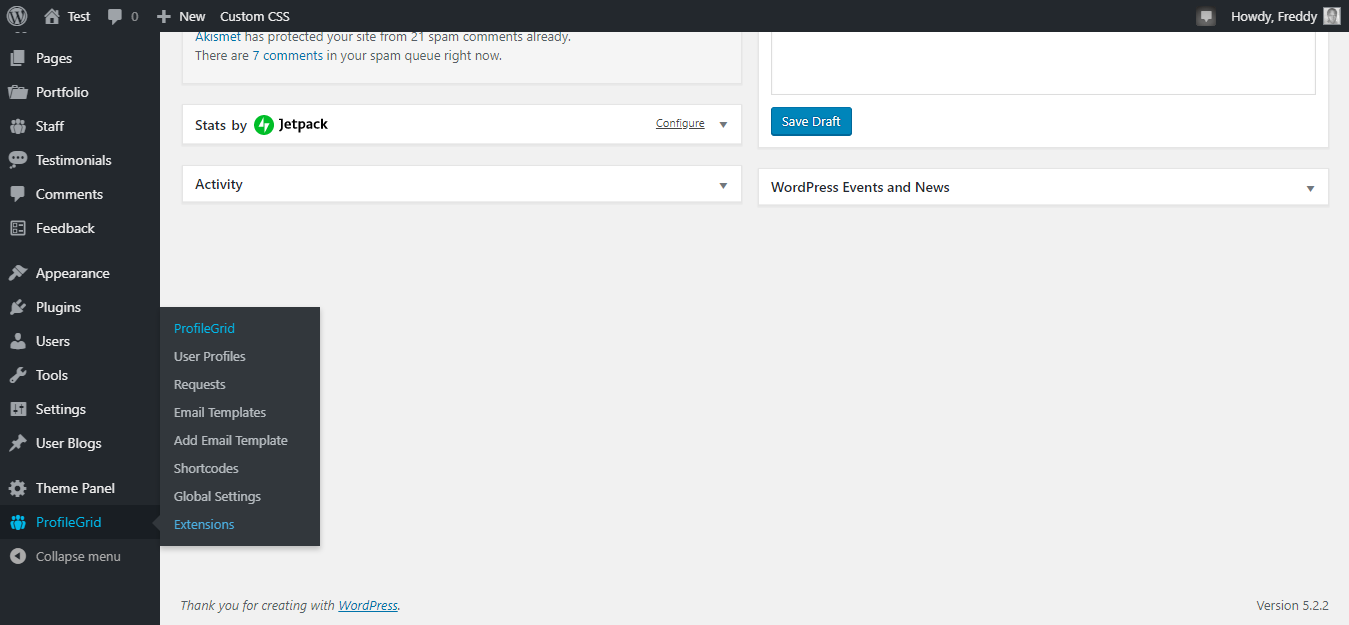
If you think you’ve seen it all, you’re in for a big surprise. Navigate to ProfileGrid > ProfileGrid (see image above) to launch the Group Manager screen seen below.
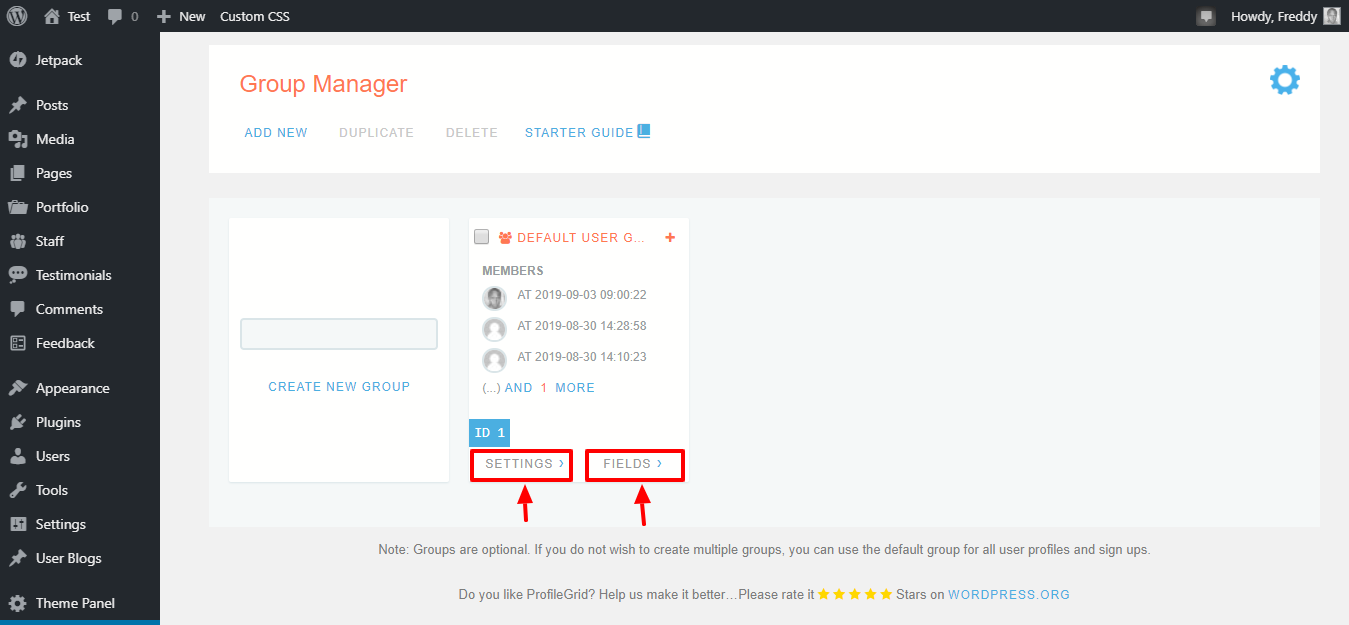
On the above screen, you can create new groups or edit existing groups extensively. Click on the Settings link to edit the current group (in our case that’s the Default User Group). Click the Fields link to add or edit custom fields on the registration form that leads users to that specific group.
User Profiles
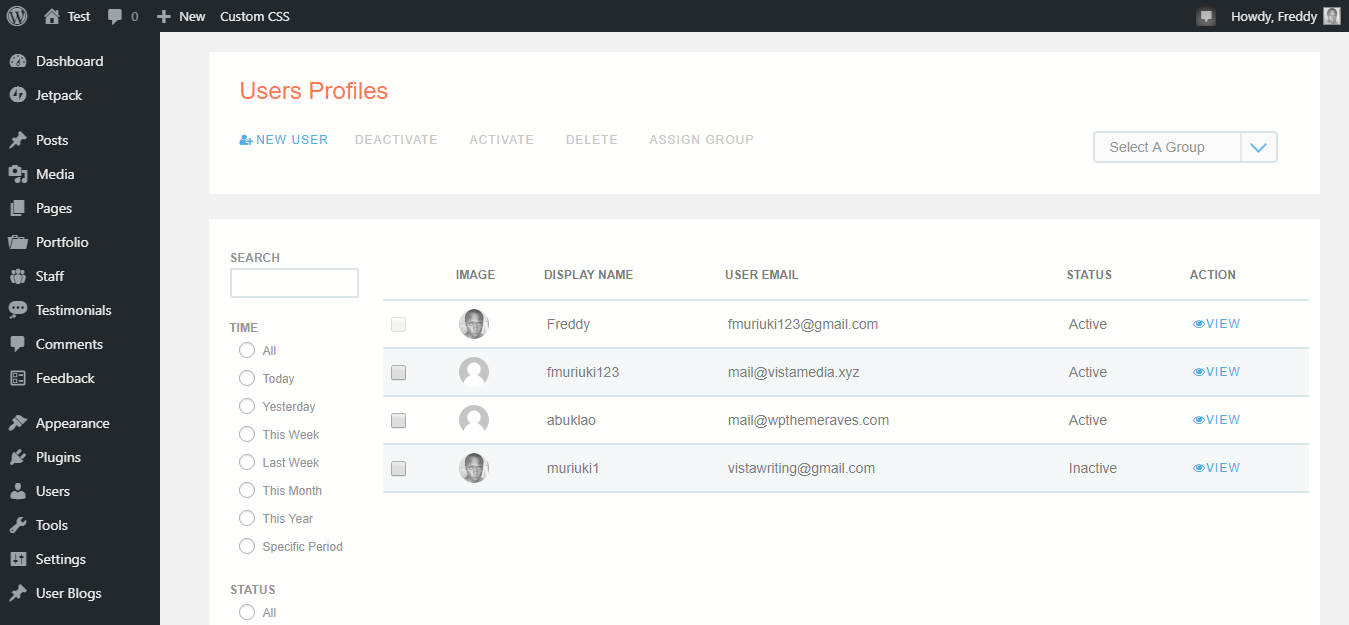
Perhaps you’re wondering how you can view the users on your website. That’s as easy as A, B, C. Navigate to ProfileGrid > User Profiles to launch the screen shown in the image above. On the page, you can do quite a lot.
You can add new users, view user details, activate/deactivate users, delete users, and assign users to groups. It’s all laid out well for you. Managing your users is a breeze with ProfileGrid and I am not sugarcoating anything.
Group Membership Requests
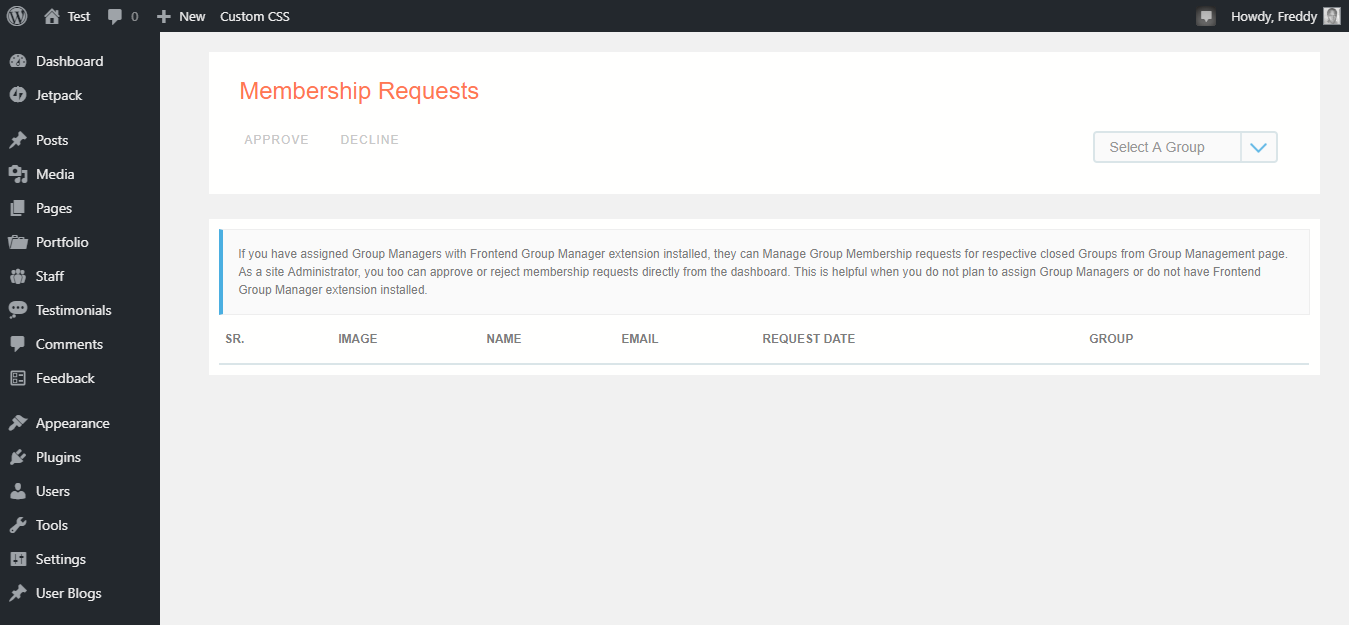
When members start joining groups, you will need an easy way of approving the membership requests. ProfileGrid has that area well covered as well. Just navigate to ProfileGrid > Requests.
Email Templates
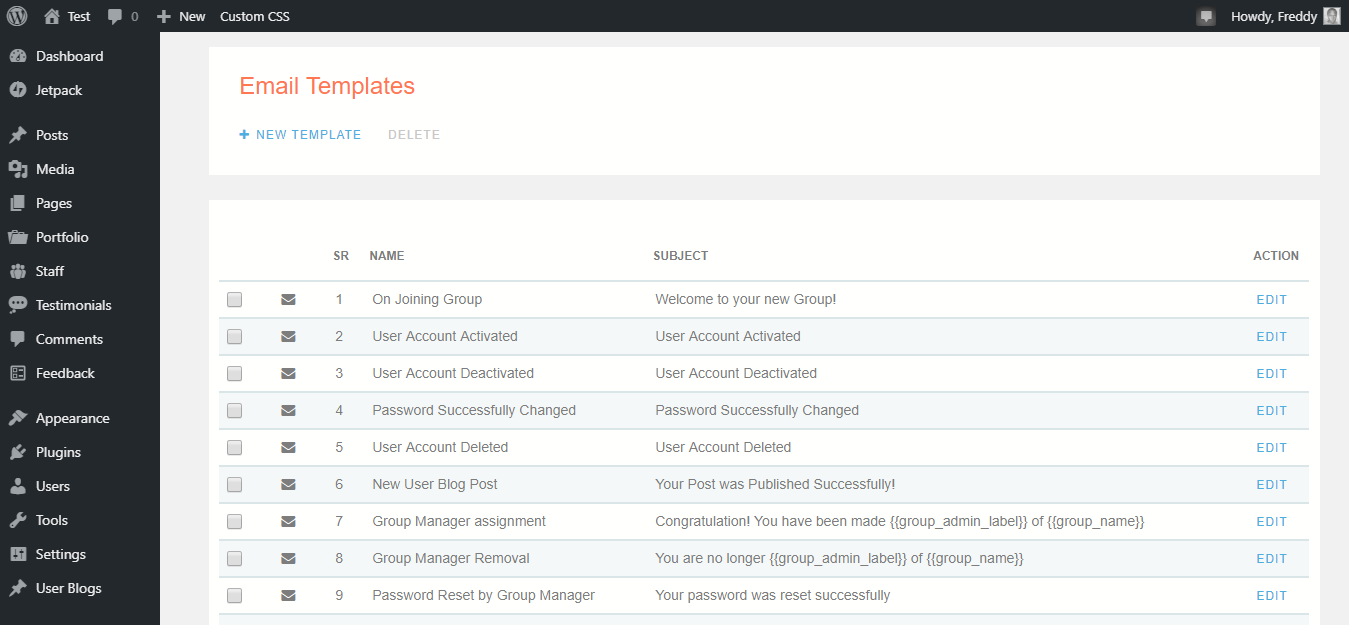
Email marketing is an incredible way of reaching out to your users and growing your community site.
ProfileGrid offers you a central hub to create/edit email templates for all stages, whether the user is joining a group, activating an account, resetting passwords etc. Simply navigate to ProfileGrid > Email Templates and unlock your email marketing genius.
Shortcodes
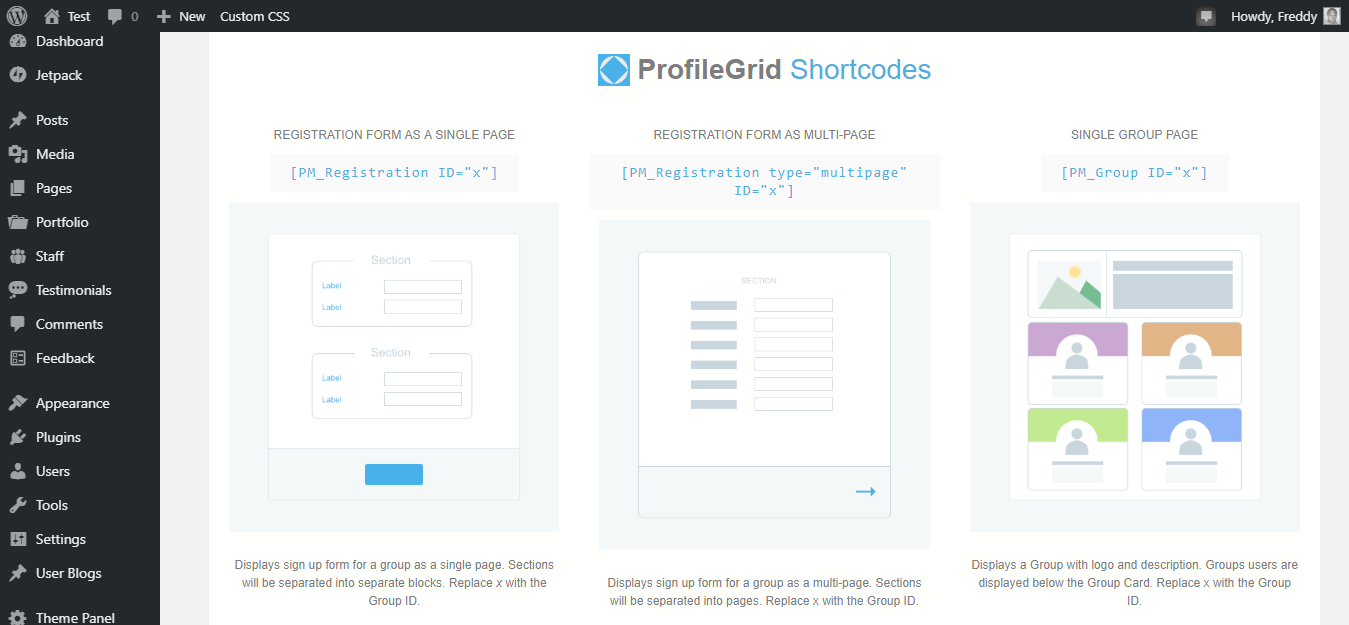
Without ProfileGrid shortcodes, you would have a hard day trying to build each page on your community website. For instance, if you didn’t have the [PM_Registration ID=”x”] shortcode, you would have to build registration pages from scratch, which can steal a huge chunk of your time.
Now all you have to do is copy-paste a shortcode into a new page, and your work is done. To view available ProfileGrid shortcodes, navigate to ProfileGrid > Shortcodes.
Phew! What a long list of impressive features?
ProfileGrid is a fantastic user profile and community plugin for WordPress. You can use the plugin to add social networking capabilities to your WordPress site, improve user profiles, and enrich WooCommerce user profiles.
Additionally, it is easy to install and configure. And thanks to extensions, you have no limits to what you can achieve in a relatively short period.
Give it a shot and let us know what you think. After all, it’s free meaning you can test it risk-free. What do you think? Is ProfileGrid your cup of tea?
Please let us know your thoughts in the comment section below. Happy creating!


Hey guys 🙂 Have questions or concerns? I am monitoring comments for the next 24 hours, so let’s go!
Hi. what if I don’t want group, just only allowing my users to send friend request and communicate each other?
Is any video tutorial for this ProfileGrid
I don’t know if there is a video guide yet. Perhaps the developer will release one soon!
I think you could just not create groups, and simply not use the group pages. But you can always ask the developer to see if there is a way to disable the functionality completely. However – this is one of the features that sets ProfileGrid apart from other user profile plugins. Groups allow users to interact and network as a group and not just one on one. If you just want users to be able to DM each other then you might be able to find something on WordPress.org.
“The point is ProfileGrid comes with more features than you will ever need. ”
This usually means that the system does not do what I need it to do: Make profiles private to anyone but the users themselves.
On their main website, ProfileGrid state that “Admins can set privacy levels of user profile data” so I would think it’s possible for you to make all profiles private, but I would suggest reaching out to the developer first just to be sure.
This is a very rich plugin that I feel will dominate in its own way on membership and commerce sites. It is amazing the extensive core features available in the free version. Also professionally writing and the dashboard just makes you want to explore more. Nice one.
Hello, I am unable to change the font size and color of message after post submission. How can I do it?
I was under the impression that Profile Grid post submissions are like a form – once you submit that’s it, the information is sent to the site admin. So any edits to your post submission should be made before submitting, or you can try contacting the site owner to see if they can update your post.