How to Create a Private Store in WooCommerce


Recognized as the leading eCommerce platform, WooCommerce is empowering 28.19% of all online stores worldwide. It allows users to easily turn your WordPress site into a fully-functional eCommerce shop without touching a bit of code. You’re able to add products, control customer data, manage the checkout process, and more.
As a matter of fact, the WooCommerce free plugin permits you to build your online store just on a basic level. There is no way to leave a place for customer reviews, to allow WooCommerce file uploads, or even to apply different payment gateways unless you install extensions.
Building a private WooCommerce store also come as a significant feature demanded by numerous users. Still, WooCommerce doesn’t support hiding stores by default. You need to seek help from powerful plugins, extensions, and add-ons to control WooCommerce products and store visibility.
You may be surprised how easy it is to shield your WooCommerce individual products as well as the entire store. Here are a few options that will keep you creating private shops on the go. But before digging into the details, we’ll first touch on who needs a private shop.
Without further ado, let’s dive in.
- Who Needs a WooCommerce Private Shop?
- Hide Entire WooCommerce Store using PPWP Pro
- Make WooCommerce Shop Private with WooCommerce Membership
- Restrict WooCommerce Access via Paid Member Subscriptions
Who Needs a WooCommerce Private Shop?
Every business owner scrambles to drive as much traffic to their online stores as possible. More visitors means more potential customers and probably higher conversion rates. And WooCommerce private shop, in this case, seems counterintuitive, right?
However, in some cases, restricting partial or the entire WooCommerce store to specific users benefits business owners in various ways. Below are the 3 most common scenarios:
Customer-specific Products
You offer sensitive and adult products like alcohol and tobacco which should not be bought by the underage. To do so, you have to identify and prevent younger folks from viewing your adult-only blogs or purchasing these addictive products.
Another useful case comes to wholesalers who just want to sell products to retailers only. Since the products’ prices will be different depending on the types of buyers, you must restrict access from individual customers.
On top of that, it’s necessary for wholesales to enable certain areas on the WooCommerce store for specific retailers. For instance, you have separate uniform categories for many universities. This university isn’t allowed to view the uniform catalog and prices of others and vice versa.
Service-based Businesses
Not all products rack up the same profits. That’s why you provide both standard and premium products via your WooCommerce stores to classify purchasers. One-time buyers shouldn’t be able to see premium goods that should have served loyal and VIP ones.
Member-only Stores
Last but not least, you already own a WordPress membership website and later on plan to sell your members exclusive products or premium page access. Each membership level in your WooCommerce membership store should be able to access different products.
Take the online training site as an example. Subscribers are authorized to view and download the first few videos of the course for free. Paid students, meanwhile, have permission to access all materials of the course, from the beginning to the last lessons.
Once you understand when to create a private WooCommerce shop, it’s time to get to know how to get things done. It’s possible for you to shield individual physical products, certain product categories, or the entire shop page with the support of Prevent Direct Access (PDA) Gold and Password Protect WordPress (PPWP) Pro.
Hide Entire WooCommerce Store Using PPWP Pro
Endorsed by thousands of customers around the world, PPWP Pro allows you to secure pages, posts, categories, and the entire WordPress site with passwords. You can also password protect WooCommerce product pages with the plugin too.
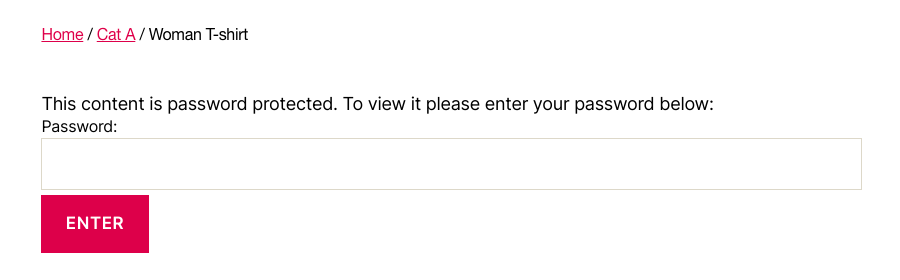
The plugin enables you to cover product pages under a password form. This is what users see when opening a protected WooCommerce product:
In addition, PPWP Pro supports you to block user access to the entire WooCommerce shop as well. To achieve that, you’re required to integrate with the WooCommerce Integration to password protect WooCommerce shop page.
The 4-step guide below will show you how to password protect the entire WooCommerce store:
Step 1: Download, install, and activate PPWP Pro plugin and the WooCommerce Integration extension for your WordPress site.
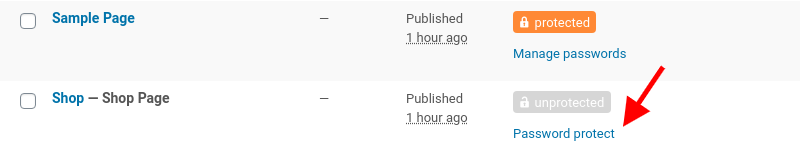
Step 2: Head to Pages and look for the Shop one.
Step 3: Click on the “Password Protect” button next to the Shop page.
Step 4: Generate a random password or create your own ones in the password protection popup.
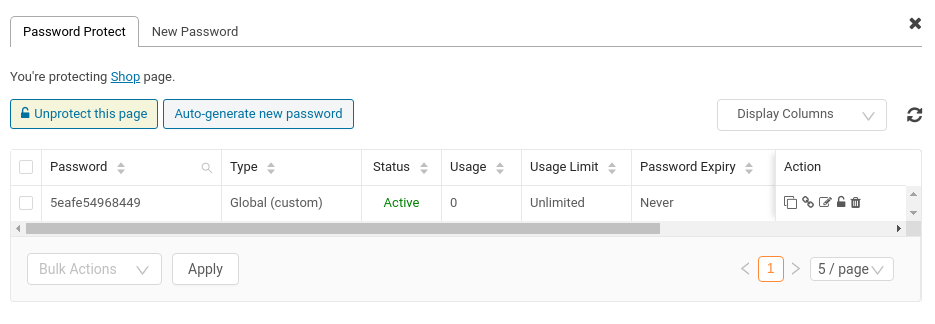
You can create as many passwords as you need. Once users enter a correct password to any product page, they also open up the rest of the store, including the main shop page.
Out of the box, the plugins allow you to auto-create and send customers quick access links to your virtual products without having to enter passwords. In other words, after purchasing your digital products, they will receive a quick access link via an email that enables them to access protected content directly.
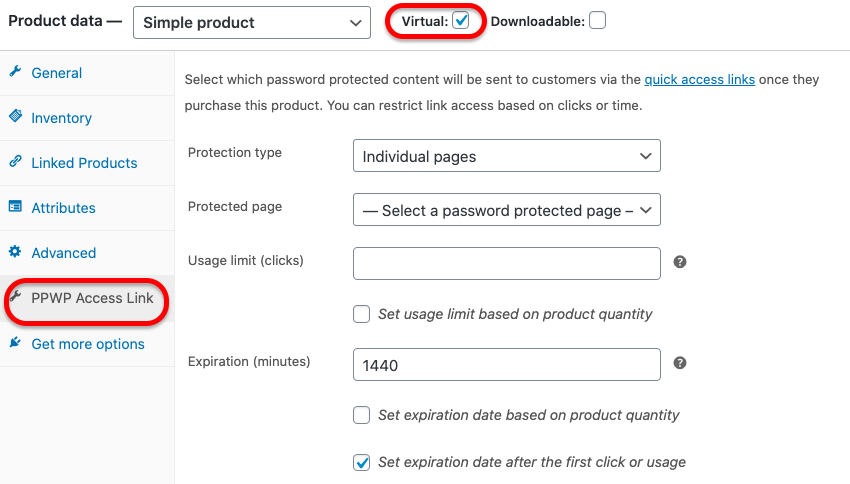
On one hand, it saves customers time filling the password form. On the other hand, it raises the security to a higher level. Buyers won’t have a chance to share their passwords with others.
Password Guideline
It’s essential to create strong passwords for your WooCommerce shop page to prevent brute force attacks. Your passwords should contain more than 8 characters, including letters, numbers, and special symbols.
PPWP takes that weight off your mind via the button Auto-generate new password. However, these passwords will have no usage limit and will never expire.
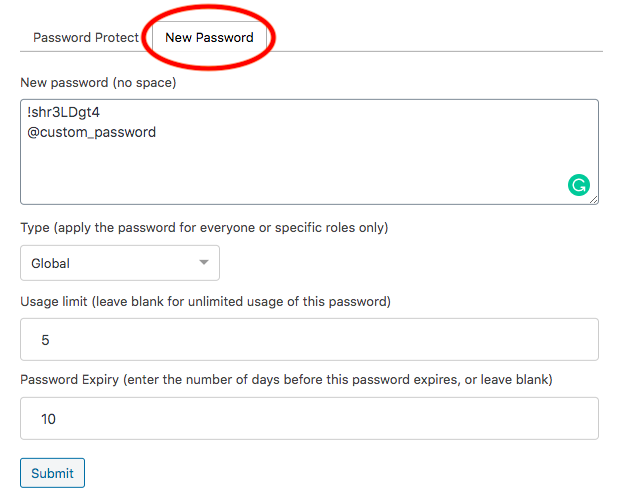
To change this, head to the New password tab:
- The Type dropdown lets you select specific user roles to enter the passwords. Any other roles won’t be able to access the shop page even though they have the correct password.
- Usage Limit defines the number of times that passwords can be used. After this number, it will become invalid.
- Password Expiry refers to the given days that passwords will expire. You can leave it blank to set the password to never expire.
Make The Entire Store Private with WooCommerce Memberships

WooCommerce Memberships helps sell access to your premium content based on membership. You can sell one or multiple products to a membership plan or offer them for free.
The plugin provides control over your membership restriction and management. It lets you create content available for members, and at the same time, determine when the restricted content expires.
You’ll be amazed at how feature-rich this WooCommerce membership plugin is. Besides limiting product viewing or purchasing, it also assists in supplying drip content as well as allowing multiple accounts for a member.
Follow this guide to easily create a private store using the WooCommerce Memberships plugin.
Step 1: Set up WooCommerce Memberships Plugin
Install and activate the plugin (you can refer to the basic steps of installing the PPWP Pro mentioned above).
Open WooCommerce > Settings > Memberships to configure your settings.
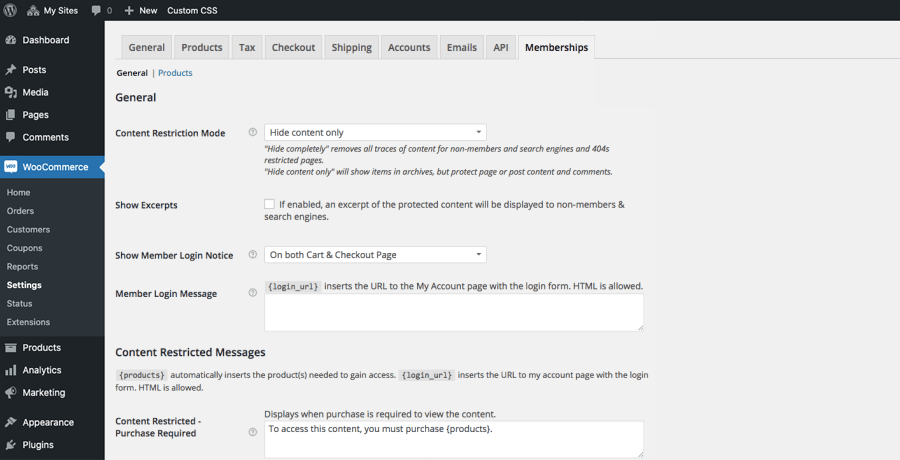
Select your restriction mode: Hide Completely, Hide Content Only, and Redirect to Page.
Choose a page to redirect non-members to.
Check the Show Excerpts box to disable content on search engines.
Notice members when they need to log in. It could be on the cart page, checkout page, or both.
Step 2: Create Membership Products
You can add new membership products and start selling memberships now. To do this, you need to follow these steps.
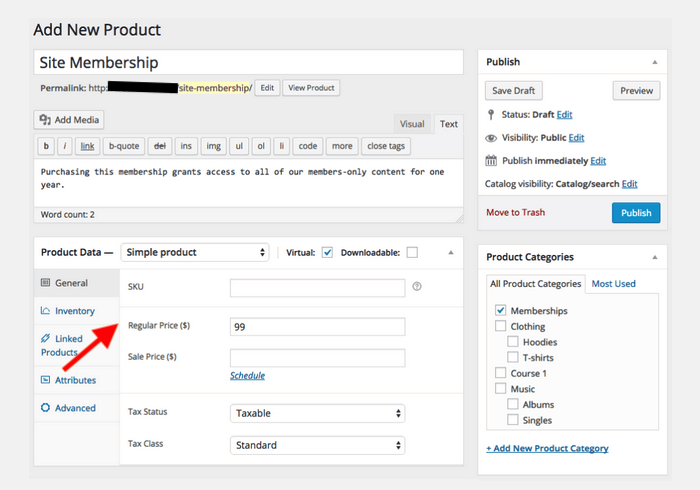
First, open the Products section from your admin dashboard and add a new one.
Set the membership cost in the Regular price box.
Click the Attributes section.
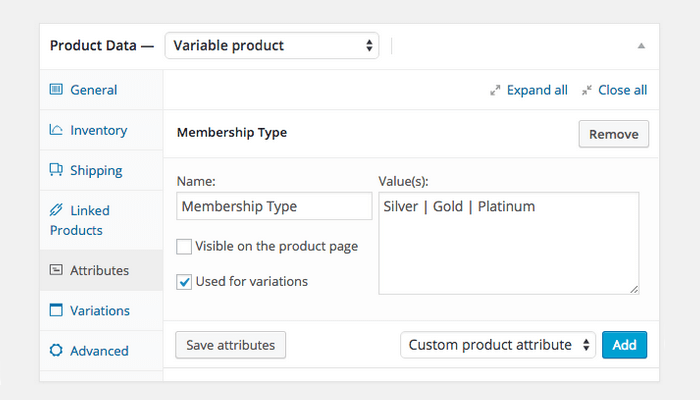
Fill in the Value(s) of your desired membership plan.
Add New WooCommerce Membership Plan
To create a membership plan in WooCommerce, you can go to Memberships under WooCommerce and select Membership Plans then click Add Membership Plan. As a result, the membership product you’ve just created will become a true membership now.
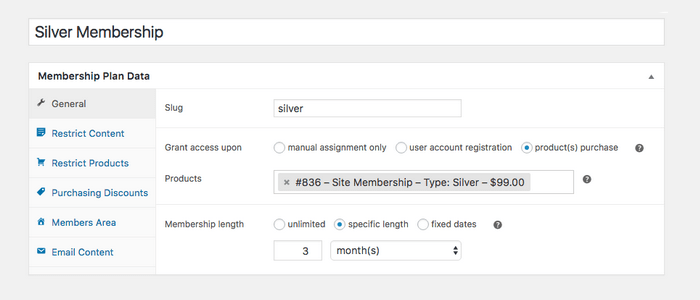
In the product general settings, you should grant access to users that buy specific products. It’s necessary to define the membership duration too.
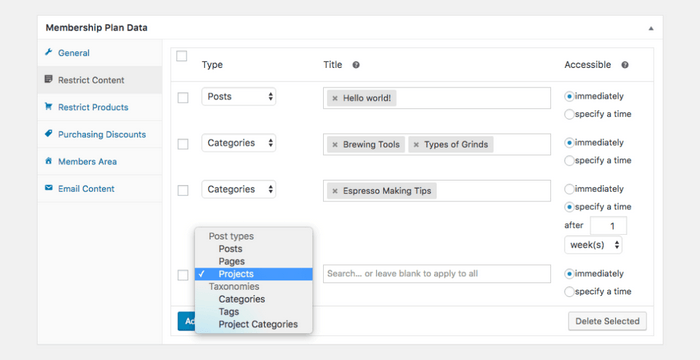
Then, head to the Restrict Content section and choose the type of content you want to grant access to, such as posts or categories. For each content type, enter your page title in drop-down lists. Once completed, remember to save your changes and update the page.
You can do the same for other product pages. As a result, your entire WooCommerce store becomes private now. Only logged-in members with the right subscription plan can have access and make purchases.
Restrict WooCommerce Access via Paid Member Subscriptions

Paid Member Subscriptions plugin, without a doubt, stands out to be an experienced veteran in restricting access to your premium content. It integrates seamlessly with WooCommerce to easily secure your shop page and any product pages.
The plugin works based on membership plan rules. In other words, visitors or non-members won’t be able to view or buy your products unless they log in under the correct roles. It also allows you to discount prices for different subscription plans.
To get started using Paid Member Subscription, the following guide will show you how.
Step 1: Install Paid Member Subscriptions Plugin
Go to Plugins > Add New in your WordPress dashboard. After that, type “paid member subscription” in the keyword box. Click Install Now and activate the plugin.
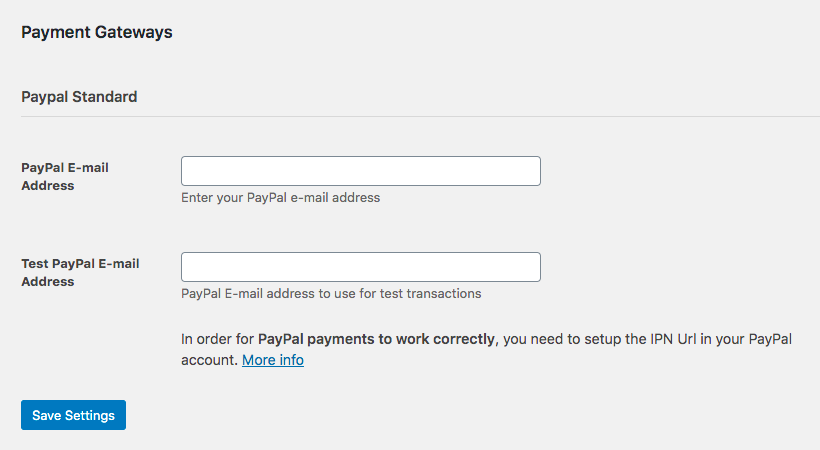
Once you’ve activated the plugin, you have to complete the payment gateway settings by entering your PayPal email address.
Step 2: Create Subscription Plans
After having the plugin activated, you must create membership levels and core pages for users to register, manage their accounts, and log in.
Hover the Pages section in your WordPress navigation menu, click Add New, and give the new page a name.
Next use the included shortcodes for [pms-register], [pms-account] and [pms-login] to create your necessary pages.
Then go back to the Subscription Plans in the plugin menu to fill in the subscription plan details with the price, status, and user roles. Remember to save your subscription plan before adding a new one.
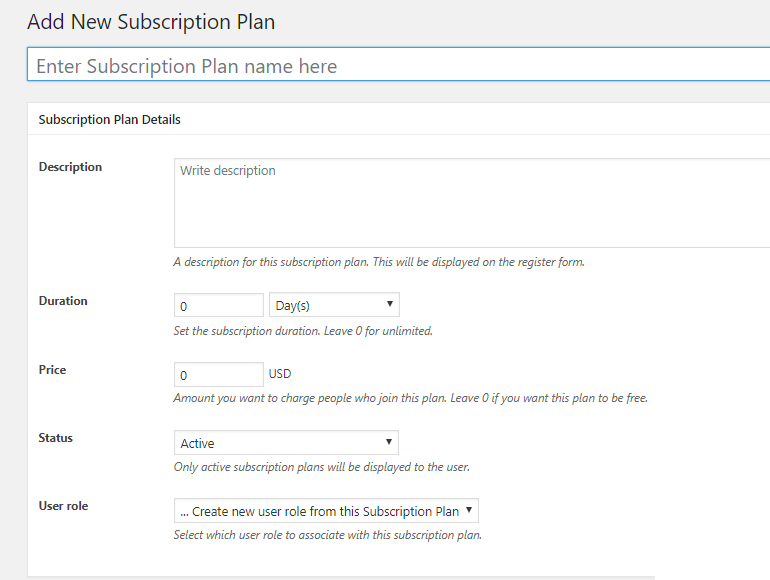
Generally, you should add a Free plan along with Pro or Gold and Silver plans. For the Free plan, simply leave the Price section empty.
Step 3: Restrict Access to WooCommerce Shop Page
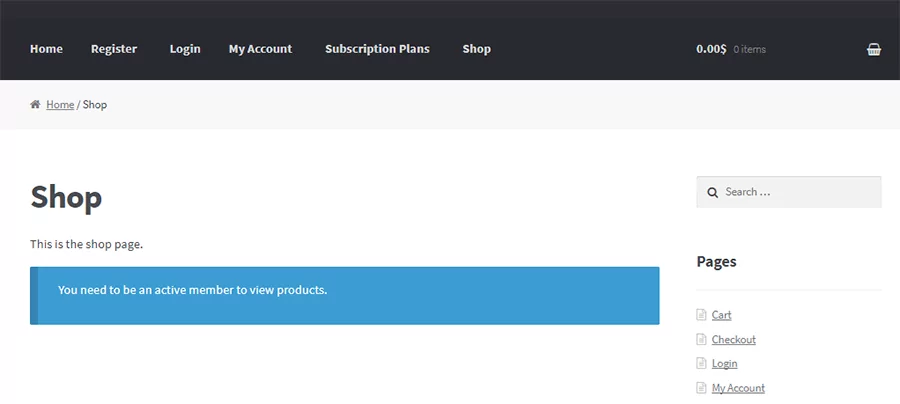
We want to keep your WooCommerce Shop page out of prying eyes but members. Only logged-in users having subscribed to subscription plans are able to access it. This is how the shop page appears when unauthorized visitors and non-members access it:
To do so, you can find and edit the Shop page under Pages. Move to the Content Restriction section newly added to the bottom of the page:
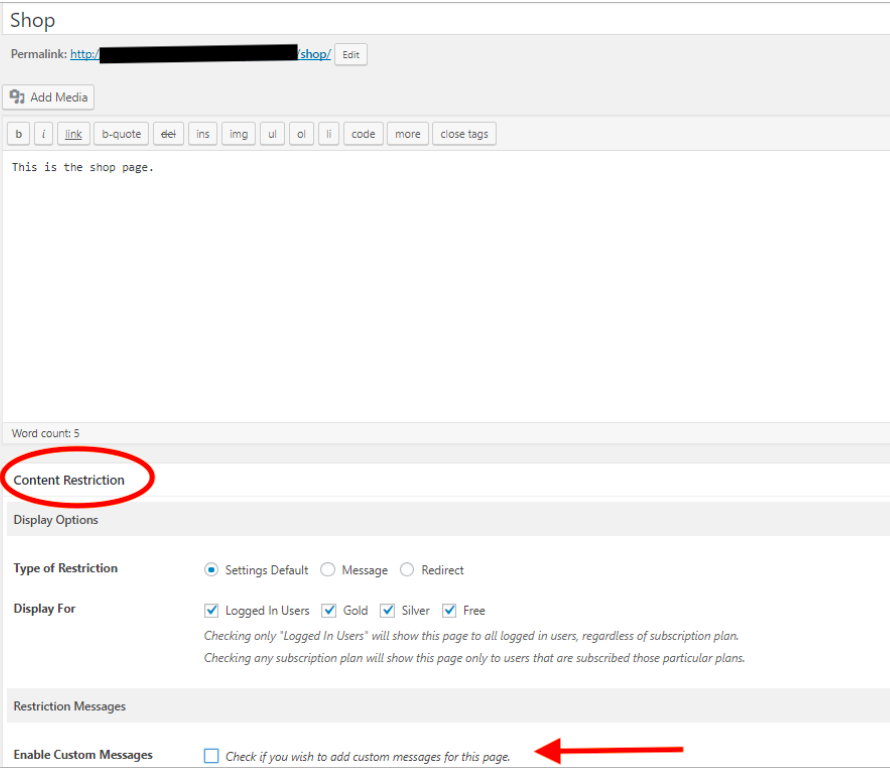
Select the roles you want to grant access in the Display For row (note – you can choose multiple plans at a time). and then adjust the message displayed on the shop page as your wish.
From the example above, users of all 3 subscription plans: Gold, Silver, and Free are authorized to access your WooCommerce shop page after logging in.
Ready to Create Your Own WooCommerce Private Shop?
Having a lot of visitors coming to your WooCommerce online store shows a good sign of increasing conversion rates. However, sometimes, it’s also essential to make your products and shop page private. You can use it as a way to display customer-specific products or sell premium goods to VIPs.
There are 3 ways for you to apply when it comes to WooCommerce products and shop page restriction. PPWP Pro lets you password protect product pages with just a snap. You need to integrate it with WooCommerce Shop Page Protection in order to cover your main shop page with a password form.
Along with that, WooCommerce Memberships and Paid Membership Subscriptions (a great free option) also stand out to be the simple yet effective solution to limit access to your private store by creating membership areas.
Still have a question about how to create a WooCommerce private shop? Leave a comment below to let us know!


