Caddy Smarter Side Cart for WooCommerce

WooCommerce is one of the most popular e-commerce plugins for WordPress with over 5 million active installations at the time of writing. The plugin helps you to convert a mere WordPress site into a powerful e-commerce platform perfect for any online store you have in mind.
It ships with a ton of features including shop, product, cart, and checkout pages. You also have automatic tax and shipping calculations, among other things. That, plus you have a ton of powerful add-ons and extensions at your disposal to supercharge your WooCommerce store in ways unimaginable.
One such extension is the Caddy Smarter Side Cart extension for WooCommerce by the folks over at Tribe Interactive, LLC., the same brains behind Klaviyo Toolkit and LightSpeedWP. The plugin supercharges the WooCommerce cart functionality offering you exactly what you need to boost your conversion rates and sales.
In today’s post, we take the Caddy WooCommerce cart extension for a ride. We will look at the features that make the plugin a must-have tool for your WooCommerce store. Later in the review, we will install the plugin and test-drive a couple of the features.
Without further ado, let us roll up our sleeves and get down to business because there is a lot to cover. Pour yourself a mug of coffee (or whatever floats your boat), and enjoy the post all the way to the end. Remember there is a free Caddy Site Cart lite version available, meaning you have nothing to lose should you decide to give Caddy a try.
What is Caddy for WooCommerce?
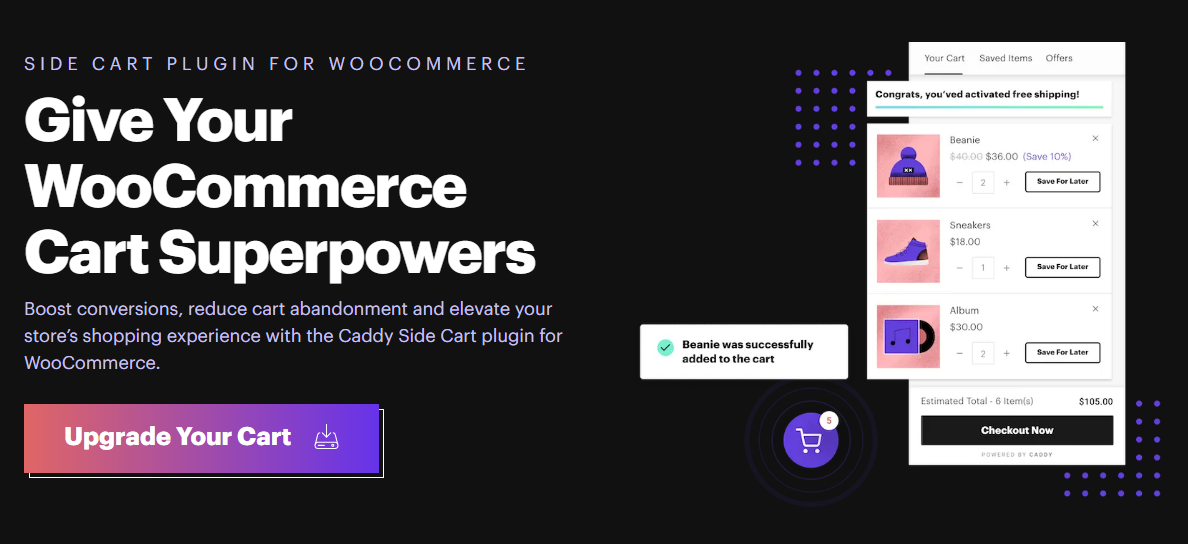
So, ladies and gents, what is this animal we call Caddy? And what does the tool do, exactly? Do you even really need it? And why do you need it to begin with when WooCommerce comes with an inbuilt cart? Well, let us learn more about Caddy (nice title, btw), and what the plugin does.
Caddy is an extension. An extension is a plugin that you use to add extra functionality to another plugin. In this case, Caddy adds extra features to the WooCommerce e-commerce plugin.
Are you following?
Specifically, Caddy is an extension to improve the WooCommerce cart functionality. As per the developers, Caddy allows you to “…give your WooCommerce cart superpowers.” It allows you to turn the bleak WooCommerce cart feature into a fantastic and fun shopping experience for your customers.
The Caddy WooCommerce cart allows you to add a side cart that is visible site-wide. Whenever a customer adds a product to the cart, it pops into view – and here is where things get interesting!
Here’s a brief video from the official demo to show you what happens.
Basically, you’re simply making the cart-checkout process more interactive for your users. The Caddy for WooCommerce extension helps you to:
- Boost conversions and grow your sales
- Improve your shopping experience
- Turn shoppers into loyal fans
If you’re looking for a solution to boost sales on your WooCommerce store without breaking a sweat, Caddy never disappoints. It offers you a ton of features as you’re about to learn in the next section. On top of that, Caddy is lightweight and coded to the latest web standards.
Plus, people are excited and raving about Caddy as one of the best tools in the market. Here’s one:
I think this plugin has potential to be the best Cart plugin on WooCommerce. Seems as its a relatively new plugin I can see this getting better and better. It’s simple to use, looks good on all themes and support is great too. Keep up the good work guys. – Jake, WolfStack
Caddy WooCommerce Cart Features
I always chirp that a plugin is as good as the feature it offers. So, what does Caddy offer in the features department? Let us learn more. Here is a quick list of what to expect:
- Free shipping meter: This feature lets customers know how much they need to add to their cart to qualify for free shipping. It motivates customers to complete an order and/or buy more products from your store in a single transaction.
- Up-sell Recommendations: Up-selling is a great way of increasing your sales. Thanks to Caddy, shoppers will see targeted/related product recommendations every time they add a product to their cart.
- Built-in Wishlist: I can’t tell you how many times I have used this feature when shopping online – and it works. Since I can save products and come back later to complete the transaction. Caddy allows your shoppers to save products for later, which increases your conversions. You also get save-for-later buttons on your shop and single product pages.
- In-Cart Coupon Offers: A well-timed coupon could help you close the sale at the last moment. Caddy offers you the ability to add in-cart discount codes easily.
- Advanced Customizations: Caddy ships with a ton of customization options. You can change the position of the cart button, choose from 7 different cart icons, and change the colors to match your site, among other things.
- Cart Notices: You can easily display notices whenever a shopper adds an item to the cart or their wishlist.
- Optimized for Speed: Caddy uses minimal code, best coding practices and is optimized for speed.
- Mobile-optimized: That means it’s responsive and mobile-friendly, which makes it perfect for whichever device the shopper is using; smartphones, tablets, and desktops (extremely important in today’s world where so many people use mobile devices as their primary way of accessing the web).
- Translation-ready: Caddy WooCommerce cart plugins is translation-ready. At the time of writing, it’s available in English and Spanish, but more languages are coming soon.
- Detailed documentation.
- Amazing support from a passionate team of WooCommerce developers.
Thanks to these features and other options, Caddy is the perfect WooCommerce extension to boost conversions, reduce cart abandonment and elevate your store’s shopping experience.
But how much does all this awesomeness cost? Well, you will be glad to learn that it won’t cost you an arm and leg to add Caddy to your WooCommerce store.
Caddy Smart Side Cart Pricing
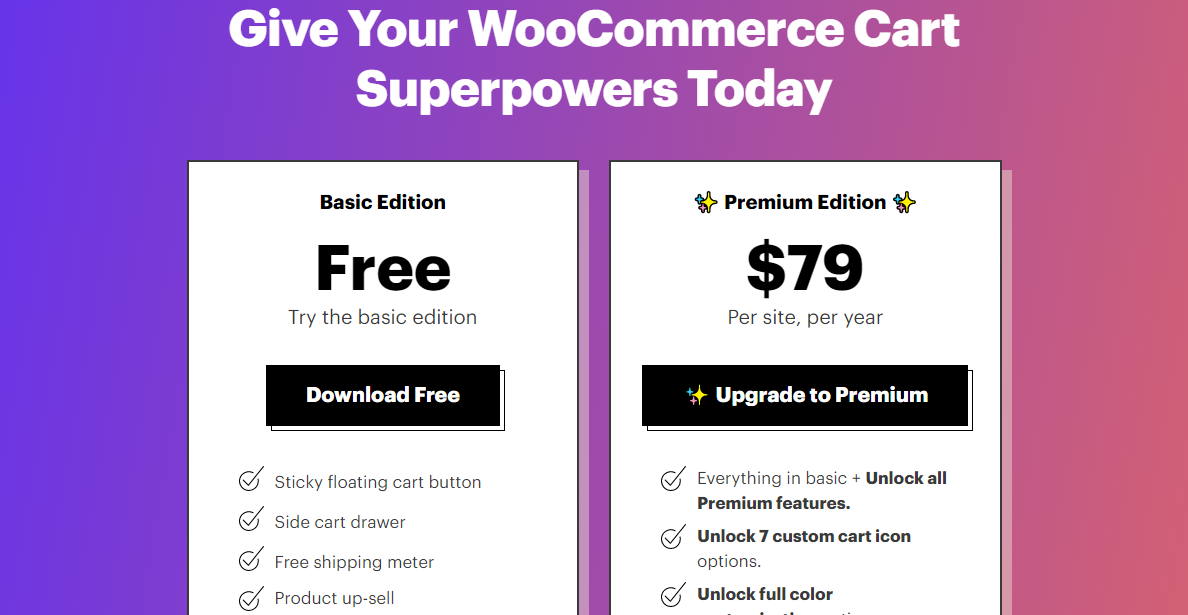
Caddy comes in two flavors. The free basic edition, which you can find on WordPress.org (or just by searching “Caddy” when adding a new plugin from your WordPress dashboard). And a Premium edition that you can only purchase from the Caddy website, which is currently priced at $79 per site per year.
The free edition offers you a taste of what Caddy can do for your WooCommerce store. This includes features such as a floating cart button, sticky side cart, coupons, a free shipping meter, product up-sells and the ability to save for later.
The premium version offers you everything in the free version plus some extras such as color customization, 7 cart icons, in-cart coupon promotion, exclusion rules, and added cart positions, among others. Premium plans also include early access to new features – so your shop can be on the cutting edge of side cart tech. In addition, unlimited professional support makes the premium offering quite attractive.
For our review, we’ll mainly be going over the premium version, so look forward to that. But as usual, we always recommend choosing a pricing plan that meets your business needs. Plus, as mentioned, you can always install the free version to try out Caddy and see how you like it (though we have a feeling you definitely will).
Moving on. Let us now install and test drive the Caddy WooCommerce Cart.
How to Install the Caddy WooCommerce Cart

Caddy is a smart side cart for WooCommerce that’s worth every penny. The free basic edition is available at WordPress.org, meaning you can install it right inside your WordPress admin dashboard.
Let’s install the free basic edition first.
Installation Notes: You must have WooCommerce for Caddy to work. Also, you must first install the free version before installing the premium edition of Caddy.
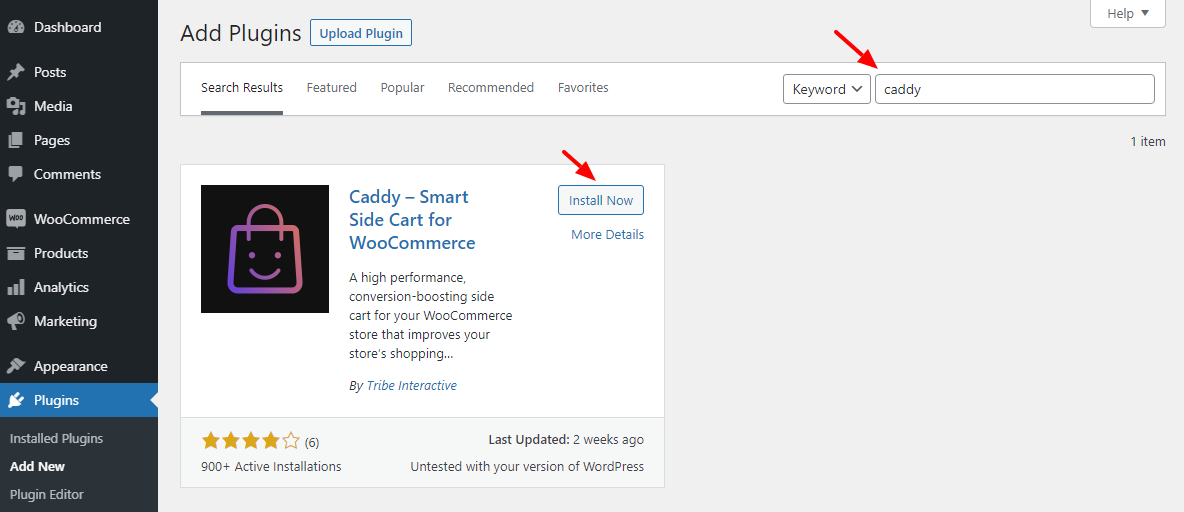
Navigate to Plugins > Add New, then enter Caddy in the keyword search box. Your very first result should be the plugin created by Tribe Interactive, so go ahead and click on the Install Now button and activate the plugin to set things in motion.
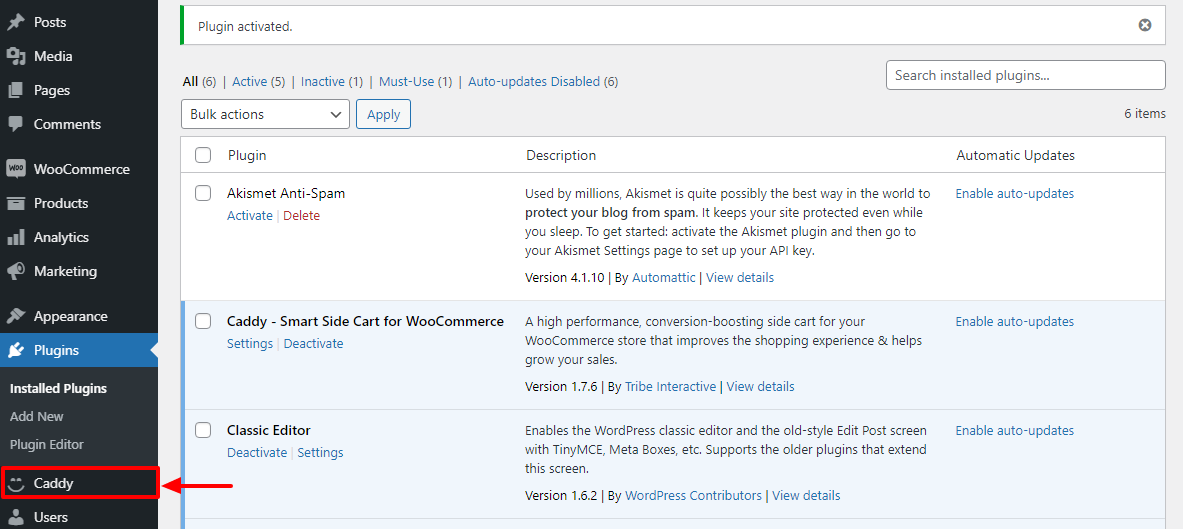
Activating the plugin adds a Caddy item to the WordPress admin menu, as shown below.
Now, you need to configure a couple of simple settings and your site cart will be ready for customers. At this point, you have complete access to all the features in the free basic edition. To check what you have, navigate to Caddy > Settings.
Doing so leads you to the Caddy dashboard but, as you can see below, you just have a few basic settings in the free edition:
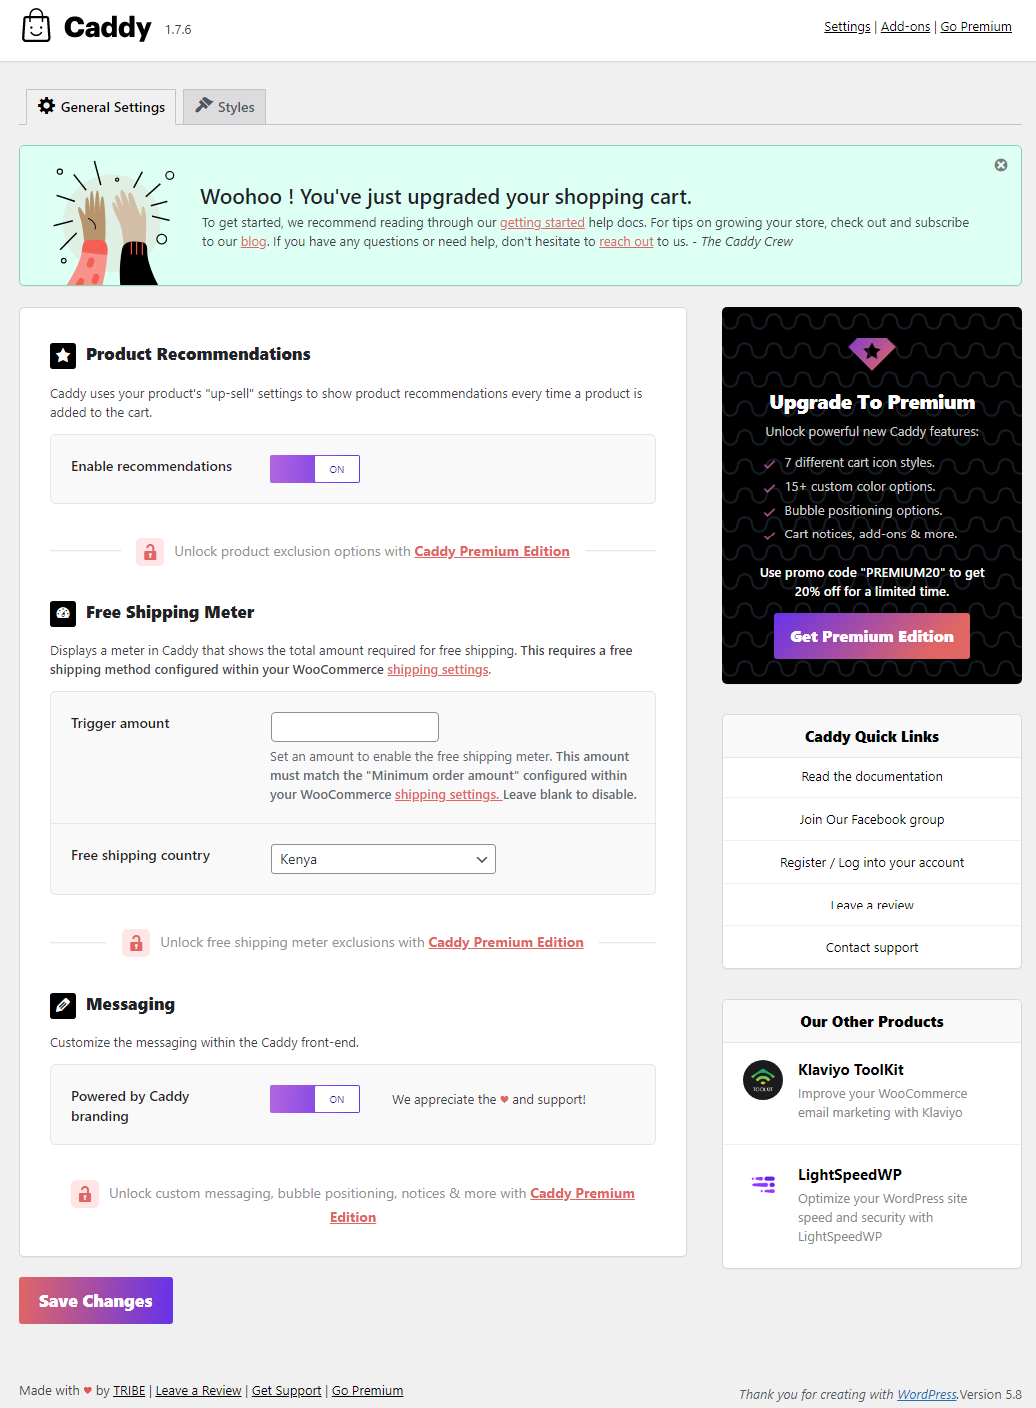
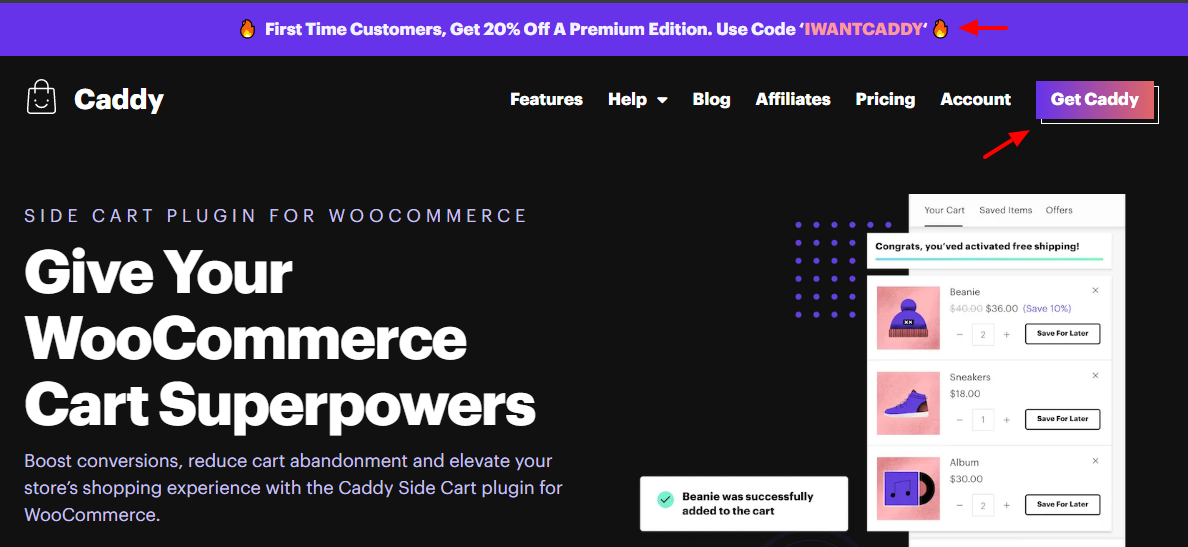
To unlock the full power of Caddy, let us go ahead and install the premium version. Order and download your premium copy of Caddy from the official Usecaddy.com website.
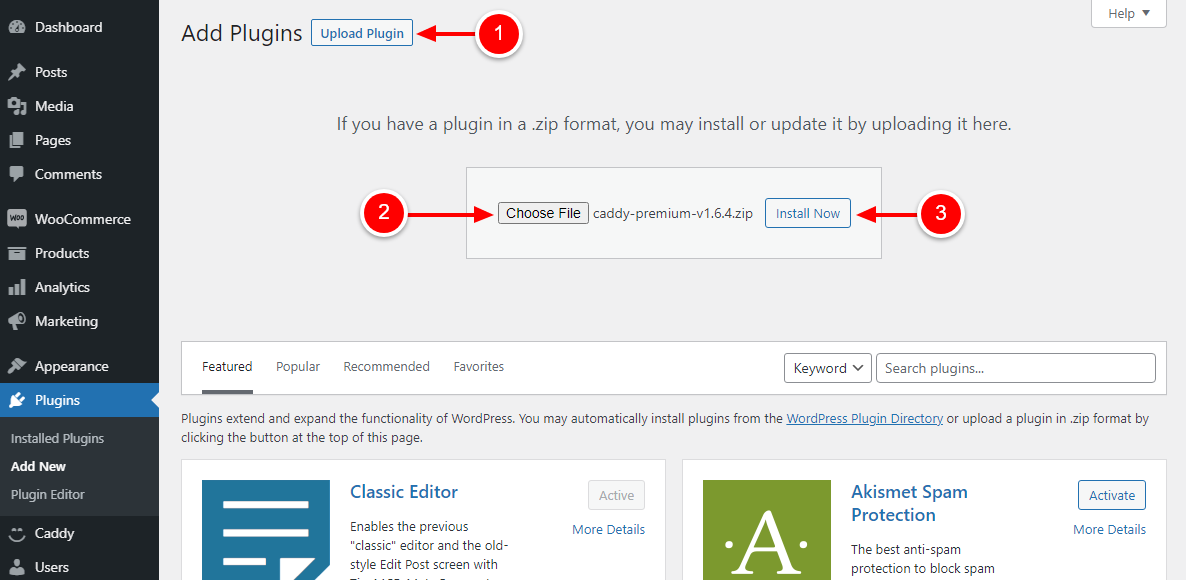
Next, log in back to your WordPress dashboard and navigate to Plugins > Add New. After that, click Upload Plugin, choose the Caddy Premium .zip file from your computer, and click the Install Now button, as we highlight in the screengrab below.
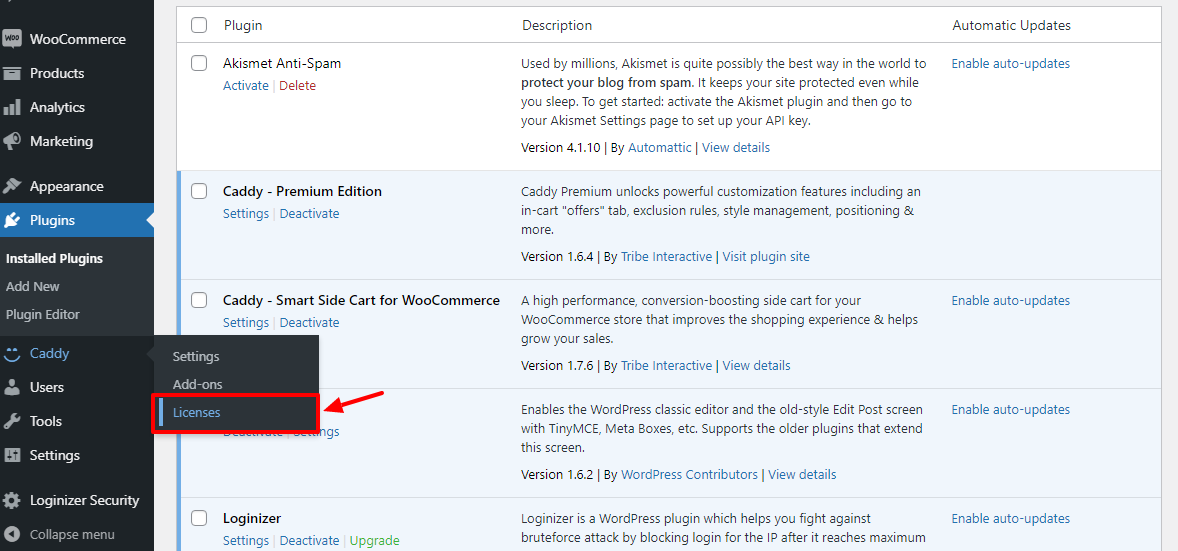
Next, activate Caddy Premium and navigate to Caddy > Licenses, as seen below.
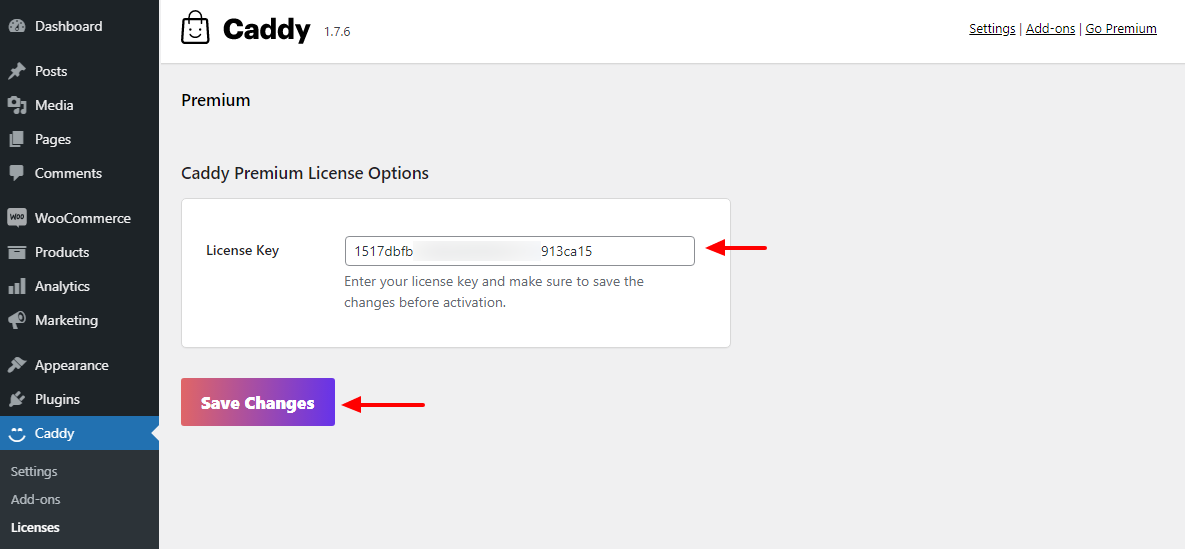
Next, copy-paste in the license key and click Save Changes:
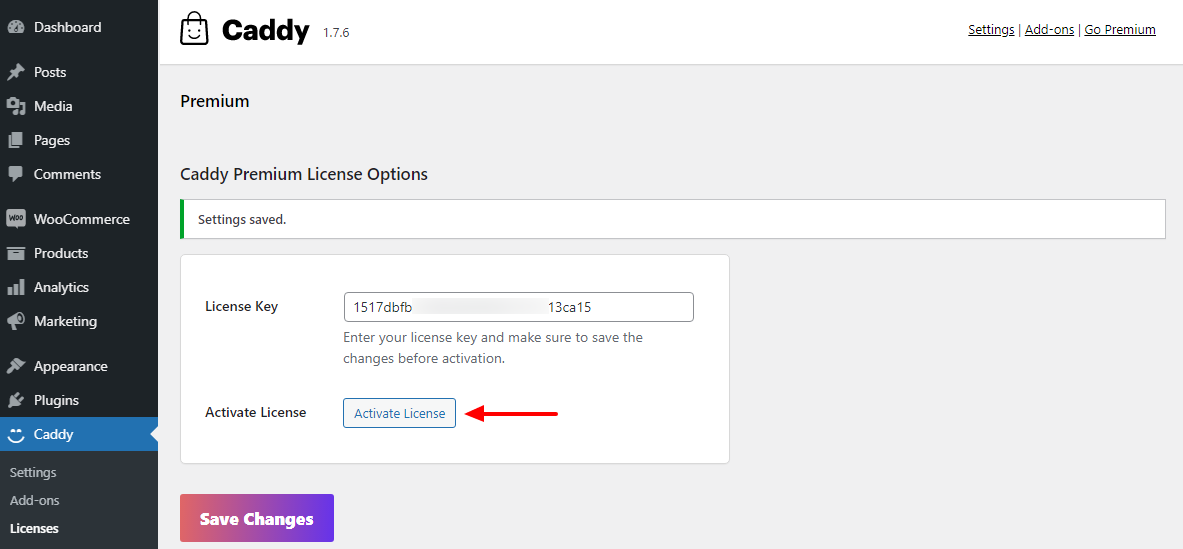
Next, click the Activate License button, as shown below.
Now that your license is active, let us see what the premium edition has to offer. Navigate to Caddy > Settings, which leads you to the premium Caddy dashboard seen below.

As you can clearly see, the premium edition offers much more features than the free edition. The best part is you can configure all Caddy settings from the above screen. It’s straightforward and intuitive, so you should be up and running in minutes.
Personally, I find the ability to enable product recommendations extremely helpful. While WooCommerce does have an upsell functionality built-in, it’s cumbersome. You have to remember to add each item individually when creating a new product (and also go back to each old product you have to upsell your new one). But with Caddy the process is automatic, since if no upsells are defined it will show related fallback products for you. Choose to use other products from the same category or your best sellers. You can also set the plugin to do nothing if you want to skip upsells completely.
The built-in wishlist is also really nice. With a click you can enable a “Save for Later” option for your customers in their cart, on your main shop page and/or on product pages.
After tinkering with the settings for about five minutes, this is what I got when I added a product to the cart on our test site:
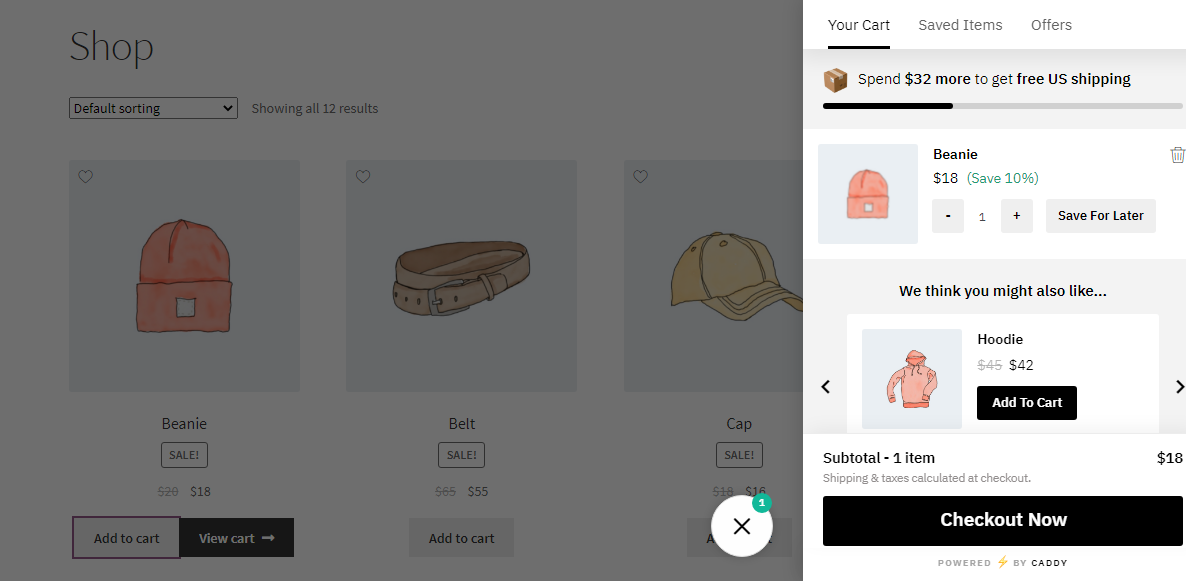
As simple as A, B, C. Honestly, I didn’t struggle one bit because the settings involve clicking/toggling a few buttons and you’re done.
Setting up Caddy smart side cart for WooCommerce is incredibly easy. You don’t need anybody to help you. If you need help, however, feel free to check out the detailed Caddy documentation on the official website.
Final Thoughts on Caddy
WooCommerce is a powerful e-commerce platform for WordPress. It offers you a ton of features to create the online store of your dreams. Still, the checkout process leaves a lot to be desired. It’s rigid and doesn’t inspire buyers.
An extension such as Caddy supercharges the cart functionality allowing you to boost sales, improve user experience and keep your customers coming back. It adds an element of interactivity to the checkout process, which makes shopping on your site fun and engaging.
I also find Caddy to be a great deal. Caddy includes tons of great sales boosting features for a lower price than other premium WooCommerce extensions and add-ons (for example, did you know that wishlist add-ons are going for $79-95 per year… for just a wishlist?!). Instead of purchasing a bunch of different pricey and potentially incompatible plugin to improve your WooCommerce cart, just go with Caddy. It’ll save you time and money in the long run.
I’m glad I found this plugin. It looks very well, works really fast and does everything without hiccups. I hope it will be found by many users and therefore you will maintain it also in the future. Thanks. – Janke
Overall I had a lot of fun playing around with Caddy, and I hope you will too. Have you tried Caddy? If so, what did you find out? Other than that, please let us know your thoughts in the comments below.


