How to Add Custom Backgrounds to WordPress

WordPress is both a blogging platform and content management system (CMS). This is surely because the platform is easy to learn, use and customize. I mean, you can turn your website whichever way you desire without trying too hard. You can even add different backgrounds to your WordPress posts and pages, which happens to be the subject of this guide.
If you’re looking to add some color and style to your WordPress posts and pages, this guide delves into the topic using a two-pronged approach. First, we will add different backgrounds to WordPress posts or pages using CSS and a simple PHP function, but if this is not your cup of tea (let’s say you’re the perfect beginner and code scares the daylights out of you), we will offer a couple of WordPress background plugins to help with the process.
Either way, you ought to have a great time since this is a relatively easy project. Ready? Let’s take the plunge and look at five ways you can add custom background to your WordPress posts and pages.
Custom Backgrounds with Gutenberg
In case you’re not familiar, Gutenberg is WordPress’ default content builder that you can use to design layouts for your posts, pages and now your header/footer. So it should make sense that there are built-in options for your backgrounds as well.
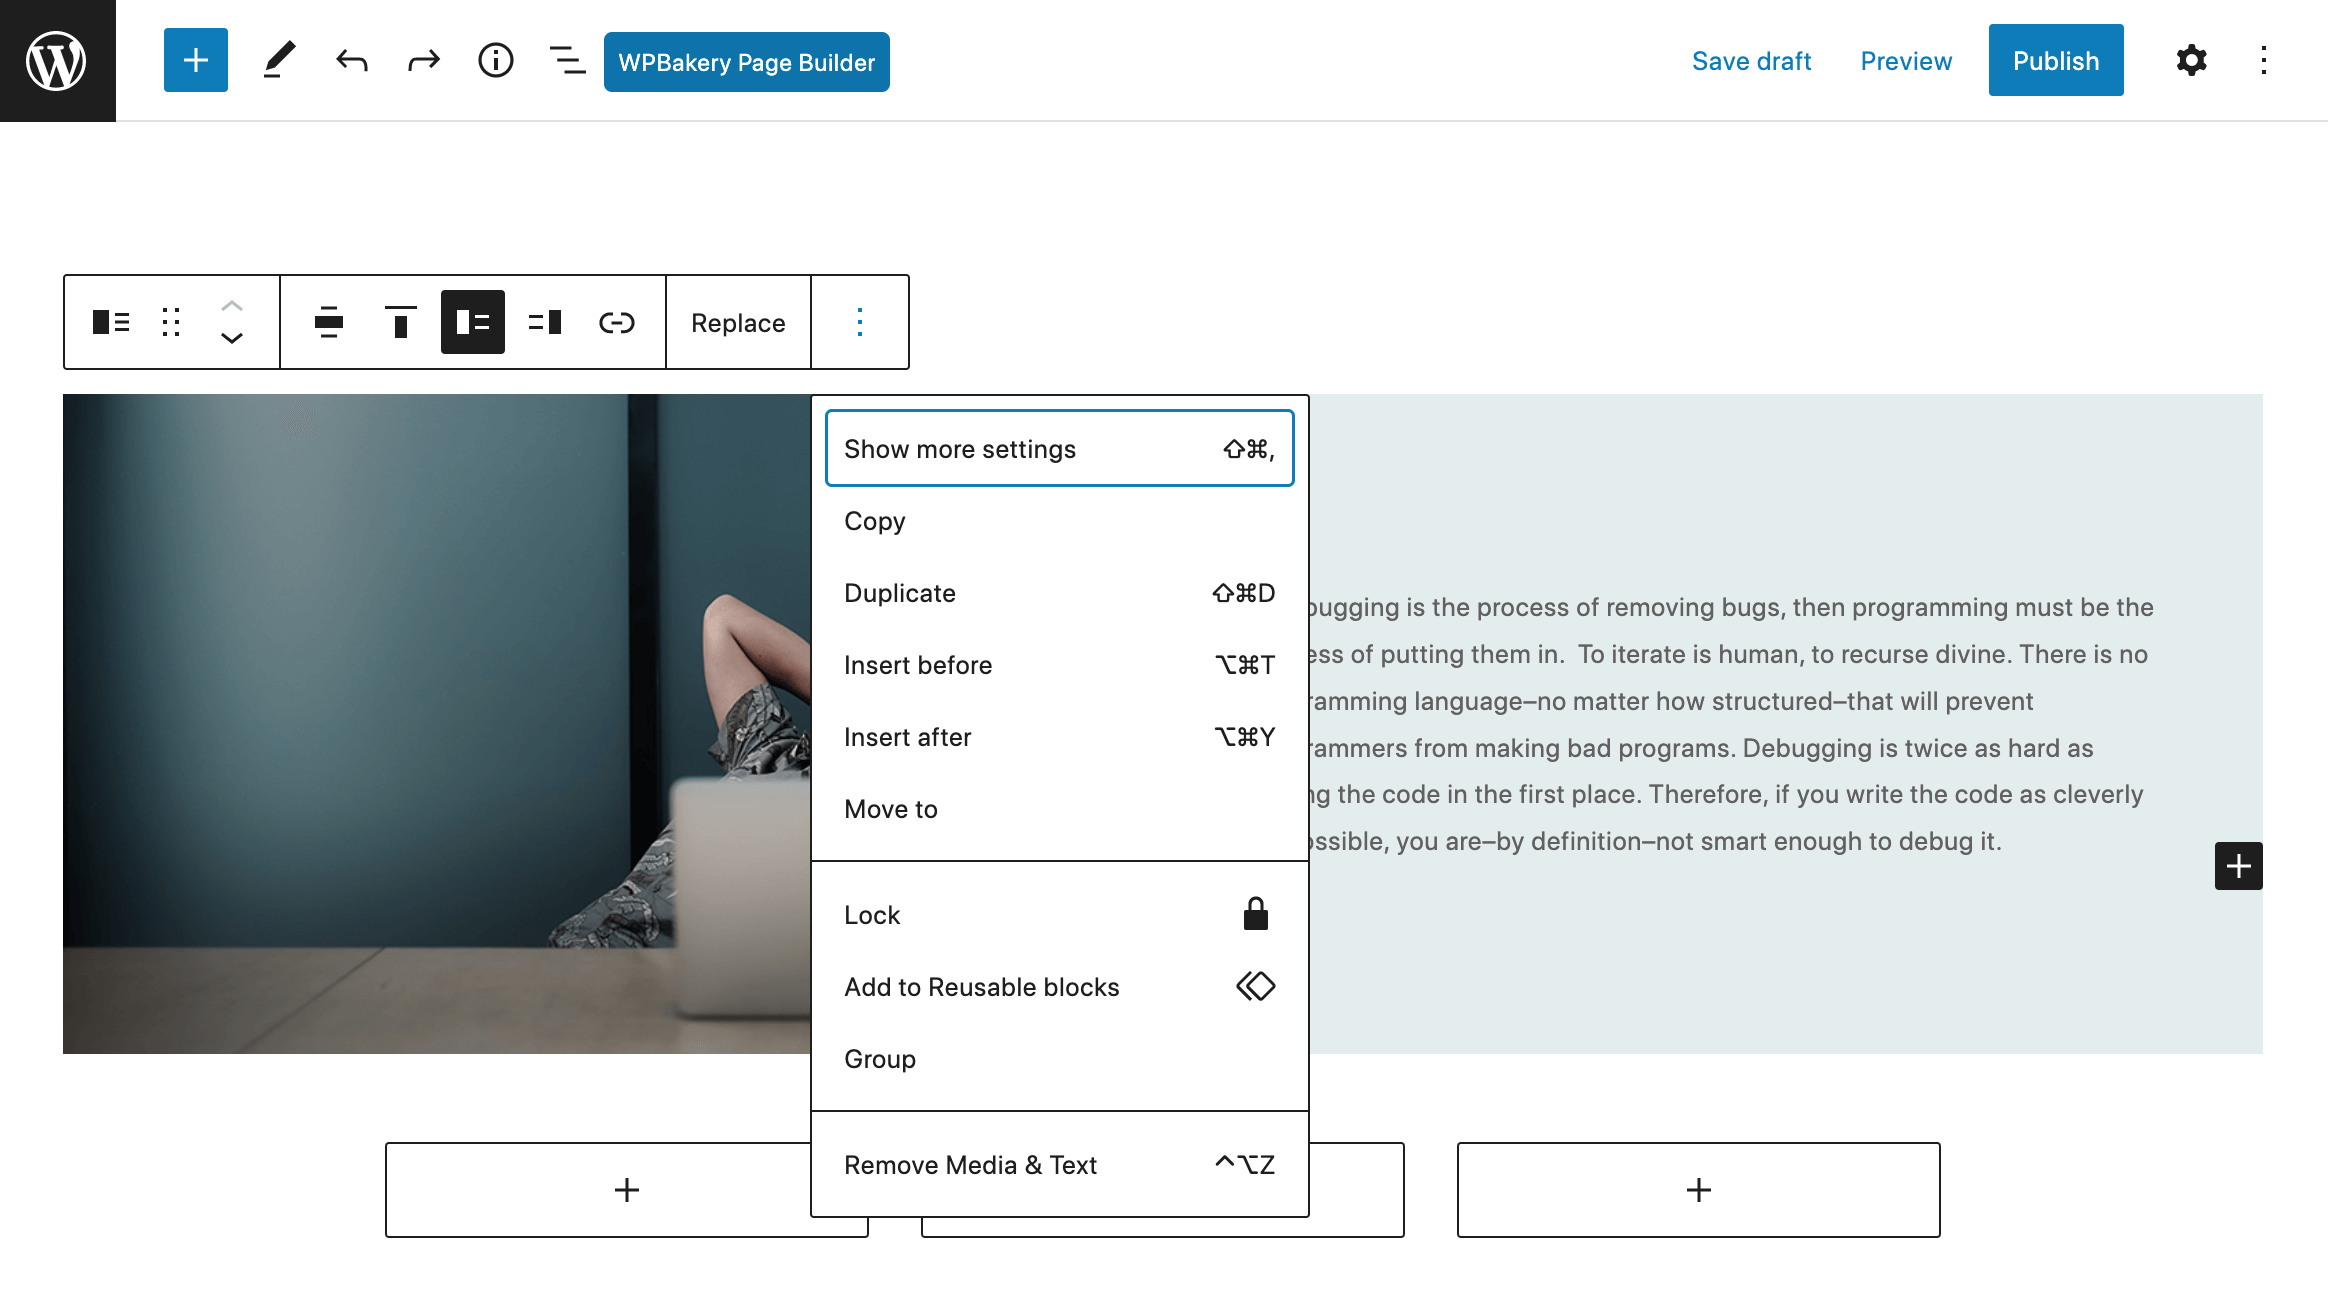
To add a custom background with Gutenberg simply click on the block that you want to edit. Then click on the icon with three stacked dots and select the option to “Show more settings”.
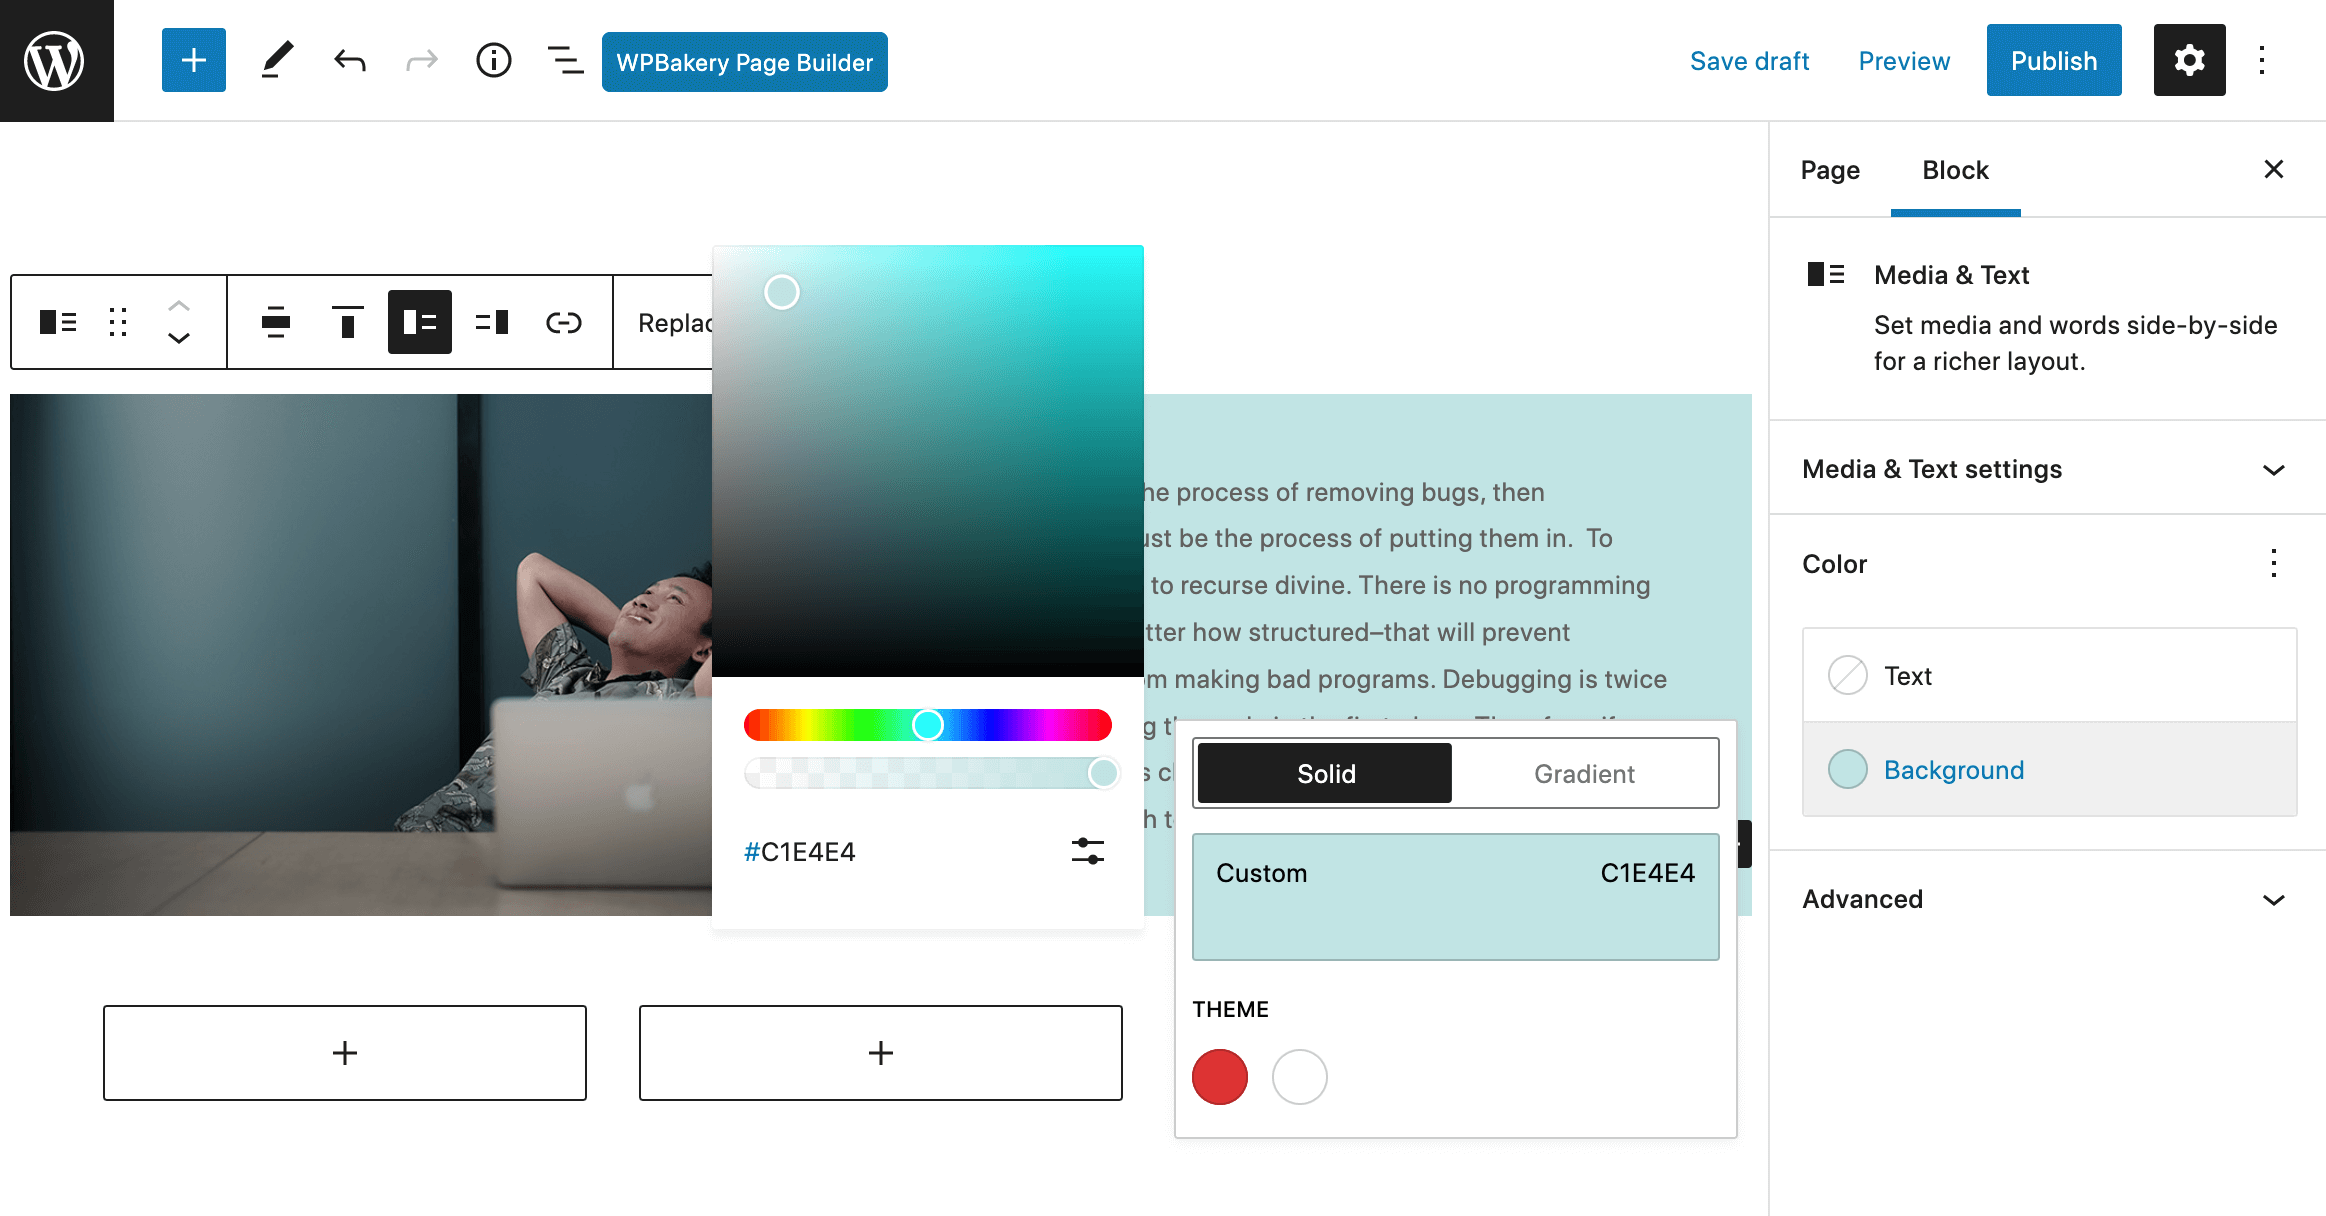
This will open a sidebar with loads of formatting options for your block. In the “Color” section you should see an option for “Background” color. Click and then use the color picker to select the background you’d like to use. Or use presets that coordinate with your Theme colors or built-in gradients.
Now, if you’re looking for a background image you will specifically need to use the “Cover” block.
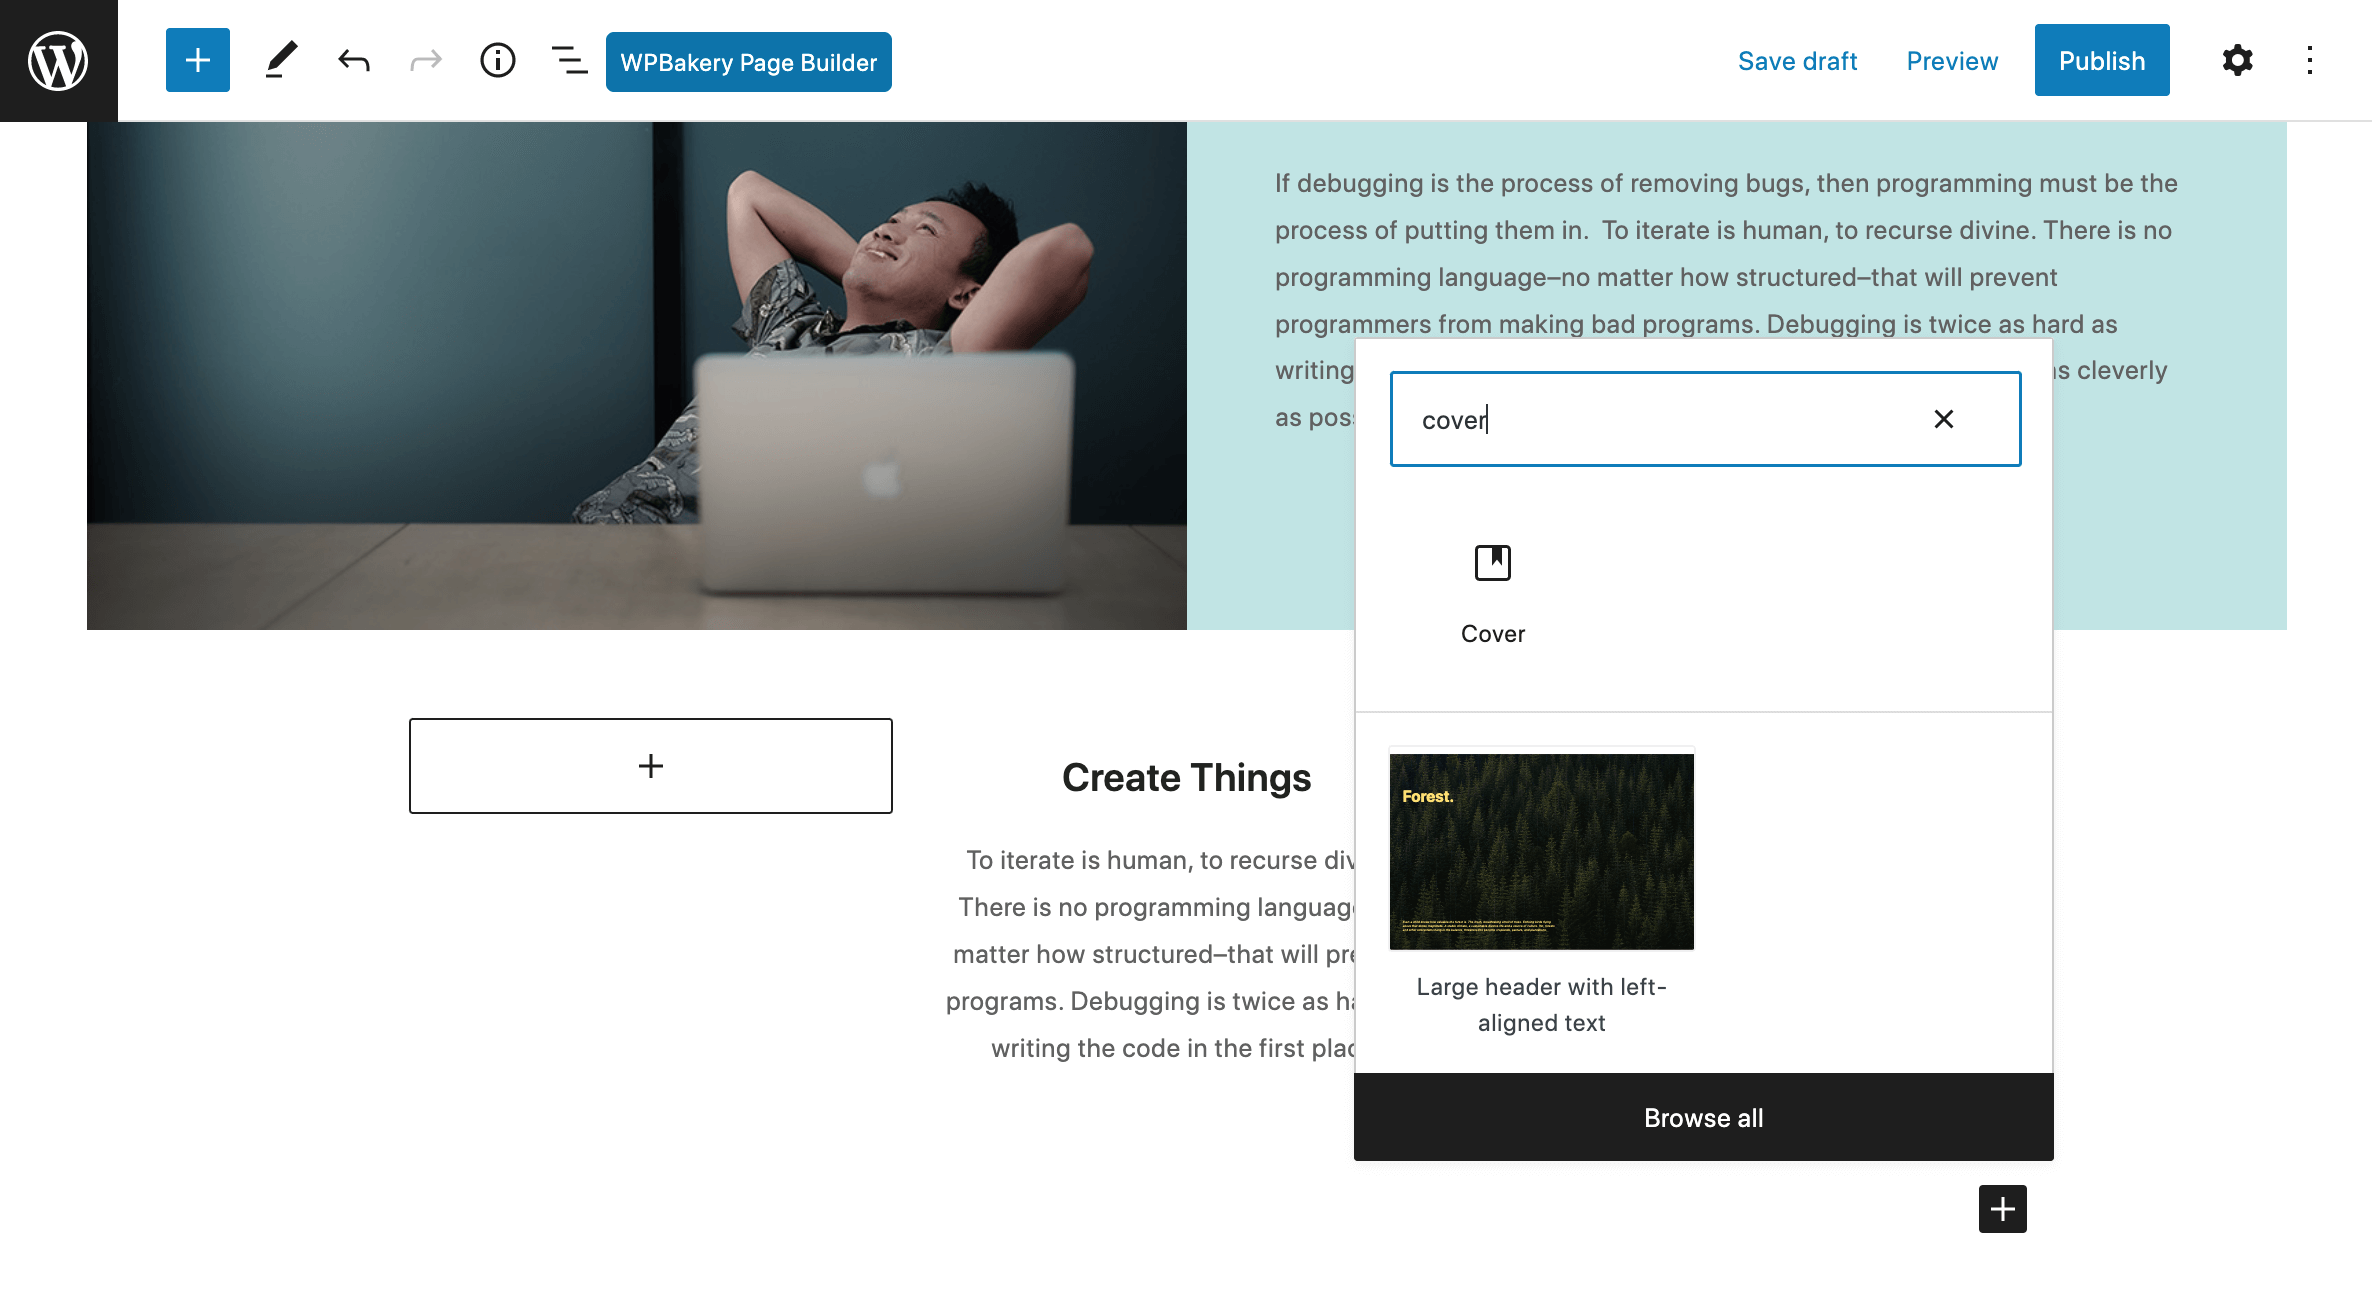
So, go to add a new blog and search for “Cover” and select this block.
Next you’ll be prompted to upload an image or select one from your Media Library. Choose your image, then add more blocks inside of your “Cover” block to finish your section.
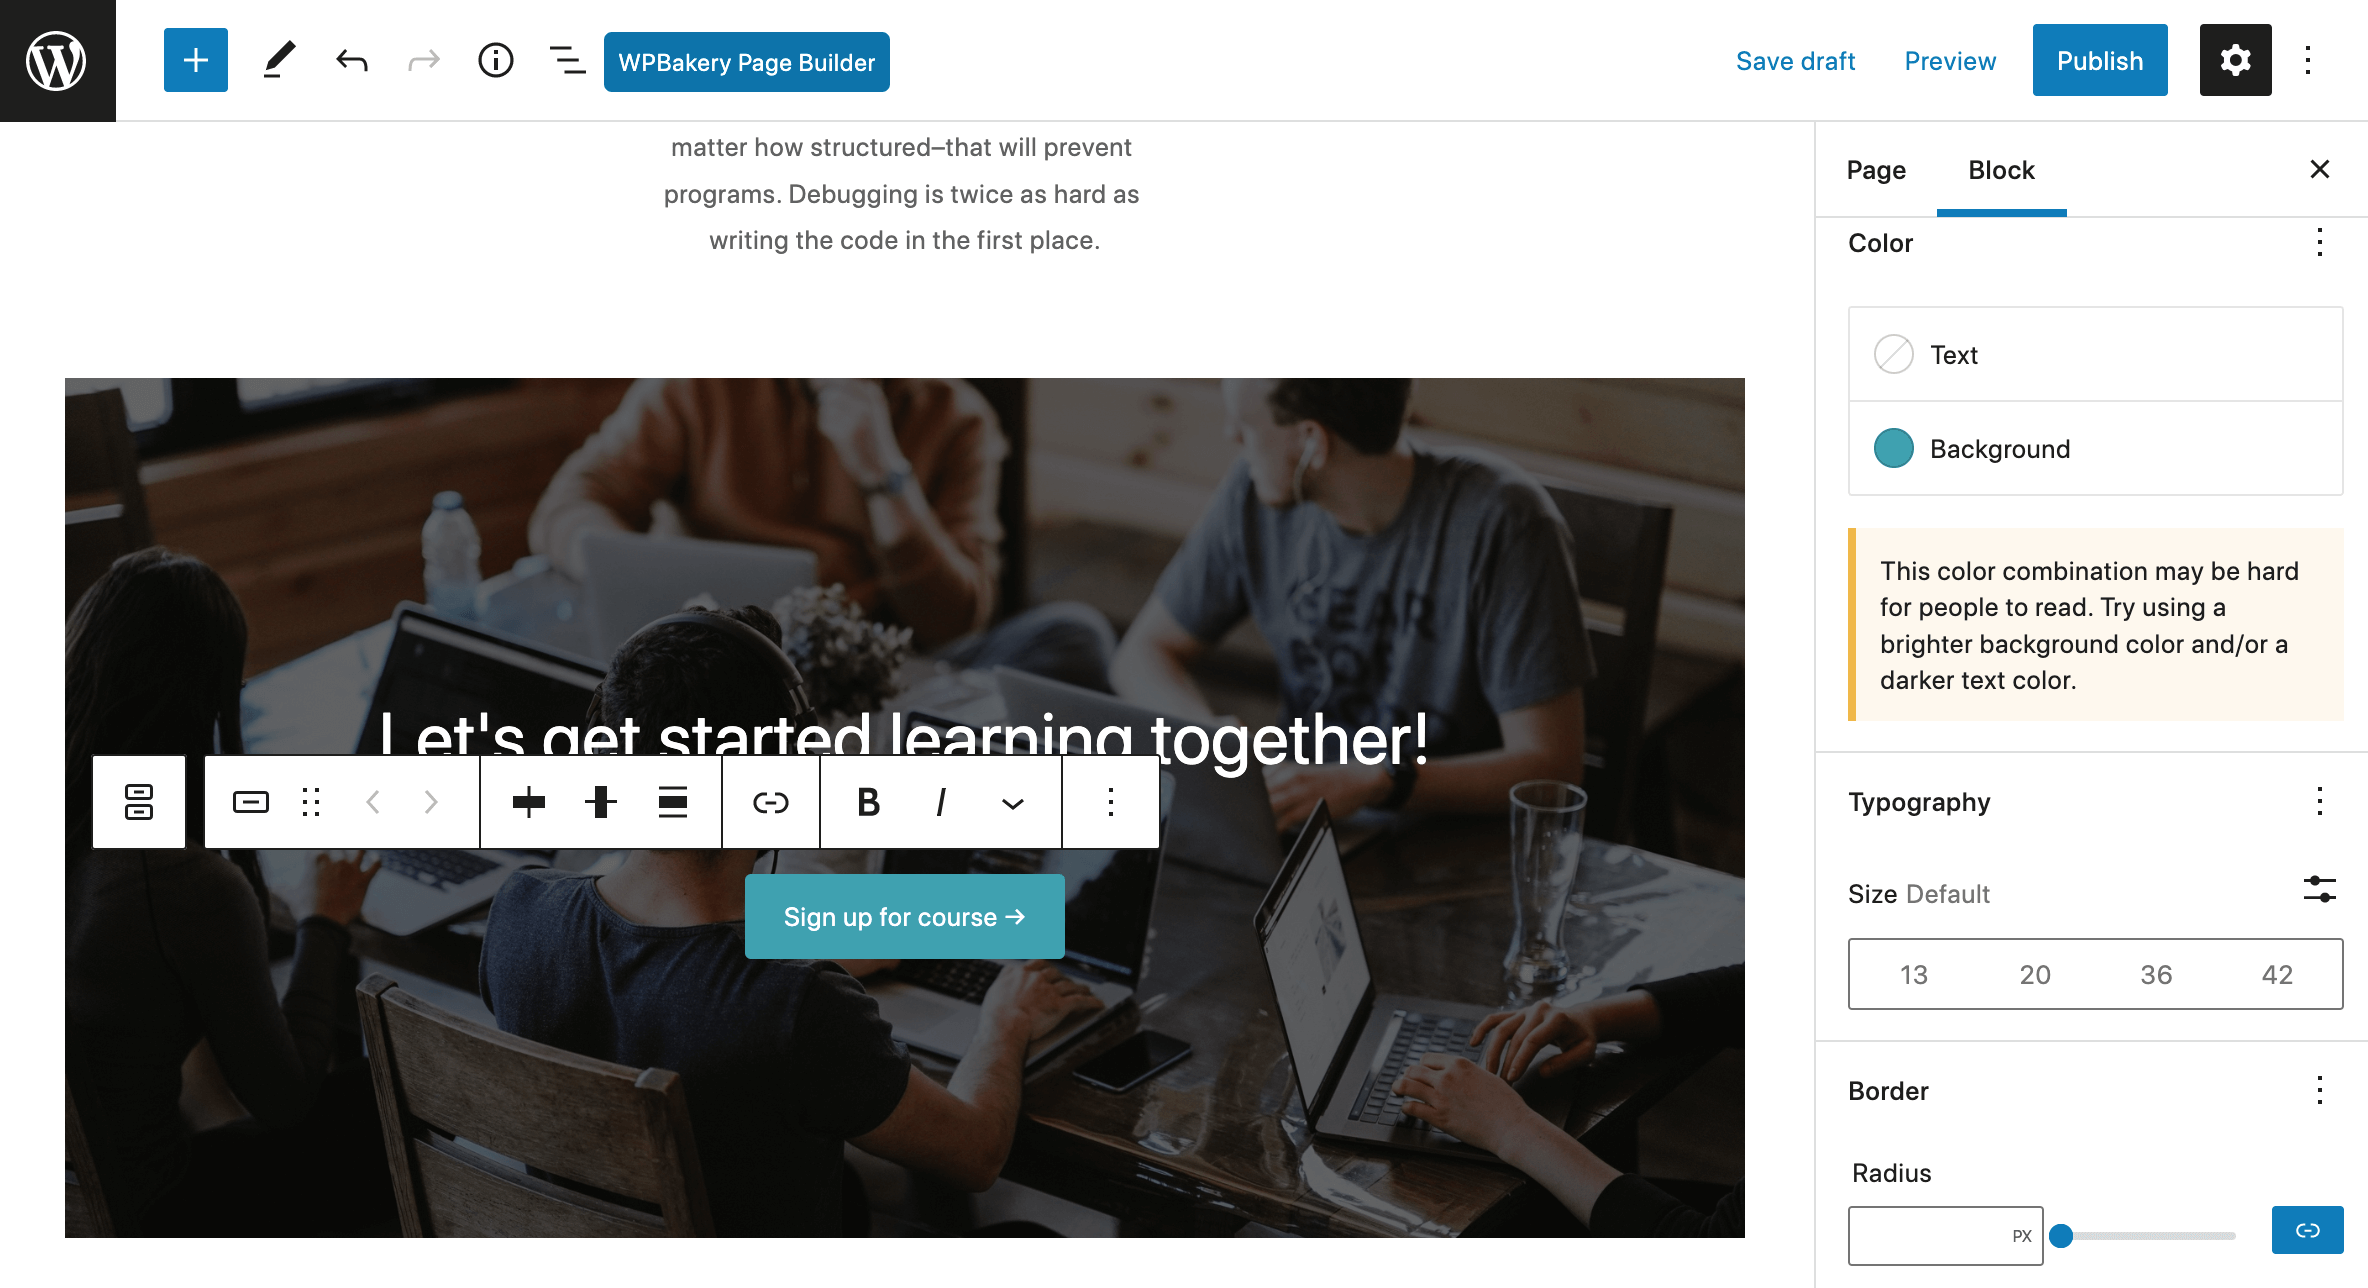
A neat feature built into Gutenberg is an accessibility test based on colors. As you can see in the image above the color selected for our button may not contrast enough with the background image, so Gutenberg warns that we may want to try a different combination. This is a great way to be sure your site is easy to read for all of your visitors!
Add Custom Backgrounds with Theme Options
It’s very possible your theme has a built-in option to add custom backgrounds, making this process a breeze.
For example, the Total WordPress theme has a built-in Theme Settings meta box on posts and pages with the option to select your own background.

When creating a post or page, simply scroll to the bottom where you’ll find the “Theme Settings” and select the “Background” tab. The options include a color picker if you want a solid color or a background image option (along with styling for the image background, such as stretch, cover, repeat etc) that allows you to upload or choose an image from your media library.

But that’s not all, Total also features site-wide background settings which can be accessed from the live Customizer. To locate the option, start in your main WordPress dashboard and click to go to Appearance > Customize > General Theme Options > Site Background.
Here you’ll find options to set a background color or image for your whole website. Note – this can be overridden by setting a custom background on a per page/post basis.
Backgrounds with WordPress Page Builders
But if you’re not a fan of Gutenberg, and your theme doesn’t offer any background options, your next place to look would be your page builder. Modern page builders have tons of customizable settings, including row backgrounds. The location of this option may vary by builder, but let’s take a look at two of the most popular options.
Elementor Backgrounds
Elementor is one of the most popular page builder plugins and while the free version offers less features than Elementor Pro, it’s still an awesome option to build your WordPress site. The plugin is easy to use and options are extremely intuitive, so even a person new to WordPress can create a custom looking site.
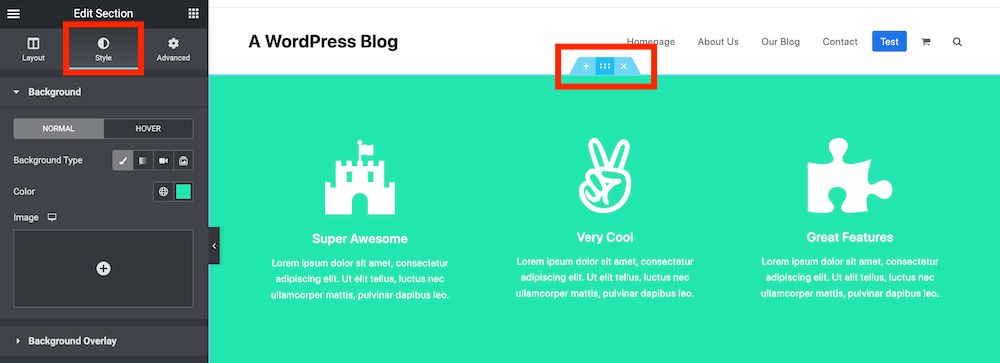
With Elementor, when you insert a row you can click on the six-dot icon (it sort of looks like a window pane) then select the Style tab to add a custom background. The first classic background setting has options for a color or an image. But wait – there’s more!

There are additional background options for a gradient (see above), video and slideshow. Plus there is a section below for Background Overlay that you can use to add a gradient or color in top of your background selection.
WPBakery Backgrounds
The WPBakery builder is included with many premium WordPress themes, and for a good reason. It offers tons of great options as well as the choice to use front end visual editing or traditional back end editing in the classic WordPress editor.
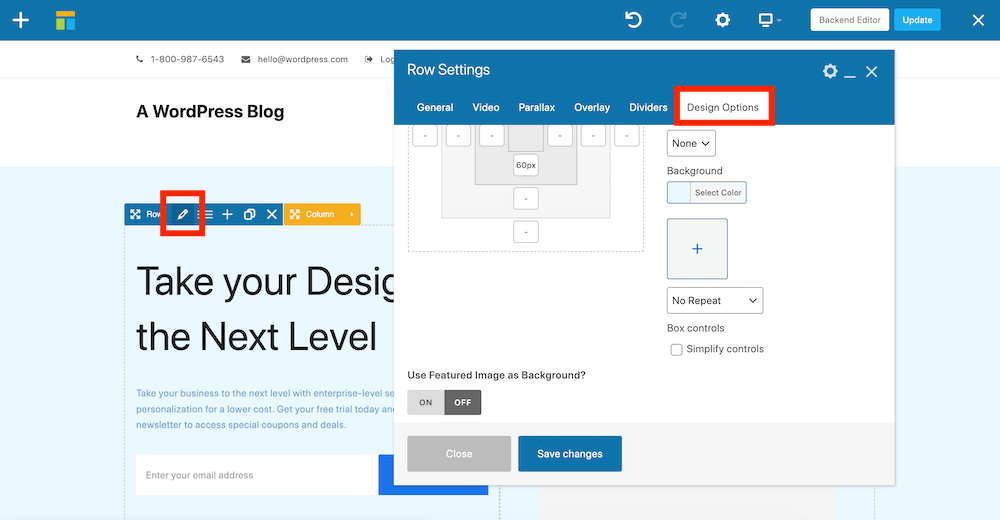
To add a background to a row, first insert a row module then click on the pencil icon to open the Row Settings. From here go to the Design Options tab. This is where you’ll find WPBakery core settings to choose a row background or a row image. While you’ll mostly want to use backgrounds on Rows, it can be found in the Design Options for many WPBakery elements (such as columns, icons, etc).
Additionally, depending on how the theme developer has extended the builder or if you have any third party extensions installed (like Ultimate Addons) you may have other settings available to you. In our screenshot above you’ll notice that there are Row options to use the post/page featured image as a background, as well as extra tabs for Video, Parallax and Overlay backgrounds that are specific to Total.
How to Add Backgrounds to WordPress with Code
Moving along – if you like your current theme and site setup sans builder, another option is to simply add a bit of code to your site to change out your backgrounds. While you can certainly copy and paste the code snippets provided herein, it would be of great benefit if you know your way around PHP, HTML and CSS. With that preamble, let’s get editing.
Add Different Backgrounds to WordPress Posts & Pages using CSS
Much of the styling that goes into WordPress posts and pages (and your entire site) is controlled by a file known as a stylesheet. The stylesheet file in WordPress is usually labelled style.css. You can access style.css by navigating to Appearance > Theme File Editor in your WordPress admin dashboard:
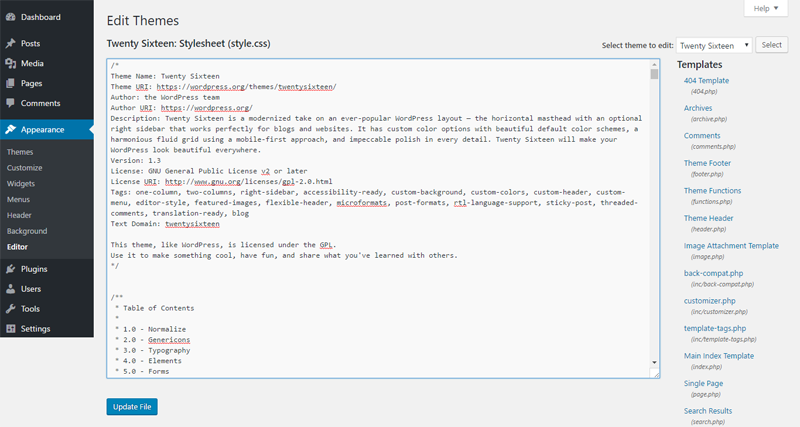
We are adding backgrounds (and other styles) to your WordPress posts/pages in style.css, so it’s of importance to get that loaded up in a separate tab.
When you navigate to Appearance > Editor, you will also see a list of all theme templates to the right of the screen. If you’re using a child theme (which you should) you will need to load your parent theme’s template files.
You need to focus on the header.php file. Why header.php? Because this file is added to every other template i.e. pages and posts when WordPress is putting together the files that make up your website. In other words, the code inside header.php shows up on every page or post you create.
Look for this code snippet:
<body <?php body_class(); ?>>This function has one purpose. It splits out CSS classes that you can use to change the style of your posts and pages. All you have to do is target a CSS class specific to the page or post you desire to customize, add your background and styles, save your changes and rejoice.
If, for instance, you viewed the source code for your home page, the above function will output something like:
<body class="home blog logged-in admin-bar no-customize-support hfeed">And that’s because the <?php body_class(); ?> part of the code snippet provides all the classes e.g. .home, .blog, .logged-in, etc., that you can use in your CSS to style various elements of your home page.
Aside: Viewing the source code for any post or page is easy stuff. If you’re using Chrome, just right-click on a page/post and select “View page source”. In Mozilla, right-click on the post/page and select “View Page Source”. If you’re using Microsoft Edge (Internet Explorer), right-click on your page/post and select “View source”.
If you view the source code for a WordPress page, this same function will output:
<body class="page page-id-2 page-template-default logged-in admin-bar no-customize-support">If you viewed the source code for a single post, our body_class function outputs something close to:
<body class="single single-post postid-1 single-format-standard logged-in admin-bar no-customize-support">As you can see, you get a couple of CSS classes that you can easily target:
- .page for all pages
- .page-id-2 that allows you to target a specific page i.e. page with id no. 2
- .single for all single posts, meaning all CSS styles you apply to this class will apply to all posts
- .postid-1 for the post with id=1, meaning all the CSS styles you apply will affect only that post
- .single-format-standard – This allows you to apply CSS styles to all posts with the standard post format
- .logged-in – The styles you apply using this CSS class will only apply to logged in users
All the items contained in class=”” offer you CSS hooks that you can use to target any post or page. But why are we adding the period (.) before each class? It is conventional CSS syntax, which indicates dictates that you must call all classes using a period (.) and all divs using hash (#). Story for another day.
For example, to apply a black background to all posts, add the following snippet to style.css:
.single { background-color: #000; }Add Background to WordPress Posts & Pages using PHP (via a custom field)
If you want to add a built-in manual method for altering the backgrounds on your site via a custom field this is also very easy to do. Simply paste the following code into the functions.php file of your theme (if you are using a 3rd party theme this is best done via a child theme). Make sure to change where it says “myprefix” to your unique identifier (this is to prevent conflicts with themes and plugins) and once it’s all ready to go you can now use the custom field “myprefix_background_image” to enter a URL to an image for any page or post in which you want to alter the background.
<?php
// Add inline style to set body background via "myprefix_background_image" custom field
function myprefix_custom_field_background() {
	if ( $background = get_post_meta( get_the_ID(), 'myprefix_background_image', true ) ) { ?>
		<style type="text/css">
			body { background-image: url( "<?php echo esc_url( $background ); ?>" ); }
		</style>
	<?php }
add_action( 'wp_head', 'myprefix_custom_field_background' );
Notice how the function hooks into the “wp_head” action? This means whenever you use the custom field inline CSS will be added to the header tag of your site with the code to alter the background according to your custom field value.
Adding Backgrounds to WordPress with the AWB Plugin
You can target WordPress posts and pages and style each to your heart’s content with PHP and CSS as we’ve shown. But if you don’t have time for code, or the above instructions don’t work for one reason or another, you can use a free WordPress background plugin.
Advanced WordPress Backgrounds

True to its name, this plugin offers plenty of options to customize backgrounds with colors, images, patterns, parallax and videos. The plugin works great with the classic editor, but is even compatible with Gutenberg and WPBakery – so you can have better background options even with your content builder.
Whether you use theme settings, dig into code or use plugins, adding different backgrounds to your WordPress posts or pages can contribute immensely to brand awareness and the visual design of your site. How do you change the background of your WordPress posts or pages? Let us know your questions, suggestions and thoughts via the comment section below.


