How to Automatically Email New Posts to Subscribers

Imagine having to manually send an email to your subscribers every time you publish a post. Drafting up an email, gathering your subscriber list, and sending it to all of them wastes a lot of time you could spend working on your blog.
Why do that when you can simply automate the process and have a notification sent out the instant you write a new article?
Multiple services exist for WordPress which can detect various triggers, such as a new post being published, and send an alert out to subscribers on your behalf. Let’s take a look at a few of your options for sending new post notifications.
Why to Automate Post Notification Emails
If you haven’t started a newsletter yet, now is the time to do so. Think of all your favorite brands; chances are, they keep you coming back with an impeccable email marketing campaign. Here are a few reasons why post notification emails are a must.
It Saves Time
Some people choose to manually send out welcome emails, post notifications, and the like, but the truth is that it’s just not sustainable in the long run.
The bigger your blog grows, the more you’ll have to deal with. A higher volume of new subscribers, an even larger list of people, and of course other sources of engagement like comments and social media will demand most of your attention.
Automating emails will save you hours of work, and personalization can keep engagement high while still retaining that personal touch.
It Engages Your Audience
With the oversaturation of online content, it’s easy to forget even about your favorite blog. A weekly or monthly reminder in the inbox can bring back readers who might have let you drop off their radar.
You might get thousands of new visitors a month, but it doesn’t mean much if you can’t keep your existing visitors returning long-term. Post notification emails build loyalty and keep your readers engaged.
It Offers Insight
Whether you’re an individual running a personal blog or a large business with thousands of readers, nothing is more valuable than analytics.
Knowing how your visitors engage with your content can give critical insight into their habits. With this knowledge, you can better tailor your content to them and draw in more loyal subscribers.
Most email marketing tools and services come with detailed statistics such as open and clickthrough rate. For example, you can see what posts in your digest get attention or what email title attracts the most clicks.
How to Automatically Email Posts with a Plugin
If you want to automate your new post emails, the easiest way by far is to install a plugin. These make obtaining subscribers and emailing them your new content an entirely background process. Just set up the plugin, create an event trigger, and everything will be taken care of for you.
Option 1: MailOptin

There are plenty of email marketing plugins out there, but MailOptin is one of the best you can get. The all-in-one package will help you capture leads, craft beautiful interactive newsletters, and automate your email lists.
The plugin itself doesn’t send the emails, but instead offers many popular email service integrations, including:
- Active Campaign
- AWeber
- Campaign Monitor
- CleverReach
- Constant Contact
- ConvertKit
- Drip
- EmailOctopus
- GetResponse
- Gist
- GoDaddy Email Marketing
- Klaviyo
- MailChimp
- MailerLite
- MailJet
- MailPoet
- MooSend
- SendFox
- SendGrid
- Sendinblue
- Sendlane
- Sendy
- Vertical Response
- Zoho
One of MailOptin’s main features is its lead generator and opt-in form builder, which will get your visitors’ attention and add them to your subscriber list.
But one of its other major features is the powerful email automation and newsletter designer. With this, you can have emails sent out to your subscribers or even create a digest of posts. We’ll show you how to do both.
First step either way: Connect to your email service provider in MailOptin > Integrations. Usually you can just insert an API key or authorize MailOptin.
Now let’s set up new post notifications.
- Go to MailOptin > Emails and click Add New.
- Select Email Automation.
- Select New Post Notification from the Select Type dropdown.
- Choose the template you want to use. You’ll be redirected to the email customizer where you can build your newsletter.
- On the left-hand panel, click Settings then scroll down to Recipient. Click the Select Connection dropdown menu and choose your email service provider, as well as the subscriber segment you want to send this email to if necessary.
What if you want to send a digest of posts on a daily, weekly, or monthly basis? The steps are very similar.
- Go back to MailOptin > Emails, click Add New, and select Email Automation as you did before.
- This time, select Posts Email Digest from the Select Type dropdown. Choose your template and customize it as usual.
- You’ll have a few different settings to change in the email customizer, such as selecting the maximum number of posts that will appear in the digest or restricting it to posts with a certain tag. You should also set the intervals your newsletter will be sent.
With that, you’ve successfully set up an automated newsletter!
Option 2: Email Subscribers & Newsletters Using SMTP
Email Subscribers & Newsletters is primarily intended for small sites with a self-hosted email solution, though the Pro version of the plugin does include limited integrations with senders like SparkMail and PostMark.
There are three plans available: Open Source (free), Starter, and Pro. The free version of the plugin relies on wp_mail, the PHP-based sender included with WordPress.
The issue with this is that the PHP mailing function is often blocked or marked as spam. For more reliable sending, you can purchase the Starter version and get access to more reliable SMTP sending.
You’ll also need an SMTP plugin like WP Mail SMTP or any SMTP host, such as the email hosting often provided by web hosts. Once you have SMTP hosting and the Email Subscribers Starter plan installed, you’re ready to set up SMTP emailing.
- In your dashboard, go to Email Subscribers > Settings > Email Sending.
- Under Select a mailer to send mail, click on SMTP.
- Enter your SMTP credentials. Contact your email host if you’re not sure what they are.
Now you just need to set up post notification emails.
- Go to Email Subscribers > Campaigns and click Manage Templates.
- If you don’t already have a New Post Published template, create one now by clicking Add New Template, or edit the existing one if you want. This will be the email you send out to subscribers.
- Back on Email Subscribers > Campaigns, click Create Post Notification.
- Configure the settings and select the template you created.
How to Share Blog Posts via Your Email Service Provider
If you don’t want to use a plugin, a more direct way is to simply send newsletters through your email service provider. While this requires fewer third-party tools, it’s usually a little harder to set up and means you won’t have an easy way to manage email automation from within WordPress.
To do this, you’ll need an email provider that supports RSS-to-email, such as MailChimp. Let’s go over how to do it with this service.
- In your MailChimp dashboard, go to the Campaigns page and click on the Automation option under “View by Type”.
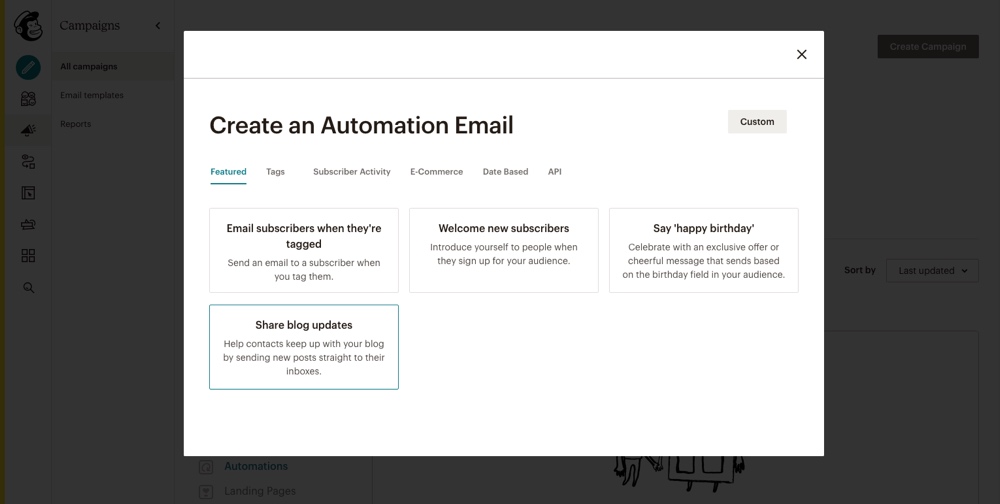
- Then click on the link to “Create an Automation”.
- This should open a window with your automation options, from here click the option to Share blog updates.
- You’ll need to enter your RSS feed URL. For most WordPress users, you can visit this by adding /feed/ to the end of your domain.
- Continue filling out info such as the audience you want to send it to, your email subject line, and the frequency your newsletter will be sent out.
- When you get to the email designer and pick a template, make sure to drop in an RSS Items block to display your blog feed properly.
With that, your subscribers should be sent a digest of your latest posts at the time interval you specified.
This isn’t the most elegant solution, however. It may get the job done, but it’s generally better to use a WordPress plugin that will give you more control over how and when your newsletter is sent out.
For example, MailChimp integrates with MailOptin, so you can rely on WordPress event triggers and not just your RSS feed to send emails at the perfect time.
Wrapping Up
Running a successful blog involves a lot more management than you might expect, and email automation can take a huge load off your shoulders. Just create a recurring campaign using your favorite email provider, and you don’t need to worry about it ever again.
If you want to set up automated new post notifications on your site, there are several options available. While it’s possible to set up an RSS feed campaign with most email providers, it’s a lot easier to use a plugin like MailOptin that integrates directly with your WordPress interface.
Such plugins also tend to come with lead generation, form builders, and email templates built in along with customizable email automation, all within your WordPress dashboard.
The all-in-one package deal can take some setup, but it’s super convenient and will save you a lot of time in the long run.


