Installing WordPress On Windows Locally With WAMP
- 1. Installing WordPress On Mac Locally With MAMP
- 2. Currently Reading: Installing WordPress On Windows Locally With WAMP
- 3. Install WordPress On Ubuntu Locally With LAMP
Wouldn’t it be great if you could install and use WordPress on your PC while coding or testing a new theme or plugin? Of course it would! In this tutorial I’m going to show you how to install WordPress in Windows using this great free software called WAMP. You won’t be needing an active internet connection after this – but who am I kidding, internet is like oxygen to us!
So lets get started. You’re going to need the latest version of WAMP and of course, the latest version of WordPress.
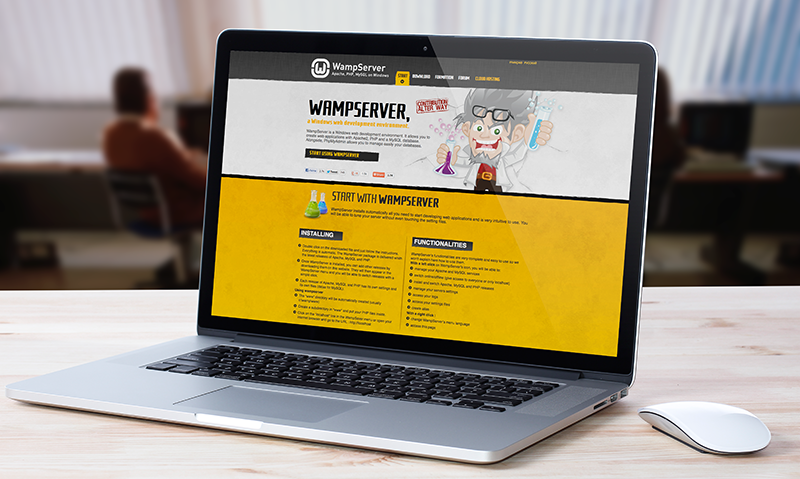
Step 1: Installing WAMP
This is a fairly simple step – keep on clicking Next till you see Finish. In case you have a doubt, you could go through the following:
- Its better to leave default installation directory unaltered i.e. “c:/wamp”
- During installation, a prompt will ask you for a “default browser”. It’s explorer.exe. Simply click on Open as shown in the screenshot.
- Click Yes when a prompt for “installing the new WampServer 2 homepage” pops up.
- Add an exception to your firewall for Apache HTTP Server.
- Let the SMTP and Email be set as the default values.
- Once the installation is complete, check the “Launch WampServer 2 now” box and click on Finish.


Step 2: Making sure WAMP is Running
To ensure that WAMP server is running, check the color of the WAMP icon (capital W icon) in your taskbar. Following are the possible situations:
- If the W icon is Red then WAMP server is not running and is offline. You will have to restart the sever or reboot your PC.
- If it is Orange, then the server is partially running, i.e. Apache (you web server) is running and the MySQL service is booting or is offline. You should usually wait around 30 seconds and if the icon still doesn’t turn Green the you should restart the server.
- If it is Green then it means that the server is online and should be accessible from your web browser.
![]()
To test if your server’s running, open your favorite browser and enter “localhost” or “127.0.0.1” in the address bar and see what comes up. You should get this:

Step 3: Create a New Database using phpMyAdmin

- Left click on the WAMP server icon and select phpMyAdmin (second one from the top).
- A new tab/ window should open up in your default browser called phpMyAdmin. Select the Databases tab.
- Enter your desired database name under Create a database (I have chosen: “yousitename_wp”) and click on the Create button.

If successful, you should get a message like this:

Step 4: Download & Extract WordPress
Close phpMyAdmin, head over to WordPress.org and download the WordPress.zip. Once you do this, extract the contents of the WordPress ZIP archive under “C:\WAMP\www”. You should find a new folder called wordpress. That’s the WordPress installation directory. If you want to change it – that’s fine. Your WordPress installation will be available under “http://localhost/folder-name”. Thus in our case, its “http://localhost/wordpress”.
Step 5: Configuring your WordPress Installation

- Open your browser and type http://localhost/wordpress in the address bar.
- Click on Create a Configuration file.
- On the next page, click on Let’s Go.
- Fill in the details carefully:
- Database name: yoursitename_wp
- User name: root
- Password: (leave it blank)
- Database Host: localhost
- Table Prefix: xs_ (The default is wp_ but its a good security practice to use some other table prefix)

Click Submit. If the database connection is successful, then you should get this message:

WordPress then creates the necessary tables in the “yoursitename_wp” database. In the following step, enter your Site Title, Username, Password and the rest of the required data. You should leave the Privacy button unchecked (because we don’t want search engines to index our site in a developmental or experimental stage) and click on Install WordPress.

And you’re done! There you have it! A fully working offline installation of WordPress in your Windows PC using WAMP.

Happy offline blogging! 😀
Leave Some Feedback
Let me know how the WAMP install went for you, or if you have any other tips or tricks, in the comments section below.


Seems like a lot of steps to get a local version of WordPress running, have you tried Microsoft’s WebMatrix? It’s a lot quicker and it does most of the install itself without you creating files.
I use it all the time and you can even view any of the files for editing or for creating child themes etc. There’s also a Database view were you can see the actual WordPress database.
I haven’t personally tried WebMatrix, but I’ll check it out. Thanks for the suggestion!
The point of the article was to help those looking to use WAMP not necessarily to point out the best and most effective method for hosting WP locally on a PC. However, Webmatrix does look pretty nice, I’ll have to give it a shot some day – currently coding on a mac though, but still love my custom PC 😉
After using MAMP (equivalent on Mac) I tested AMPPS, http://www.ampps.com and found it much easier to install and configure. They provide WordPress and many, many other applications within the app – just a click to download and install. You can enable Multisite (WPMU) and choose language direct from the setup page. Also easy to create “domains” for installations and place them where ever you want on your computer.
It is also free. It is run by Softaculous and I think they use it to promote the service they sell to web hosts.
Works om Windows and Mac but not on Linux, yet
Didn’t know that! Thanks for pointing it out mate!
Nice write up,
I use Wamp on my Windows Box and for the WordPress install (i create about 30-50 a day) i use my wordpress auto installer for wamp, you might want to check it out.
Looks pretty nice. However, you really only need to install WordPress once because you should just setup a Multi-Site locally so you can quickly add/remove/manage sites.
Not really, when working on multiple languages and testing plugins a multi site install is useless. Also when working on client sites I keep a local install for development and then the move to production is much simpler than a multi site install.
IMHO.
To each their own 😉 As a theme/plugin developer I don’t ever need to export a finished site to a live site. I’m sure it can’t be too difficult with MS, than again I’ve never had to do it. The multiple language thing I can see why MS might be a pain in the a**. There isn’t any good plugins for switching languages on an MS site easier?
Sadly none that I know of :/
I use XAMPP and XAMPP Lite to install WordPress locally. But then moving the site to the main domain poses a bigger problem for me, especially with links, etc.
How do you go about this?
This is a script I’ve used before which works very well: https://github.com/interconnectit/Search-Replace-DB
Thanks for the script, when i’m moving WordPress from localhost to live, i have changed them manually,
I think this script will help full for me…
Guys, the reason I created this ‘complex’ tutorial is to show you how to move the offline installation to your online hosting server.
It wouldn’t be complete if you can’t move it right? 😉
Next part of the series coming right up!
Did I miss … “how to move the offline installation to your online hosting server.” from Sourav K? Is the info somewhere else? Thanks for any help.
We haven’t written this post 😉 But its a good idea for a future article! To move your local site to live it should be very easy, all you need to do is export/import your database and files.
Thanks AJ … and thanks for Ultra !
Stewart – “ArtnArch”
You are welcome 😉 And glad you like Ultra!
Hey Stewart,
Thanks for that I idea, will make an article. =)
And it would be a good idea to cover the issues related to trying to set up either WAMP, AMPPS, or others with “127.0.0.1 localhost” in a Windows 7 64bit / IE browser environment. It’s a mess out there. “Waiting for response from localhost” page requests never resolving. Even with Apache and MySQL working.
Thanks for the suggestions!
Hi, installation all good. Click on the green icon, select phpmyadmin, then instead of going to localhost where I can select My Databases in order to create a new database, I get a phpmyadmin Login screen. “root” and no password don’t work. How can I get the localhost screen from the phpmyadmin login?
Fixed – I uninstalled then re-installed, and that fixed it. I think it might have to do with choosing the WAMP homepage during installation.
Paul, I think there was an error during WAMP’s installation. Glad to know that the good ol’ uninstall – re-install trick still works! 😀
Webmatrix only works on Windows 7 or Windows 8, no use to us dinosaurs on XP.
Come 2014, Microsoft is gonna drop support for Windows XP. It’s high time you upgraded mate! 😉
Of course, I would always recommend Win7 over 8.
Always. B-)
Bainternet’s autoinstaller plugin looks like a handy facility. When I activate it, it tells me that I need cURL installed for it to work. removing the “;” before the enable extension command in php.ini doesn’t work. Anyone know how I can install cURL on localhost?
I’m thinking seriously of switching to Mac. Would that be a good idea, or would it be a huge learning curve?
I’m checking out ways of hosting more than one site locally , there’s a lot of advice available for that. Thank you, I appreciate your very good tutorial on installing WAMP.
Hi Paul,
It really depends…are you a fast learner? Do you like the Mac UI? I personally switched over about 3 months ago. At first I thought it was going to be horrible and I wouldn’t be productive. Within not even a week I pretty much had everything figured out and I’ve been working faster then ever before 😉 I have been turned into a Mac lover, something I never thought I would be!
ps: When I was using the PC I personally used XAMPP – maybe would want to test it out!
How to get file permission 755 like linux, my theme is not working and most probably due to access rights
You might have to change your owner permissions, have a look here – http://stackoverflow.com/questions/1113691/a-general-linux-file-permissions-question-apache-and-wordpress
I used to use Appserve but I prefer wamp more. Love it.
I am trying to install this on WAMPEE, which is a portable version of WAMP. When I try to go to http://localhost/, I get an error message. WAMPEE seems to want to open at http://localhost:81.
So when I get entering the DATABASE HOST into the configuration file, if I add LOCALHOST, gives an error message: “Error establishing a database connection.” If I try LOCALHOST:81, it seems to freeze, with the progress spinner going.
Any help would be appreciated.
By the way, I’m putting all those terms in lower case. I just put them in upper case in this message for the sake of clarity.
Regards,
Alan
Alan,
I think you should remove the portable installation of WAMP (WAMPEE) and run a registry cleaner software, preferably CCleaner and clean your registry.
Next download the latest version of WAMP and follow the instructions. If you run into any issues there, let me know.
Cheers,
Sourav
Thanks for the response, Sourav. I have ccleaner and run it only occasionally. I already have the regular WAMP installed on my C drive, on which I have WordPress. It is working normally.
The WAMPEE is a portable version of WAMP and makes no registry changes. As such, I’m not sure what ccleaner would do. I hate to mess with the registry unless it is really necessary.
The reason I wanted to use WAMPEE was to have a portable installation of WP so I could take it to a meeting and demonstrate an installation of WordPress for a club I belong to. They want to have their own WP website, and I wanted to show them a demo version.
I could use XAMPP, but it is quite slow on a USB stick and on most computers, except really fast modern ones.. The meeting place that I go to will have a rather slow computer.
Please let me know what I could do to make this work on WAMPEE if you have any ideas.
Regards,
Alan
Hi Alan,
I understand your objective. Here are a few tips:
1. Your WordPress database resides in your computer, in a .sql file which can be exported/imported in other databases.
2. I don’t think using WAMPEE will copy the database files, i.e. you might not be able to show your WordPress project to your clients, in another computer. However, I’m not absolutely sure about this. Even if that works, there’s no guarantee that’s its going to work in the client’s computer flawlessly. 😉
3. The best way to overcome this situation is to upload your work in a ‘dummy’ website. Buy the cheapest domain possible (.info or something) and get a simple host which allows multiple databases (and not sites). (Check out our hosting pages for recommendation)
Next, you can shift your localhost WordPress database to the dummy site. Not only your clients will be able to see the changes real-time, but it is a much more systematic approach. I’ve tested this method with a few clients and the results were good.
As for your original question on WAMPEE I’m afraid I won’t be of much/any help. But I #3 works for you. 🙂
Cheers,
Sourav
Love the guide, but have your guys got a detailed one for multisite? I have no problem creating the multisite install on WAMP, but I can’t seem to add additional sites (at least none that work). I would also like to know more about back up, export and import of the multisite DB. Cheers Dave
There isn’t anything that would need to be done in your WAMP setup for the subsites to work. You should be able to go to the Network admin page and simply create sites. If the subsites aren’t working, then maybe your Multisite settings aren’t correct – http://codex.wordpress.org/Create_A_Network#Step_2:_Allow_Multisite
Exporting a MultiSite is the same as a regular site…You can just go to PHPMyAdmin and export the DB and then import it elsewhere.
how to move a wordpress site from local server to live server?
One way is to just export/import the database and move the files over then change the URLs to match the new domain – https://github.com/interconnectit/Search-Replace-DB
Great post. thanks for help 🙂
hey hello…
and thanks for help….this really went great start for me to install wordpress on wamp easily…….it worked 🙂
This is very easy way 2 install wordpress..thanks
Great! Thanx a lot for the help. I struggled a bit with point 3.2, I got to a login screen. If you like to help the next guy, update the article with suggesting to try “root” as username and leaving the password field blank.
Hi Sourav ,
Nice post . Completed the installation and started with WP. Once I started downloading a theme , below error popped up :
The uploaded file exceeds the upload_max_filesize directive in php.ini.
Went to php.ini file but no clues .
Please guide .
Regards ,
Ratan .
Have a look at this post on WordPresss.org for increasing your PHP memory limit.
Thanks for the install instructions. Tried doing it with 2 other help sites and got no where, followed yours and got it working in 5 min.
Great tutorial & comments, I wish I had found wpexplorer.com earlier. Being new to WAMP/MAMP WordPress it is a little daunting at times.I am not a developer but an enthusiastic hobbyist who loves building web sites / blogs for friends.
I have a small home network running WAMP and MAMP and would like to scale this down to one webserver MAMP or WAMP and then be able to access it and wordpress (websites) from my other computer, phone(android) or Tablet(android).
Which would you recommend MAMP or WAMP? I find MAMP a little more intuitive than WAMP. If you could point me in the direction of a good tutorial on the above it would be much appreciated. A lot of tutorials I have read or watched seem to be made with assumption.
Cheers Great work
Sorry for the delay! I personally use MAMP but pretty much only because it’s what I’ve always used. I’m not sure about being able to access the sites from another computer, I’ve never had the need for that.
Simple, Clear and Helped.
Thanks Dude…
Thank you for posting. I have a question that im sure has hundreds of different answers. I have installed Wamp on my local machine which is running fine and all is great. I can view my WordPress site by typing in localhost/mysite. no issues.
however, I am breaking my head with this follow up issue. What I did not mention is that I am part of a domain group at my company (where I installed Wamp locally) and what I would like to do is use this machine as a server so that other computers within my network can see this website. Ultimately, the site will be used as an IntrAnet site for other employees to access,view, comment, post, etc…
I would like to have this machine always on to do host the site through Wamp. What do I need to configure to make this happen? A lot of the threads talk about moving to a hosting environment or a live internet environment, I dont want to do either of those…. my “live” environment would consist of making live for all the other pcs on my company’s network. Thanks for any follow up or help.
Hi Ed,
Have a look at the first response here: http://stackoverflow.com/questions/19036759/share-localhost-on-lan-wamp
Wamp Server is an outdate project died on 2013. Probably it is not the best best choice for wordpress
I personally use Mamp Pro and prefer XAMP for Windows…but Wamp is still fine to use if people prefer it. It still functions perfectly fine and the forum is still very much active.
Well i think there are some changes you guys have to make, after hours of search, i got it working
If you could let us know the errors in the post that would be great so we can fix it. Thanks for the heads up Kingsley!
Thanks for sharing. Love the WAMP.
Very easy to follow and setup
Hi AJ
Nice explanation with images. everyone can easily understand the process. Thank you for sharing this helpful article. keep posting stuff like this.Thank you again, good job..
got stucked at step 2… it shows me a blank page and nothing else in it
php.ini doesn’t say anything and i uninstalled / installed wamp server and wordpress (following the instructions again and again) and same blank page :@
Try enabling WP_Debug incase all you have is a PHP error so you can see it and then troubleshoot.
Sir, i am in trouble. My WAMP server icon is not in Grean color. it is Orange.. what i do for that to it be Green..??
Sorry, this could be due to tons of different reasons, I can’t really help with this (would be impossible). I would recommend you check out XAMP or MAMP though because WAMP I don’t think will be supported anymore in the future.
The Tutorial was an absolute cinch to follow. Worked straight away for me. A big kudos for sharing. very insightful.
I enjoyed reading this post Sourav! Great work and easy to follow…I used this as a reference point when assisting a client and we all had an awesome time. Thanks a lot for sharing 🙂
great!!!….thanks alot
Thanks found it super simple and fast to follow after attempting instructions form another site. Gold star to you and thankyou for the super clear instruction
Thanks A Lot I found This Article So Useful, But How Do I install More Than One Site? And How To I Transfer Online
You should setup WordPress multi-site and then when you want to move it live check out our post on Migrating Your WordPress Site.
Thank you so much for the info. It was of great help to me. Finally installed .. very concisely and clearly explained ! 🙂
Please can you just make that step four a bit explicit, am having difficulties..thanks
Basically you need to go to WordPress.org and download WordPress then extract the zip contents into the correct location.
Thand you so much. I’m a total beginner wanting to make some changes to my site but clueless and terrified of wrecking it. Now I can play to my hearts content! Your instructions were very clear, had no problems at all (to my amazement!)
Hi there,
Very well explained. Installing WordPress website has become fun after reading this article.
Thanks for sharing your professional experience.
I’m not sure if I missed it but what do we do when the icon never turns green, mine stays orange. Where do I go to see potential issues?
This most likely has to do with your ports. Are you using a Mac? If so this article may help you out.
ps: You may want to check out DeskTopServer also, it’s awesome!
I read all the instuctions this was very hepful if anyone still wants any help may watch this video below:
The video looks good, thanks for sharing!
Great Post on Installing WordPress On Windows Locally With WAMP Its very helpful for me………Thanks for Sharing
while installing wmpserver i received an error message “the program cant stat because VCRUNTIME140.dll is missing from your computer. try reinstalling the program to fix this problem” ive done that yet still it shows the same error message. please what do i do?
Absolutely amazing tutorial.
I stuck for hours because apache was not running, I was read all the documentation wampserver and nothing worked, until it succeeds finally changing in httpd.config port 80 for any other …hope this help others
If reinstalling the program didn’t help you can searched the internet for the file, downloaded the missing VCRUNTIME140.dll file and copied the new one into your Windows. If the folder already contained a copy of the .dll file you had to overwrite it with the new copy. The fix should took effect immediately and you could game without problems and without the need of a system restart. Though restarting is always a good idea after making changes in Windows systems.
Very nice and detailed article although I found WAMP to get slow sometimes.