How to Create a Simple WordPress Plugin

WordPress is a darling of many, and rightfully so. It’s incredibly easy to use, free (or open-source), flexible, and the best part, quite extensible. Thanks to plugins, you can extend WordPress to add practically any functionality you have in mind.
If you’re the perfect beginner, WordPress plugins are just like the apps on your phone. Your phone works great as it is, but you can add more functionality using apps. The same applies to the WordPress content management system (CMS).
The WordPress platform is already powerful, but you can achieve much more using plugins. For instance, WordPress plugins allow you to add extra functionality such as e-commerce, SEO, spam protection, advanced forms, social media, better security, live chat, visual page building, and much more.
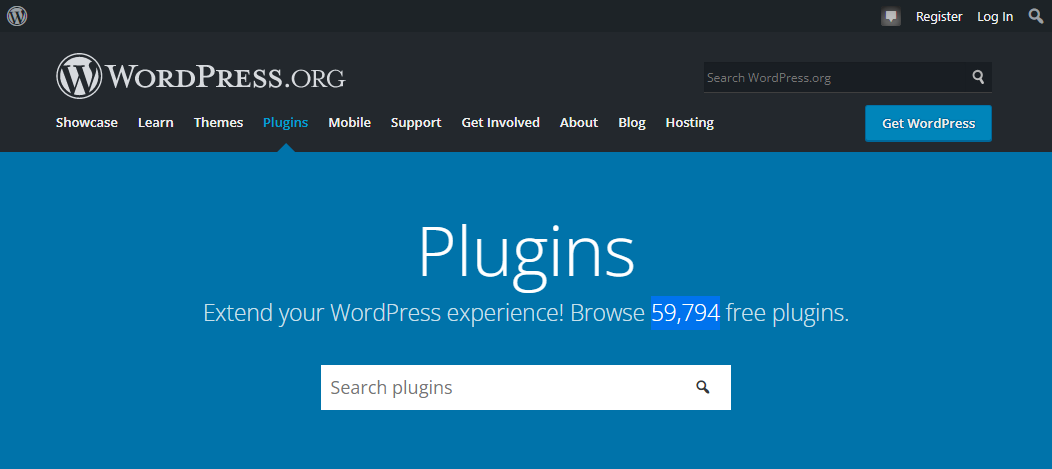
There are thousands of free and premium WordPress plugins out there. The official WordPress plugin repository alone has over 59,000 free plugins at the time of writing! Other marketplaces, such as CodeCanyon, offer you thousands of premium WordPress plugins.
That goes to say that there is possibly a plugin for nearly any feature you need to add to your WordPress site. Still, at times, you might need something unavailable from the aforementioned plugin sources. In that case, you might need to create a WordPress plugin from scratch or modify (or fork) an existing plugin.
And in today’s post, we will show you how to write a simple WordPress plugin, which is nice if you want to create something simple or dive headlong into plugin development. With that preamble, let us start because there is a ton of stuff to cover.
Writing a Simple WordPress Plugin: The Basics
Before we get to the fun part, there are a couple of basic things you should know. As a beginner, you might assume creating WordPress plugins is a tough nut to crack. Well, not really. Anybody can learn how to write a plugin whether you have a degree in computer science or not.
At the same time, some PHP coding knowledge will go a long way if you plan to write more plugins in the future. That’s because WordPress plugins are coded in the PHP programming language. With this knowledge, you will better understand how PHP functions work, which makes your work a lot easier. Still, it’s easy stuff.
Also, depending on the features you need, your plugin might contain just one file or multiple files including CSS stylesheets, JavaScript scripts, and media files. Lastly, it’s important to familiarize yourself with WordPress Coding Standards and best practices to stay on the safe side.
Rest easy because today we won’t venture into the complex stuff. I will show you how to write a simple plugin and share a couple of tools and resources that will make your work a breeze. Are you excited yet? I sure do hope so 🙂
What You Need to Write a WordPress Plugin

You will need a couple of things going on before writing your WordPress plugin. For starters, don’t test your plugin on your live site. If anything goes wrong, you risk knocking out your website, which leads to horrible downtimes while you fix things.
Instead, create a testing or staging site locally or on your server. Here’s how to:
Alternatively, you can use tools such as Local by Flywheel or DevKinsta.
Other than that, you will need a text editor such as Notepad++, SublimeText, or Atom. While it’s not a requirement, you can use tools such as Pluginplate or Plugin Boilerplate to speed up development (more about this later).
And now the fun part, let us write a simple WordPress plugin. For this tutorial, I’m creating a plugin that will add a custom post type for an imaginary restaurant website I’m building.
To the uninitiated, WordPress supports several post types including page, post, attachment, revision, and navigation menu. For our case scenario, we will create a simple plugin that adds the “Recipe” custom post type. For illustration purposes, I will call my plugin “Hot Recipes.”
Let us dive right in.
How to Write a Simple WordPress Plugin
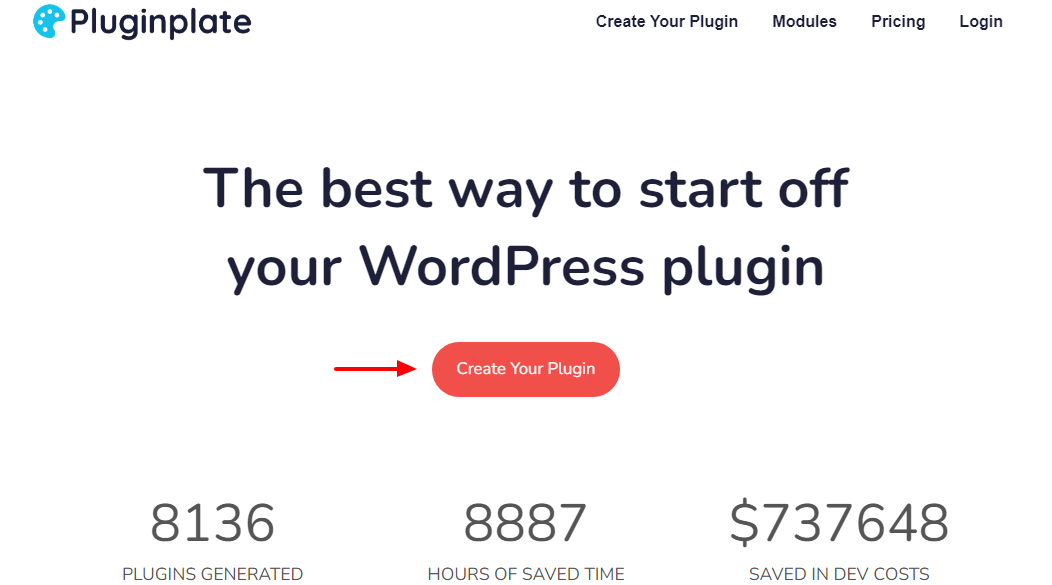
Each WordPress plugin has a main file that you can create manually or using tools such as Plugin Boilerplate or Pluginplate. To save time, let us use Pluginplate (it’s more intuitive, IMO) to generate the main file and a couple of extra files and folders that you might need later. At the moment, however, we simply need the main file.
Creating the Main File
Head over to Pluginplate.com, and click the Create Your Plugin button, as we highlight below.
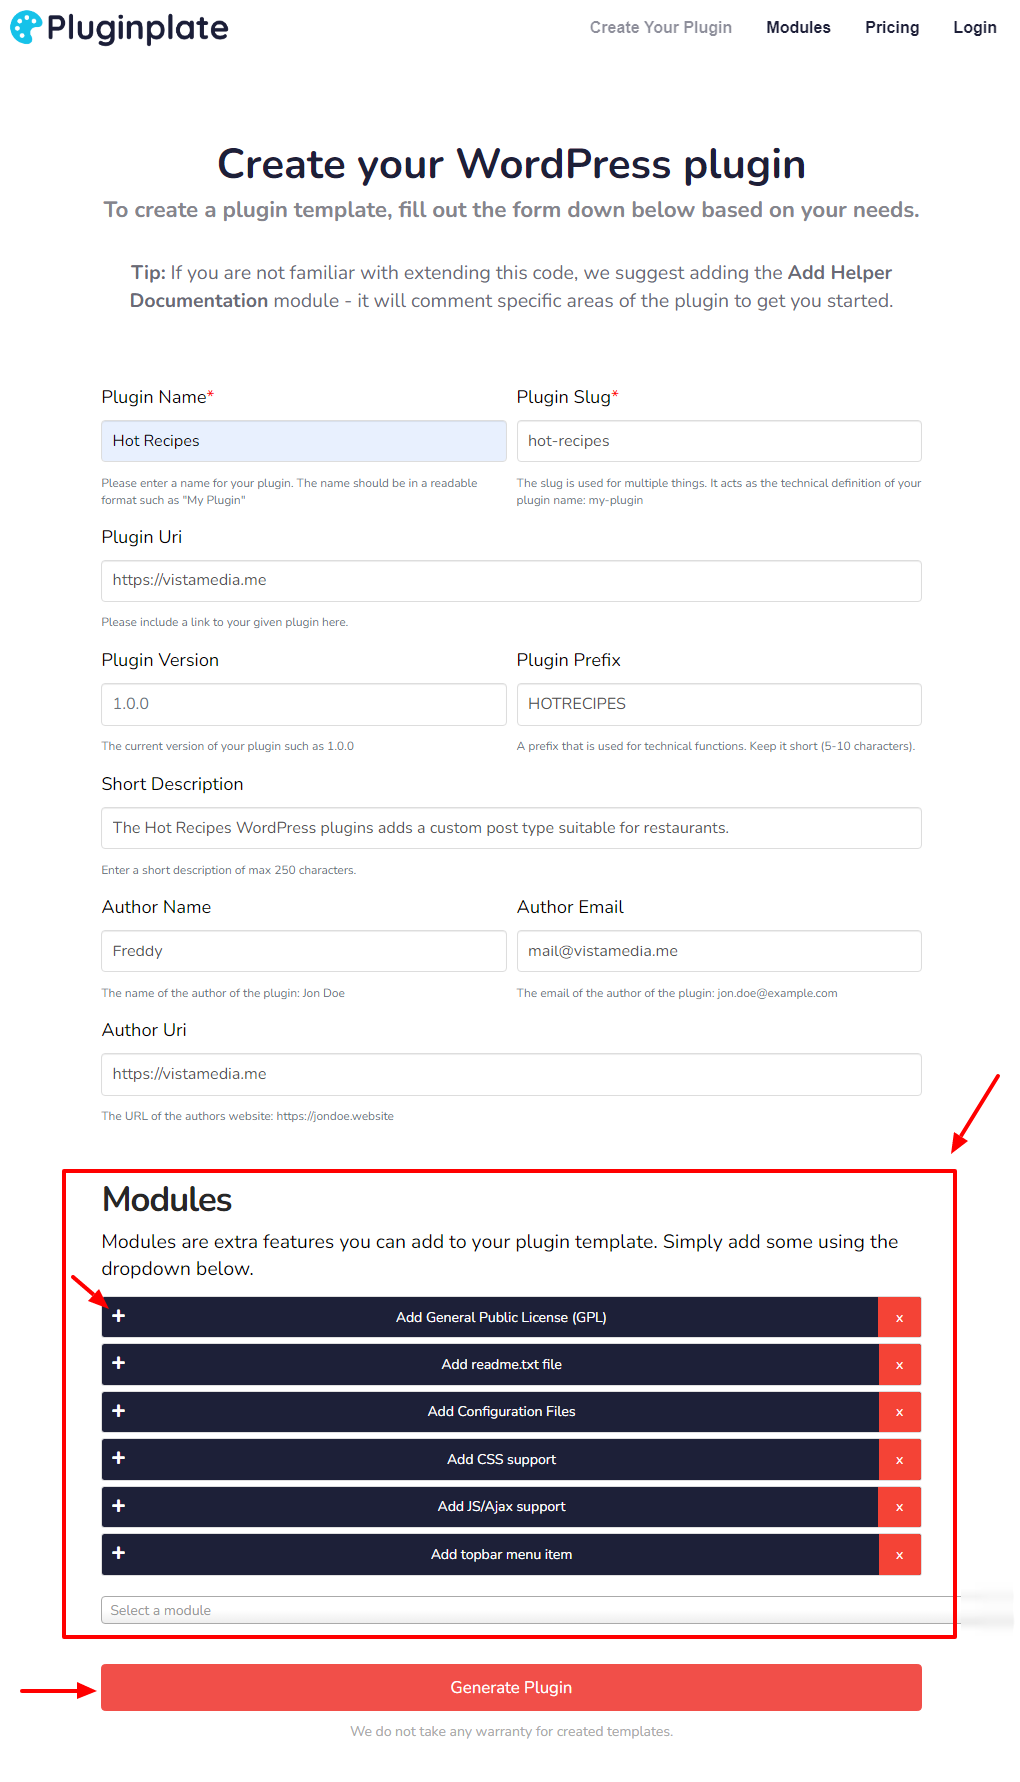
Next, fill out your plugin information as shown below. Towards, the bottom of the page, you will notice the Modules section that allows you to add extra features to your plugin. Notice, also, that you can customize each module by clicking the Plus (+), as we detail below. Once you’re satisfied, click the Generate Plugin button:
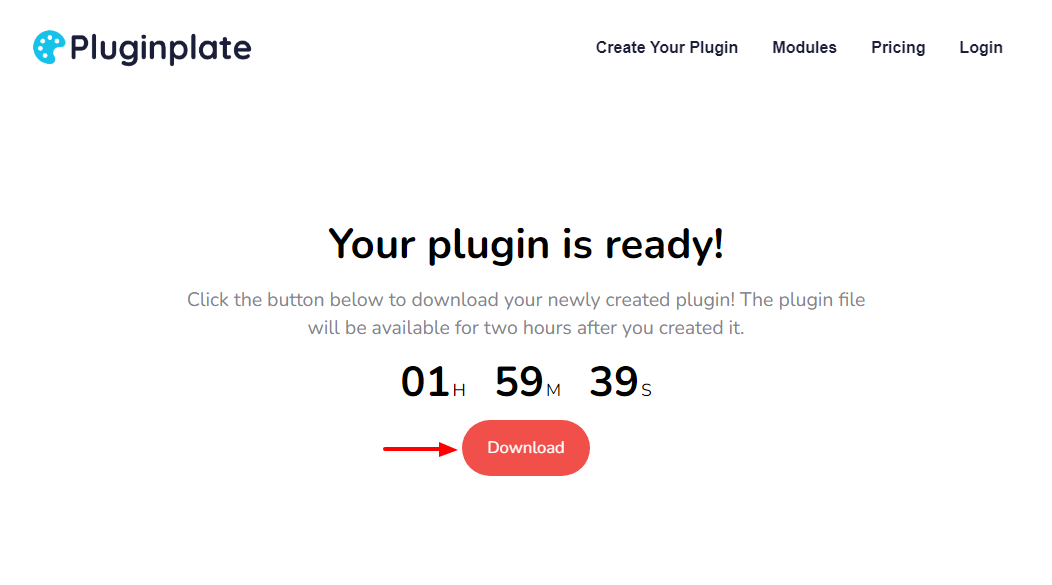
After that, click the Download button and save your plugin to your computer.
Now, we have all the basic files we need, including the main file. But don’t pop the bubbly yet, our plugin won’t do anything as it is. We must add the code that will execute when we activate the plugin. Based on our example, my main file is hot-recipes.php, which is the file we will edit in the next section.
Adding Functions
To locate the hot-recipes.php mail file, extract the ZIP folder you downloaded from Pluginplate:
Inside the folder, you should see your main file, which in our case – again – is hot-recipes.php:

Inside the plugin folder, you can see a bunch of other files but we don’t need those at the moment. Next, let us add some functions to the main file. Open the main file (hot-recipes.php) in your favorite text editor (I’m using Notepad++).
You will see the following piece of code or something similar depending on how you filled out the form at Pluginplate:
<?php
/**
* Hot Recipes
*
* @package HOTRECIPES
* @author Freddy
* @license gplv2-or-later
* @version 1.0.0
*
* @wordpress-plugin
* Plugin Name: Hot Recipes
* Plugin URI: https://vistamedia.me
* Description: The Hot Recipes WordPress plugins adds a custom post type suitable for restaurants.
* Version: 1.0.0
* Author: Freddy
* Author URI: https://vistamedia.me
* Text Domain: hot-recipes
* Domain Path: /languages
* License: GPLv2 or later
* License URI: https://www.gnu.org/licenses/gpl-2.0.html
*
* You should have received a copy of the GNU General Public License
* along with Hot Recipes. If not, see <https://www.gnu.org/licenses/gpl-2.0.html/>.
*/

// Exit if accessed directly.
if ( ! defined( 'ABSPATH' ) ) exit;

// Plugin name
define( 'HOTRECIPES_NAME', 'Hot Recipes' );

// Plugin version
define( 'HOTRECIPES_VERSION', '1.0.0' );

// Plugin Root File
define( 'HOTRECIPES_PLUGIN_FILE', __FILE__ );

// Plugin base
define( 'HOTRECIPES_PLUGIN_BASE', plugin_basename( HOTRECIPES_PLUGIN_FILE ) );

// Plugin Folder Path
define( 'HOTRECIPES_PLUGIN_DIR', plugin_dir_path( HOTRECIPES_PLUGIN_FILE ) );

// Plugin Folder URL
define( 'HOTRECIPES_PLUGIN_URL', plugin_dir_url( HOTRECIPES_PLUGIN_FILE ) );

/**
* Load the main class for the core functionality
*/
require_once HOTRECIPES_PLUGIN_DIR . 'core/class-hot-recipes.php';

/**
* The main function to load the only instance
* of our master class.
*
* @author Freddy
* @since 1.0.0
* @return object|Hot_Recipes
*/
function HOTRECIPES() {
	return Hot_Recipes::instance();
}

HOTRECIPES();
Nice, everything looks great. The above code will tell WordPress the name of the plugin as well as the version, author, license, and other details. You don’t need to edit anything. Let us move to the next step.
Just below the above code, add the following code:
/**
 * Registers the recipes post type.
 */
function hot_recipes_register_post_types() {

	// Set UI labels for the recipes post type.
	$labels = array(
		'name' => _x( 'Recipes', 'Post Type General Name', 'hot-recipes' ),
		'singular_name' => _x( 'Recipe', 'Post Type Singular Name', 'hot-recipes' ),
		'menu_name' => __( 'Recipes', 'hot-recipes' ),
		'parent_item_colon' => __( 'Parent Recipe', 'hot-recipes' ),
		'all_items' => __( 'All Recipes', 'hot-recipes' ),
		'view_item' => __( 'View Recipe', 'hot-recipes' ),
		'add_new_item' => __( 'Add New Recipe', 'hot-recipes' ),
		'add_new' => __( 'Add New', 'hot-recipes' ),
		'edit_item' => __( 'Edit Recipe', 'hot-recipes' ),
		'update_item' => __( 'Update Recipe', 'hot-recipes' ),
		'search_items' => __( 'Search Recipe', 'hot-recipes' ),
		'not_found' => __( 'Not Found', 'hot-recipes' ),
		'not_found_in_trash' => __( 'Not found in Trash', 'hot-recipes' ),
	);

	// Set other arguments for the recipes post type.
	$args = array(
		'label' => __( 'recipes', 'hot-recipes' ),
		'description' => __( 'Recipes.', 'hot-recipes' ),
		'labels' => $labels,
		'supports' => array(
			'title',
			'editor',
			'excerpt',
			'author',
			'thumbnail',
			'comments',
			'revisions',
			'custom-fields',
		),
		'taxonomies' => array(),
		'hierarchical' => false,
		'public' => true,
		'show_ui' => true,
		'show_in_menu' => true,
		'show_in_nav_menus' => true,
		'show_in_admin_bar' => true,
		'menu_position' => 5,
		'can_export' => true,
		'has_archive' => true,
		'exclude_from_search' => false,
		'publicly_queryable' => true,
		'capability_type' => 'post',
		'show_in_rest' => true,
	);

	// Registes the recipes post type.
	register_post_type( 'recipes', $args );

}
add_action( 'init', 'hot_recipes_register_post_types' );
The above code simply registers our custom post type “recipes” with an array of options. It also adds features such as support for revisions, custom fields, excerpts, comments, featured image, and so on. These are the features you’ll see inside the post editor when adding a new recipe.
Aside: Now, I wouldn’t worry much about the syntax at this point as a beginner because it’s beyond the scope of today’s post. But with some PHP knowledge, you will understand every part of the above code, and what each part does. Besides, there is plenty of resources and code lying around on the internet to learn and practice.
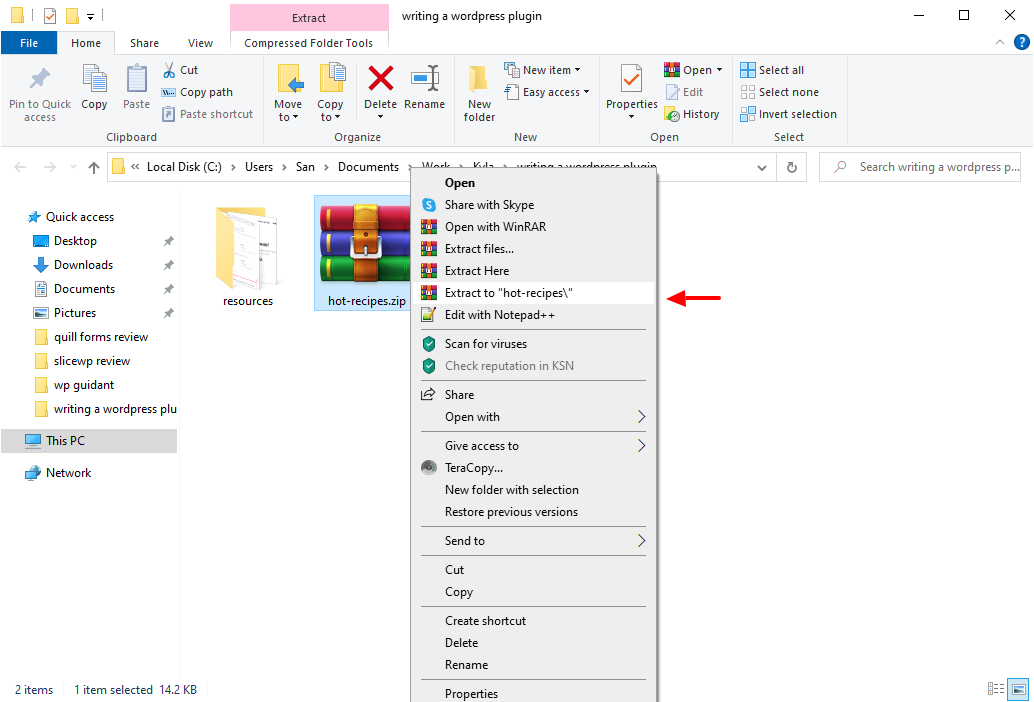
Compress Your Plugin Folder
Save all your changes. Compress the hot-recipes folder (it’s the folder where you found the hot-recipes.php main file we just edited) into a hot-recipes.zip archive (on a Mac it’s as easy as right-click, compress file – and on PC I believe it’s very similar). Just make sure your folder saves as a .ZIP extension or the plugin won’t install.
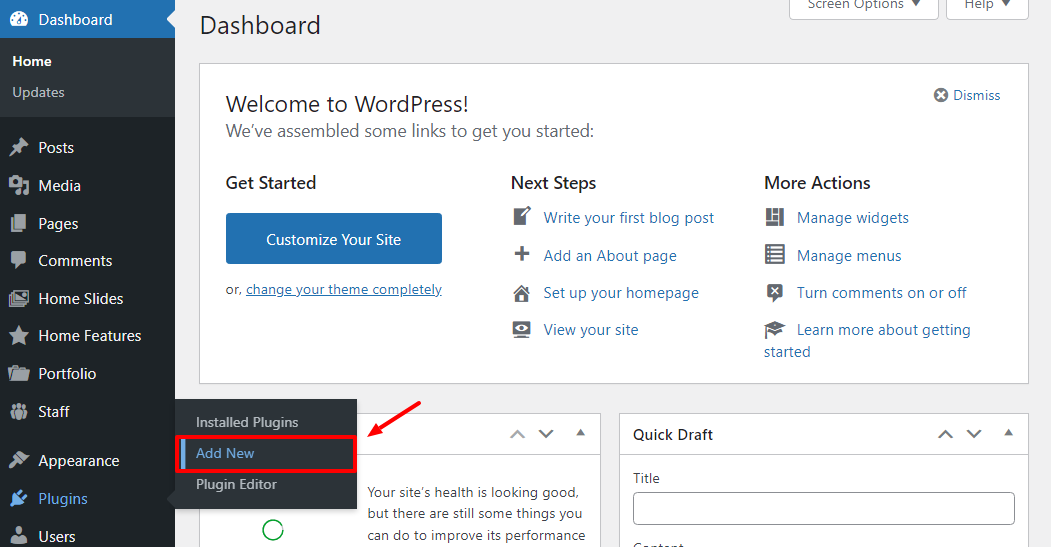
Next, log in to your test site and navigate to Plugins > Add New, as shown below.
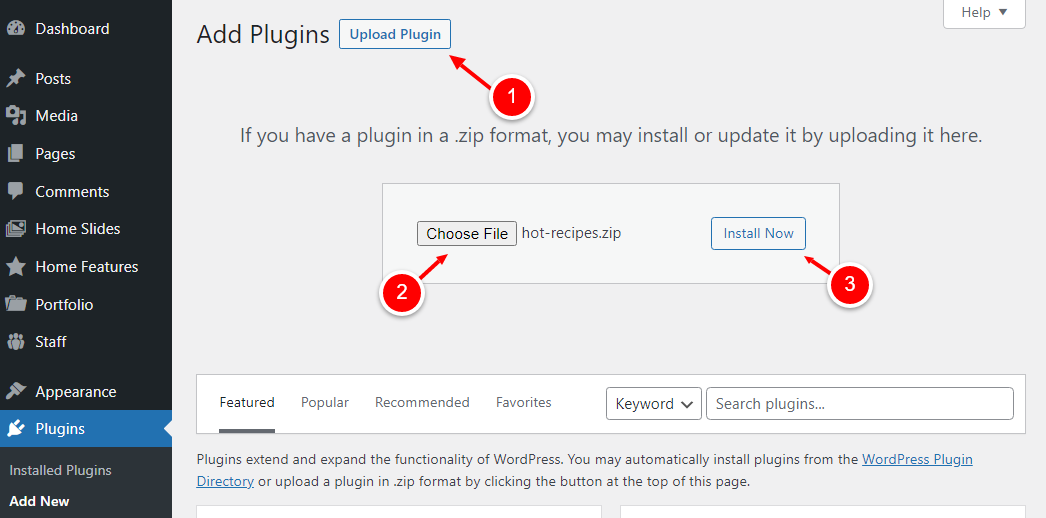
Next, click the Upload Plugin button, choose your plugin ZIP folder from your computer and click Install Now:
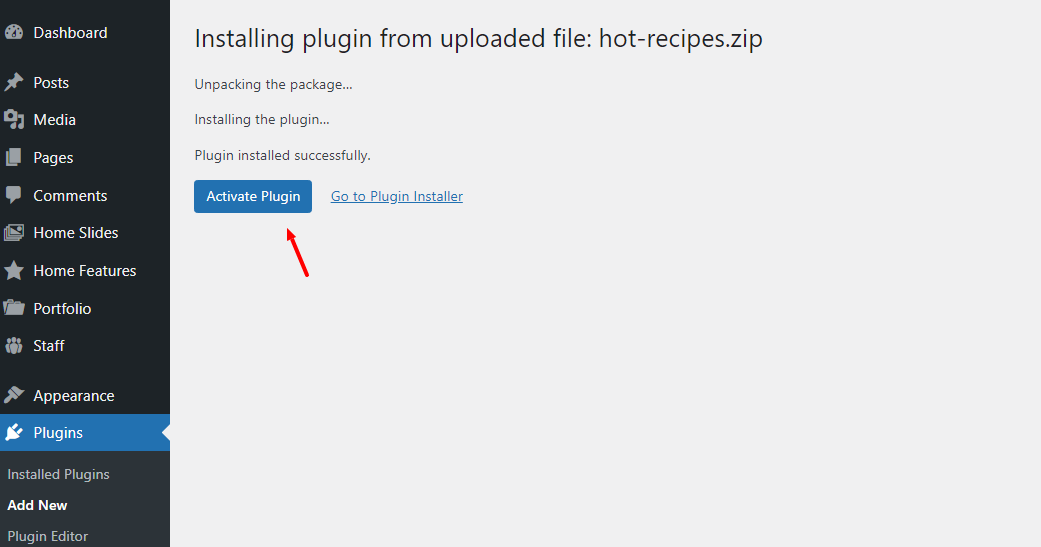
Next, Activate the plugin:
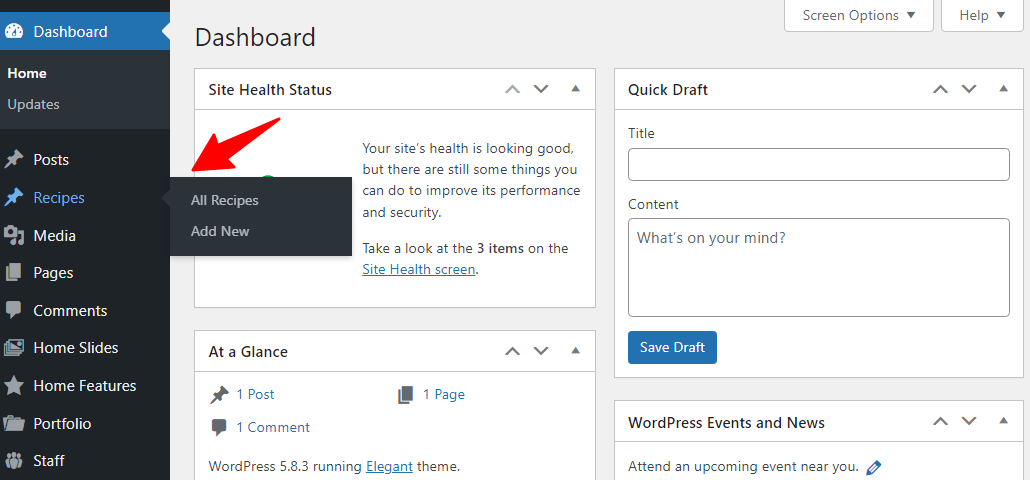
Now, if you check your WordPress admin menu, you will notice our new Recipes post type, complete with the ability to add new recipes:
Congrats on writing your first simple plugin! With this introduction, you can go further and play around with the code to see what you can get. Also, you can study the source code of other plugins (all WordPress plugins are open-source) to learn more.
Now all you need is a few more resources (checkout the Plugin Handbook) and lots of practice and you will be coding away in no time like the legend you are.
Programming and writing WordPress plugins can seem intimidating at first, especially as a beginner. But with the right tools and some learning resources, you can develop plugins like a boss in no time. It just takes some coding chops and determination and you’re halfway there.
I hope this tutorial pointed you in the right direction as far as understanding plugins go. This post should serve as a stepping stone to developing complex WordPress plugins that do whatever you will. Don’t stop here, check out the resources I recommended above to increase your knowledge of WordPress plugin development.
If you found this tutorial helpful or if you have anything else to add we’d love to know. Please share your thoughts in the comments section below. See you around!


Nice article, with the help of this article we can understand the basic of plugin development.
Great tutorial, with all the basic things covered in depth. If you could do a full start to finish tutorial of a plugin that would be nice (just a suggestion).
Theme Creator (thetechpower.com)
Best tutorial!
That is one of the best writing sample about WordPress plugin. I would like to congratulate you for great contribution. I also would like to say that from your content people might get better Idea. Thanks to share with us for your great job.
Wow… What a perfect source to learn WP Plugin Development..! I know the value of this post because of I am also WP Plugin developer and I also wrote an article guide about WordPress Plugin Development.
I hope you will like it and please let me know your reviews and thoughts about it. Once again thank you for the best WP tutorial.
Thanks for sharing good article because as a newbie it is hard to understand WP plugin development. In this post, you shared your knowledge in simple way. I’m glad to learn from Freddy.
Thanks for the kind words Matthew, we are glad the post was useful. Cheers!
Hi Freddy. Thanks for a nice tutorial 🙂
Just one question. How do i do if the function is located somewhere else, like in “myFunctions/testFunction.php”. I have tried but just get “call to undefined function”.
Best Regards
/Roland
If you place functions in other files you need to load them via require_once in your primary plugin file.
very well explained. Thanks, Freddy for the valuable info.
Very useful but for a lame person and a beginner like me, not complete.
How do I use the plugin in an actual page after activating it? I’m using the Gutenberg release and I have no clue from where or how to use it. Please do not take my criticism negatively; I’m sure there are other like me.
Thanks
Hi Armand,
Well this sample plugin doesn’t actually do anything to use “on an actual page” like you mention. If you have a look at the article we show 3 sample functions for the plugin which do 3 different themes (fix WordPress typos, replace words, add a note to the bottom of your post). Now, if you are building plugins you really should have an understanding of basic PHP, this guide is intended to show you how plugins are formatted in WordPress and their basic structure. It’s up to you to decide what code goes into the plugin and what the plugin will do.