How to Add Push Notifications to Your WordPress Site

Every webpreneur I have met dreams of driving more traffic to their website(s). Just like you, they are usually ready to do whatever it takes to attract more visitors. In some cases, beginners resort to blackhat SEO techniques that produce short term gains but lead to Google penalties down the line, which is just sad.
The good news is there are many legitimate ways of driving relevant traffic to your website. To point you in the right direction, conventional methods of gaining more readers and customers include email marketing, SMS, SEM, whitehat SEO, PPC, social media marketing and – relatively new in the market – push notifications.
If you seek to drive more traffic to your WordPress website using push notifications, you will love this post. In today’s serving, we show you exactly how to add push notifications to your WordPress site using the popular OneSignal service. In other words, we set up the free OneSignal WordPress plugin and configure the whole thing to send out a test push notification, you know, so you can hit the ground running.
If that sounds like something you’d love to do, fill up your mug because there is a lot to learn. Please share your concerns, best marketing tips, and general thoughts in the comments.
What Are Push Notifications?
Push notifications are clickable notifications that your website sends to a computer or mobile device. It is a relatively new marketing channel, which allows you to send marketing messages to your site visitors long after they leave your website or close their browsers.
Push notification marketing is growing in popularity since it doesn’t require the visitor to provide an email address or any other contact detail to subscribe. It is a new form of interrupt marketing with higher opt-in and click-through rates than other forms of marketing such as email.
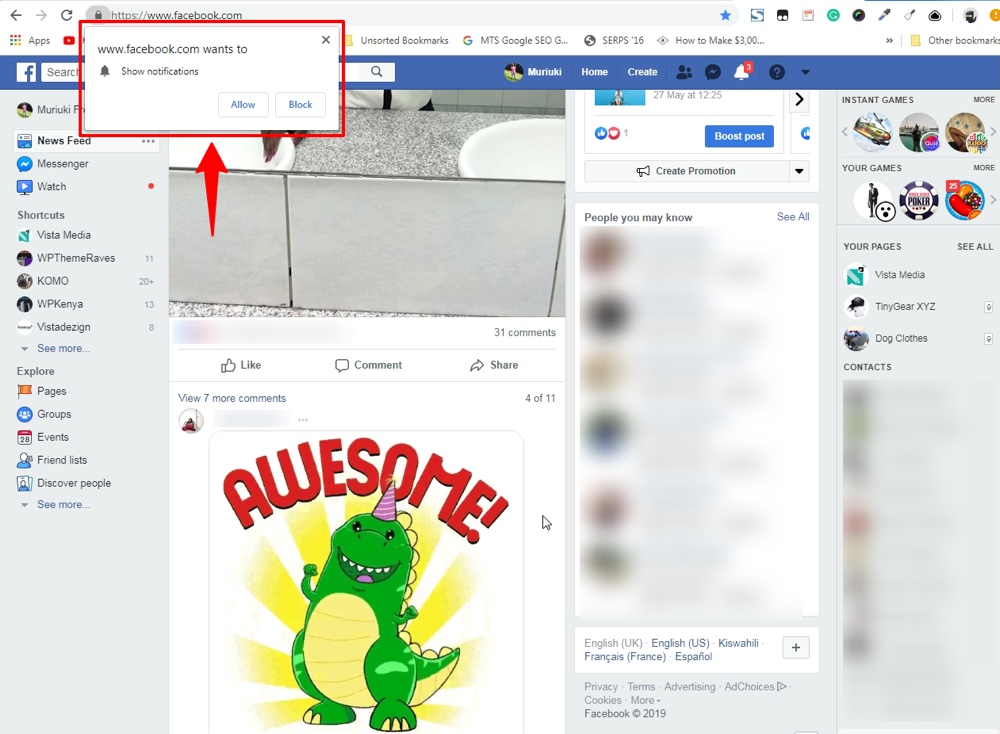
That’s right, push notifications are quite popular that big name brands such as Facebook and Pinterest among others use the tactic to keep users going back for more content. The image below shows you Facebook push notifications in action.
But don’t take my word for it, here are a couple of interesting facts about push notifications according to an article published at SendX.
- Push notifications have an average opt-in rate of 7 – 10%
- Click-through rate of push notifications is 4 to 8 times more than email CTR
- Push has an average unsubscription rate of 10%
- E-Commerce websites lead the pack as far as adopting push notifications go followed by media sites and SaaS companies
- For finance websites, web push has an opt-in rate of 15% and CTR of 30%. The opt-in rate and CTR for gambling sites is 20% and 15% respectively. E-stores have an opt-in rate and CTR of 10%.
That out of the way, how do you use push notifications to push your business agenda forward?
How to Use Push Notifications
Push notifications come in handy in a number of scenarios. Unknown to many beginners, there are a couple of use cases for push notifications including.
- Sending out time-sensitive alerts, which include sale events, flight notifications, breaking news, sports score updates, etc.
- Building engagement by sending users notifications about new web content, blog posts, case studies, white papers and so on
- Re-targeting by sending in-stock updates as well as cart abandonment notifications
- Customer retention by sending push notifications about targeted discounts and win-back campaigns
TL;DR: Push notification marketing comes with a number of benefits including high opt-in rates, low unsubscription rates, multiple use cases, better delivery, increased engagement, and – as we mentioned earlier – a higher CTR than many other forms of marketing.
Now that push notification marketing doesn’t sound like alien technology, let us set up and configure the OneSignal push notification service on your WordPress website.
How to Install OneSignal Push Notifications
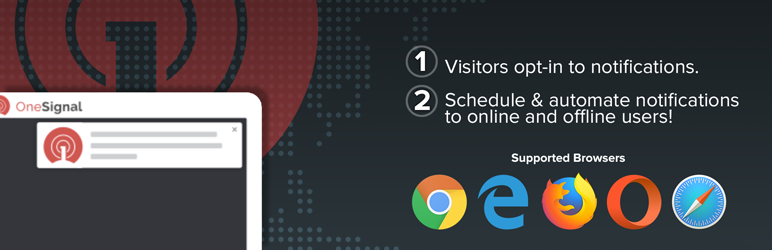
To set up the OneSignal push notification service, we use the nifty OneSignal WordPress plugin. The plugin is available in the WordPress.org plugin repository meaning you can install it from within your WordPress admin dashboard.
We also use an SSL-ready domain name, and we encourage you to do the same. Besides, SSL boosts your WordPress site security and means good things for your SEO efforts.
But how do you set up OneSignal push notifications? Don’t worry, it is as easy as pie – the stuff of fourth graders per se, and you won’t have to chew your keyboard like the dude in the image above. Or punch your laptop, whichever comes first 🙂
Moving on.
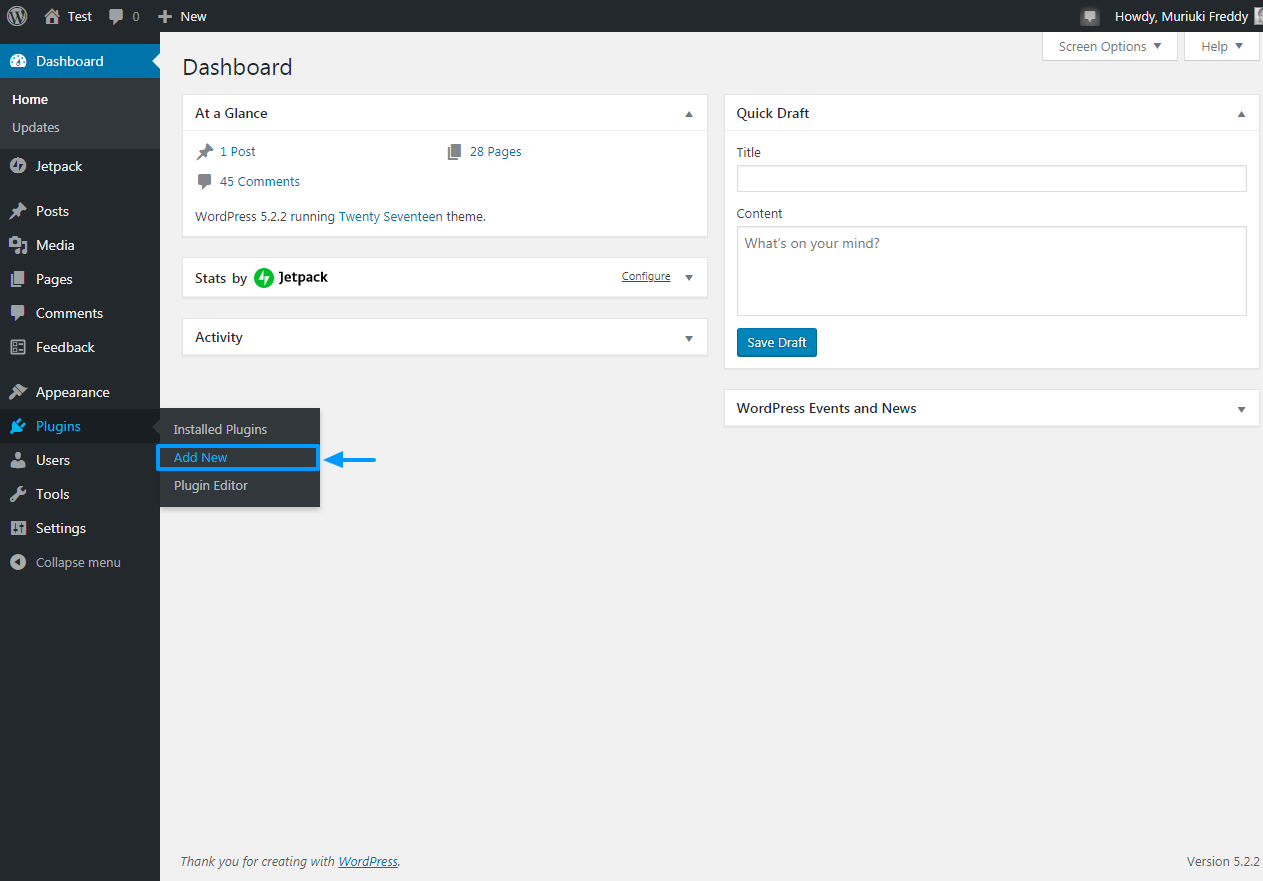
Login to your WordPress admin dashboard and navigate to Plugins > Add New as shown below.
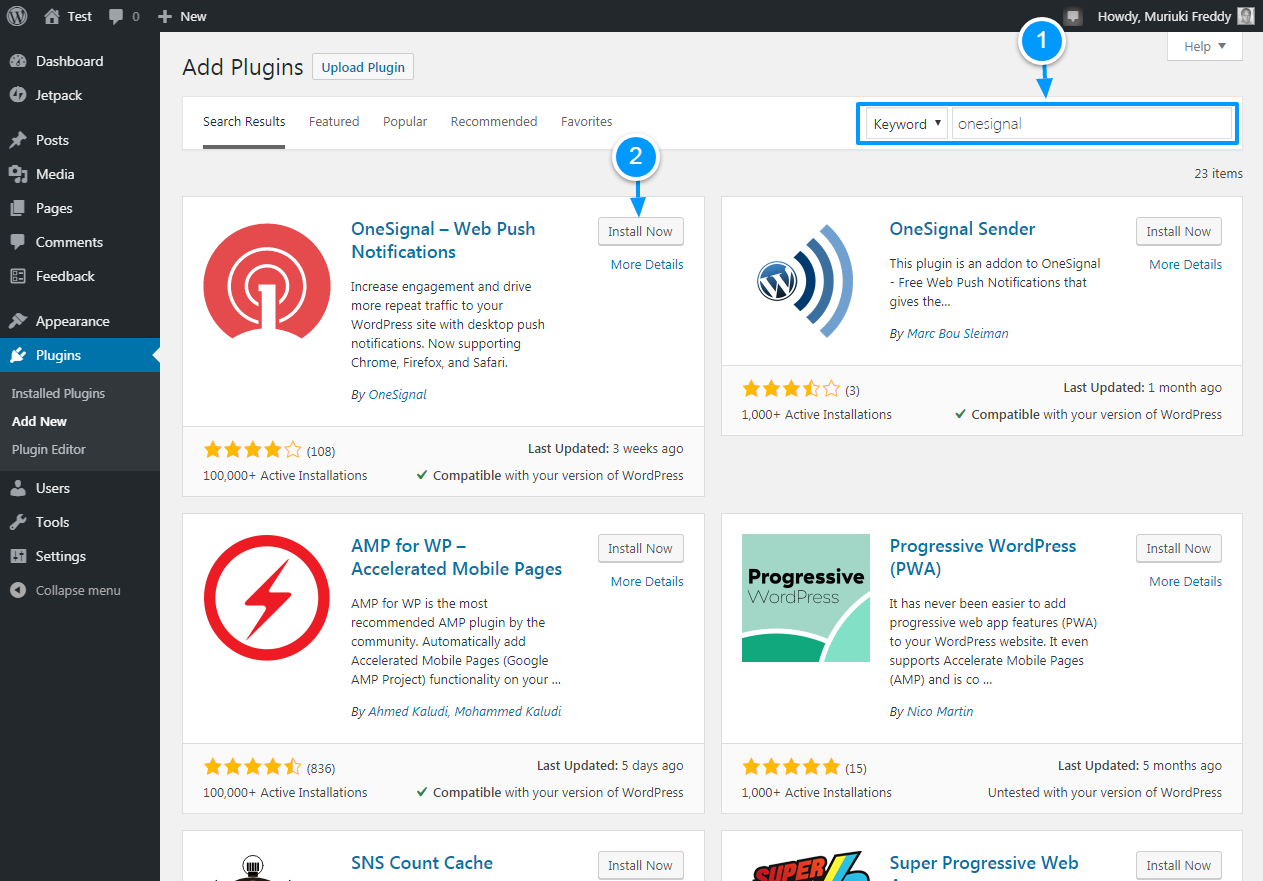
Doing so leads you to the Add Plugins page where you can install plugins from your PC or directly from the WordPress.org plugin repo. On this screen, type “OneSignal” in the keyword search box, and once you find the plugin, hit the Install Now button as we detail in the image below.
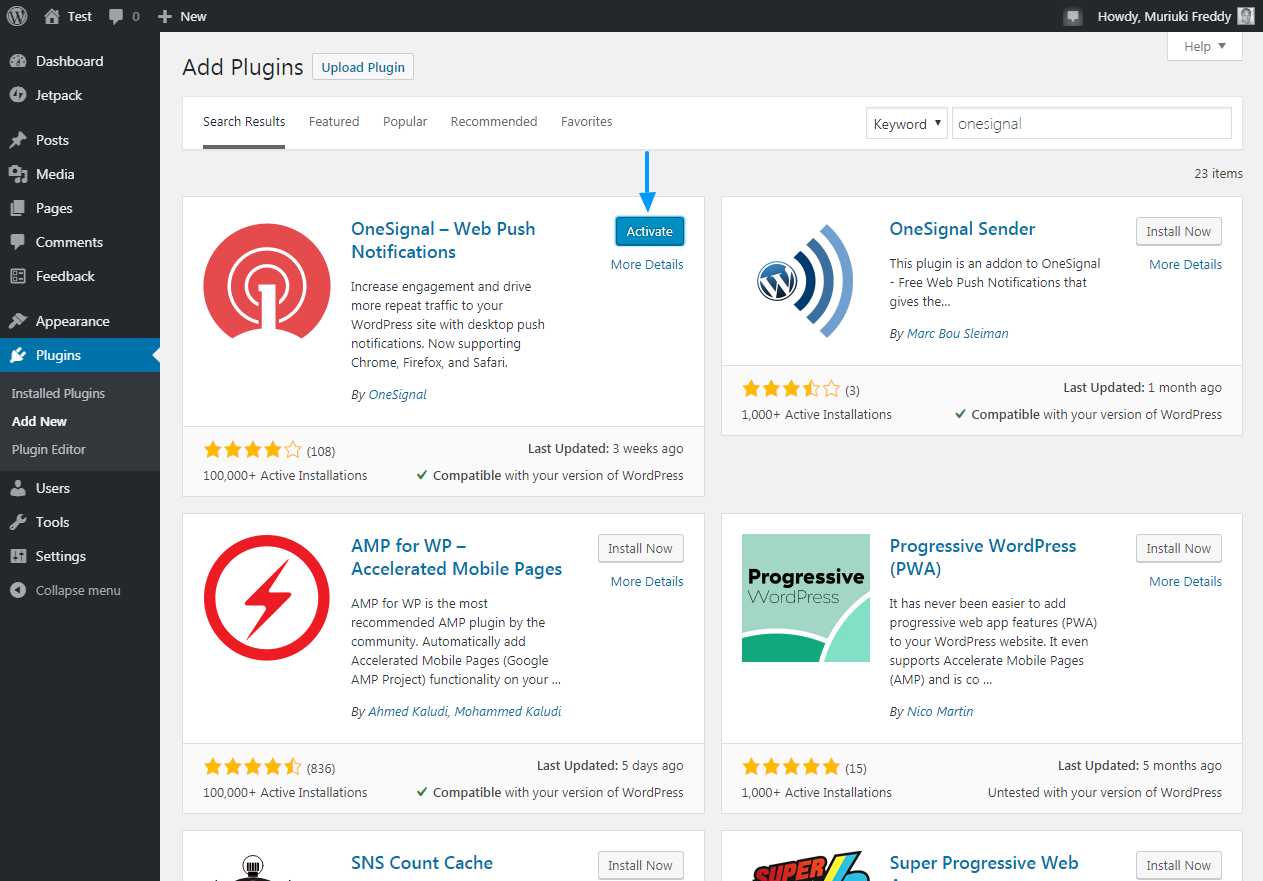
Wait out the installation and finally hit the Activate button as shown below.
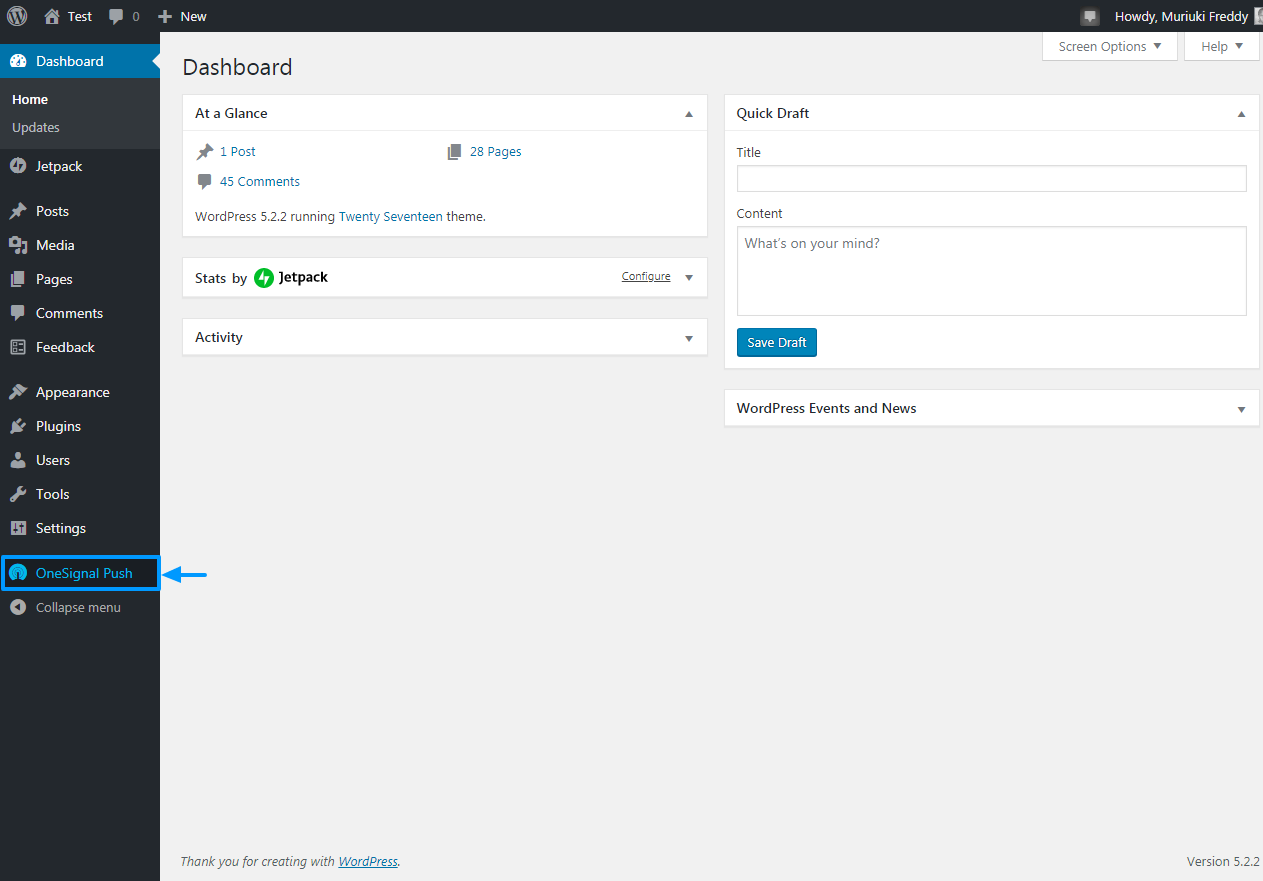
Activating the plugin adds a new OneSignal Push item to your WordPress admin menu.
How to Configure OneSignal Push Notifications
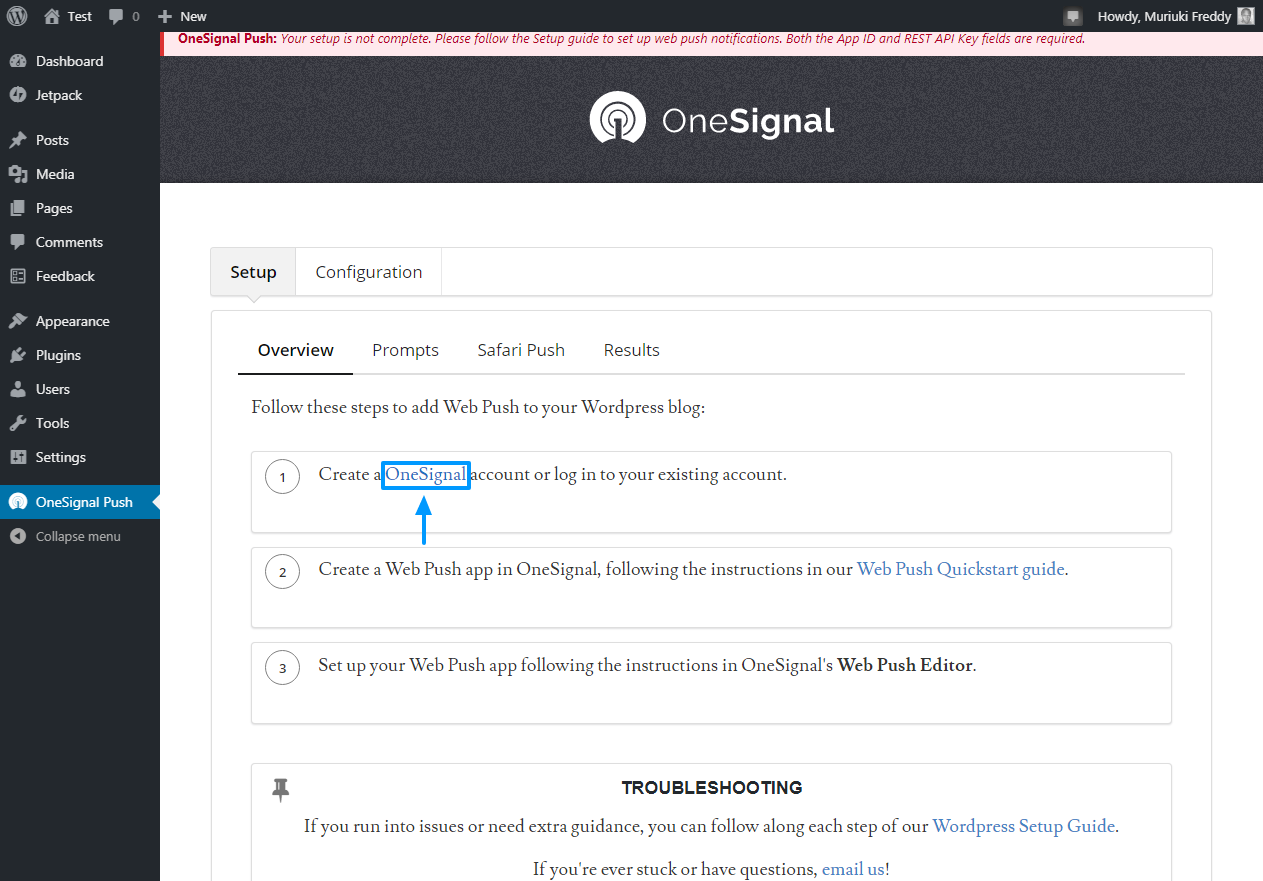
While the OneSignal push notifications service comes with plenty of features, it’s quite easy to configure and use. To configure OneSignal push notifications, click OneSignal Push on your WordPress admin menu as we highlight in the screengrab below.
Doing so leads you to the OneSignal settings page shown in the snapshot below.
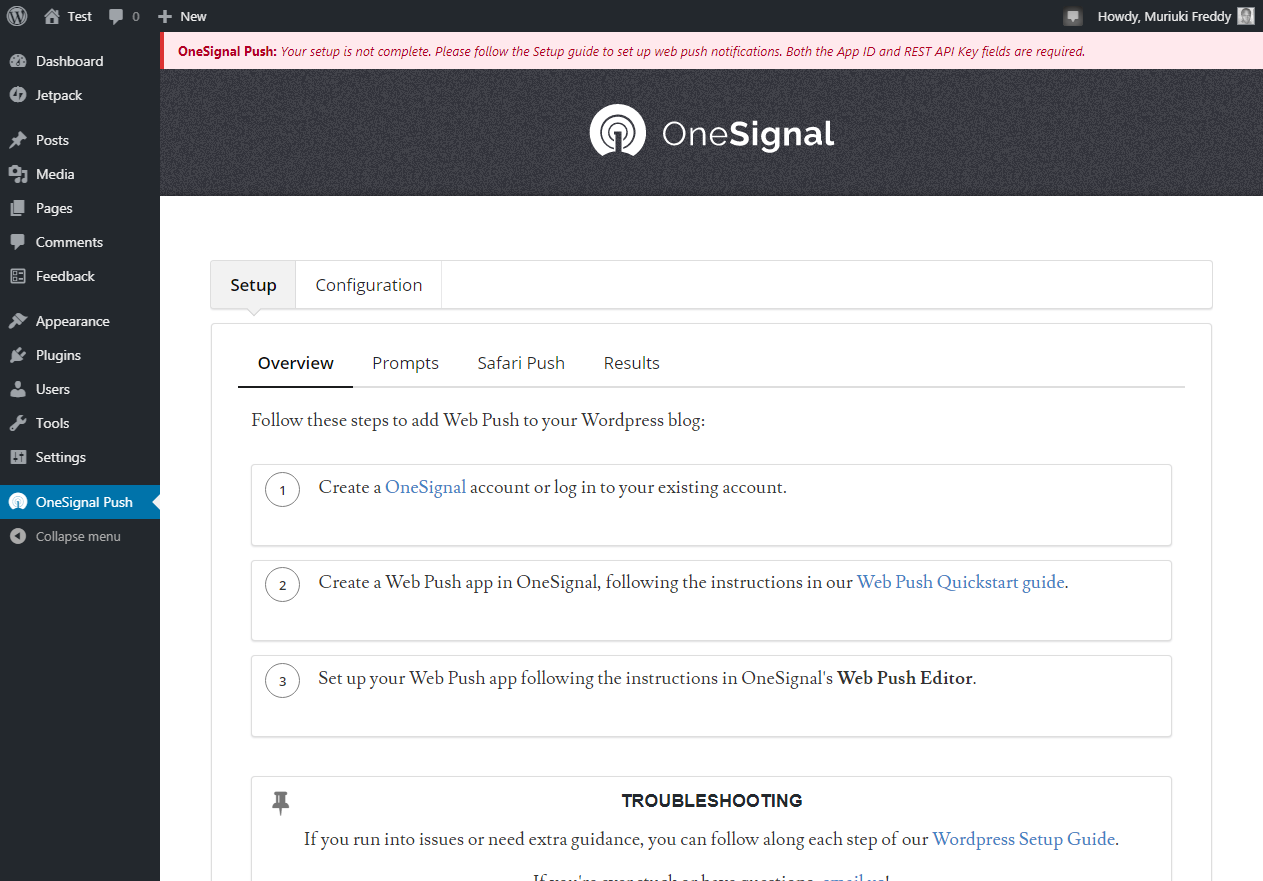
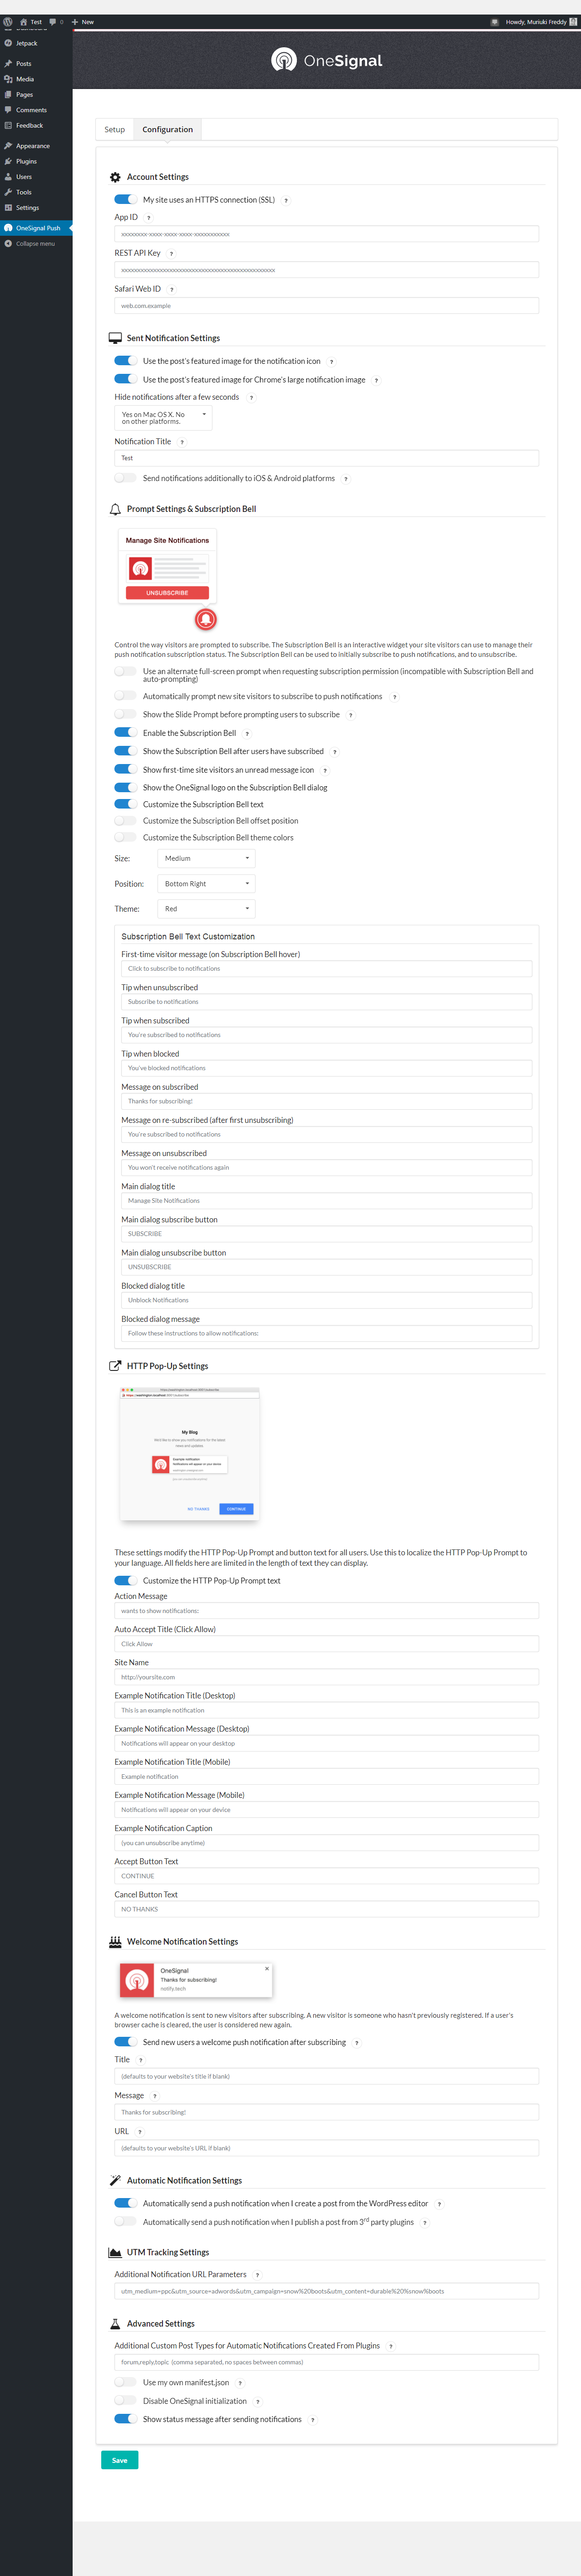
Notice the notification at the very top of the page? Well, it lets you know what you should do next, just like the instructions shown under the Setup tab as shown in the image above. The Configuration tab shown next to it allows you to link the OneSignal push notifications service with your WordPress site.
The image below shows you the options available under the Configuration tab; options that you use to configure, control and customize your push notifications.
Create a Free OneSignal Account
You’re doing just fine, so far so good. Now, let us get down to work and actually create a working web push app. To do that, you first need to create a free OneSignal account.
How?
On the Setup tab, click the OneSignal link as shown in the screenshot below.
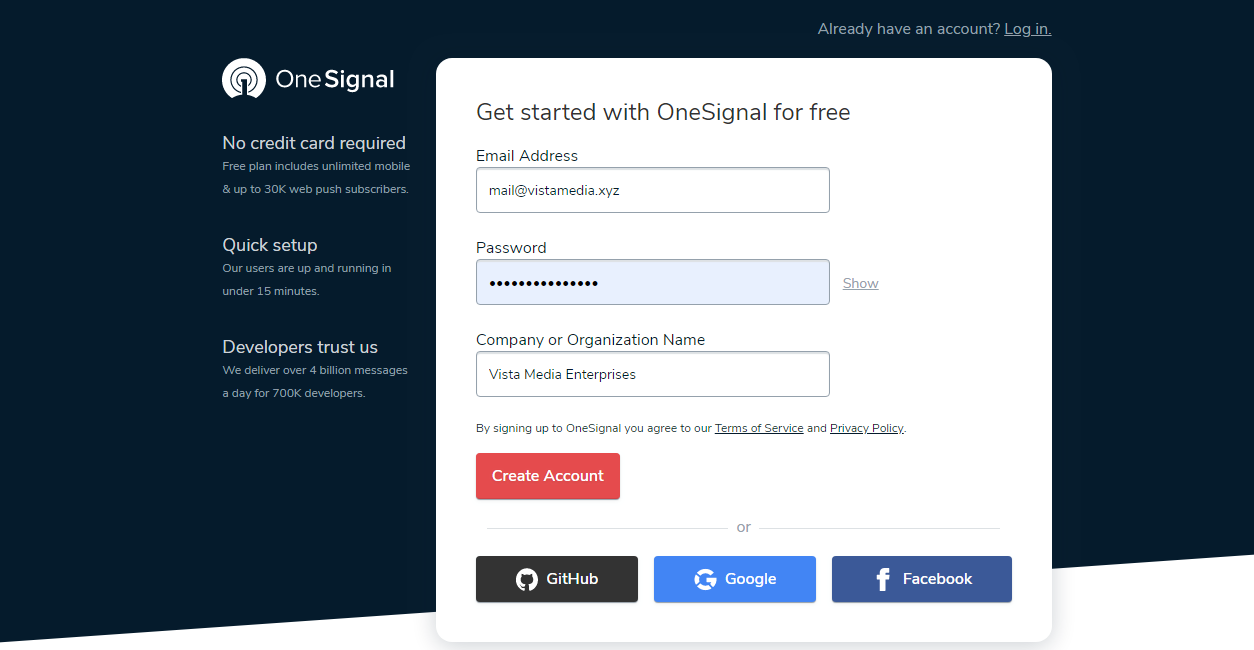
Alternatively, you can simply point your browser to onesignal.com. All the same, clicking the above link opens the official OneSignal website in a new tab. Next, click the Sign Up button as we highlight in the image below.

Doing so leads to a simple and short sign-up form. Fill out the form with your email, password and company name and then hit the Create Account button. Alternatively, you can sign up using GitHub, Google or Facebook as we illustrate in the image below.
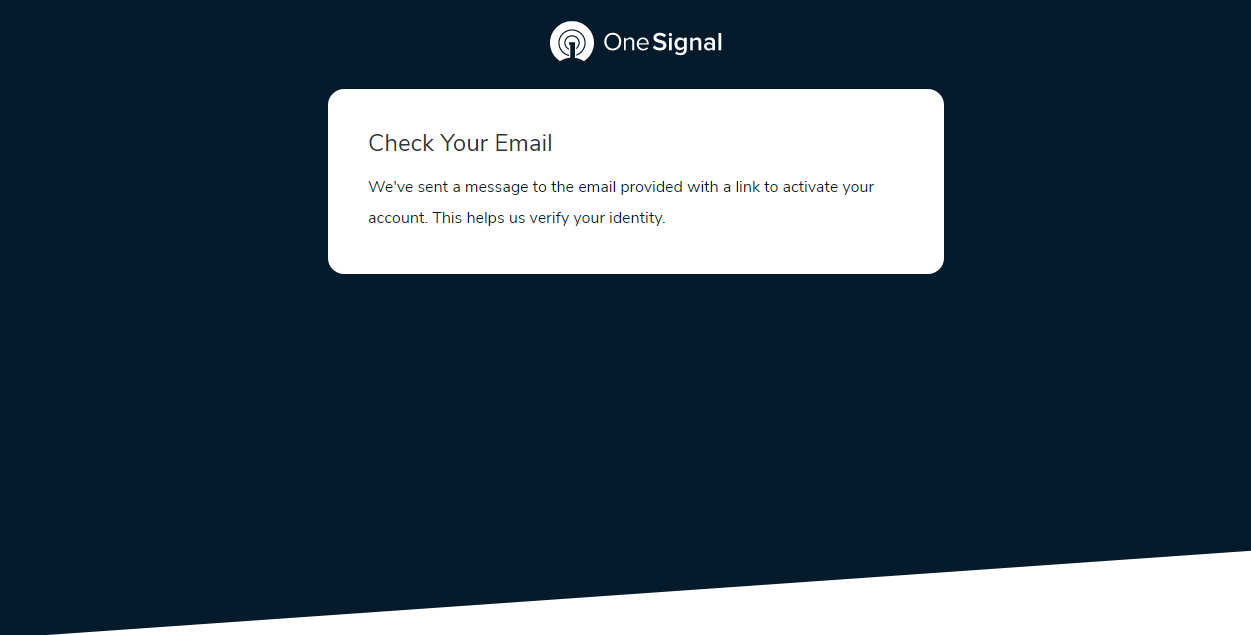
On successful registration, OneSignal will prompt you to check your email in order to activate your account.
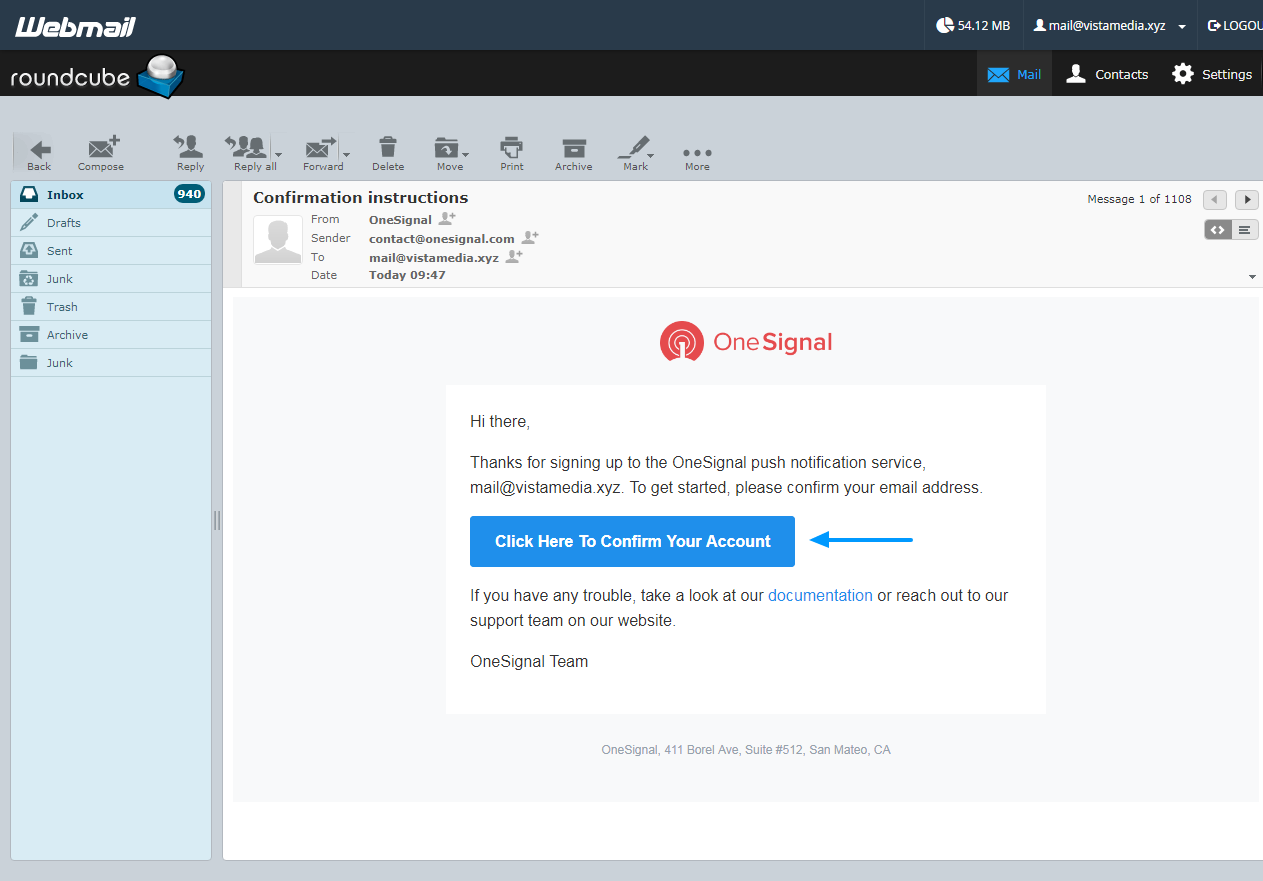
Log in to your mailbox and click on Click Here To Confirm Your Account button as shown in the image below.
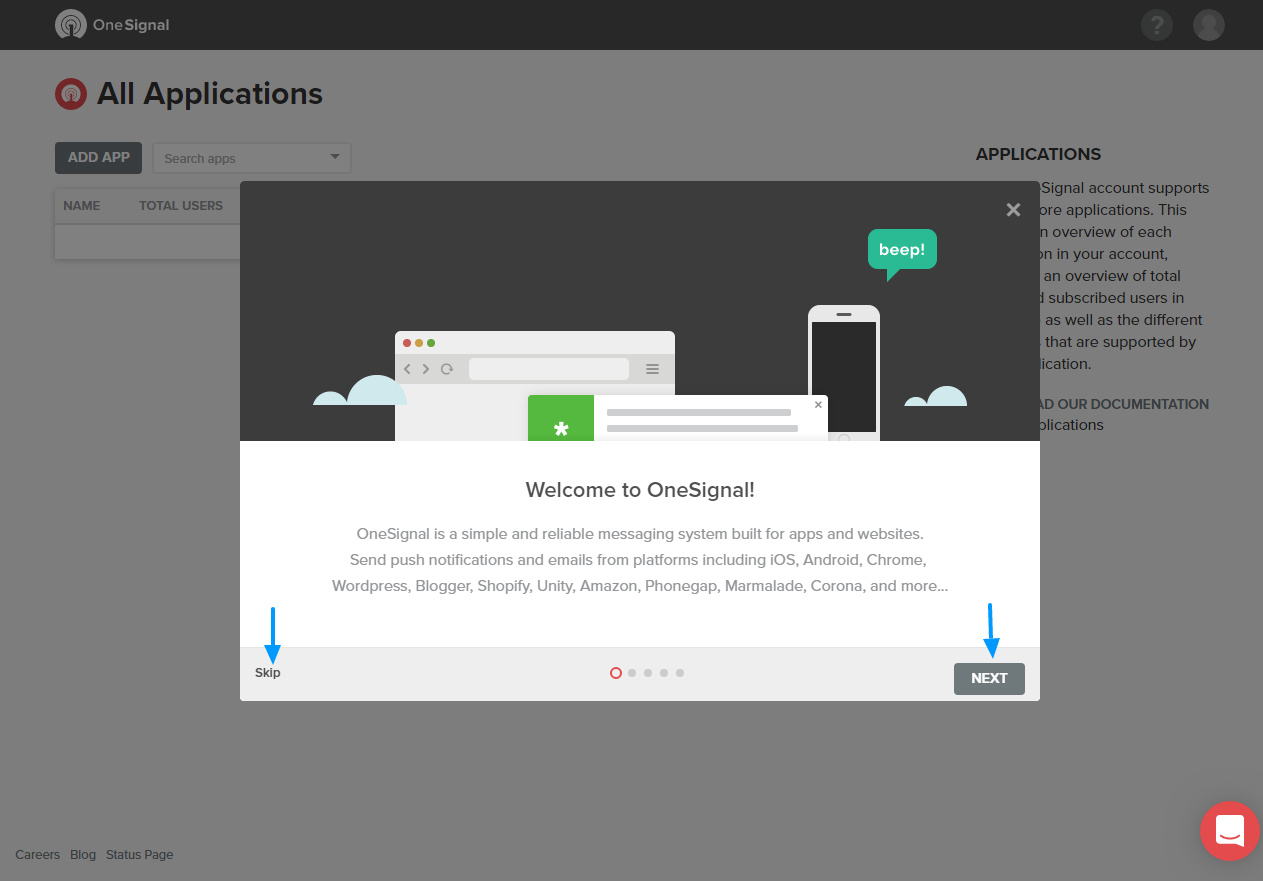
Clicking the above button confirms your account and opens the OneSignal dashboard in a new tab. OneSignal welcomes you with an onboarding tour that you can take or skip as shown below.
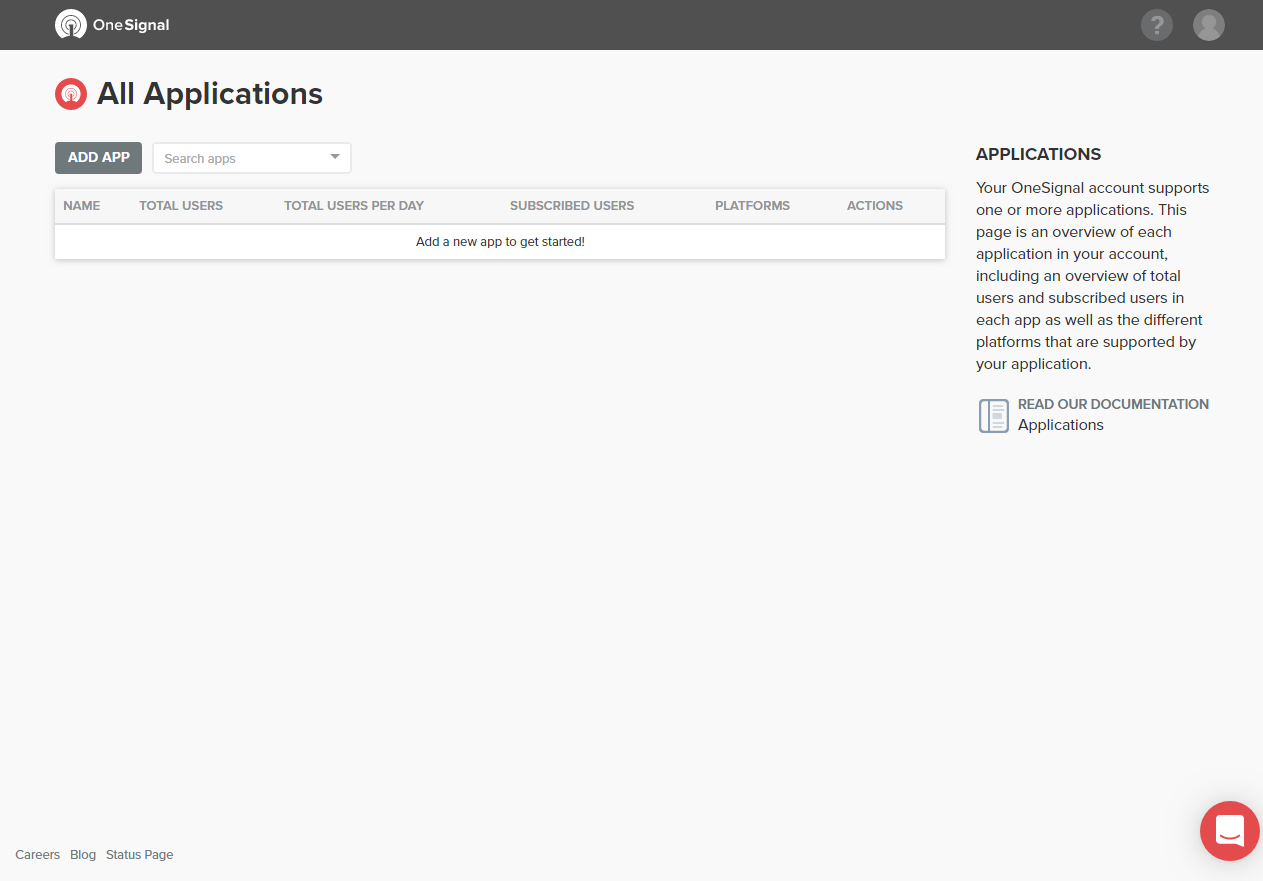
But whether you take the tour or not, you will eventually end up on the simple OneSignal dashboard shown in the following image.
Create a Web Push App
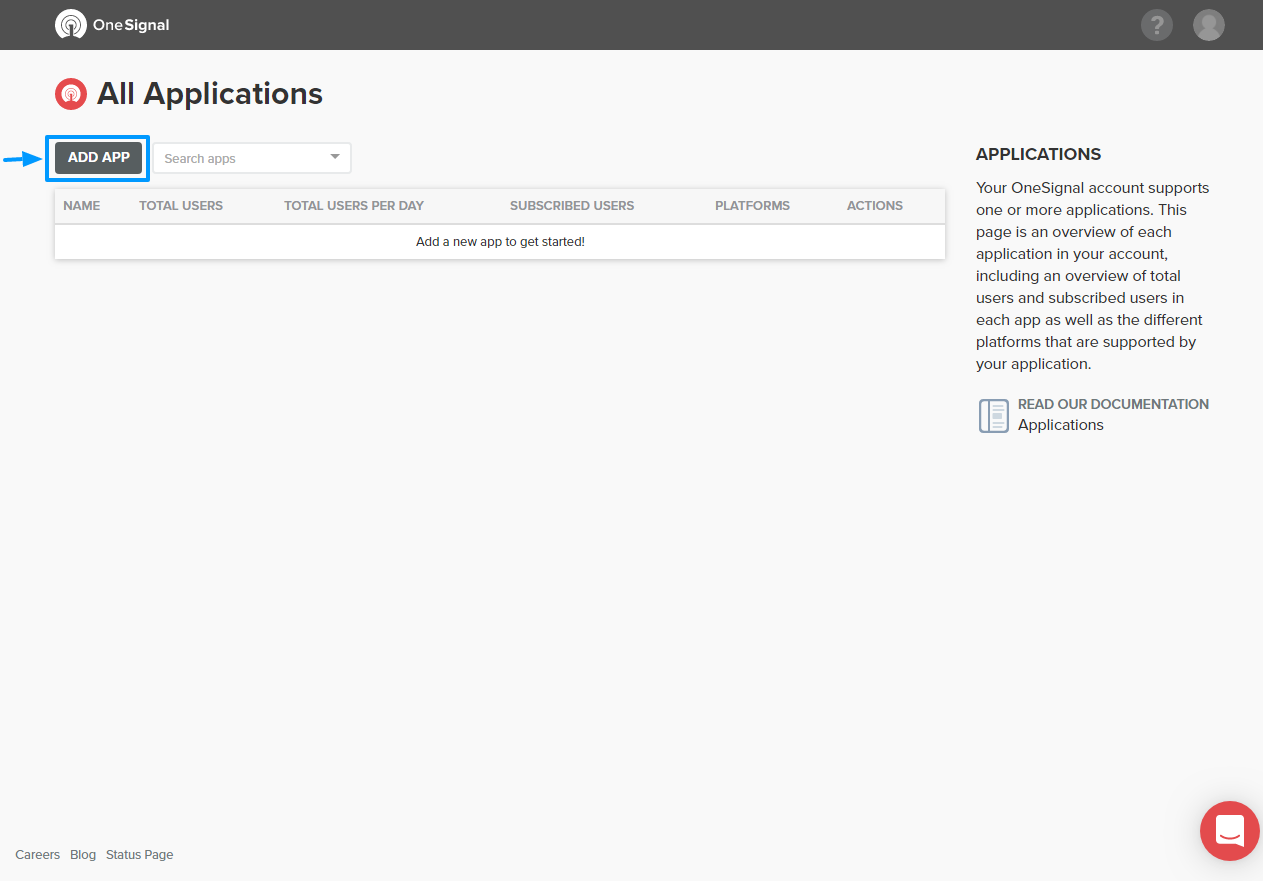
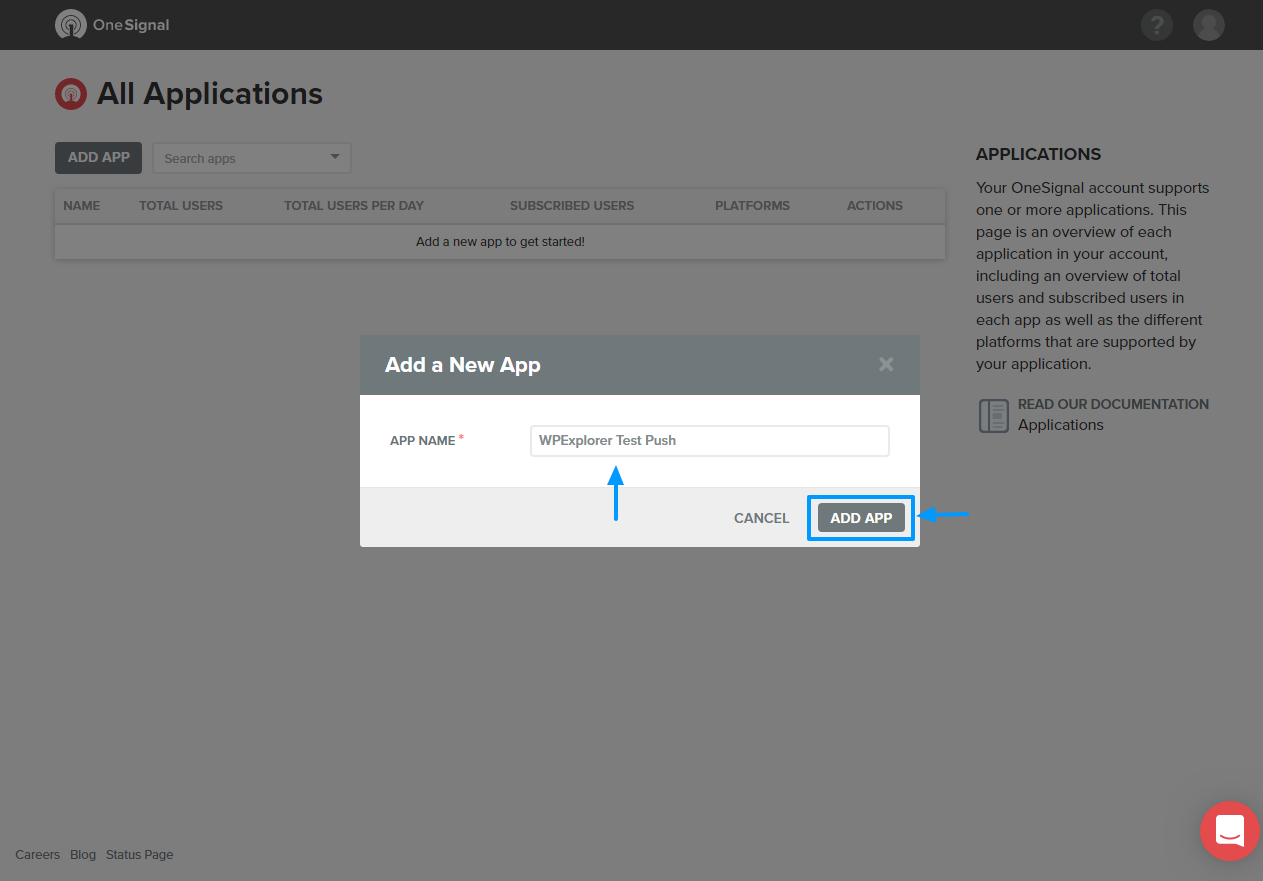
Now that you have an active OneSignal account, let us create your first web push app. Click the Add App button in your OneSignal dashboard as we highlight in the image below.
Add an app name so you can find it easily next time via the pop-up that appears and hit the Add App button as detailed below.
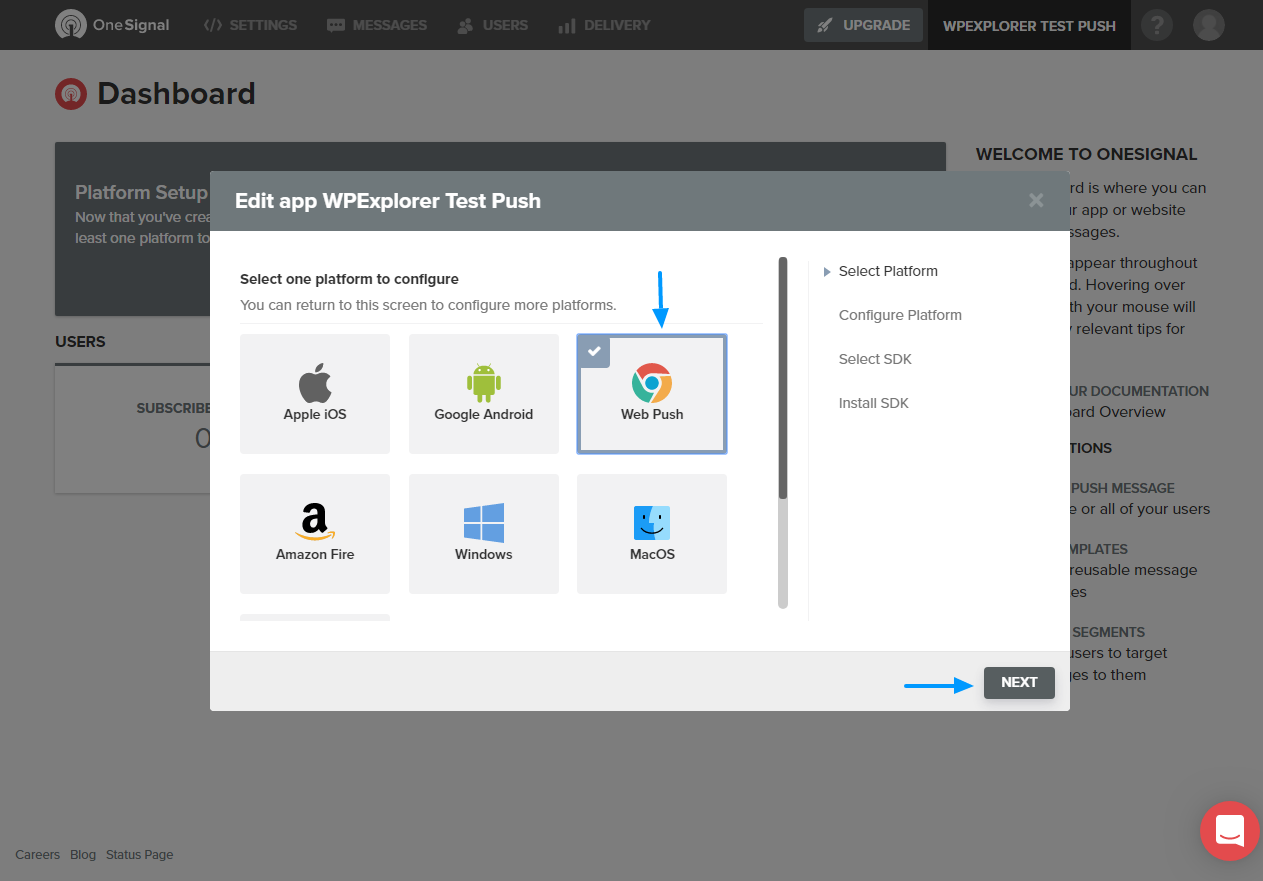
On the next screen, select Web Push and click the Next button as we highlight in the screenshot below.
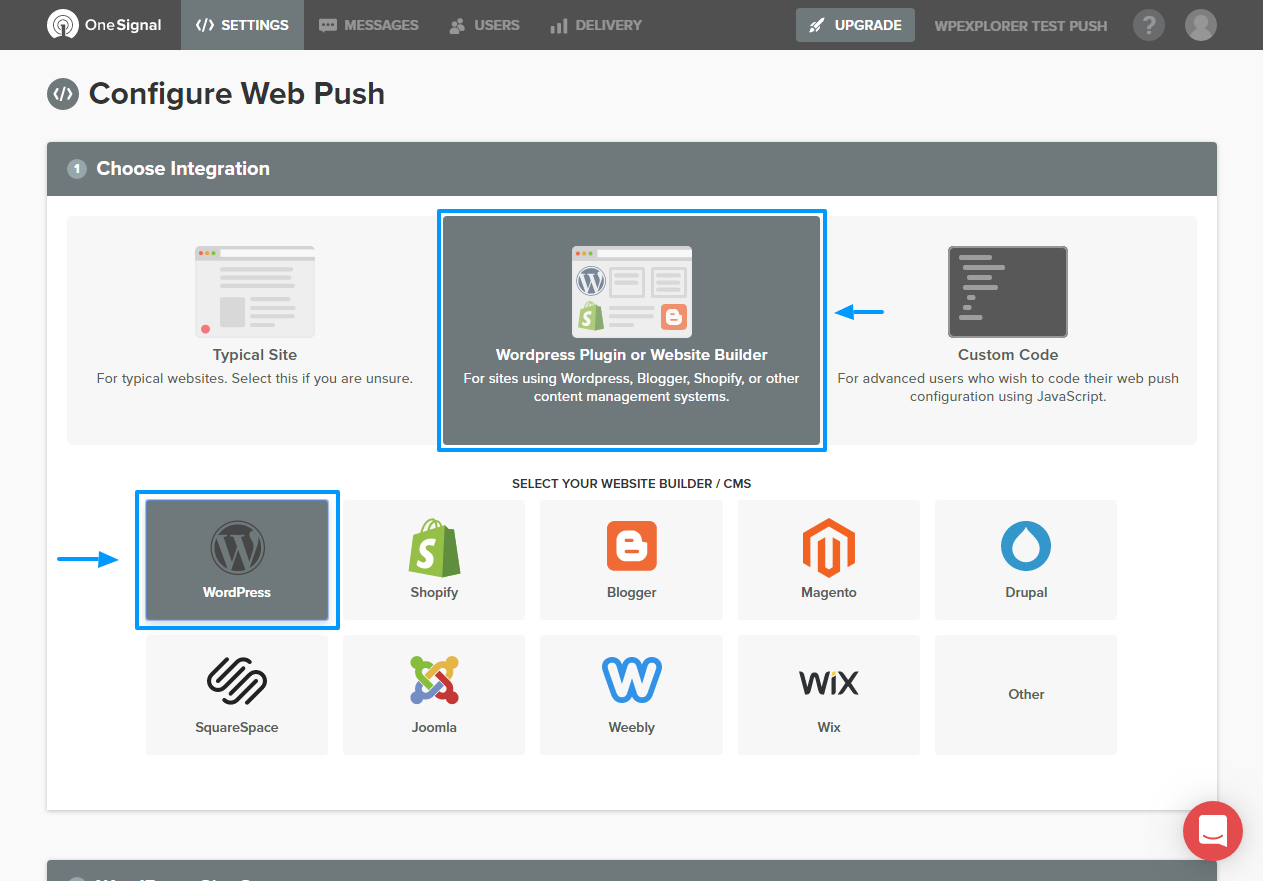
After that, click the WordPress Plugin or Website Builder tab and then the WordPress tab as shown below.
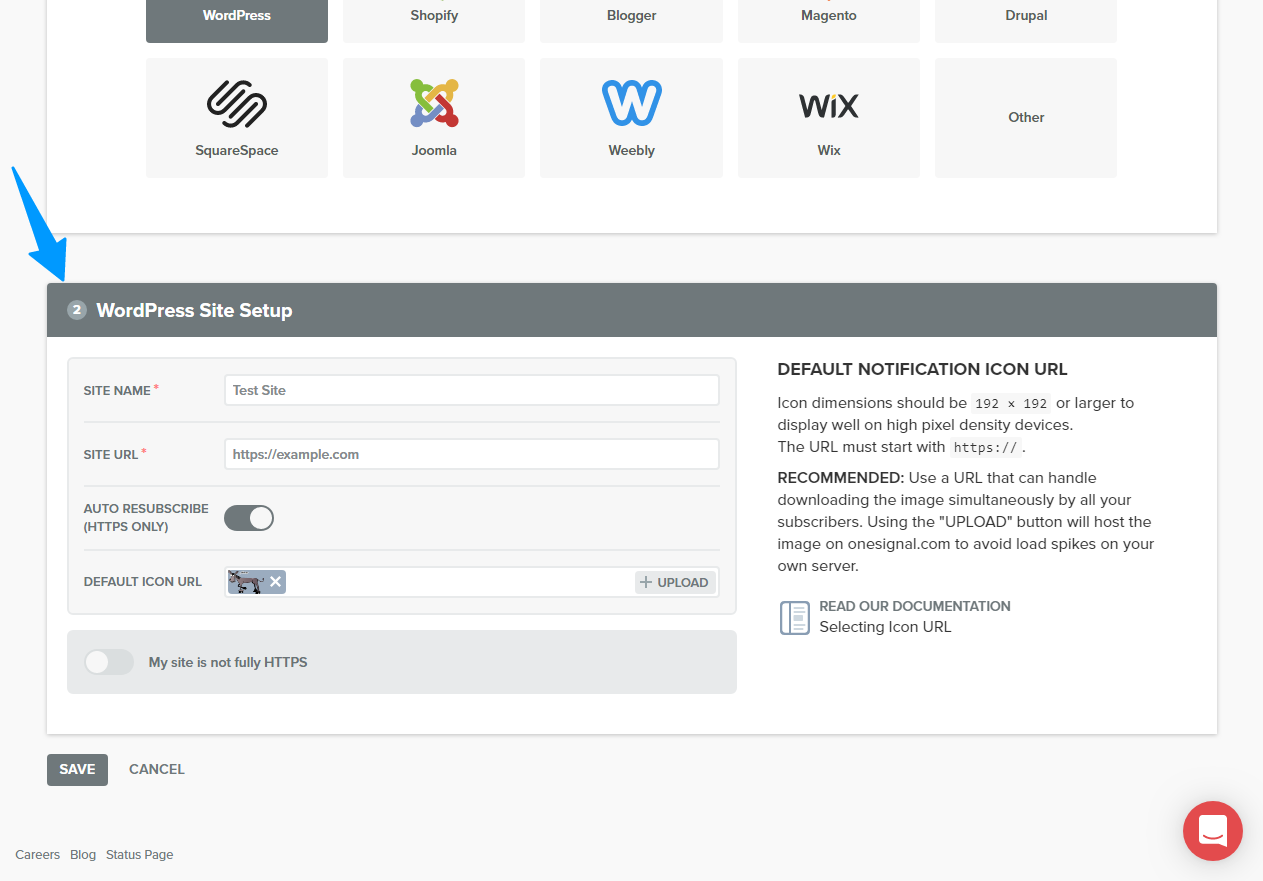
Next, scroll towards the bottom of the page, fill out the form, upload your icon and hit the Save button as shown below.
Doing so saves your web push app and exposes the APP ID and API KEY you need to add OneSignal push notifications to your WordPress site. See image below for details.
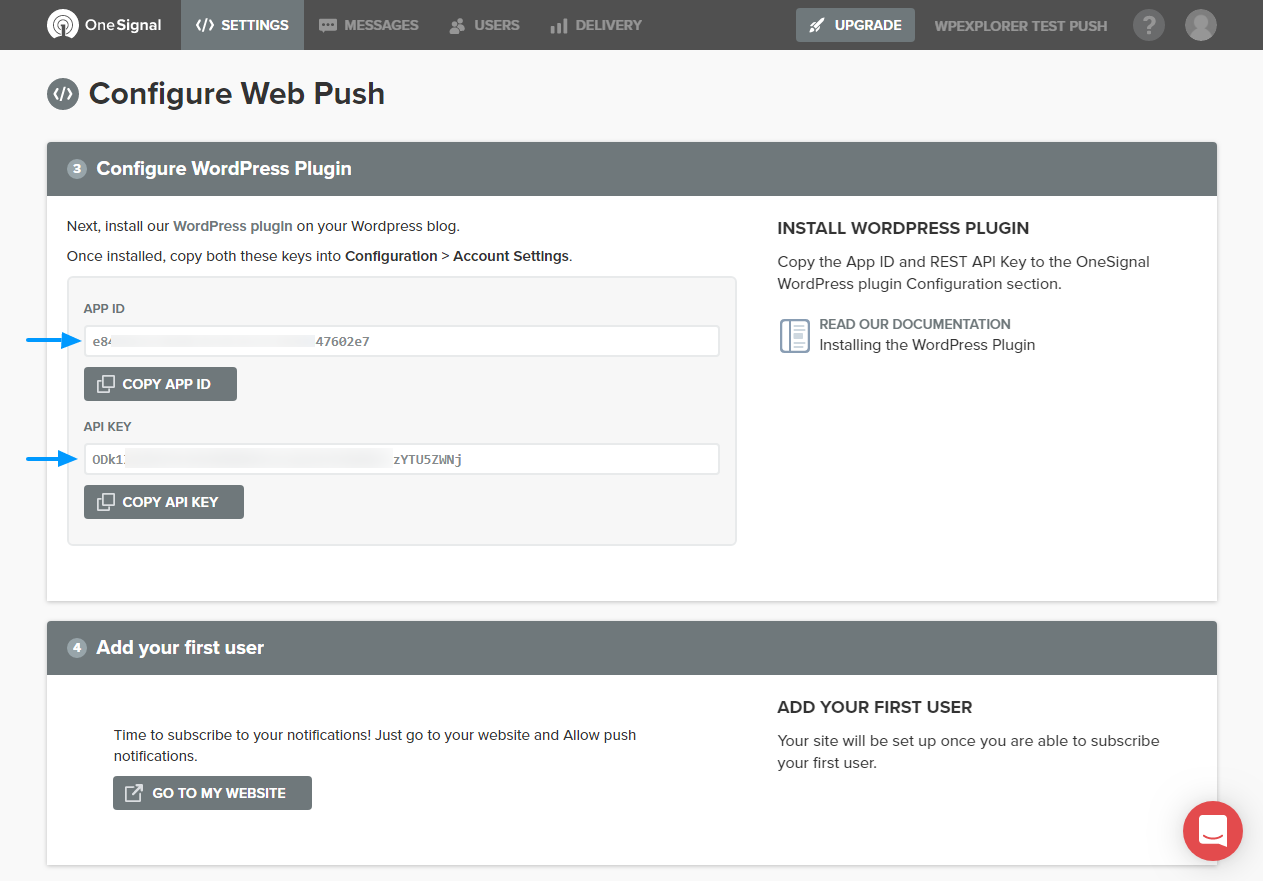
You need to copy-paste the APP ID and API key into the respective fields of the Configuration tab. Simply navigate to OneSignal Push > Configuration and copy-paste the APP ID and API key as we highlight below.
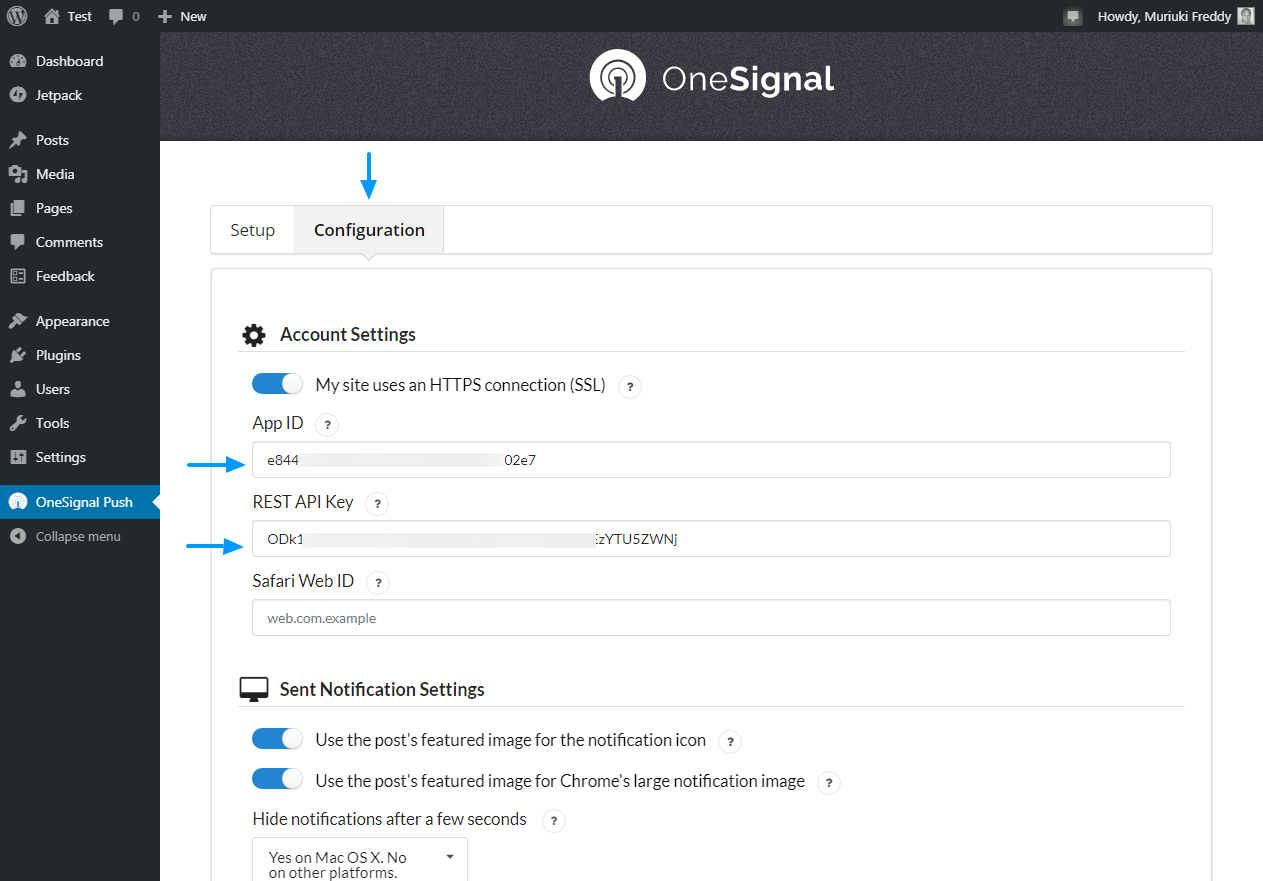
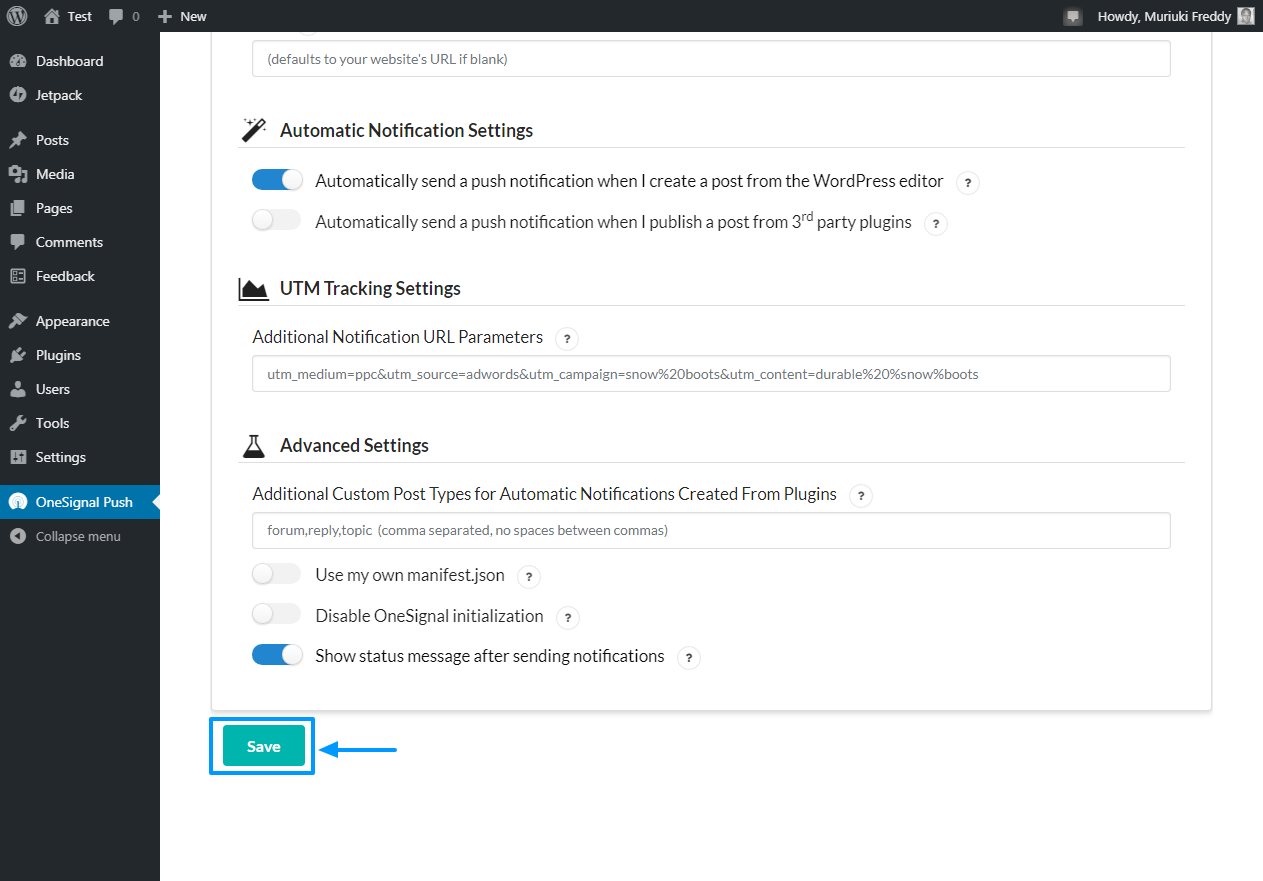
After that, choose your desired settings on the same page. Next, scroll towards the bottom of the page and hit the Save button as shown below.
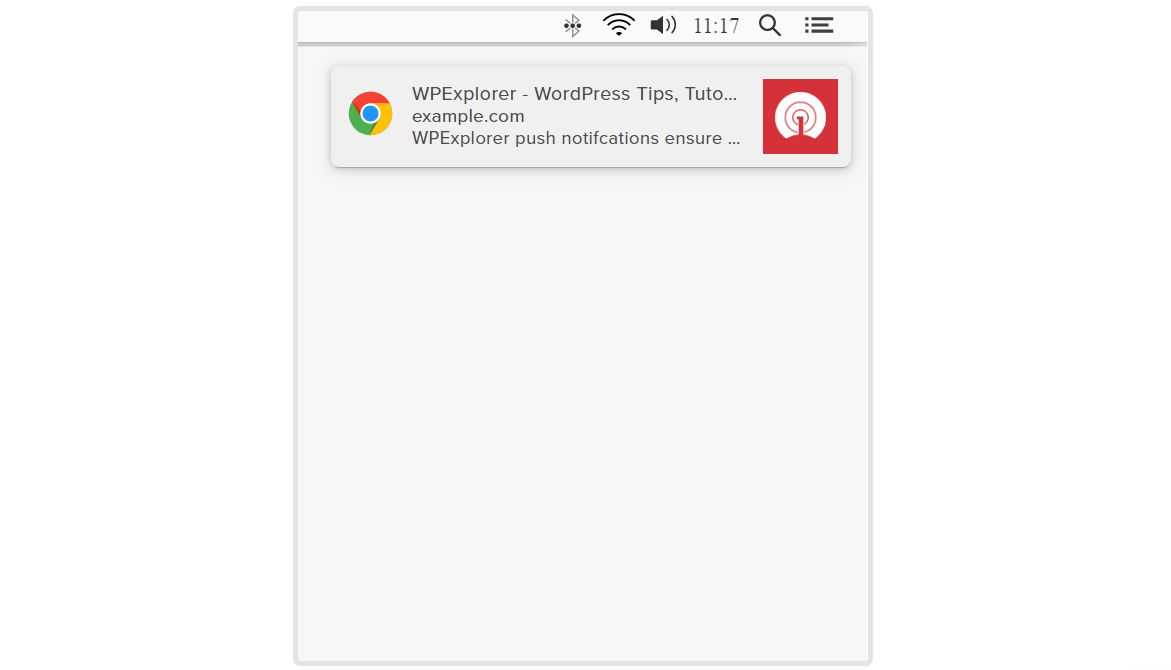
And that’s it! Now, your website is pushing notifications on all supported browsers except Safari. Try out the new push notifications feature by visiting your website in a new incognito browser window. I even tested the Opera browser, and here is what I got.
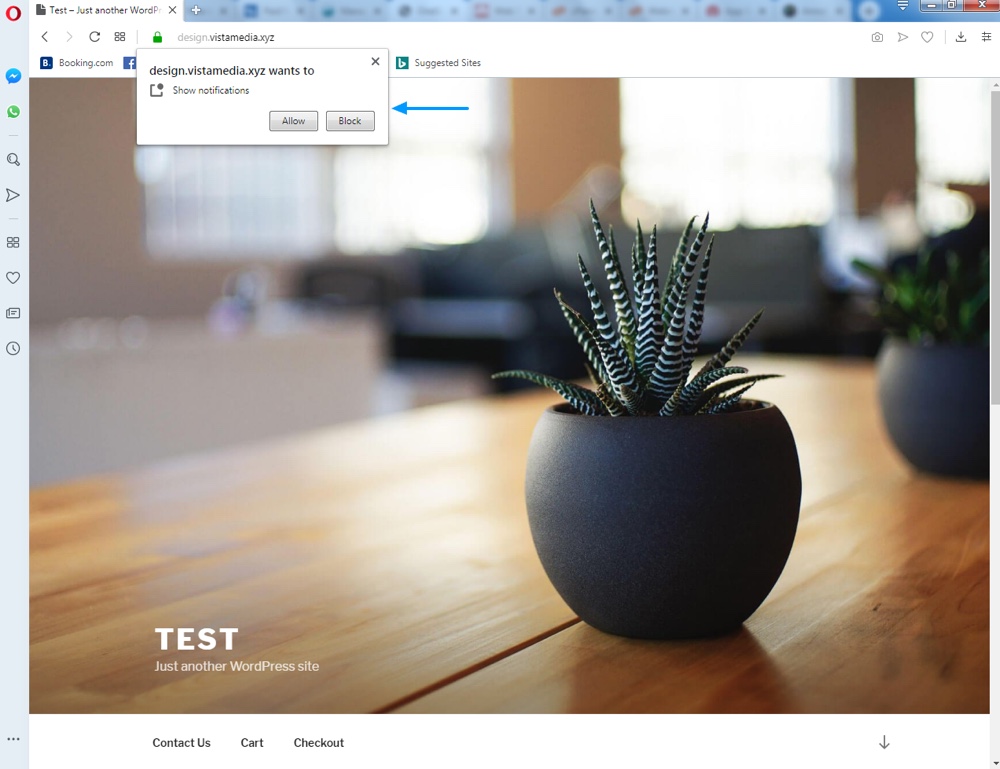
Not bad for about 10 minutes of configuring the OneSignal push notifications service. What do you think?
Configuring OneSignal Push Notifications for the Safari Browser
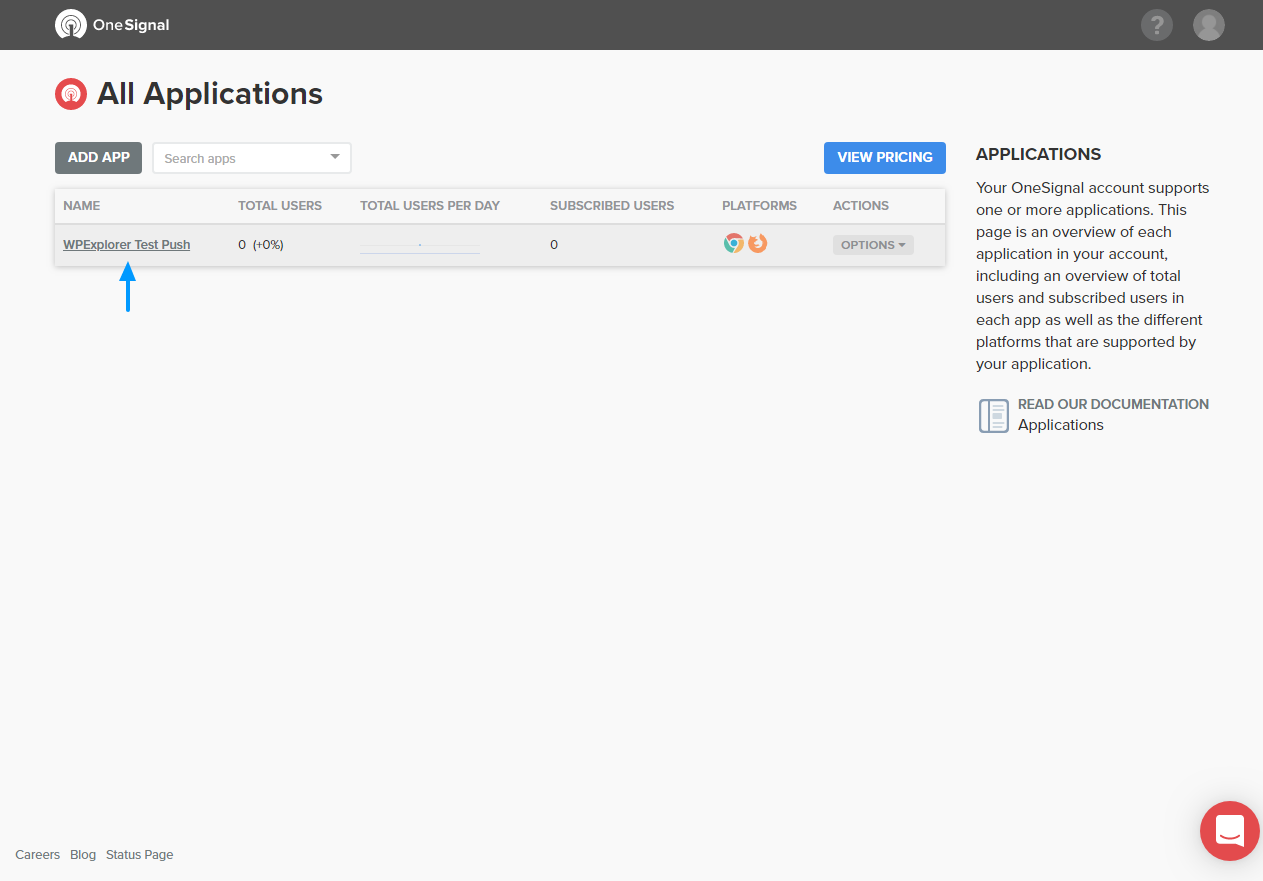
To configure push notifications for the Safari browser, you need to generate the Safari Web ID. How? Open your OneSignal dashboard and click on your web push app as shown below.
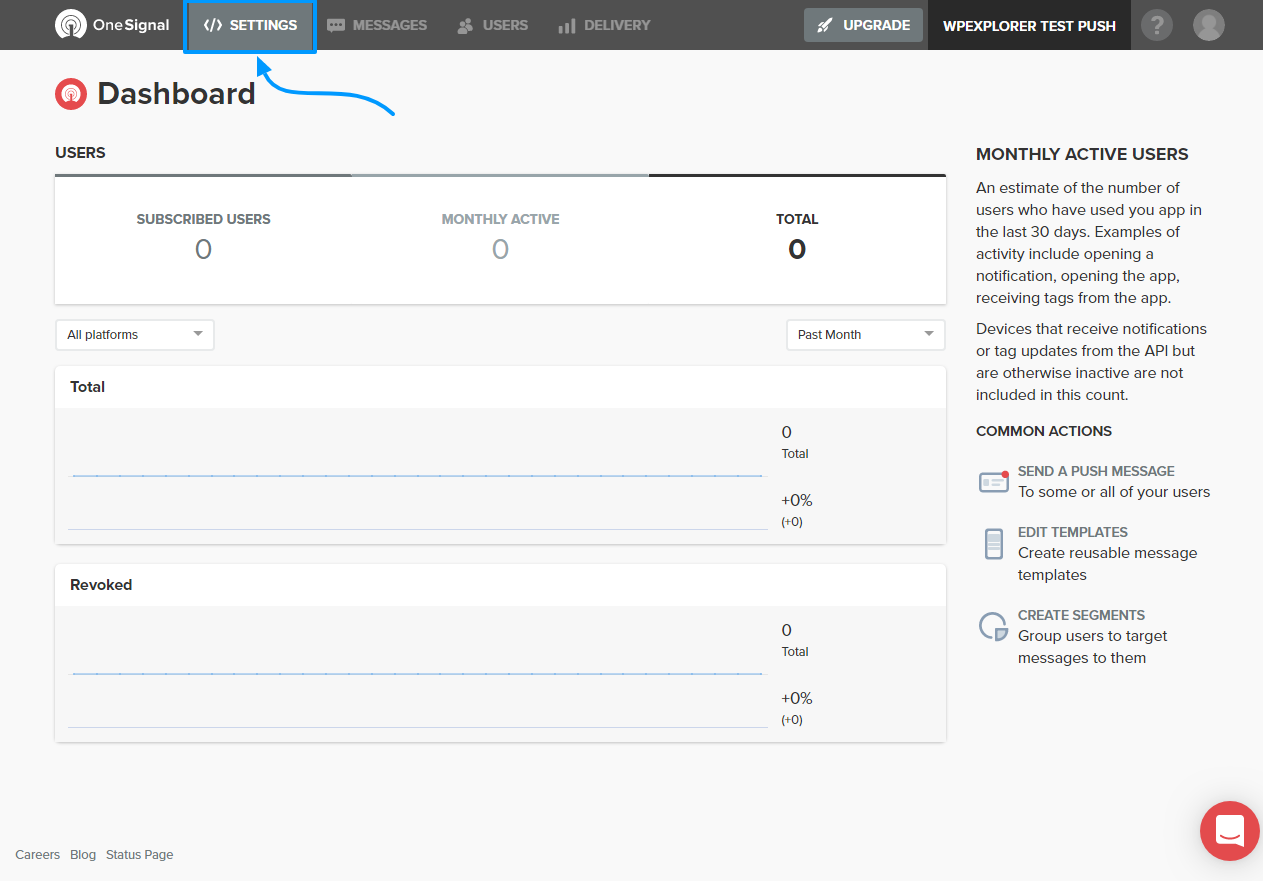
Next, click Settings as shown in the screenshot below.
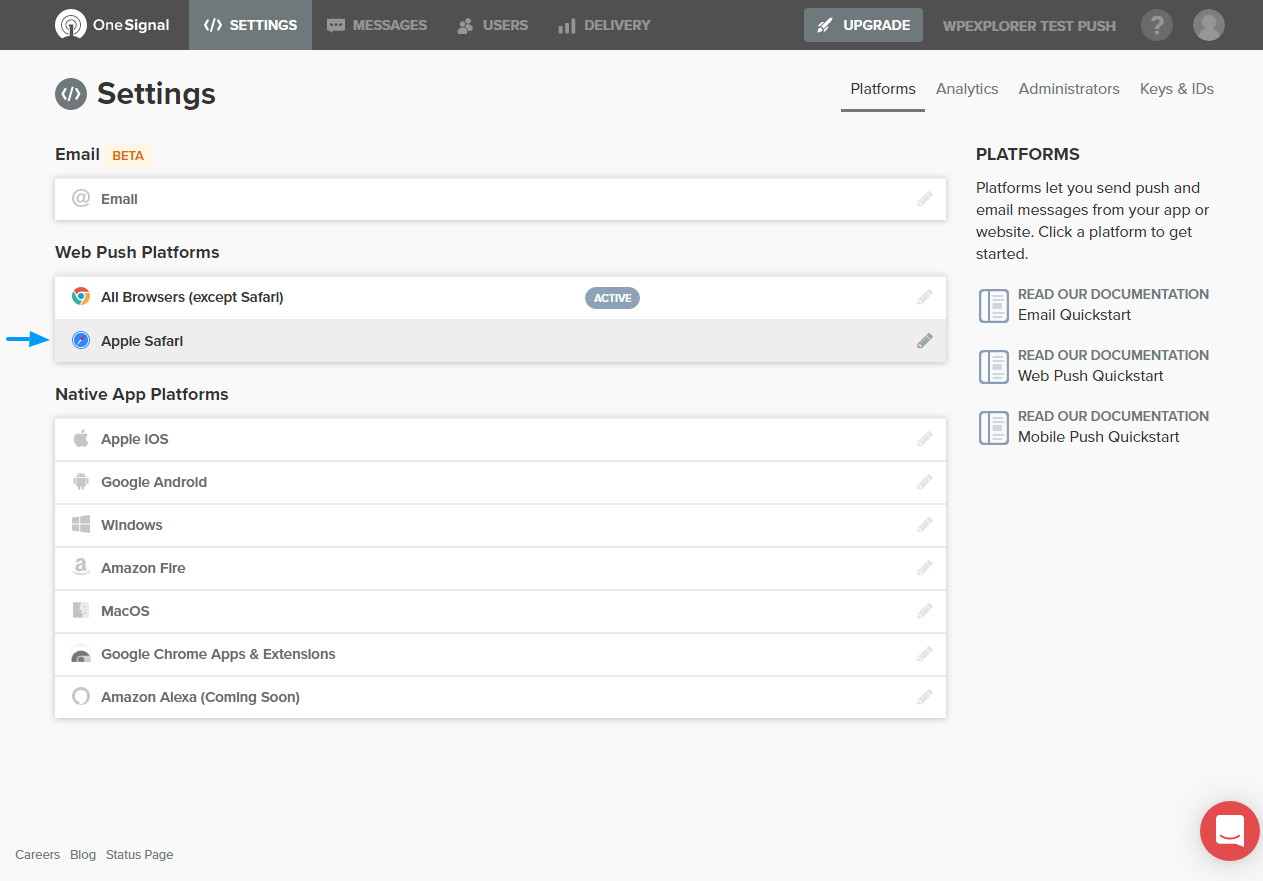
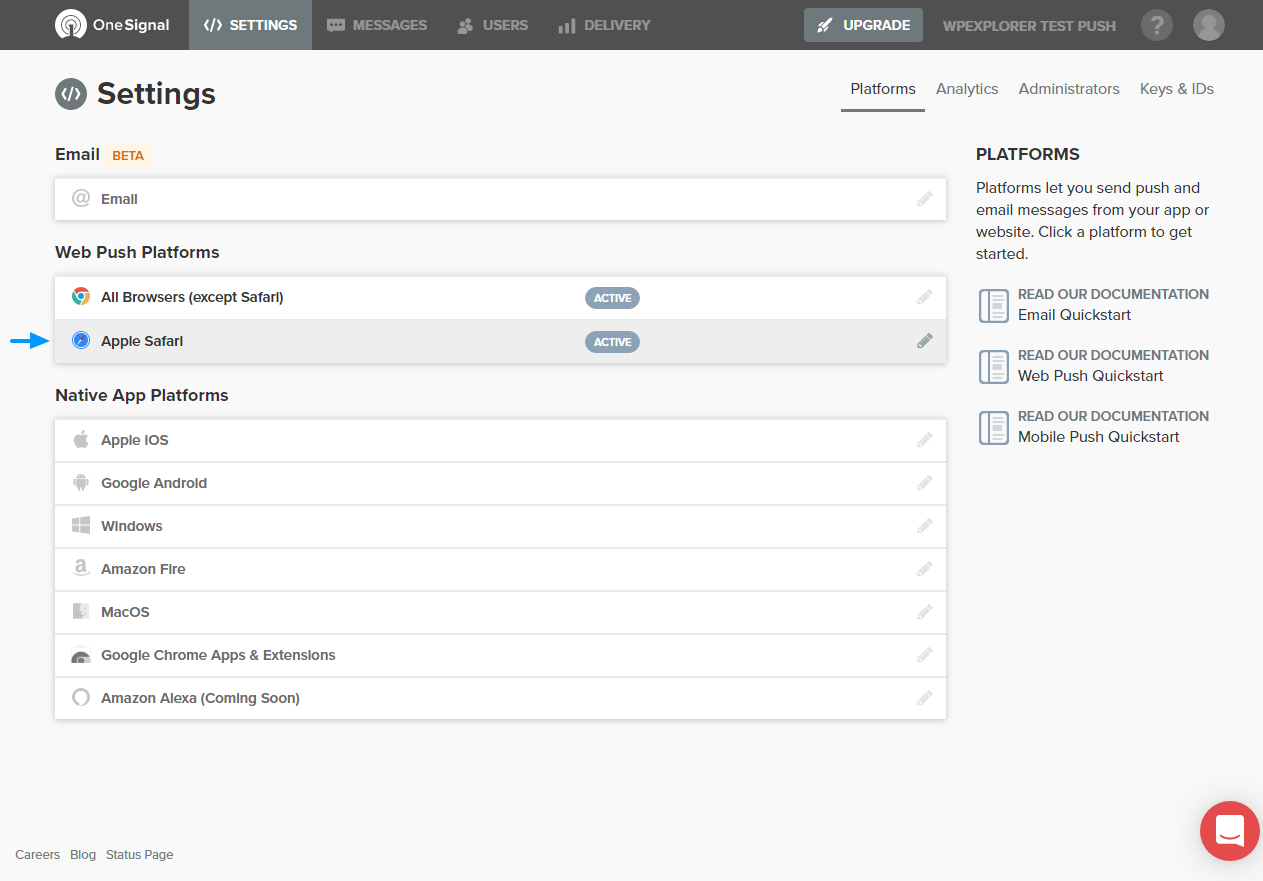
After that, click the Apple Safari tab as we highlight below.
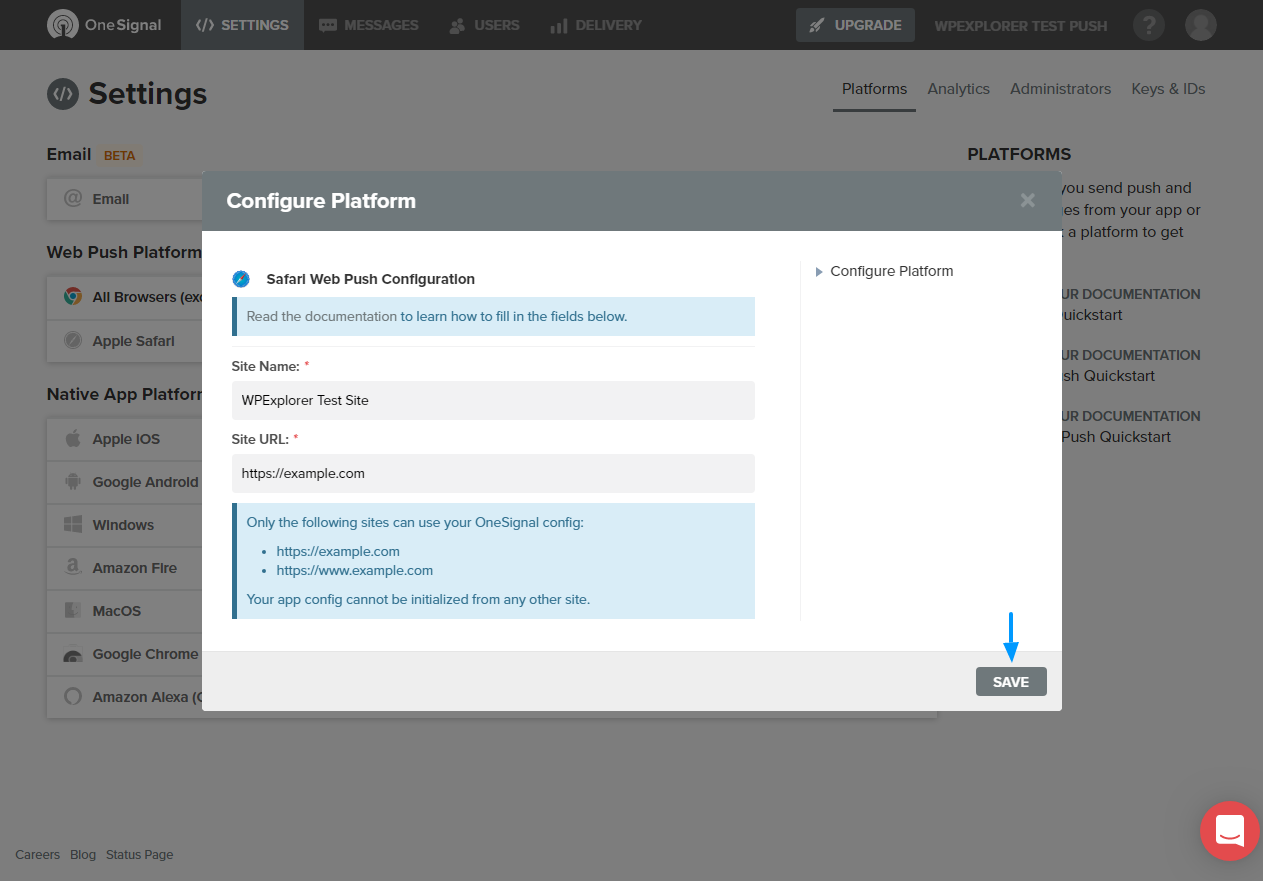
Next, fill out the pop-up that appears and hit the Save button as we detail below.
After that, click on the Apple Safari tab again as shown below (notice it’s marked ACTIVE).
Doing so brings up a pop-up with your Safari Web ID as shown in the following image.
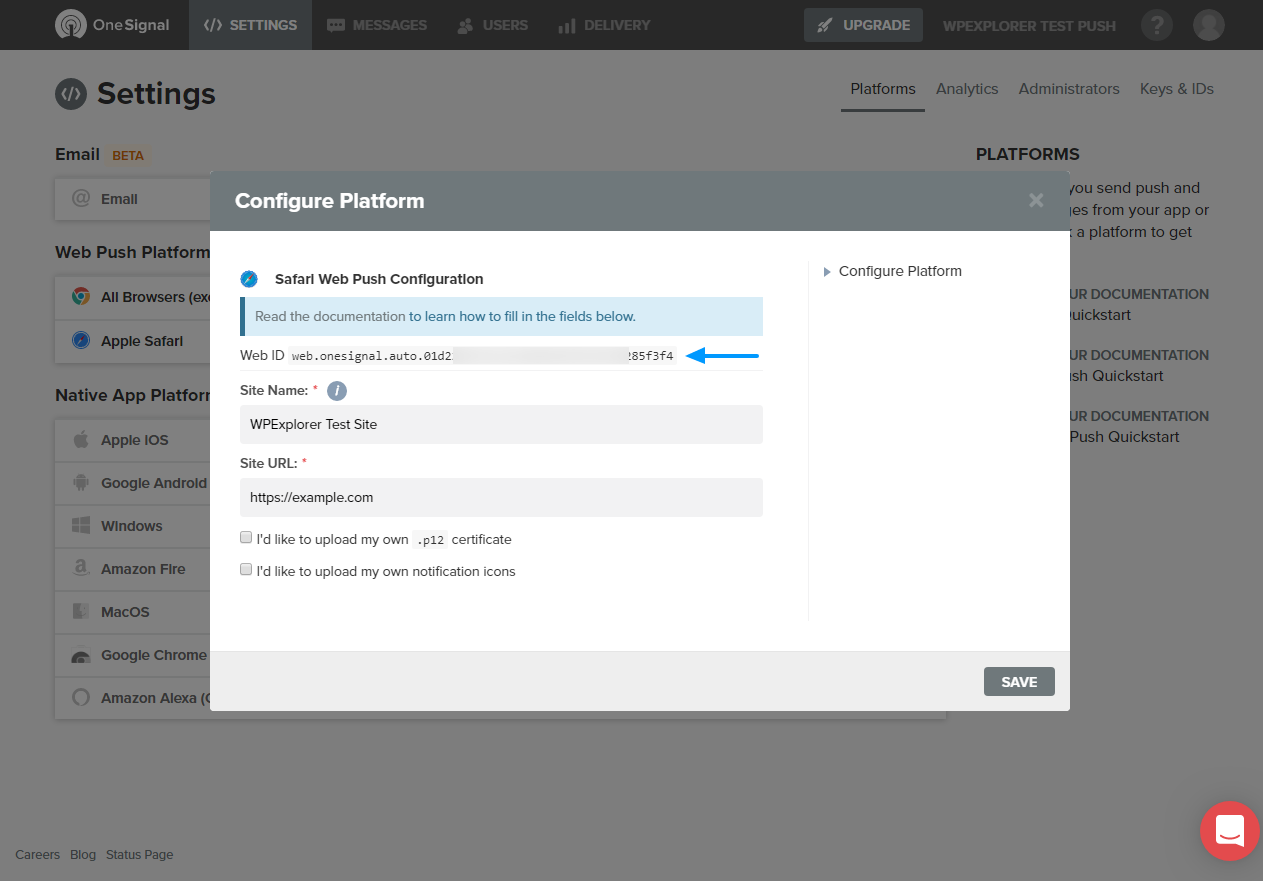
You must copy-paste the above Web ID into the Configuration tab as we did with the APP ID and API key as shown below.
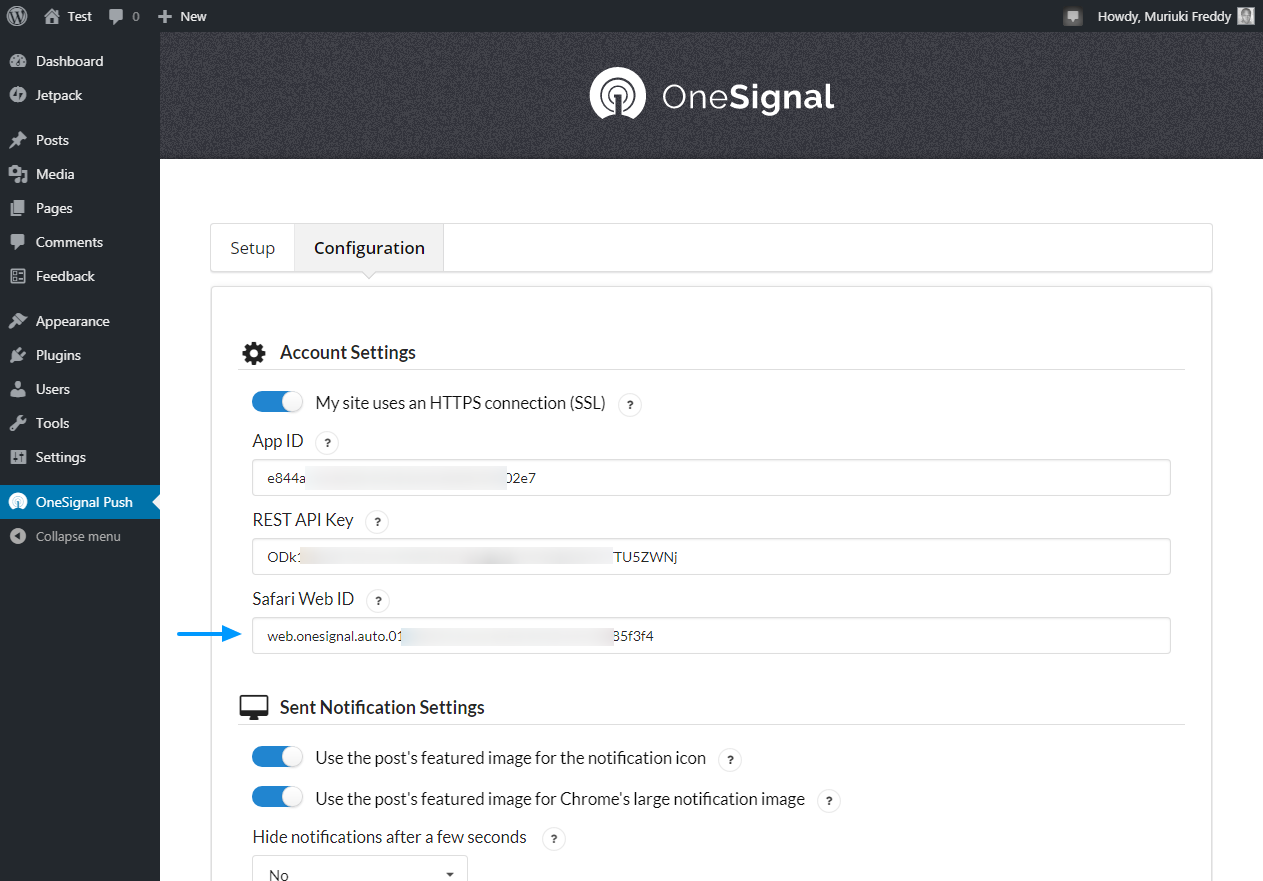
Scroll towards the bottom of the above page and hit the Save button. Now, your OneSignal push notifications are active and supported on all major browsers. The best part is the free OneSignal account supports up to 30,000 web subscribers. The free account supports an unlimited number of mobile subscribers.
If you need more power, you can always spring for a premium package, starting at $99 bucks per month. We always encourage you to go with the option that works for your business.
Push notifications are a great way of staying in touch with your site visitors. And since visitors give push notifications prior consent, you’re sure that the people who subscribe are actually interested in what you are offering.
The advantages of push notifications make this marketing channel lucrative and quite effective. Setting up push notifications using the OneSignal WordPress plugin and service is incredibly easy you should be up and running in less than 15 minutes.
Do you have a question about push notifications? Any comments about this post in general? Please share with us in the comments.


I am going to create a wordPress site.That’s why i was roaming around different website to website to learn many things about wordPress.Thus I found this article and I think this push notification process is a good system to make our audience connected with our websites.So I think i should use it in my site..
Thanks Katherine for sharing the post.
Hey Katherine,
Great piece of content here adding push notifications in WordPress. I agree with you, push notification makes it easy to a user to get’s updated of the blog/website whenever you have new published post. It’s another simple method of getting user attention and always coming back into your site.
Keep it up. Thanks for sharing.
~Rod
Most of the businesses nowadays are leveraging technology to make it easier for their customers to interact with them.
Thank you for sharing the wonderful information regarding to the react native push notifications
It definitely helped me to increase my knowledge about this. Such a great article.