How To Build an Online Portfolio with WordPress (and the Total Theme)
A portfolio website is a perfect platform to showcase anything you want. It may be products that you’re selling, the projects you’ve completed, awards that you received, photographs that inspire or artwork that you’re proud of. A portfolio site will market your products, services and skills to your target audience. Moreover, it can be helpful in generating leads. If you’re a creative professional (web designer, artist, painter, writer, graphic illustrator), a well designed website is specially important to attract clients and grow your business.
In this post, we’ll go through the steps of building a portfolio website with WordPress using the Total theme. At the outset, you should know that the Total theme includes a built-in custom post type for portfolio. So it’s easier to create your portfolio and add your portfolio items. And if you know how to work with standard posts, creating a portfolio will be that much simpler for you.
Let’s get started!
Step 1: Select a Web Host
When it comes to hosting, there’s a vast number of hosting options to suit every pocket. But if you’re stuck for picking one, take a look at the WordPress hosting solutions WPExplorer recommends.
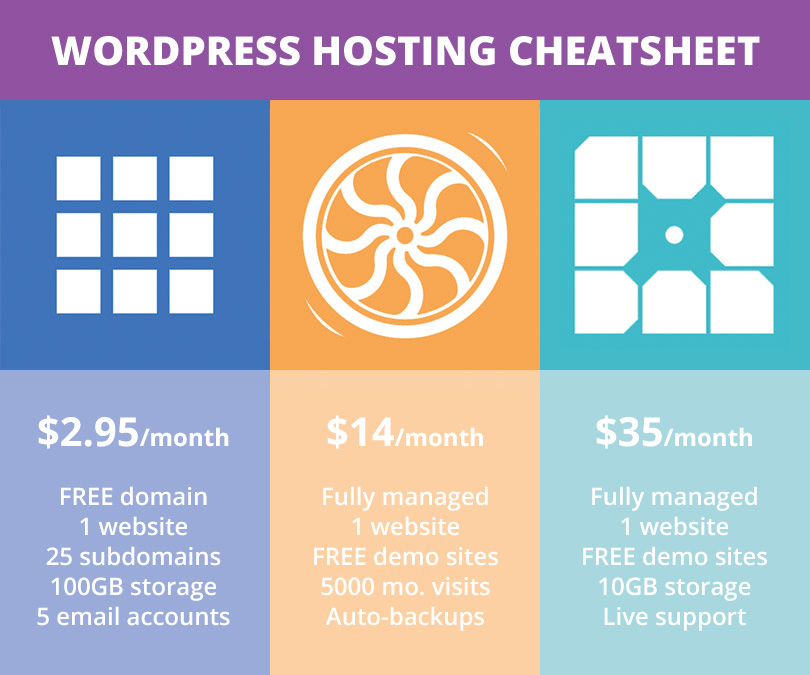
Bluehost is a great option if you’re just getting started since it offers plenty of resources at a low price – which is even lower when you use our link. You can get Bluehost for just $2.95 the first year!
But if you want hosting that’s a breeze to use, Flywheel and WP Engine are two of the best managed WordPress hosting companies around. Both offer great features at a reasonable price, and best of all you don’t ever have to think about your server since they take care of everything for you.
Step 2: Choose a Domain Name
While signing up with a host for server space, you’ll need to have your domain name handy. Your domain name is unique to your website and you can obtain these names from Registrars like NameCheap and GoDaddy. Choose a name carefully, as it can get quite messy to change it later.
Step 3: Install WordPress
Installing WordPress is easy! With managed hosts your WordPress install is already setup for you. If you choose Bluehost simply follow the one-click install process and you should have WordPress ready in a few minutes.

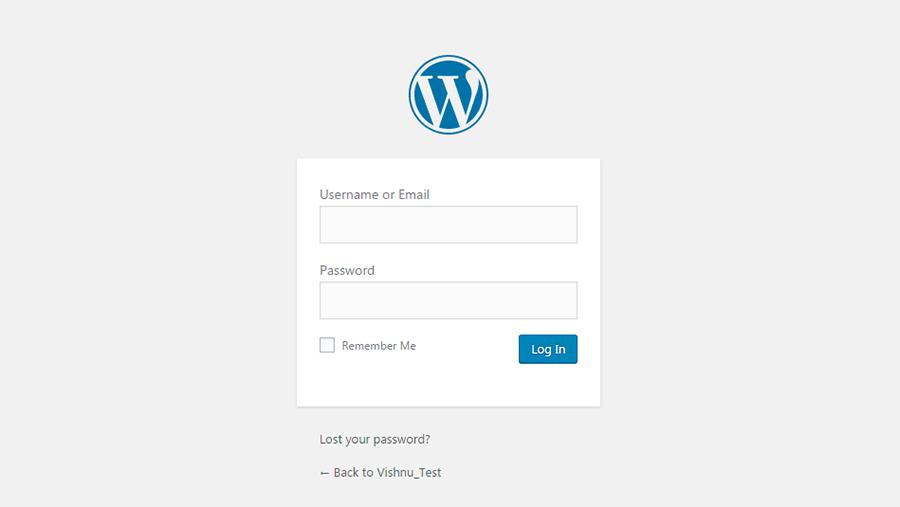
When you reach the login screen, enter the username and password you created while installing WordPress and enter your website. Once there, you can go about creating your actual portfolio website.
Step 4: Pick and Activate a Theme
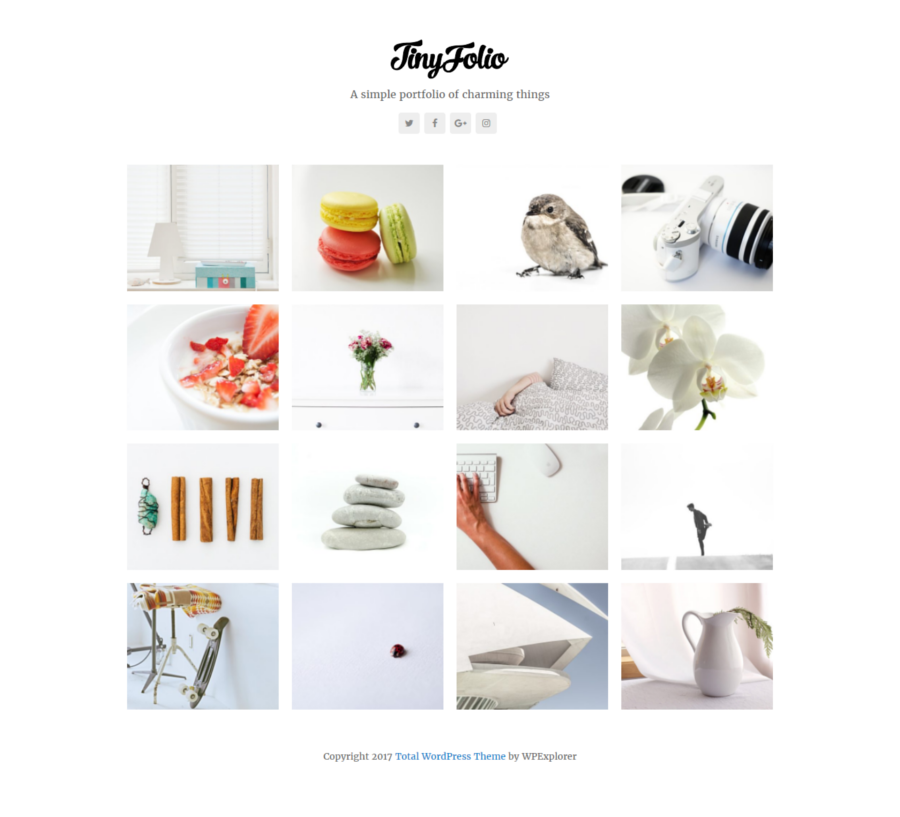
This step is going to be easy for us, as we’ll be choosing Total. In our opinion it’s one of the best themes you could choose for any project since the theme comes with tons of features and options you can use for businesses, charities, portfolios and more. And with the easy demo imports you can create beautiful portfolio websites with Total in just a couple clicks, like this one below:
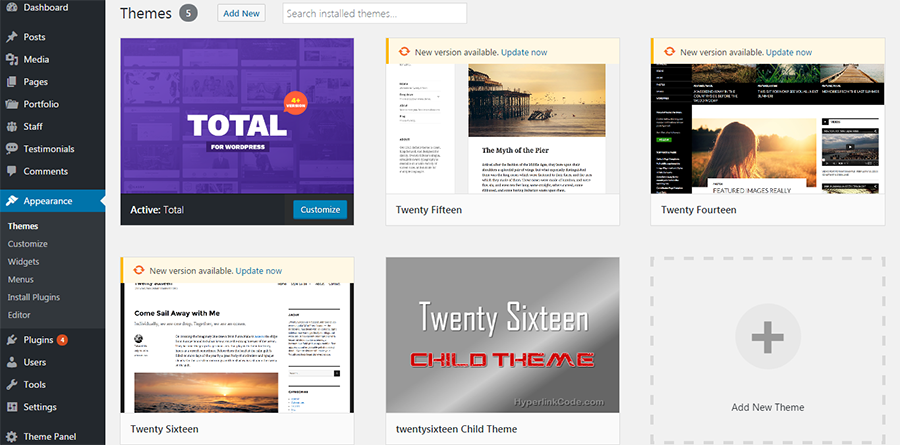
After installing the Total theme, activate it from your dashboard by clicking Appearance > Themes > Add New.
At this stage, you have a choice to make – you can simply import any demo website from Total using the Demo Importer. Total has 40+ pre-built websites, including demos for portfolio. You can pick any demo, import it and add your own content to it.
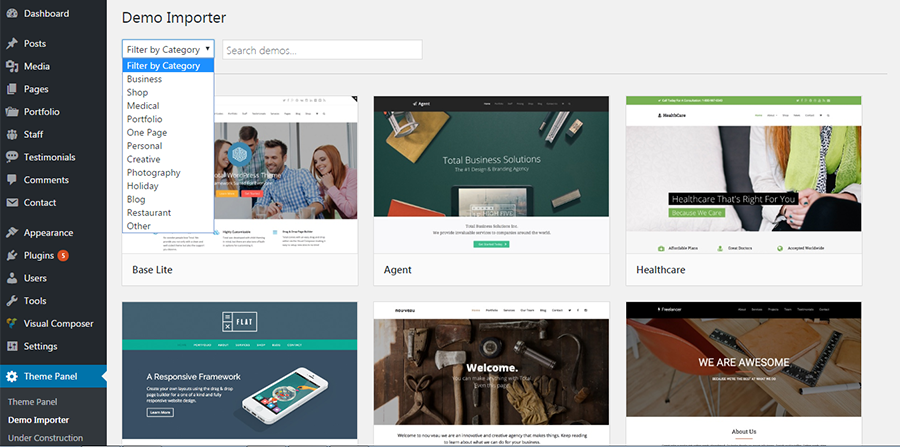
Simply choose the demo you like and follow the onscreen prompts to install then activate any required plugins and to import the sample content (posts, post types, widgets, menus etc).
Step 5: Create and Edit Portfolio Items and Create a List of Portfolio Items
Of course you don’t have to import a demo to get started, you can always build your own website from the ground up. When using the Total theme it’s easy to create your own portfolio.
But before we can create our portfolio page, we need to create the portfolio items that will go into it. With Total, you have two options for creating your portfolio items.
Option 1: Using Total’s Portfolio Custom Post Type As-Is
Your first option is to use the portfolio post type as it is to create your portfolio. From the WordPress Dashboard, click Portfolio > Add New.
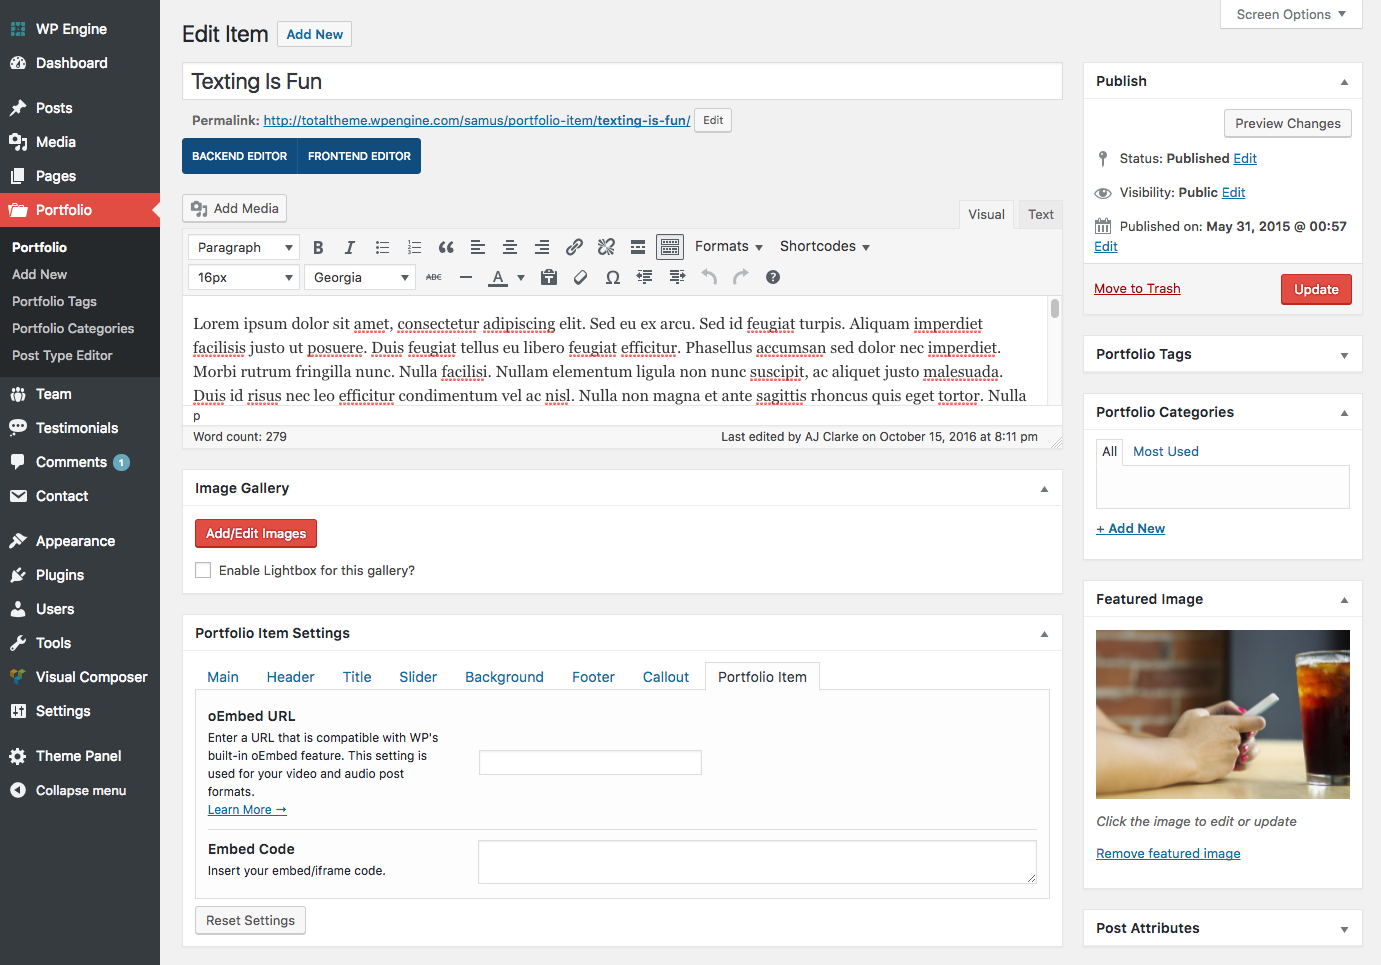
Add your portfolio item title, tags, categories and any text content. Total supports various content types – add a Featured Image if you want to display a single image, add multiple images to the Image Gallery section to create a slider, or add a link for an audio or video file in the Portfolio Item section. But in all of these cases you’ll probably also want to select a page layout under the Main settings (left, right or no sidebar) and set a featured image for your post to be used in portfolio grids, carousels and related posts. Once you’re done save the post.
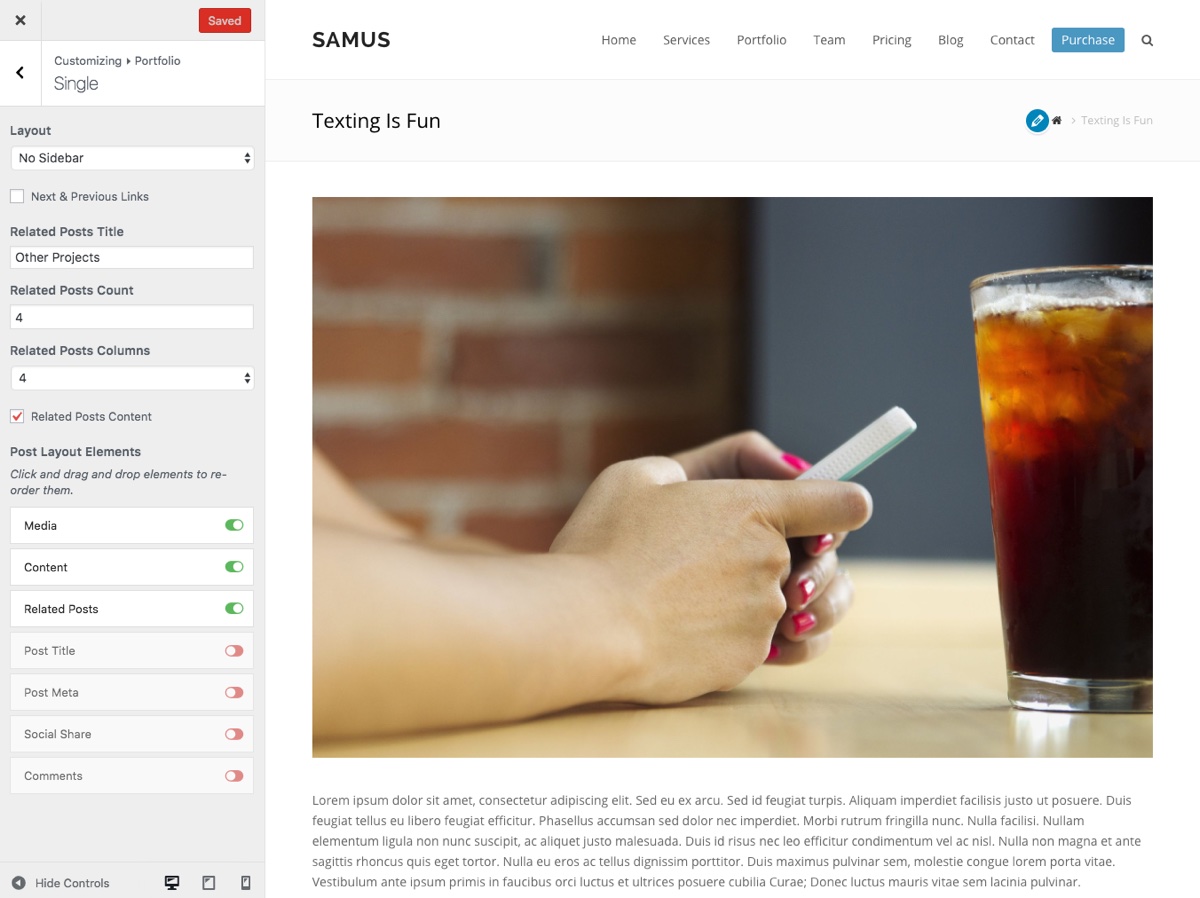
The next step is to go to Appearance > Customize > Portfolio to customize your portfolio archive pages (main, tags and categories) as well as your single portfolio item pages. From here you can choose a sidebar layout, related posts count and enable various page elements then drag & drop them into the order you want.
That’s it! Just add more items to fill out your portfolio.
Option 2: Build Your Own Portfolio Template with Visual Composer
If you want to be more hands on, you can be your own designer using Total’s features and the Visual Composer page builder. Visual Composer is a visual page builder that helps you create beautiful layouts using drag and drop method. As a user, it means that you do not have to know any coding and can actually enjoy the web building process. It comes free with Total, and you should see a prompt to install the plugin on your website when you activate the theme. Just remember to also activate it.
Visit the Visual Composer Settings from the dashboard to setup the plugin. Click on Visual Composer > Role Manager and adjust the settings. Most importantly, enable the composer for the post types you want to use it on. By default, Visual Composer is enabled only on pages. Enable it for Portfolio post types also so that you’re able to build portfolio items with the help of Visual Composer.
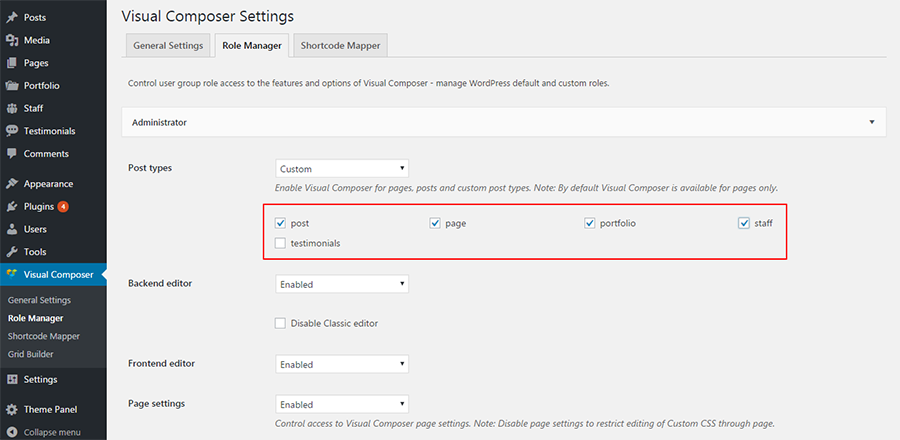
Just like the last option you’ll need to create a new post by clicking on Portfolio > Add New. Give your post a name, select categories or tags, choose a sidebar layout under the main settings section and set a featured image. Save your post draft. Now you can start building!
You have the option to use the frontend (visual) or backend (block) editor of Visual Composer start to edit the portfolio item. We prefer the frontend editor since you can see your page elements, custom colors, paddings/margins and more. But no matter which you choose to use simply select the Visual Composer Add Element button to get started.
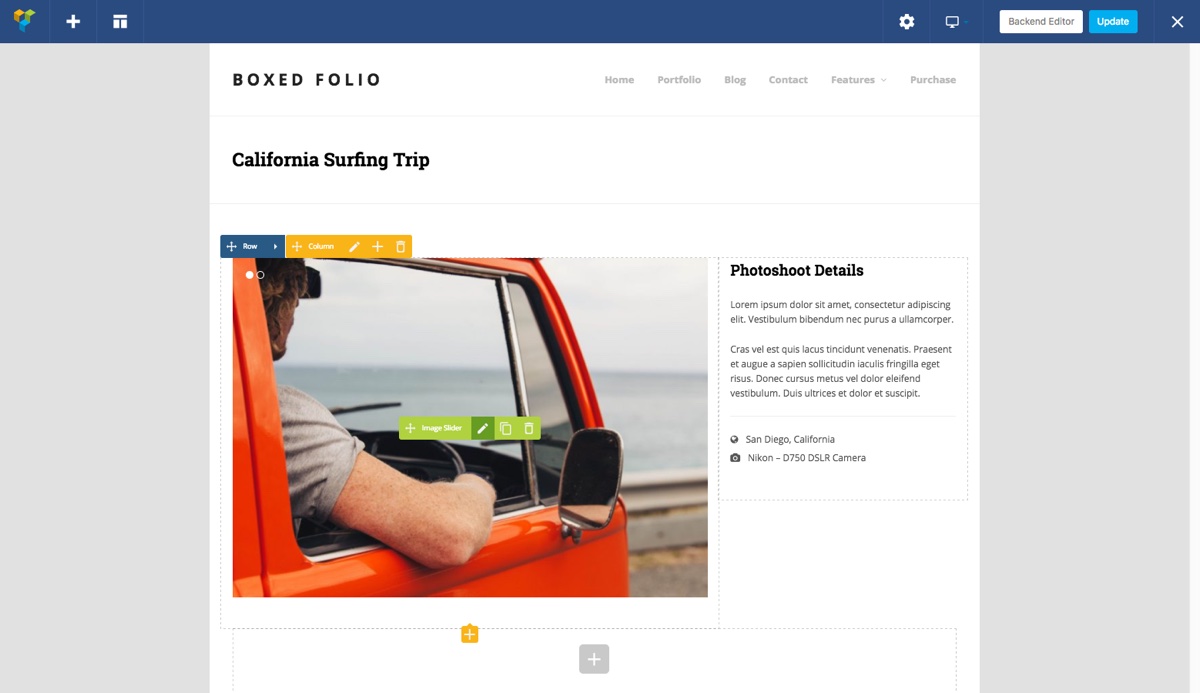
You’ll see all the elements available in the elements library. Total has a number of specially designed elements in the library, in addition to the standard Visual Composer elements. You can see that the snapshot above uses the Image Slider and a Text Box to create the portfolio item. However, you can use almost any other element form the library.
When you’re done with editing save the portfolio post and click Publish. If you’re going to be creating many similar items, you can even save the template for repeated use. To save your layout as a template return to the backend editor.
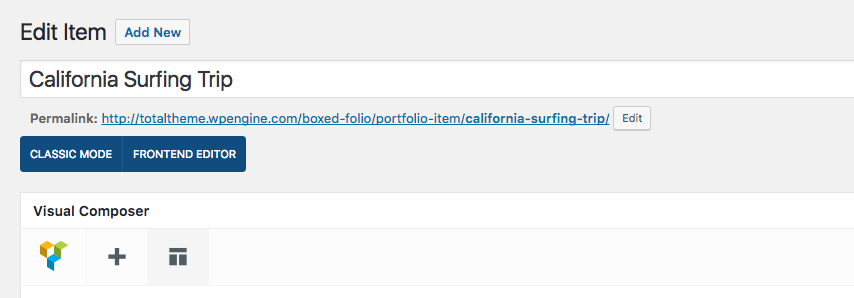
Click in the Templatera button (which looks like a little gray layout icon).
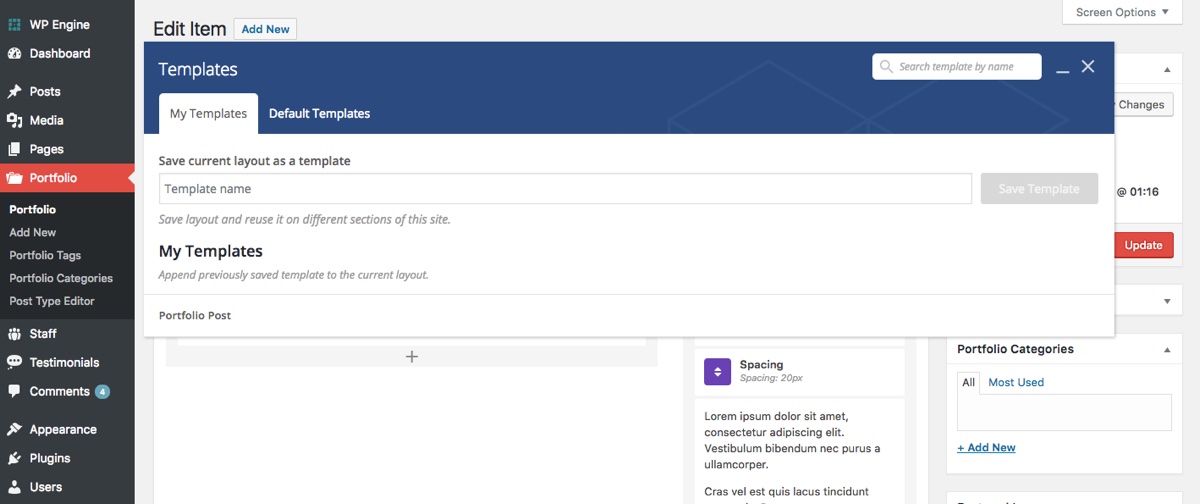
Then give your template a name and save it. To use your template on a new post just click on the Templatera icon to insert the layout you saved. Alternatively you can set the template as the default for all new posts in a given post type.
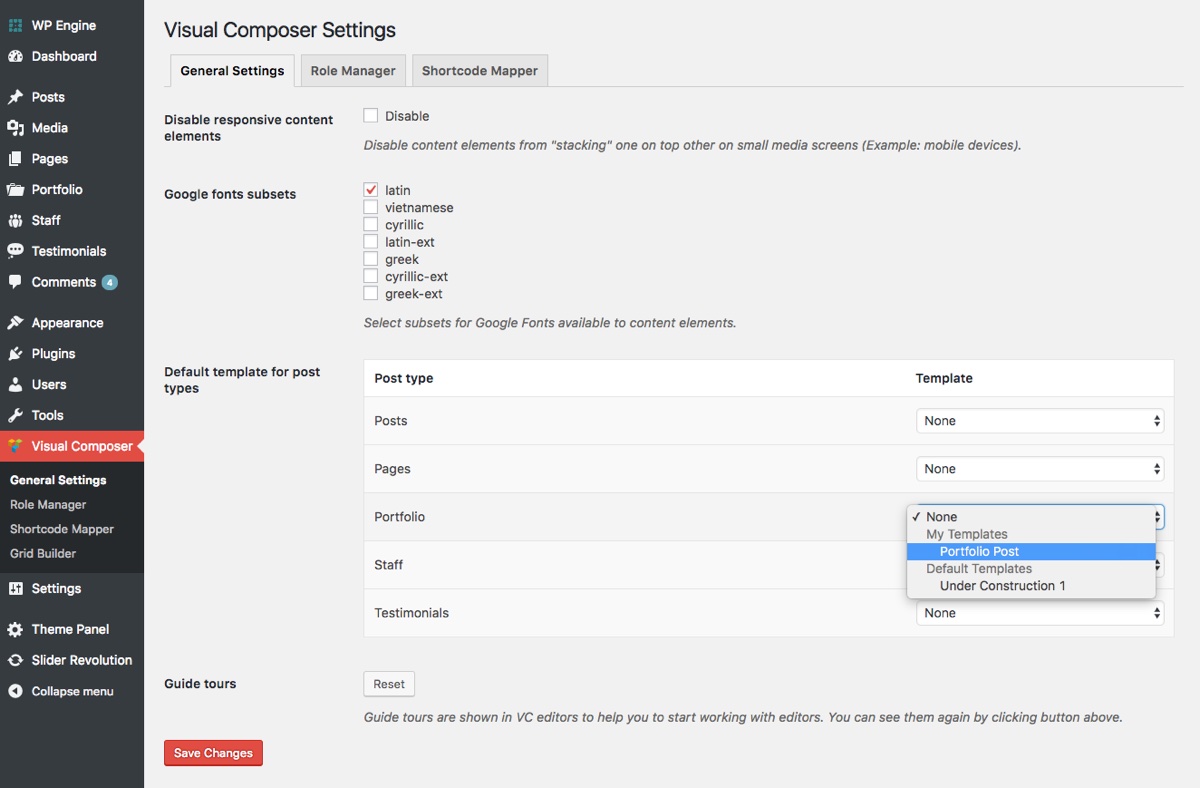
To do this, navigate to Visual Composer > General Settings and set your preferred template for each post type. If you plan on adding many items to your portfolio, staff etc. this will really save you some time as all of your standard page elements will be auto inserted and formatted for you.
Step 6: Creating The Portfolio Page
Now that we have the list of portfolio items we want to display on our portfolio, it’s time to create the page that will hold these portfolio items. Create a page in the way you normally do with WordPress. Go to Pages > Add New. Title the new page and save it.
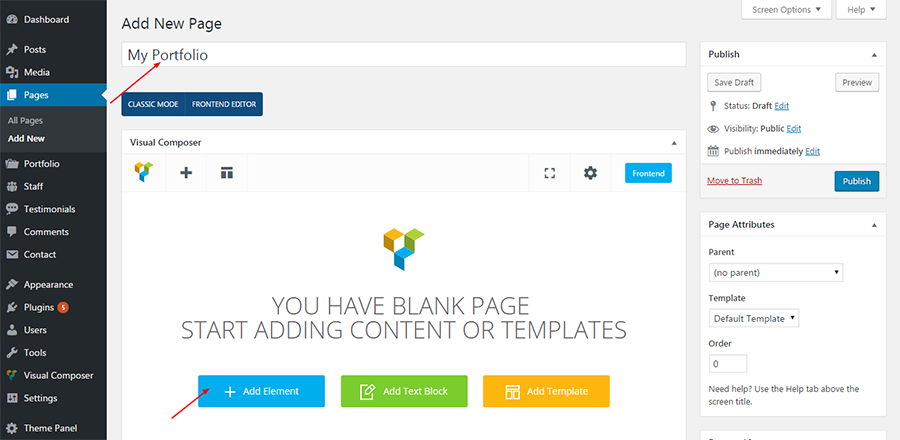
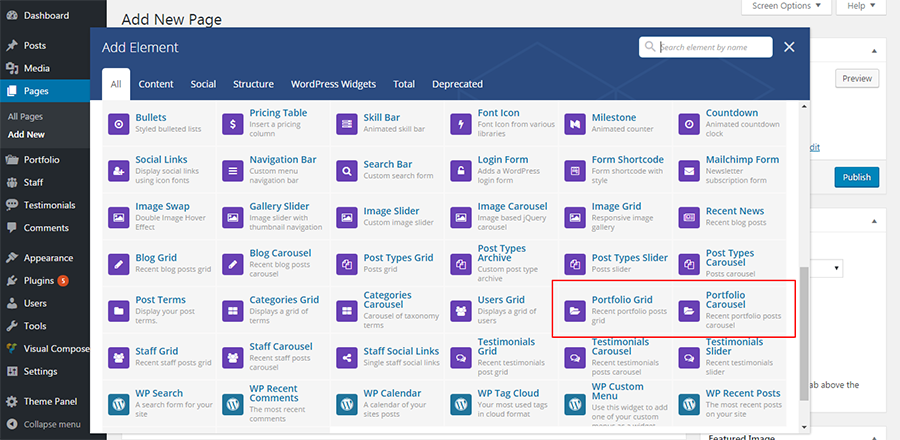
Next, click on the Visual Composer option you want to work with – again you’ll have the option to use the frontend editor or backend editor. This will open the live drag and drop editor. Click on the blue Add Element button. We’ll use the Portfolio Grid element to build our portfolio page. Select Portfolio Grid. If it’s a carousel you want on your portfolio page, select the Portfolio Carousel element.
You can adjust the settings in the Portfolio Grid element to fine tune the way your Portfolio page appears. You can select the size of the images, add borders, title them, specify categories, select the order, columns and posts per page, enable pagination, choose grid styles, add excerpts and much more. Save the Portfolio page after filling in the settings options below the text editor.
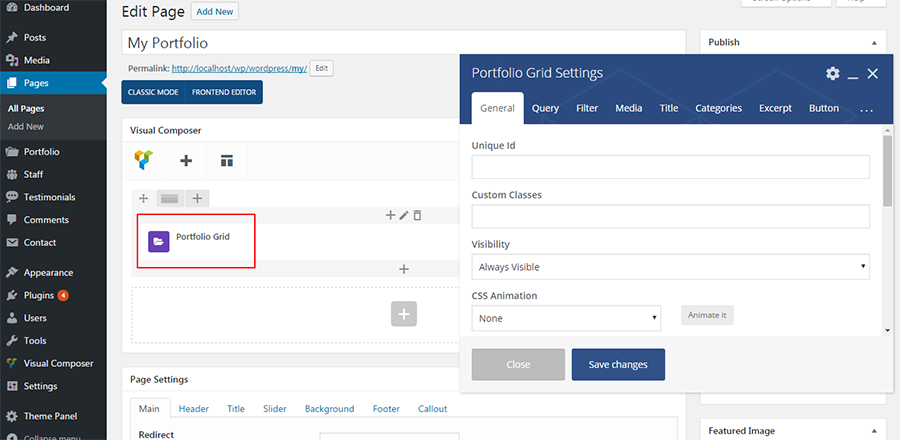
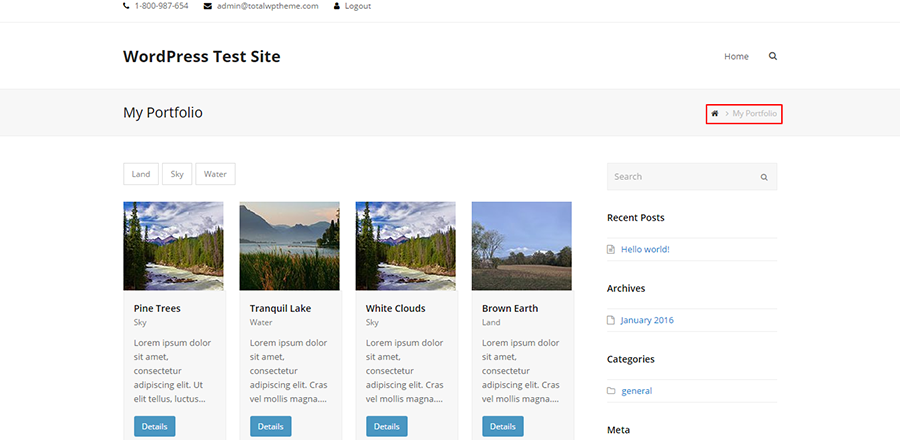
It’s possible to view the changes even as you make them. This is how my portfolio page looks in the frontend once I’ve saved the changes to the Portfolio Grid element.
Step 7: Customize Your Portfolio
You can use the settings in the live WordPress Customizer to set options for breadcrumbs, archives layout, single post style, image cropping and more.
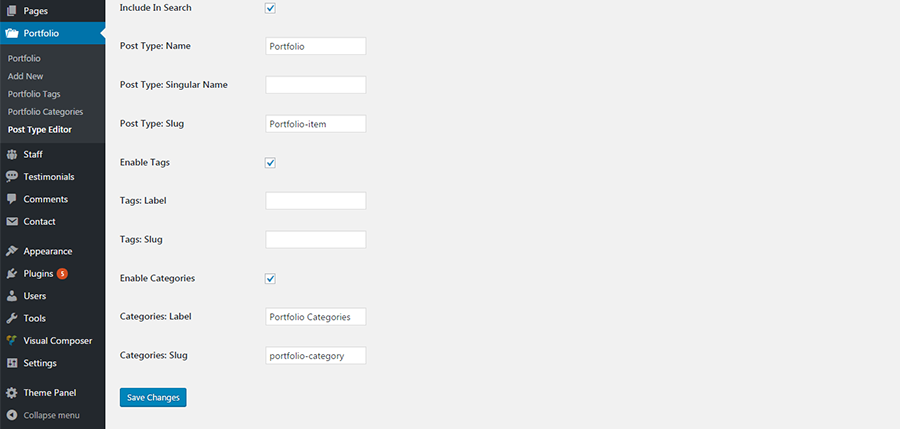
If you want to make changes to the admin icon, post type name, slug and taxonomy use the Portfolio Post Type Editor.
Step 8: Adding Your Portfolio to the Menu
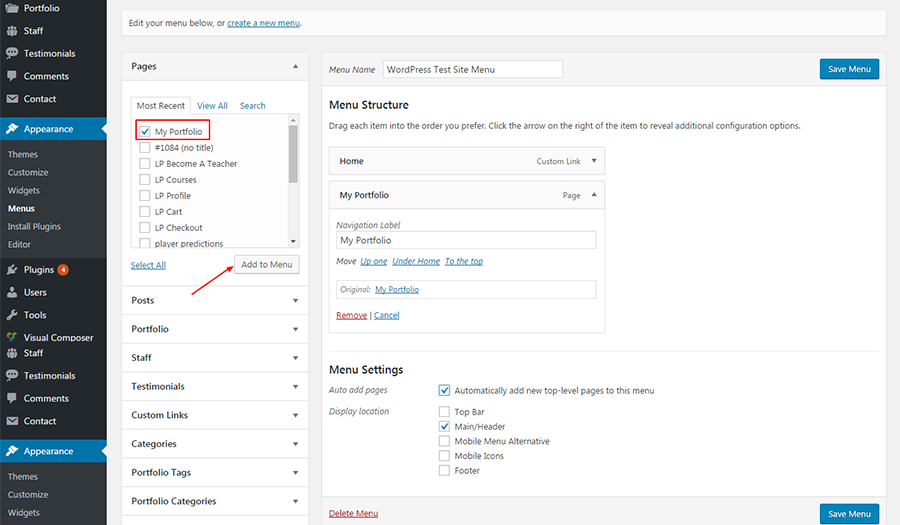
On a portfolio website, it makes sense for the portfolio page to appear in the main menu so visitors can access the ‘Portfolio’ straightaway and view the portfolio pages. To add your new portfolio page go to Appearance > Menu, select the Portfolio page and click Add To Menu.
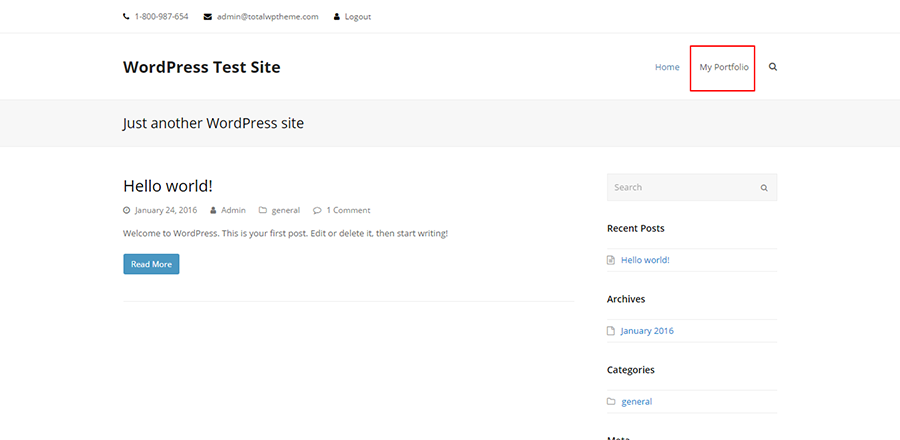
Now the Portfolio appears as an easily accessible menu item on the home page (and any other page with the main menu enabled).
If you would like your portfolio page to be your homepage, just navigate to Settings > Reading, set your Front Page display to a static page and then select your Portfolio. Easy peasy!
Finishing Up
With the Portfolio section of your website in place, you may want to go ahead and add more pages to your website. Consider a Contact Page, About or Services which are are incredibly useful and are a necessary part of a portfolio website. Create as many pages as you want or need, remembering to include the important ones in the menu to have a full fledged portfolio website.
With you portfolio done you can move onto generating traffic to your portfolio, optimizing your images, or even monetizing your website. What other tips do you have for building your portfolio online?



That’s a great article. I think Total is pretty easy to use. I have little to no experience with web design or build. The last time I tried to do it there were no smart phones! So I hope my question isn’t completely basic.
Is it possible to change the navigation title from portfolio item? I use the portfolio section to outline my classes and workshops. I’d like to eventually be able to use it to allow people to booking classes.
Any advice?
Thanks in advance for your help.
Hey there, yes changing the word “portfolio-item” in the title is very easy, we have a documentation page for this here. But for any future questions related to the theme please leave a comment on ThemeForest. This will ensure you get prompt replies as we don’t review blog comments as often as well as it will make sure you receive support by a developer. Thanks!
Hello,
Hopefully I can ask you here for some help.
I have recently started my website with the Total theme. I am just learning to find my way in WordPress and with this theme.
I want to create a fotoalbum like the one I had on my old website.
So, I want the different albums on one page.
My question is whether this is possible with the ‘Portfolio’ option of the Total theme?
Or do you have a better solution?
I hope you can help me.
Kind regards,
Yiannos
We can’t offer theme support on our blog – but if you could leave a pre-purchase question on the item page on Themeforest we’d be happy to help over there!
very informative post on portfolio creation
thanks