Beaver Builder WordPress Plugin Guide & Review
Page builders have been the talk of the WordPress community for a while now. These tools have been popular for a long time, but with the introduction of the new Block Editor, many have wondered how relevant they still are.
While the Block Editor is an intriguing new feature, however, nothing beats page builder plugins when it comes to designing custom pages and posts. The Beaver Builder WordPress plugin is a perfect example of the benefits this kind of tool offers – being both easy to use and surprisingly powerful.
In this post, we’ll take a close look at Beaver Builder. We’ll discuss its key features and pricing, then show you how it works in action, so you can decide for yourself if this is the right page builder solution for your website.
Let’s jump right into our new and improve, updated guide to the Beaver Build WordPress page builder!
Why You Might Need a WordPress Page Builder
Unless you’re brand new to the platform, you’re probably familiar with the Classic WordPress editor:
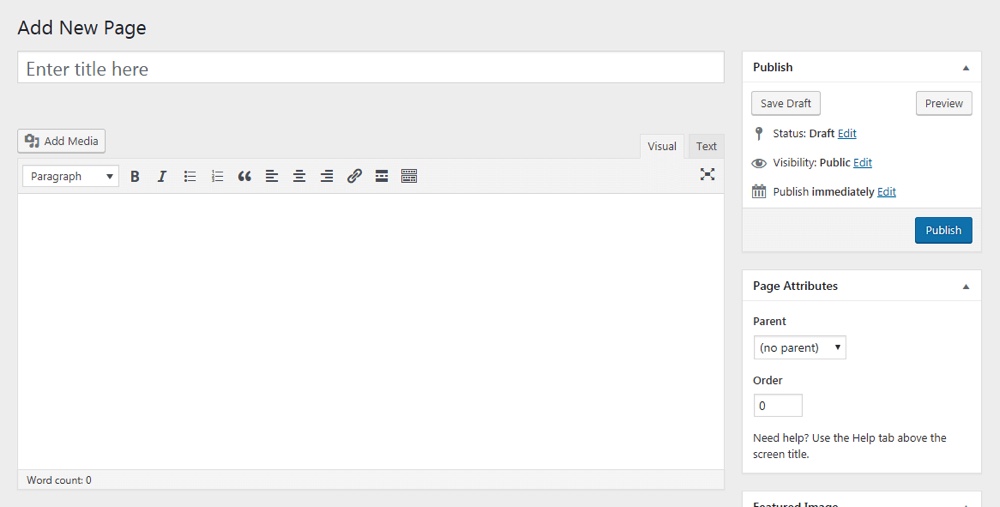
While functional, this was always a bare-bones system. Almost all of your content was added to a single field, including text, media, and so on. Creating unique layouts and adding cool features was possible, but often required coding know-how and/or some additional plugins.
Recently however, WordPress developers put out a brand-new version of the editor now powered by Gutenberg:
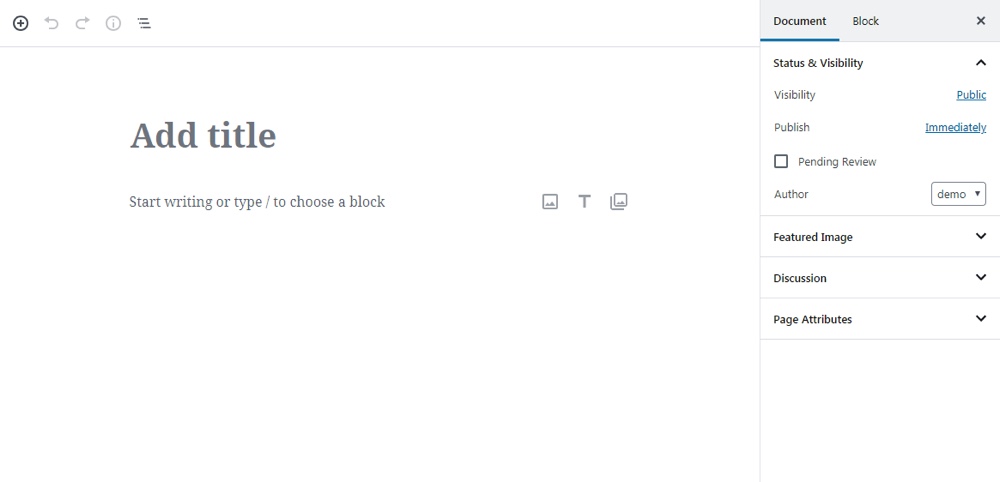
This change was a long time coming, yet it’s also nothing particularly new. The Block Editor is a streamlined version of a page builder – a solution that’s been popular with WordPress users for some time.
While every WordPress page builder is different, at a basic level they’re almost all based on the same fundamental concept. They provide you with a selection of pre-built elements, and enable you to build content out of those pieces. The goal is to make it easier and more intuitive to build content with unique layouts and features, even if you have no design or coding experience.
However, it’s worth noting that the Block Editor is a very limited feature. It lets you design posts and pages in a more visual fashion, but offers a small library of blocks and little support for complex layouts. This is why it’s still worth looking into your other page builder options – such as the plugin we’ll be discussing throughout the rest of this post.
Beaver Builder Basics
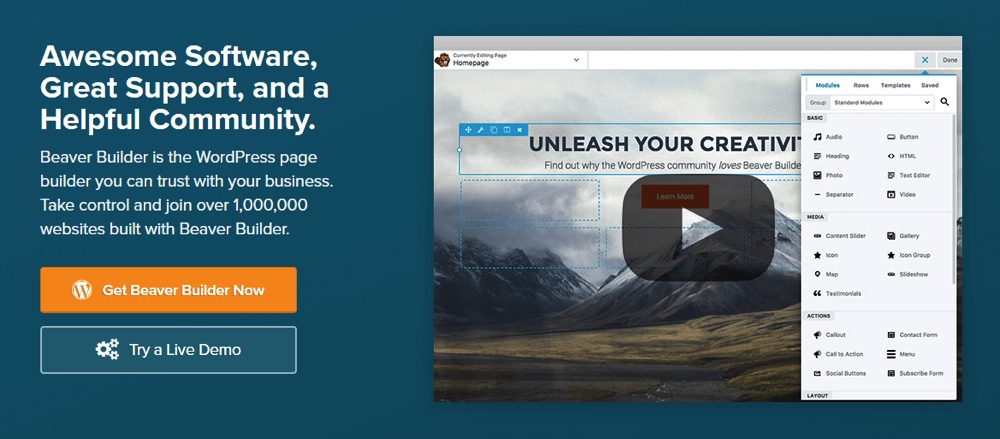
Beaver Builder is one of the most popular page builder plugins out there, and for good reason. It’s simple for beginners to pick up, yet comes with a wide range of options to play with. At a fundamental level, it’s a drag-and-drop system for creating posts and pages – just like any other page builder. However, it offers a lot of additional functionality as well.
Some of this plugin’s key features include:
- A large library of content ‘modules’, ranging from basic options (such as text and image modules) to more advanced functionality (Call To Action, map, and gallery modules, etc).
- A custom editing interface that enables you to build pages, posts, and custom post types visually, and see your changes immediately.
- The ability to create complex multi-column layouts and adjust sizes, spacing, and more.
- Pre-built sections and page templates that let you kick-start the design process, which you can modify as needed.
- The option to create and save your own templates for later use.
- Options for adding custom HTML and your own CSS classes, for more advanced users.
Of course all of this functionality does come at a cost. While there is a Beaver Builder Lite version available for free, it offers only a few basic modules, and doesn’t include many core features such as templates and import/export options. However, the lite version is useful for giving this page builder a test run, and seeing if you like how it works.
If you’re planning to use Beaver Builder in earnest, you’ll want to pick up a premium license to get access to the full package. These start at $99 for use on unlimited websites, and one year of support:
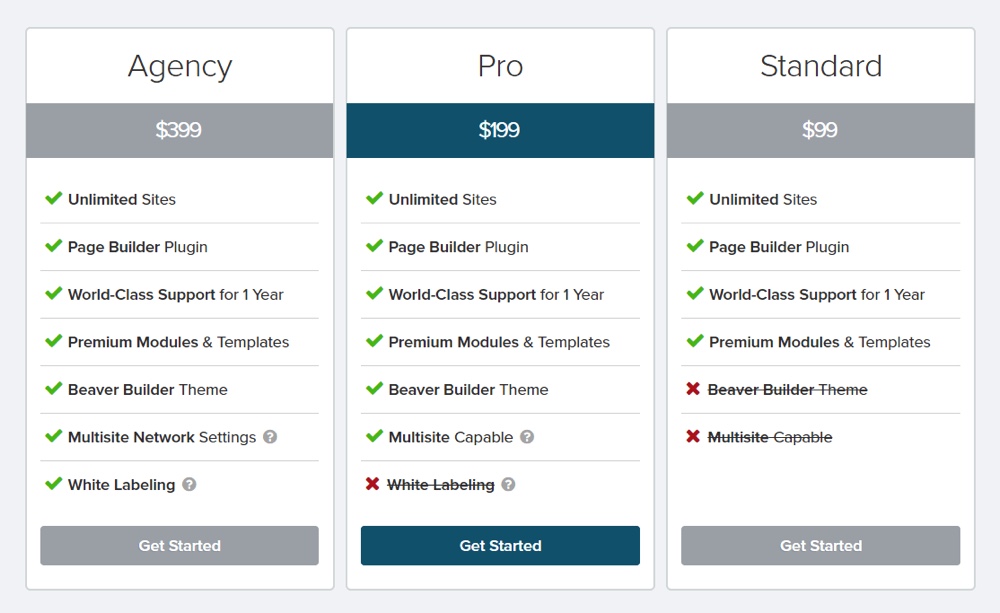
This particular tool does require an upfront investment. The initial cost can pay out in saved time and a more effective website over the long term, though, so it’s not a bad deal if it’s within your budget.
How to Get Started with the Beaver Builder
When you’re on the fence about whether or not to pick up a new plugin for your website, the best thing to do is learn everything you can about it. When it comes to page builders, this includes what they look like, how they work, and what options they provide.
With this in mind, let’s take a walk through what it’s like to pick up Beaver Builder, and start using it to create posts and pages. Naturally, this first thing you’ll need to do is install and activate the plugin.
In addition, you’ll want to activate your license key if you purchased the premium version (which we’ll be using in this tutorial). Then, you can get right to work.
Step 1: Access the Beaver Builder Editor
When you install the plugin, you’ll see a new Beaver Builder tab in your dashboard. This is where your custom content will be saved – for example, if you create your own unique templates.
You can also create content with the page builder by going to Beaver Builder > Add New. Alternatively, you can simply go to Pages > Add New (or the equivalent for posts and custom post types). You’ll see a new option:
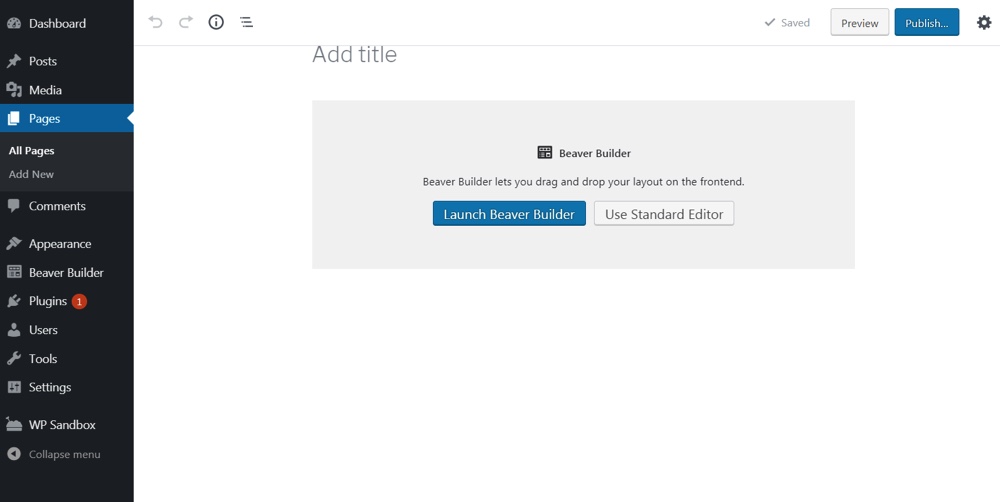
This means you can either create your content in the default WordPress editor, or in the page builder. Let’s hit the Launch Beaver Builder button:
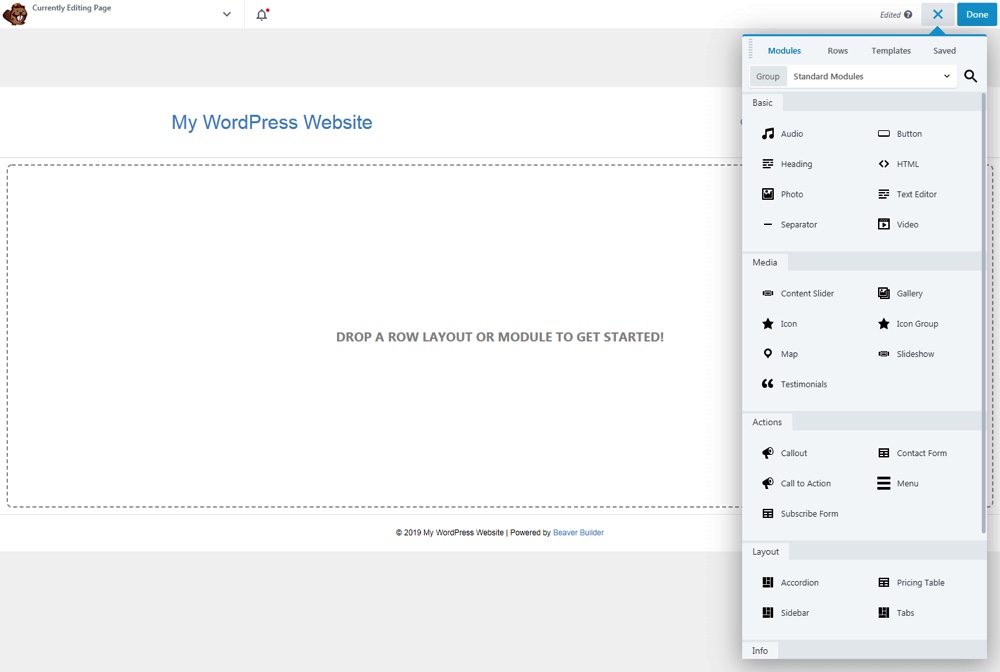
As you can see, you’ll be taken to an entirely new interface. Here, you can create content and see exactly what it will look like on the page.
Step 2: Select a Starting Template
It’s worth noting that you don’t have to use templates if you don’t want to. You can build your pages and posts entirely from scratch, by adding whatever modules you like. The easiest way to learn is by starting with a template, however, which is what we’ll be demonstrating here.
In the menu on the right side of the editor, select the Templates tab at the top, and you’ll see plenty of options. Simply click on a template or drag it onto the page, and you’ll see the full version:
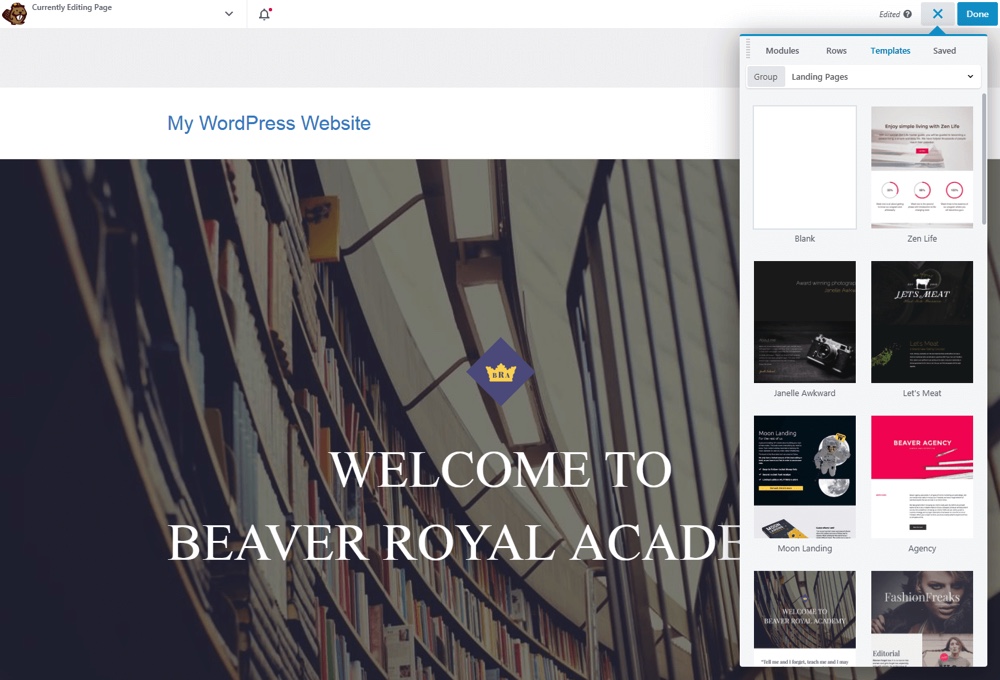
This provides you with a starting layout, along with placeholder text and images. Fortunately, every element here can be replaced and modified at will, so you can create something unique to your website.
Step 3: Edit Individual Modules
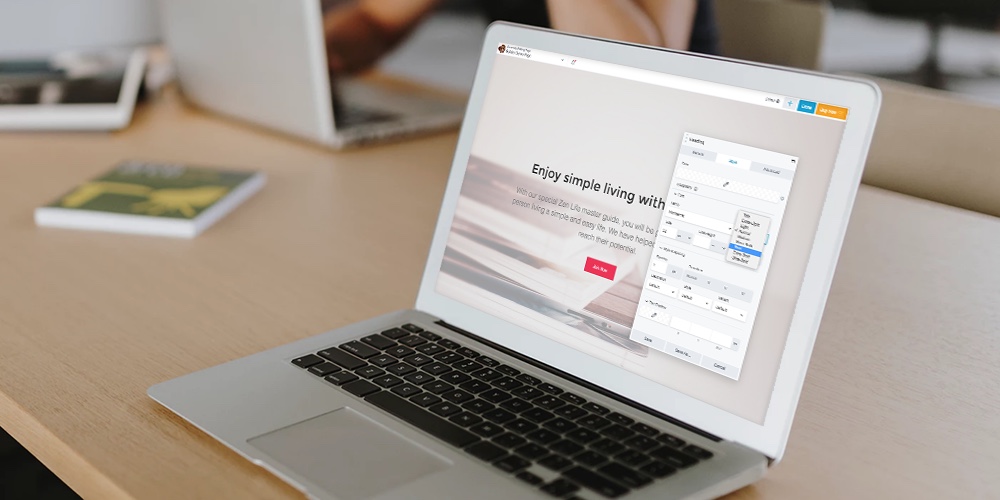
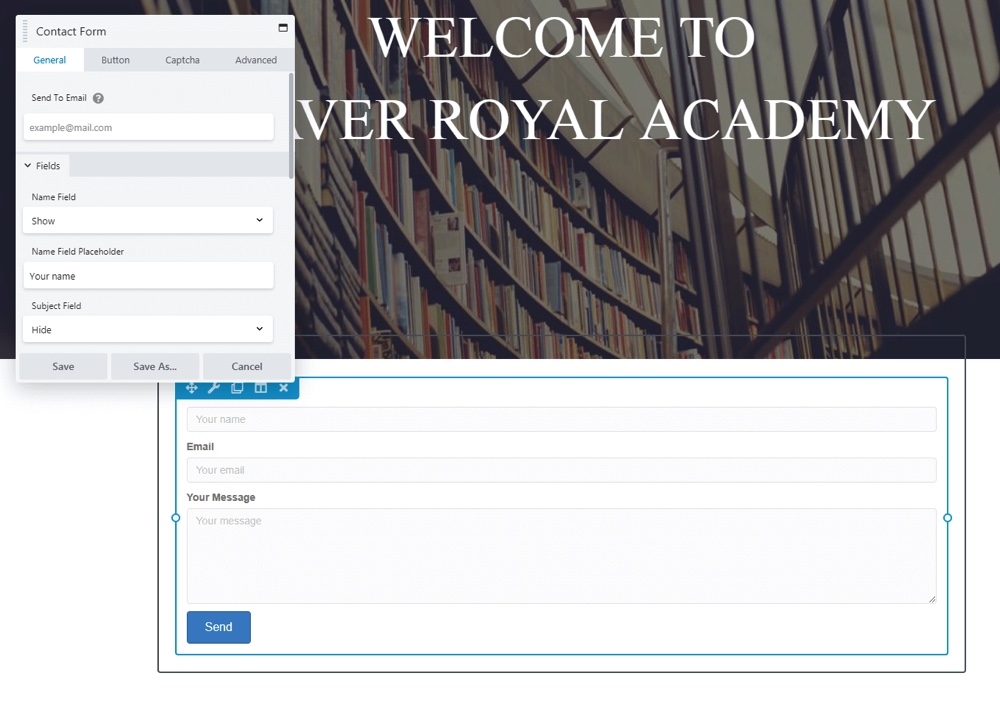
Each individual element in the Beaver Builder editor is a self-contained module. To see what we mean, you can hover over a piece of text, an image, or a feature on your starting template. You’ll see the module outlined in blue, and if you click on it, you’ll see a new menu:
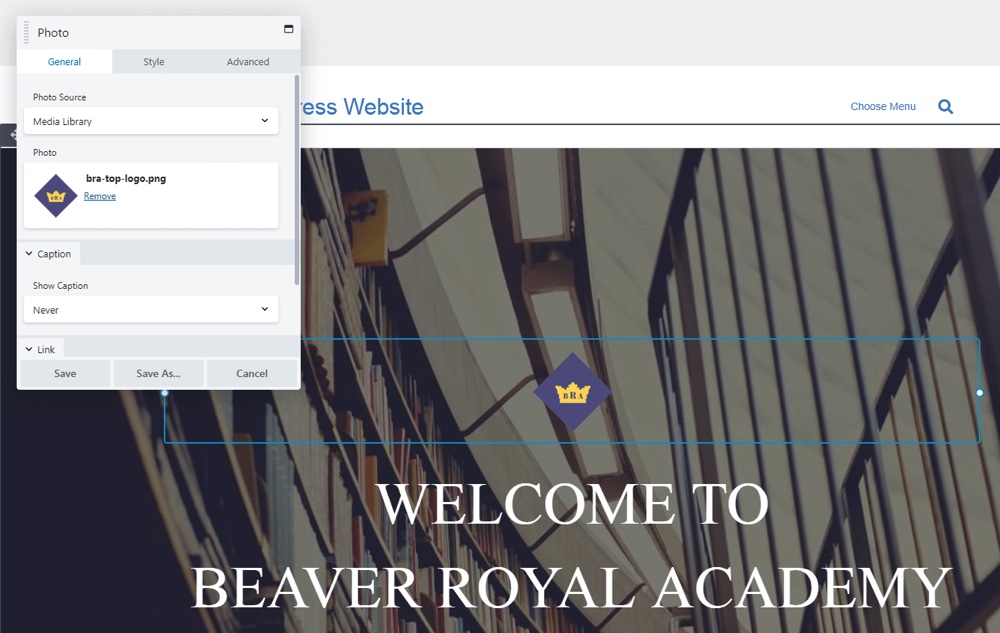
This is the settings box for that module. It contains all the customization options for the selected piece of content. Exactly what it includes, therefore, will depend on the type of content you’re working with.
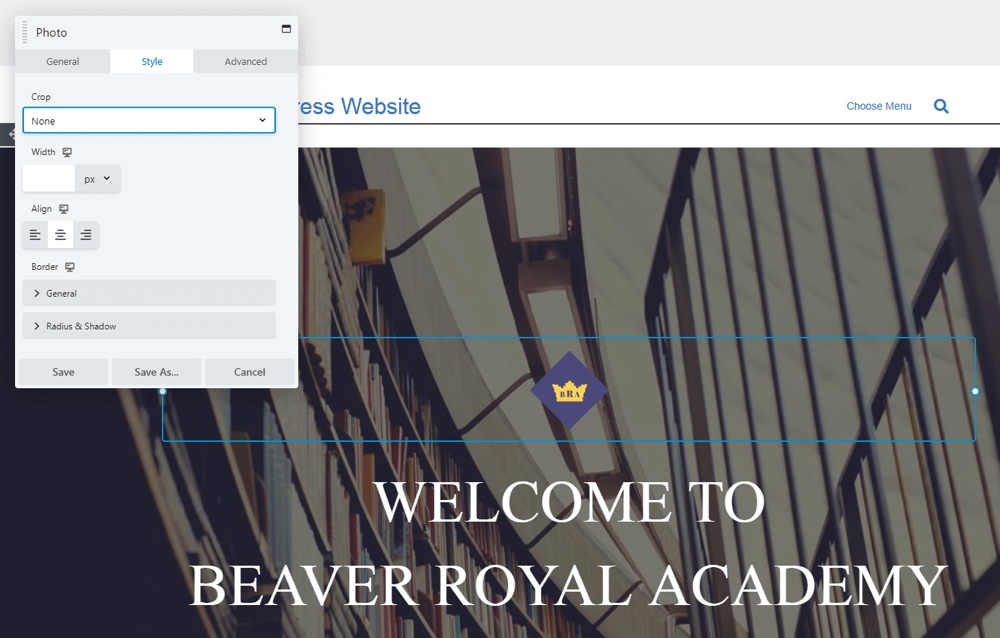
For example, the Photo module enables you to change which file is used, and add a caption and/or link. You can also switch over to the Style tab to modify the image’s alignment, border, and more:
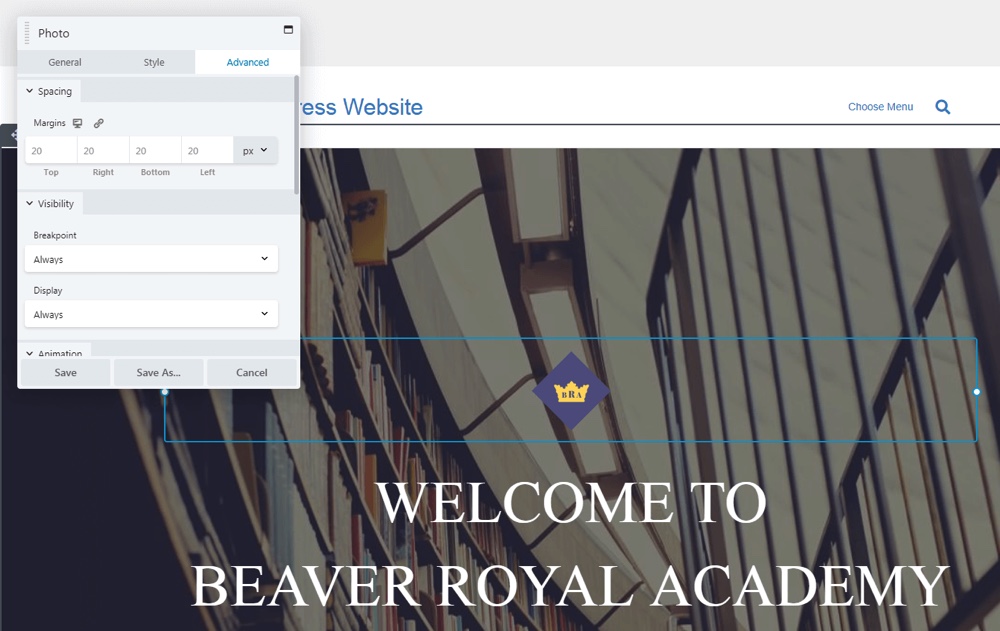
Most modules also feature an Advanced tab, where you can tweak its margins, make it visible only on certain types of devices, add custom HTML, and so on:
As you can see, customizing your Beaver Builder modules is a cinch. It will take a little experience to get familiar with the options each type of module offers, but once you do, you’ll find yourself adding in your own content in no time.
Step 4: Customize Your Content’s Organization and Layout
Along with making changes to individual modules, you can also customize your page as a whole. One of the ways to do this is by adding and removing modules. To add a module, simply select one from the editor’s main menu, and drag it into place on the page:
On the other hand, you can remove modules by hitting the X that appears when you hover over them. You can also drag modules up and down or side to side, in order to rearrange them at will.
In addition, you’re able to change your page’s overall layout. To see an example of this in action, hover over a module and hit Edit Column > Column Settings:
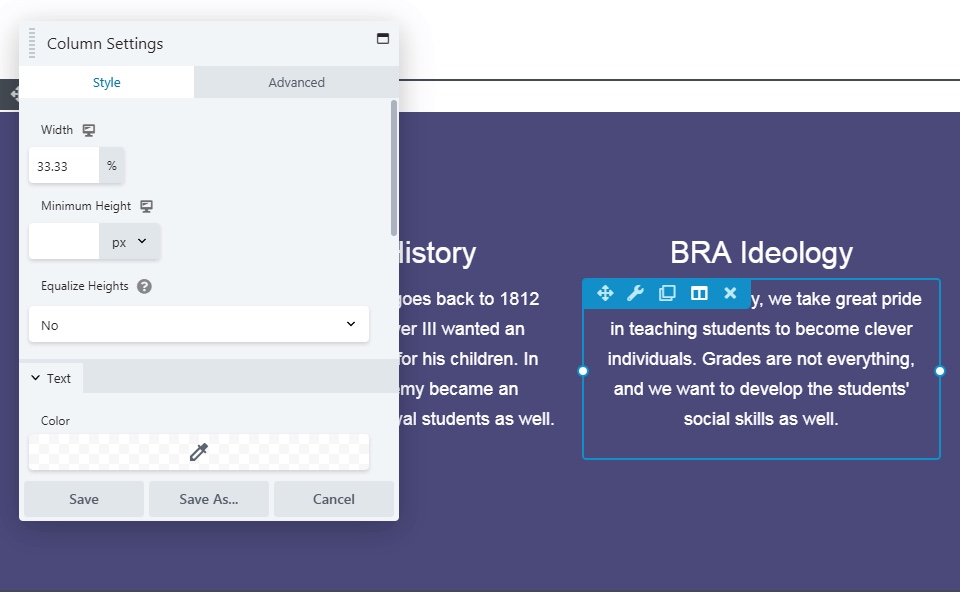
Here, you can find options pertaining to all modules in the particular column. You can modify the column’s background color and spacing, for example, and even add a border.
Now hover over the page’s background, and select Row Settings in the top-right corner:
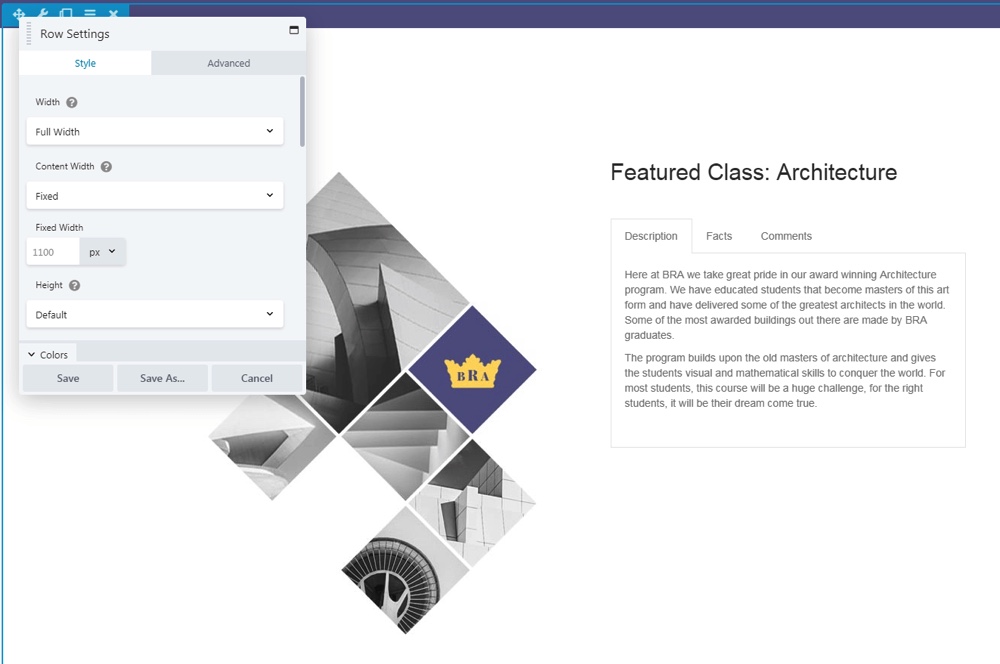
You’ll see a similar menu, but this time the options apply to the relevant row of modules. You can set the row to fixed or full width, customize colors, and make many of the same changes you have available with columns.
Finally, select the editor’s main menu again and navigate to the Rows tab:
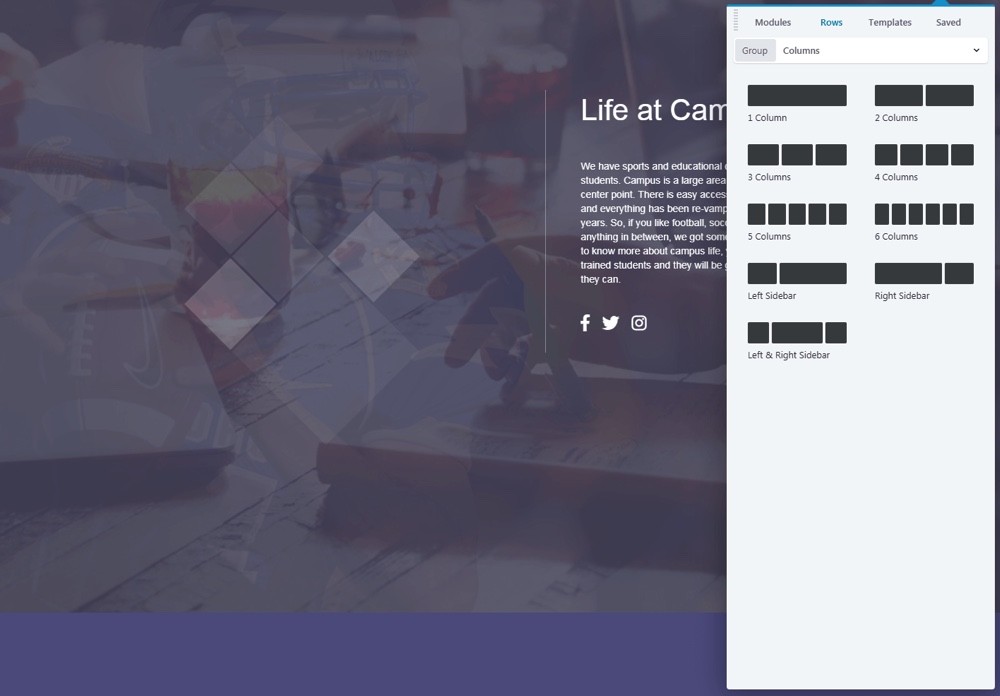
This is where you can add new rows and columns to your page, enabling you to change its layout dramatically. In addition, this is the first place you’ll want to go if you’re creating a page or post from scratch. You can determine your content’s layout first, then add in modules wherever you like.
Step 5: Expand the Page Builder’s Feature Set (Optional)
It’s worth noting that there are lots of other features and options in Beaver Builder – we’ve only scratched the surface here. However, we’ve walked through the key functionality you’ll need to understand in order to get started. After, the hands-on approach is the best way to learn the ropes.
Before wrapping up, though, we should point out that there are a few ways you can get more out of this particular page builder. First, there’s an official Beaver Builder theme, which you get for free with the top two licensing tiers:
You can use Beaver Builder with whatever theme you like. However, this one is built from the ground up to function alongside the page builder. It provides a basic framework that you can shape into many different types and styles of websites.
There’s also an optional add-on, the Beaver Themer:

With this extra plugin, you can also use Beaver Builder’s drag-and-drop page builder on your site’s headers and footers, archive pages, 404 and search pages, and more. This enables you to design nearly your entire website using the same system.
At $147 it may not fit into every budget, but it’s a useful addition for a website you intend to monetize, or for developers and designers working on multiple sites.
Choosing a page builder for your website is a big commitment. Changing the way you create and design content down the road can cause compatibility issues, so it’s best to start out with a tool you know you’ll be happy to use for the long run.
Fortunately, Beaver Builder is a solid option for both beginners and more advanced users. Plus, it’s easy to get started with as you’ve seen above.
Have you ever used Beaver Builder, and what was your experience like? Share with us in the comments section below!


This one looks good, I haven’t used it yet, but I will test it out. I’m pretty sure that one day WordPress will decide to integrate such page builder in WordPress core, because using plain shortcodes on WordPress for non-tech users is nightmare. If anyone is using WordPress for more than a pure blog then page builder is a must.
useful article, but I did not find in it a link to the site lethemes.com, that previously helped me a lot
How would you use 3rd party plugins with the fronted builder?
Unfortunately I am not sure how to extend the Beaver Builder. I am more of a “Visual Composer” user at the moment.
Hi Webweaverman! Beaver Builder supports both short codes and widgets. Most 3rd party plugins (at least ones that render something on the front end) provide one or the other to use.
If the 3rd party plugin adds any widgets to your site, they can be inserted into the layouts.
Thanks for the this review. Chris Lema also gave it a very good review so on the strength of two good reviews and no bad press on the web that I could find – I purchased. After using on several site I have to say – I love it. It is so intuitive and easy to use that it cuts development time immensely.
In the past I used the Themify Builder and Visual Composer but both of those required saving or updating the page to see the front end. How time consuming. Plus they are clunky to use. Doesn’t save time. With Beaver Builder I and my clients can edit pages and stay in the WYSIWYG interface all the time. Visual Composer was good in its time but has failed to innovate and I don’t recommend it.
I also tried Divi theme with its built in builder but I found that too difficult to use with clients. I was spending all my time trying to train them to use it. Too hard for them to make simple edits as the Divi builder got in the way. It is fine if you do this for a living but my clients are busy making money or providing services and don’t want to become Divi experts just to make simple additions and updates.
They got frustrated so I dropped it. The same with Thrive Themes’ – Thrive Content Builder. My clients could not use it and it didn’t have any page templates like Beaver Builder does so again it was a big support issue. Thive Builder also requires you start with a blank page and to only use their builder. With Beaver Builder I can append content to an existing page or post and stay in Visual mode WYSIWYG – nobody else does that.
Since you help me discovere Beaver Builder and I feel I have found the perfect balance. Easy to use. Clients get it and love it. They love the page templates and ease of use. I have done a few sites now and haven’t gotten any support issues.Just happy customers sending me checks and payments.
It works and I don’t need to buy add-ons like Visual Composer. My next step is to purchase the Agency upgrade and white label the builder – my clients will think it is my own. Using Beaver Builder with Genesis themes and Dynamik Builder theme is like finding nirvana – I can quickly create great looking custom sites with Dynamik now and not get bogged down with code and plugins. I highly recommend Beaver Builder.
I might actually get my life back now as it is saving me so much time. Thank you – Thank you for the review. I hadn’t heard of it before your review so you introduced me to my best productivity tool ever.
I am glad to hear you had a great experience Charles! Good luck with your projects 😉
I also bought the agency label and am looking to white label it. I agree with you man genesis + beaver + dynamic is a wonder mix.
Dynamic + Genesis = Custom themes
Beaver = Custom easy to edit content that is html free.
Although I am thinking that Beaver + Dynamic could replace Genesis as they have their own basic theme and child theme. Just like Genesis.
Busy revamping my website and current service offering because beaver is going to make it easier to maintain and create websites. Clients wont have to know html or css.
“using Beaver Builder with Genesis themes and Dynamik Builder theme ”
Why do you need to use all three ?
Why not just BB + Genesis ?
David that is a good mix, i have had time to play with beaver builder for a while now. Beaver builder and its theme is actually sufficient, but if you want a little more speed, i would go for generatepress + Beaver builder. Genesis is lightweight too, but genratepress is just much easier to use and customise. Its also fast than genesis and that is saying alot.
So with white labeling does that mean that if I purchase the $199 package I can’t remove Beaver Builder from the footer?
David, I think it means it removes all mention of Beaver Builder from the admin area so you can use it on client sites. You definitely don’t have to mention Beaver Builder on the front end of your site to use it.
I am interested in giving it a go. Since a few of you are current users, can you tell me if this plug-in affects load time? My main interest is in developing mobile friendly pages, so naturally, speed is essential. I plan to keep the sites as compact as possible, as well.
Hi Joseph, it shouldn’t matter as long as you have proper caching setup on your site. When your site is properly cached it doesn’t run any PHP since it saves copies of your HTML, so whether you build your pages with a page builder or not it shouldn’t make a difference. The biggest affect on your page speed is server related.
Beaver Builder is good. I try the demo. Impressed by how fast and easy it is, compare to Visual Composer. I really like it.
Beaver Builder does not play nice with Genesis child themes. It is impossible to figure out how to use it to modify your front home page. It seems to force the entire site to get rid of side bars if you use the suggested method of creating a page for your home page. And that seems to be the only way to acheive a front home page.
It seems that unless you are good at coding and developing (in which case you might not even need it) it will be impossible for you to use unless you get their theme, which adds an additional $100. I have tried the free plugin before deciding to buy it and it is impossible to find any usable instructions on how to simply 1) modify my front page, and 2) keep my blog and pages with their existing sidebar. I have wasted an ENTIRE DAY and gotten nowhere. So what I had hoped would make my life easier and saving me time turned out to be a huge waste.
Sometimes I have to wonder if these developers have any idea who their average users are and what their needs are. I wish they would stop thinking like devs and developing for devs and start thinking of their potential customers who are average business owner users.
This plug in should NOT be touted as easily usable with Genesis child themes. It is not. If I can’t make the free plugin work then why would I possibly consider actually buying the plugin. I can only assume that if I can’t find a usable tutorial for the free plugin, there probably won’t be usable tutorials for the paid version either.
My opinion, unfortunately, is that this has wonderful potential, but as it stands, it does not work like it is stated to work. And I resent having to pay an extra $100 to get the Pro package simply to get the theme that MIGHT make it usable. Then, have to renew every year to get updates.
Obviously, I’m not an affiliate marketer, so my opinion is based on my user experience as an average small business owner just trying to get a site up that does the work it needs to do. .
Sorry to hear you have been having issues! I think you should shoot an email to the Genesis team because Genesis is a paid-for product you can ask them for support. Maybe there is something very simple that needs fixing or tweaked in order for both products to play nicely. Personally I haven’t tested the Beaver builder with Genesis. That said, both things you mention (modify the front page and keep the blog/pages with a sidebar) definitely seem to be theme related because the Beaver builder is used only for replacing the content inside the post/page and not the way the theme handles your layout and sidebars.
I have tried many of the WordPress page builders but always end up going back to Elementor. I have tried beaver builder but could never get on with it.