How To Share WordPress Posts Automatically with Buffer

With billions of active users engaging across platforms, social media has become an obvious choice for companies and startups looking to enhance their online business.
While social media makes it easier for you to get your brand, products, services or information in front of a viable audience it’s ultimately up to you how you choose to take advantage of the benefits of the apps available. One of the most effective and reliable social media apps is Buffer. Read on to find out everything you need to know about using Buffer for social media management, how it behaves as a powerful social media booster and how to integrate it with WordPress.
Why Buffer?
Buffer is a powerful social media sharing app. It supplements your ability to engage live on Social Media without bombarding your followers with updates all at once! We’ve talked about post scheduling for your blog before, and Buffer is essentially post scheduling for social media.
If you don’t want to flood your followers with concurrent posts on Twitter, Facebook, Linkedin or other social media pages then the Buffer app the perfect system to help you. It allows you to easily schedule and bookmark Facebook updates, prepare Pinterest pins well in advance, schedule tweets from any computer in the world (provided you have a working internet connection) and more. All you need to do is preset the updates and add them in Buffer. The app will do the rest.
Not only is your content timely updated but this also keeps your customers engaged on your platform throughout the day. In addition, you can use Buffer statistics to see the number of people who clicked on your content, which posts were re-shared, etc.
How to Set Up Buffer
Ready to get started with Buffer? It’s as easy as 1, 2,3. We’ll show you step-by-step how to get setup with this awesome social media scheduling app.
1. Create A Buffer Account
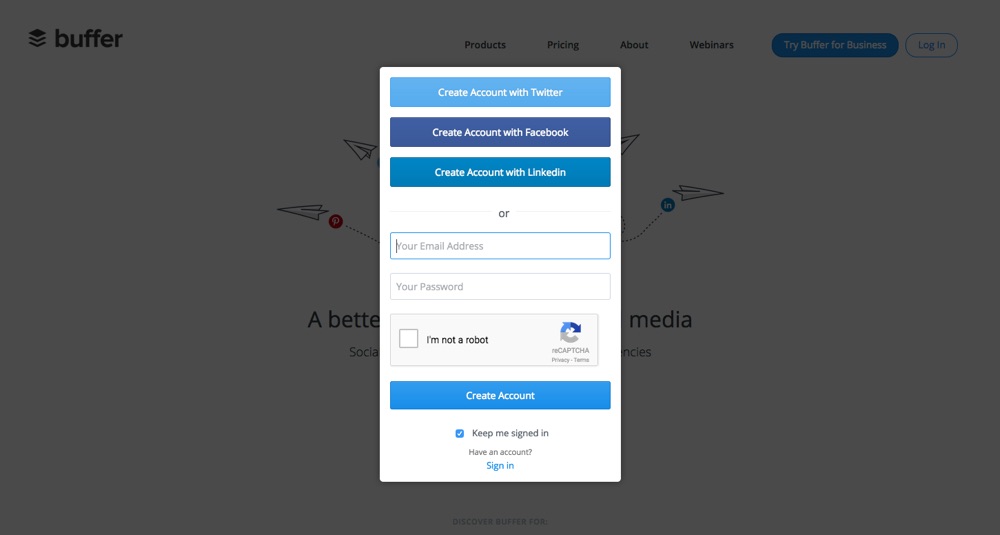
First sign-up for a Buffer account using Facebook, Twitter, Linkedin accounts or you can use Buffer’s option to sign up with your email.
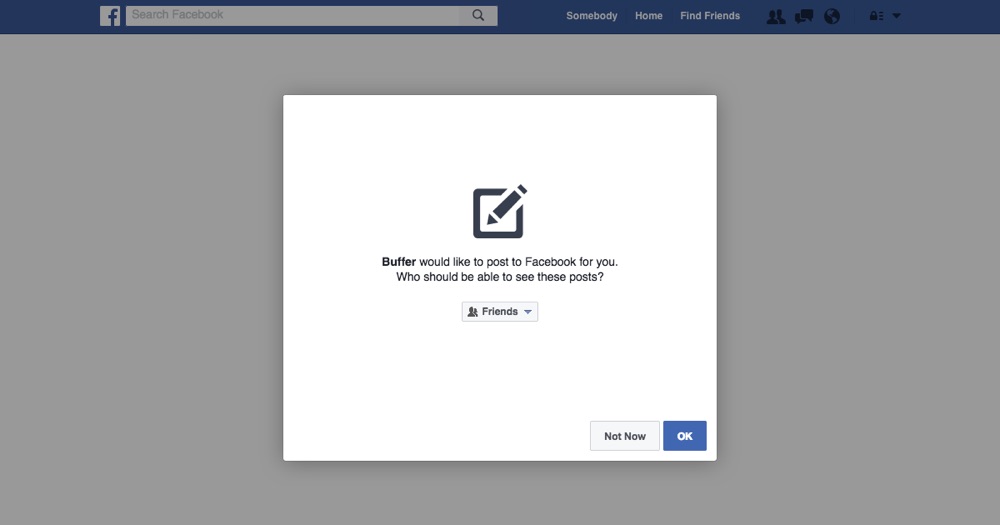
Next you’ll be prompted to link you social networks. You can choose from: Twitter account, Facebook Page or Profile or Group, LinkedIn Profile or Page, Google+ Page, Pinterest and Instagram. Depending on the network you are connecting Buffer will ask for permission to access certain aspects of your social media accounts – this is necessary for your to schedule and post content via Buffer.
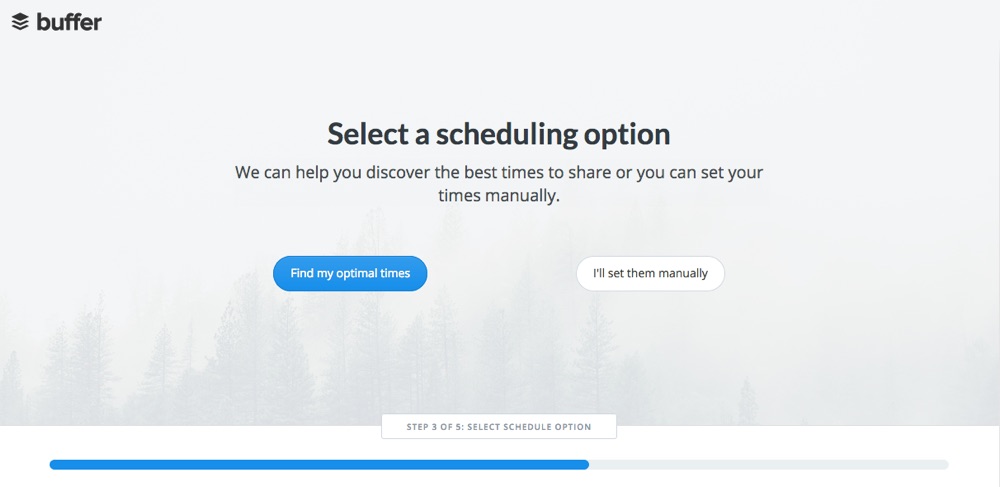
Once you’re done setting the options for your social account buffer will ask if you want to manually set posting times or if you want Buffer to calculate them for you.
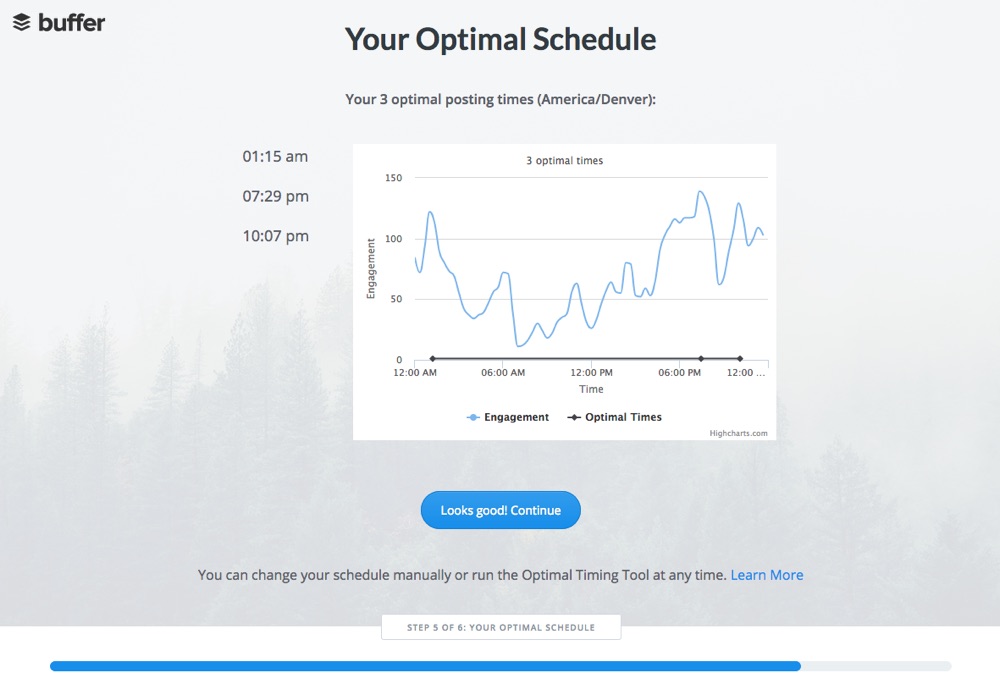
If you choose let Buffer do the scheduling for you (which we highly recommend) simply add in the number of posts a day you want and it will calculate when you should post based on your highest traffic times. With that done you’re finished setting up your account!
2. Scheduling Social Media Posts with Buffer
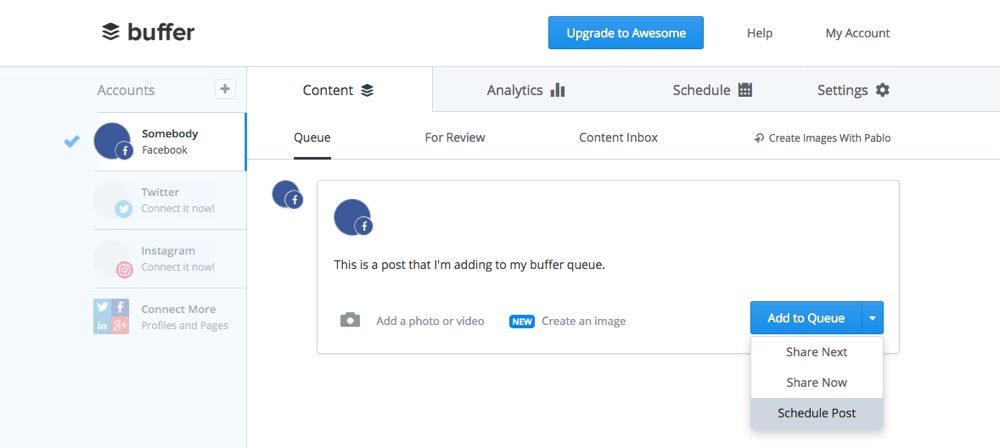
The next step is to start scheduling posts and updates for your social media accounts. Log into Buffer. From the “Content” tab you can add your preferred posts, articles, quotes or tips (even images and videos). If you used Buffer to create your optimal posting schedule just click the “Add to Queue” button and you’re post is all set to be sent out at your next available posting time. You can also choose to “Share Now” or your can “Schedule Post” to set a custom manual posting time.
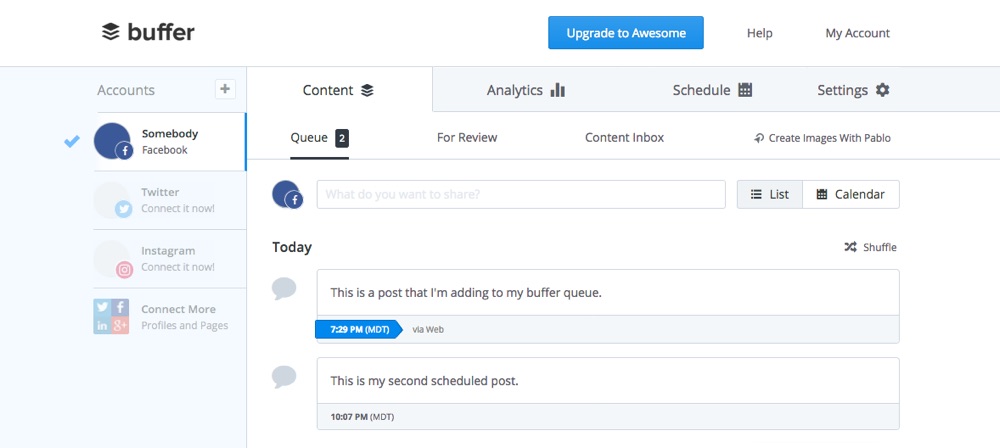
Once you have your posts and updates scheduled they will automatically go out to your social media accounts at your pre-determined times of the day. So you can spend the rest of your day focused on your business and not your social media accounts.
3. Integrate WordPress with Buffer for Even Easier Sharing

Buffer is a great tool on it’s own, but when combined with WordPress it’s a surefire way to boost your traffic and reader engagement with social media. To add Buffer to your WordPress site we recommend using a plugin, like WordPress to Buffer. Since it’s in the WordPress.org plugin repository you can install it right from your dashboard under Plugins > Add New.
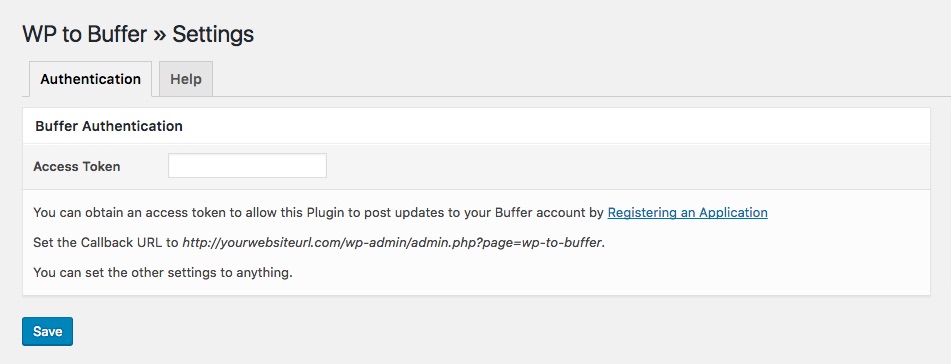
Once installed and activated you will need to create an access token in Buffer so the plugin can access it. To do this go to Buffer’s App page and register your website using the Callback URL that was provided on the plugin’s setting page (see above).
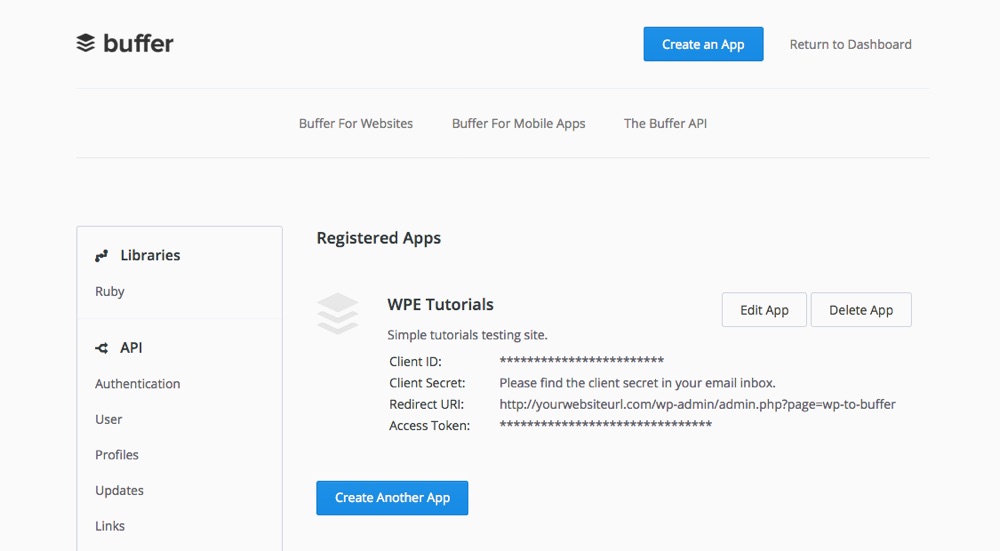
Once you’ve registered your website copy the “Access Token” and paste it into your plugin settings page. Now you can get started with the settings for sharing your content!
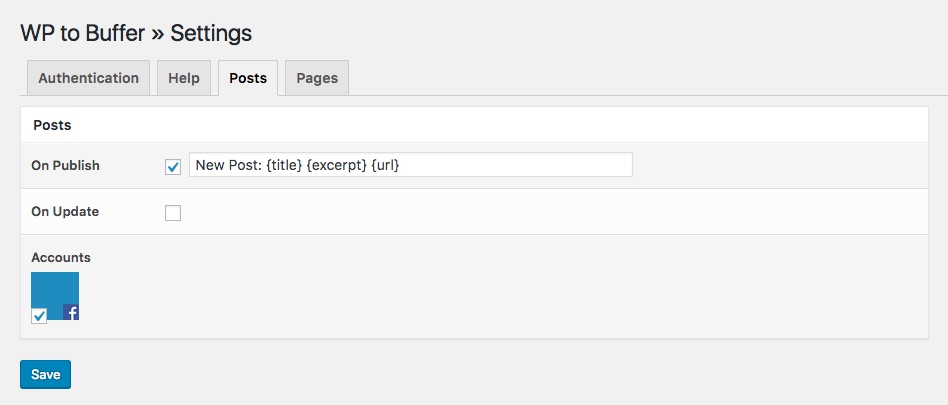
WordPress to Buffer includes options for you to schedule your posts and pages to be shared when they are published and updates. Check the box (or both) and then edit the new post format using the plugin’s tags including your blog name, post or page title, excerpt, post category, date published, URL and author. Then check the box for which Buffer linked social accounts you want to automatically share your content on.
Then simply save your settings. Now as you create content on your site it will automatically be shared with all your followers via Buffer! There is a Pro version available which includes features such as the ability to auto-pin content to Pinterest, custom tags for sharing your content, support for featured images, individual post settings, etc. So if you want more options you can upgrade with the click of a button.
Tips to Get the Most Out of Buffer for WordPress
In addition to using Buffer to promote your WordPress site, here are a few tips to help you optimize the content you’re sharing to get the absolute best results possible:
1) The first rule of good social marketing is be real with your customers. Try not schedule too many posts in a day – automation is good but too much makes your accounts seem less human and more, well, automated.
2) Create your own content to source through Buffer. If you’re curating content from other sources make sure to create your own custom excerpt to share it with to keep it fresh for your readers.
3) Try to avoid posting to Facebook frequently. They do penalize items shared using third party apps or services so your content might not reach your customers (don’t worry though – all the other social media accounts Buffer supports have no problem with automated sharing).
4) Be social online with your readers. Re-tweet and reply to comments. It will increase your reader engagement and having new comments on your website creates new content which is good for SEO.
5) Many people use Buffer, so why not add an “Add to Buffer” button on the top of your website. This way your followers can add your shared content into their Buffer account.
6) Take advantage of Buffer’s Optimal Scheduling option. This will ensure that your shares reach the highest number of followers.
7) Use the Buffer browser extension to make sharing updates and curated content even easier. With this, you can also shorten the URL, add photos and more.
Wrapping Up
There are other social media scheduling options but Buffer by far out-does every one by being easy and efficient. With easy to use features like custom scheduling, multiple account management and tracking Buffer is the most convenient way to regularly update the content for your users. If you have any questions about Buffer feel free to ask. And if you’re already using Buffer we’d love for you to share your experience in the comments below.


