Notify.Events Ultimate WordPress Notifications
How do can you monitor visitor activity and events on your website in real-time? That’s simple; you use real-time notifications. If you had no idea, you can receive notifications from your website via SMS, push notifications, Facebook Messenger, Telegram, and everything in between. And it’s all very easy to set up with the right WordPress notifications plugin.
Tracking events on your website helps you to stay sharp and improve work efficiency. How does that work? Well, when you know what users are doing on your website in real-time, it becomes a lot easier to meet them at their point of need. In other words, real-time notifications make it easier to take your leads thro’ your sales funnel.
In today’s post, we cover a WordPress notifications plugin known as Notify.Events. The plugin helps you to receive real-time notifications from your WordPress website via 30+ messenger apps. We’ll walk through the features that make Notify.Events a great notifications system, and then test drive the whole thing.
Do You Need Real-Time Notifications?
Notifications offer you one of the best ways of boosting engagement and sales. As an example, you can use real-time notifications to stay on top of orders just like ReadySetGrow:
Today Notify. Events helped my team track a new order from one of our sites. Usually, we notice such orders after 2-3 days. The message was received in Telegram. Kudos to Notify!
Real-time notifications allow you and your team to track events on your website as they happen. For example, if a certain prospect needs prompt support, you want to send an instant notification to your customer service rep.
If a customer makes an order, for instance, you want to receive an instant notification so you can fulfill it as soon as possible. And you want to receive such order notifications in real-time on any device, wherever you are.
Simply put, real-time notifications make it easier to run your online business. With instant notifications alerting you to what’s happening on your site, you can take immediate action and turn things in your favor.
What is the Notify.Events WordPress Plugin?
Before we get lost in technical details, how about we start by learning more about the subject of today’s review. So, what is the Notify.Events WordPress notifications plugin? And how can it help you?
The Notify.Events is a powerful yet easy-to-use WordPress notifications plugin that allows you to capture events on your website in real-time, and send notifications to any recipient you wish, helping you manage your online business better.
For instance, the plugin can capture and send notifications for events such as:
- WooCommerce new orders, out of stock, low stock, order status change, etc.
- Contact Forms 7, Ninja Forms, and WPForms form submissions
- User registrations and logins
- New comments
- Post activities: Added, Sent for Review, Published, and Approved
- And so much more
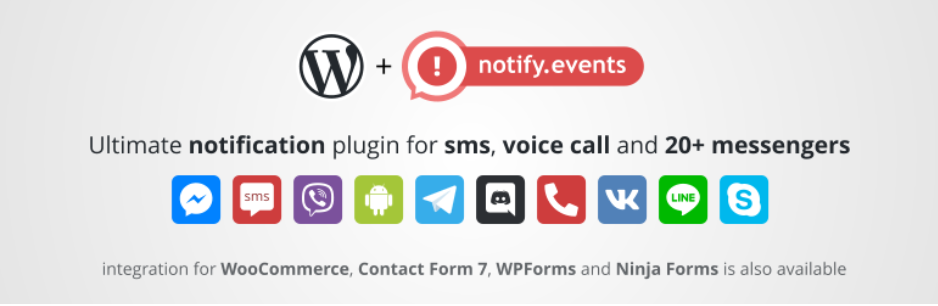
The Notify.Events plugin sends notifications to you or your team via several channels including SMS, voice calls, push notifications, Facebook Messenger, Telegram, Viber, and 30+ other messaging apps.
The plugin is the real deal if you need to receive real-time notifications from your WordPress website. Thanks to a slew of features, you will never miss an important event on your WordPress website.
Key Features
Are you looking for a notifications plugin that offers you all the functionality you need? Well, Notify.Events is one such plugin. The Notify.Events service is packed to the brim with all the features you need to supercharge your WordPress notifications.
Here’s what to expect.
Message Filtering
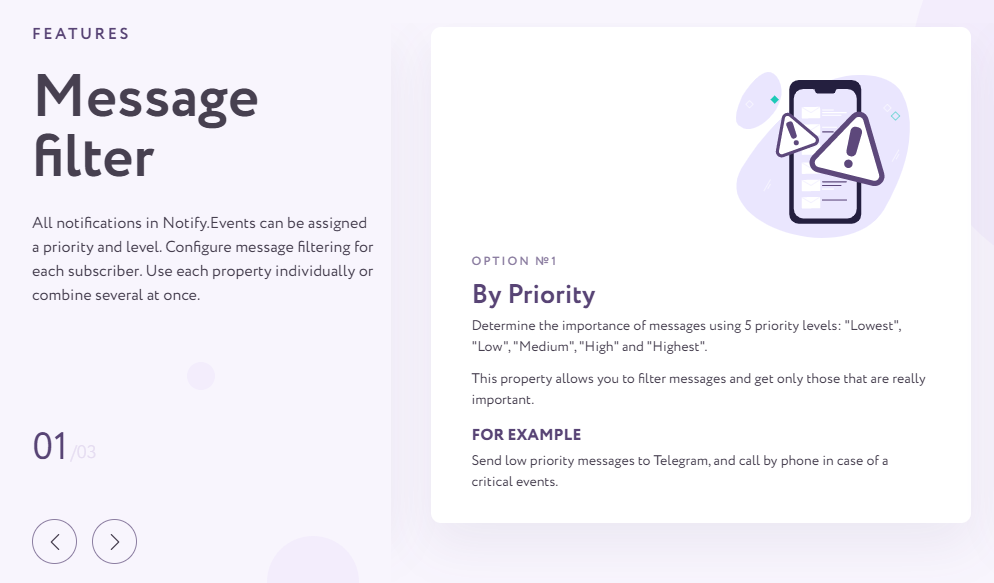
The message filter feature allows you to receive notifications by priority. As such, you can filter messages and receive only those that are important.
The plugin offers you five priority levels: lowest, low, medium, high and highest. As an example, you can send low-priority notifications via Telegram, and high-priority notifications via SMS or call by phone.
If you log in to your Notify.Events account, you can also filter notifications by level, time and day. You can use properties individually or combine several at once.
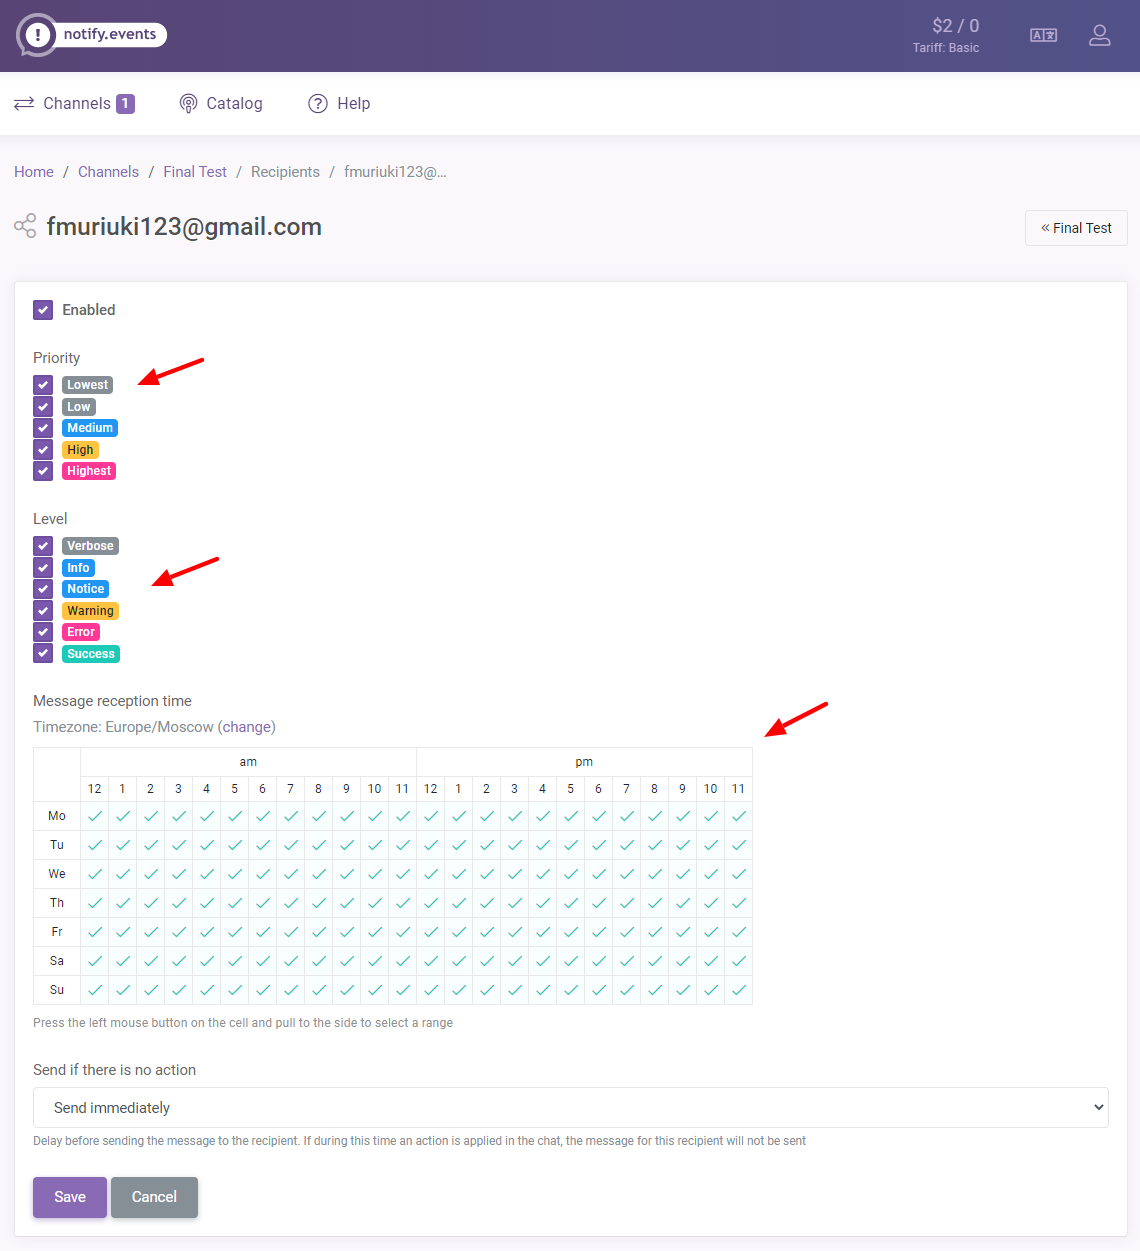
The time filter is a great solution to manage shift work and organize different notifications dependent on time. Just set what time and day each team member receives notifications. Or you can set up SMS notifications in the daytime and phone calls to wake you up at night in case of urgent events.
Integration with over 20 Services
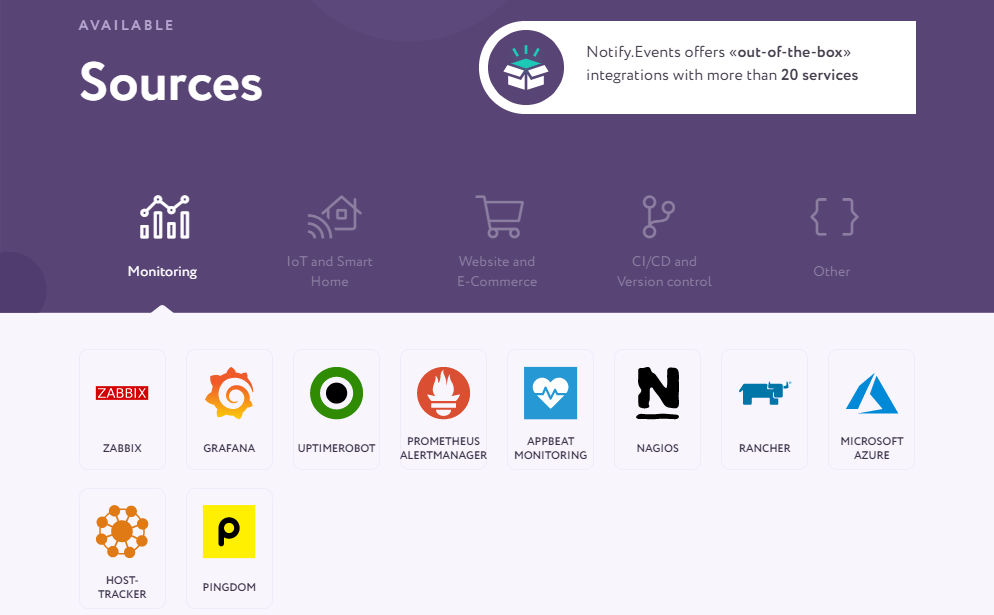
Managing all the aspects of your website is no easy task. Things can quickly get out of hand especially if you have many websites to run. If you’re busy and don’t have real-time notifications from your website(s), you might miss a lot of important events.
At times, you might miss an important email simply because you didn’t check your mailbox. The Notify.Events system helps you to overcome such challenges. You can integrate the service with your email provider, and receive instant SMS notifications when you receive an important email.
But that’s just the beginning, the Notify.Events system offers you seamless integration with over 20 services out-of-the-box. For instance, you can easily integrate the Notify.Events service with website monitoring services such as Pingdom, Zabbix, UptimeRobot, and Microsoft Azure, among others.
Additionally, you can integrate the Notify.Events service with IoT apps such as Home Assistant and Node-RED. You can further connect the Notify.Events platform to your business website or eCommerce store.
The plugin we’re covering here today is completely compatible with WooCommerce. That means you can receive instant notifications about orders, form submissions, and every other event you’d like to track.
There is even something for development teams. Notify.Events also integrates with CI/CO and version control services such as GitLab, CodeShip, AppCenter, and more. If you have a custom app, you can create bespoke integrations using incoming webhooks and emails.
What that means is you can streamline your notifications across multiple platforms for an inclusive workflow that works for every team member. The best part is you can automate notifications easily, which makes project management a piece of cake.
Multiple Ways to Reach Your Recipients
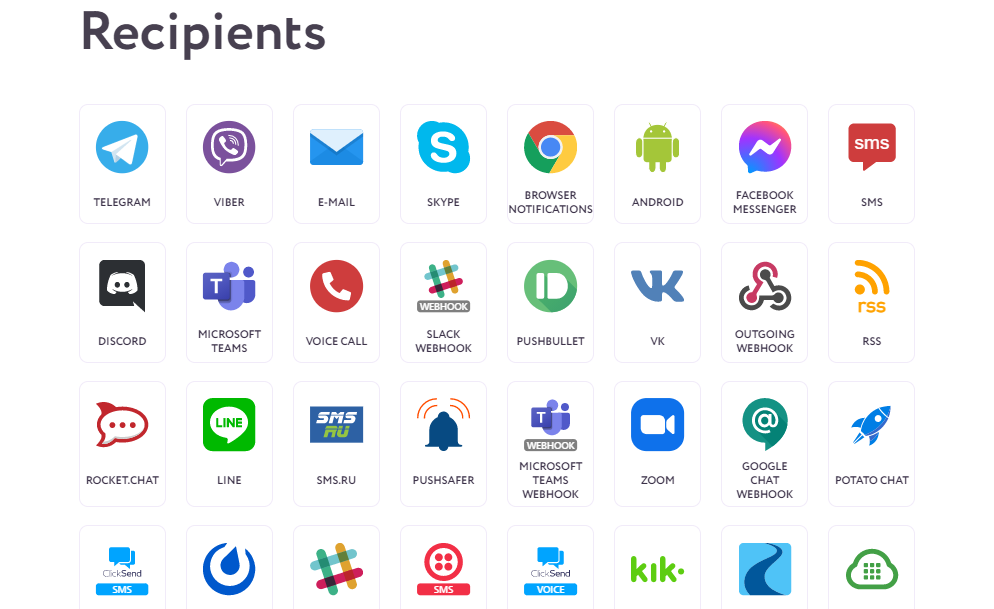
We live in a world full of communication apps and it’s insane to ignore the potential these tools offer. The good news is you can easily configure Notify.Events to work with a wide range of apps and services. Heck, you can even configure the plugin to notify you via voice calls.
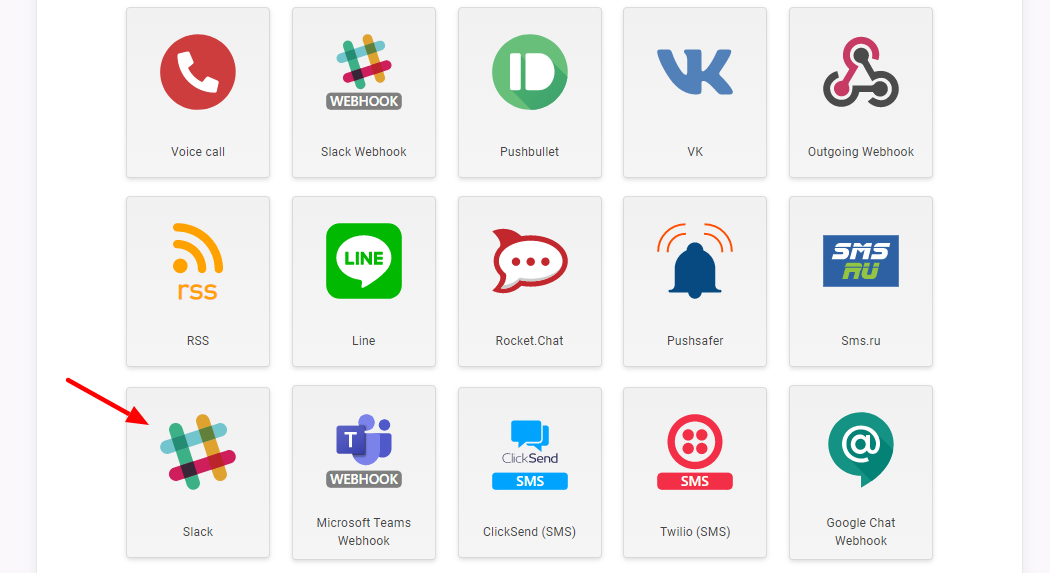
If you’re curious, you can use SMS, email, Skype, browser notifications, Google chat, Slack, Microsoft Teams, Discord, and the list goes on and on. That means you can automatically send notifications where they are convenient for you and your team.
They say the more the merrier, and the more channels of communication you have, the faster you can reach your subscribers aka team members. That translates to faster execution that saves you time, money, and effort. That, plus you will always stay up to date since you’re not missing any important events.
Absolute Flexibility
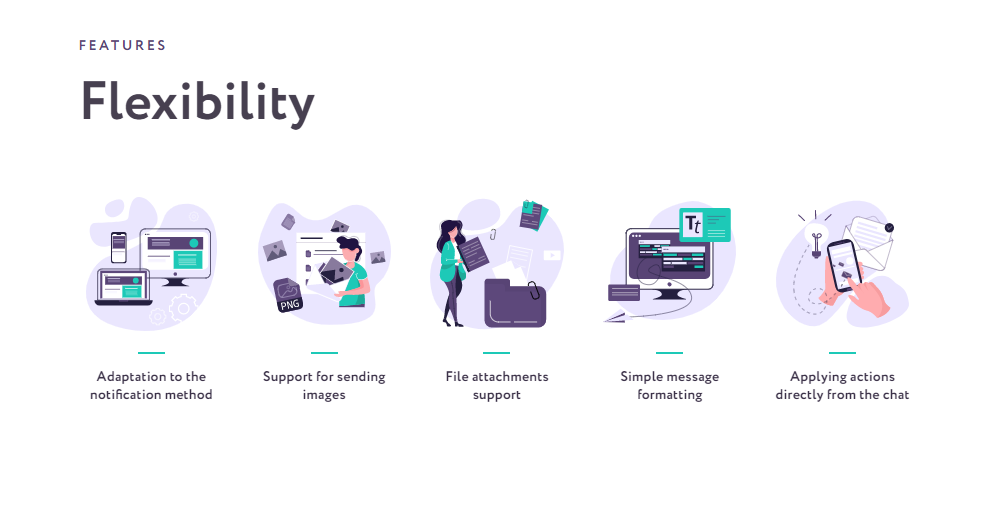
To save resources and simplify notifications, you need a versatile tool that is full of features but easy to use. The Notify.Events service offers you a lot of flexibility as far as managing notifications on your site goes. It’s a fully-fledged system that ensures you don’t miss important events without bogging you down with complex settings.
For instance, it’s incredibly easy to adapt your notifications to any device or browser. As we saw earlier, you have plenty of integrations and communication channels at your disposal. Your notifications automatically adapt to whichever communication tool the user is using.
Additionally, you can customize the content that goes into your notifications. You can customize how and what you’d like your team members to receive in notifications. You can use different variables to customize and personalize the messages you send to your subscribers. Further, you can format your messages to highlight key points.
With the key features out of the way, how much does Notify.Events cost?
Notify.Events Pricing Plans
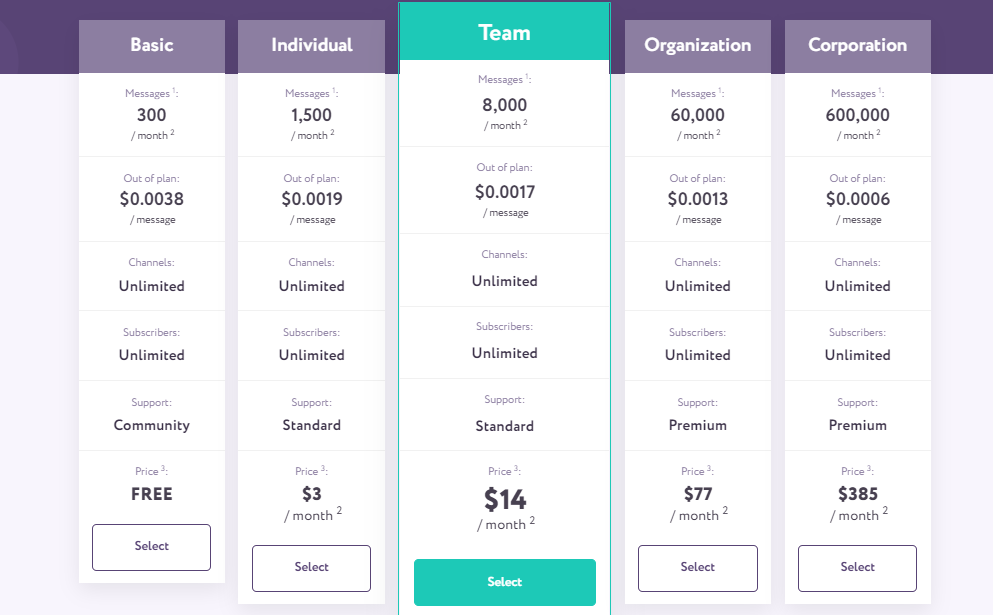
If you’re wondering how much all this awesomeness is gonna cost, you’ll love the next part. Notify.Events developers offer you a free plan and four premium plans. The main difference between the plans is the price, the number of messages, and the type of support you get.
Here are the deets (as seen in the image above):
- Basic Plan – The plan offers you 300 messages per month and community support. The plan is perfect if you’d like to try the service. You can also use the plan if you don’t send many notifications since the message limit is renewed each month.
- Individual Plan – Perfect for budding bloggers and beginners, the Individual plan costs just $3/month. It offers you 1,500 messages/month, and standard support.
- Team Plan – The Team plan offers you 8,000 messages per month and standard support. It will set you back just $14 bucks a month and is ideal for agencies and small teams.
- Organization Plan – If you’re a big enterprise, you might want to consider the Organization plan, which offers you 60,000 messages/month and premium support at $77/month.
- Corporation Plan – Designed for big corporations with heavy demand, this plan offers you 600,000 messages per month and premium support at $385/month.
NB: Each plan offers you unlimited channels and subscribers.
Now that you know what we’re working with and how much everything will cost, let us set up the plugin for that much-awaited test drive.
How to Install Notify.Events
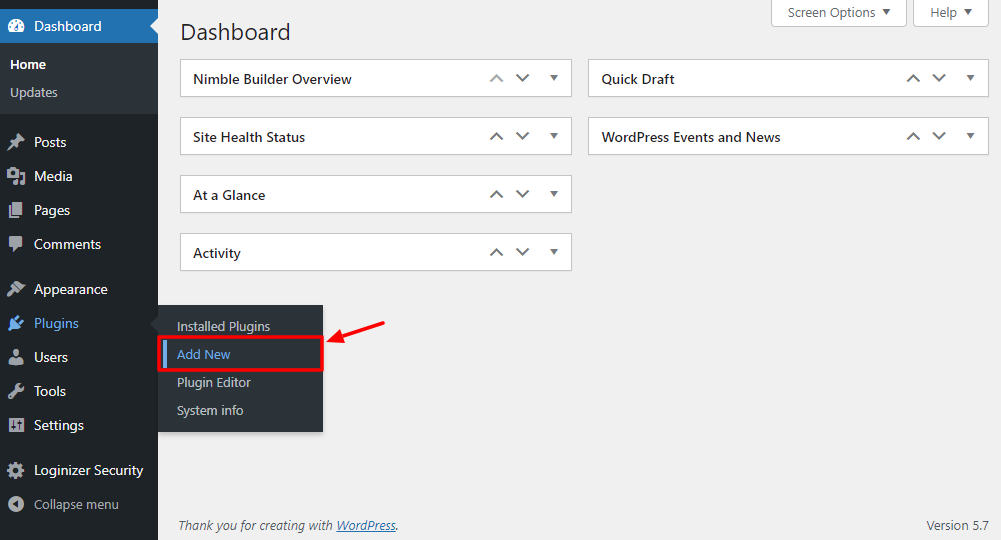
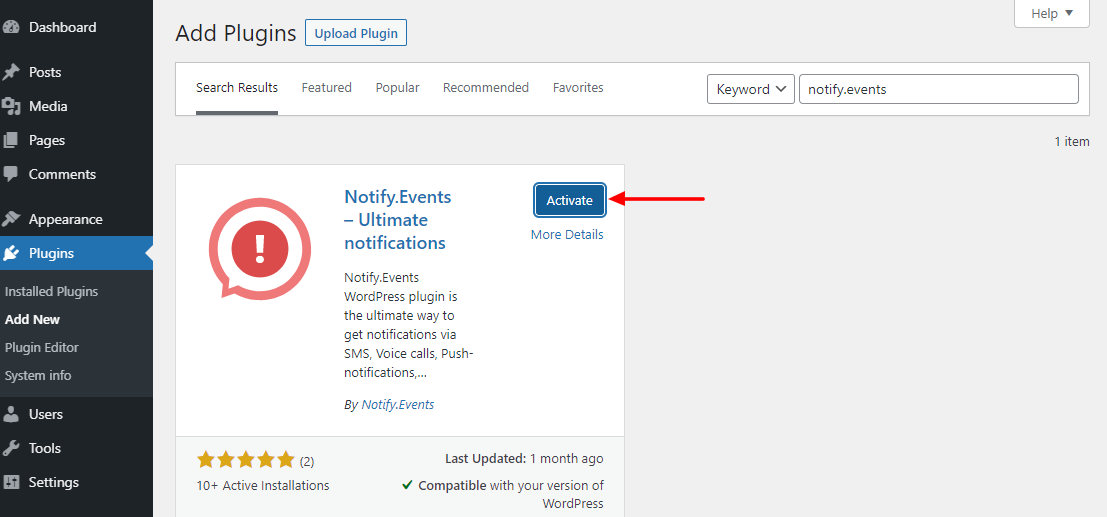
Since Notify.Events is a free WordPress plugin, you can install it directly inside the WordPress admin dashboard. Navigate to Plugins > Add New:
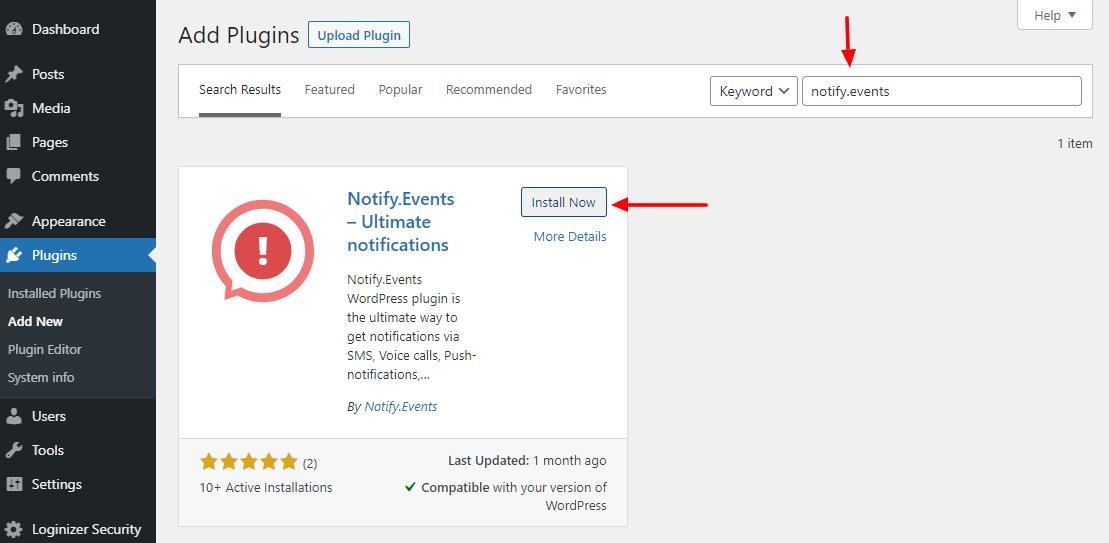
Next, enter Notify.Events in the search box and click Install Now once you find the plugin, as shown below.
After that, hit Activate to get the ball rolling:
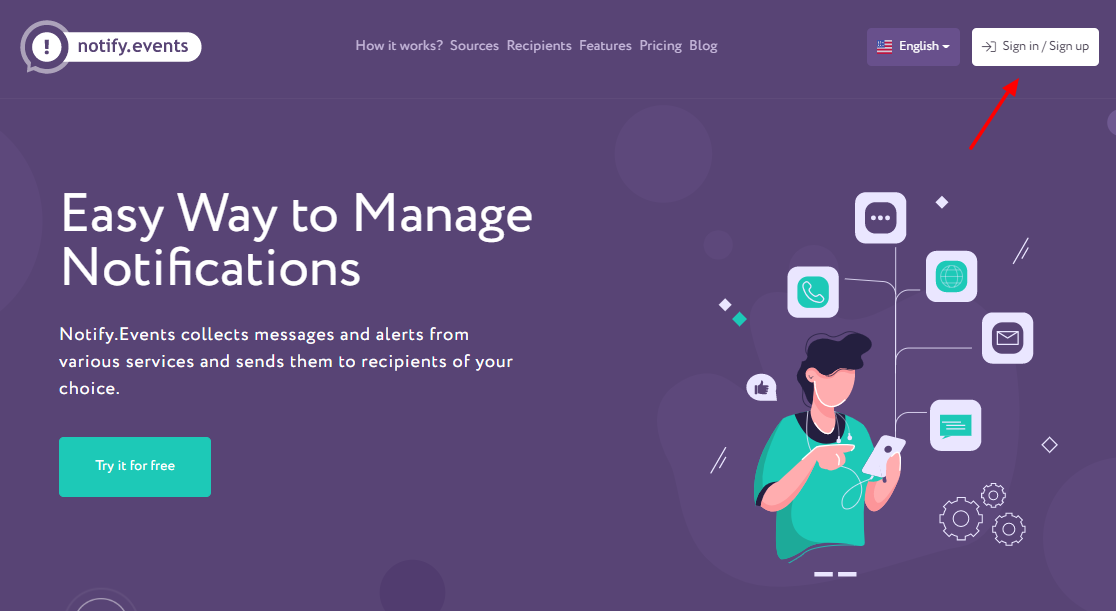
For the next part, you need a Notify.Events account. Head over to the official Notify.Events website and click the Sign in/ Sign up button, as shown below.
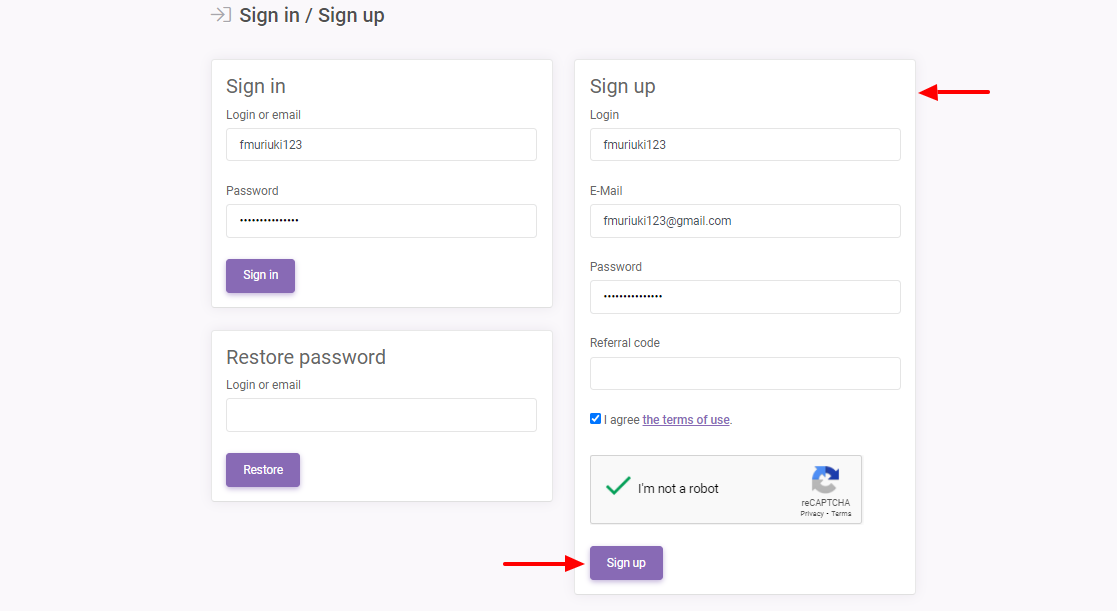
Then simply fill out the sign-up form and click Sign up at the bottom:
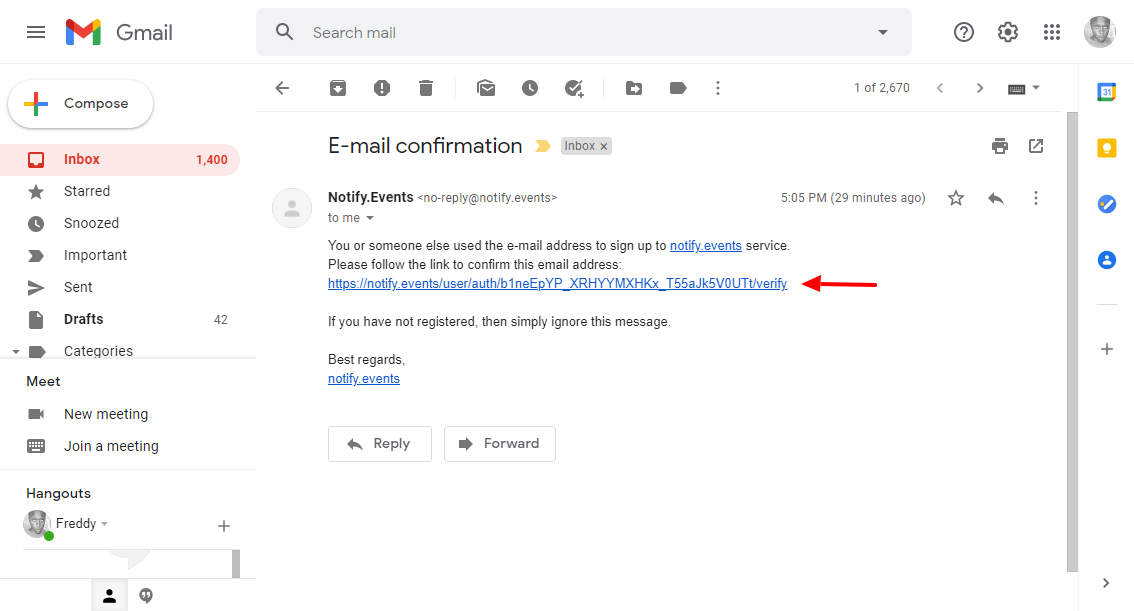
After that, Notify.Events will redirect you to your control panel. Before you do anything else, login to your mailbox and click the email confirmation link you received from Notify.Events:
Doing so confirms your account and leads you back to the Notify.Events control panel, which looks like so:
Pretty neat, huh?
Now, let us send a few test notifications via the Notify.Events system. It’s incredibly easy you should be up and running in minutes.
How to Send Notifications with Notify.Events
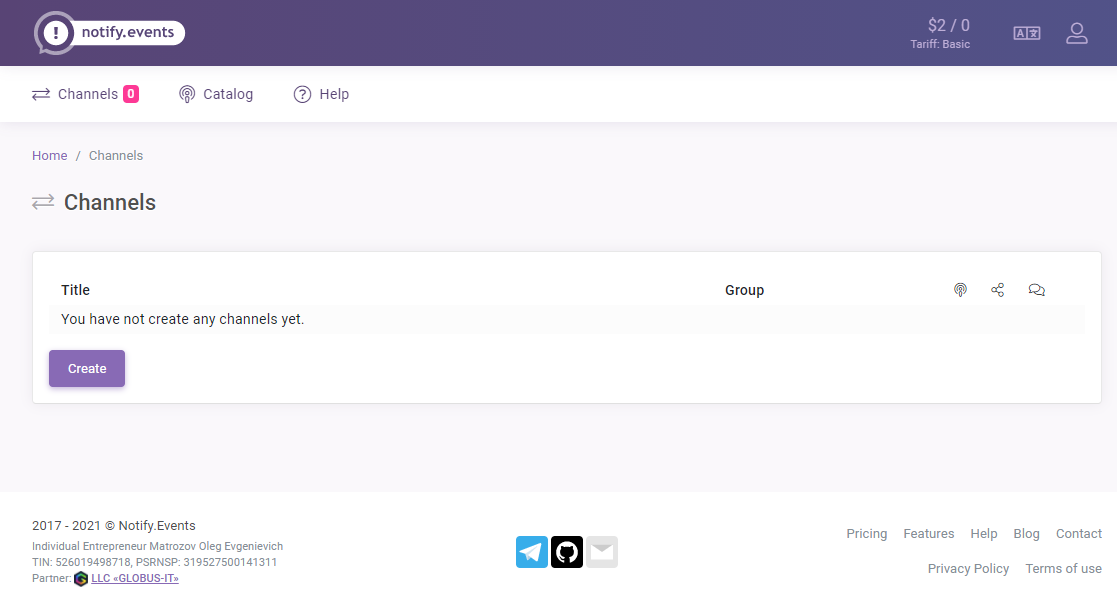
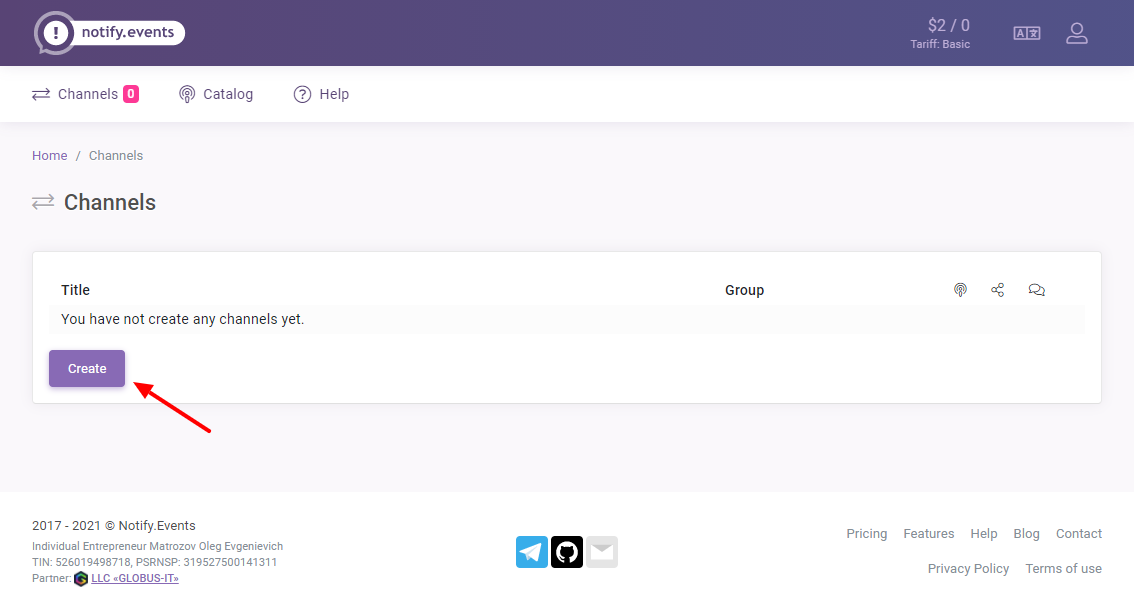
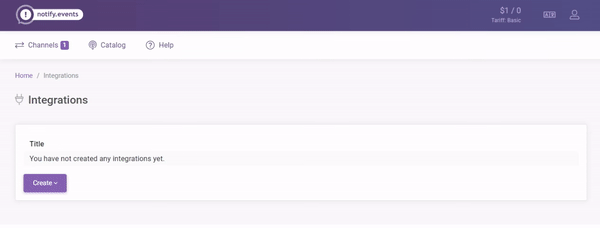
Inside your Notify.Events control panel, click Create under the Channels section, as shown below.
Aside: A channel is simply a feed (or section in your control panel) that groups your sources, recipients, and messages. You can create multiple channels for different sources, recipients, and messages as you deem fit.
Next, enter a title for your channel and click the Save button:
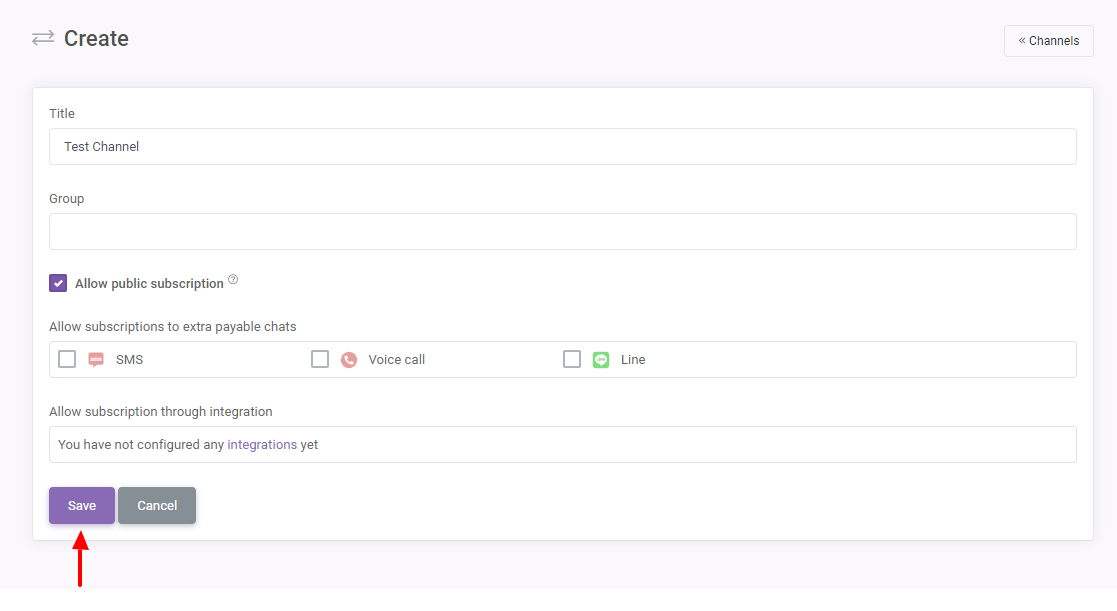
As you can see in the above image, there are other neat things to do on the above screen. For instance, you can assign a group to your channel, allow public users to subscribe, and even configure subscriptions via integrations with some third-party SMS notification services if you already use them.
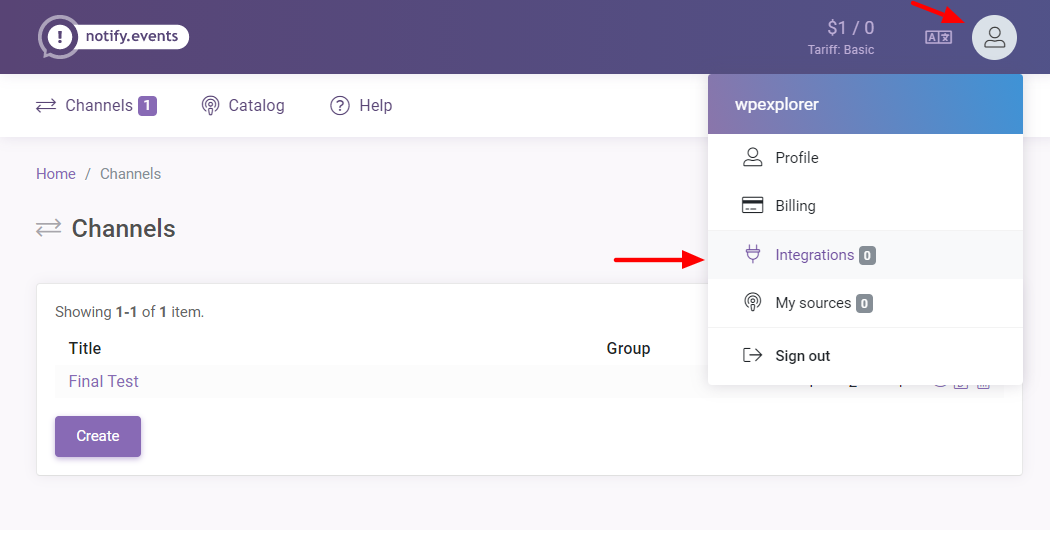
To configure subscriptions via integrations, click the Profile icon in your control panel and select Integrations:
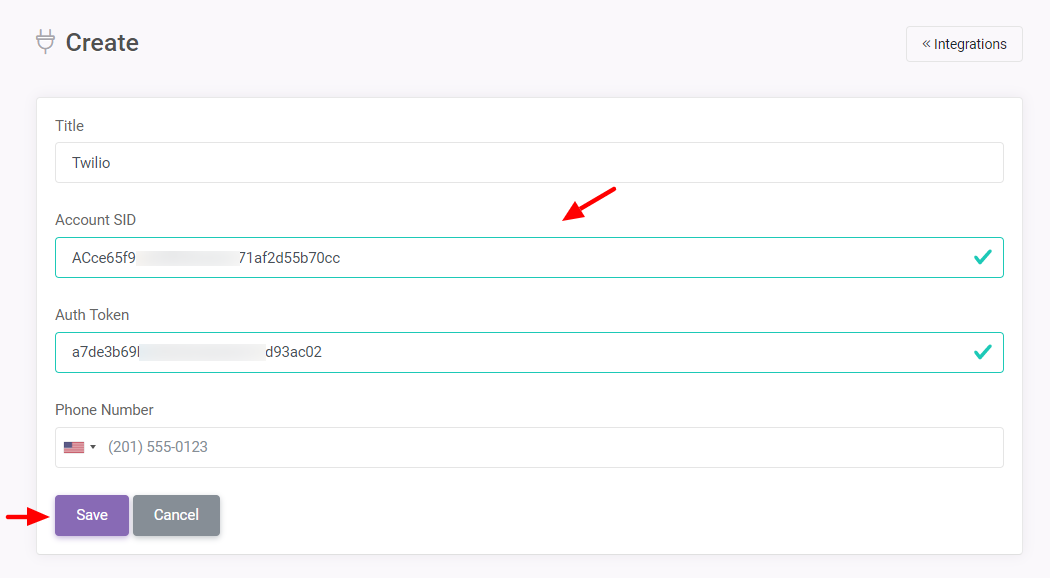
Next, click Create and choose your integration. For illustration purposes, I am using Twilio (You’ll need an existing Twilio account):
After that, add the required credentials from your Twilio account and click Save:
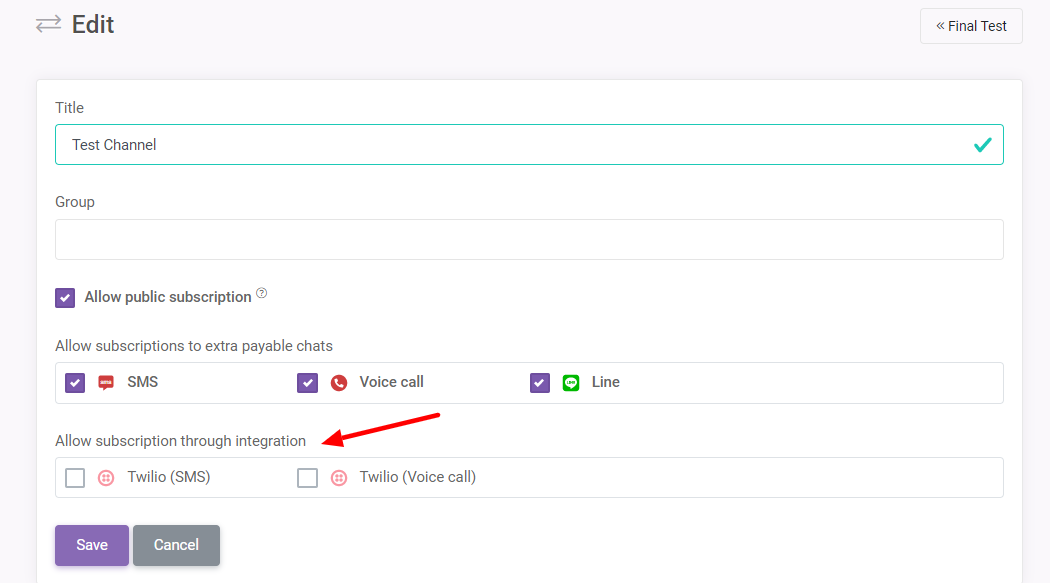
Now if you go back to your channel edit screen, you’ll see the additional integrations:
After that, click the Save button, which leads you back to:
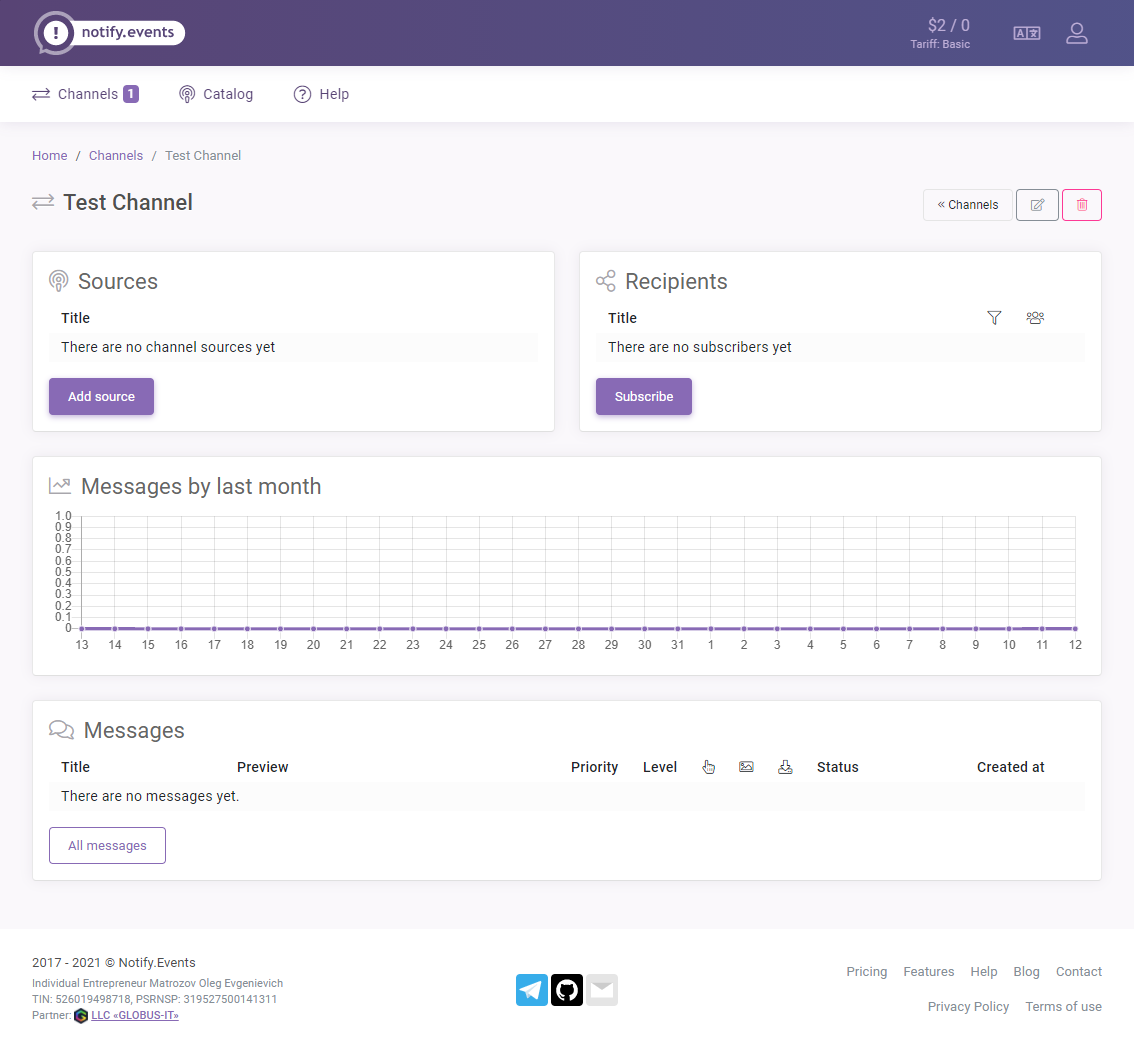
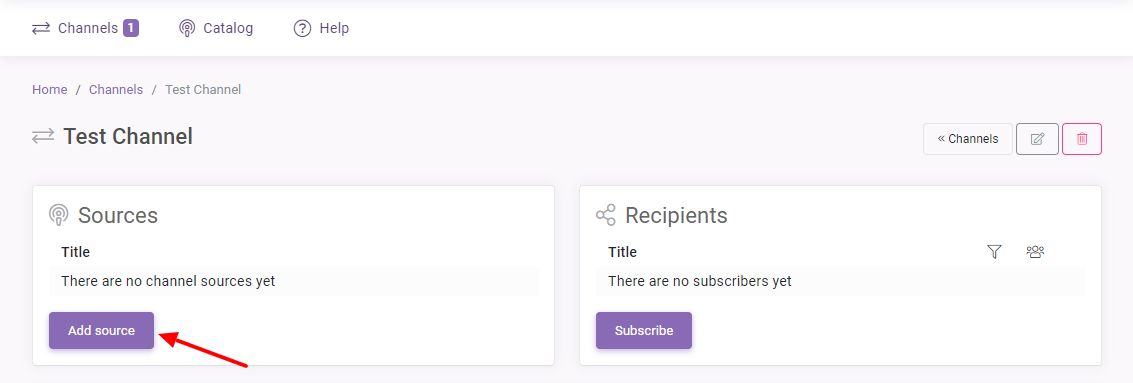
Now, your test channel needs a source and a subscriber.
Adding a Channel Source
Click on the Add source button:
Next, click the Website and E-Commerce tab, as we highlight below.
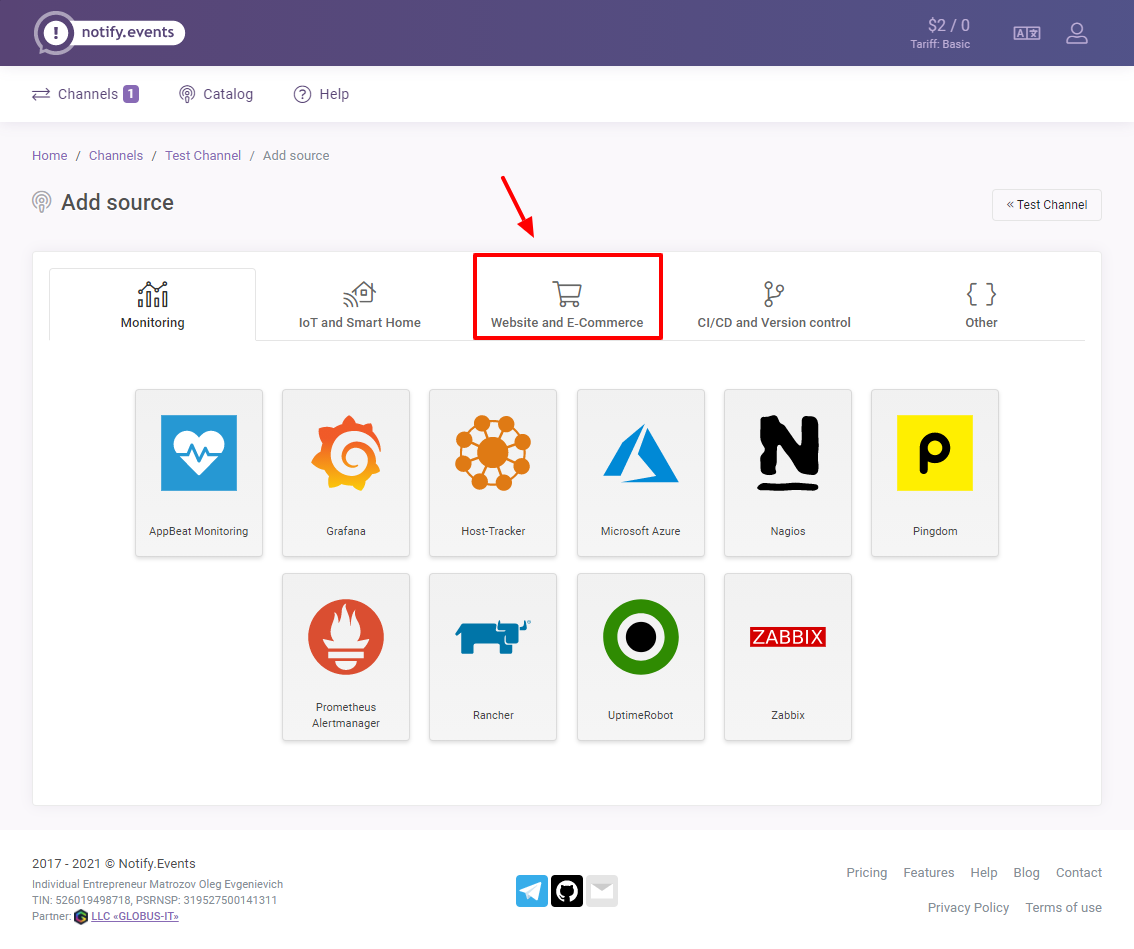
See, you can add many other sources but we are working with WordPress for illustration purposes. Next, click the WordPress icon:
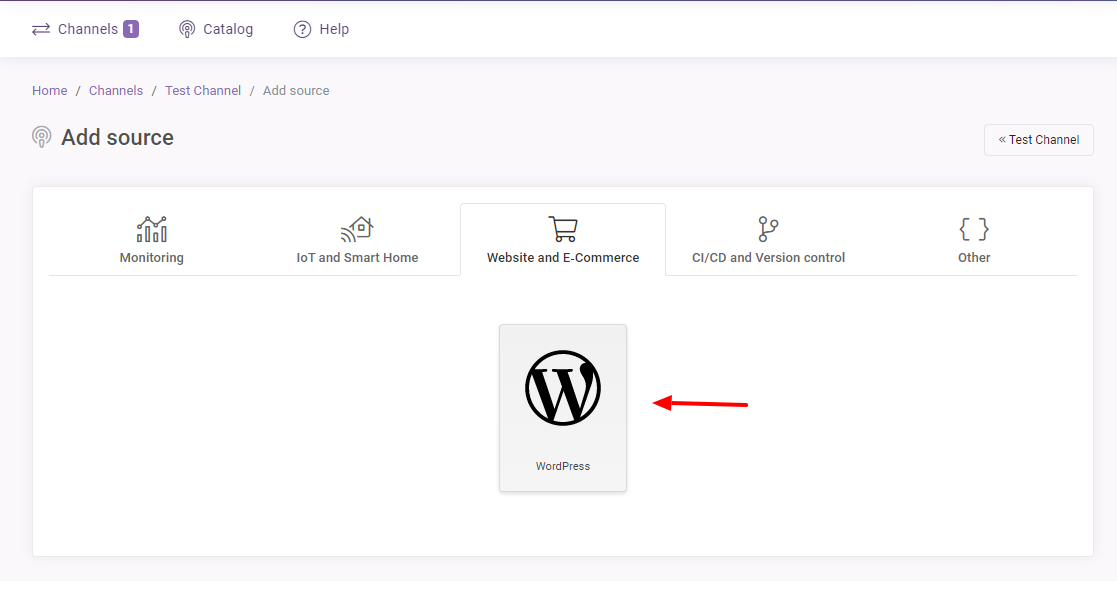
After that, hit the Next button:
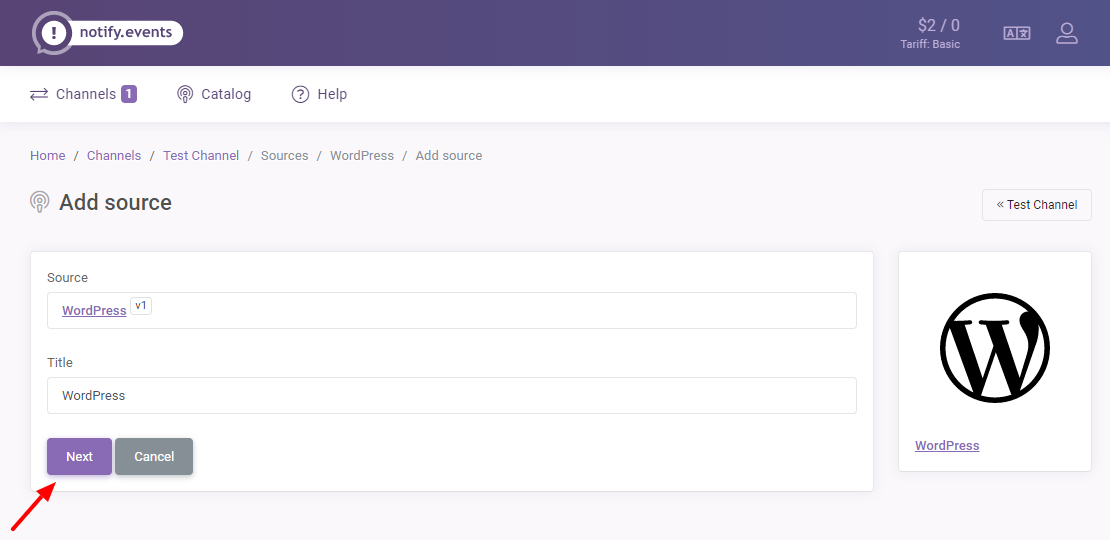
This is all straightforward and self-explanatory you shouldn’t run into problems. On the next screen, click the token to copy and then Done, as shown in the following screengrab.
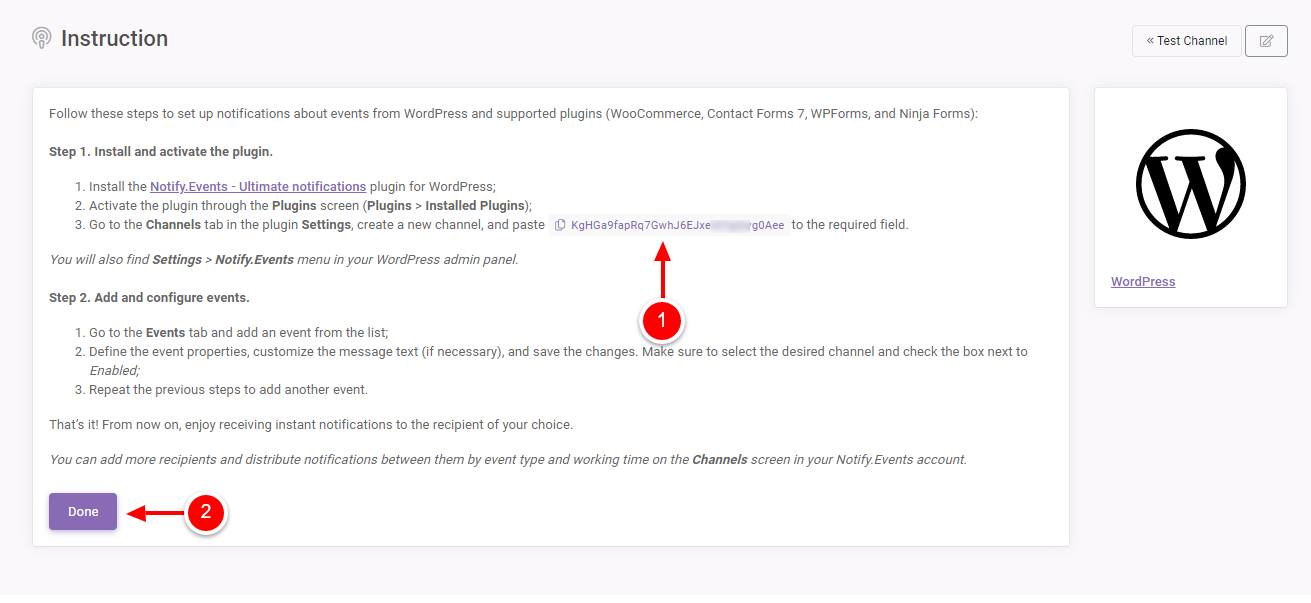
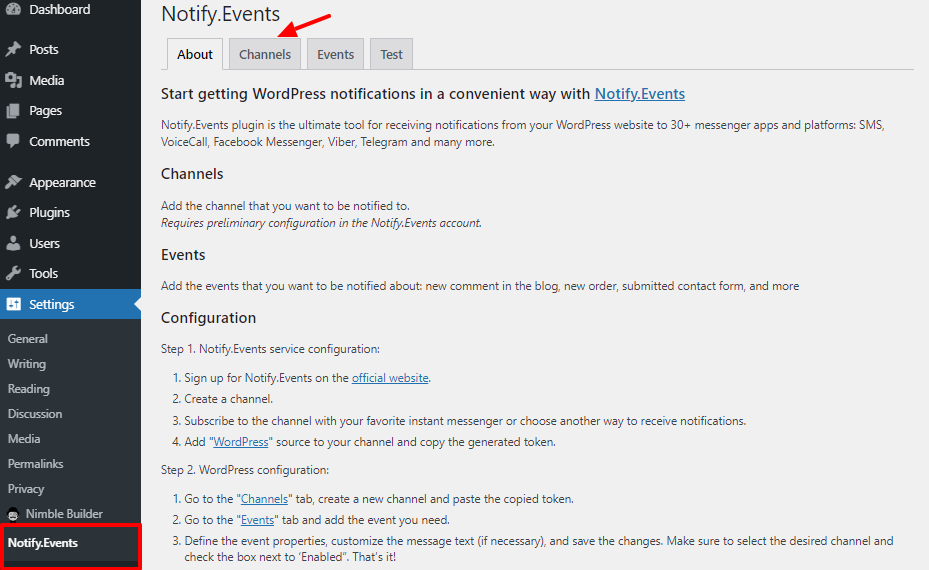
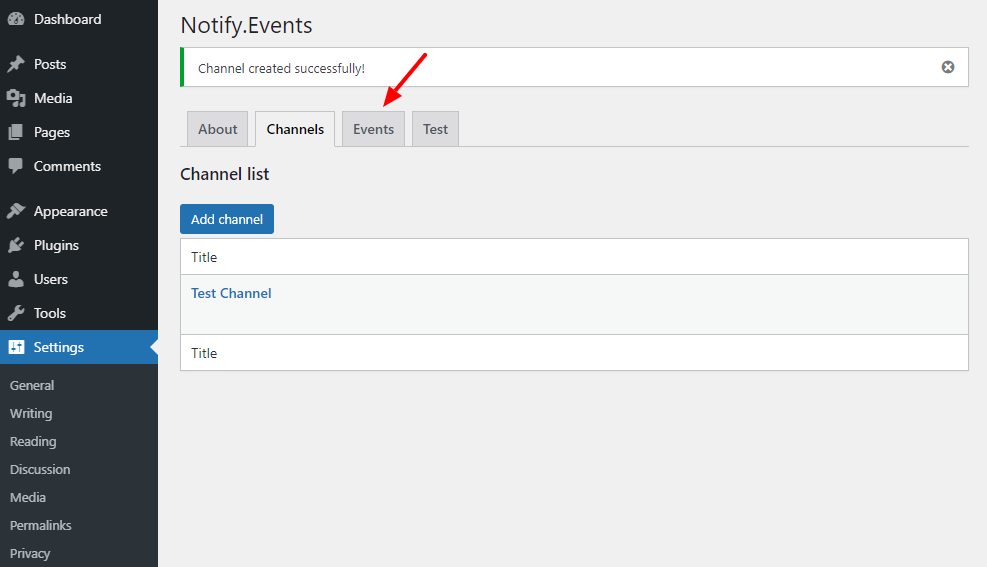
Back in your WordPress admin dashboard, navigate to Settings > Notify.Events and then click the Channels tab, as highlighted below.
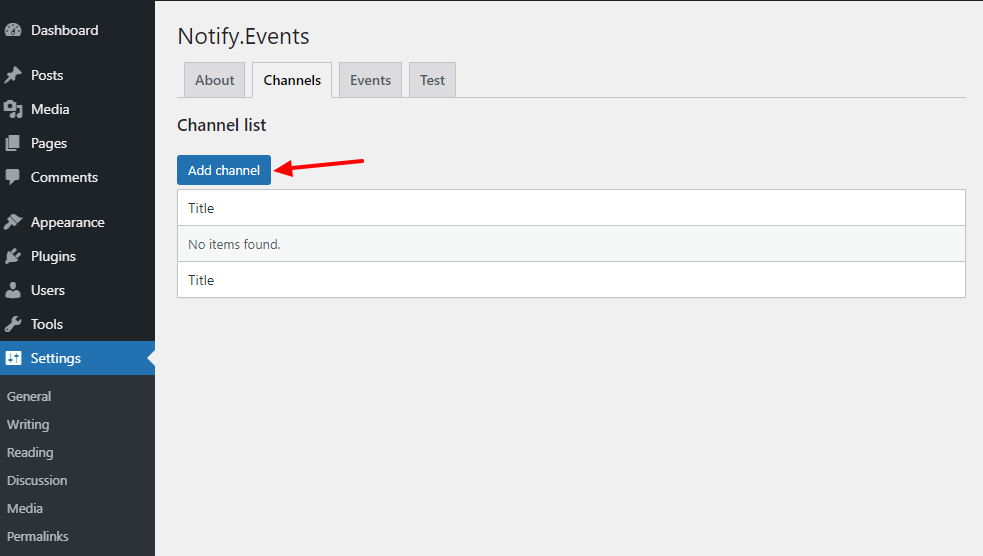
Next, hit Add channel:
You are doing just fine 🙂
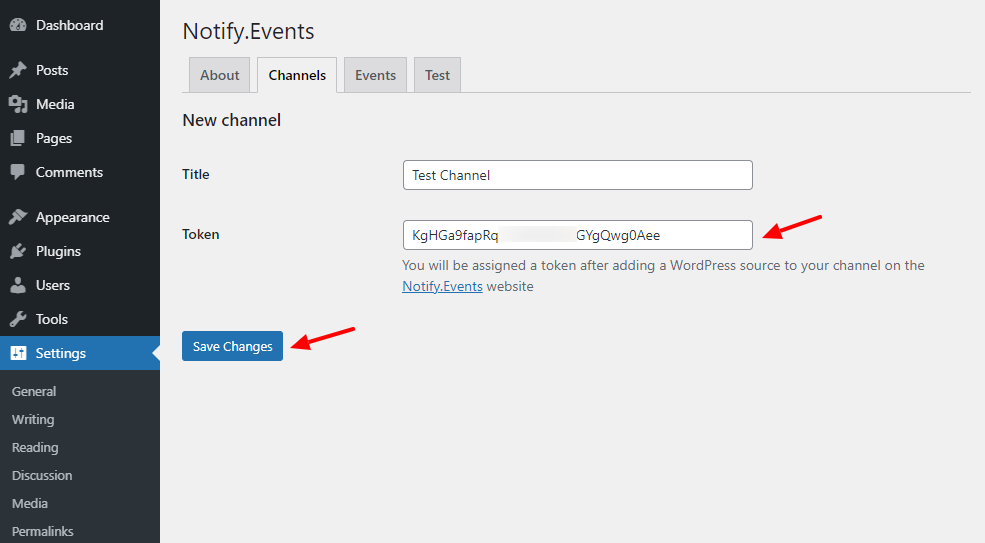
After that, enter a title for your channel, paste the token you copied earlier and hit Save Changes:
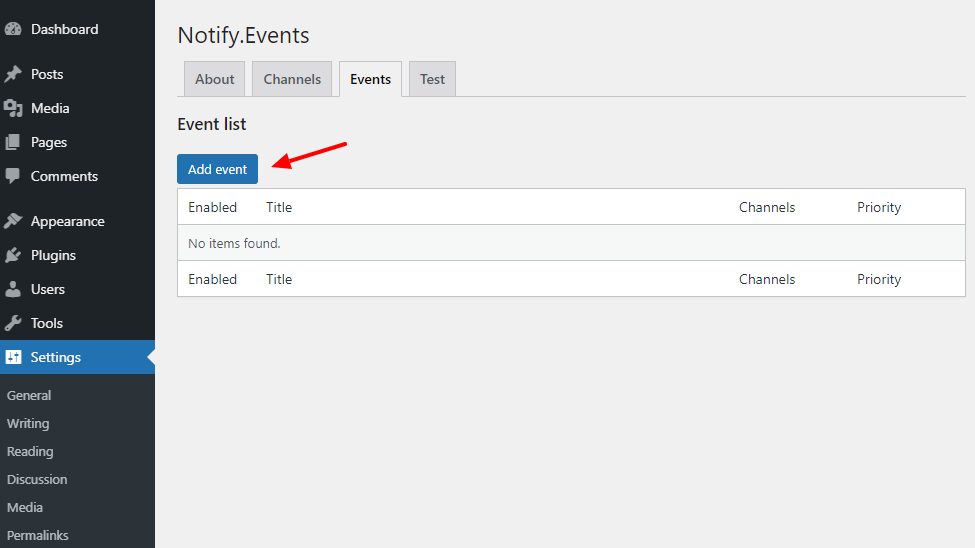
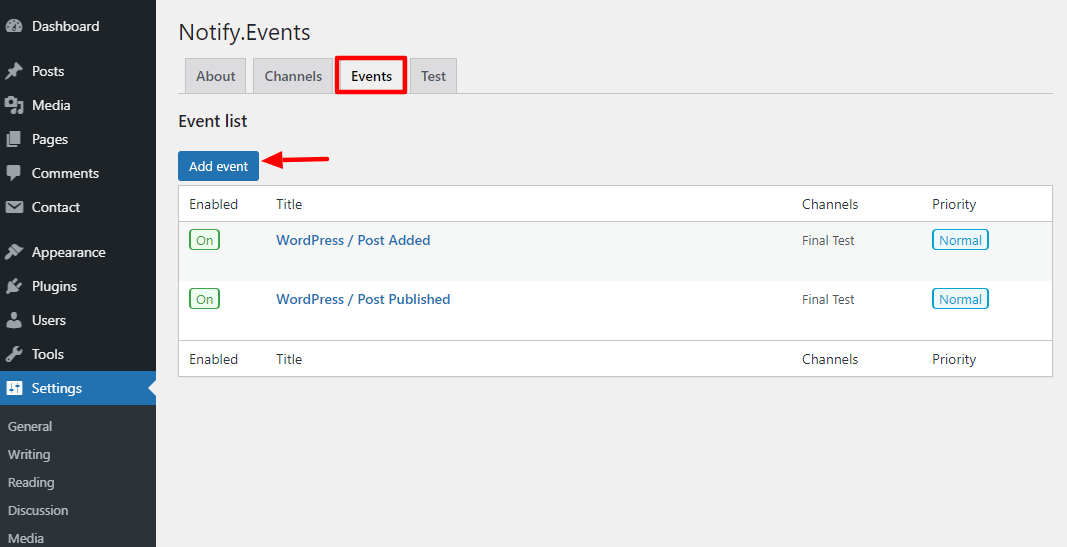
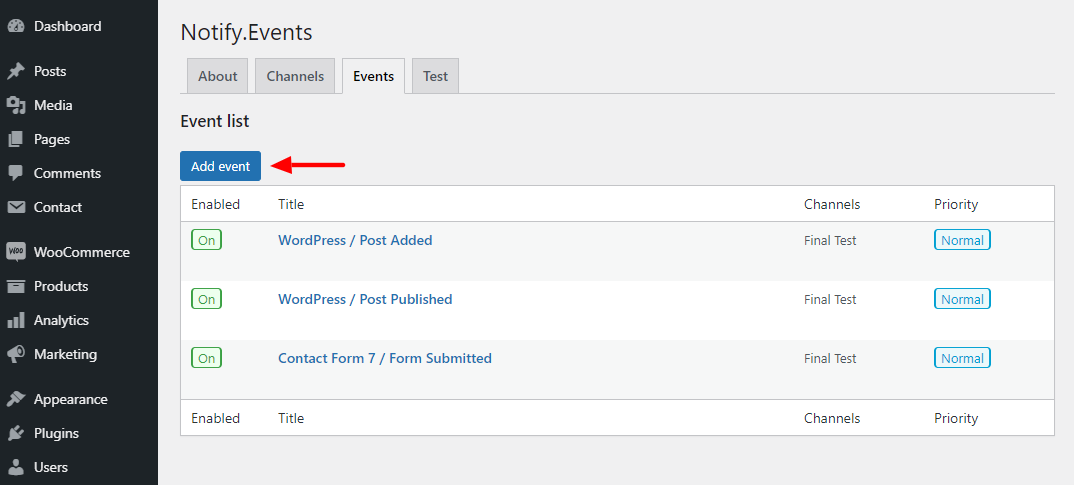
Adding Events
Now that we have our channel ready (nearly), let us add some events that will trigger notifications. Click the Events tab:
Next, click the Add event button:
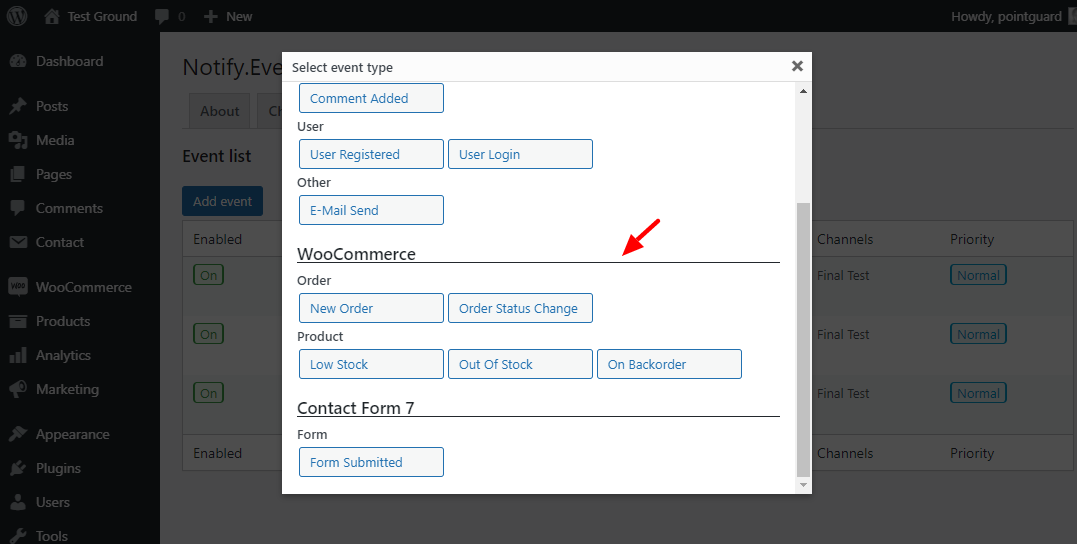
After that, choose a WordPress event type:
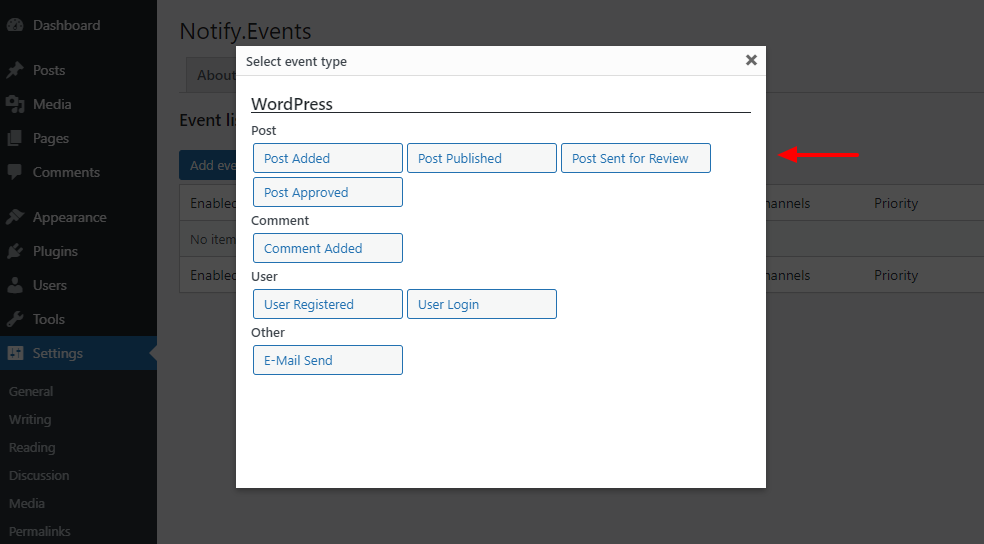
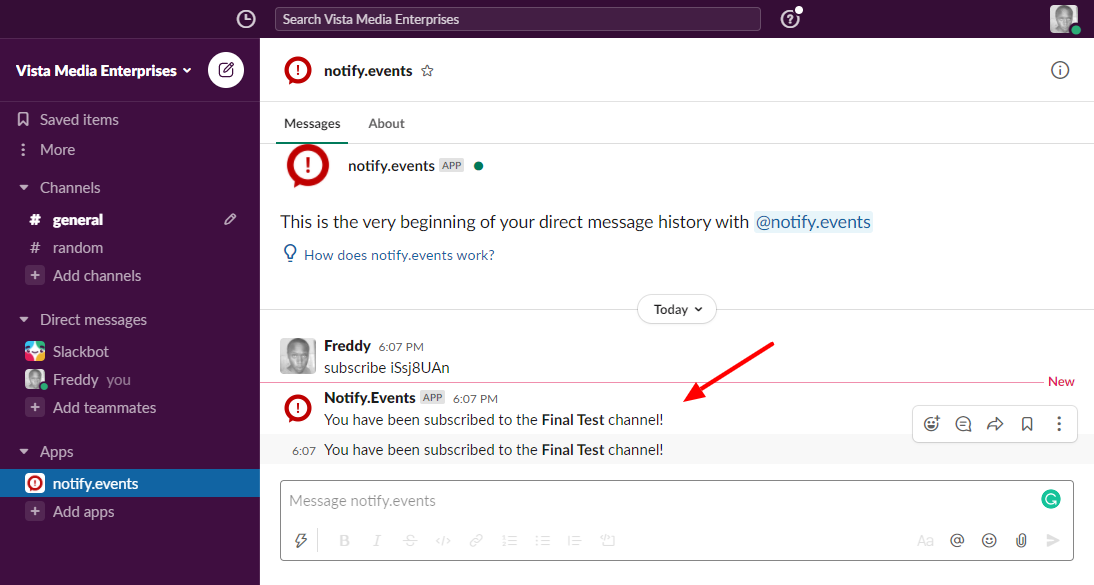
Your event type can be anything. Perhaps you want to receive a notification whenever a user logins or publishes a post. For illustration purposes, I went with Post Added, which tells Notify.Events to send a notification every time a user adds a post to your WordPress website.
Next, ensure you tick Enabled, choose your channel, and click the Save Changes button:

Pro Tip: You can customize your message template using variables, as shown above. It’s easy-peasy stuff you will have a lot of fun 🙂 To add more events, simply repeat the process. And just so you know, I added another event that will notify me if a post is published. Also, you can add an event to whichever channel you desire.
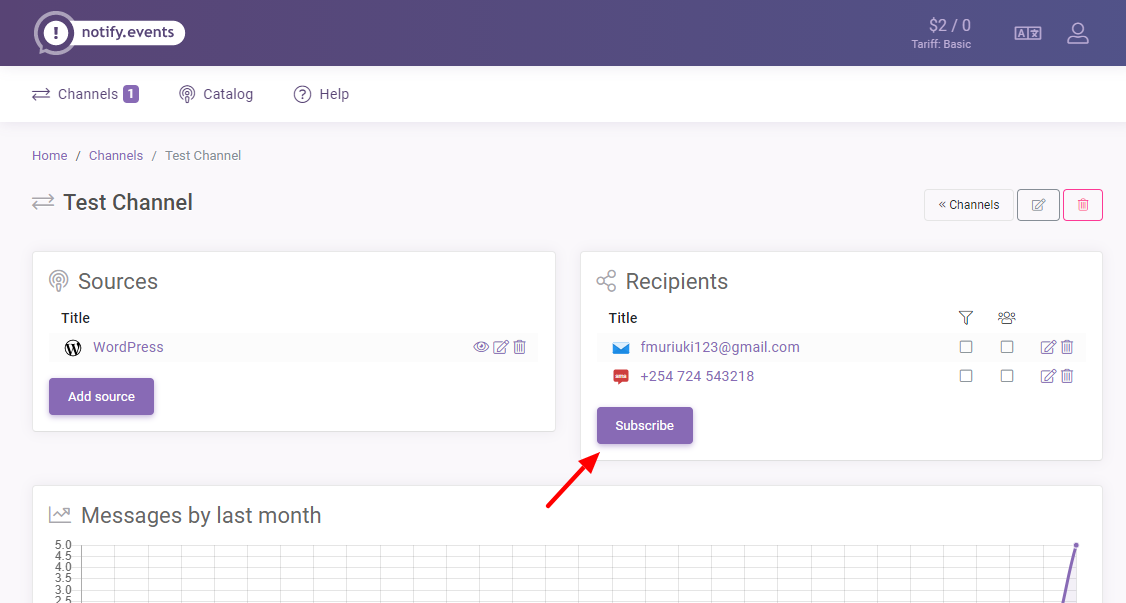
Now, you know how to create an active channel and event. However, our test channel does not have a recipient/subscriber yet, so let’s fix that real quick.
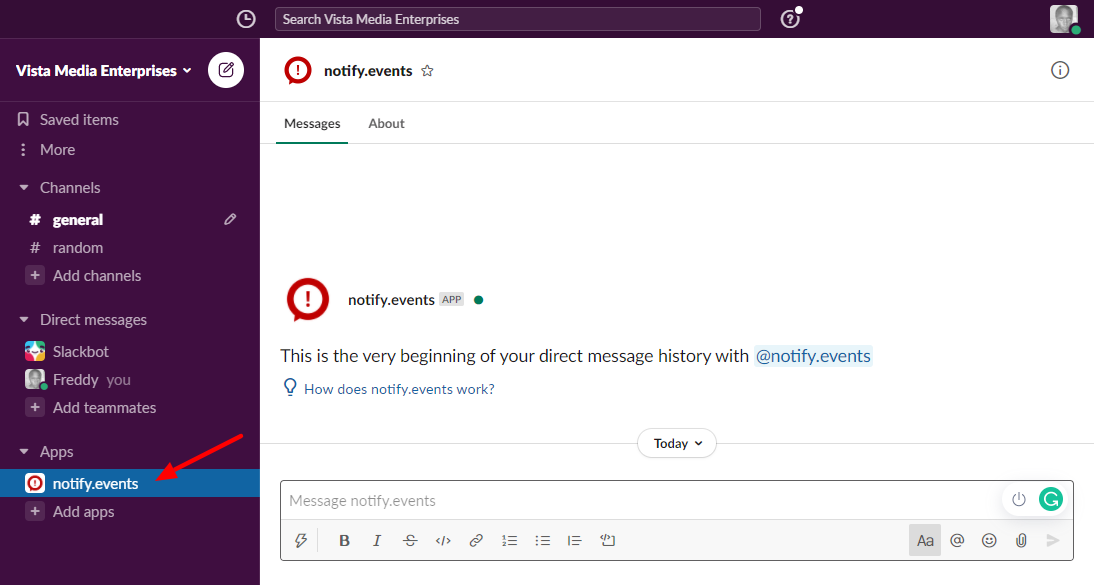
Adding a Subscriber
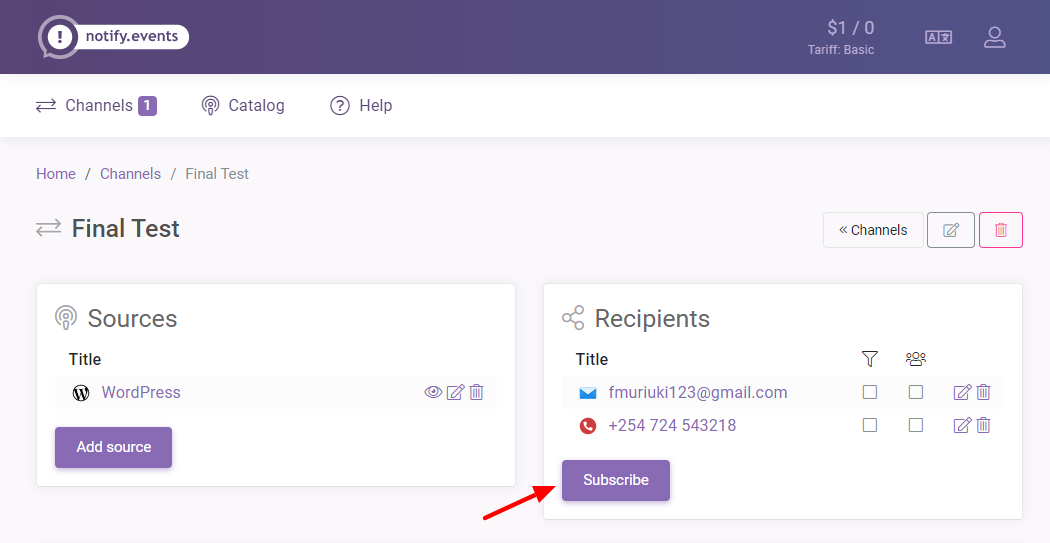
The subscriber is the person who will receive the notifications your WordPress site sends. You can add unlimited subscribers to Notify.Events, so yay!
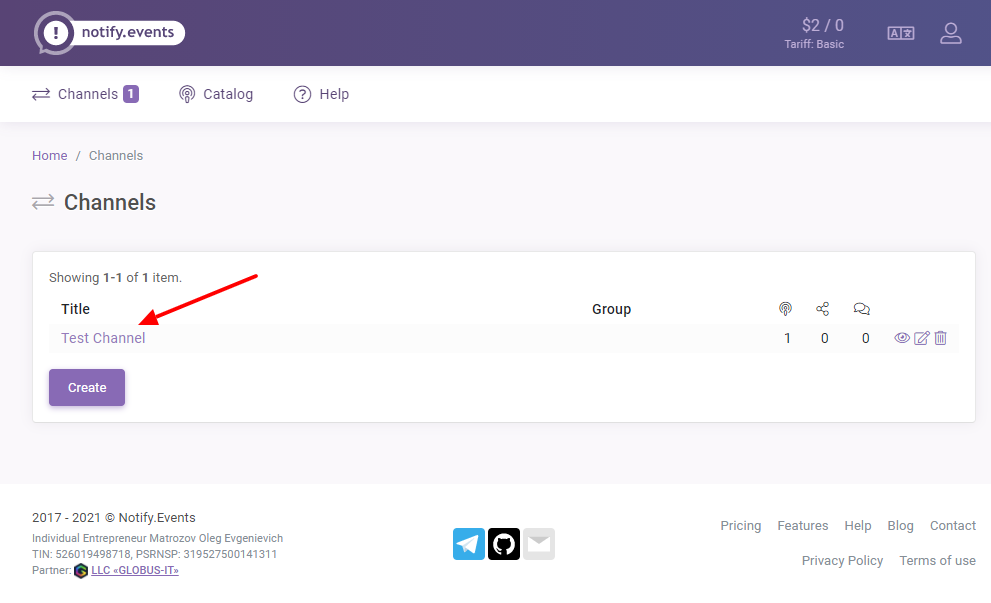
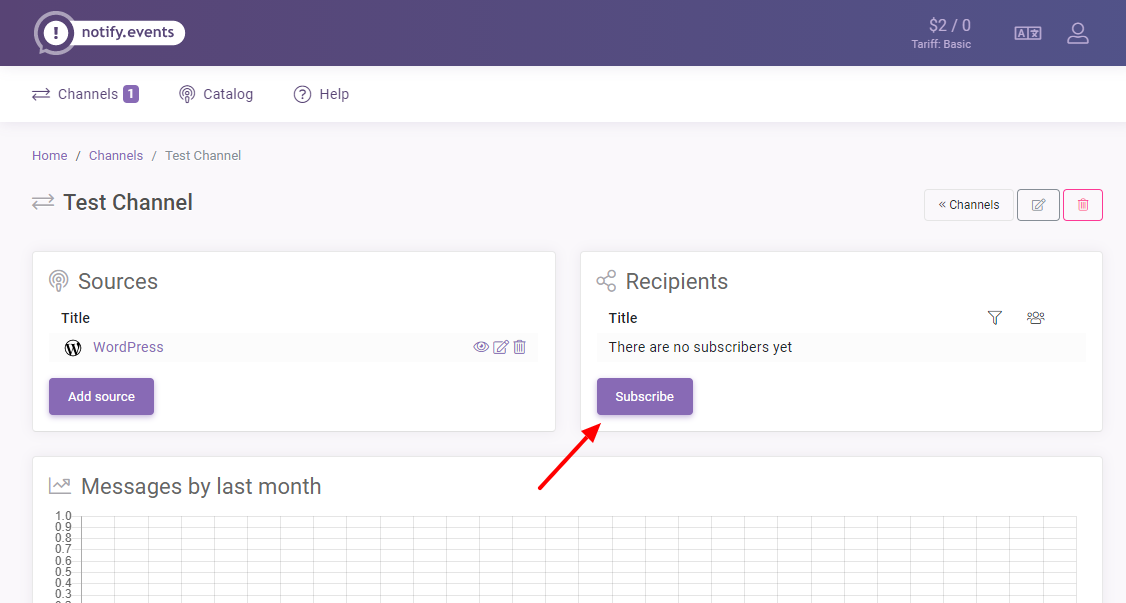
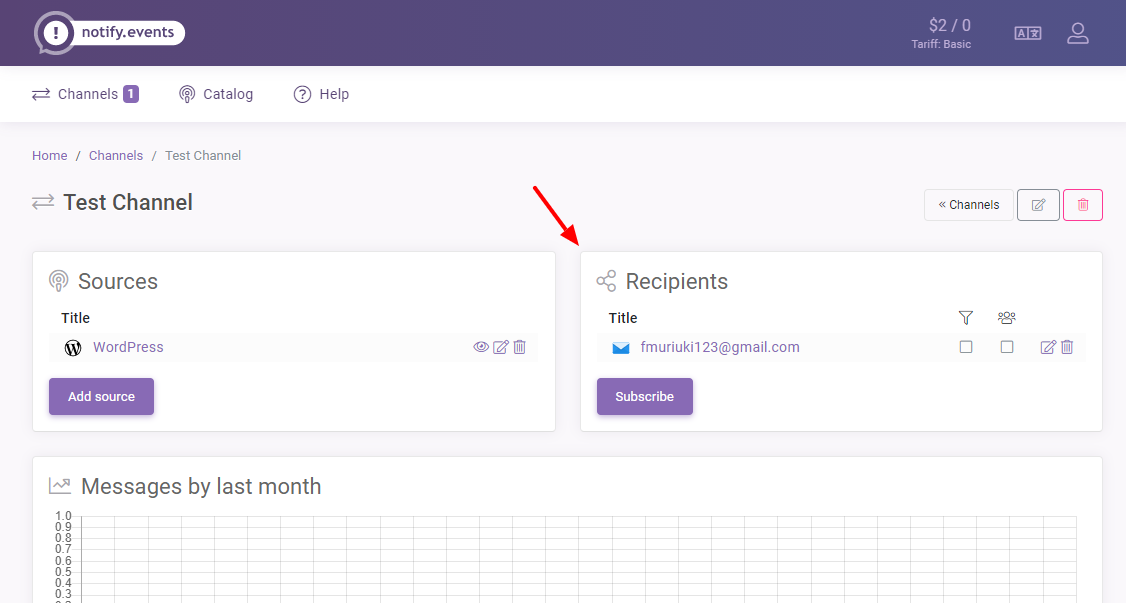
Log in back to your Notify.Events control panel and choose your channel:
Next, click the Subscribe button:
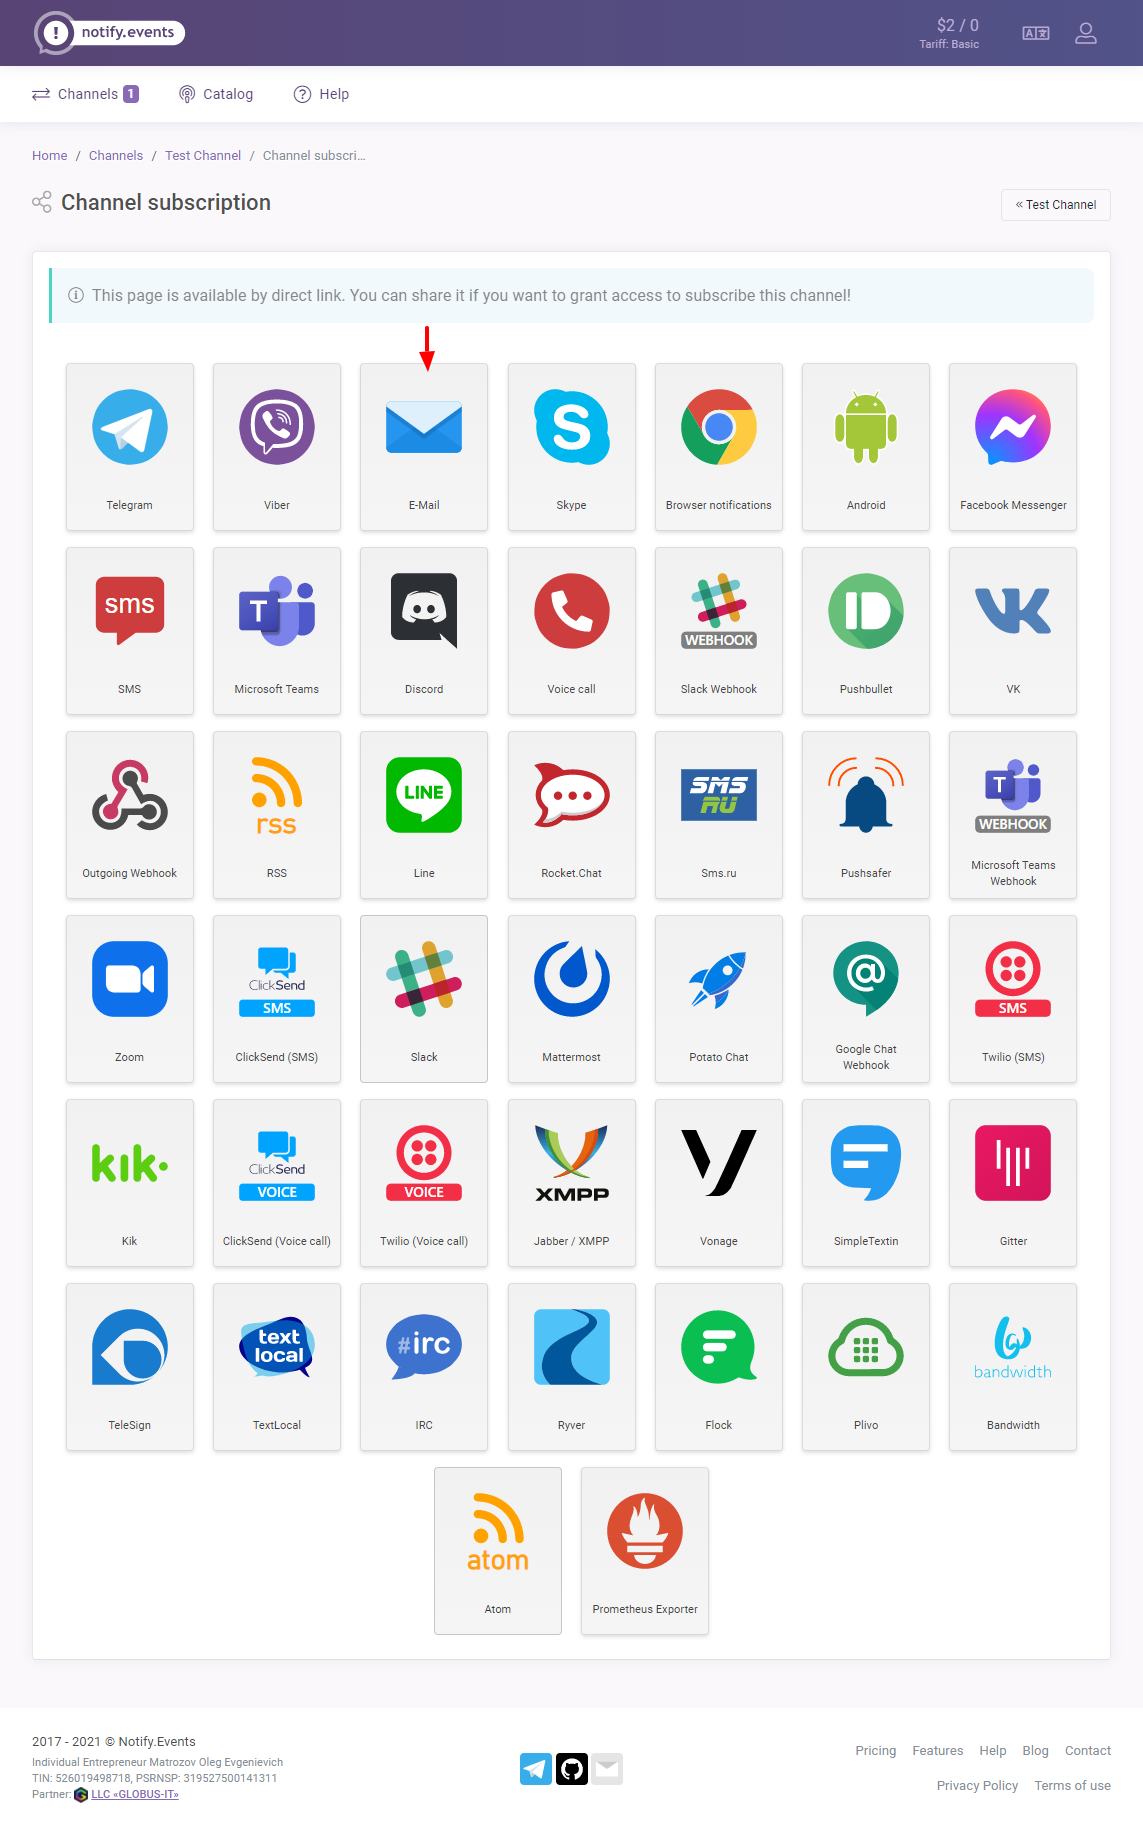
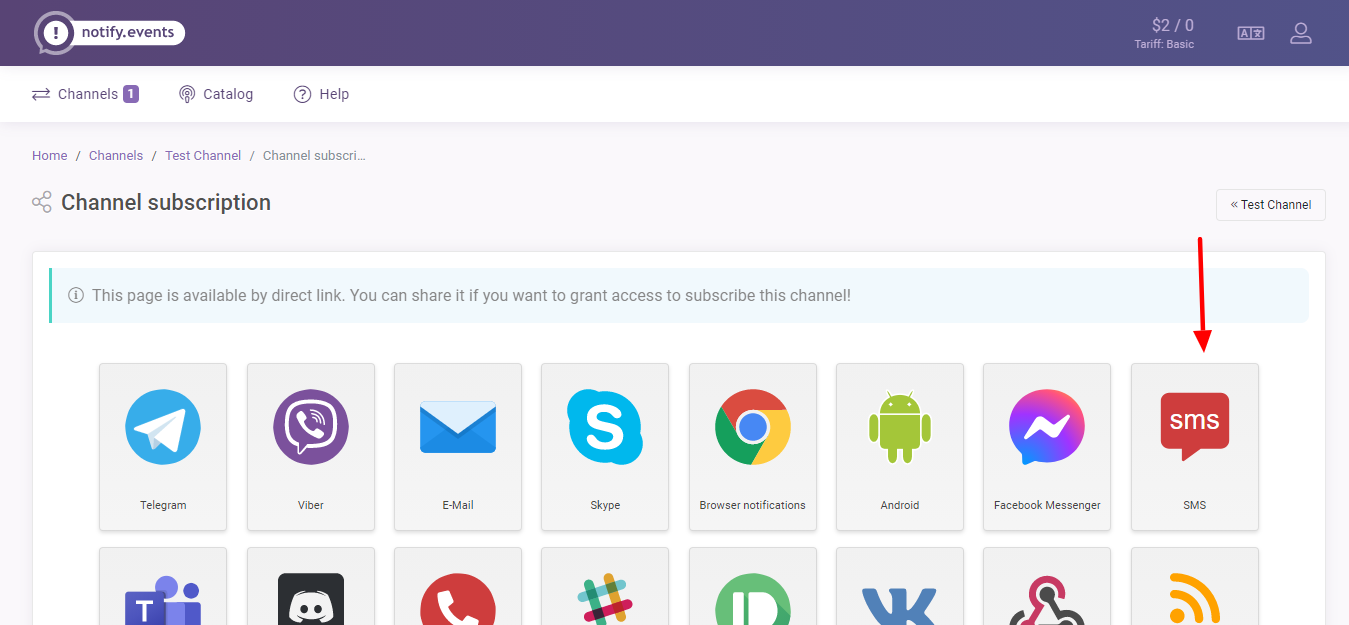
Next, choose how you will subscribe. You can choose any service you want, but for testing purposes, I went with Email, as shown below.
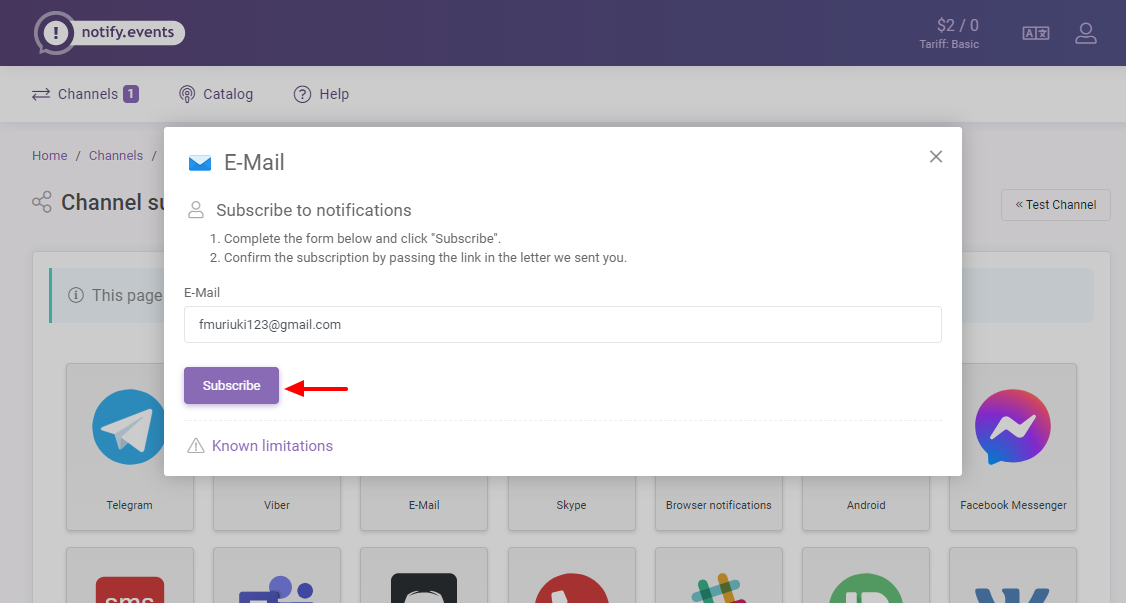
Next, enter your email and click the Subscribe button:
Surely, can things get any easier?
Next, open your mailbox and click the subscription confirmation link, as shown below.
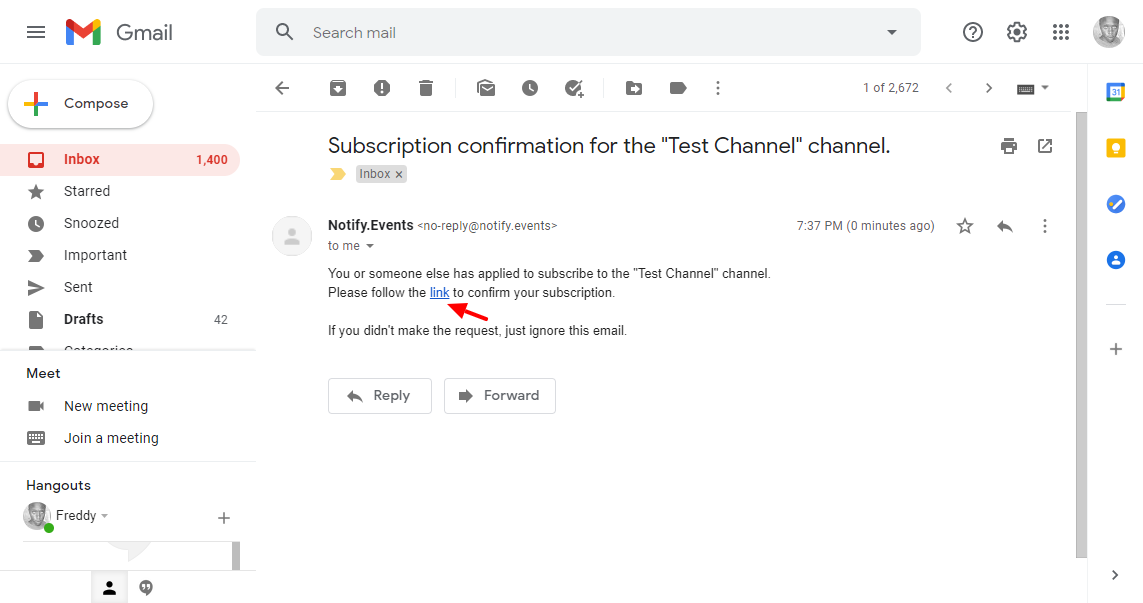
Doing so leads you back to the Notify.Events website. In your control panel, your channel has now one subscriber:
Excellent!
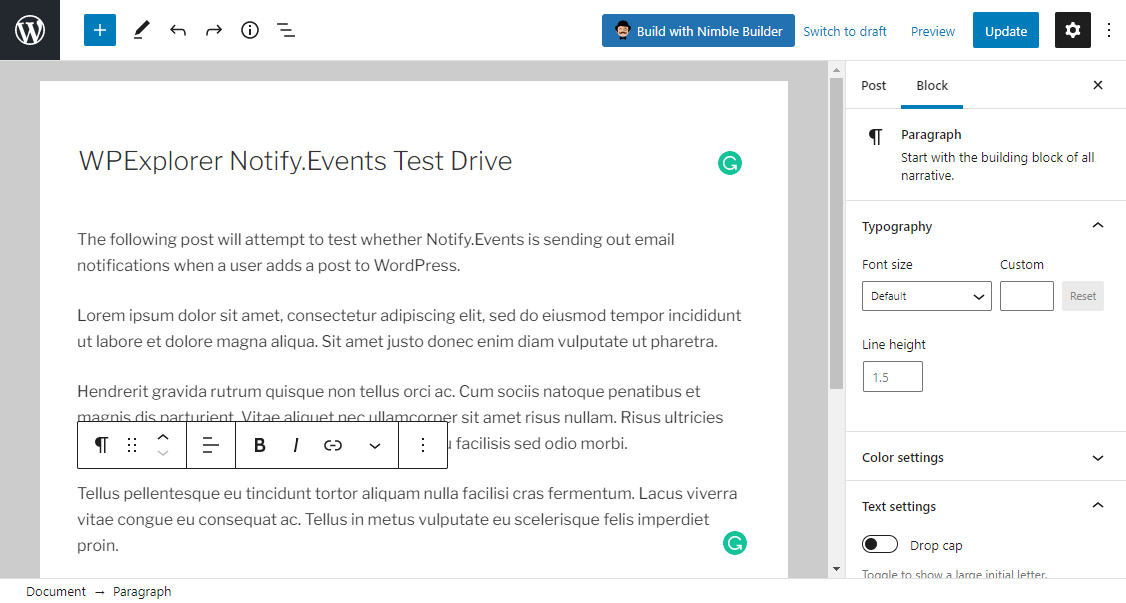
Now, let us add a dummy post to WordPress and check if we shall receive a notification in our email 🙂
Testing Notify.Events
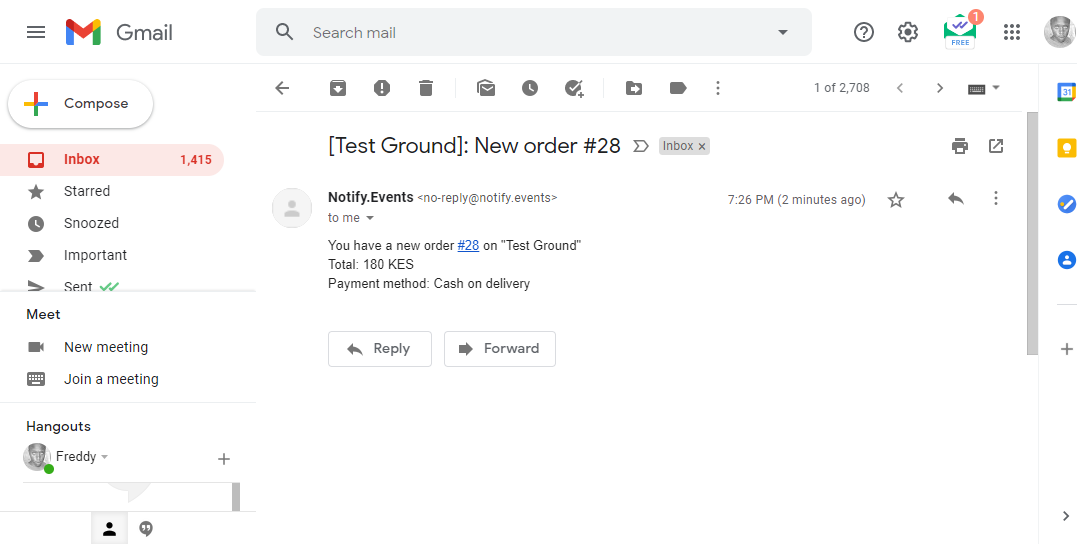
And now for the moment you’ve all been waiting for, let us check if it’s working. I went ahead and created a dummy post in WordPress the usual way:
After hitting the publish button, I quickly switched to Gmail to see if there was a notification, and sure enough, as the sun rising in the east, there it was:
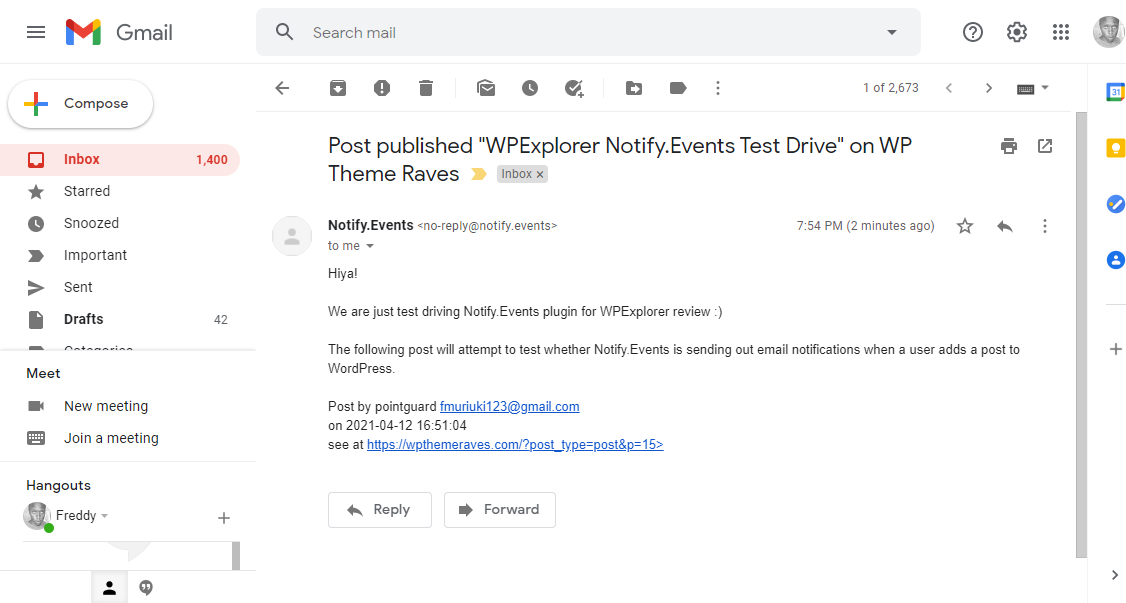
Yes, we did it!
Configuring email is super-duper easy. Configuring other services is more or less the same; just follow a few simple instructions and your work is done.
For example, here is how to configure Slack notifications and a notification triggered by Contact Form 7.
Slack Notifications
From your channel, click Subscribe:
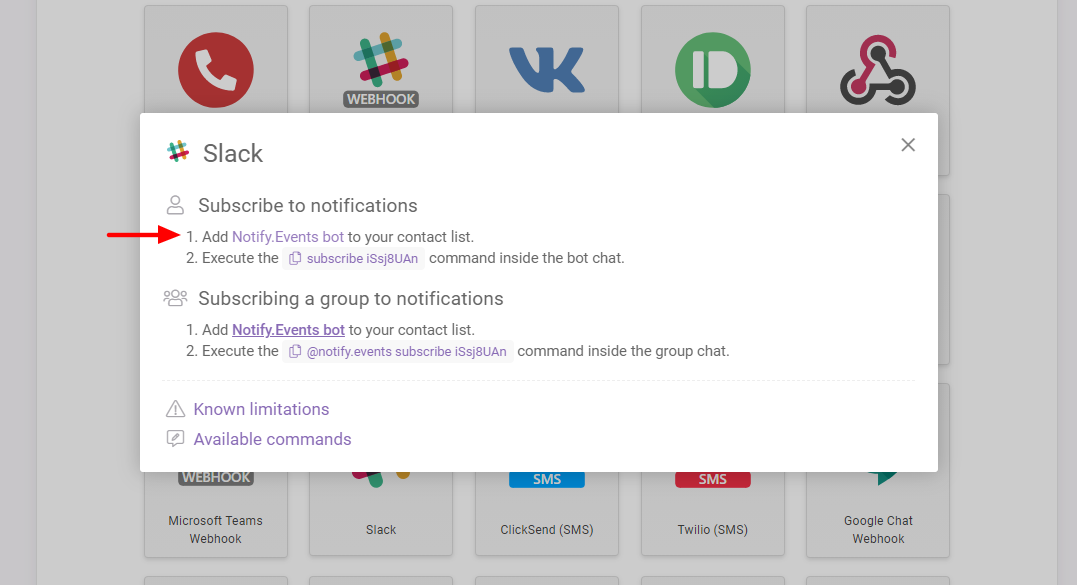
Next, click Slack, as shown below:
Next, click Notify.Events bot to install the Notify.Events slack app, as shown below.
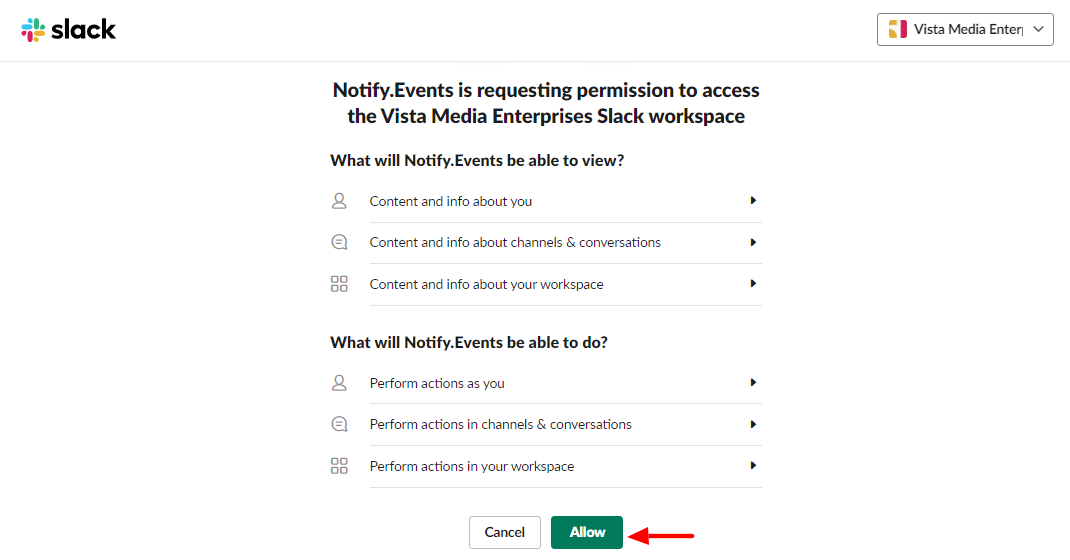
If you’re already logged in to your Slack account, Notify.Events will request permission to access your workspace. Click Allow:
Doing so authorizes Notify.Events and redirects back to your control panel. Next, click Slack again:
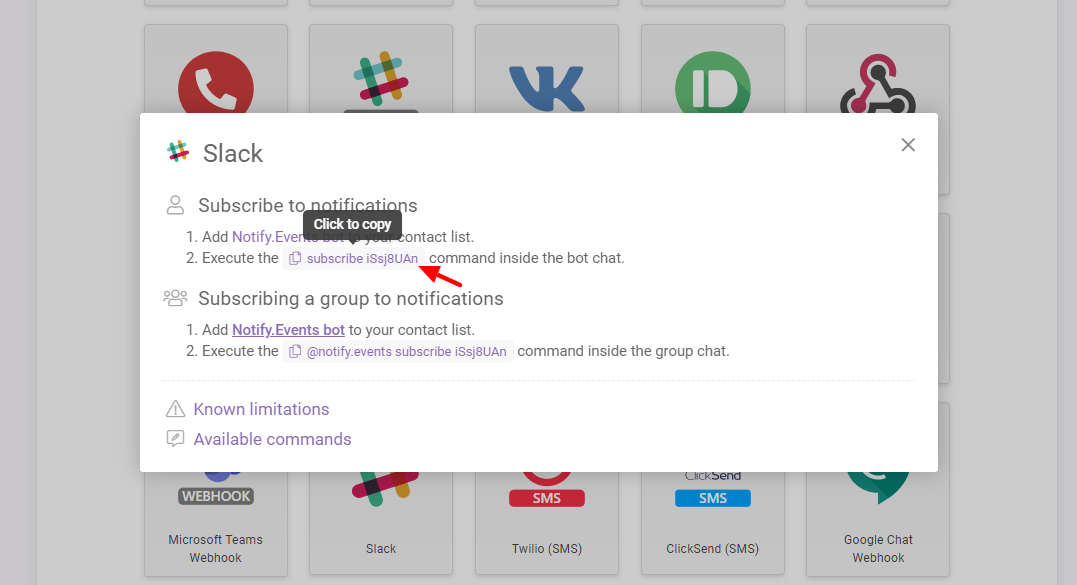
After that, click to copy the subscribe command, as we highlight below.
Next, open Slack and click notify.events, as shown below.
Next, paste the command you copied in the message box and press enter:

If all goes as planned, you should see this success message:
There you have it. As easy as A, B, C.
Now, if you add or publish a post as we did earlier, you get the following notifications inside Slack:

Now, let us configure notifications triggered by Contact Form 7.
Contact Form 7 Notifications
Receiving notifications from your Contact Form 7 forms has never been easier. I’m assuming you already have forms on your site.
To configure notifications for Contact Form 7, navigate to Settings > Notify.Events:
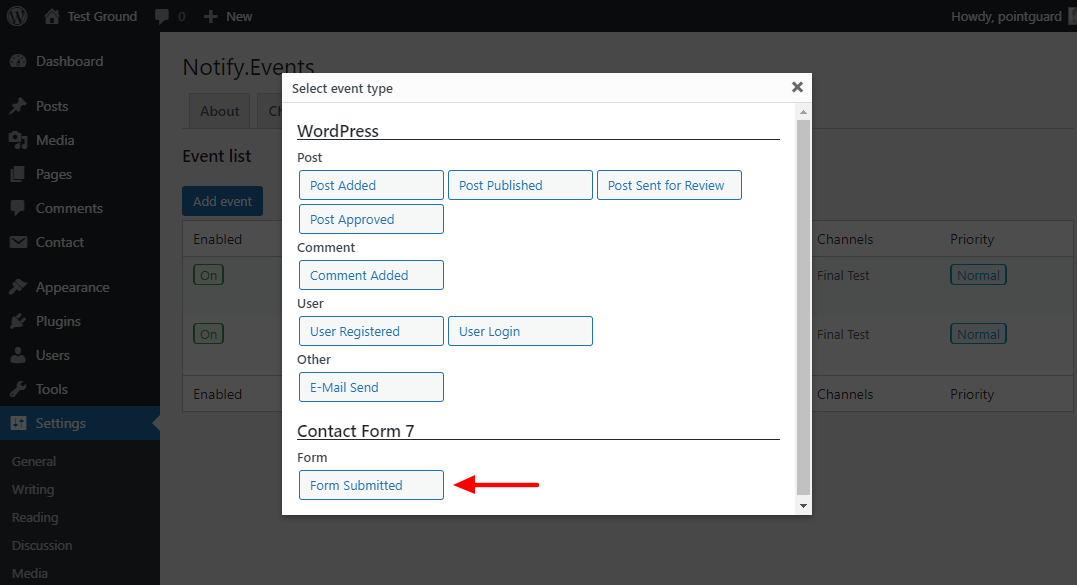
Next, navigate to Events and then click Add event:
Next, click the Form Submitted event type under Contact Form 7, as shown below:
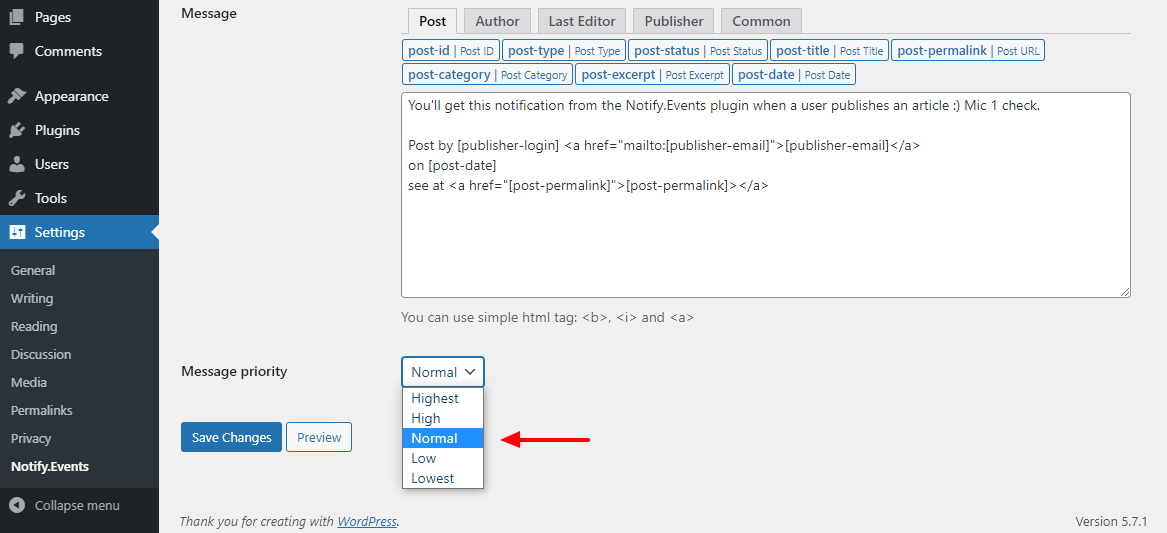
On the next page, enter your event details and click Save Changes:
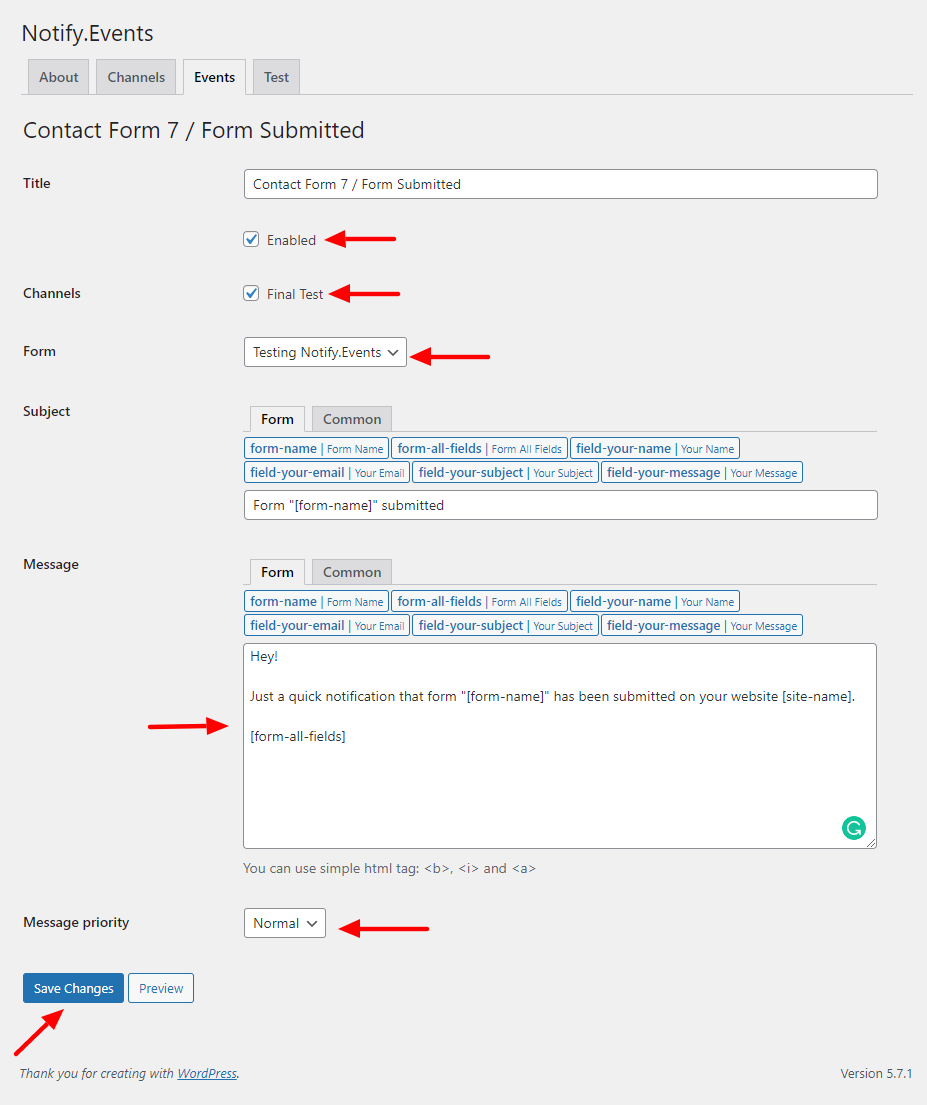
A few things to note:
- Ensure you’ve enabled the event
- Make sure you pick the right channel
- You can receive notifications for all forms or just specific ones
- Edit the message as you wish
- Change message priority
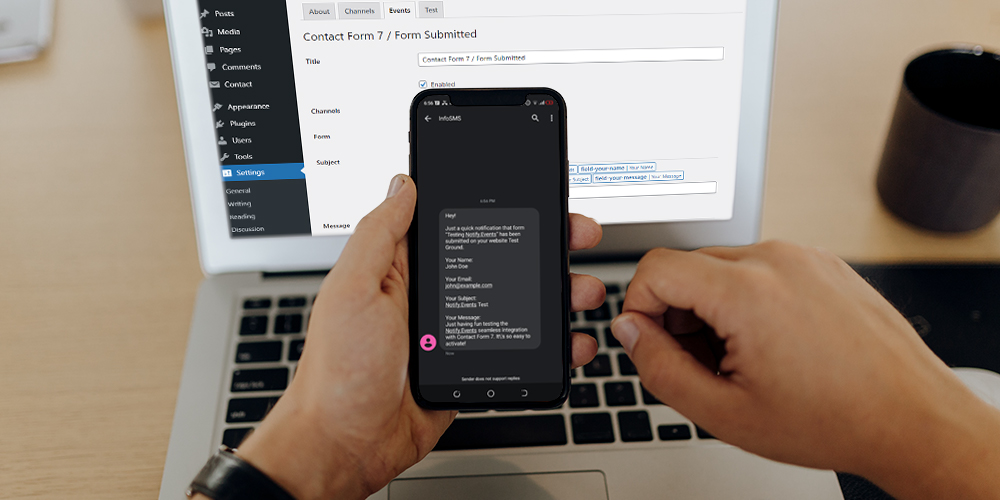
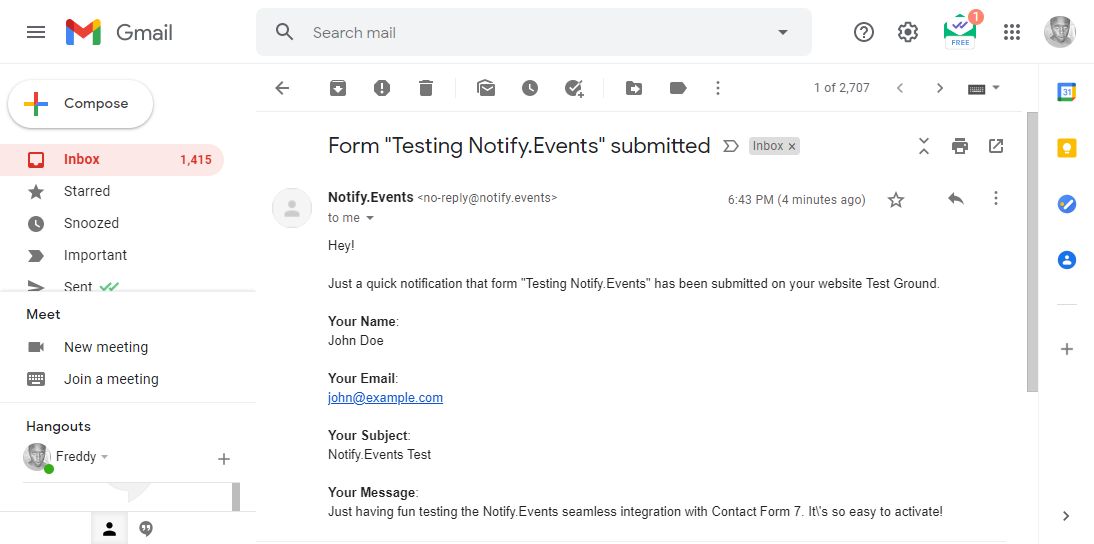
Now, if someone submits your Contact Form 7 forms, you will get a nice email notification:
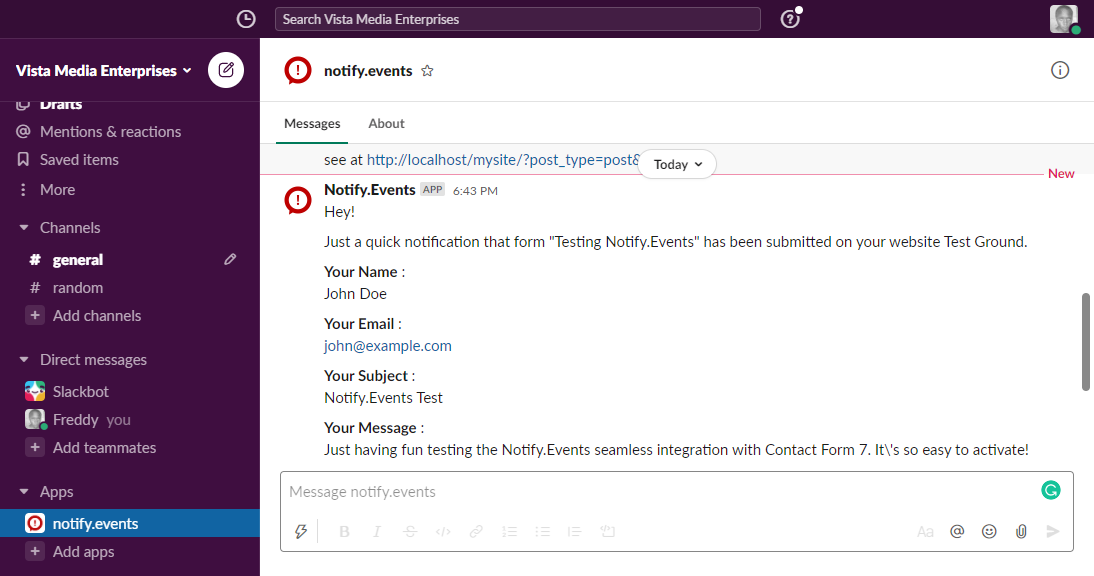
Another notification in Slack:
You will also get a text notification if you activate SMS notifications:
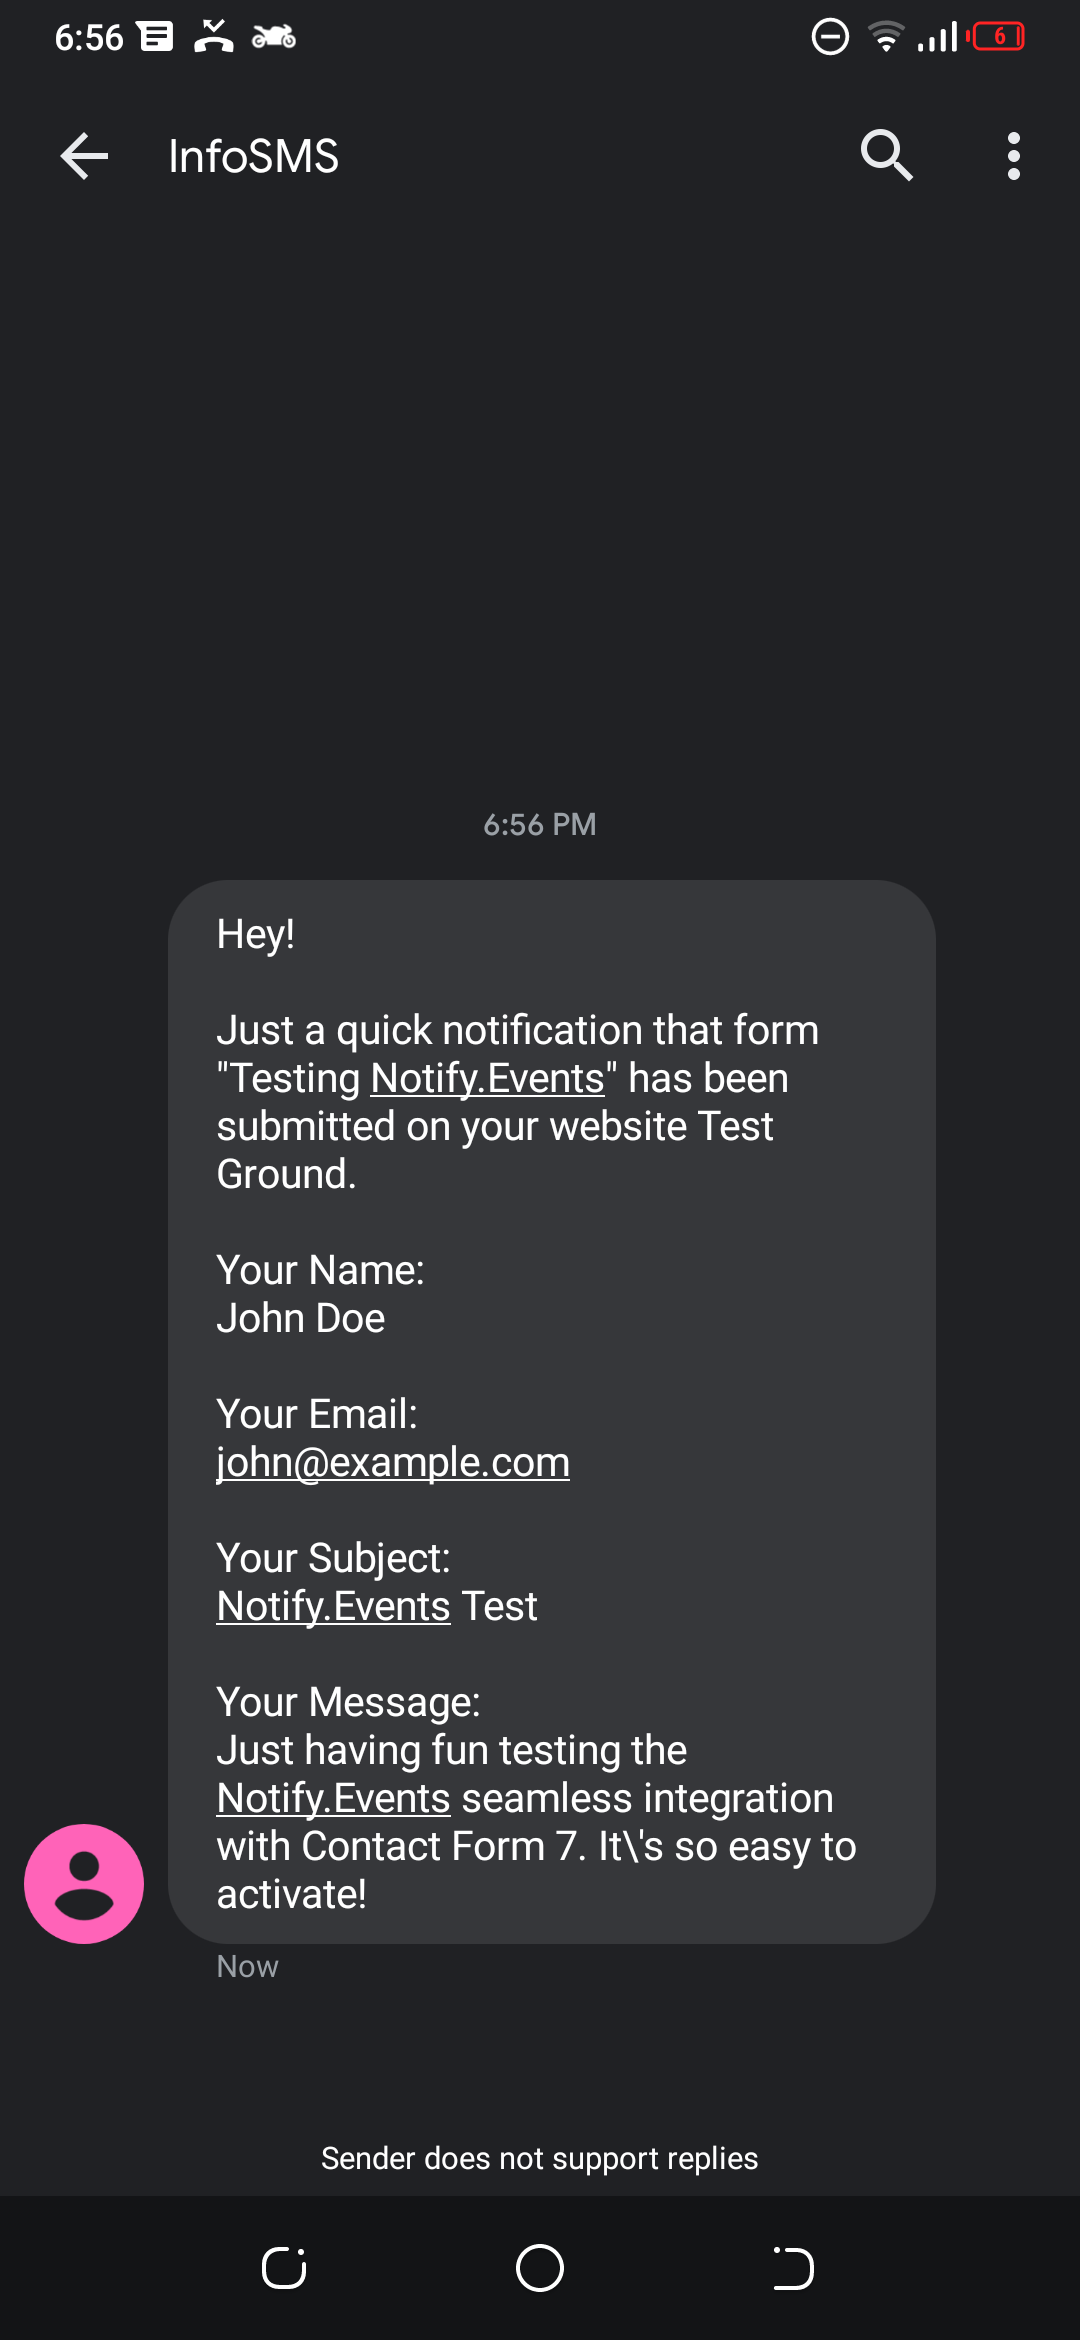
The point is you can integrate Notify.Events with 30+ messaging apps, which allows you to receive instant notifications at all times.
But does it play well with an eCommerce platform such as WooCommerce? Well, let’s see.
WooCommerce Notifications
Notify.Events allows you to receive real-time notifications about your WooCommerce store. You can immediately see when a buyer places an order, and when the status of the order changes. Further, you can receive notifications for low stock or out-of-stock items and so on.
In your WordPress admin dashboard, navigate to Settings > Notify.Events > Events and click Add event:
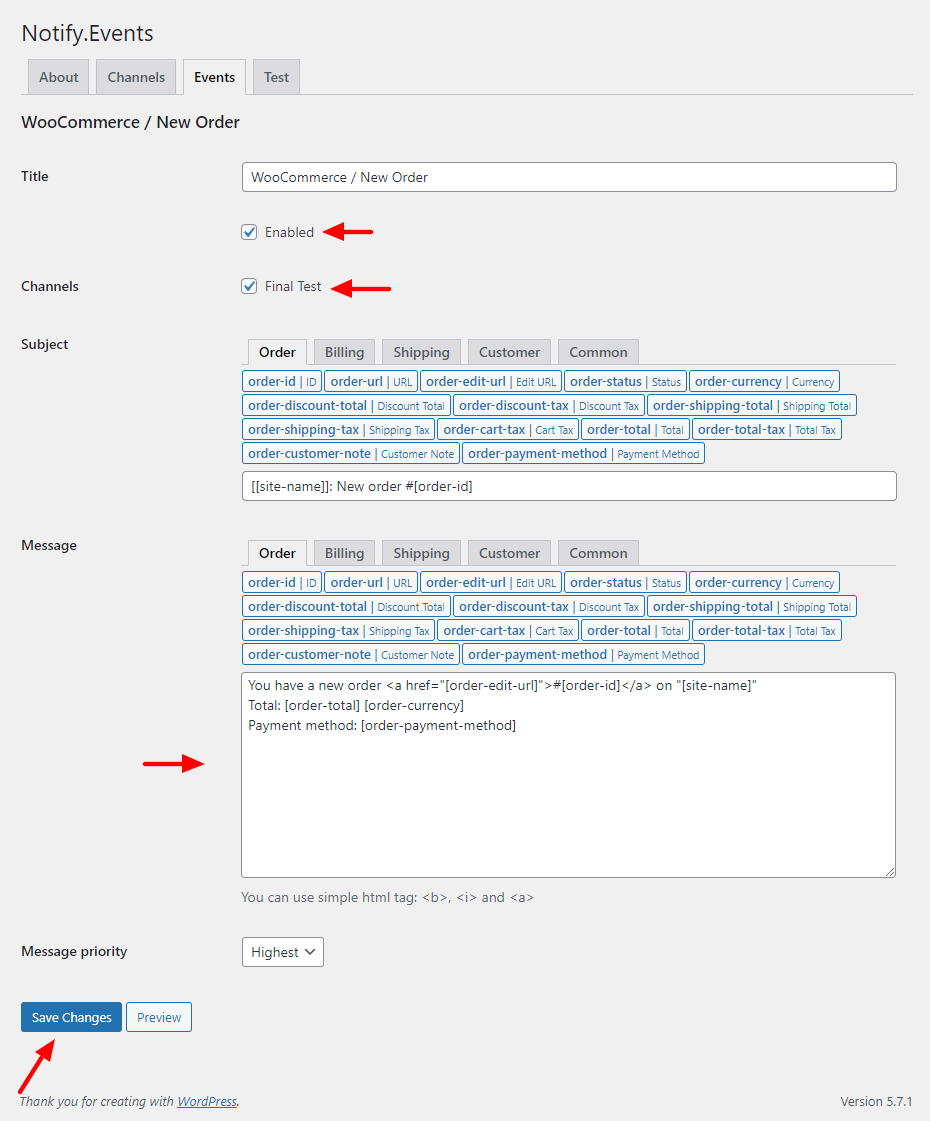
After that, choose the event type from the available options under WooCommerce:
For testing purposes, I went with the New Order event type. On the next screen, you can customize the notification message extensively using WooCommerce tags. Just don’t forget to enable the event, choose the channel, and Save Changes:
If a buyer places an order on your site, you will receive a notification to the messaging app of your choice.
Let’s move on to SMS notifications.
SMS Notifications (Paid)
I was so impressed I decided to give SMS a try as well. Quick reminder – SMS and voice call notifications are paid features and come at an additional cost in excess of the subscription plan.
Simply click Subscribe:
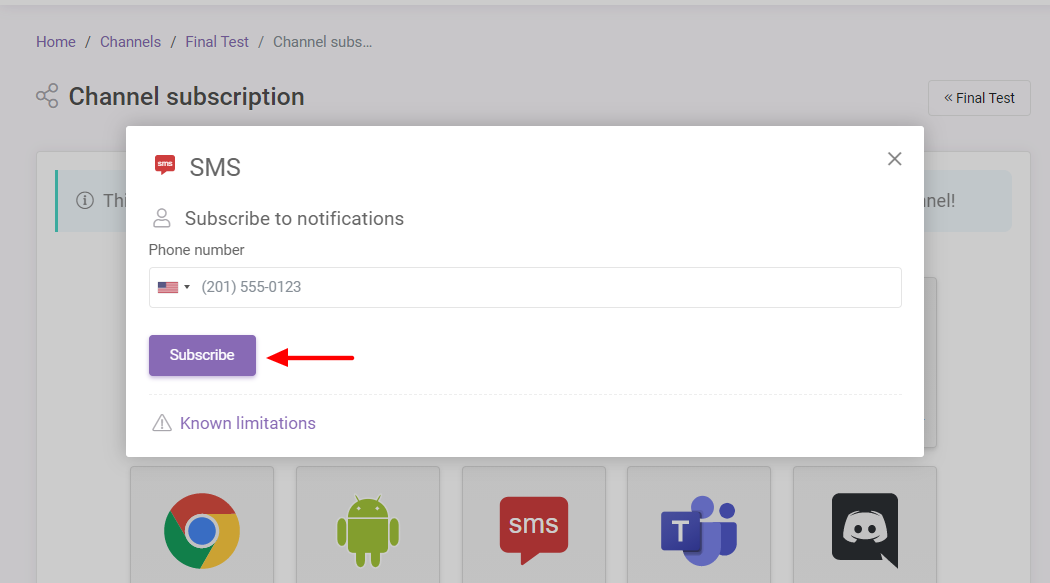
Next, choose SMS, as shown below:
After that, enter your number and click Subscribe:
And you’re done!
Here’s the SMS notification:
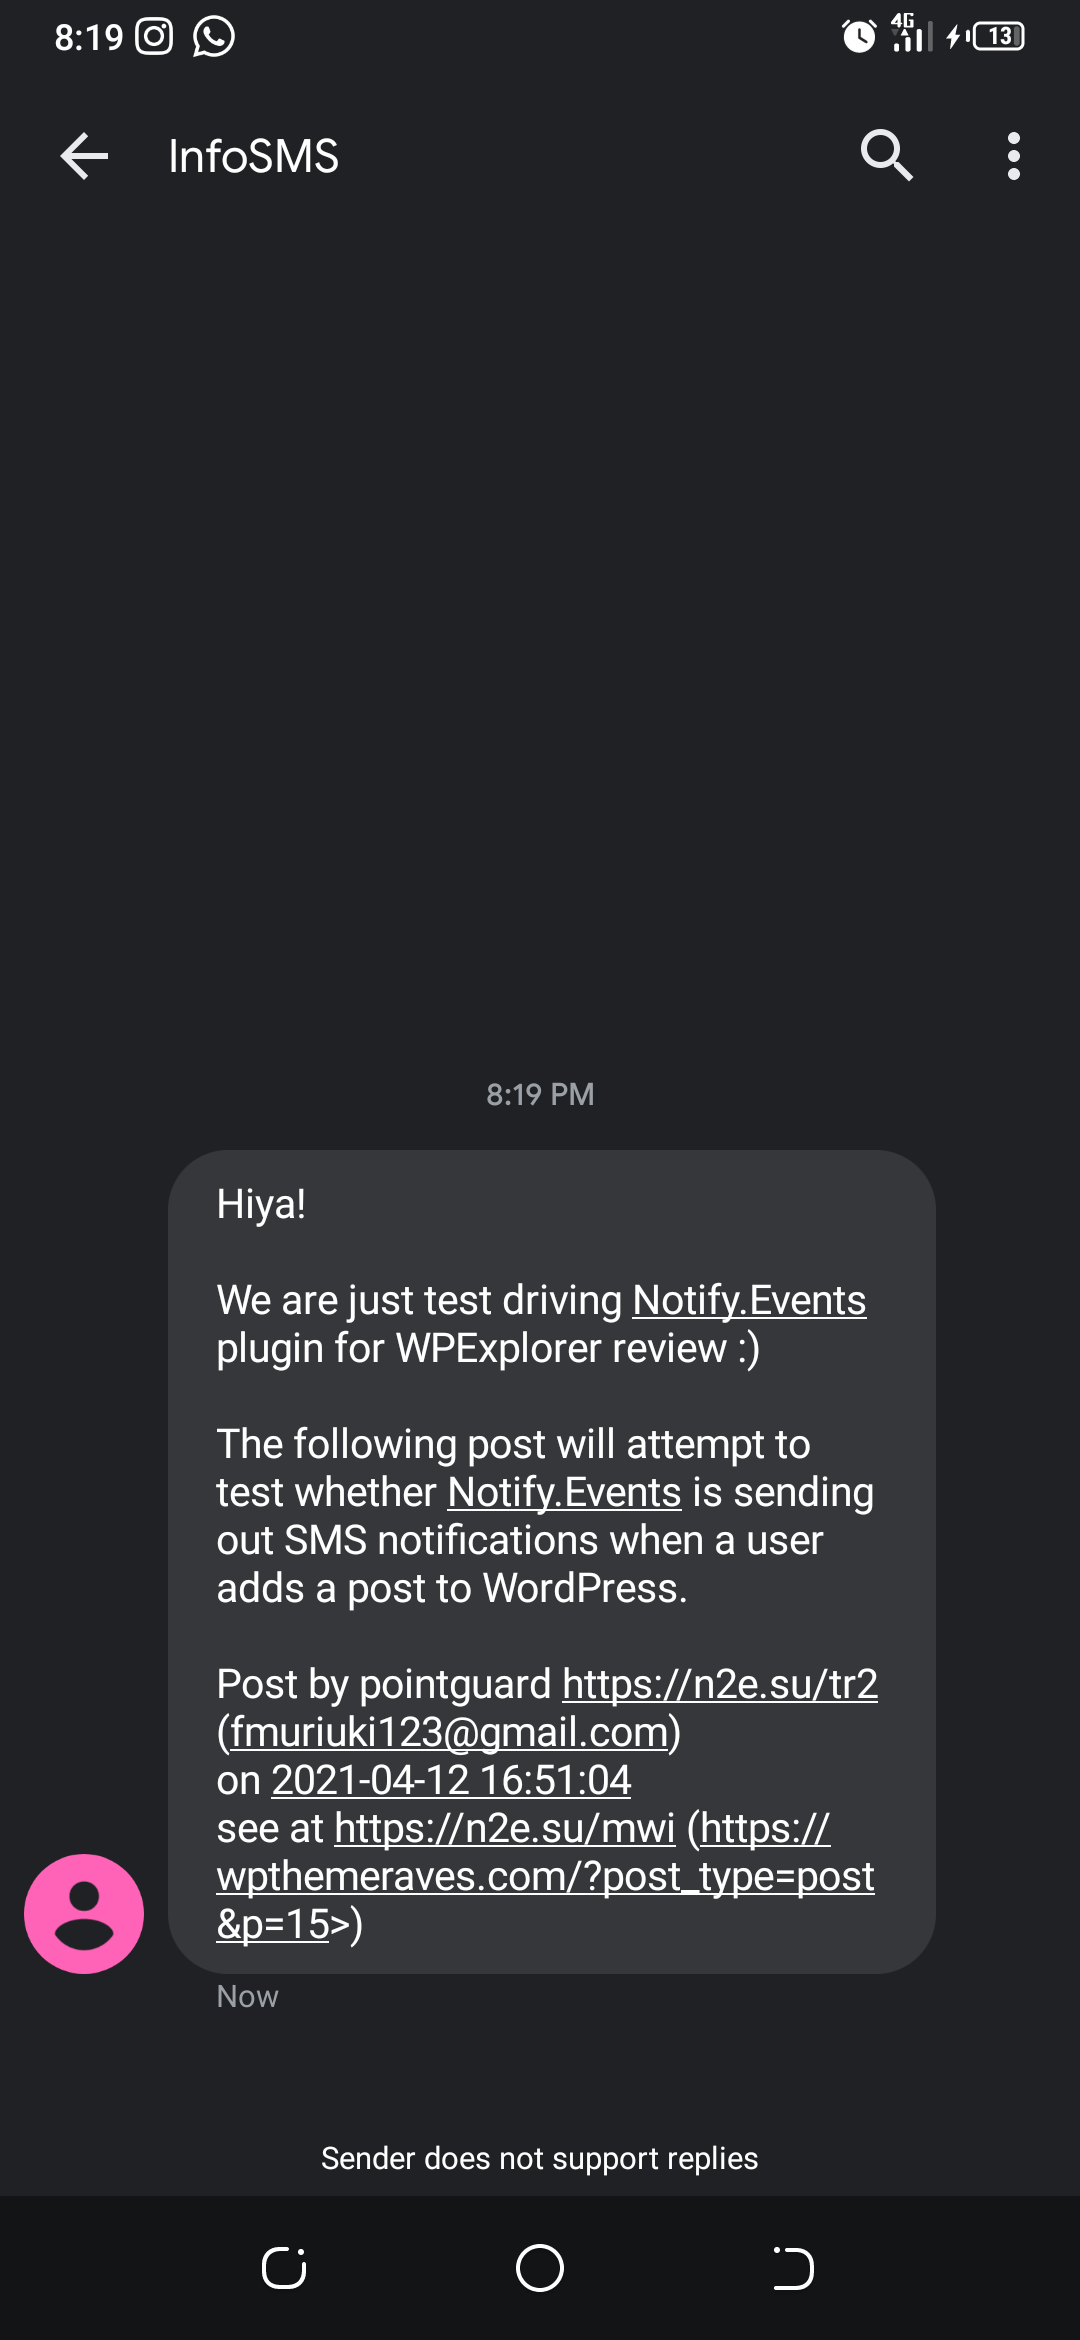
Lo and behold, it worked like magic.
How easy? Similarly, it is easy to activate push notifications, Facebook Messenger, and other services with Notify.Events. It’s quite intuitive and works as advertised; you’ll simply love it.
Wrapping Up
If you’d like to keep track of what is happening on your site(s), notifications are the way to go. They are super-duper easy to set up with a tool such as Notify.Events.
With the right strategy, you can have more people subscribe and manage your entire business easily. You can link with project management tools and so on to streamline your workflow.
How do you implement notifications on your WordPress website? Have you taken Notify.Events for a ride? There is nothing to lose because there’s a free version 🙂