Jetpack for WordPress: Supercharge Your Site

If you’re a using WordPress, you’ve probably heard of Jetpack. This plug-in has gained much popularity over the last few years and is being used by many WordPress users nowadays. Because of its growing popularity and large user base, we’ve come up with a detailed tutorial about this incredible plug-in, with which you can clearly know what is Jetpack, what is required to install it, what features does it have, and how to use it? Hopefully, this tutorial will not only help you vastly improve user experience on your site, but also make your WordPress life a lot easier. Let’s begin!
What is Jetpack?
Jetpack, developed by cool guys over at Automattic (WordPress’ parent company), is a powerful and multipurpose plug-in. This plug-in adds a wide range of helpful features to your self-hosted WordPress.org site, which were once only available to WordPress.com users. By leveraging the power of awesome cloud infrastructure from WordPress.com, Jetpack brings you dozens of amazing features for which you’d normally need to install dozens of individual plug-ins: contact forms, photo galleries and carousels, proofreading tools, social sharing, extra sidebar widgets, robust stats, image optimization, and more.
What is required to install Jetpack?
To get started with Jetpack, you’ll need the following:
- A free WordPress.com account.
- Any self-hosted website running the latest version of WordPress (recommended 3.1 or later).
- A web host that uses PHP v5.2.4 or greater.
- A publicly accessible and XML-RPC enabled website.
To save you the trouble, some hosting providers automatically install Jetpack for you. You can also use some of its features (that do not require a connection to WordPress.com) on a local host WordPress installation for testing, by enabling the development mode.
What features does it have?
Though Jetpack currently has more than 30 delightful features, but folks at Automattic are really working hard to add more incredible feature to this impressive plug-in. In this section, we’ll walk you through Jetpack’s most popular features. Hope, you’ll certainly find something useful that you would like to add to your WordPress site.
Free Features

Publicize: This sweet module allows you to connect your website to popular social media networks and automatically share the new content with your friends. It is perfect for regular bloggers.
Social Links: This module is a Publicize based canonical source that lets you specify where your social media icons should link to.
WordPress.com Stats: This handy feature gives you a nice overview of your site’s traffic through a clear and attractive interface. You can easily know how many people visited your site, and which pages and posts are most popular. It is one of the best alternatives to Google Analytics.
Beautiful Math: By combining the simplicity of WordPress and power of LaTeX markup language, this module helps you get the most out of math blogging platforms. It is superb for math-oriented blogs.
Carousel: With Carousel, you’ll be able to transform any standard WordPress gallery into a gorgeous full-screen image viewing experience with comments photo meta data (Exif).
Comments: By replacing the default WordPress comment form with a different comment system, Jetpack Comments allows your readers to comment on your posts using their Facebook, Twitter, Google+, or WordPress.com accounts.
Contact Form: A great way to insert a contact form anywhere on your WordPress site.
Custom CSS: The Custom CSS Editor lets you customize your theme’s appearance without creating a child theme and worrying about losing your customizations due to theme updates.
Enhanced Distribution: Using this incredible feature, you can share your blog’s public content to search engines, market intelligence providers, and to other services in real-time.
Extra Sidebar Widgets: This module is a set of eight widgets you can add to your WordPress site. Below is the list of all Widgets that can be added:
- Facebook Like Box
- Gallery Widget
- Image Widget
- Display WordPress Posts
- Send to Readmill
- Twitter Timeline
- RSS Links
- Gravatar Profile
Featured Content: With this module, you can show your site’s most important content in a highlighted area on the home page of your site to give your readers a credible featured content experience.
Gravatar Hovercards: Enabling this feature, you’ll be able to display a pop-up business card of your readers’ Gravatar profiles in the comment section.
Infinite Scroll: Detailed instructions on adding infinite scroll support to your theme and using CSS to make infinite scroll blend perfectly with your site design.
JSON API: This feature will let you authorize applications and services to securely establish a connection with your blog and allow them to make use of your content in new ways.
Likes: The Like button allows your blog readers show their appreciation for posts you’ve written. Also, it’s a way for authors to show the popularity of their content to people around the world.
Markdown: With Markdown, you can write posts, pages and comments in Markdown, and then publish all them in HTML.
Mobile Push Notifications: This feature makes it possible for you to receive push notifications of recent comments on your Android or Apple devices, and moderate them while you’re on the go.
Mobile Theme: Activating the Mobile Theme module, you can optimize your WordPress site for mobile devices. So your mobile visitors could easily scan your site.
Monitor: Once you’ve enabled this feature, Jetpack will send an email to your WordPress.com account if your site goes offline and when it is back up again.
Omnisearch: Using this single search box, you can search numerous different things locally on your site and from select providers as well.
Photon: A great way to boost your site’s speed by loading Images from the WordPress.com’s super-fast Content Delivery Network (CDN).
Post by Email: By taking advantage of this great feature, you can quickly and easily publish content to your blog by email, using any email client.
Sharing: Jetpack Sharing gives your readers the power to easily share your content on their favorite networks with a few simple clicks.
Shortcode Embeds: This feature allows you to embed different types of media from the web into your site without any coding. For example, you can embed videos from YouTube and Vimeo, presentations from SlideShare and tweets from Twitter.
WP.me Shortlinks: Using this feature, you can get wp.me domain powered shortlinks for your posts and pages. This way, you’ll have more space to write on social networking sites.
Spelling and Grammar: Enabling this module will improve your writing. Jetpack uses the After the Deadline proofreading service to check your spelling, grammar, misused words, and style.
Subscriptions: This module allows your visitors to subscribe to your latest blog posts and comments to get notified via email.
Tiled Galleries: With Tiled Galleries, you’ll be able to display your image galleries in 3 different styles: a circular grid, a square mosaic, and a rectangular mosaic.
Toolbar Notifications: A great toolbar that will notify you about all the activities on your site, right from the Admin bar and on your mobile device.
Jetpack Single Sign On: Activating this module will let you register for and sign in to your self-hosted WordPress.org site, using the same WordPress.com log-in credentials.
Widget Visibility: This module will enable you control which pages your widgets should appear on and which pages they should be hidden on.
Google Integration: The best way to integrate Google’s services – like Google+ Profile, Google Docs, Google Maps, Google Calendars etc. – into your Jetpack-activated WordPress site.
Related Posts: Activating this feature will display a section of related posts at the bottom of your posts.
Subscription-based Features

VaultPress: Using this feature, you can get real-time backup and security service for your WordPress site.
VideoPress: This module will make it possible and easy for you to upload and insert videos to your site.
How to Use Jetpack?
To take advantage of the awesome features of this powerful plug-in, all you need is to follow four simple steps. We assure you all these steps are quite easy to handle and don’t require you to have any coding knowledge. This means even a novice who uses WordPress for the first time can install and manage Jetpack without any hassle. Let’s go ahead and get started.
Step One: Sign up for WordPress.com
The first and foremost step to integrate powerful features of WordPress.com with your website is to sign up with this platform. If you already have a WordPress.com account because you’ve created a blog there or set up Akismet for your site, then you can skip this step. If you don’t, logon to WordPress.com.
After you’ve logged on, you’ll find a “Get Started” button of orange color on the WordPress.com’s home page, as shown in the screenshot given below.
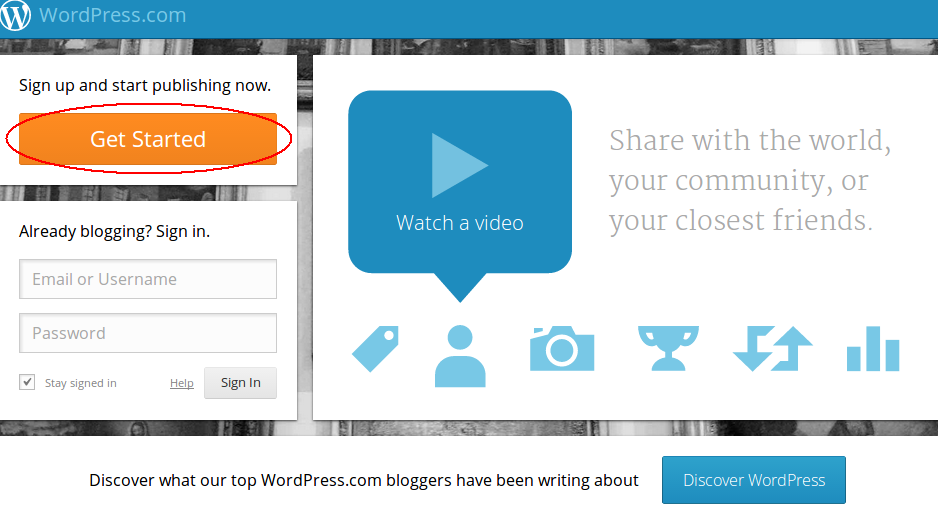
Click on that button, you’ll directed to the sign-up page where you’re required to fill-up your e-mail address, username, password, and blog address. Enter a blog address along with other information, only if you want to create a blog on WordPress.com. Otherwise, we recommend you to sign up for just a username.
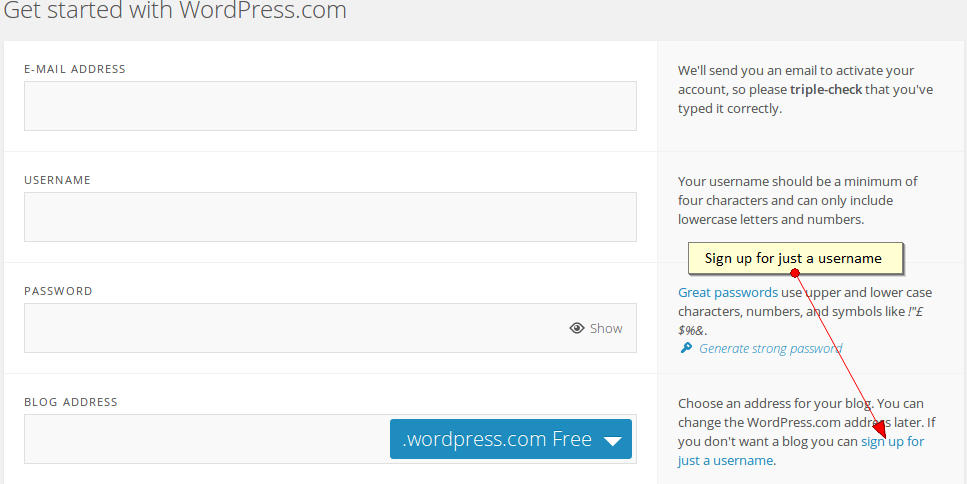
After filling up all the required information on the sign-up page, you can easily activate your WordPress.com Account by clicking on “Create Blog” (if you’ve entered blog address) or Sign-up (if you’ve chosen sign up for just a username option) button. Remember the username and password you’ve entered here will be required in the latter steps.
Step Two: Install and Activate Jetpack
However, you can do this by downloading the Jetpack zip file from Jetpack’s official website, and uploading it to your website. But installing Jetpack using the built-in plug-in installer in your WordPress dashboard is much easier.
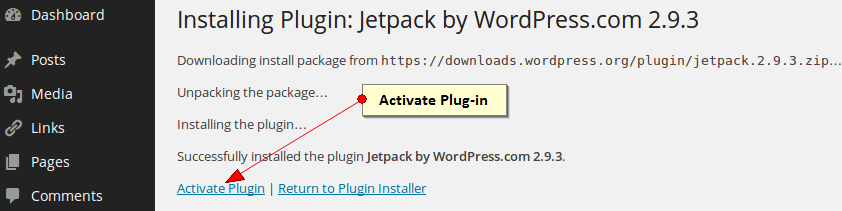
To install Jetpack using the second method, you’ve to login to the dashboard of your WordPress site. After that, go to Plugins –> Add New. Search for “Jetpack” and you’ll find the latest version of Jetpack at the top of the list of results. Install the plug-in by clicking the “Install Now” link.

If the installation is successful, click “Activate Plug-in” link to activate the plug-in.
Step Three: Authorize WordPress.com
Once Jetpack is activated, you’ll see a blue banner at the top of the page, having a green button in the right hand side asking you to “Connect to WordPress.com”.

Click the green button and you’ll be directed to a new screen that asks you to enter your WordPress.com username and password in order to authorize the Jetpack connection. In addition, this screen also gives you an option to quickly create a WordPress.com account using the “Need an account?” link, if you don’t have created yet.
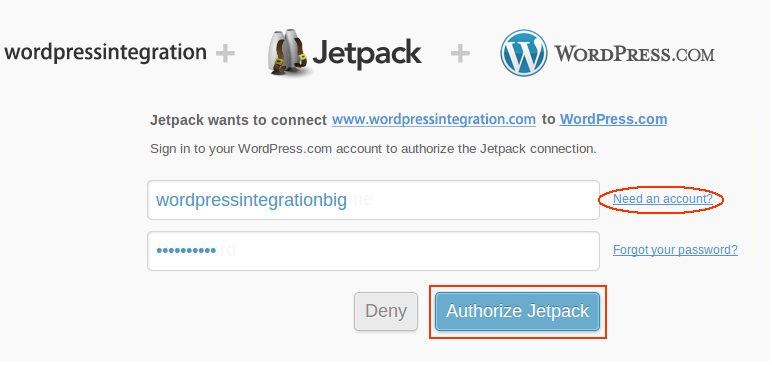
Enter your username and password here, and then click the “Authorize Jetpack” button.
Step Four: Learn and Configure Modules
If the authorization is successful, you’ll be redirected to the settings page of Jetpack, displaying a banner at the top of the page as shown in the screenshot given below.
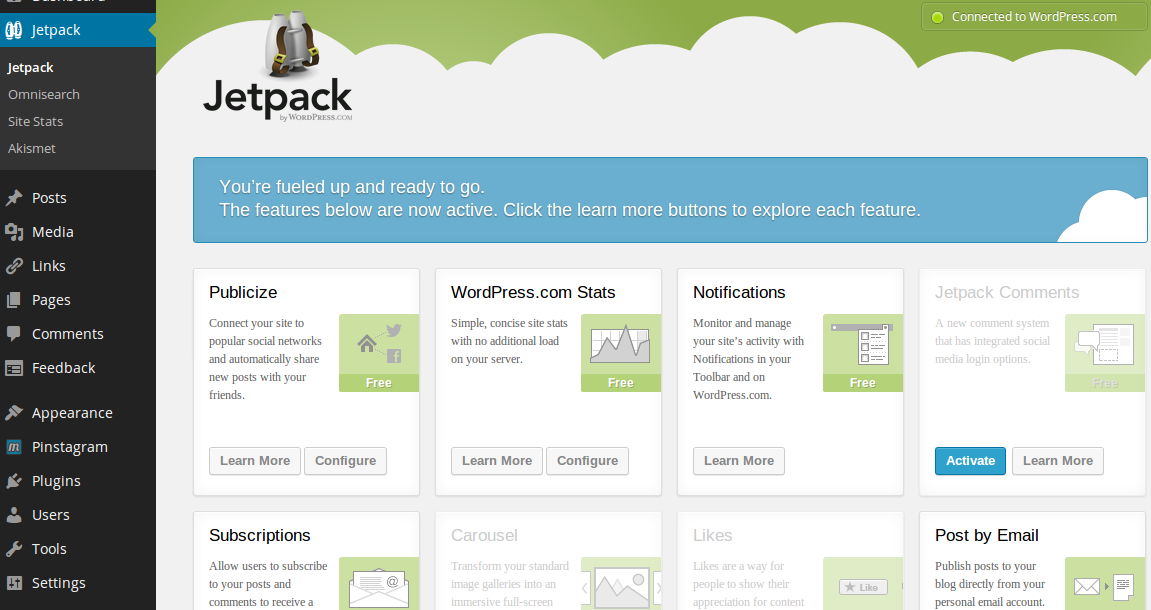
The settings page may look like a “bundle of plug-ins” to you, but really it isn’t so. Each “card” on this page represents a module. You can know more about each module by clicking on “Learn more” button given on each card.
However, most of the modules are automatically activated by Jetpack, but some of them don’t get activated by default. You can manually activate them from the settings page. Once activated, a “Configure” button will appear on card, using which you can manage all the settings of that activated module.
Conclusion
Congrats! You now have Jetpack installed, and once you’ve configured all of your options you’ll be ready to go! Which features are you most excited to try out? Or, if you already use Jetpack, let us know what you think about this all-in-one WordPress plugin!