How to Remove Gutenberg Blocks in WordPress
Looking to slim down your site and remove unused blocks from the Gutenberg editor? You’ve come to the right place! In this guide I’ll show you how to easily remove blocks from your site to slim things down and trim down bloat.
As with any page builder, Gutenberg includes many blocks that may not ever be needed or used on your site. And while I would argue that Gutenberg is missing many crucial blocks such as tabs, accordions, animated text, icon boxes (many elements which are included in our Total theme for WPBakery) there are also tons of blocks that the average user will never need. For example, have you ever used the verse block?
Remove a Single Block
Let’s start by looking at the unregister_block_type core function which is used to remove a singular block. In the example below I am removing the Yoast SEO breadcrumbs block because I will never need it on my site since breadcrumbs are built-into my theme:
add_action( 'init', function() {
    unregister_block_type( 'yoast-seo/breadcrumbs' );
}, PHP_INT_MAX );
First we are hooking into init and using the PHP_INT_MAX predefined constant to ensure our code runs the latest possible, then we use the unregister_block_type function and pass the name of the block we want to remove to it.
Where do I find the block name?
If you aren’t sure what the name is of the block you are trying to remove you can insert one into a page, switch to the “code editor” view and you should be able to locate the block name. For example the Yoast breadcrumbs block looks like this in code view:
<!-- wp:yoast-seo/breadcrumbs /-->The block name would be the text between the code commenting minus “wp:” – aka “yoast-seo/breadcrumbs”. Block names use the format {namespace}/{blockname} unless it’s a core block in which case when you insert the block it will not include the “core” namespace so it will instead look something like this:
<!-- wp:verse -->
<pre class="wp-block-verse">My verse text.</pre>
<!-- /wp:verse -->
So even though the name of the verse block is technically “core/verse” it gets added to the page as wp:verse. Keep this in mind if you are removing core blocks from your site – see the following section of this tutorial.
Check out our list of WordPress core blocks where you can easily locate the name of any core block.
Removing Core Blocks
If you haven’t gotten this far down the tutorial you probably tried using the method above to remove a core block and got frustrated…why? Well, for some reason you can’t use the unregister_block_type function to remove core blocks!
I don’t understand why there is such an inconsistency in the way you remove blocks, you just have to accept that it is what it is. To remove core blocks you actually need to hook into the allowed_block_types_all filter and this is where things get more complicated because the filter expects an array of allowed not disabled blocks.
Below I’ll show you how you can whitelist or blacklist core blocks. Keep in mind though that this code will only remove the blocks from the editor, but core blocks are always registered on the site so if you had previously used a block it will still render in the front-end or in the backend.
Whitelisting Blocks
I’ll start by showing how you can whitelist the blocks you want to use on your site. Depending on your site this may be preferred if you only need a few blocks.
add_filter( 'allowed_block_types_all', function( $allowed_blocks, $editor_context ): array {
    $allowed_blocks = [
        'core/paragraph',
        'core/heading',
        'core/list',
        'core/list-item',
        'core/code',
        'core/quote',
        'core/code',
        'core/preformatted',
        'core/pullquote',
        'core/table',
        'core/gallery',
        'core/image',
        'core/video',
        'core/spacer',
        'core/separator',
        'core/shortcode',
        'core/embed',
        'yoast/faq-block',
    ];
    return $allowed_blocks;
}, 100, 2 );
This is actually the exact list of whitelisted blocks I use for wpexplorer.com, which I use to hide tons of blocks I will never need slimming down the editor and maybe speeding things up (I’m not sure if it makes any difference to loading times to be honest, if it did it would be negligible).
Important: The allowed_block_types_all filter doesn’t return any blocks by default, this is because by default ALL blocks are allowed. So you can’t run a print_r() or var_dump() on the $allowed_blocks variable to get a list of all the currently allowed blocks because it won’t return anything. Additionally, if you are creating a whitelist of allowed blocks and install a new plugin that contains custom blocks you may need to update your code to allow the plugin blocks if needed.
Blacklisting Blocks
If we wanted to remove certain blocks instead of defining a list of allowed blocks we can do that as well via the same filter but doing things a bit differently. If you had a look at the important notice above you would know that the allowed_block_types_all filter does not return a value by default. So in order to create a blacklist we’ll need to first get a list of all registered blocks, remove the blocks we don’t want and return the rest.
add_filter( 'allowed_block_types_all', function( $allowed_blocks, $editor_context ) {
    $blocks = array_keys( WP_Block_Type_Registry::get_instance()->get_all_registered() );

    $blacklist = [
        'core/verse',
        'core/file',
    ];

    return array_values( array_diff( $blocks, $blacklist ) );
}, 100, 2 );
Removing Blocks by Post Type
By default all blocks are available in all instances of the Gutenberg editor. This means if you have a custom block that you only need for a specific post type you will still see it when editing other post types. If you want specific blocks to only be available for specific post types you’ll need to use the “blacklisting” method mentioned above with an added check:
add_filter( 'allowed_block_types_all', function( $allowed_blocks, $editor_context ) {
    $blocks = array_keys( WP_Block_Type_Registry::get_instance()->get_all_registered() );

    $blacklist = [
        // These blocks should only be available for pages.
        'page' => [
            'core/verse',
        ],
        // These blocks should only be available for posts.
        'post' => [
            'core/comments',
        ],
    ];

    foreach ( $blacklist as $post_type => $post_type_blocks ) {
        if ( $post_type !== $editor_context->post->post_type ) {
            $blocks = array_diff( $blocks, $post_type_blocks );
        }
    }

    return array_values( $blocks );
}, 100, 2 );
Hiding Blocks without Code
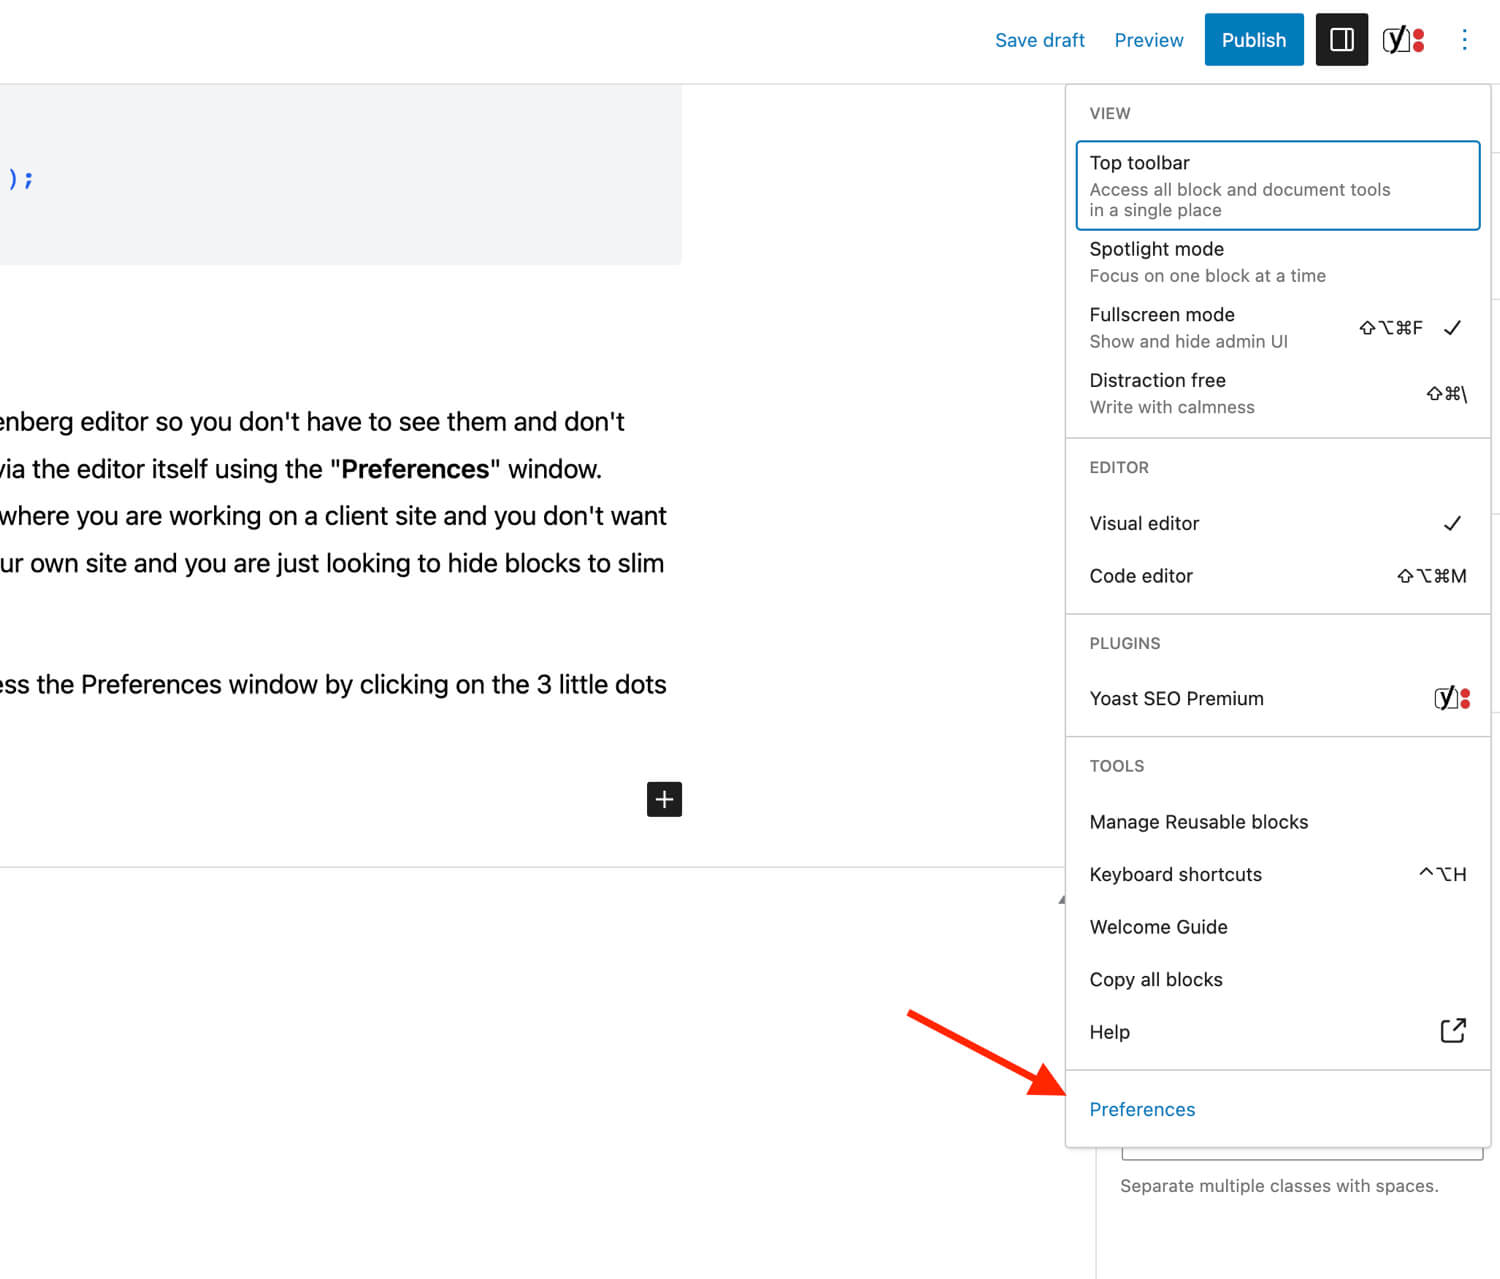
If you simple want to hide blocks from the Gutenberg editor so you don’t have to see them and don’t want to use any code you can actually do this via the editor itself using the “Preferences” window. Removing blocks using code is ideal for cases where you are working on a client site and you don’t want your client to access the blocks. But if this is your own site and you are just looking to hide blocks to slim things down then you don’t need any code.
Edit any post or page with Gutenberg and access the Preferences window by clicking on the 3 little dots on the top right:
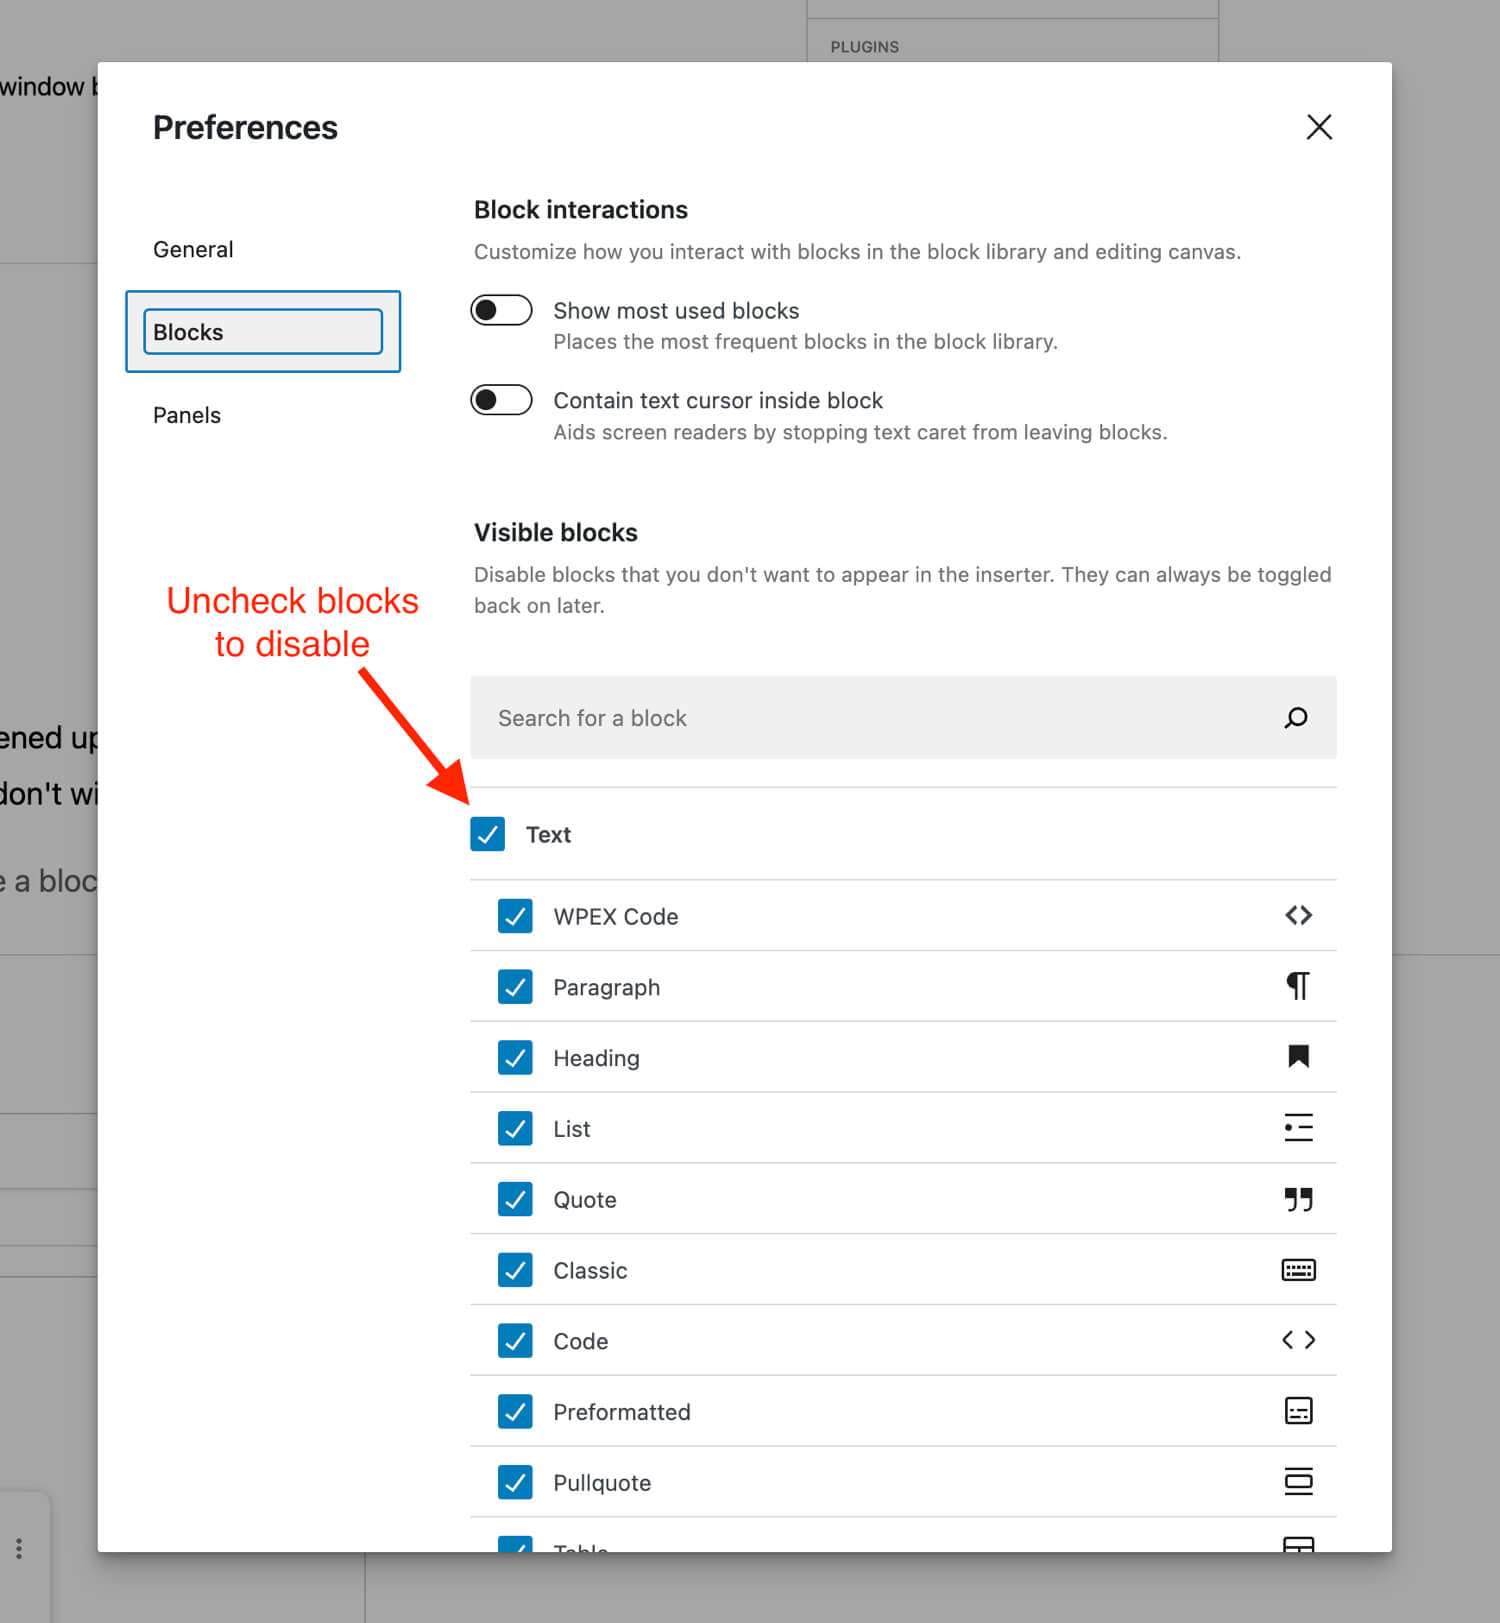
Once you’ve opened up the preferences page click on the “Blocks” tab and from here you can uncheck any blocks you don’t wish to see.
Conclusion
Removing or hiding Gutenberg blocks is surprisingly easy to do, although you could argue the code to hide core blocks is a bit strange. Personally I like creating a whitelist of blocks that my site will use to prevent added bloat, let me know in the comments if you are currently removing blocks from your site, which ones and why.