How to Customize Your WordPress Admin Dashboard
Custom cars. They will take you from point A to B just like any other automobile. They are made from the same materials and burn gallons of gas just like any other motor vehicle. Yet we (or at least the car aficionados among us) have a profound love for the custom made car. Why?
- They look way better than their counterparts straight off the assembly line
- They are optimized for better performance
WordPress is one of the greatest vehicles you can use to achieve your online dreams. It comes with a great dashboard, and out of the box, WordPress will help you and/or your clients to build great websites in no time.
But the WordPress admin dashboard is too “mainstream” in feel and look. I mean, while it’s beautiful, it doesn’t exactly ooze personal style. It’s a bit generic and probably won’t impress a client who has used the platform before. Heck, it won’t impress a client who appreciates personal styling or some resemblance of branding.
On the other hand, custom WordPress dashboards are personal and will provide your clients the additional feel good factor that keeps them yearning for more. You can build your brand or tune the WordPress dashboard to the needs of your client, leaving you with a great product that comes in great packaging – your own custom packaging. In today’s post, we will:
- Eliminate unnecessary widgets and menus to create a cleaner and lighter custom dashboard
- Customize the dashboard footer link
- Get rid of generic elements such as the WordPress logo
- Touch on screen options
- Touch on a few plugins you can use to customize your dashboard
By the end of this post, you should be able to create beautiful and personal WordPress admin dashboards that resonate with your clients or reinforces your online brand presence. Enjoy to the end and wow us with your thoughts in the comment section below!
Wait! Before We Start, Create A Child Theme
You could edit your core theme files, or use the Editor under Appearance in your theme dashboard, but that would mean never updating your WordPress theme again. Before making any changes to theme files you should create a child theme. This way when you update the core theme all of your changes will remain in tact. Here are some quick steps to get you setup just for this tutorial, but we also have a full child theme creation guide or you can reference the WordPress codex for more help.
- Create your child theme folder: Log into your WordPress installation and locate the wp-content/themes/yourthemename folder. Within this folder add a new folder and name it “child-theme” or “yourthemename-child” (you get the idea).
- Create your child theme’s CSS file: Now that you have a new child-theme folder you can add new files to tweak or override the style and function of your current theme. First create a new style.css file within your child theme folder, then edit the new file to add some basic heading info (just so you or subsequent developers know what’s going on):
After the heading you can add all of your awesome CSS to change the look of your parent theme using your child theme./*--------------------------------------------------- Theme Name: Your Child Theme Folder Name Here Description: Child theme for Parent Theme Name Here Author: Your Name Here Template: Parent Theme Name Here ----------------------------------------------------*/ - Create your child theme’s PHP file: Inside of your new child-theme folder create a functions.php file. Next edit the new functions file to add code that will load your original “parent” theme’s styling:
Just be sure to add your function.php tweaks after that last open PHP tag.<?php function myprefix_theme_enqueue_styles() { wp_enqueue_style( 'parent-style', get_template_directory_uri() . '/style.css' ); } add_action( 'wp_enqueue_scripts', 'myprefix_theme_enqueue_styles' ); ?>
You can of course add lots more to your child theme to make changes to templates for your header, footer, or anything else really. But for the purposes of this tutorial you’re all set! So here we go…
Eliminating Unnecessary WordPress Dashboard Widgets
Once you log in to your WordPress dashboard, you will notice a couple of sections (widgets) such as At a Glance, Site Stats, Quick Draft, and WordPress News among others. Most of these dashboard widgets are added by WordPress, but the number of widgets displayed could go up or down depending on your theme and/or plugins. Some themes and plugins add their own widgets to the dashboard.
While some of these widgets are useful, do your clients need to see each? Do you need to see each of these widgets every time you log in? Perhaps you had to put up with the widgets because you had no way of getting rid of them. Today is your lucky day. You can easily remove as many dashboard widgets as you wish using a few lines of code:
// Remove dashboard widgets
function remove_dashboard_meta() {
	if ( ! current_user_can( 'manage_options' ) ) {
		remove_meta_box( 'dashboard_incoming_links', 'dashboard', 'normal' );
		remove_meta_box( 'dashboard_plugins', 'dashboard', 'normal' );
		remove_meta_box( 'dashboard_primary', 'dashboard', 'normal' );
		remove_meta_box( 'dashboard_secondary', 'dashboard', 'normal' );
		remove_meta_box( 'dashboard_quick_press', 'dashboard', 'side' );
		remove_meta_box( 'dashboard_recent_drafts', 'dashboard', 'side' );
		remove_meta_box( 'dashboard_recent_comments', 'dashboard', 'normal' );
		remove_meta_box( 'dashboard_right_now', 'dashboard', 'normal' );
		remove_meta_box( 'dashboard_activity', 'dashboard', 'normal');
	}
}
add_action( 'admin_init', 'remove_dashboard_meta' );
Copying the above code in your child theme’s functions.php file (found at wp-content/themes/yourthemename/child-theme/functions.php) and saving the changes will eliminate all dashboard widgets with the exception of those added by your theme or plugins. From the code above, all users with less than admin capabilities won’t see the widgets thanks to this part of the code:
if ( ! current_user_can( 'manage_options' ) )…which checks if the user has (‘manage_options’) capability only available to administrators. Perhaps you don’t want to rid your dashboard of all widgets. You can use the following code instead:
// Create the function to use in the action hook
function wpexplorer_remove_dashboard_widget () {
    remove_meta_box ( 'dashboard_quick_press', 'dashboard', 'side' );
}
add_action ('wp_dashboard_setup', 'wpexplorer_remove_dashboard_widget');
Copy the above code to your functions.php file and save changes to get rid of the Quick Draft widget. To remove any other widget, just replace ‘dashboard_quick_press’, ‘dashboard’, ‘side’ with corresponding slug for each widget. Other standard widget slugs include:
- dashboard_incoming_links
- dashboard_plugins
- dashboard_primary
- dashboard_secondary
- dashboard_quick_press
- dashboard_recent_drafts
- dashboard_recent_comments
- dashboard_right_now
- dashboard_activity
But you might have additional widgets added by your parent theme, other plugins you have installed or even your hosting (WP Engine adds one called wpe_dify_news_feed). To find the slug for these added widgets use a browser inspector (we like the one in Chrome – it’s part of their default web developer tools so all you have to do is right click on an element and choose “inspect”) then copy the div ID for the widget you want to remove.
Adding WordPress Dashboard Widgets
Now that you can eliminate dashboard widgets as you fancy, let us try adding our own custom widgets. You can display anything you want with your widget, so nothing is to hold you back from creating the custom dashboard of your dreams. The best part is it is super duper easy adding a widget to your WordPress dashboard. Just add the following code to your wp-content/themes/yourthemename/child-theme/functions.php file:
/**
 * Add a widget to the dashboard.
 *
 * This function is hooked into the 'wp_dashboard_setup' action below.
 */
function wpexplorer_add_dashboard_widgets() {
	wp_add_dashboard_widget(
		'wpexplorer_dashboard_widget', // Widget slug.
		'My Custom Dashboard Widget', // Title.
		'wpexplorer_dashboard_widget_function' // Display function.
	);
}
add_action( 'wp_dashboard_setup', 'wpexplorer_add_dashboard_widgets' );

/**
 * Create the function to output the contents of your Dashboard Widget.
 */
function wpexplorer_dashboard_widget_function() {
	echo "Hello there, I'm a great Dashboard Widget. Edit me!";
}
Save changes. Of course, you can edit the plugin to suit your needs. Put your HTML, PHP or whatever where you have:
echo "Hello there, I'm a great dashboard Widget. Edit me!";Your new custom widget will appear at the absolute bottom – below all the widgets – which might be outside the viewport if you have many widgets. You can, however, drag and drop the widget at the top (or anywhere else for that matter).
Custom WordPress Dashboard Page
Let’s say you are interested in creating a totally different dashboard. One that comes with your own custom HTML, PHP and even styling. If you want to go beyond just adding/removing dashboard widgets, please checkout How to Create A WordPress Custom Dashboard Page by Remi Corson.
He has built a great plugin that will help you to speed up creating your own custom dashboard page (custom-dashboard.php). You must brush up on your PHP development skills to fork the plugin to suit your specific needs. All in all, I tried Sweet Custom Dashboard and it’s amazing. Your custom dashboard could be an install away :). Want to customize your welcome message, checkout our post on Customizing Your WordPress Dashboard Welcome Message.
Removing WordPress Dashboard Menus
We can add or eliminate WordPress dashboard widgets and even change how the dashboard looks entirely (thanks to Remi), Now let’s move on to the next part: eliminating unwanted menu items.
Why? You want to remove some menus to provide clients a leaner dashboard and keep them from accessing “restricted” areas. If a client does not know their way around WordPress, they might end up breaking the site if they visit and change options on such pages as Settings or Plugins. Add the following code to your functions.php file:
function wpexplorer_remove_menus() {
	remove_menu_page( 'themes.php' );          // Appearance
	remove_menu_page( 'plugins.php' );         // Plugins
	remove_menu_page( 'users.php' );           // Users
	remove_menu_page( 'tools.php' );           // Tools
	remove_menu_page( 'options-general.php' ); // Settings
}
add_action( 'admin_menu', 'wpexplorer_remove_menus' );
The above code removes the menu links to Settings, Plugins, Appearance, Users and Tools for all users. You can remove sub menus as well. Here is the example code that removes the Widgets sub menu under Appearance:
function wpexplorer_adjust_the_wp_menu() {
	$page = remove_submenu_page( 'themes.php', 'widgets.php' );
}
add_action( 'admin_menu', 'wpexplorer_adjust_the_wp_menu', 999 );
In the example above, users will access all sub menus under Appearance except Widgets. You can remove as many menus or sub menus as you wish. Just remember this won’t stop users from accessing these pages directly. I mean, if a user enters, for instance yourdomain.com/wp-admin/options-general.php, they will access your Settings page. Good thing most users won’t bother if the item is not on the menu.
If you can’t or don’t want to edit your functions.php file, you can always install the Admin Menu Editor plugin, which gives you complete control over your menus. It ships with a couple of cool features including role-based menu restrictions, ability to hide menus and create custom menu items among other cool features.
Customizing the WordPress Dashboard Footer
To this moment, we’ve made “significant” customization to your WordPress admin dashboard. It’s only right to take some credit for all the brilliant work you’re doing. Customizing the footer (“Thank you for creating with WordPress.”) can further help strength your (or the client’s) brand. Let’s change your footer to “Built with love by Your Name.” Just add the following snippet to your functions.php file and save changes:
// Custom Admin footer
function wpexplorer_remove_footer_admin () {
	echo '<span id="footer-thankyou">Built with love by <a href="http://www.wpexplorer.com/" target="_blank">WPExplorer</a></span>';
}
add_filter( 'admin_footer_text', 'wpexplorer_remove_footer_admin' );
Replace ‘Your Name” with your name, website, email address etc and yourdomain.com with your actual domain name. Moving on…
Customizing the Login Form
So far, you have everything it takes to customize your WordPress admin dashboard. Let’s go a step further and customize the login page, so your users can have a truly personalized experience from the get go. After all, why bother customizing your WordPress dashboard only to be given away by the login page?
With this page, we need to customize two elements: the default WordPress logo and the wordpress.org link that comes with it. But before I show you the code 🙂 , you can customize your login page easily using any of these 15 Best Custom Login Page Plugins for WordPress. Now, for the warm fuzzy feeling that comes from playing with the code, copy the following to your functions.php:
function wpexplorer_login_logo() { ?>
	<style type="text/css">
		body.login div#login h1 a {
			background-image: url(<?php echo get_stylesheet_directory_uri(); ?>/images/logo.png );
			padding-bottom: 30px;
		}
	</style>
<?php }
add_action( 'login_enqueue_scripts', 'wpexplorer_login_logo' );
Replace logo.png with your custom logo filename, which you should first upload to wp-content/themes/yourtheme/images. Keep your custom logo below 80 x 80 pixels even though you can change this with some custom CSS. With the custom login logo in place, it is time to change the link that comes with the original WordPress logo. Let’s us link your new logo to your website. Copy this code to your functions.php file and save changes:
function wpexplorer_login_logo_url() {
	return esc_url( home_url( '/' ) );
}
add_filter( 'login_headerurl', 'wpexplorer_login_logo_url' );

function wpexplorer_login_logo_url_title() {
	return 'Your Site Name and Info';
}
add_filter( 'login_headertitle', 'wpexplorer_login_logo_url_title' );
Remember, you can always style your login page as you wish using CSS. Or, you can simply start with an awesome theme like the Total Multi-purpose & Responsive WordPress theme which comes with built-in options for a custom login page and site branding.
Customize WordPress Dashboard: Screen Options
If you don’t want to dive into code or install plugins, you can take advantage of Screen Options to create a custom WordPress dashboard. Just log in to your WordPress dashboard and at the top of the screen to the right, you will spot a Screen Options drop-down menu. Click on this to expand and check/uncheck to activate/deactivate widgets. You can then drag and drop your widgets to arrange them as you wish.
The only disadvantage is this method saves your settings on a per-user basis, meaning it won’t do you much good if you have a multi-author blog. Also, you can’t keep users from re-activating the widgets at will.
Bonus: Use A Plugin
We’ve spent the majority of our time covering code options. But if you’re pinched for time, a plugin can be helpful.
Option 1: Ultimate Tweaker Plugin for WordPress
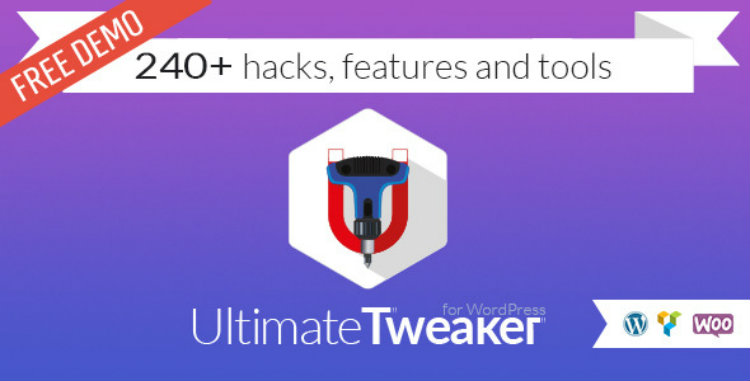
First up, something a little bit different: the Ultimate Tweaker for WordPress, available from CodeCanyon. The truly ultimate plugin option for editing your WordPress admin (ad a few other WordPress features).
Most plugins support functionality for one specific purpose, but not the Ultimate Tweaker; this plugin is a versatile all-rounder, the like of which I’ve never seen before. Essentially, Ultimate Tweaker supports 240+ different WordPress hacks, tricks, and tools to make your life easier. This makes it useful in a number of ways: improving efficiency, removing the parts of WordPress that annoy you, and extending the WordPress core functionality beyond what you thought was possible.
Those 240 hacks are really diverse, and can be broken down into 35 different categories. To give you an idea of what Ultimate Tweaker can do, here are just a few of its “hacks:”
- Add a logo above a sidebar menu
- Rebrand the WordPress dashboard and login page
- Disable right-click or Print Screen button on your website
- Boost security by adding reCaptcha 2 to your login screen
- Set JPEG quality to reduce the file size of images
- Enable shortcodes in text widgets
- Create a minimum word count for posts
- Disable the wrong password “shake” on the login screen
- Add Google Analytics code to your website
- 19 new keyboard shortcuts for WordPress
- Create a custom 404 page
- Disable automatic WordPress updates
Many of these WordPress hacks are things we’ve all turned to Google for at some point or other. Most of them are relatively minor by themselves, but with a comprehensive list of several hundred, collectively the plugin can offer a lot of value. The WordPress community are usually very vocal about what they’d like to see from the WordPress core, so I really hope the developers listen to the community and implement some of their suggestions in future updates to this plugin.
Option 2: Forest – Revolution WordPress Admin Theme
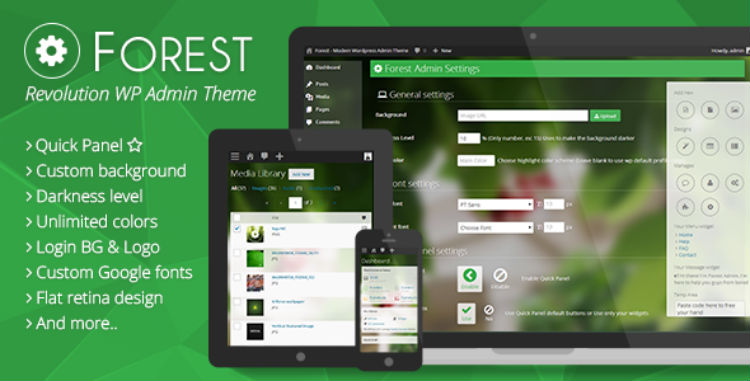
Just want to change the branding of the backend of your website? While we’d typically recommend using a bit of code, you can also use a plugin. If you’re bored of the default dashboard’s appearance, the Forest WordPress admin theme lets you give it a bit of a facelift. And for just $9. Forest won’t change how you do familiar tasks in WordPress, like adding posts/pages, it will just make WordPress look better when you’re doing them! The plugin also lets you modify the default WordPress login page.
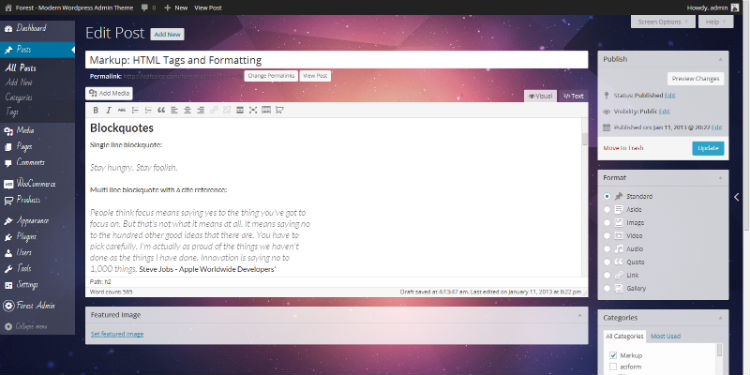
Forest lets you add your own background image to the WordPress dashboard – or you can use one of the six images provided free, including the one in the screenshot above. You can customize the dashboard using your own creativity (using unlimited colors), or using one of the default WordPress color schemes. You can further customize the dashboard by choosing your own typography from over 600 Google fonts. The plugin supports a light and dark skin, and you can configure the opacity levels of each element. If there are some buttons in the dashboard you don’t use, you can even hide them — this is great for client websites where too many options could overload them.
Note: Forest will not change the appearance of your live website in any way, it’s purely for the back-end.
Resources on Customizing WordPress Dashboard
Looking to learn more about customizing WordPress dashboard? Here are a few extra resources for your professional toolkit:
- Dashboard Widgets API
- 15 of the Best Custom Login Page Plugins for WordPress
- How to Create a WordPress Custom Dashboard Page
- Customizing the WordPress Dashboard for Your Clients
- Customizing the WordPress Admin – The Dashboard
Over to You…
Creating a custom WordPress admin dashboard is one of the best ways of strengthening brand image and providing personalized experienced to your clients. It’s simple and won’t take a lot of your time. So what are you waiting for? Get customizing.
Other than that, what did you learn here today? Have you ever created a custom WordPress admin dashboard? Share with our eager community in the comments below. Cheers!


Hi,
I create a freemium plugin to do this called WP Admin UI. You can customize, manage and optimize almost everything in your WordPress backend with just few clicks.
The free version is available on https://wordpress.org/plugins/wp-admin-ui/
Best regards,
Benjamin
This article was great. Why I wasn’t already doing half of these things for my clients is beyond me. Talk about a time saver. I could probably create a custom dashboard and admin experience within an hour that would cut my client training sessions in half.
That’s a great idea and yes it would probably help your clients a lot !
Very detailed, and informative. This will be very useful even to beginners. Thank you so much for sharing!
How could you go about adding a website/theme header and footer to the admin dashboard so that the back end starts looking like the front end? Found nothing on the internet about this 🙁
Hi James, my name is AJ and I’m the primary developer and CEO of WPExplorer. Personally I wouldn’t recommend this, although you can easily by using the in_admin_header and in_admin_footer hooks to insert your custom html into the backend. What I would recommend, of course it depends on your exact needs, is providing front-end specific capabilities to your users. For example if what you want is the ability to have authors log into your site and submit posts there are plugins/code you can use for them to do so via the front-end and never allow authors into the actual WP dashboard.
Hi
Thanks a lot for this great tutorial
This article was so helpful to me. I couldn’t figure out how to get rid of a third party dashboard widget that was bundled with their plugin. Your instructions worked like a charm. Thanks for all the details that went into this!
Thanks for the tips! I don’t really like to change functions.php, I broke my site a couple of times.
Now I use free plugin AGCA for most of my sites, maybe it’s not perfect, but it works for everything I need
I prefer not to touch any code, I’m quite sloppy about that