Create Stunning Product Photos for WooCommerce

WooCommerce has been a fascinating prospect for WordPress users to create online stores without going into the development technicalities. Outright e-commerce functionality is available to your WordPress based website with the simple installation process of the WooCommerce plugin. Along with the whole prospect of product and order management portal, this plugin allows you to upload product photos and create galleries around each of the products. Let’s get you through the brief guide that will outline the process and best practices to get things done.
Table of contents
Why Create Product Photos from Scratch?
Often business owners underestimate both the quantity and quality aspects of the work that needs to be done when your online store is live. It is not just that you have the domain, hosting, WordPress, and WooCommerce installed, your sales are going to have a significant boost. Assuming you have the products finalized or available to be sold online, you need to focus on creating stellar self-explaining photos that can convince the target audience to take action.
There are multiple aspects of product photos users are allowed to have with the functionality provided by WooCommerce. Users can have a single product image, product gallery, and product thumbnails. There comes the work of image sizing work that needs to be done in an appropriate manner. If you aren’t familiar with conventional photo editing tools like Photoshop then use an online image cropper, so that the right versions are uploaded to the website.
There would be probably two scenarios, whether you have a branded product that is already sold on the internet or a private label one where you have something unique to offer against any product type. Let’s discuss them one by one.
Source Product Photos From the Internet

When you have branded products to sell, manufacturers or parent brands would already have detailed photos and descriptions on there to be reused for the online retailers. You can browse through their websites and download respective product photos (just be sure to follow the terms of use). Often they would be in other formats or sizing versions that aren’t quite suitable for your website.
You need to adjust their image formats, convert them to a standard size you are going to use all over for WooCommerce product photos, and perform additional work like background removal. It is a key thing to note here is that you can’t just simply download and upload to your website. This is because firstly, you might not get all photos from one place. Secondly, they might have used other formats or frames that won’t go well with the WooCommerce store. Thirdly, you need to have your own photo background frames and sizing recommendations for a consistent website layout.
Also, you can bulk upload or bulk edit WooCommerce products if you need the job to be executed in less time. A pro tip here would be that all the product photos that are sourced and edited, have meaningful file names and place the images in their relevant category folders. This way you can conveniently upload them, track them and keep stuff always sorted out.
Conduct Product Photoshoots
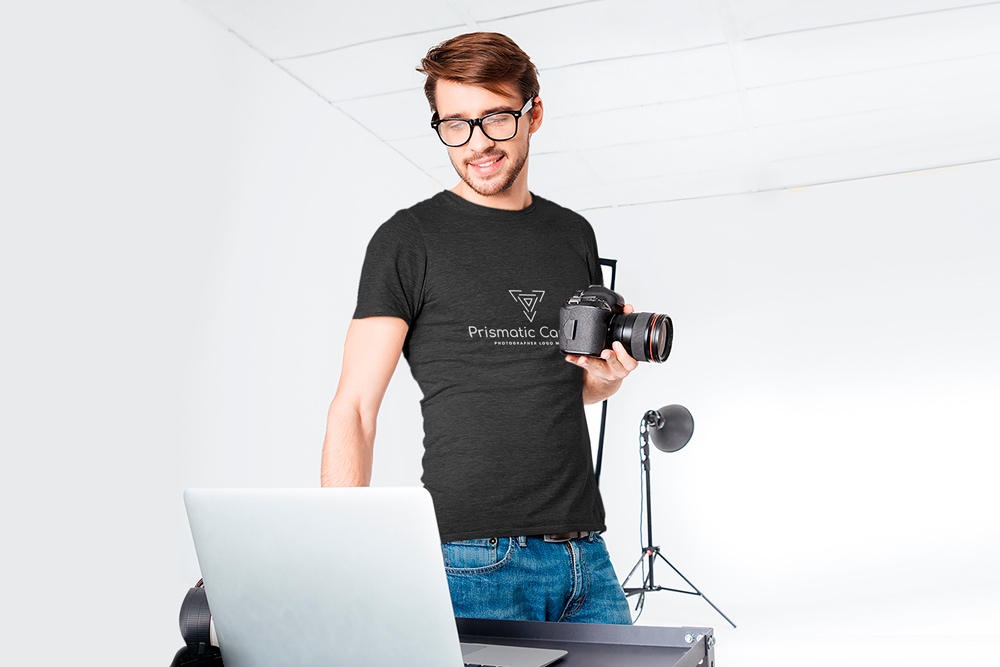
You might think that you can simply capture a photo from your phone of the product and upload it. While this may sound good when you want to sell a used product but when you are dealing with WooCommerce and personal brand, it isn’t going to work at all. While the capturing device can be a high-end mobile phone or a DSLR, product photoshoots are to be conducted while taking care of certain technicalities.
It is widely preferred to have white background product images because they are easy to go with most website layouts and social media platforms. If you choose to go with other color schemes, then you would need to meet those specific design requirements to resonate with the overall branding theme. This greatly depends on what colors you adore personally and what would be appealing to the target audience.
Special care needs to be taken of lighting and background. If there is any natural light available at your photoshoot place, it is quite good otherwise you would need to get some suitable studio lights. Dedicating a place to conduct these sorts of product photoshoots would be a better tradeoff. If this is not feasible to do everything by yourself then outsourcing this to a professional agency can also be the option to save upfront costs.
When clicking the photos, you need to have the same background for all product photos that you choose for your website. Place the product nicely centered and click a detailed high-quality picture. If any of the images are off the quality charts, then you might not get great product page conversions.
Design Product Photos with Mockups

For many reasons you might want an alternative to photoshoots. Can you create amazing product shots for your brand even if you don’t have a camera? Yes! There is an alternative called smart mockups.
Online design tools like Placeit and marketplaces like GraphicRiver (affiliate link) have semi-customizable stock photos, design templates and mockups of different products. You can create your visuals based on what you want to show to your audience, instead of spending hours trying to get rid of a background image. Some mockups might not even have backgrounds, making it a lot easier to add your brand’s official tone.
What exactly could you find? Mugs, T-shirts, tote bags, apparel, home decor, you name it! As mentioned before, these products may or may not have a background in a particular industry. You can find some with models, or with the product alone. Personalizing them is much easier than you think. Just drag your design, customize the product’s or photo background’s color (if it applies) and ready, download as a PNG file.
How to Upload Product Images to WooCommerce
Once you have the image files ready to be uploaded, it is time to deal with the WooCommerce panel to upload them. You have the option of bulk upload but it would be recommended to create products one by one if you aren’t much aware of the technicalities involved with specs and attributes.
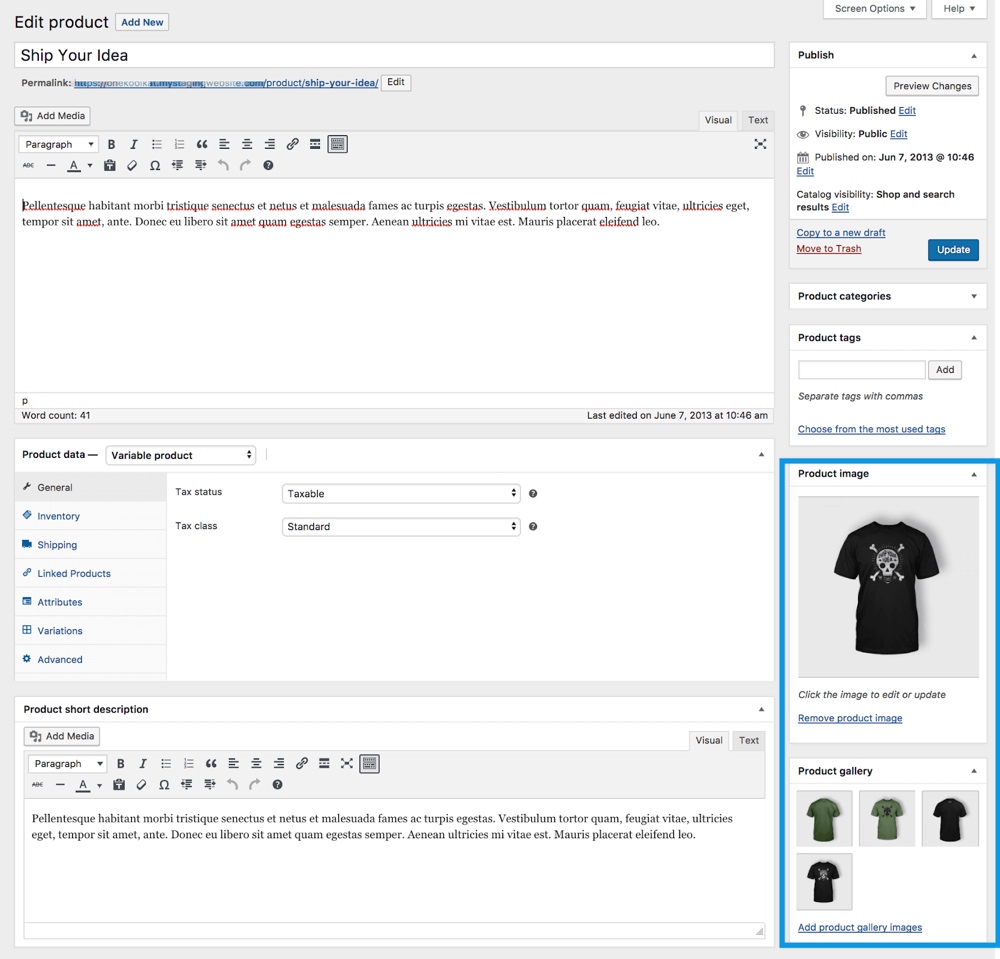
When you click on create or edit products, you have the option to set product images on the right side of the interface. The heading where you have “Product Image”, is where you can set the main image of the product where it would be seen at the glance. It is to be noted that this image will be seen everywhere where this product will be called at any homepage or category page adjusting to different sizes layout.
Under this, you will see the “Product Gallery” tab. Here users can upload multiple photos of the same product. This feature facilitates you to give a detailed oriented product experience from different standpoints. Users can see these images when they hover onto the product or land on a product page.
When you click on the add image button to any of these tabs, you will have the feature of selecting the image from media files or upload new ones. Once you select or upload product images, a good SEO practice would be to set the image alt texts, their captions, and descriptions. This helps Search Engines better in determining the purpose of the images used all over for the E-Commerce website.
The reordering feature is also accessible with WooCommerce and users can adjust what order of product gallery images are shown to the website visitors. The images added and selected can be removed also in the future if you feel like changing them to enhance the product experience.
Further Product Optimization Recommendations

This guide to creating WooCommerce product images would not end up before we near perfection. The ideal size for each of the product images would be 800 px x 800 px. This fits perfectly to different catalog layouts and square images adjust quite well other than rectangle orientations. WooCommerce smartly adjusts the sizes to be displayed on different layouts and screens so it is best practice to play with an image size that adapts well.
Also, the image title alt texts you set should be meaningful. If you have product title names as the title of the product images, this would allow you to conveniently locate them in your online admin panel and local desktop files. The alt texts should be keywords optimized that you want to be visible against on the search engines. Missing alt texts would should errors and warnings whenever there is a website audit conducted.
There are various other functionalities involved like Lightbox and Zoom that you should keep them as it is. Customizing them would require coding and development skills. It would be a better trade-off when you are looking to have a customized theme for your e-commerce website using WordPress.
Final Thoughts
WooCommerce has made lives easier for many e-commerce geeks out there. Just plug and play to get things live in real-time environments. Avoiding best practices from the start comes with certain costs and repercussions. Potential revenue loss is always there when ideal product images are not created that resonate with the minds of the target audience.
User experience is of critical importance in globally existing e-commerce competition. Search engines also now evaluate these sorts of factors like bounce rate, navigational behavior, and conversions to determine what sort of experiences website visitors are getting. Deep analysis insights are required to determine the cause of low website conversions.
Once you observe at a glance that product images do not appeal to the viewers, this would leave a lot of optimization work to do for the website owners. This brief guide on how to create WooCommerce product photos would save you from all of this hassle in the near future. The summary of this would be to create high-quality product photos, store and upload them in a well-sorted manner with meaningful names, and upload them to the WooCommerce panel with all the optimization work done.


