How to Bulk Edit WooCommerce Products


Stuck on how to change product price, title, or any other property of a large number of products? This guide intends to provide a solution to this problem with different bulk edit plugins.
Up to a limited number of products and limited product properties, we can update it by WooCommerce’s bulk edit option itself, isn’t it? But it is a bit difficult if we need to filter the right products to be edited when having a store that sells thousands of products with many categories and subcategories and so on. The next solution is plugins!
In this guide, we can check how to bulk edit product categories with 3 different plugins. They are:
- ELEX WooCommerce Advanced Bulk Edit Products, Prices & Attributes
- WP Compress – Image Optimizer
- WISDM Customer Specific Pricing
- Bulk Table Editor by Consortia
Let us check how to bulk edit WooCommerce products with the above-listed plugins one by one.
1. ELEX WooCommerce Advanced Bulk Edit

This feature-rich plugin comes with advanced filters to sort the right products among the entire list of products in your store. And if you could not find an exclusive product property of your store in this plugin, you can create and edit them!
Check the step by step process to bulk edit products with this plugin.
Step 1: Install and Activate the Plugin
Then go to your WordPress Dashboard and navigate to WooCommerce > Bulk Edit Products.
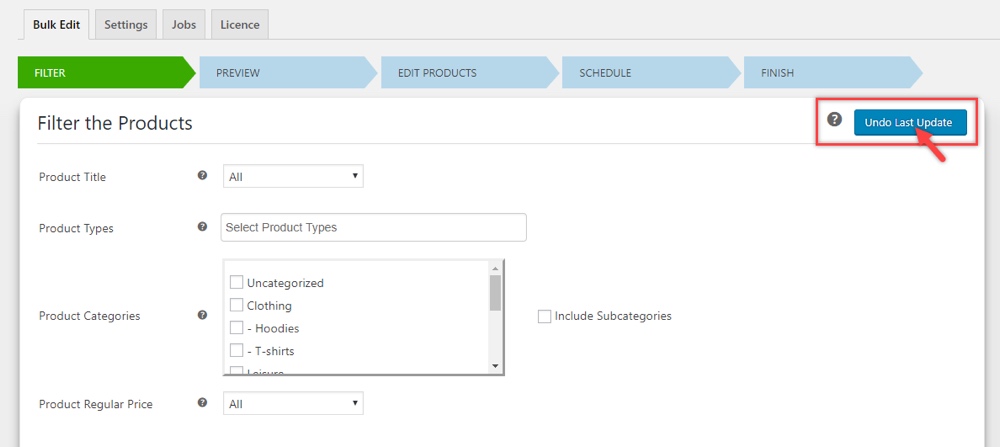
Step 2: Filter Products to Bulk Edit
The page for filtering the products will be displayed.

With this, you can filter the products based on Title, Tag, Type, Category, Price or Description.
If your store sells variable products, you have options to filter based on the global attributes and custom attributes in your store.
- Product Attributes (Group with OR): With this, you can enter the attribute values in the text box. All products with at least any one of the attribute values will be filtered.
- Product Attributes (Group with AND): This will filter the products if all the entered attributes are available for the product.
- Custom Attributes: You can enter the custom attributes for filtering the products which contain the attribute variations.
While filtering, there are possibilities of some unnecessary products can be included in the list. For avoiding that, you can exclude certain products by its ID, categories, and subcategories.
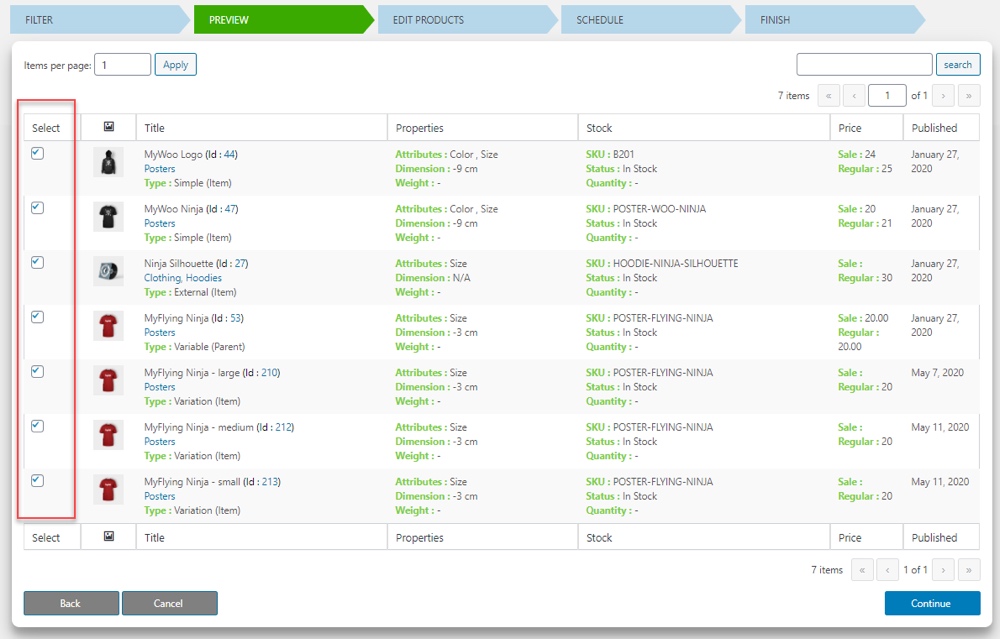
After setting up the filters, it is necessary to preview the filtered list.
Step 3: Preview Filtered Products
With this preview, you can check whether all required products have been excluded as well as any unnecessary products have filtered. If you find so, you can go back to the previous step by clicking on the Back button for resetting the filters. And for excluding certain products, you can simply uncheck the corresponding text boxes.
After proceeding with the preview of products, the next step is to actually make edits.
Step 4: Create Bulk Edit
This bulk edit plugin provides a handful of default product properties to edit.
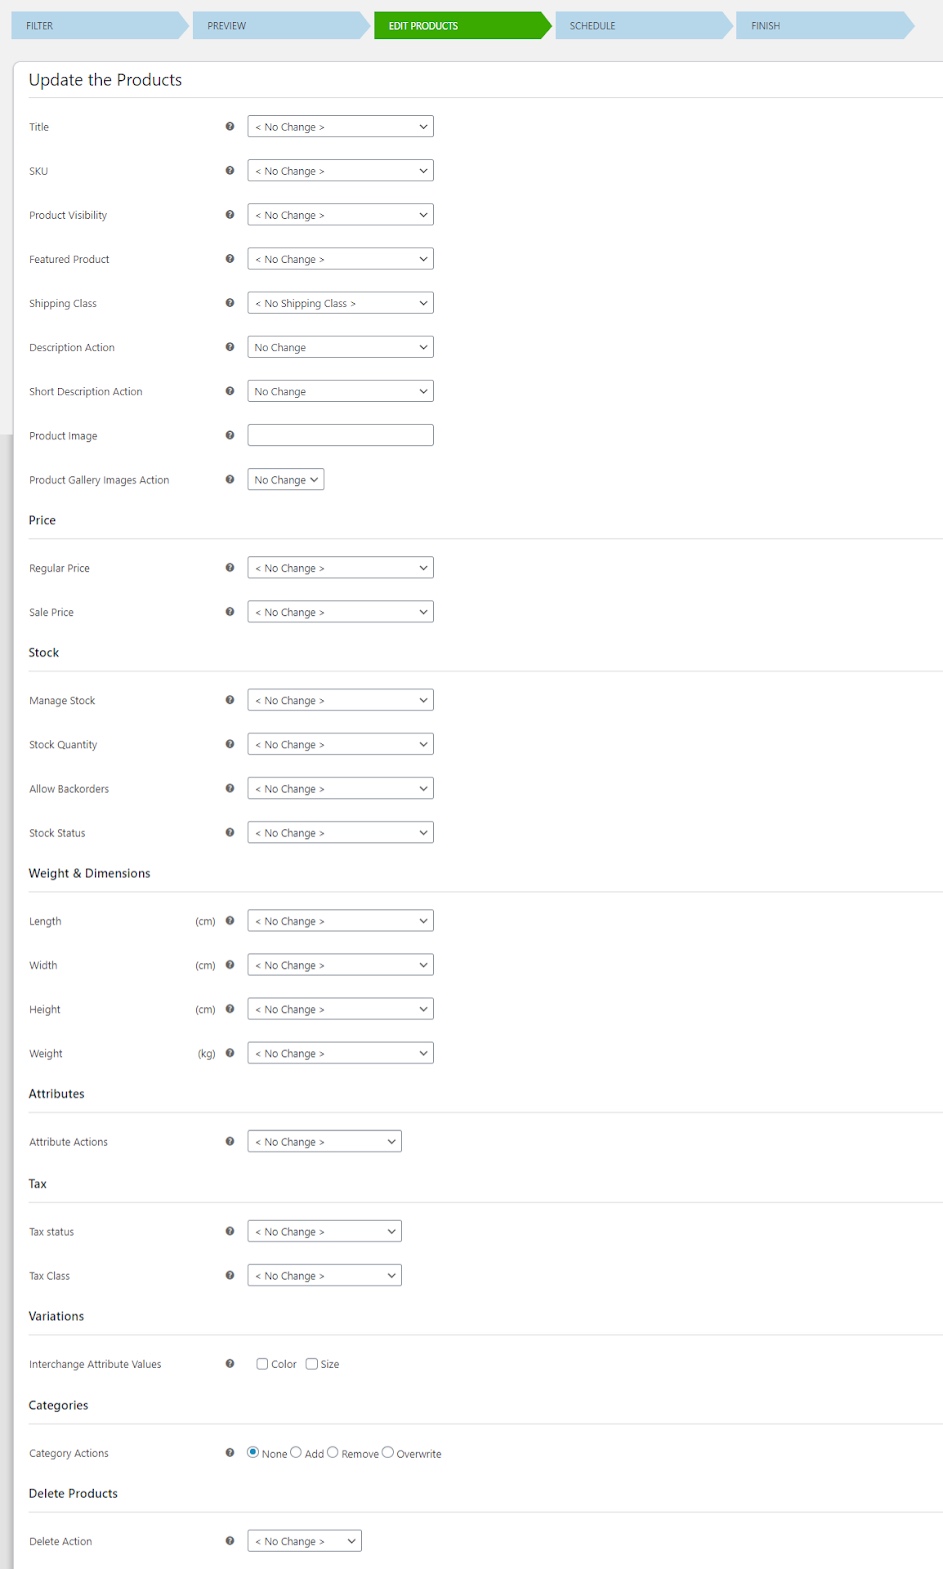
There are options to make bulk changes to general product info, pricing, stock, weight/dimensions, attributes, tax settings, variations and categories (as well as a delete option).
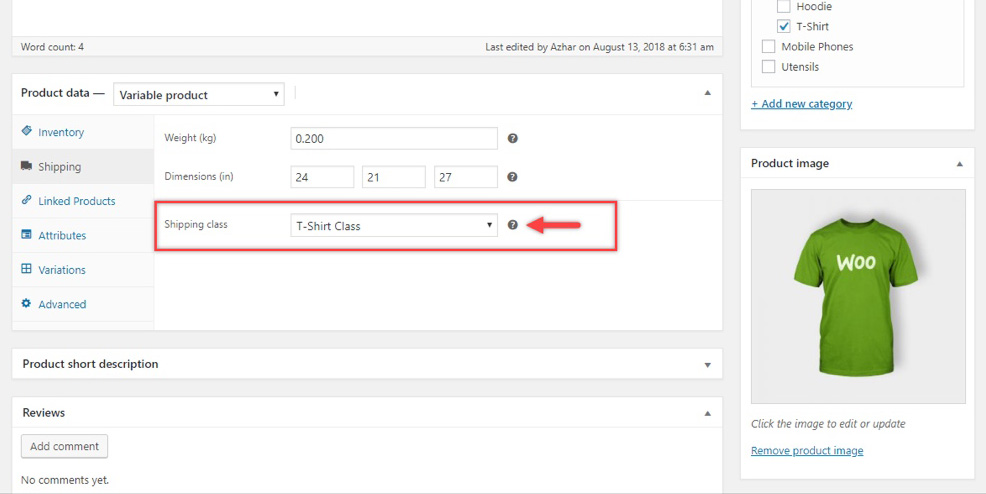
For example: Easily update your products to offer a new shipping class. Here, I’ll apply the T-Shirt Class to the filtered T-Shirt products.

It will reflect on the T-Shirt products’ individual pages.
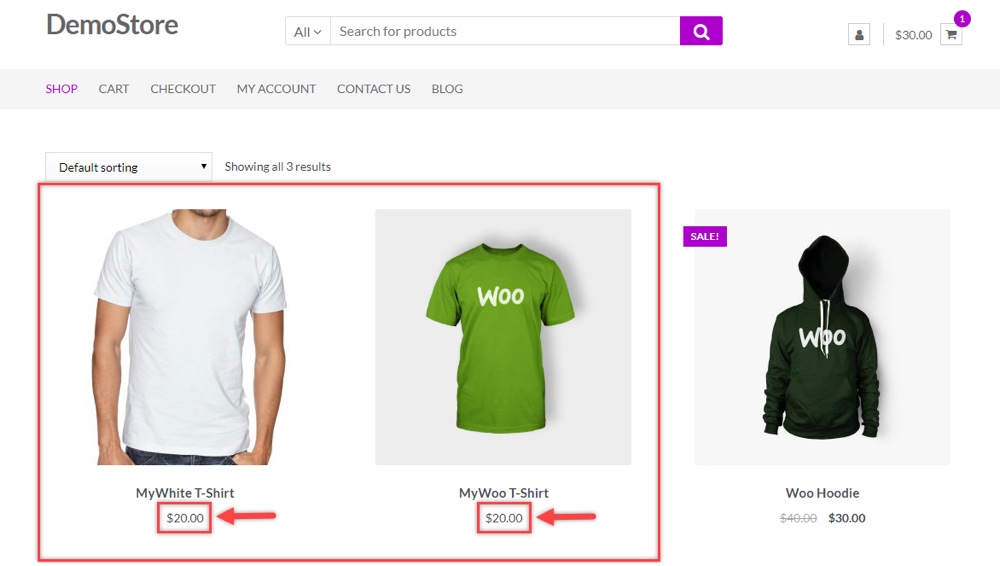
Check another example: set a flat price of $20 to all T-Shirts for a flash sale.

It will reflect on the shop page as below.
Check out the documentation for exploring more editing options in detail.
If you cannot find a specific property of your products in this plugin, go to the Settings tab and create.
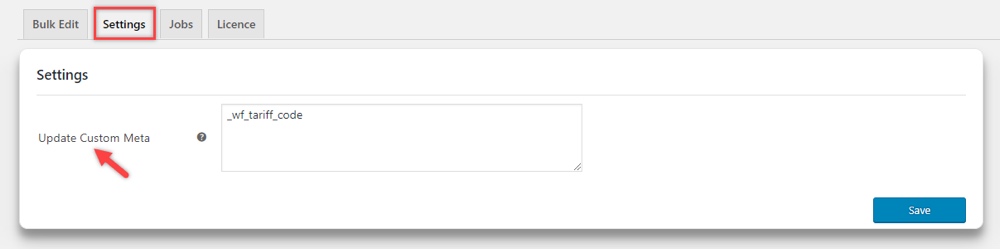
In the text area, you can enter the custom properties and save it.
You can find this property on the edit page along with other default properties.
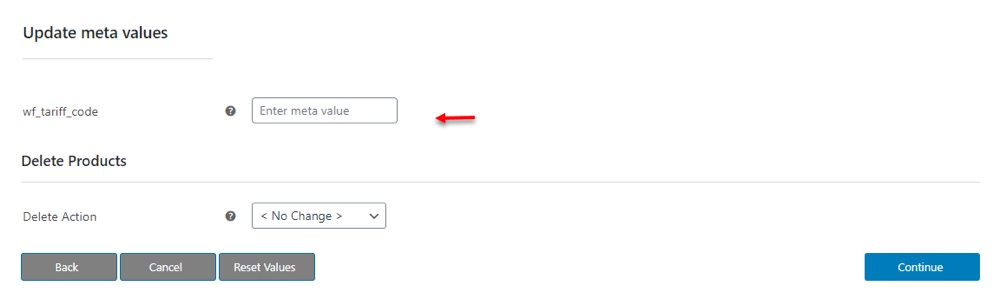
There you can set the value to be updated to all filtered products for that custom property.
After setting up all the required edits, you can click on Continue. If you need to change anything in the previous step, you can go back, or you can reset all the values you have set in a single click.
Step 5: Schedule Bulk Edit
Either you can immediately update these changes on your products, or you can schedule it for later, and as a recurring process as well.
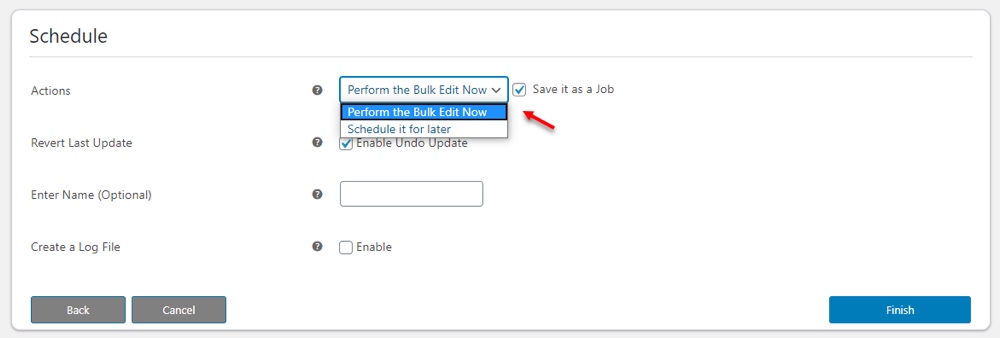
If you choose to execute instantly, you can check to save it as a job, enable to undo updates, give a name for the job and save the information of updates in a log file.
If you are planning to schedule it for later and as a recurring update, you can schedule the date and time for an update, and a date and time to revert to previous values if needed, frequency of update such as daily, weekly or monthly, and select to save the information in a log file.
You can click on Finish if everything has been set properly. Or else if any changes needed, you can go back to the previous step.
Step 6: Bulk Edit Execution
Once you have set up all the edits and executed the edit, a tab will be displayed that shows the update is successful.
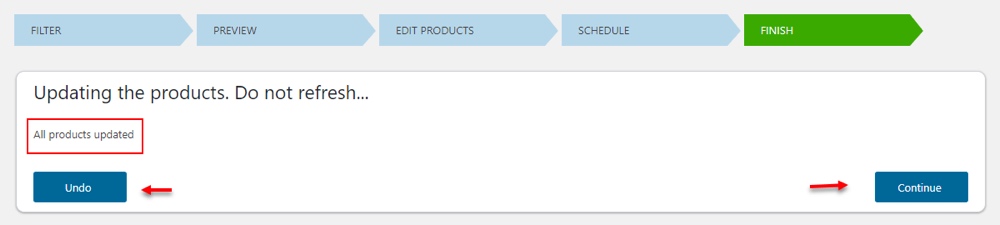
From there you can undo the update if needed. Click on Continue if everything has been updated properly.
All saved jobs will be listed on the Jobs tab along with the details such as the chosen fields and schedule details.

7 buttons are available for each job to Edit, Cancel, Copy, Run, Revert or Delete the job as well as Cancel the schedule and Download log file.If you have changed your mind or accidentally click on the button to update, you do not need to worry. Yes, there is an option to undo the last update on the filter page. You can simply click on that.
With this advanced bulk edit plugin, you can do the bulk edit with the handful of filtering options and properties effectively without harming any other products in your store.
With ELEX Bulk Edit Products, Prices & Attribute for WooCommerce plugin, you can edit whatever product properties you want. Hence it is a complete package as you do not need to install separate dedicated plugins for editing different product properties such as plugins for bulk editing prices, images, categories, etc.
Next, let us check a plugin that helps to compress all images on your site as such. As I mentioned before, it is a kind of dedicated plugin that only you can use as an all-in-one image optimization tool.
2. WP Compress Image Optimizer
This image optimization plugin also comes up with bulk optimization of images as well as bulk restoration. That is if you find your website takes more time to load rather than average loading time, it’s time for you to work on the website optimization!
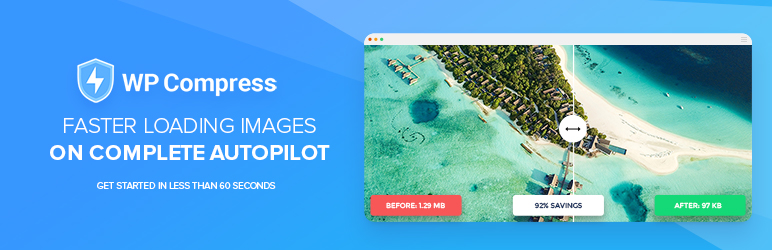
Yes, the first thing is to optimize the images on your website by shrinking it to small sizes without losing its quality. For that, you can use this WP Compress plugin into your WooCommerce website. Since images are one of the most important product properties in a WooCommerce store, it is necessary to optimize them as a lot of images will be there on a single page!
You can do 3 bulk image operations with this plugin such as:
- Compress: For compressing images to lower size.
- Restore: Restoring the compressed images to its previous size.
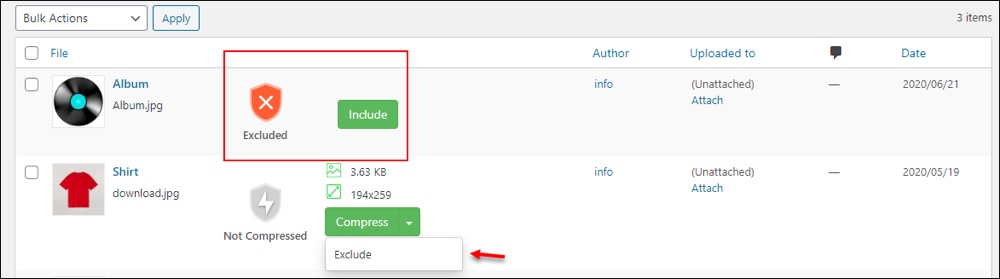
- Exclude: Exclude products from compressing their images while the bulk update.
How to integrate it with your WooCommerce store? Go through the following steps.
Step 1: Install and Activate the Plugin
Download WP Compress freely from WordPress. Install it in your WooCommerce store and activate it.
They will ask for an API key. So sign up to WP Compress, give your details with mail ID. An activation link will be sent to that address. Click on the link, add your website, and you will get an API key.
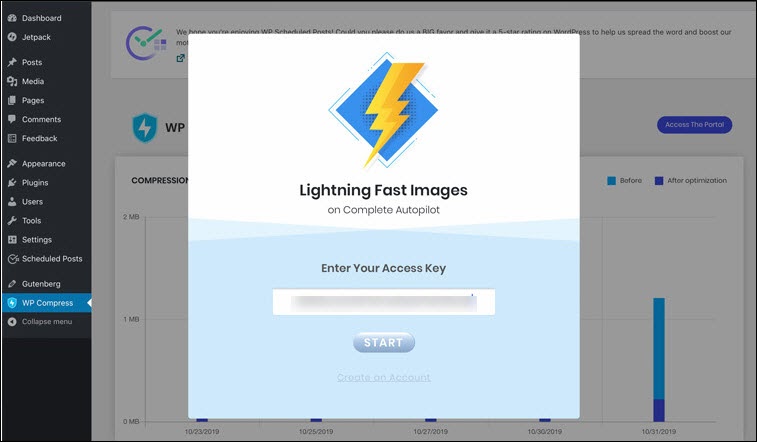
Copy and paste it into the plugin prompt, and that’s it for activation!
Step 2: Compress Images in Bulk
It has 2 modes such as live CDN mode and local mode.

By default, it will be in live mode/autopilot mode, that is it automatically compresses all images. You can switch it to the local mode for compressing the images as such manually or individually from the media library.
If you choose the local mode, you can enter an image size to resize all images. That is, images will be already in different sizes, but the maximum size after the compression will be the size you have entered here.

You can also choose the optimization level accordingly. If you choose Lossless, the image quality will not be lost after the compression. But here, only limited compression will be applied to the images. If it is Intelligent, it will keep a balance between quality and compression. The Ultra will reduce the size into very small without considering the quality of images.
If you want to keep the backup on cloud or local, you can choose it accordingly based on the requirements.
If you want to exclude some products, you can go to the Media > Library. And exclude the products should not be included in the bulk edit of image compression.
After setting all these, you can click on Compress All Images.

If you want to revert the images into old sizes, you can simply click on Restore All Images.
These edits can be done on individual products from the media library page.
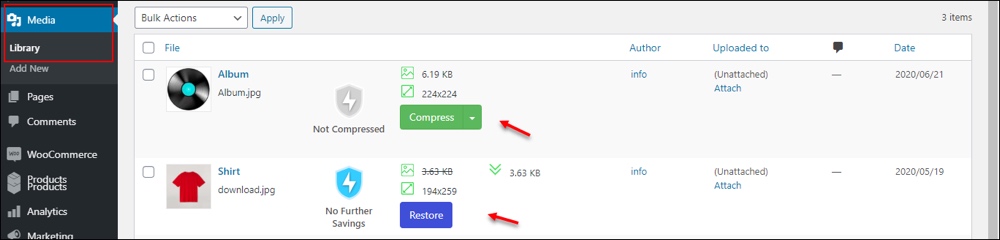
You can compress and restore product images individually.
3. WISDM Customer Specific Pricing
This premium plugin is basically a dynamic pricing plugin, that you can also use to edit product prices in bulk, based on their categories. Besides this, this plugin helps to set up role-based pricing, special pricing based on product quantity, and different discount rules.
Check how you can bulk edit product prices with this plugin.
Step 1: Install and Activate the Plugin
First, you need to purchase the plugin from WisdmLabs then upload, install and activate it.
Step 2: Bulk Edit Product Prices
Go to the WordPress dashboard then to CSP > Category Pricing.
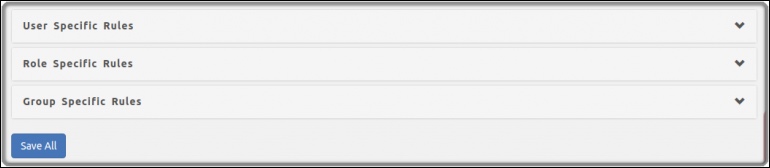
Choose the section, the category-based pricing should be applied for the customer, role, or group of your WooCommerce store.
You can choose the user roles, users, or group to whom you want to offer the special pricing for product categories. Then choose the product categories for applying the price edit to those categories only. You can set other details for applying the discounts such as the discount type, the minimum quantity of products, and the value.
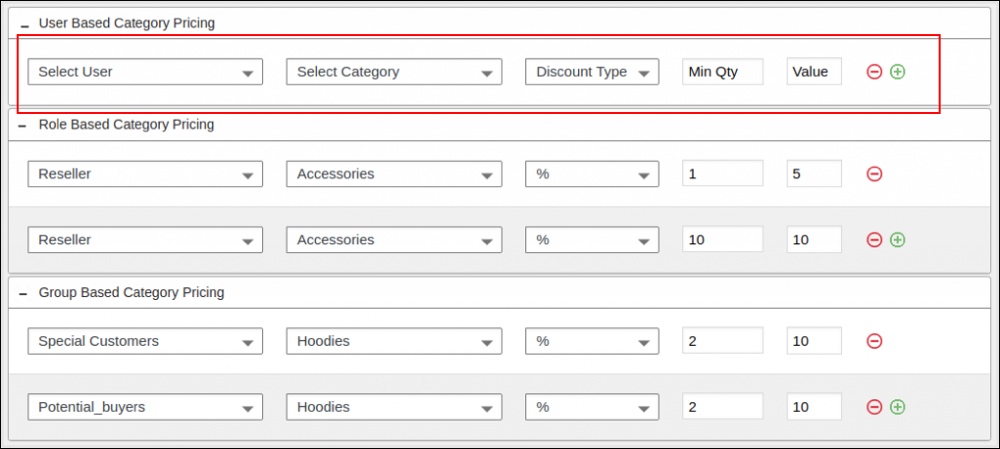
You can set the details accordingly for editing product prices of specific product categories.
You can also apply the discount to all products without any filters and to all simple, variable, or any type of products with the global discounts option.
Go to your dashboard and from CSP > Global Discounts tab.
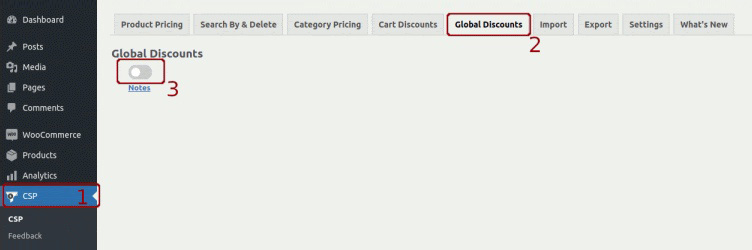
You can simply activate it. After that, you can apply global discounts for users, user roles, user groups in your store with the options on the following tab.
After the settings, you can save it.
4. Bulk Table Editor by Consortia
An alternative to the first bulk product editor on our list, the Bulk Table Editor by Consortia offers a different interface to bulk edit products. Instead of walking you through steps and drop downs, the plugin offers an intuitive spreadsheet-like table that you can use to quickly make changes to individual items or groups of products.
Step 1: Install and Activate the Plugin
First things first, you’ll need to purchase a copy of the Bulk Table Editor by Consortia from WooCommerce’s website. Then upload and install the plugin on your site.
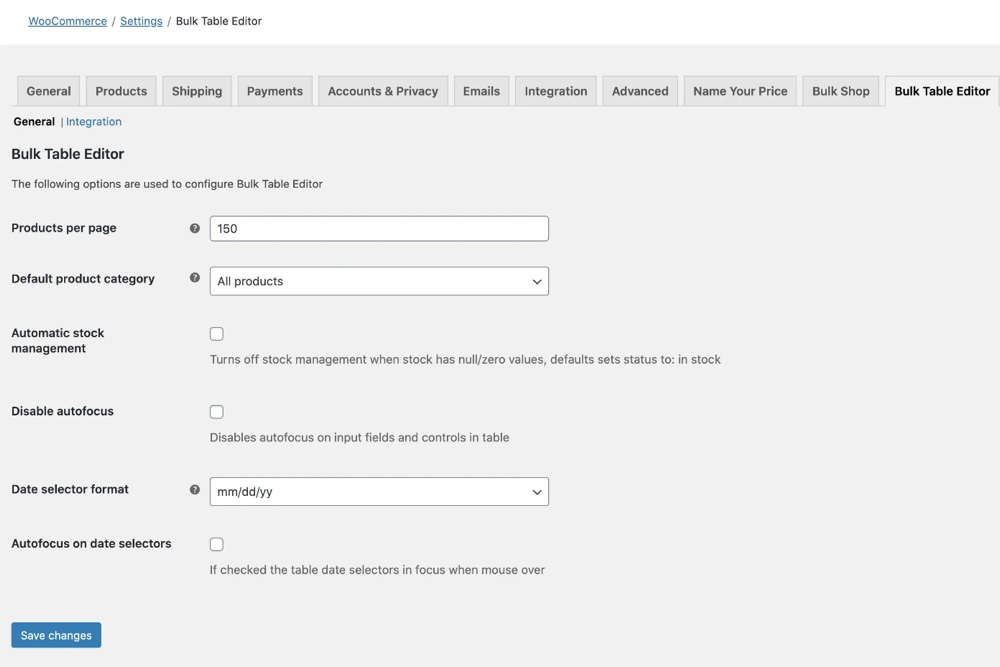
Step 2: Configure & Bulk Edit Products
With the plugin installed, you’ll find a new tab added to your main WooCommerce Settings section for the Bulk Table Editor. This is where you can customize the table display and choose options for products per page, product category (or all), auto stock management and date format. There is also an Integrations tab where you’ll find options to edit slugs and add extra columns.
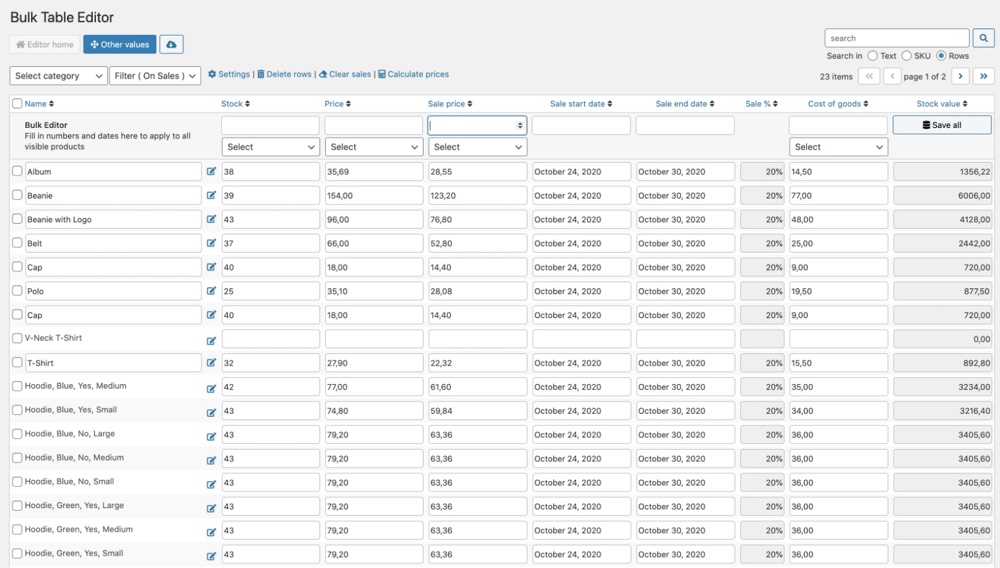
When you’re happy with your selections save your changes and head over to your editor by navigating to Products > Bulk Table Editor.
From here you have quick and easy access to main settings for all of your WooCommerce products. This includes your current stock, pricing, SKU, current sales, COGS, tags and more. To edit simply click on a table cell. You can also filter displayed products to edit specific groups or categories of products. Just click save when you’re done.
The whole reason to edit products in bulk is to streamline your work process and save time – and the Bulk Table Editor by Consortia certainly enables you to do just that.
Well, we have gone through how to bulk edit WooCommerce products with 3 bulk edit plugins, isn’t it? Now, it’s time to wrap up!
There are many bulk edit plugins available to edit WooCommerce product properties. Some plugins come up with advanced features to filter the products finely and accurately and provide almost all product properties to edit by default. Some other plugins are dedicated to editing particular product properties such as images or product prices. You can choose the plugins for your WooCommerce store according to your requirements.


