Accessibility Checker by Equalize Digital Guide
I think you will agree when I say: As a website owner, you want to attract as many visitors as you can. After all, traffic is the lifeblood of every website. But is your website accessible to everyone? And this is why today we’ll be taking a look at the Accessibility Checker by Equalize Digital.
If your WordPress website is not accessible, millions of users with disabilities or different devices will miss out on your products and services.
Website accessibility is all about creating a high-quality website that everyone can use. I’m talking about the kind of website that has elementary issues that make the website hard for certain groups of people.
“The power of the Web is in its universality. Access by everyone regardless of disability is an essential aspect.” – Tim Berners-Lee, W3C Director and the inventor of the World Wide Web.
Web accessibility covers all disabilities that affect the way people use the website, including:
- Cognitive
- Visual
- Physical
- Auditory
- Neurological
- Speech
Note that web accessibility is not meant for people with disabilities only. It also benefits people using different hardware and software to access your website.
Web accessibility is crucial for people who use smart TVs, smartwatches, mobile phones, and other devices with varying screen sizes to access your website.
Why is web accessibility important?
- Well, for starters, it makes your website usable by people with disabilities, which is important from a humanistic perspective.
- Secondly, eliminating web accessibility issues on your site improves usability and user experience for everyone.
- Thirdly, you can expand your target audience, which gives you an advantage over your competition.
The best part is accessibility is easy to implement on your WordPress website. You simply need to eliminate all the issues that make your website hard to use for certain people.
And for that, you need an accessibility tool that helps you to scan your website without breaking a sweat.
Accessibility Checker by Equalize Digital is one such tool. It’s one of the easiest accessibility scanners you’ll find and helps you to identify accessibility issues that could potentially send a chunk of your visitors away.
In today’s review, we delve deeper into what makes Accessibility Checker one of the best plugins to test and fine tune accessibility for WordPress. As usual, we will take it for a spin to see the magic in action. Without further ado, let us get down to business!
What is the Accessibility Checker Plugin?
Accessibility Checker, developed by the team at Equalize Digital, is a fantastic WordPress plugin that helps you to test accessibility on your website. It’s an easy-to-use tool that shows you web accessibility errors and warnings right on your post/page edit screen.
The plugin scans your content automatically when you save a draft or publish your post/page. As such, you get real-time information about the accessibility of your post/page long before you release it to the world.
The tool also guarantees ongoing accessibility and compliance, since content contributors can confirm they have entered content in an accessible form.
Accessibility Checker by Equalize Digital is precisely the tool you need to make your website accessible and compliant with Web Content Accessibility Guidelines (WCAG).
The base plugin is 100% free to download and use at WordPress.org, but there is a PRO version with a lot more features such as full site accessibility scans, the ability to scan additional post types, user restrictions, and much more.
Whether you perform manually accessibility checks or not, the Accessibility Checker plugin is the best tool for small businesses and large organizations alike.
It doesn’t matter the type of website you want to scan, be it a huge eCommerce store with thousands of products, a small portfolio website, or a multi-site network, Accessibility Checker works as advertised.
It’s incredibly simple to set up and use that you should be up and running in less than five minutes. That, plus you get accessibility reports without tinkering with buttons and settings.
There are plans to add more features in the future, so you can expect the Accessibility Checker WordPress plugin to continue developing.
Now that you know what we are working with, let us cover the features you can expect.
Accessibility Checker Features
Accessibility Checker offers you the perfect set of features to check and fix accessibility issues on your WordPress website. The plugin doesn’t come with feature bloat.
Here are some of the features you can expect:
- Unlimited scans whether you’re using the free or PRO version
- No third-party APIs that slow your website with external scans
- Scan password-protected websites such as staging sites
- No per-page fees
- Scan pages, posts, and custom post types
- Full site scanning including archives and taxonomies
- Supports your favorite plugins such as WooCommerce, Beaver Builder, Elementor, and Advanced Custom Fields
- Ignore errors and warnings selectively
- Restrict users that are allowed to ignore accessibility errors and warnings
- Flesch-Kincaid grade level readability scans
- Simplified summaries for WCAG 2.1 AAA compliance
- Detailed documentation
- Email, phone, and Zoom support
- And more
The Accessibility Checker plugin is packed to the brim with all the features you need to check if your website is accessible. The plugin helps you see how your content stacks up against more than 40 accessibility checks.
But how much does the Accessibility Checker WordPress plugin cost?
Accessibility Checker Pricing
As we mentioned earlier in the review, there is a free version of the Accessibility Checker plugin at WordPress.org. That version is great if you’d like to try the plugin before you buy. It’s also perfect if you’d like to use it as a monitoring tool for an already accessible website.
If you need the full power (or just want to be certain your site is as accessible as possible), it’s best to go with Accessibility Checker PRO.
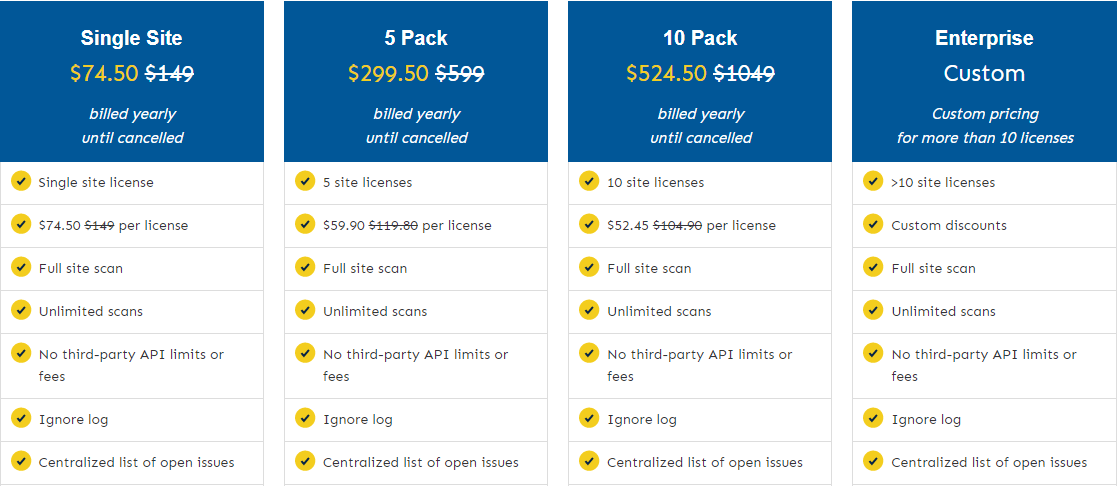
Equalize Digital offers you four pricing packages namely:
- Single Site Plan, which costs $74.50 per license per year (normally, $149 per license per year without the 50% discount they are offering at the time of writing)
- 5 Pack Plan at $299.50 per year for five site licenses (normally $599 per year). That translates to about $59.90 per license per year.
- 10 Pack Plan, which sets you back $524.50 for 10 site licenses (normally $1049). That is about $52.45 per license per year.
- Enterprise Plan with custom pricing for more than 10 site licenses. Contact Equalize Digital for a custom quote.
As usual, always go for a pricing plan that works for your business needs and budget. That out of the way, let us install the Accessibility Checker free version as well as the PRO version and check out what we have.
How to Set Up the Accessibility Checker Plugin
Setting up the Accessibility Checker WordPress plugin is the stuff of fourth-graders. It’s so simple you don’t need any technical expertise.
Since the free version is available on the official WordPress plugin repo, we can install it directly from the WordPress admin dashboard. Also, note that you must first install the free version before installing the PRO version or the latter won’t work. That said, let us start.
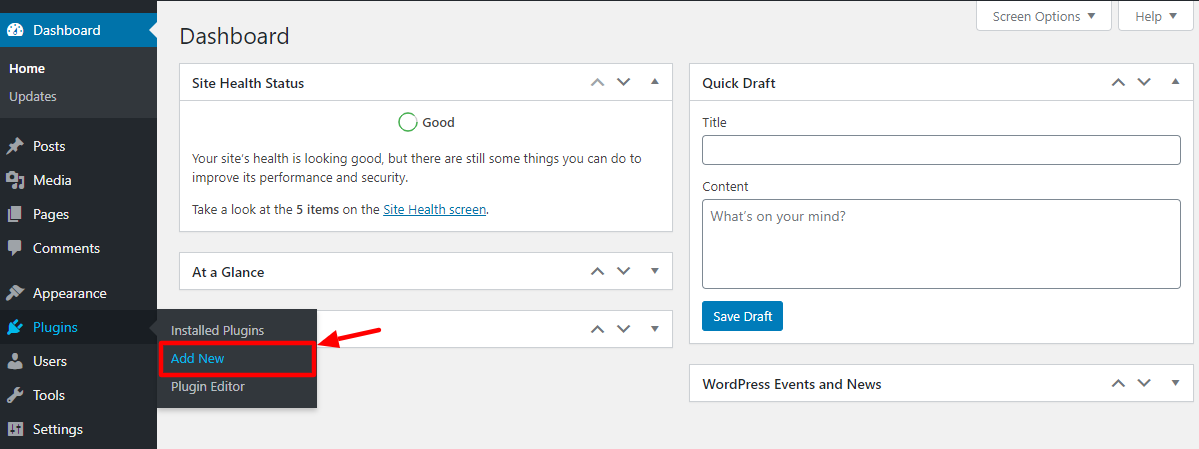
Navigate to Plugins > Add New, as we highlight below.
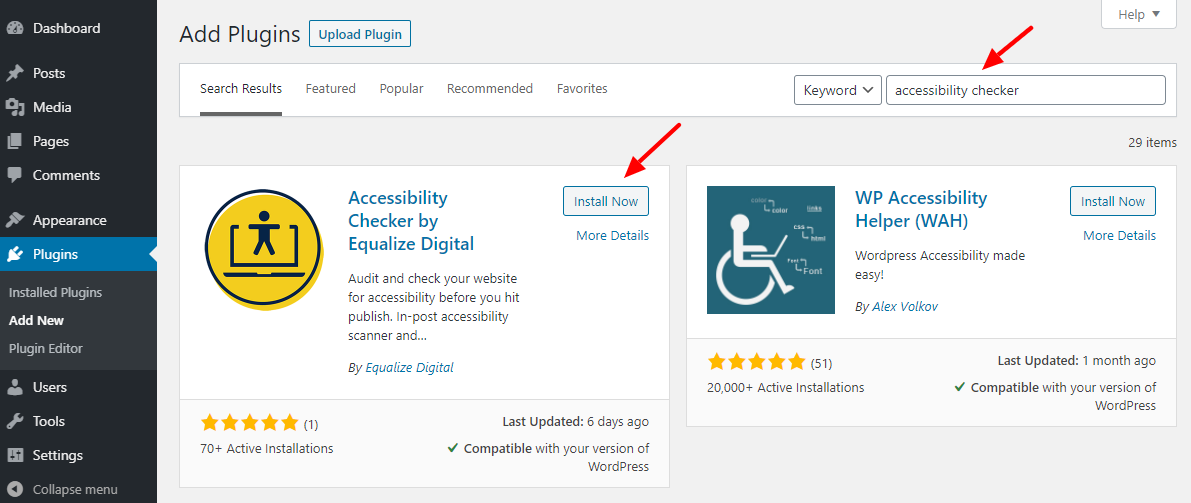
Next, enter “accessibility checker” in the keyword search box, and hit the Install Now button once you find the plugin (ensure it is by Equalize Digital), as shown below.
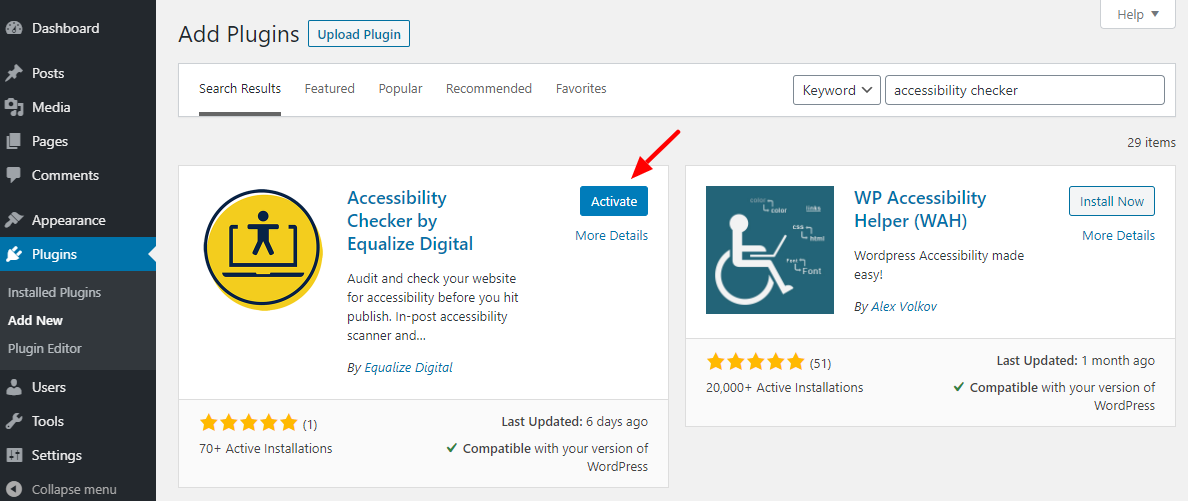
After that, click the Activate button to get the ball rolling, as we highlight in the screengrab below.
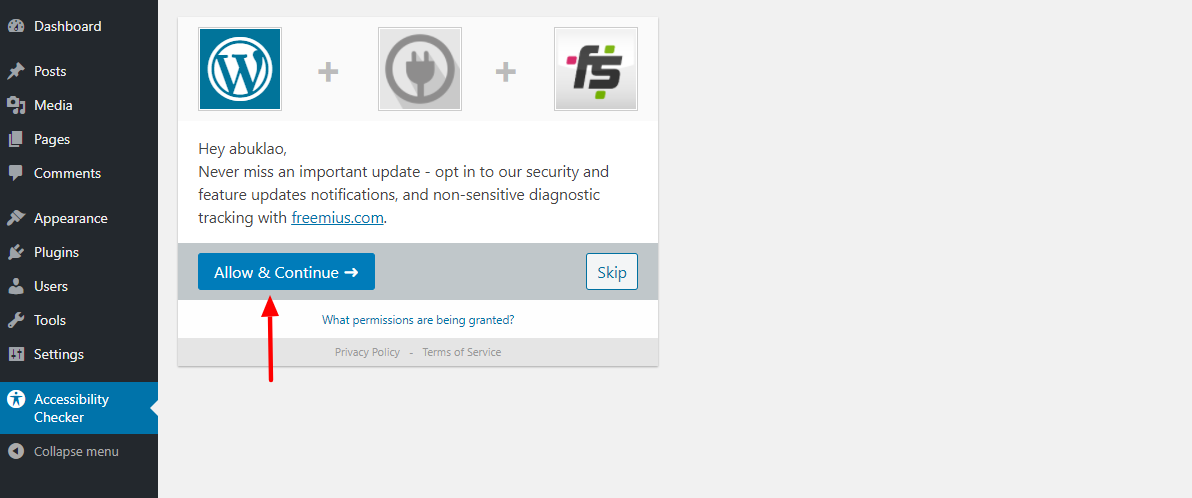
After that, click the Allow & Continue button to opt-in to security and feature updates:
Doing so leads you to the Accessibility Checker welcome page, which looks like so:
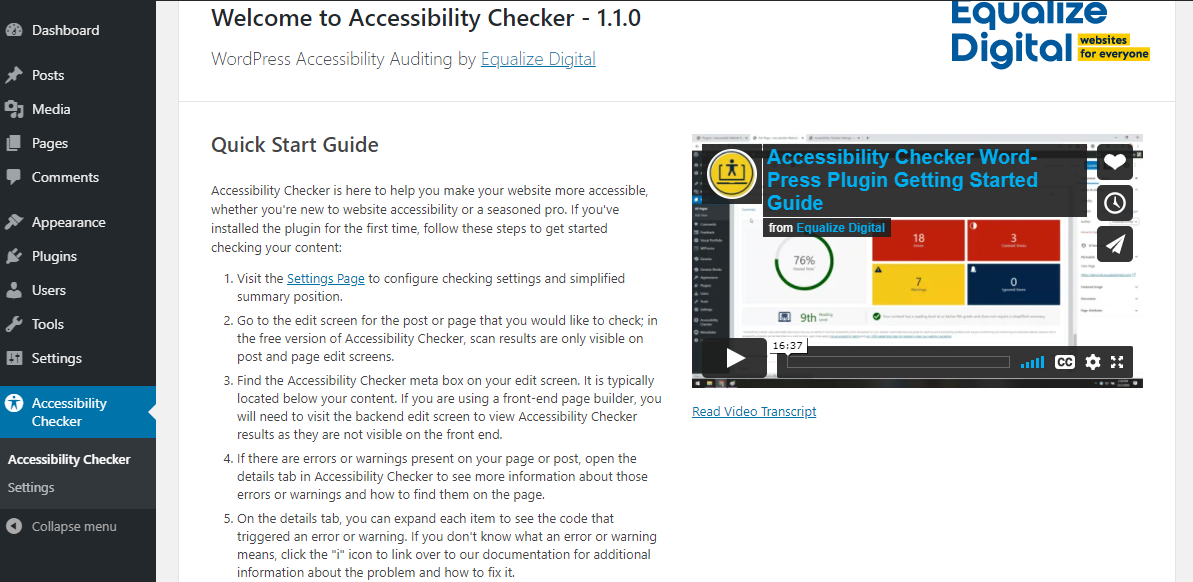
The above welcome screen has a lot of information to help you hit the ground running. There is a quick start guide, and the same video we shared earlier in the review. Scroll further down and you have links to Accessibility Checker official documentation and support forum.
Before we check out the Settings tab, let us install the Accessibility Checker PRO version. After purchasing, you will receive a compressed ZIP file and license information.
To install the Accessibility Checker PRO version is easy stuff. Navigate to Plugins > Add New, as we highlight below.
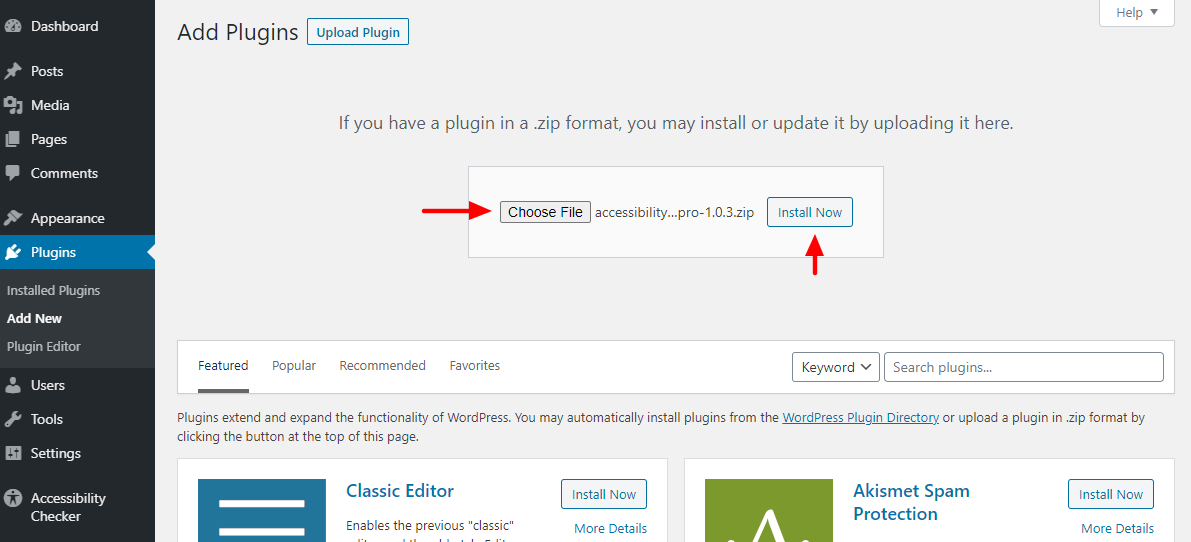
After that, click the Upload Plugin button since you’re installing the PRO version from your device and not WordPress.org:

Choose the Accessibility Checker ZIP file from your system, and hit Install Now, as shown below.
After that, activate the plugin:

You’re doing alright, so far, so good 🙂
Settings
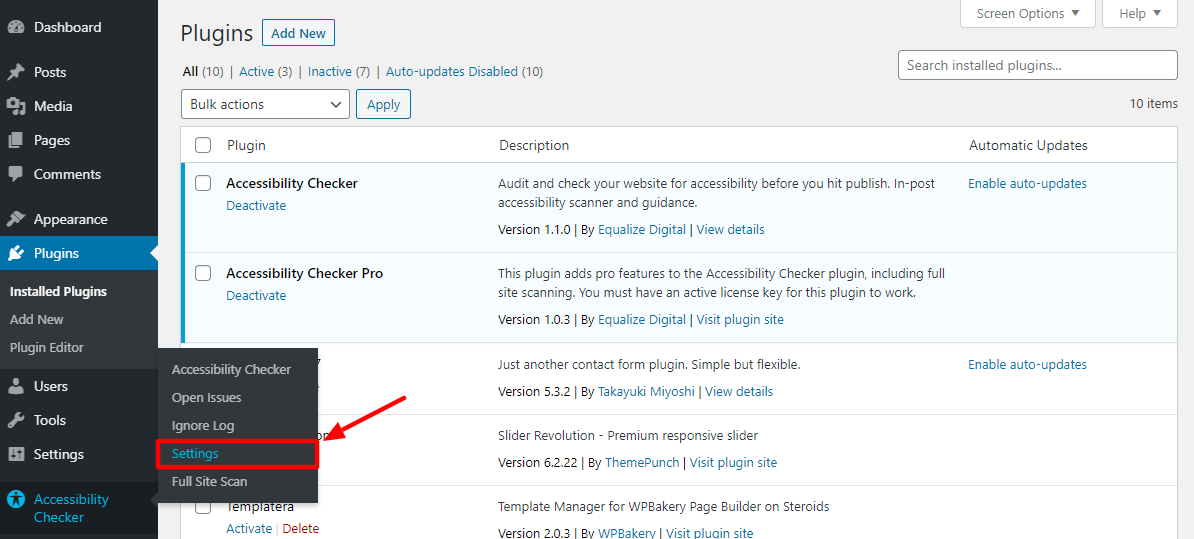
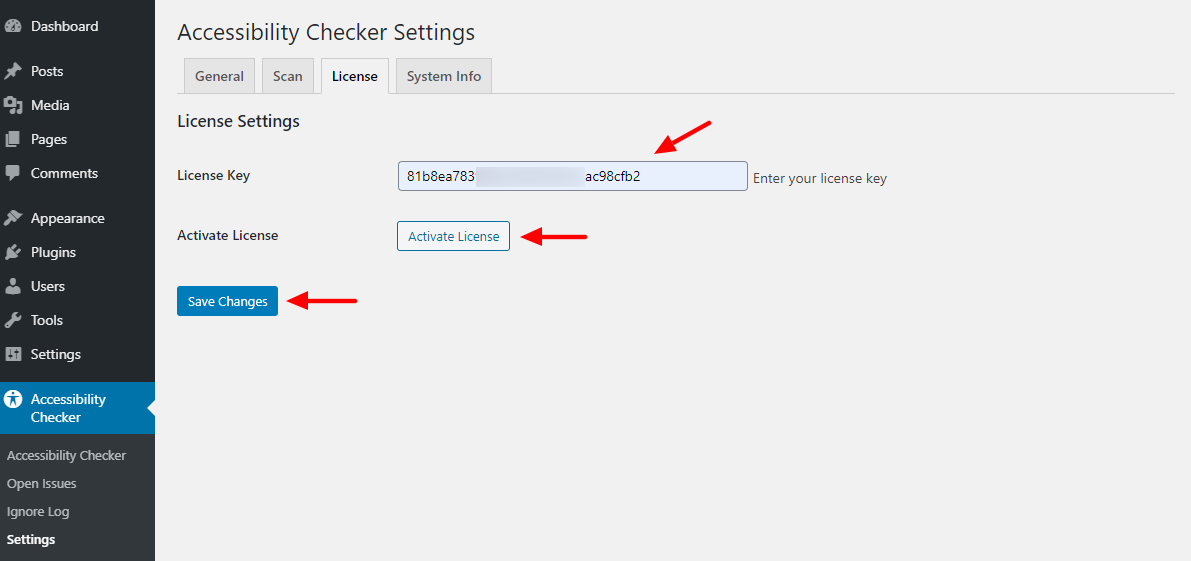
After activation, the Accessibility Checker plugin will prompt you to activate your license. Alternatively, you can activate your PRO license by navigating to Accessibility Checker > Settings:
Next, click the License tab, enter your license key, click the Activate License button and then Save Changes, as shown below.
Now you’re ready to start scanning your post, pages, custom post types, and your entire website for accessibility issues. But before that, let us check out what other options the Settings page offers.
Navigate to Accessibility Checker > Settings:
Doing so leads you to the General tab:

The General tab offers you several settings to configure the Accessibility Checker plugin further. They include:
- Option to choose which post types to scan
- Fields to enter your username and password if you’d like to scan a password-protected site
- Checkbox to delete all Accessibility Checker data when you uninstall the plugin
- Choose user roles that have permissions to ignore issues
- Settings for your simplified summaries
- Ability to add a footer accessibility statement that shows your visitors your website is accessible and WCAG compliant
After the General tab, you have the Scan tab:
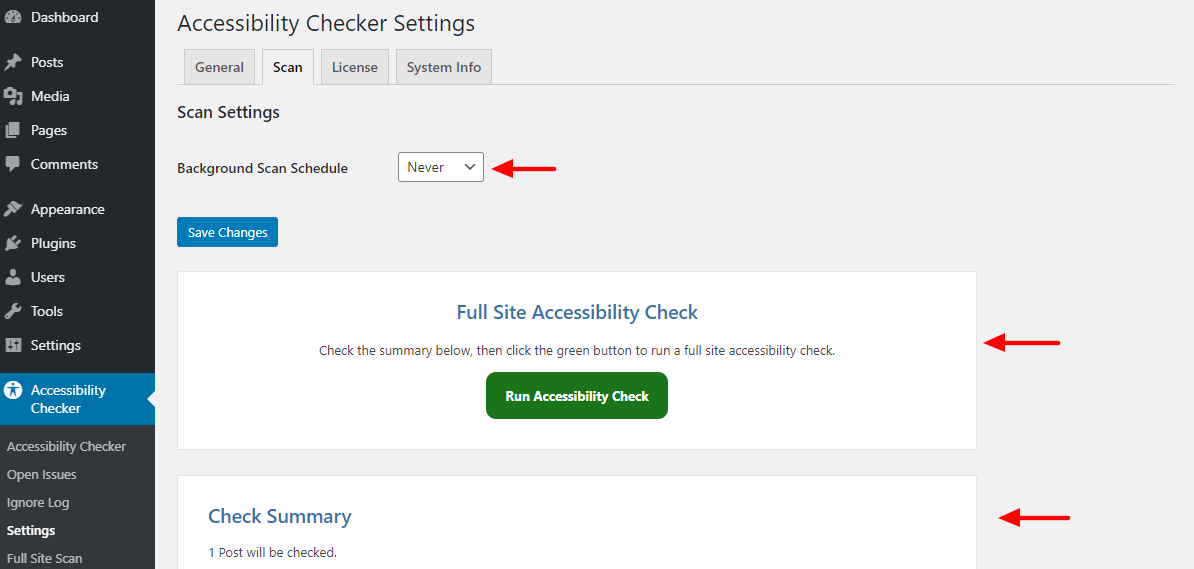
Under the Scan tab, you can:
- Schedule weekly or monthly background scans
- Run a full site accessibility check
- And read a summary of the results
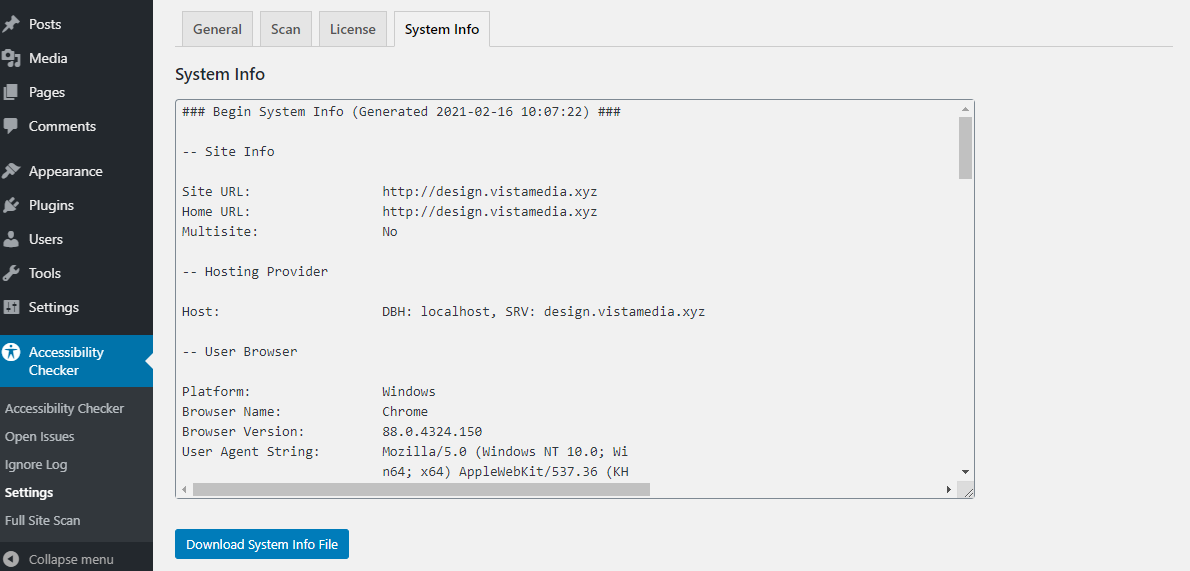
Lastly, we have the System Info tab, which shows you just that – system info:
Now, let us open a sample page or post, so we can see Accessibility Checker in action right inside the page/post editor.
Navigate to Pages > All Pages:
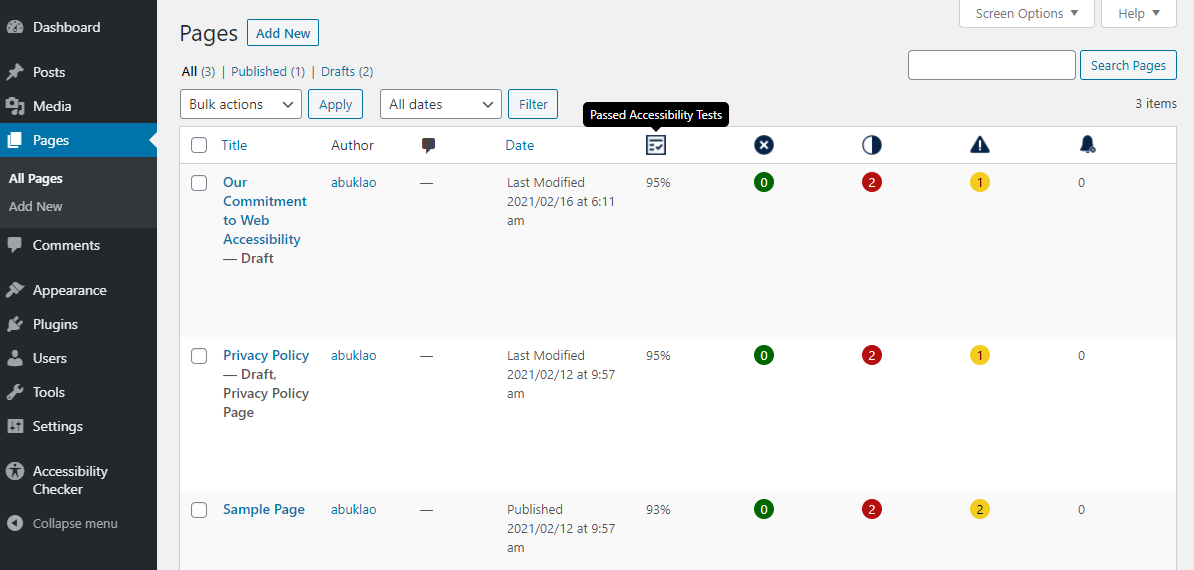
As you can see from the above screenshot, Accessibility Checker is already showing you some accessibility results long before you open any page/post in the editor.
Open any page/post and scroll to the bottom where you will see the Accessibility Checker meta box:
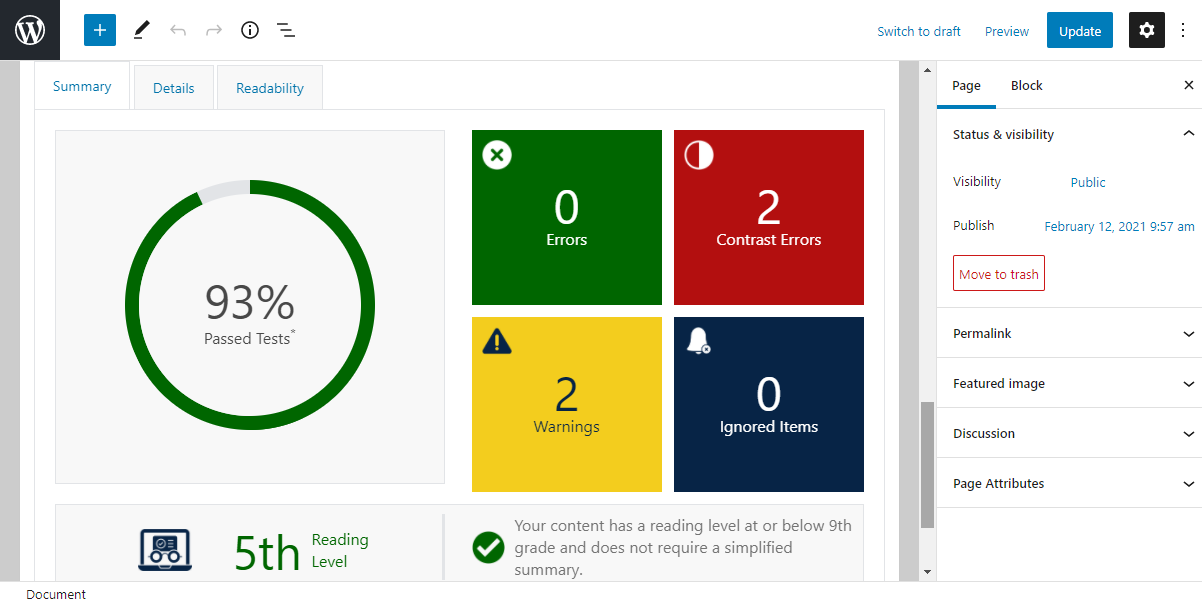
Firstly, you have the Summary tab, which offers you an overview of that page’s accessibility. Passed tests, errors, reading level, and warnings are highlighted in the Summary tab.
Next to that, you have the Details tab, which offers more information about passed tests, errors, and warnings:
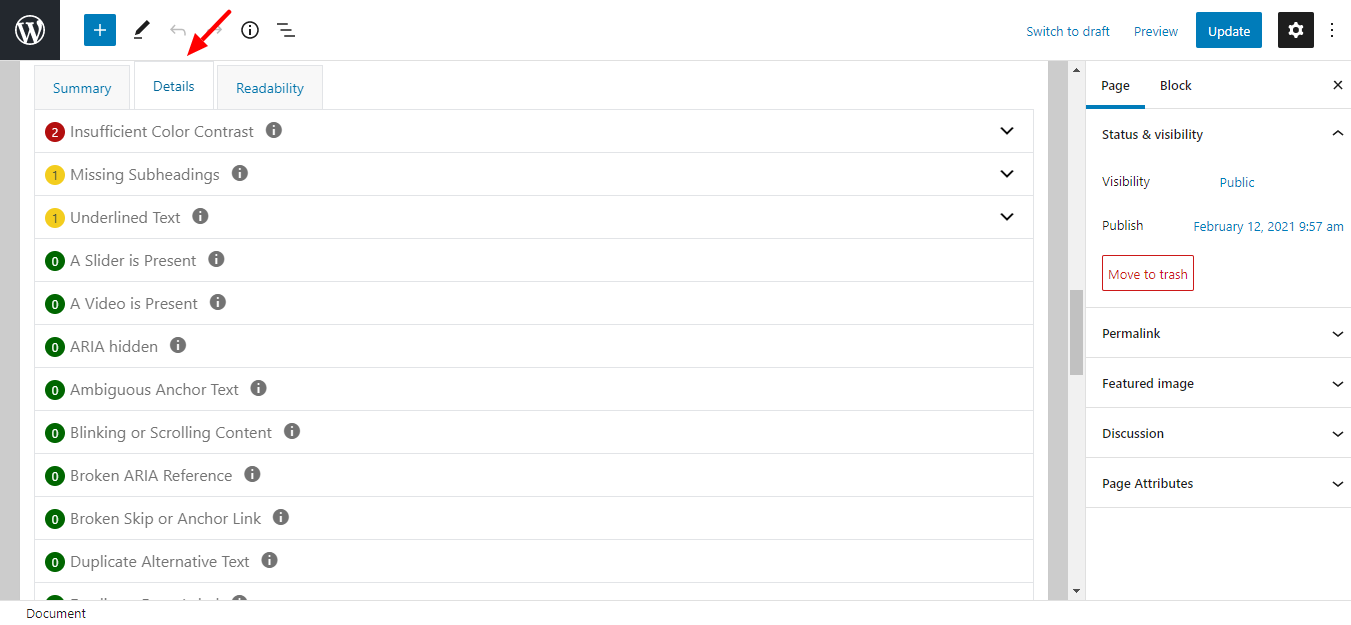
Here, you can see the affected code, and how to fix each error or warning. You also have the chance to ignore whichever issue you want.
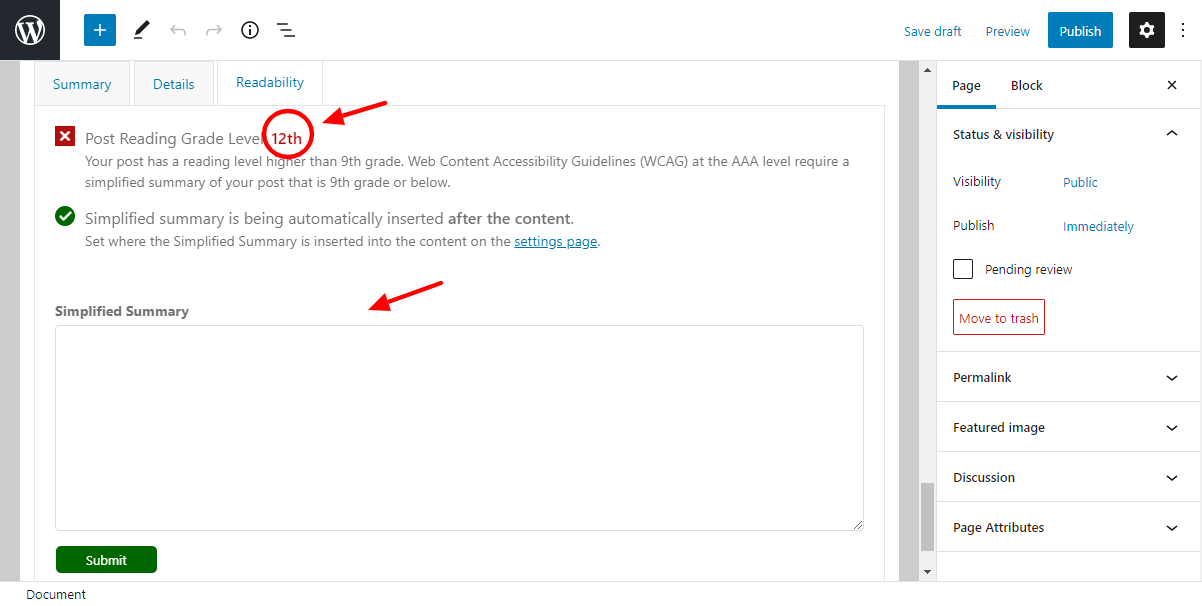
And lastly, we have the Readability tab:

The readability tab shows you whether your content is difficult to read. If the reading level is above 9th grade, you will be prompted to add a simplified summary. You know, something like this:
Other Options
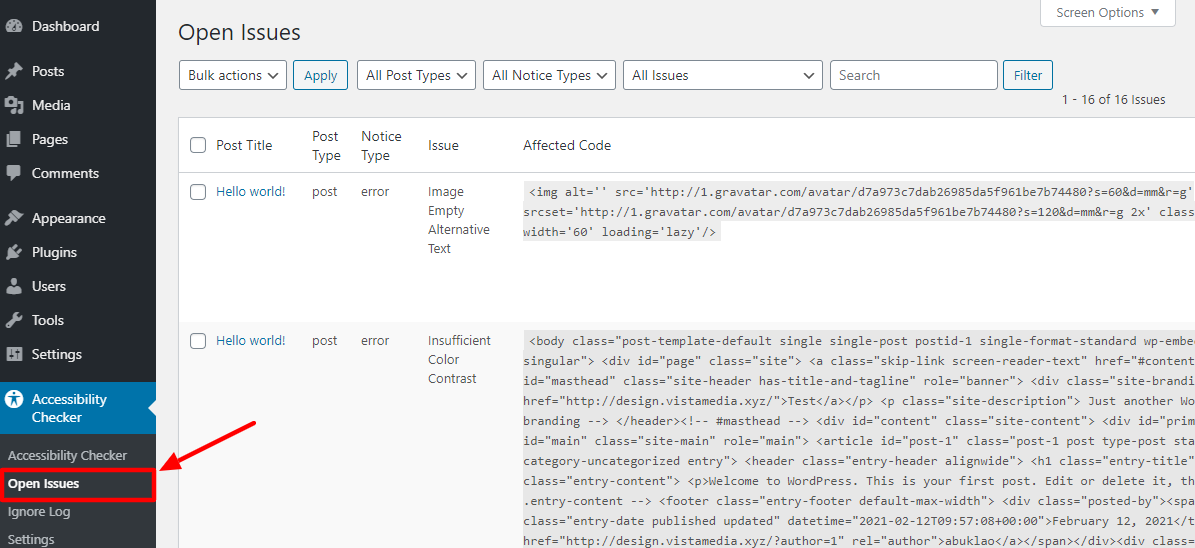
Accessibility offers you other options under the main menu. If you’d like a snapshot of all the accessibility issues on your website, navigate to Accessibility Checker > Open Issues, as shown below.
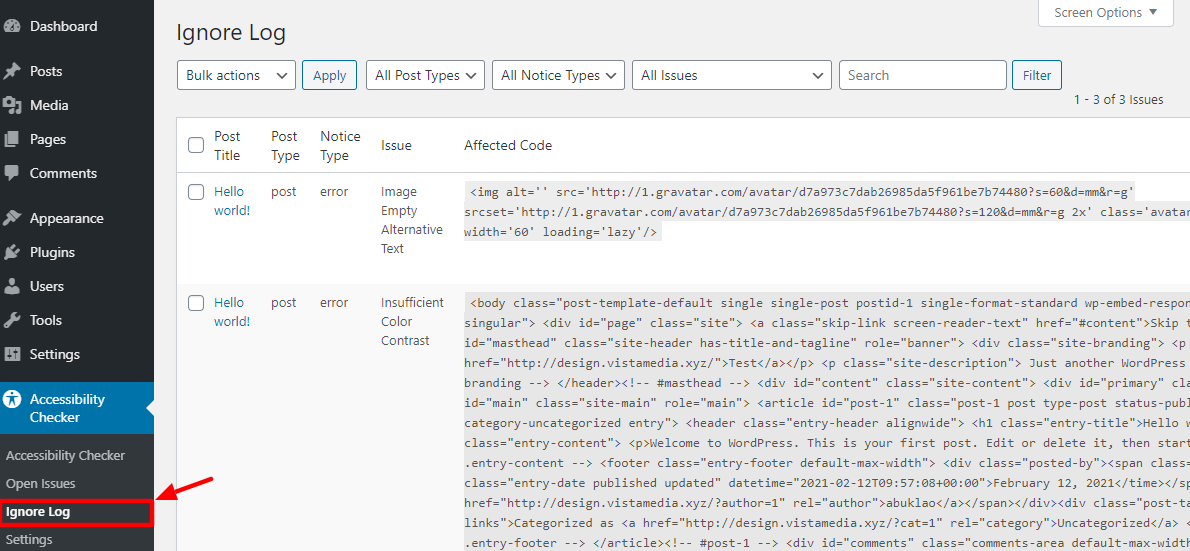
To see all the issues that you or any other user has ignored, navigate to Accessibility Checker > Ignore Log, as we highlight below.
And that is all there is to it! Accessibility Checker is incredibly easy to use.
Web accessibility is all about creating high-quality web experiences that are accessible to all and sundry. It’s all about making the web usable for all. It’s important to scan your website for accessibility issues to ensure you’re not excluding certain people from your products and services.
With a plugin such as Accessibility Checker, you can now check the accessibility of your entire website in a matter of minutes. When you find errors and warnings, take the time to fix the issues, so we can create an accessible web for us all.
What are your thoughts? Please let us know in the comment section below.