How To Set Up WordPress Email Logs


How do you check email logs in WordPress? If you’re running a website, you’re probably using WordPress. And you’re probably allowing for site emails – whether they’re just basic password resets, contact forms or perhaps a newsletter. WordPress is not just your ordinary platform. Apart from the fact that it’s affordable, you can improve the software’s functionality on your own. One of the ways you can do that is by installing plugins.
The email log is one such awesome plugin. It’s great because it allows you to monitor all emails sent from your WordPress site. If you haven’t set up the WordPress email log just yet, you should! In this article, we’ll look at how you can do just that.
Ready? Let’s start!
Why Set Up Email Logs for WordPress
I’ve mentioned what email logs on WordPress can do for you. The question then is this: Why should you log those emails sent from your website in the first place?
It’s simple, really. When you have a record of all the emails sent by your website, you can ensure your site operations are always on track.
Imagine if you had to check if a specific email was sent to the right person. With email providers it’s easy to do that. As soon as you create a new Gmail account, for example, you can immediately access the Sent folder to check. WordPress websites, on their own, can’t do that. Without the logs, it would be impossible for you to trace your site’s steps and make the necessary corrections if needed.
Besides, the logs can also show you if those emails sent from the website have actually been delivered. In essence, then, they also help ensure your site–at least where the delivery of emails is concerned–is working as it should. So if there are email deliverability issues, you can immediately take the necessary steps to fix the problem.
In other words, when you set up email logs on your website, you ensure your website operations run smoothly and efficiently.
How to Set Up Email Logs in WordPress
So, how can you set up your WordPress email logs? You’d have to choose your preferred plugin first. Among the options you have are WP Mail SMTP Pro, Email Log, and WP Mail Logging. In this section, we’ll look at how you can get everything set up with WP Mail Logging plugin, in particular, since it is the most known among WordPress users.
1. Install the WP Mail Logging Plugin
You’d need to install the plugin first, of course. That part’s quite easy. After accessing your WordPress site, do the following:
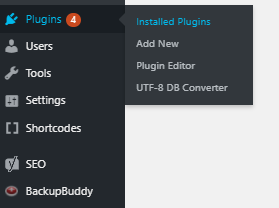
- On the Dashboard, click on Plugins:
- Click on Add New.
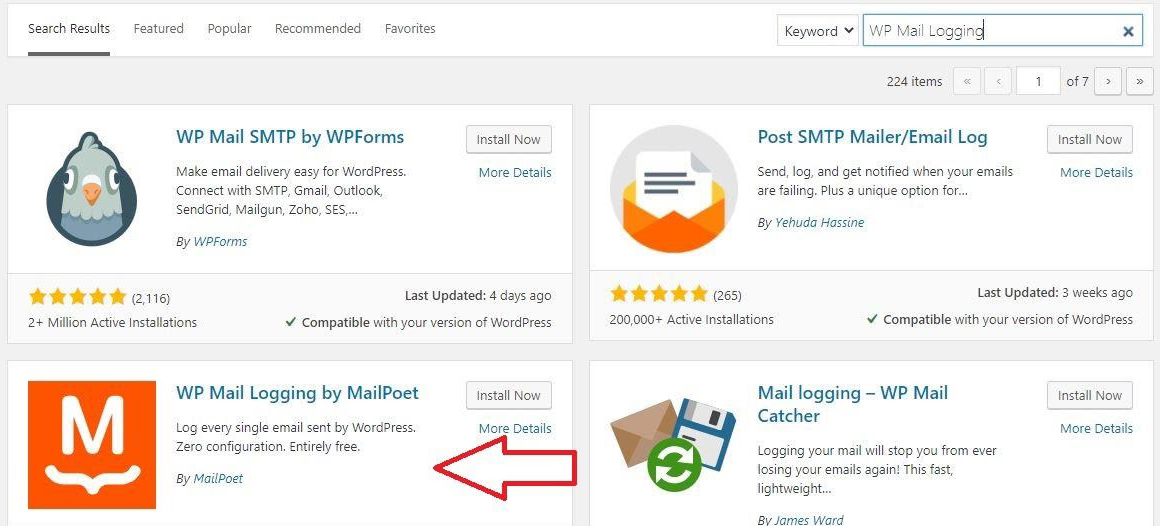
- If you can’t find the WP Mail Logging Plugin on the list that comes out, use the search feature.
- From the list that WordPress gives you, just pick the WP Mail Logging Plugin by MailPoet.
- Click on the Install button.
You’ll know you’ve installed the plugin when the Install Now button turns into an Activate button. Click on that Activate button.
2. Set Up Your Plugin
Now that your plugin is activated, it’s time to customize it.
You can do that by looking for the WP Mail Logging plugin on that list WordPress automatically gives you right after you activate the same:
That list looks something like this:
Since my list is alphabetically arranged, I had to go to the bottom of the list to find the WP Mail Logging plugin:

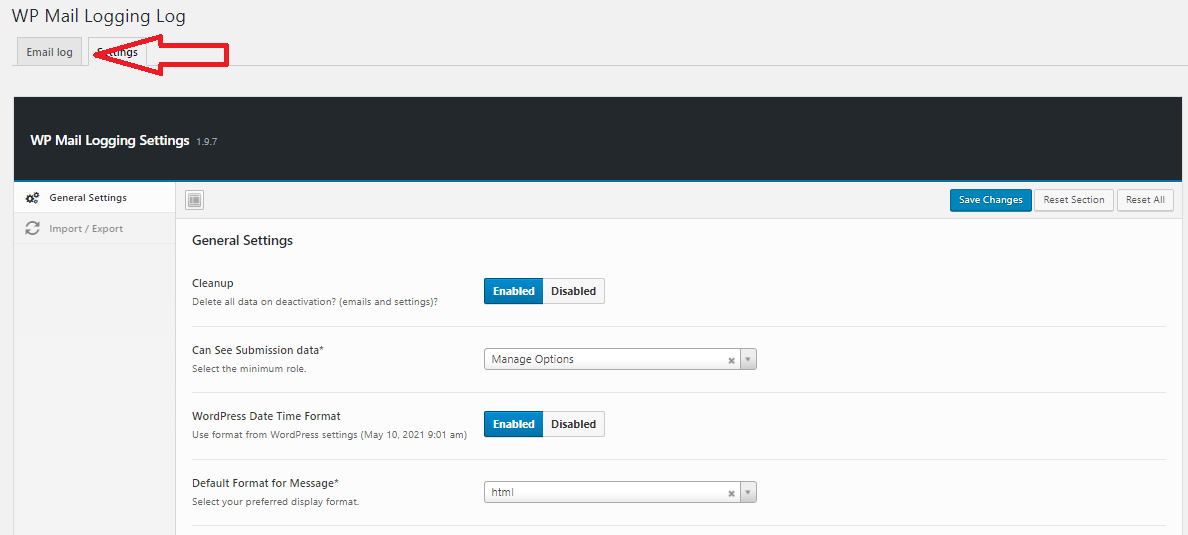
Once you find the plugin, click on Settings and customize according to your preferences.
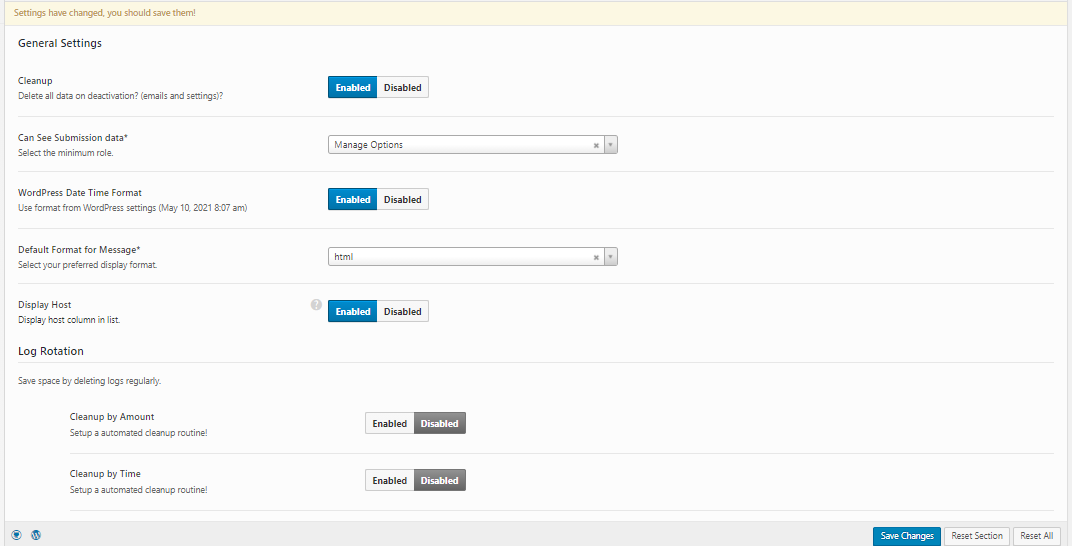
You can ask the plugin to delete all your WordPress data on deactivation. You can also set up an automated cleanup routine by time or amount.
Don’t forget to save the changes you made.
3. View Your WordPress Email Log
To view your email log, your website needs to send out an email first. The plugin, after all, won’t be able to show you the emails your website sent before you installed it.
To get your site to send an email, do the following:
- Log out of your website.
- Click on Forgot Password.
- Log back into your website.
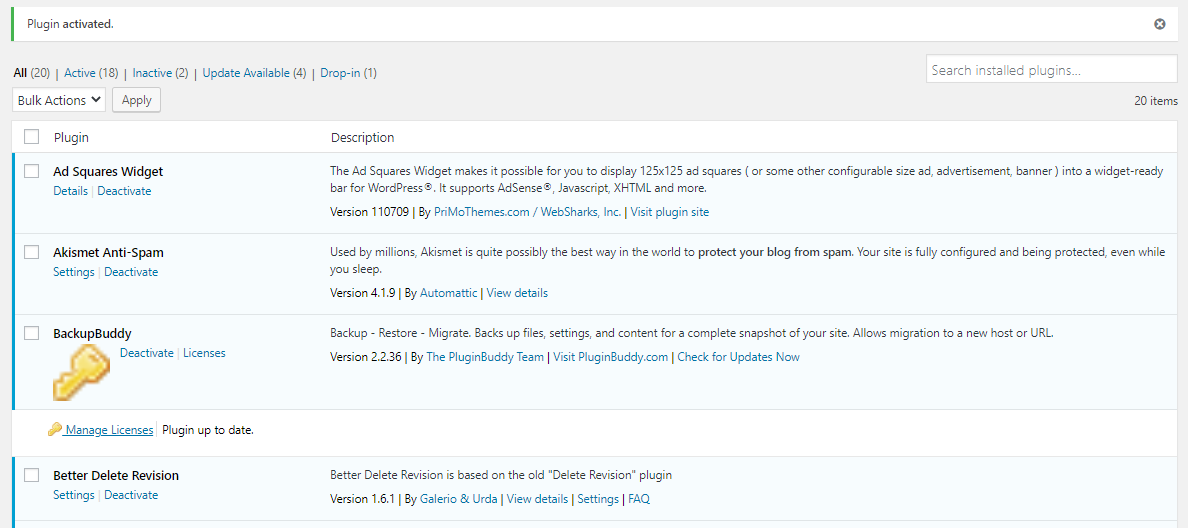
Once on your WordPress Dashboard, look for Plugins again. This time, though, click on Installed Plugins:
You will again get a list of the plugins you’ve installed on your WordPress site. Then do the following:
- Look for the WP Mail Logging plugin on the list.
- Click on Settings.
- Click on Email Log. It’s right beside Settings.
You should then see that lone email you sent, with additional details such as the host, the email address of the recipient, and the subject of the email, in this case, a password reset.
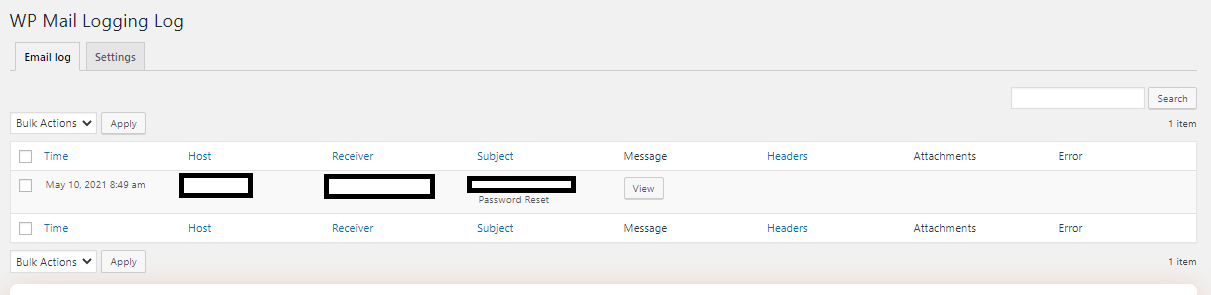
You’ll also get the date the email was sent by your website and the exact time.
4. Check in Detail Emails Sent
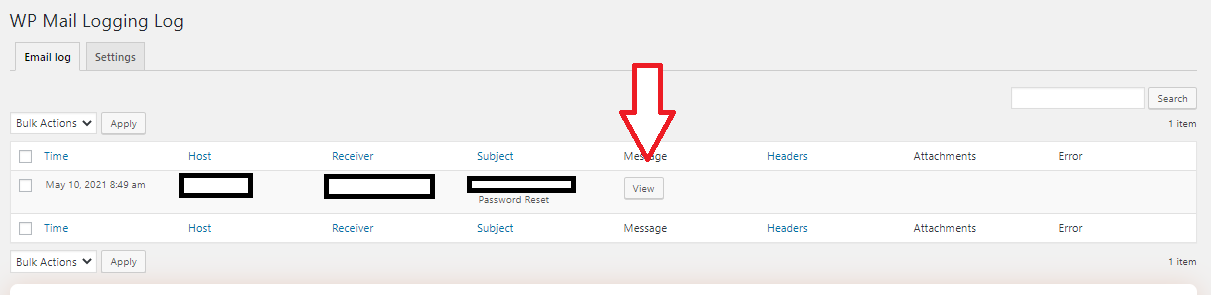
You can also check the exact content of each email your website sent (or tried to send). On the email log, just choose the email you’d like to read and click on View under the Message column:
Your password reset email should look something like this:

By clicking on the View button, you can also see if the email came with any attachments or headers. More importantly, you’ll also see if there was an error in the sending of the message.
Troubleshooting
Let’s say based on your email log, you found an email wasn’t sent to the intended recipient.
At this point you should try to isolate the problem first.
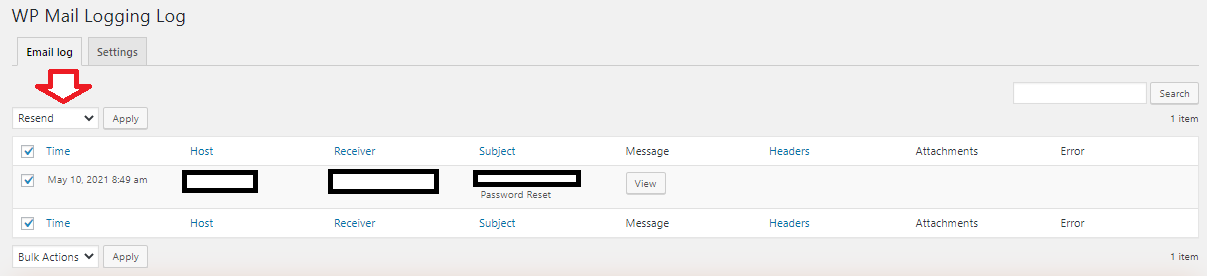
Try resending the email again. You can do that from the email log. Follow these steps:
- Check the box of the email you’d like to resend.
- Go to Bulk Actions. Switch that option to Resend.
- Then, click on Apply.
You should immediately get an updated email log that includes that email you just sent. If that email was sent, then you can at least conclude the problem isn’t your Personal Home Page Mail. You might want to take a look at your server. If you’re using shared hosting, it’s possible someone was sending too many emails the server ended up getting blacklisted.
If that email, on the other hand, wasn’t sent again, then the problem might just really be your PHP Mail.
Just use the plugin features to isolate the problem. Because once you know the cause, you can make the necessary adjustments.
WordPress’ email log plugins are a great addition to your website. They can help you keep track of the emails your site sends. When you monitor those emails, you’ll know whether they are actually sent to the intended recipients or not. That can help you determine issues even before they become a big problem.
The good news is, there are WordPress email log plugins you can install for free. The WP Mail Logging plugin is an example. Once installed, it’s also pretty easy to set up. Just follow this guide and start tracking.
You’ll see your website operations running smoothly and efficiently.