How to Create a Client Questionnaire with Gravity Forms

If you are a web freelancer, one of the hardest parts of getting clients is figuring out if they are the right client for you. Using a questionnaire with your potential clients to gather all the project details is a great way to start the process and determine whether to proceed. However, it seems like a lot of work.
Fortunately, WordPress comes to the rescue! One of its most popular form plugins, Gravity Forms, makes it really easy to set up a form on your website with everything you need to manage your pre-sales questions. Its powerful features will help you easily create a questionnaire that suits your needs.
This article will take you through the process of creating a questionnaire with Gravity Forms so that you can start impressing your prospects.
What You’ll Need
Before we get into it, let’s take a quick look at what you will need to create your client questionnaire.
- A website on WordPress. This is pretty obvious. Gravity Forms is a WordPress plugin so you will need to already have your website up and running on WordPress. If you’re new to this, take a look at our guide on how to get started with WordPress.
- The Gravity Forms plugin. Gravity Forms is a very powerful WordPress plugin for creating forms, which integrates seamlessly with the WordPress dashboard. Beyond just forms, Gravity Forms has several add-ons for more complex functionality, such as surveys and polls.
- An outline of your questionnaire. You need to have some idea before you start of what you want to ask to identify ideal clients. Think through some of the things you would want to know both about the client and their project, and make some notes before creating the questionnaire.
Installing and Configuring the Plugin
Now that you’re ready to get started, head over to the Gravity Forms site and purchase a basic License ($59), which will be fine for our questionnaire. You can always upgrade to a higher license option after you decide that Gravity Forms is your form plugin soulmate.
Installing Gravity Forms is just like installing any other WordPress plugin. After purchasing the license, you can download the zip file from inside your Gravity Forms account and upload to WordPress under Plugins > Add New.
After activating, there are some initial steps you will need to complete before creating your first form. The Gravity Forms documentation has a Getting Started page that will walk you through obtaining your license key and and using the setup wizard.
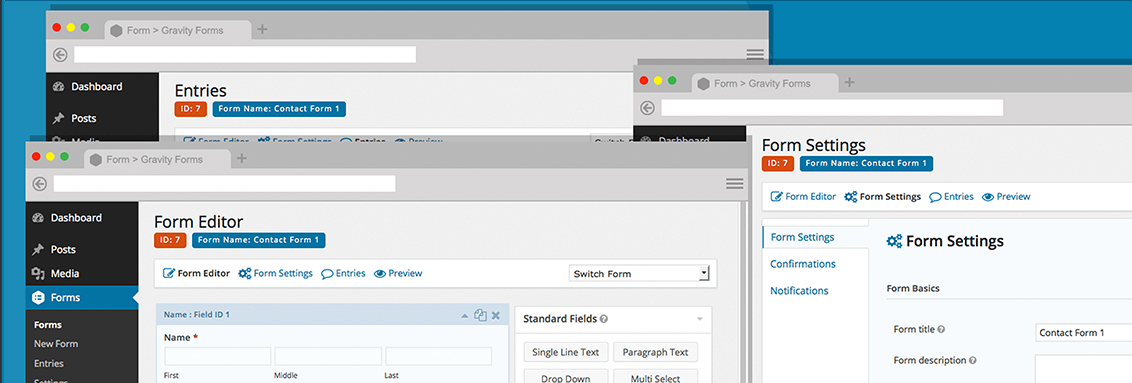
Creating Your Form
When you finish with the setup wizard, you should be on the form creation page. If you took a break, just click on Forms > New Form in the menu on the left. You will need to enter a name for the form and click the Create Form button.
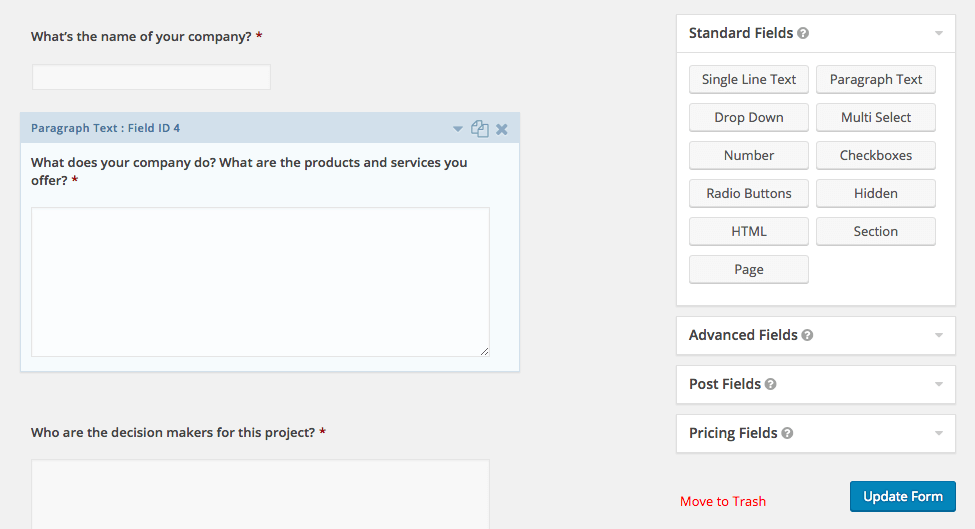
The field types on the right are grouped into multiple categories:
- Standard. These are your basic form fields such as text boxes, radio buttons and drop downs.
- Advanced. The fields included here provide specific formatting such as email addresses, phone numbers and website URLs.
- Post. These include title, body, excerpt and other fields that enable you to create draft posts in WordPress from the data submitted through the form.
- Pricing. These include products, quantity, options, shipping and total, which will all come in handy if you decide to use Gravity Forms to create an order form for selling goods and services.
Based on your questionnaire outline (remember that?), you can add the fields you need. You may want to consider having text fields for open ended questions like “What is the name of your company?” and “What products and services does your company provide?”.
For a question like “What is your estimated budget for this project?”, you could try using a drop-down to limit them to the options you specify.
Don’t forget to ask for contact information using name and email fields. Once you think you are done adding fields, hit the Update Form button to save your form.
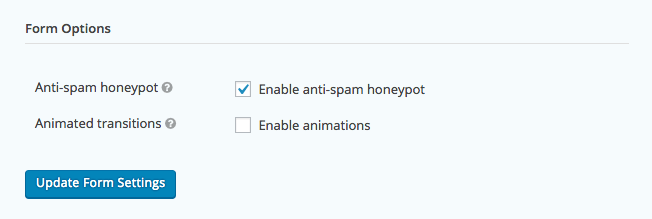
Before you place the form on your website, there are a few settings you will want to configure. Click on Form Settings, and on the first tab, we advise you to enable the anti-spam honeypot. This is a simple way to reduce the number of spam entries your form may attract. Hit the Update Form Settings button and move on.
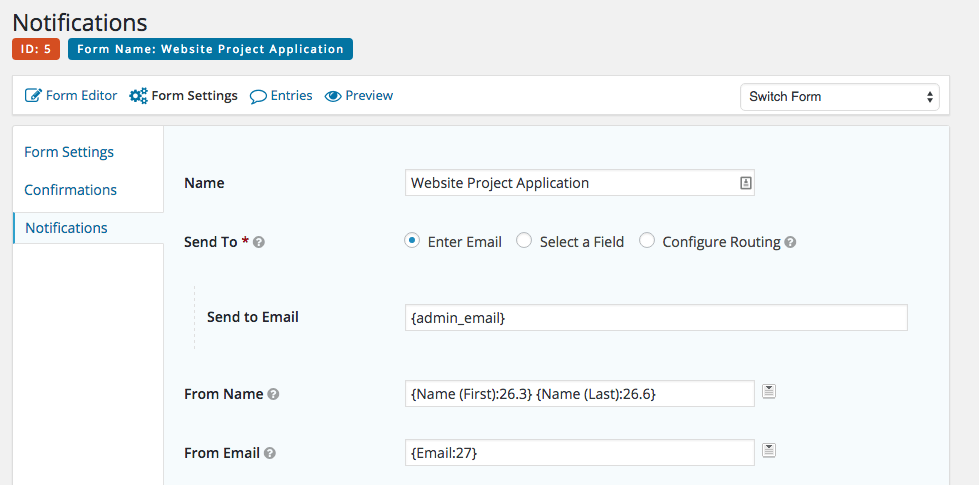
Next, click on the Notifications tab, and make sure that the notification will be sent to an email address that you actually check. If you plan to use the default administrator email address for your website, you can leave this setting. You can also customize the email that gets sent from this screen.
Once you are satisfied, hit the Update Notifications button and your form is ready to be published! Simple, eh?
Publishing your form is a simple matter of adding the form to a post or page on your website. There is now an Add Form button in the WordPress post editor, which will enable you to select your form. Click the Insert Form button and save your post or page. The form is now live on your website!
Going Beyond Basic

Gravity Forms has some other useful features to help take your questionnaire to the next level. You can use the Section field type to group questions and add descriptive text. By doing this you can help to guide your prospective clients through the questionnaire.
If you have more than eight to ten questions, you may want to consider breaking your form into multiple pages. In the standard fields grouping, you will also see a field type called Page. Adding this field to your form wherever you want to break will add next and previous page buttons to your form when viewed by a website visitor.
Gravity Forms includes very powerful conditional logic which enables you to show and hide fields or sections based on responses to previous questions, for example. This could be very useful for asking different questions based on the type of project being requested.
Creating a client questionnaire in WordPress isn’t difficult, and can be done quickly and easily using Gravity Forms. Taking advantage of its powerful features, you will have a very impressive questionnaire perfect for your business.
If you followed along as we went through the steps outlined above, your questionnaire can be created and published on your site today. You could already be directing prospective clients to it and starting to streamline your client process.
We love Gravity Forms and think it is perfect for this application. If you have any questions or suggestions or if you think we left out something, please let us know in the comments.


