How to Add Featured Images In WordPress

Virtually every WordPress theme offers an easy, built-in way to assign a specific featured image to posts or pages. This is main image displayed at the top of a post or page. It’s also sometimes referred to as the post thumbnail, as this image is used as the thumbnail (often a smaller or cropped image) for the post or page in other theme elements. For example, the post grid on your main blog page or a widget with a list of recent posts in your site footer will display a post thumbnail.
Whether you call them post thumbnails or featured images, it’s all the same. But if you are new to WordPress and are having trouble adding featured images on your website then have a look at our guide below. We’ll show you exactly how to properly define a featured image.
Step 1: Edit the Post or Page
The first step to add a featured image in WordPress, of course, is to log into WordPress. Then either (A) create a new post or page, or (B) click to edit an existing post or page.

Step 2: Click on “Set featured image” Link
Next open the window to actually select a featured image. Depending on if you’re using Gutenberg or the Classic Editor, so we’ll show you both.
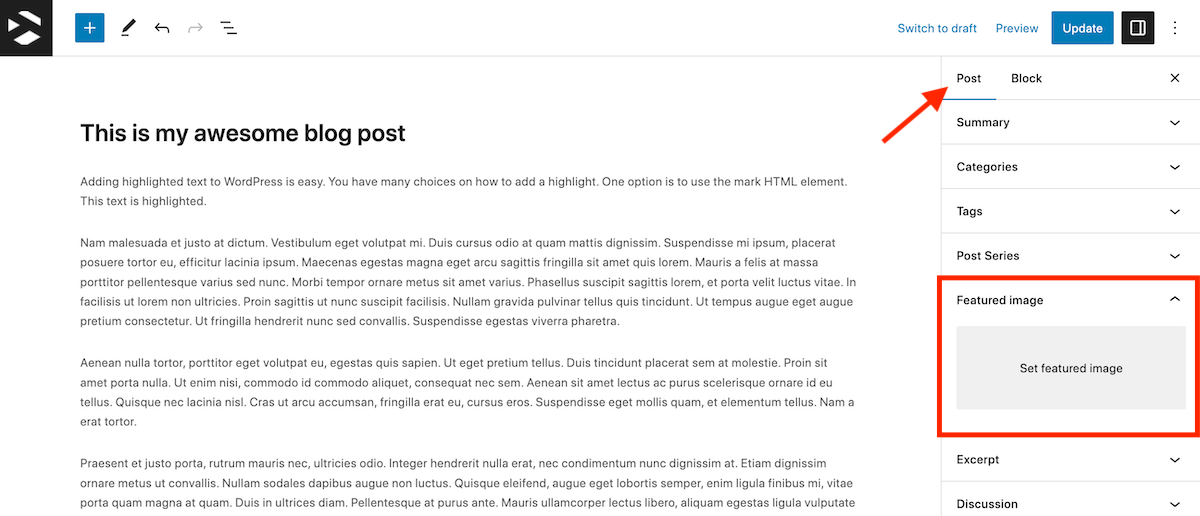
In Gutenberg (see above), click on the “Post” tab and open the section for Featured Image by clicking on the down arrow. Then click on the gray area for “Set featured image.”
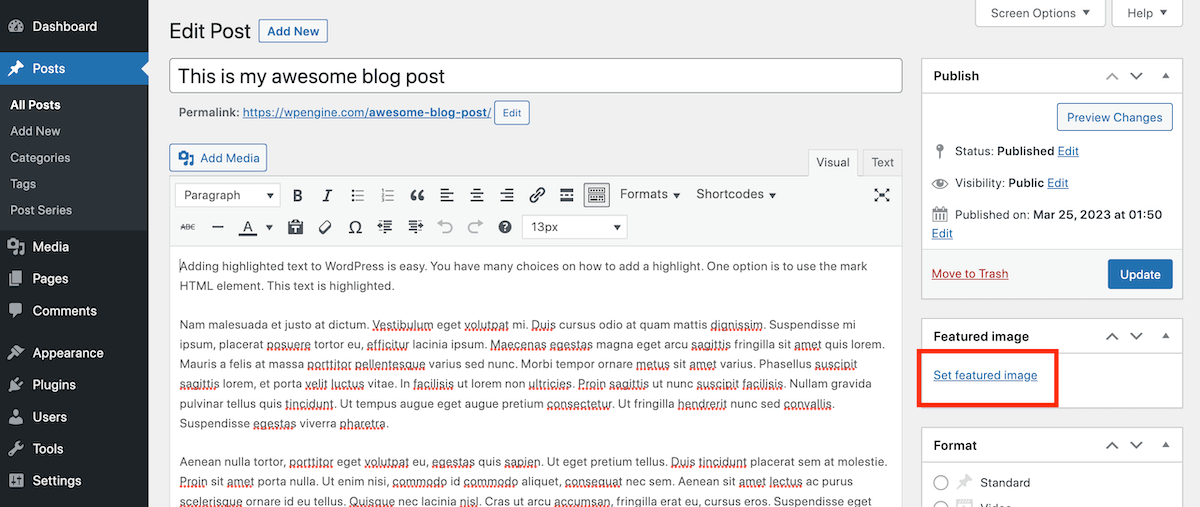
If you’re using the Classic Editor, click on the “Set featured image” link on the right side of the post editor.
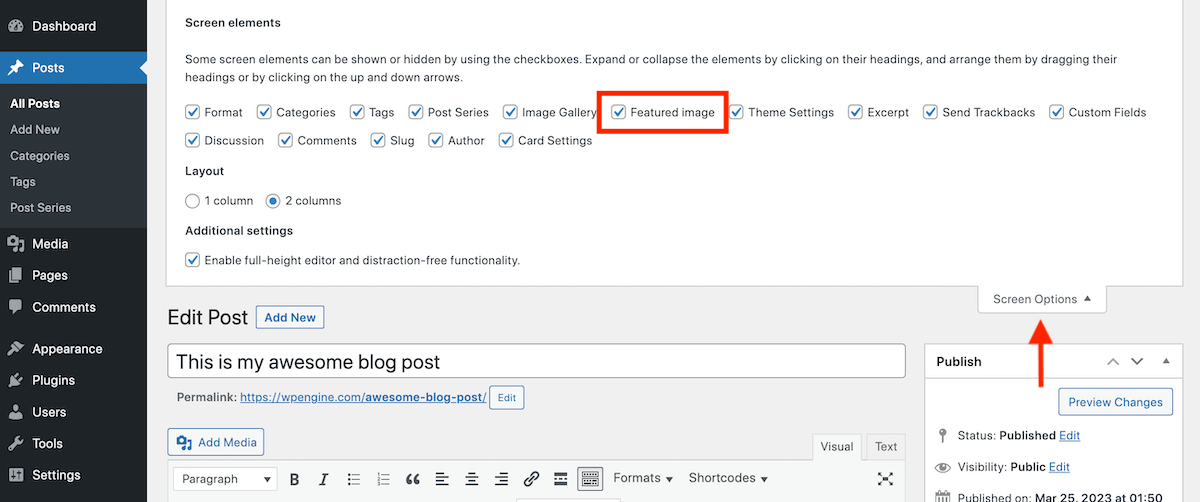
Note: If you do not see this option in the Classic Editor make sure that the option for “Featured Image” is checked under the “Screen Options” tab in the top right corner. But if you still do not see the option then most likely the theme you are using doesn’t actually support the Featured Image/Post Thumbnail functionality.
Step 3: Choose an Image from the Media Library
After clicking the Set Featured Image link a popup will appear. From here you can use an existing photo from the media library or upload a new one.
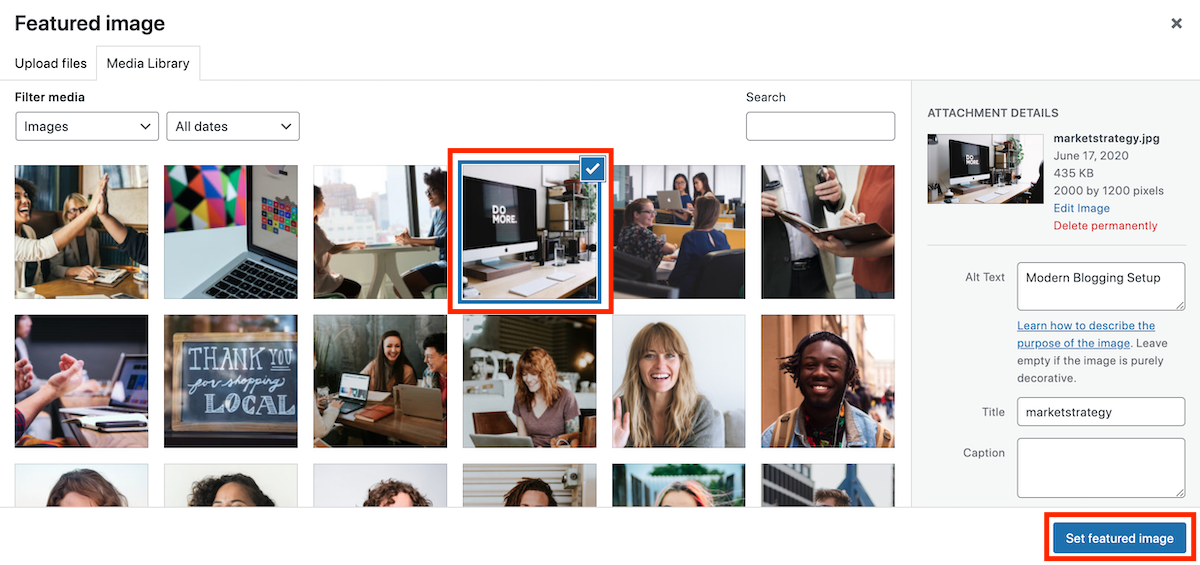
To use an existing photo, make sure the “Media Library” tab is selected, which will display all the images currently uploaded to your WordPress site.
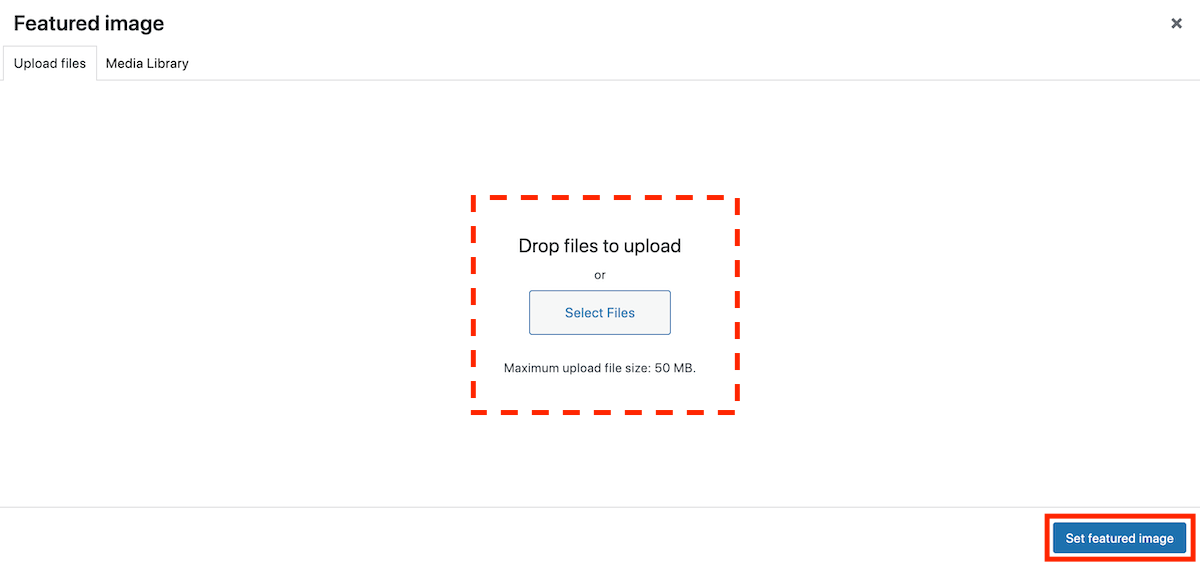
Alternatively, to upload a new image select the “Upload Files” tab. Then from here you can simply drag and drop any image from your computer into the window (or click the “Select Files” button to browse for an image) and it will be uploaded to your site.
Step 4: Click the “Set featured image” Button
Once you’ve selected an image click on the “Set featured image” button to confirm your selected image and exit the popup window. This will assign the selected image to the post or page you’re editing.
Also remember click the “Update” or “Save Draft” button to make sure the image is saved as the featured image. Otherwise if you exit Gutenberg or the Classic Editor, or accidentally refresh your page, your image may not be selected or saved correctly.
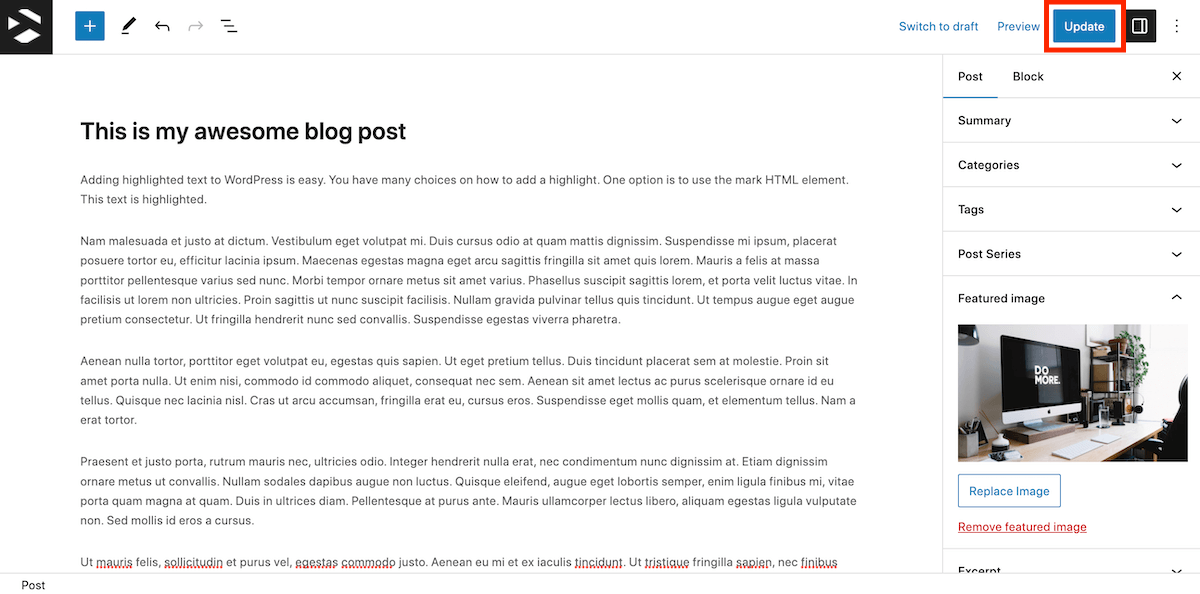
In Gutenberg, the update/save setting will be in the top bar (see above).
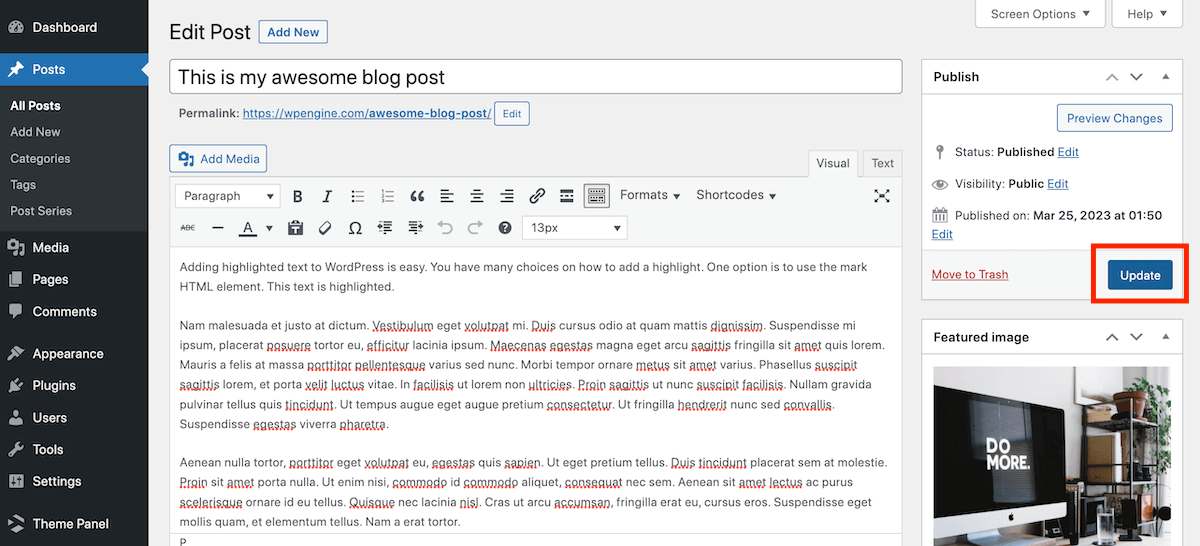
And in the Classic Editor the update/save button will be to the right.
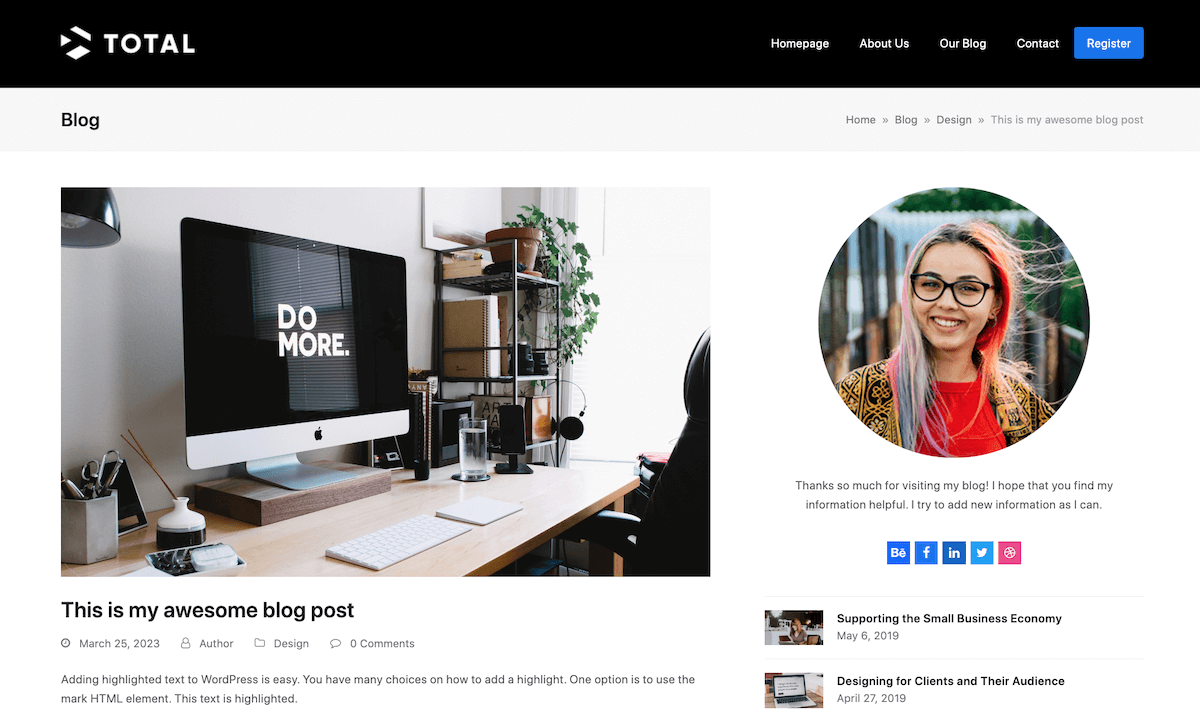
With your featured image saved, once your post or page is live the featured image will be displayed. Just now that how the feature image is displayed (e.g. in a column like above, as a full width image, as a header background, etc.) will depend on your WordPress theme.
Bonus: Resizing Featured Images
Now that you know how to properly set your featured image the next step is to learn how image resizing is handled in WordPress. This way you can display featured images at the right dimensions on your live site.
It’s important to note that every theme is a bit different. Most themes use the native WordPress resizing function which only crops images based on theme defined sizes on upload (and each time you upload an image it is resized to every custom defined image size in your theme).
Comparatively, some themes (for example our own “Total Theme“) have built-in resizing functions that are more optimized and allow greater user control. If you are a developer, checkout the core add_image_size function to learn how to define custom sizes in your theme. If you are an end user, read the documentation for your theme or contact the theme developer to ask how you can manage your featured image sizes.
But generally speaking most themes will work with the WordPress image resizing function. So be sure to see if your theme has any custom edit image sizes either in their Theme Panel or in the live Customizer (under Appearance > Customize). If you locate settings and you can tweak them accordingly and if not, most likely the theme has preset sizes.

In either case, if your theme is using the native WordPress sizing function we recommend using the Regenerate Thumbnails plugin. Simply go to Plugins > Add New and search for and install “Regenerate Thumbnails“. Next visit the plugin settings and run the script. This will pass the images on your site through the correct functions to be resized either according to your custom settings or the theme’s default settings.


Why this “Featured Images” adding is not working with image imported from URL. There is no really other solution but to add image from PC ?
Due to security reasons WordPress only allows images upload to your server to be set as featured images. They must be a part of your media library. There might be a plugin to accomplish what you want, have a search for it.
I so much love your themes, infact their what ive been looking for. but it is a big stress in manually adding thumbnail images… you need to make the images appear automatically or maybe make 1 just for me. i wont mind.
There is a plugin for everything… http://wordpress.org/plugins/auto-post-thumbnail/
This solved a great mystery for me – thanks a bunch!!
This is what I was looking for, I could not cope with this photo how to set them to be displayed in entries. Thanks for this post.