How to Build an Editorial Calendar in WordPress (And Actually Use It)
Building an editorial calendar in WordPress isn’t that difficult of a task.
However, it all comes down to whether or not you use the calendar for your blogging schedule or if it gets to the point where it actually makes you more unorganized.
An editorial calendar can work for both individual and multi-author blogs. Each of these types of blogs require calendars, since the individual-author blog probably doesn’t have an editor to keep the author on point, while the multi-author blog is just more complicated, seeing as how numerous articles are scheduled and coming in from different sources.
Since the editorial calendar is such a crucial part of your blogging success, let’s walk through which editorial calendar plugins you should consider. Then, we’ll explain the installation process, which tools benefit your process, along with some tips on how to keep at it with your calendar.
Choose an Editorial Calendar Plugin That Suits You
There’s a limited number of editorial calendars on the market, making it somewhat easy to figure out which one is right for you. Below are the options and why they stand out in my opinion:
- Editorial Calendar – It’s completely free and easy to use. You don’t have to configure any settings upon installation, and it gives you one of the cleanest, most basic editorial calendars out there. It doesn’t have reminders or more advanced features, so some argue it’s for the more proactive bloggers.
- CoSchedule – You have to pay a price for this one, but most users state that it’s completely worth it. It’s one of the better options for improving your chances of using the calendar, with a headline analyzer, Chrome extension for curating content, reminder system and options for scheduling other things like social media and emails.
- PublishPress – This plugin is free, but some of the useful add-ons are free. I like the notifications and comments you can make with people on your team, along with custom statuses (like “Pitched” or “Assigned” instead of “In Progress” or Pending Review.”)
- Edit Flow – Here’s another free editorial calendar with user groups, comments, custom statuses and a story budget. If you’re looking for a few extra features, I’d recommend this after Editorial Calendar.
- WP Content Calendar – This is a less popular plugin so I haven’t tested it out as much. That said, it has drag and drop tools, the full calendar and more.
Our Pick: The Editorial Calendar Plugin or CoSchedule
It’s a tough race. I personally enjoy the minimalism of the Editorial Calendar Plugin, but I completely understand that some people want more features like with CoSchedule and Edit Flow.
For this article I’m going to utilize the Editorial Calendar plugin, but the tips mentioned apply to editorial calendars in general.
Install the Plugin and Make Sure You Know Where Your Calendar Is
A big part of actually using your editorial calendar is knowing where it is. I’ve used some calendars in the past where the link is somewhat hidden or I would never end up clicking on the tab that leads me to the calendar. That’s no good. I understand that all editors and authors have their own quirks, and that’s why it’s essential that you test out all of the more credible calendar plugins.
If you feel like you’ll never open the calendar, skip the plugin.
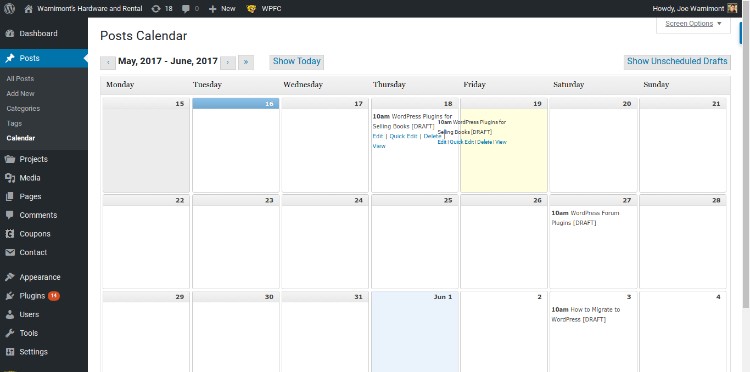
For example, I searched for Editorial Calendar in the backend of my WordPress site, located the plugin I wanted, installed and activated it.
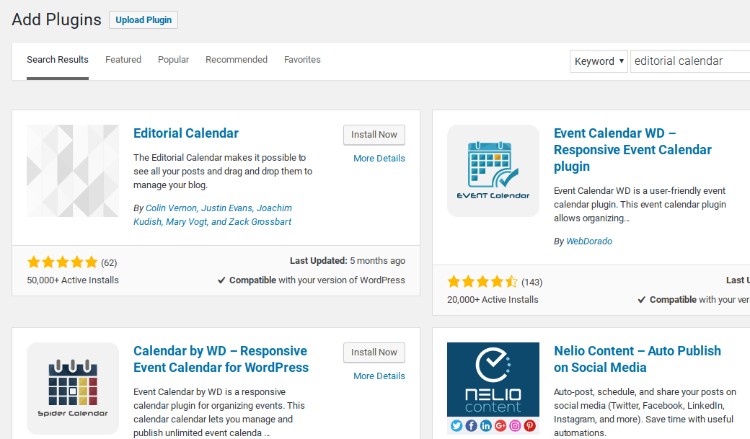
After that, it actually took me a moment to find out where the calendar was located. However, my mind then realized that the Posts tab made sense.
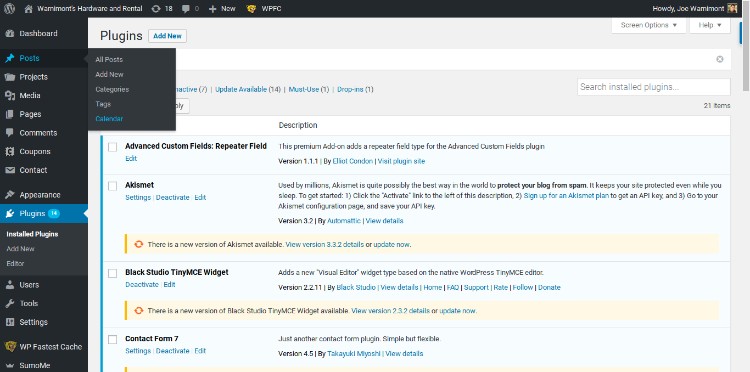
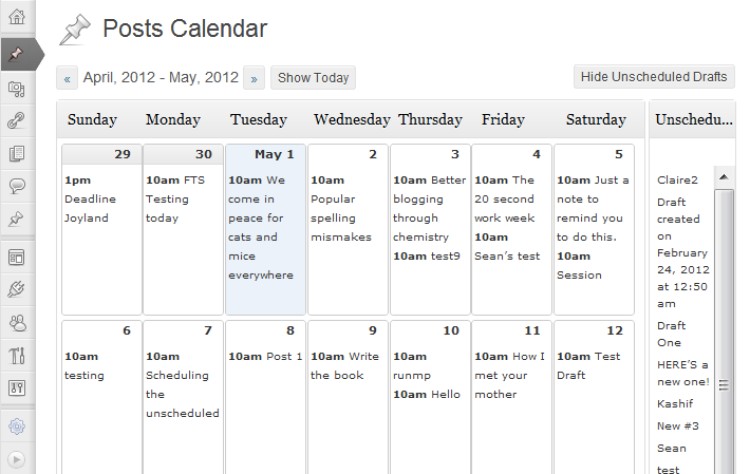
So, when you go to Posts > Calendar, the full calendar pops up on your screen for editing. The reason I enjoy this setup is because I click on that Posts tab every single time I make a new blog post in the first place. You might have other tendencies, but I’m not a huge fan of other editorial calendar plugins because they have separate dashboards or hidden calendars.
This works out just right for me.
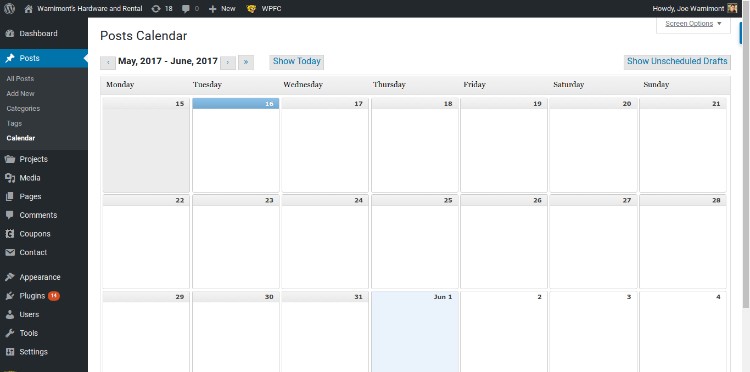
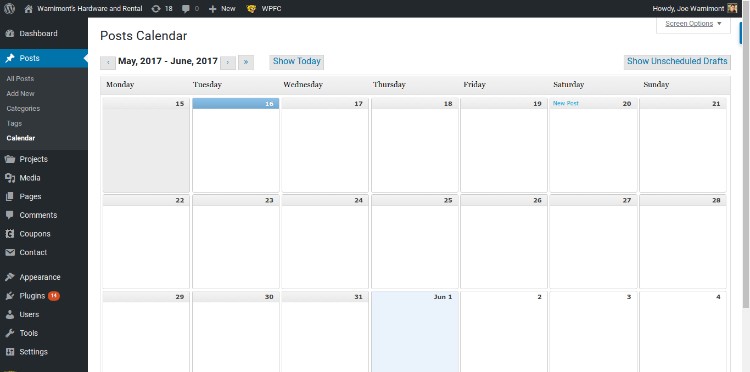
Making a new post requires you to click on one of the days in the calendar. You’ll see a New Post button when you scroll over a day.
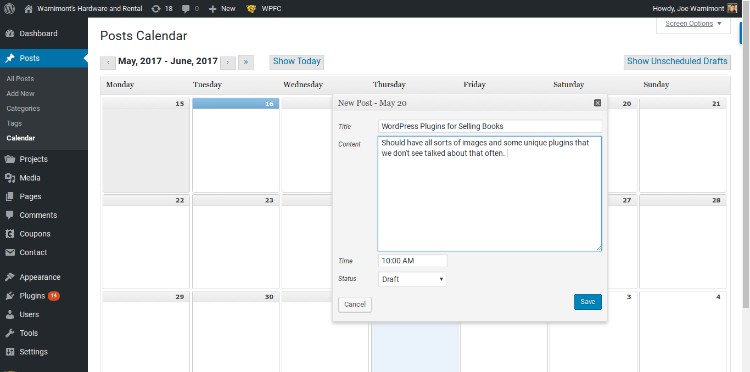
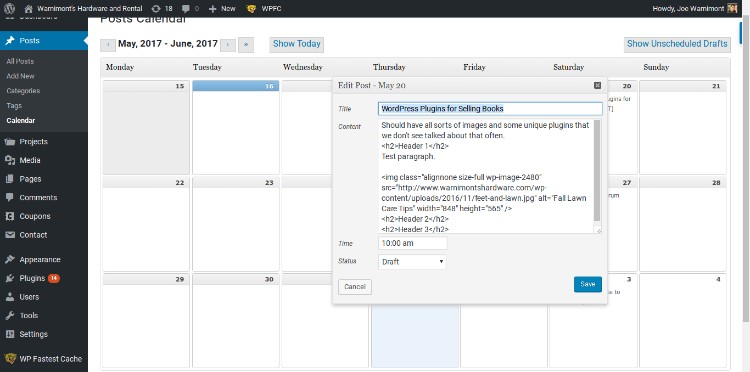
After that it lets you quickly fill in a title, content, time for publishing and the status of the post, such as Draft. Once you hit the Save button it’ll be saved in the calendar for future editing and publishing.
Keep in mind that you will have to change the Draft status to Scheduled in order for the calendar to do its job.
Develop Your Posting Schedule
One way to ensure that you don’t forget about your calendar is to stick with a hard schedule.
Deciding that you’re going to post once a week isn’t enough. Saying that you’re planning on five or six posts a month is even worse.
Stick to a weekly schedule and choose a day of the week. This way you’ll remember, and your readers will start looking forward to that day.
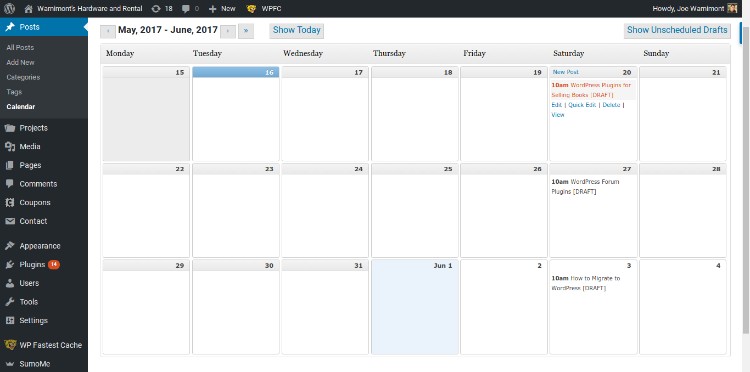
For example, in my calendar I’ve planned to post every Friday at 10AM. At the beginning of each month I plan those four Fridays with the blog titles and any extra notes that need to be written down.
Search For and Make a List of Blog Post Ideas
Keep an eye out constantly for new blog post ideas. Your best bet is to follow blogs and publications that relate to your blog. If you see an interesting topic, mark it down and create your own spin to make it unique.
After that, place the title in your calendar so that you never forget about it. You don’t have to schedule the thing right off the bat, but you should have a hefty portion of Drafts waiting to be looked at on your calendar.
Some other places to find nice blog post ideas include:
- Google Trends
- Google Alerts
- Quora
- Industry forums
Complete Simple and Advanced Edits Differently
One reason people stop using their editorial calendars is because they get burned out.
Don’t make that mistake by completing more work than you have to. All major edits should be done in the regular Post page, but the Editorial Calendar plugin has a wonderful tool for quick edits, saving you time in the long run.
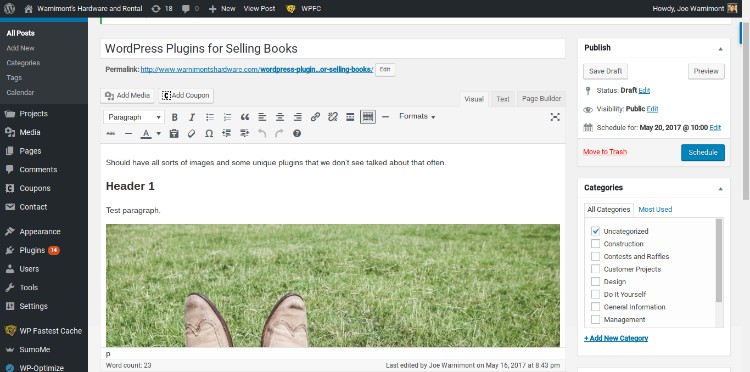
All you have to do is go to the calendar and select the post you want to view. Click on the Quick Edit button to adjust any content you desire. What’s even cooler is that if you learn a bit of HTML you can make just about all post edits from this view.
Make Notes for Later or for the Editor
Communication is key for an editorial calendar. The Editorial Calendar plugin I like doesn’t have comments or reminders to schedule your posts. However, you can solve this with an extra program like Trello.
If that’s not your style, try out other plugins like CoSchedule and Edit Flow. They’re more complicated, but the features are far more advanced than that of the Editorial Calendar plugin.
Good Luck With Your Editorial Calendar!
Organization like this gets overwhelming, so take the tips we covered above to push through and make your blog as efficient as possible. If you have any questions, let us know in the comments.


