How to Create a Sticky Header in Elementor

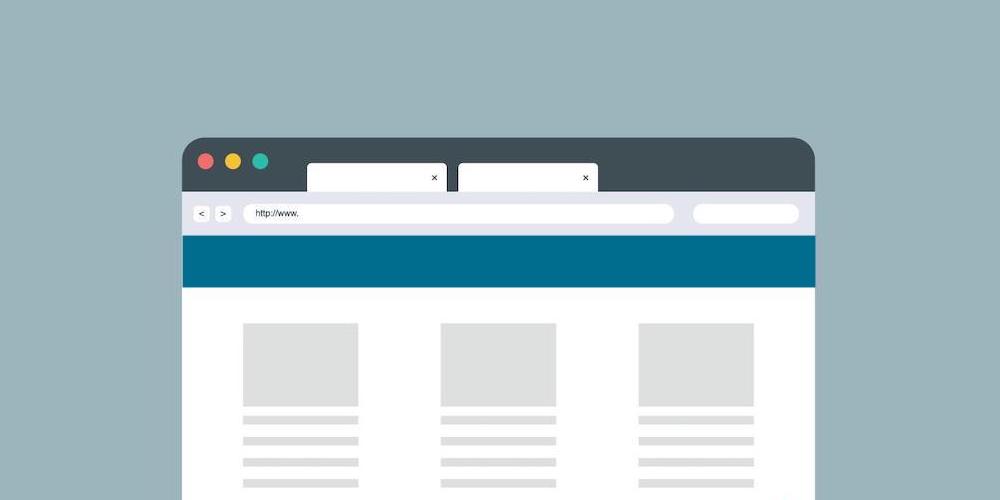
The header and footer are one of the most important parts of a website. Your website’s header is the first thing a visitor notices while landing on your site. A header refers to the navigation bar that displays the business logo, links to all important pages, any CTA, and a way of contacting you via a phone number or email address.
A well-structured header is crucial for your website and can be used to advertise any messages or promotions. It creates easiness for potential customers to explore the website. A good header functions like a good salesman; for example, using the call to action of 20% off for only today will urge the users to buy your product.
A header can be of particular types, such as a sticky or fixed. A sticky header is also known as a fixed header. It is a smart navigation tool that fixes the main menu at the top of the page as visitor scrolls down.
In this article
- Importance of Sticky Headers
- Option 1: Using Built-in Theme Options
- Option 2: Create a Sticky Header using Elementor Pro
- Option 3: Create a Sticky Header Menu using the Xpro Elementor Theme Builder
- Option 4: Create a Sticky Header Menu with the myStickymenu Free WordPress Plugin
- Option 5: Use Custom CSS for a Sticky Header
Importance of Sticky Headers
A sticky header is a fixed header that allows users to quickly access the search and all important pages without going to the top of the page. According to a study, 22% of internet users said that websites with sticky headers are easier to navigate. Another study found that using a sticky header on an e-commerce website increased conversions by 3%.
Creating a sticky header in Elementor is not simple, especially if you are creating a website for the first time. So, we have created a step-by-step guide to help you design a sticky header with Elementor without writing a single line of code.
Let’s get started!
Option 1: Using Built-in Theme Options
Before diving into Elementor or custom solutions, it’s always worth checking whether your WordPress theme includes a built-in sticky header option. Many modern themes come with this feature already implemented, making it the simplest and most reliable way to enable a sticky navigation bar.
In many cases, the sticky header is enabled by default, or can be turned on with just a few clicks in the theme settings. No additional plugins or custom code required.
For example, the Total WordPress Theme includes a built-in sticky header option that you can enable directly from the Customizer. This ensures full compatibility with the theme’s layout and styling, without the need for workarounds.

If your theme offers this feature, it’s almost always the best method to use. It’s optimized for performance, fully supported by the developer, and far less likely to cause conflicts compared to third-party solutions or custom CSS.
Option 2: Create a Sticky Header using Elementor Pro
A sticky header is a very efficient way to create convenience for your website users. Let’s see how we can quickly design a sticky header using the Elementor theme builder that comes as a premium feature in Elementor Pro.
Step 1: Create a Main Menu
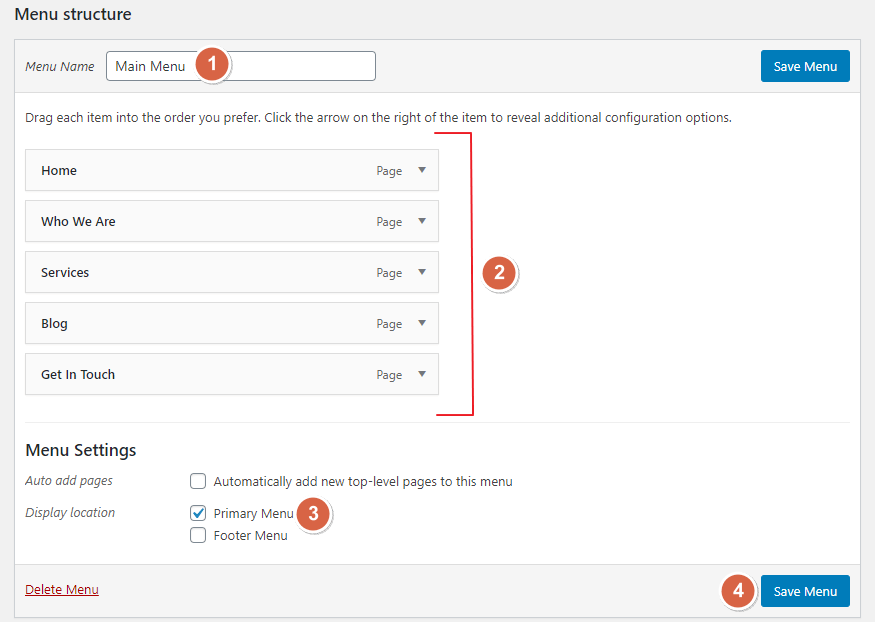
Before creating the sticky header for your website, first, you need to create the Main Menu in your wp-admin > Appearance > Menus. Add all the important pages that you want to show in your header must be listed here.
Step 2: Open the Theme Builder
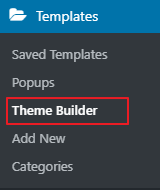
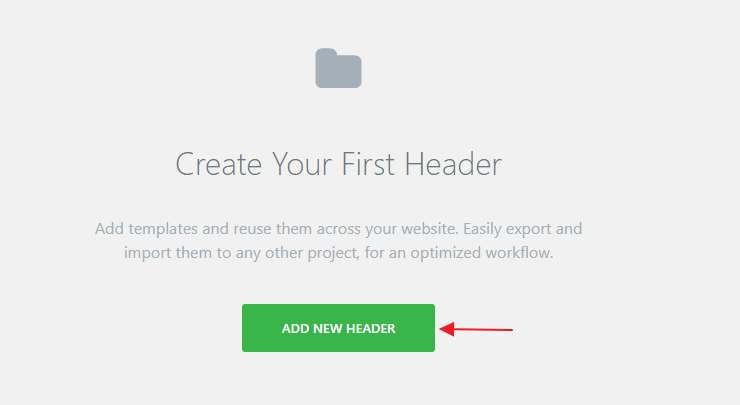
After creating the main menu, go to Elementor Templates > Theme Builder. On the theme builder page, click on the Header section and choose “Add New Header.”
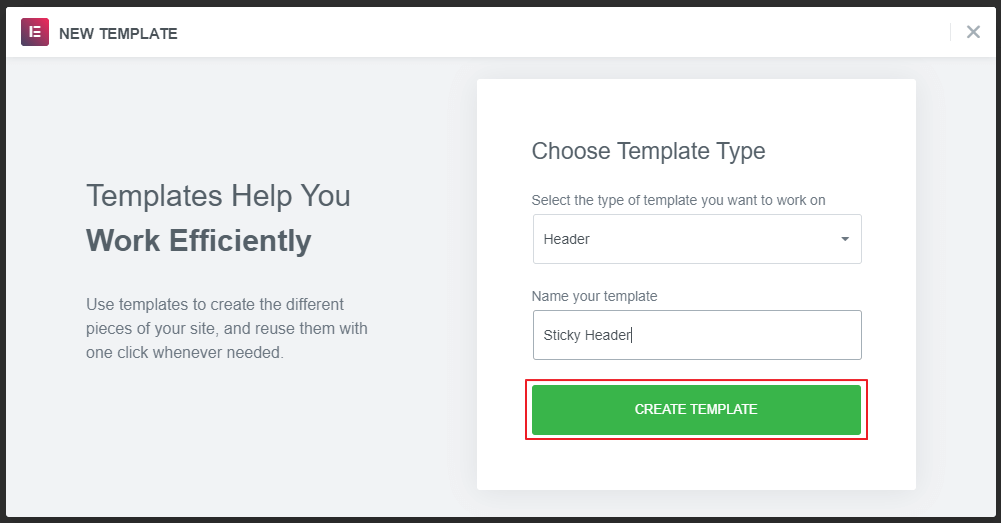
After that, a pop-up will appear; write the name of the header template and click on “Create Template.”
Now you will be redirected to the Elementor Editor page. On this page, you can choose any prebuilt header templates or create your own. Here, we will create a sticky header from scratch.
Before we start creating the header, it is important to highlight that Elementor offers 7+ widgets that you can utilize to create your header.
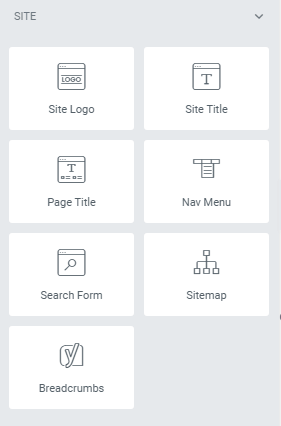
Step 3: Build a Header Template in Elementor
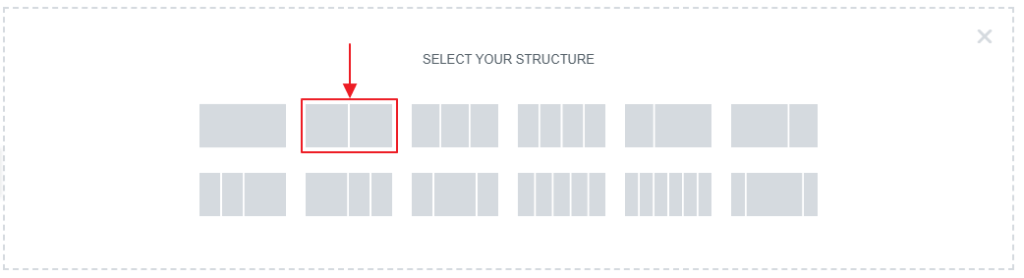
Now select the two-column structure (one column for the logo and the other for the horizontal menu).
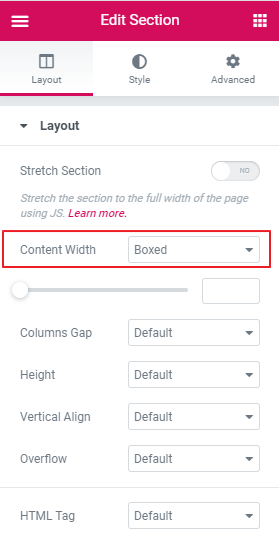
Then go to layout and select the boxed option in content width.
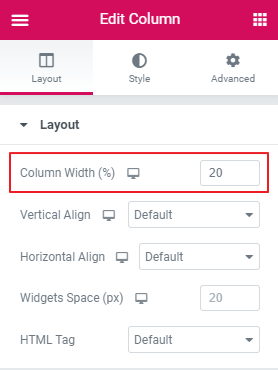
Choose the column width to 20% under the “Edit Column.”
Now, add the logo of your website to the left column and select the left alignment. Then in the right column, add the Nav Menu and choose the menu you created in step 1. Now, align the main menu to the right-hand side.
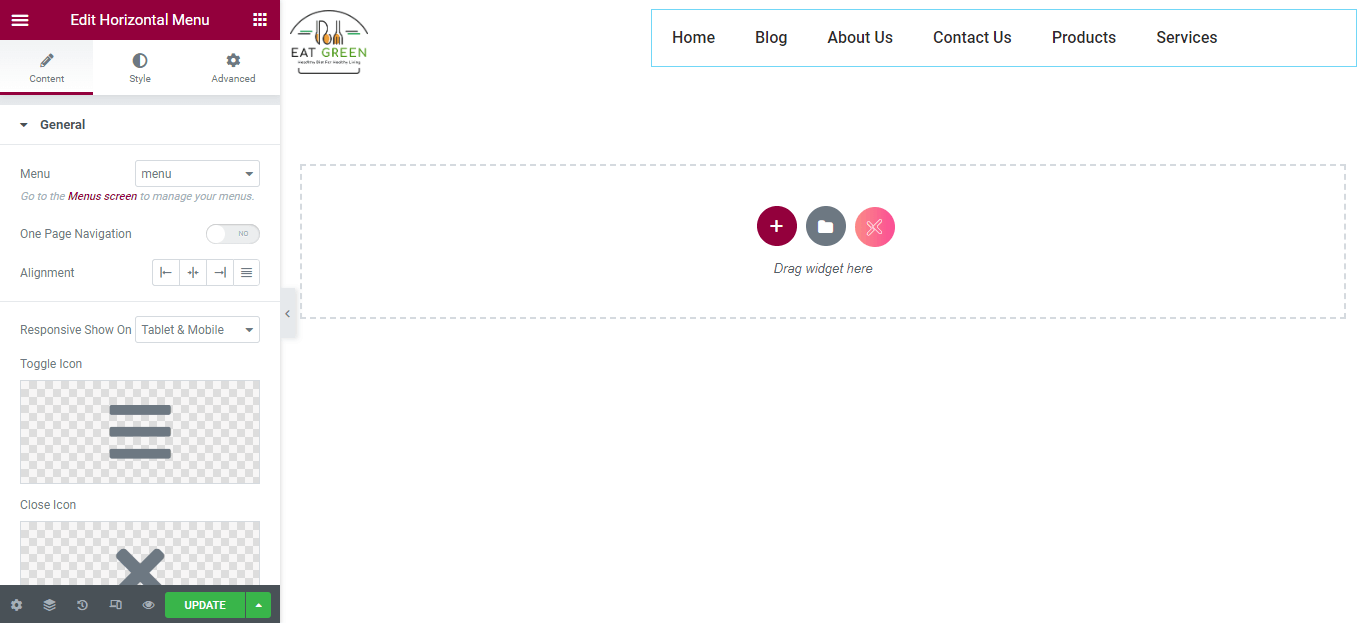
In this tutorial, we are creating a basic header. You can create a more stylish header by adding hover animation effects, background color, and buttons.
Step 4: Make Your Elementor Header Sticky
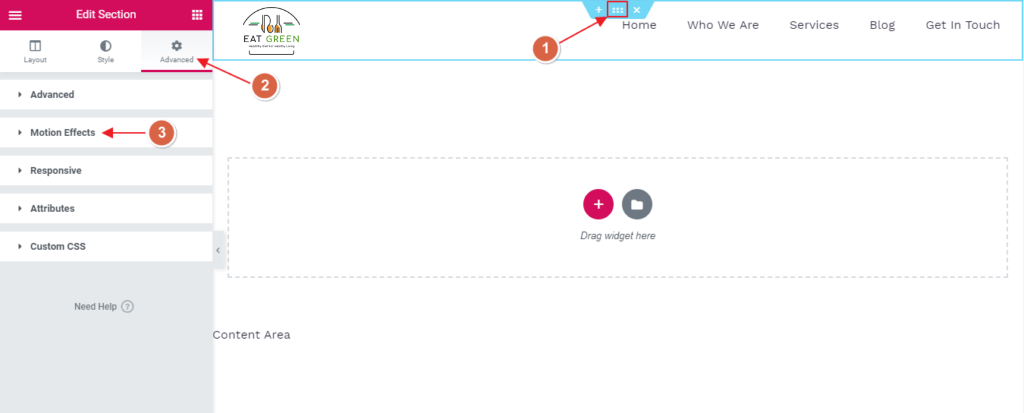
Now that you have designed a basic header, it is time to make it sticky. To make it fixed, click on the Edit section and go to Advanced > Motion Effects.
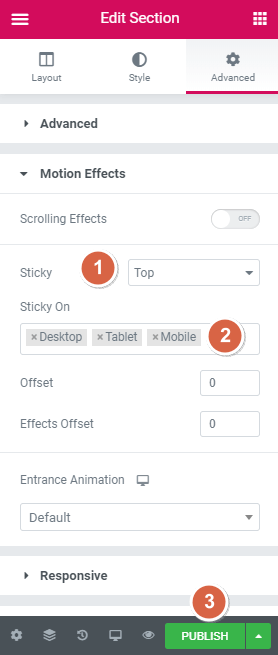
Under the advanced section, select sticky to the ‘top’ from the dropdown, select the devices you want to display your sticky header on and click on publish button.
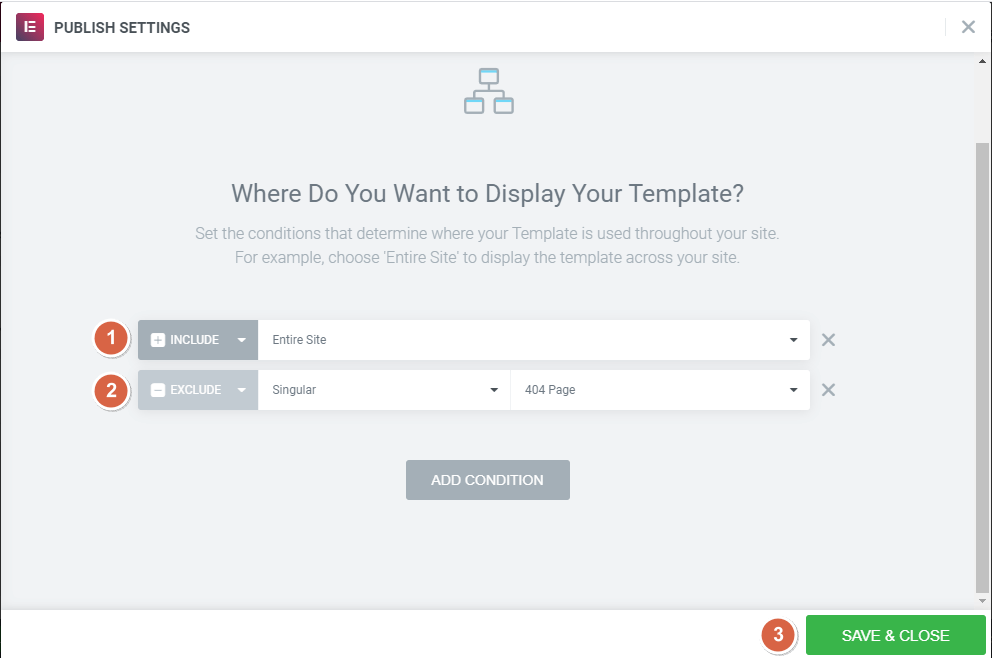
Once published, a new pop-up screen will appear asking you to ‘Add a Condition’ for your header. Setting the conditions determines where your header is used throughout your website. For example, choose “Entire Site” to display it across your site.
That’s it, now you know how to create a sticky header in Elementor in a few steps.
Add More Style with Custom CSS
You can make your Elementor sticky header more stylish using a custom CSS class. You can add background color, height, sticky effect, and transition effects. Let’s see how we can achieve that.
Go back to the “Edit section” and go to Advanced > Motion Effects.
Go to “Effects Offset” under Motion Effects and enter the value 100. It is the scrolling distance where the scrolling effect appears whenever a user lands on your website.
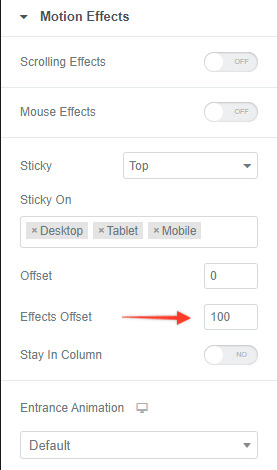
Scroll down and open the “Custom CSS” dropdown. Paste the CSS class given below. You can also edit this CSS to design it however you like.
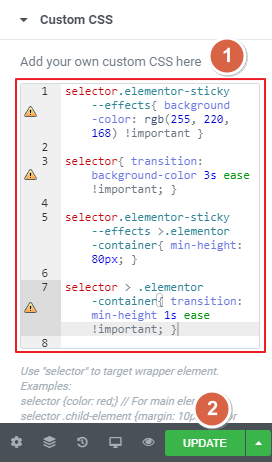
Custom CSS:
selector.elementor-sticky–-effects {
  background-color: rgb(255, 220, 168) !important;
}

selector {
  transition: background-color 3s ease !important;
}

selector.elementor-sticky–-effects > .elementor-container {
  min-height: 80px;
}

selector > .elementor-container {
  transition: min-height 1s ease !important;
}
Option 3: Create a Sticky Header Menu using the Xpro Elementor Theme Builder
You can also use the FREE Xpro Elementor Theme Builder to create a sticky header with a full creative design experience. It is a free Elementor add-on that gives you the functionality to create a sticky header using premium header templates and theme builder widgets.
Let’s see how we can create a sticky header in Elementor using this theme builder plugin.
Step 1: Install the Xpro Theme Builder Plugin
Go to your WordPress Dashboard > Plugins > Add New.
Now, search for the Xpro Elementor theme builder, click on the “Install Now” button, and “Activate” it once installed.
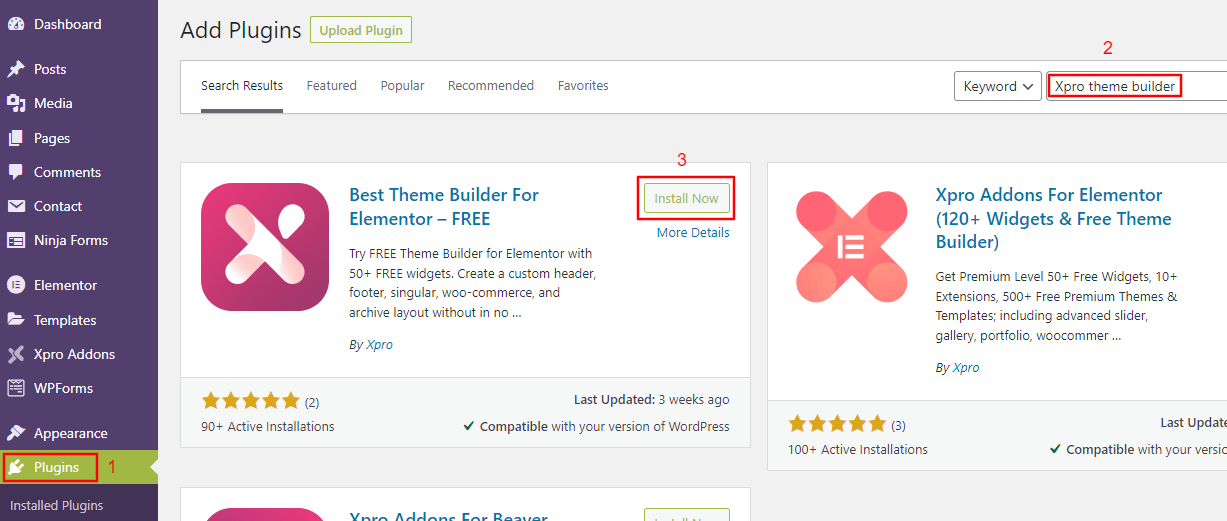
After activating the plugin, you will see the “Xpro Addons” option in the sidebar of your dashboard.ss
Step 2: Create a Sticky Header
To create the sticky go to Xpro Addons > Theme Builder > Add new.
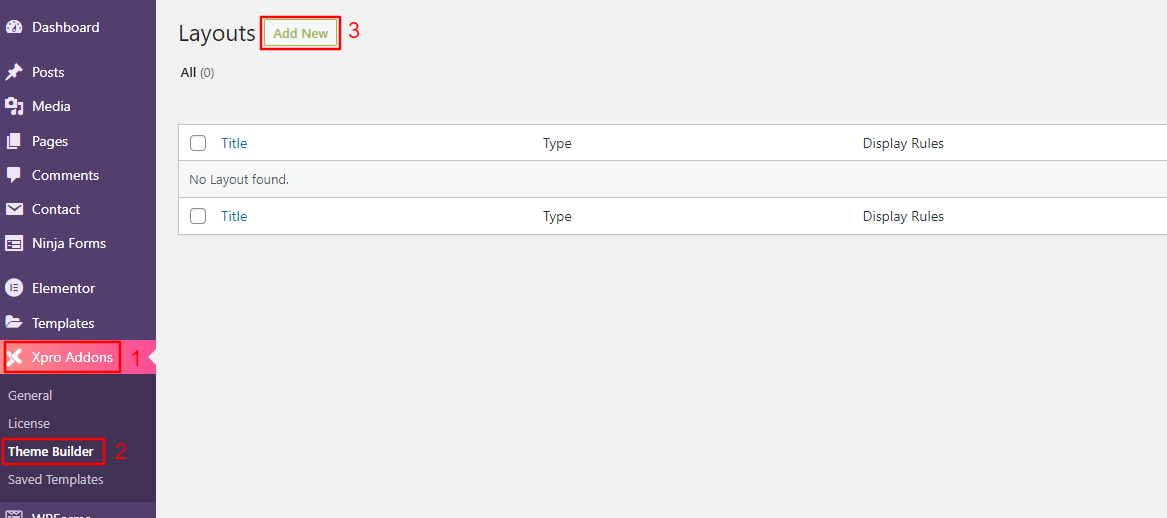
Add the title of your sticky header. Select the “Header” option from the “Type of template” dropdown.
Choose “Enable” from the “Header Sticky” option and click on the “Edit with Elementor” button after saving your setting. You can also tweak other settings according to your choice.
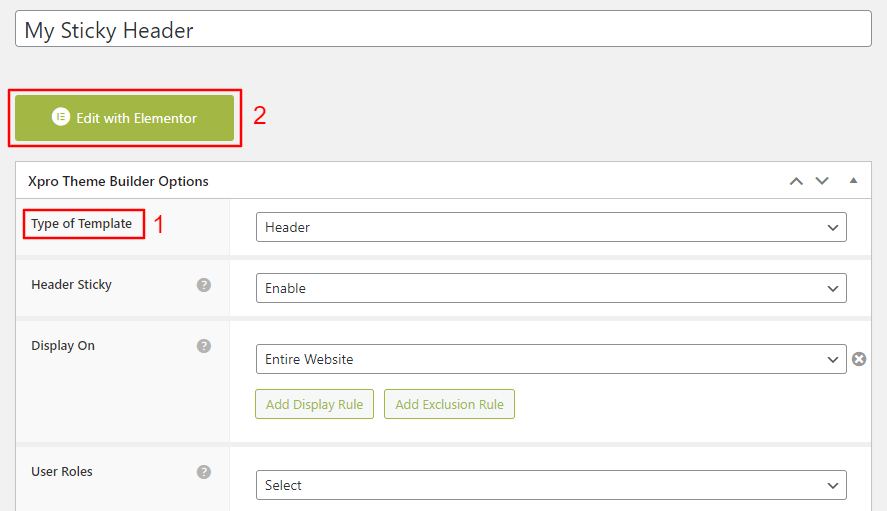
Now you will be redirected to the Elementor editor page. On this page, you can choose any of the modern pre-built templates or create your own. Here, we will create a sticky header from scratch.
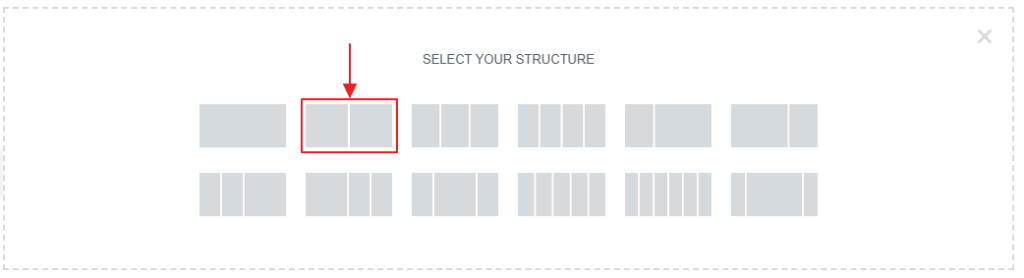
Select the two-column structure, one for the logo and the other for the menu.
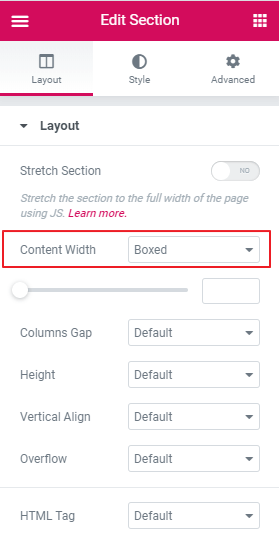
Now from the “Layout” option, set your content width to “Boxed”.
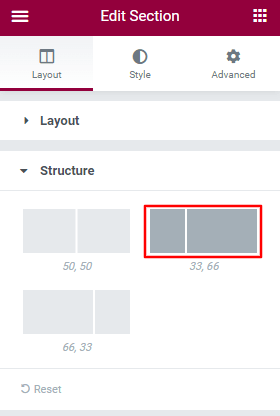
Set the structure with a “33,66” ratio from the Structure dropdown.
Add your website’s “Site Logo” to the left column and select the left alignment option under the General dropdown. Then in the right column, add the Nav Menu and choose the “Main Menu.” Now, align the main menu to the right-hand side.
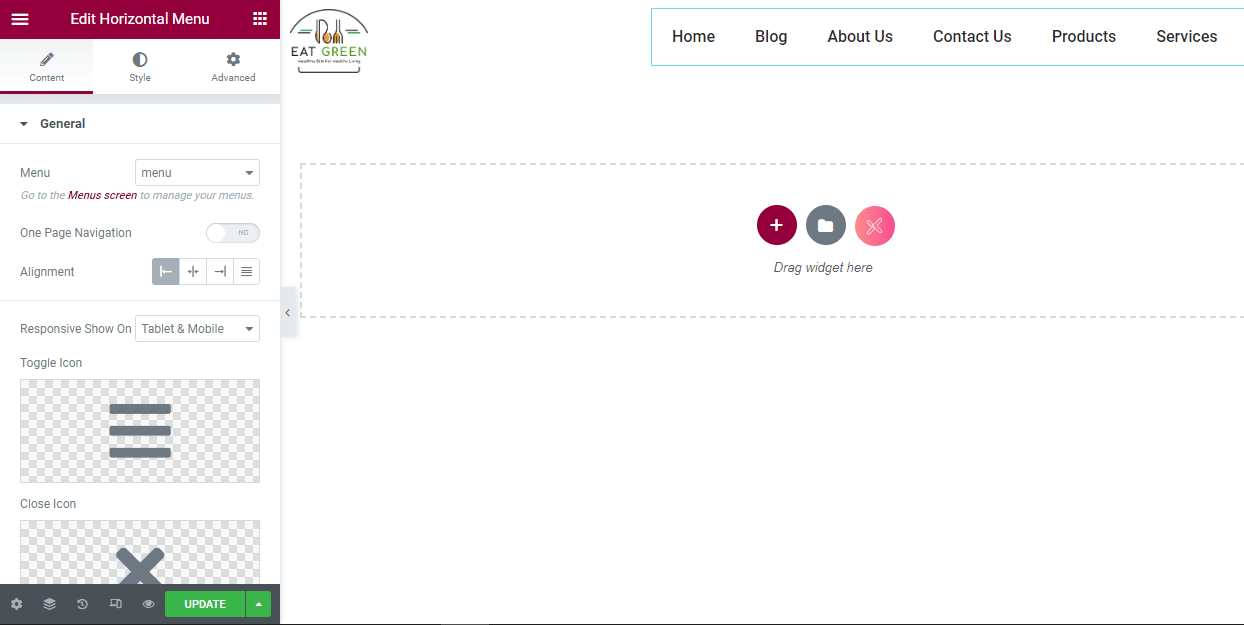
Now, click on update, and your header will go live on your site.
Option 4: Create a Sticky Header Menu with the myStickymenu Free WordPress Plugin
myStickymenu is another WordPress plugin that can be used to create a beautiful customized header for your Elementor website. You can create a welcome bar for announcements, add a countdown for promotions, and more.
Let’s create a sticky menu with myStickymenu.
Step 1: Install the Plugin
To install the plugin, go to your WP Dashboard > Plugins > Add New.
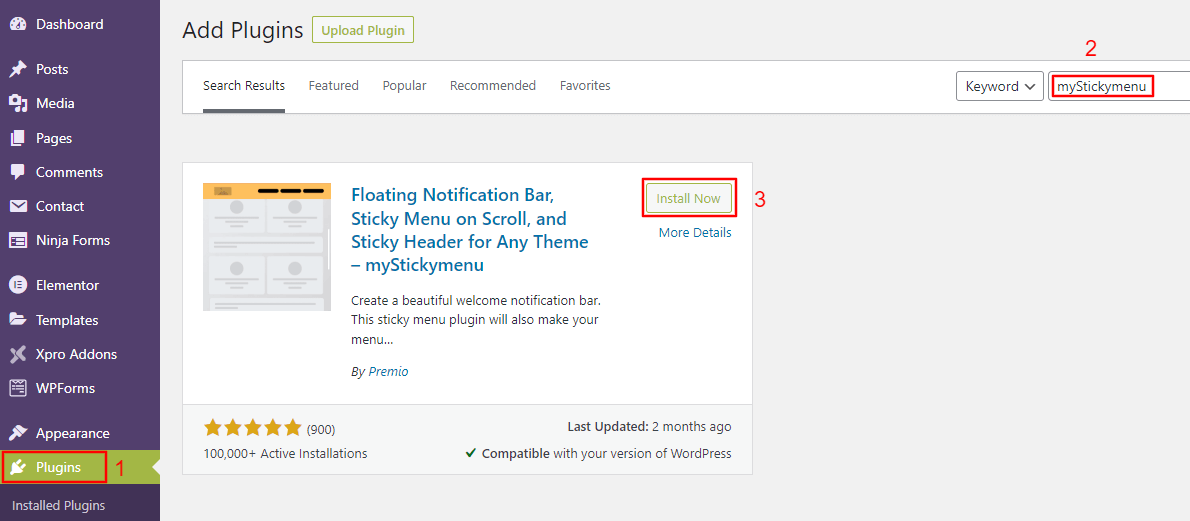
Now, search for myStickymenu, click on “Install Now,” and then click on “Activate”.
Step 2: Enable Sticky Settings
Go to Settings > myStickymenu. Toggle the sticky menu button and select “Other Class or ID” from the dropdown under Sticky Class.
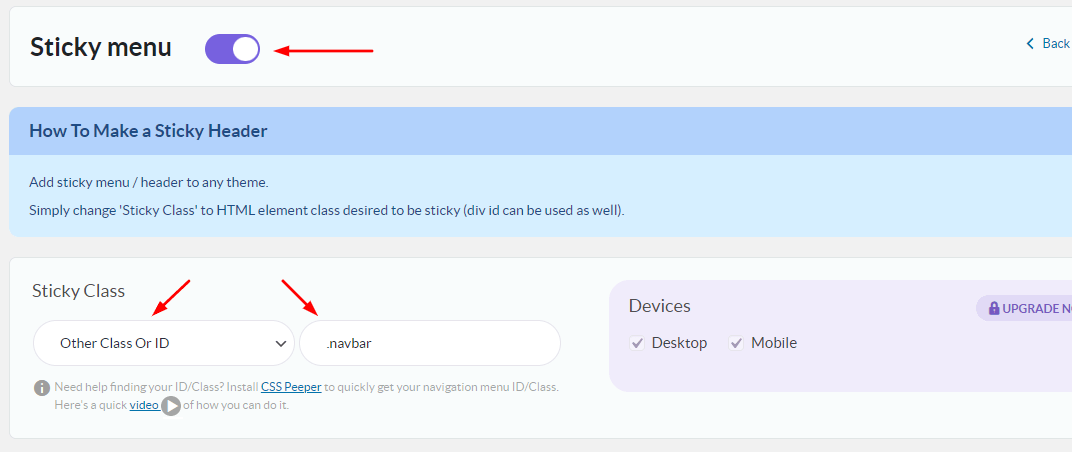
Change the other settings like opacity or background color according to your web design goals. Now, scroll down and click on the “save button”. Refresh your website to see the sticky header in action.
myStickymenu is a good plugin for creating a sticky header, but it has a drawback. You can only make a basic sticky header with it. To get more customization options, you have to upgrade your plan.
Option 5: Use Custom CSS for a Sticky Header
The final method for creating a sticky header in Elementor is by adding custom CSS to your WordPress theme. While this approach can be effective, it’s also the most complex and least universal. Sticky header implementations often depend heavily on your specific theme’s structure, which makes it difficult to provide a single, reliable code snippet that works for everyone.
For this reason, we recommend reaching out to your theme developer. They can confirm whether your theme already includes a built-in sticky header option you may have missed, or provide guidance on implementing a custom CSS solution tailored to your setup.
Conclusion
If your website features long-form content, adding a sticky header can significantly improve navigation and overall user experience. As we’ve covered, there are several ways to create a sticky header in Elementor, but using built-in theme options, Elementor Pro or the Xpro Elementor Theme Builder is by far the simplest and most flexible approach.
Ultimately, the best method will depend on your specific needs, budget, and comfort level with customization, so choose the approach that works best for your Elementor website.