How to Create a Menu in WordPress
When creating your WordPress site it’s important that you make it easy for visitors to find what they’re looking for. This is where your WordPress menu (also called a navigation menu) comes in. A great navigation system is like a map that shows your visitors exactly where to go to find what they’re after. Which means they’re more likely to stay on your site and stay engaged with your content.
In this step by step guide, we will share tips on how to design a good site navigation. Then we will show you exactly how to set up WordPress menus using the Gutenberg site editor, the classic main Dashboard and finally via the live Customizer.
How to Design a Useful WordPress Navigation
As mention, your site’s navigation is how readers (as well as search engines) will browse your website. So here are a few tips to ensure you create a good navigation menu.
Keep it Simple
The best navigation system is easy to use. Don’t over-complicate your navigation menus by including pages that the user doesn’t necessarily need. Stick to your most important content – essential WordPress pages such as About, Contact, Shop etc.
Also, don’t assume that more links is always better. For a small blog it might be best to link to your handful of post categories, while a large e-commerce site might use a mega menu with many links to niche landing pages according to style, season, price, sizing, etc. Tailor your links according to your site and your audience.
Add Navigation Menus to Multiple Locations
To get readers clicking your links, it can be beneficial to show said links a couple of times within different locations of your site. The logic here is simple: the easier the reader can find the links, the faster they can click through.
By default, most WordPress themes will have a navigation menu in the header section, and perhaps the footer as well. You can, however, use the Navigation block (or a menu widget) to display your navigation menus wherever you fancy.
The best menu locations for maximum exposure include the header, sidebar, and footer areas. The sidebar is also a prime spot for categories, archives, and tags, so feel free to take advantage of these features to enhance your navigation system.
Include a Search Form
Make it easier for readers to pinpoint the exact content they want with a search. It’s best to place a search form in a prominent location on your WordPress site. For instance, the header is much more useful than the footer which is only visible once a user scrolls down. Even worse, if you have infinite scrolling in place, said user might never reach the search form.
Many WordPress themes integrate a basic search as a part of their header design, though WordPress also includes a Gutenberg search block as well as a classic WordPress search widget that can be used to add in a search form yourself. You can also improve your site search with the help of a plugin, but that is something we won’t be covering in this post.
Main takeaway: At the end of the day, just ensure your navigation menus are easy to find and use. Also put important content first, so it is incredibly easy to find.
So, let’s look at the three different ways you can create, add and edit a menu in WordPress.
How to Create a WordPress Menu with Gutenberg
WordPress block themes, and in particular full site editing (FSE) themes, rely on the built-in Gutenberg editor for your site layouts. This includes your WordPress menus, which are inserted with the Gutenberg Navigation Block.
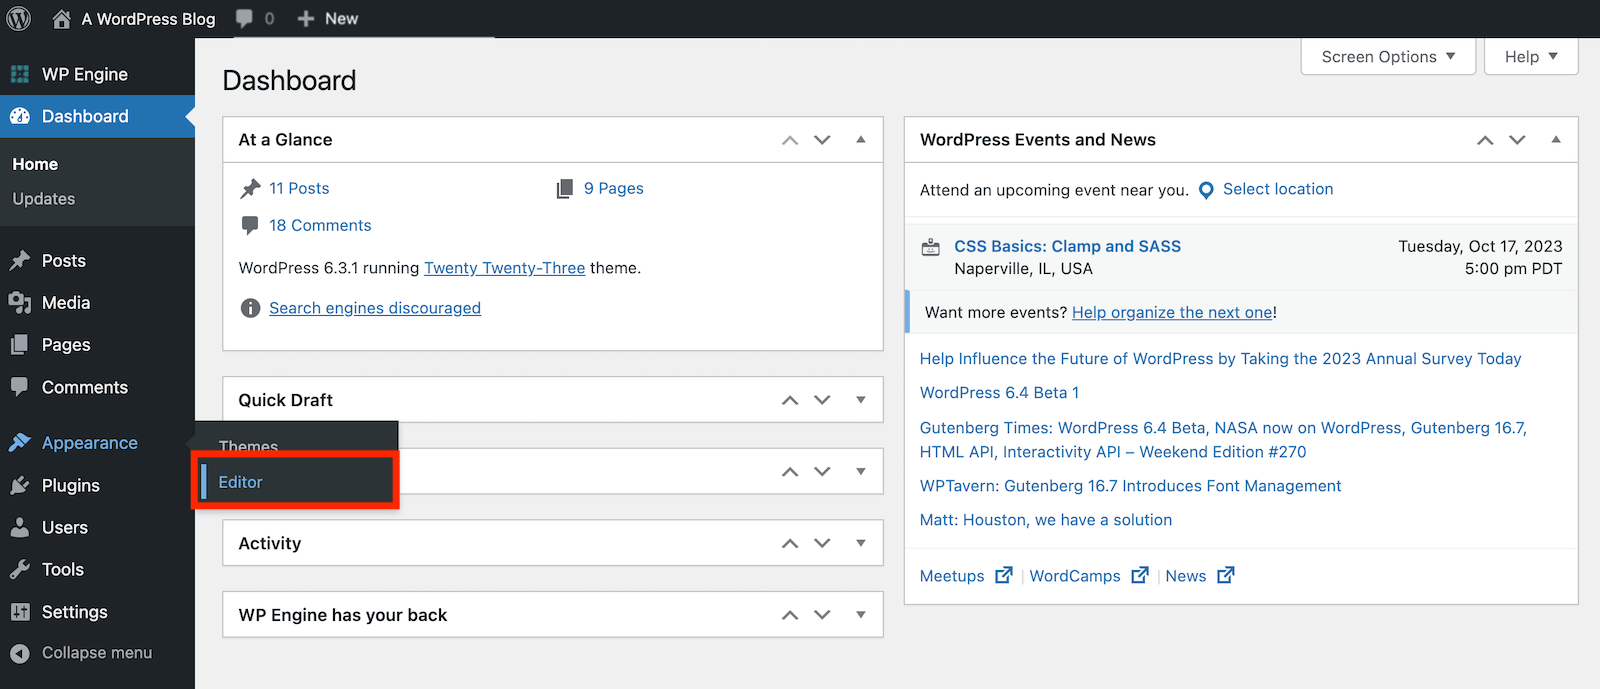
To add or edit your site menu(s) you will first need to login and go to Appearance > Editor. This is where you can access the main areas of your WordPress site to edit with Gutenberg.
Select the Pattern for the Location with Your Menu
Because Gutenberg is built with blocks, you will need to add or edit your Navigation block in the correct pattern location.
Within the Editor click on the option for Patterns.
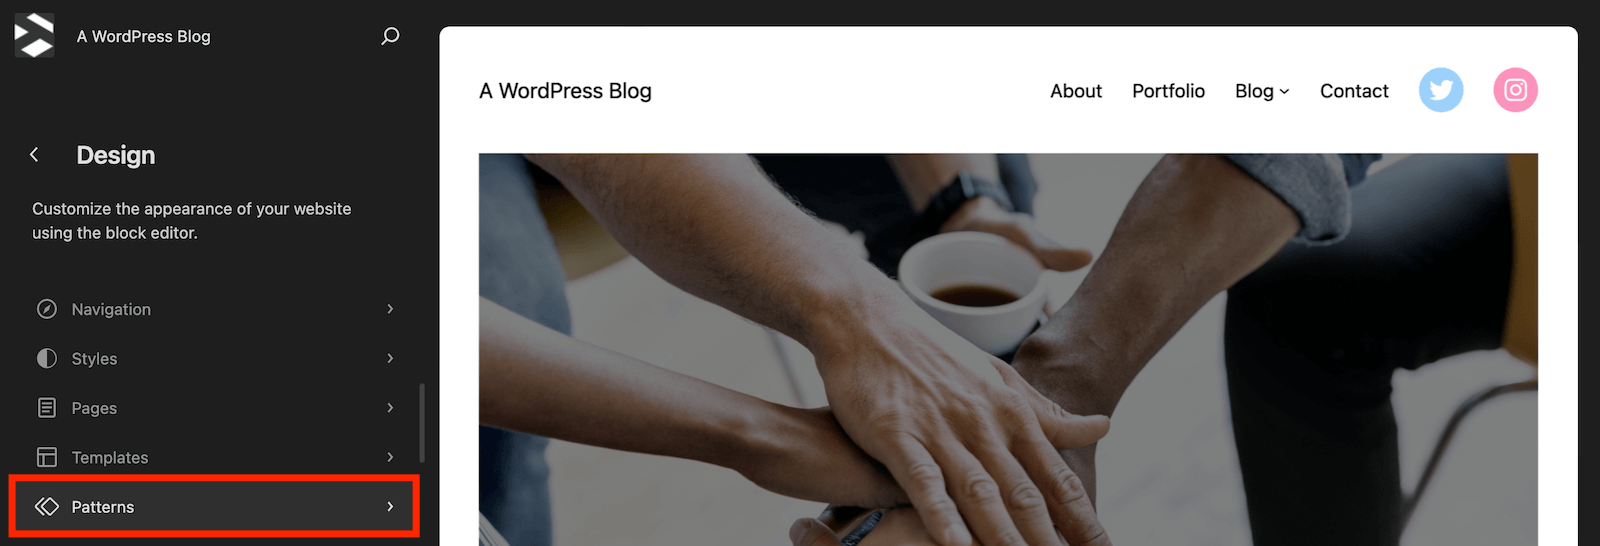
Typically main menus are located in the Header section of a website, with additional menus in the Footer or possibly even in a Sidebar. Since these sections are the same across your whole website they are created using Gutenberg Template Parts. So select the Template Part you want to add or edit a menu in.
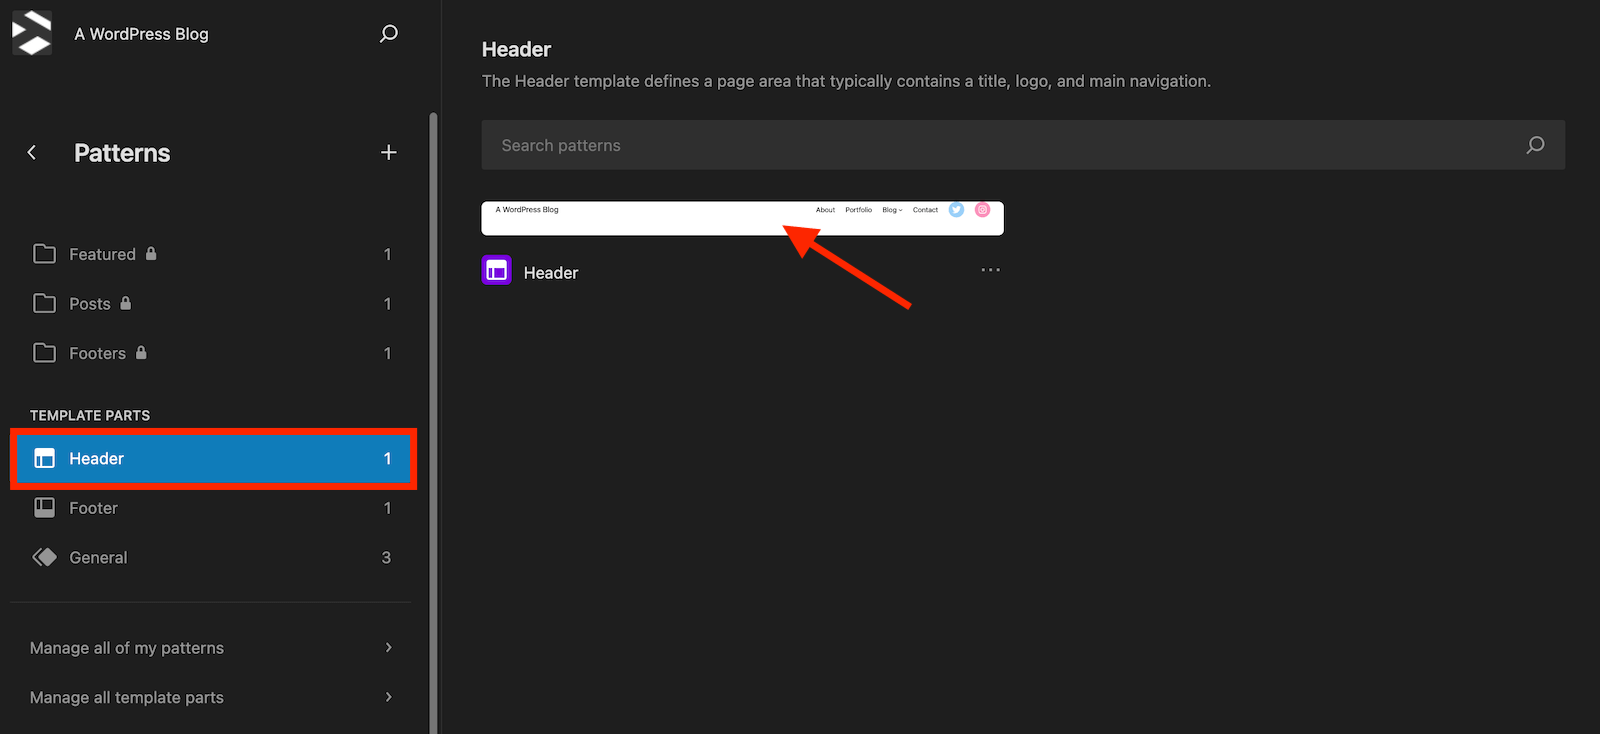
For our example we’ll select the Header template part and then click on the pattern being used for our header that we’d like to edit. Most Gutenberg themes should have default patterns included that you can edit.
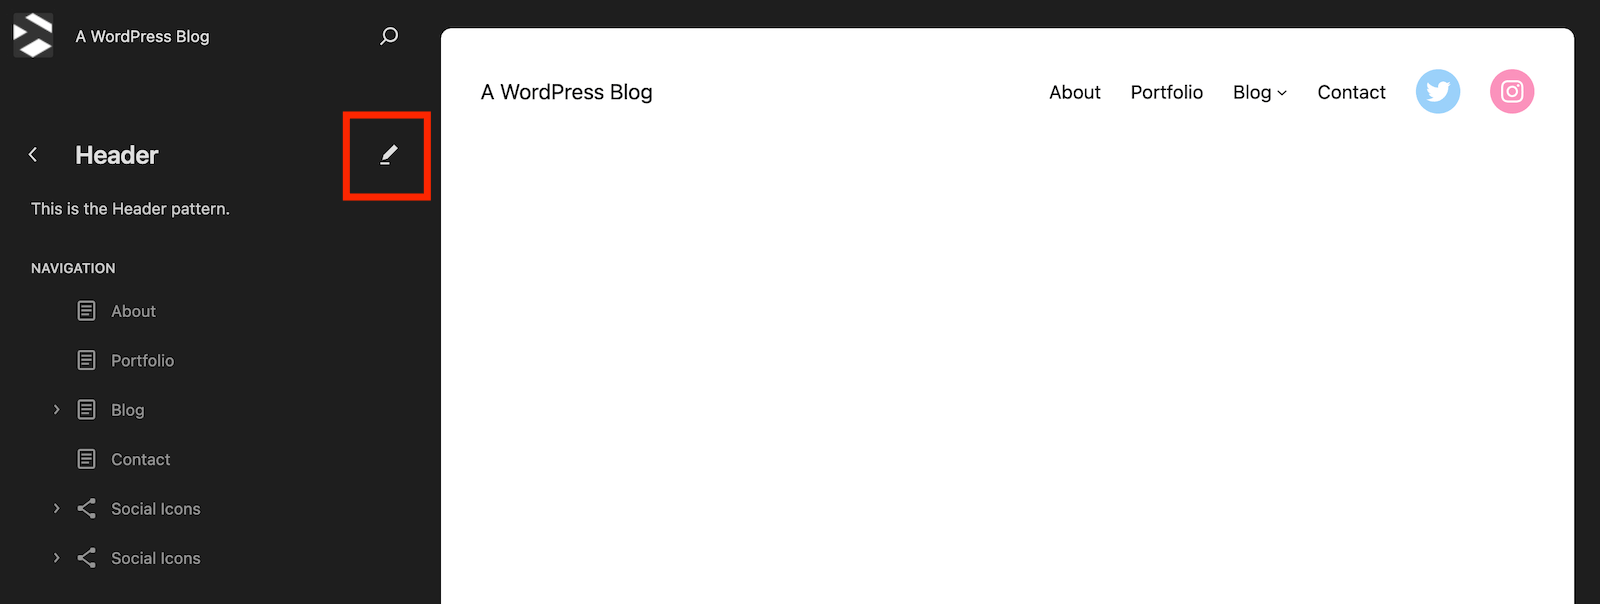
Once you’ve selected a pattern it will open a preview screen. From here you’ll notice that if you pattern already includes a Navigation block you can view the navigation menu in the right hand sidebar. However all you can do is reorder or remove menu items. To Add or Edit your menu click on the pencil icon.
Edit the Navigation Block
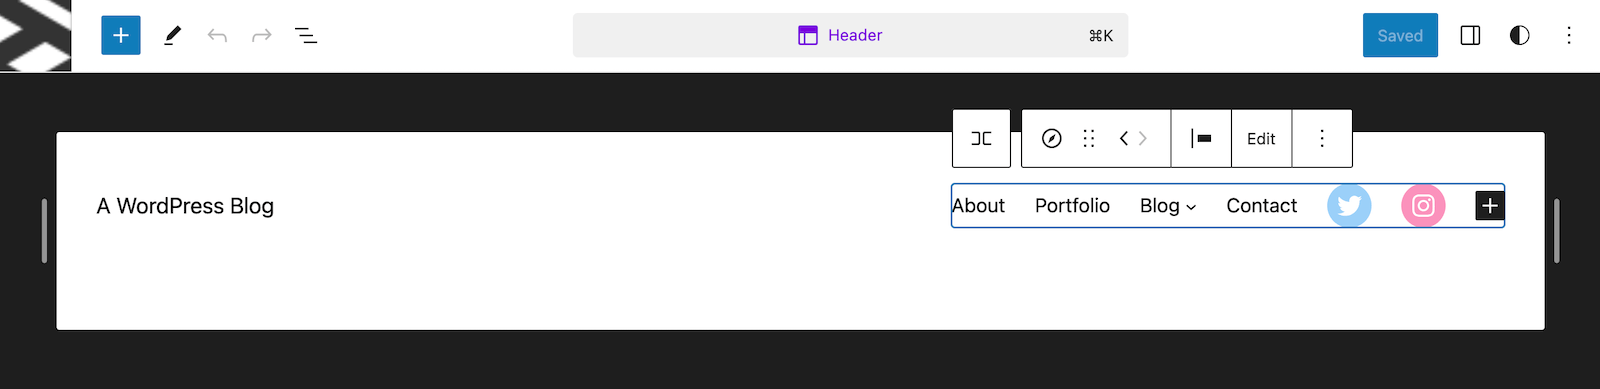
Now your Header pattern will be opened in the Gutenberg Editor. From here you can click and select the Navigation block to edit it or insert a new one if it doesn’t already exist in your pattern.
Add Menu Items
To add menu items select the Navigation block then hover after any of the menu items until you see a black + icon to click on.
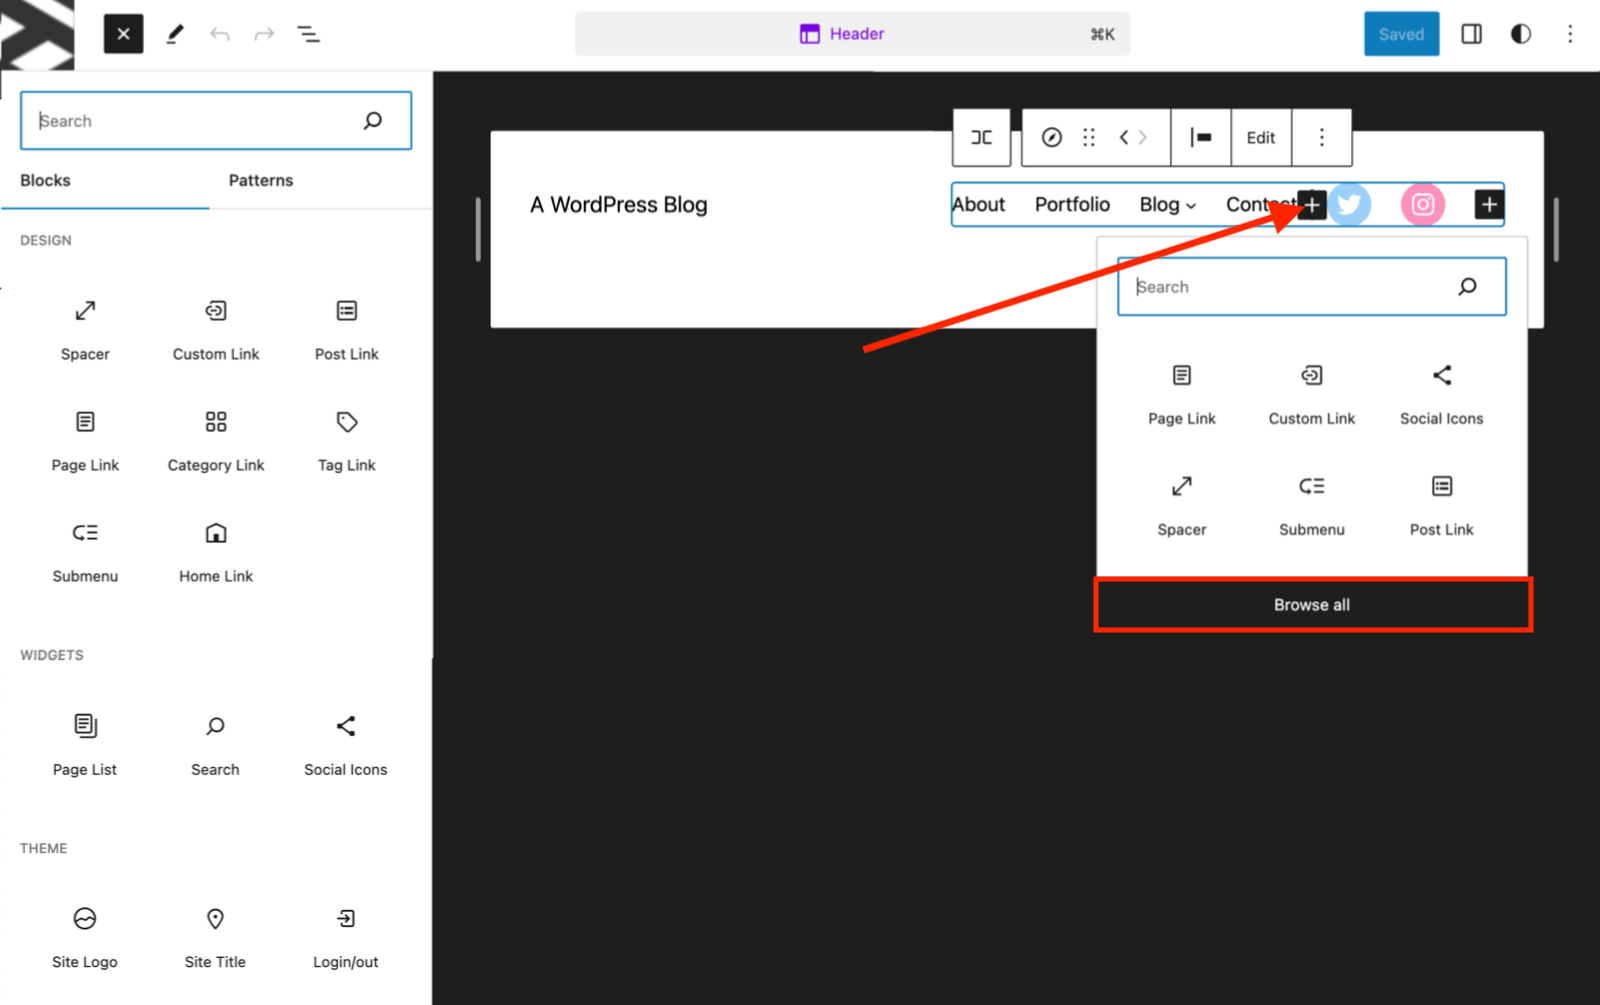
When you clock on the + a quick add window will open with your most used menu navigation blocks as well as a search field to find a block. Alternatively you can click the “Browse All” option to open the left sidebar window where you can easily view all of the available options that can be inserted into the navigation.
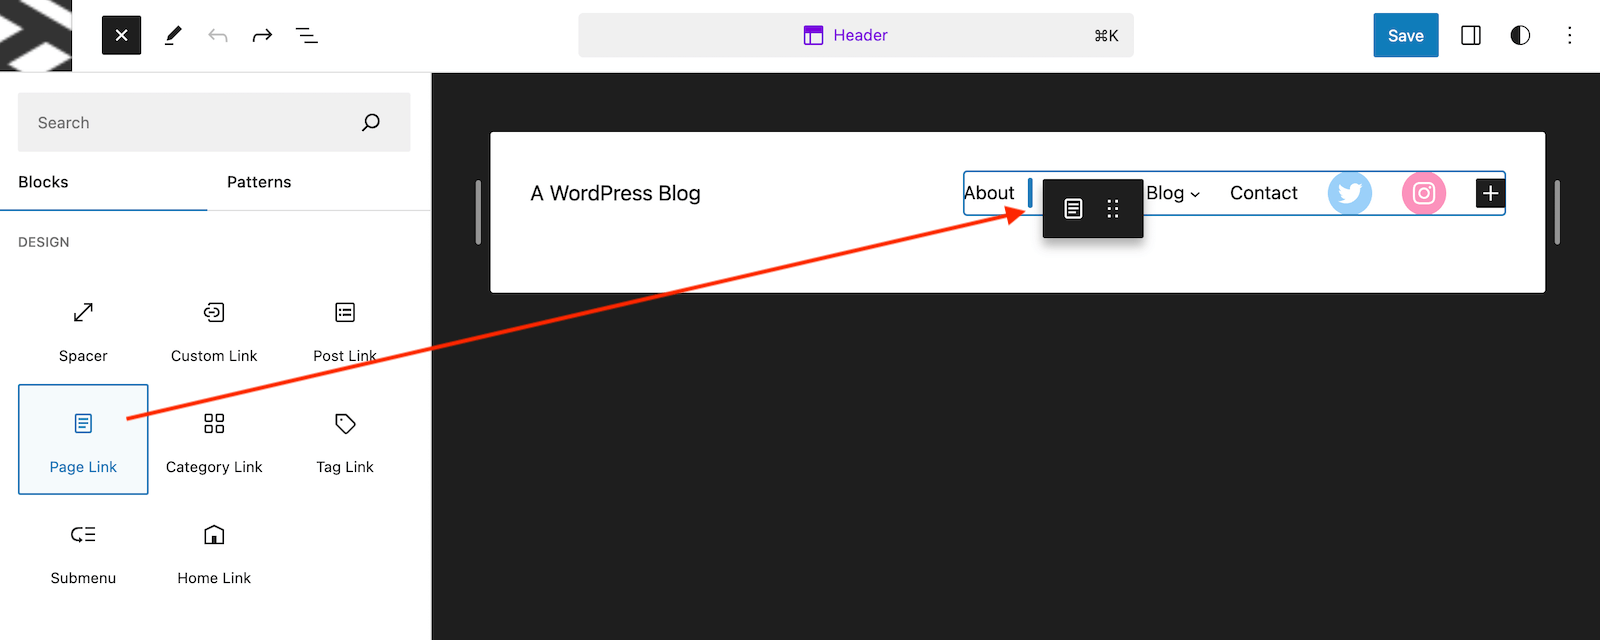
To add a menu item simply click to insert from the quick add window, or drag the block from the left sidebar window and drop the block into place. Depending on the block you add you’ll have different options available after inserting.
For example, when you add a Post Link, Page Link, Category Link or a Tag Link you will be prompted to select from the corresponding links that currently exist on your site. The Home Link will add a direct link to your home page, and the Custom Link will allow you to enter in any link manually.
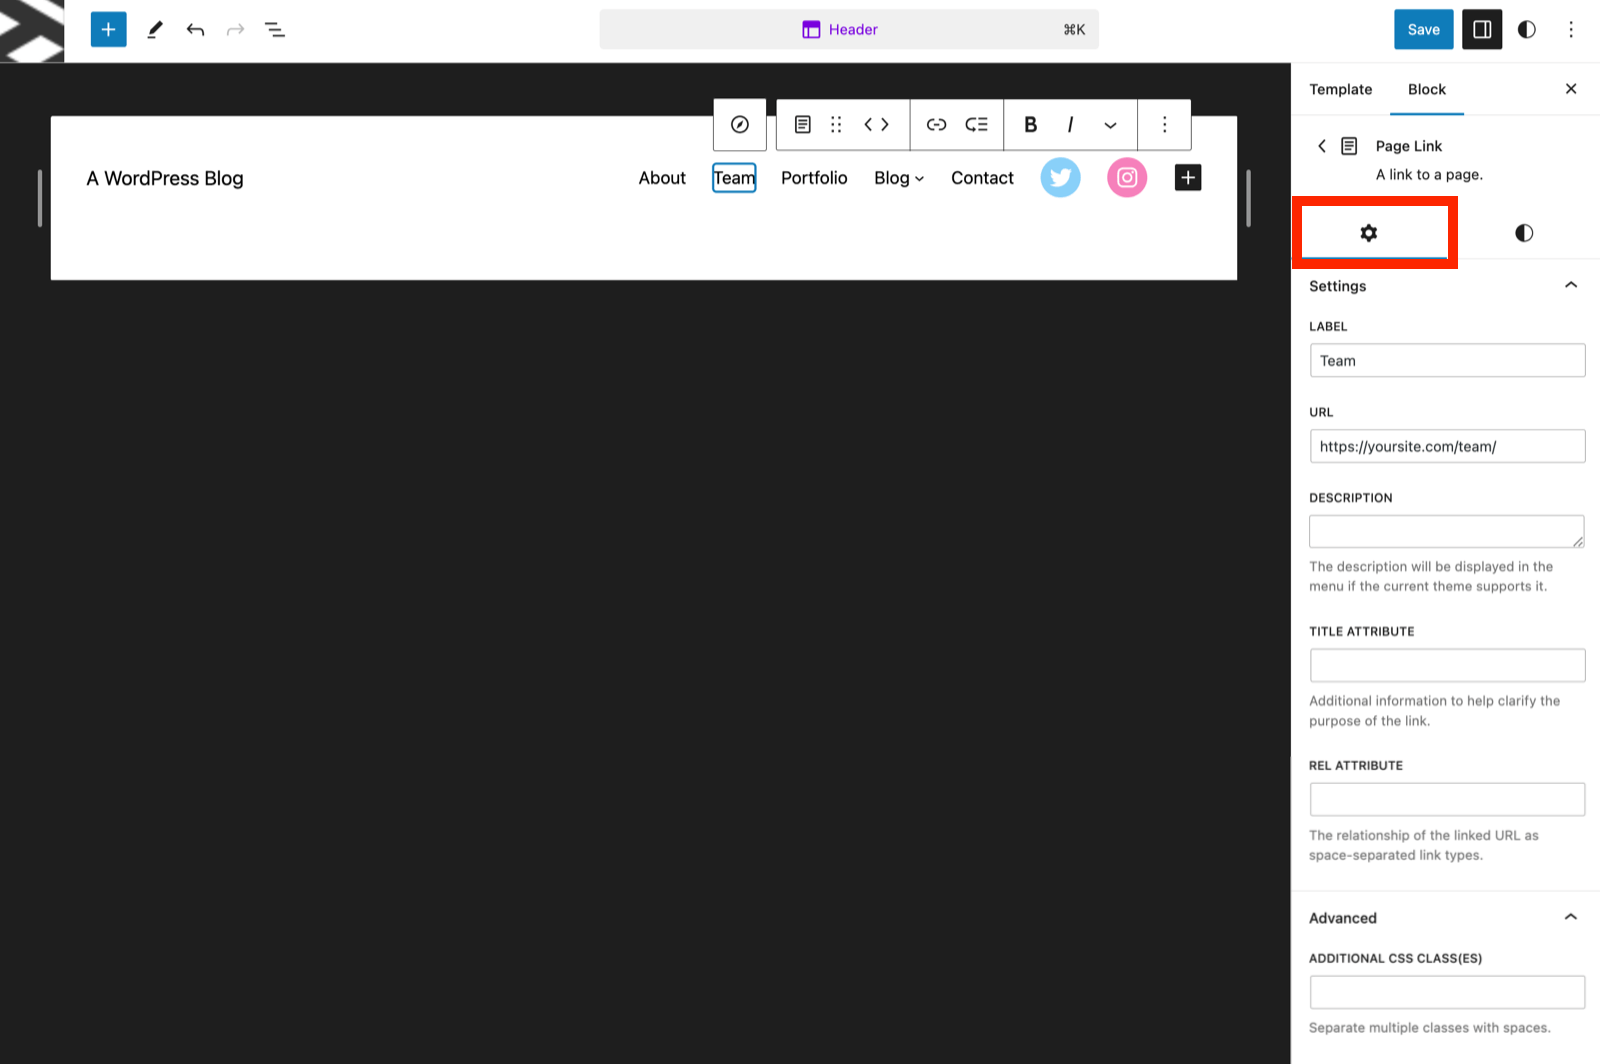
The Settings (cog icon) for your link block will be open by default after inserting. This is where you can customize aspects of your link including:
- Label: the link title displayed in your navigation menu
- URL: the link target URL
- Description: if part of your theme’s styling, this is an extended description that may be displayed in the menu below/beside the link label
- Title Attribute: additional information about your link used by screen readers
- Rel Attribute: add qualifiers for search engines to better understand your link (e.g. “sponsored” means that the link was paid for or generates income such as an affiliate link, “ugc” for user generated content, or “nofollow” for links that you do not want to endorse)
- Additional CSS Classes: custom CSS for more styling (for example, your theme may include a class to make your link look like a button)
You can also open the Styles (half-moon icon) for your Link to edit the typography font size as well as the width for your link block.
Reorder Menu Items
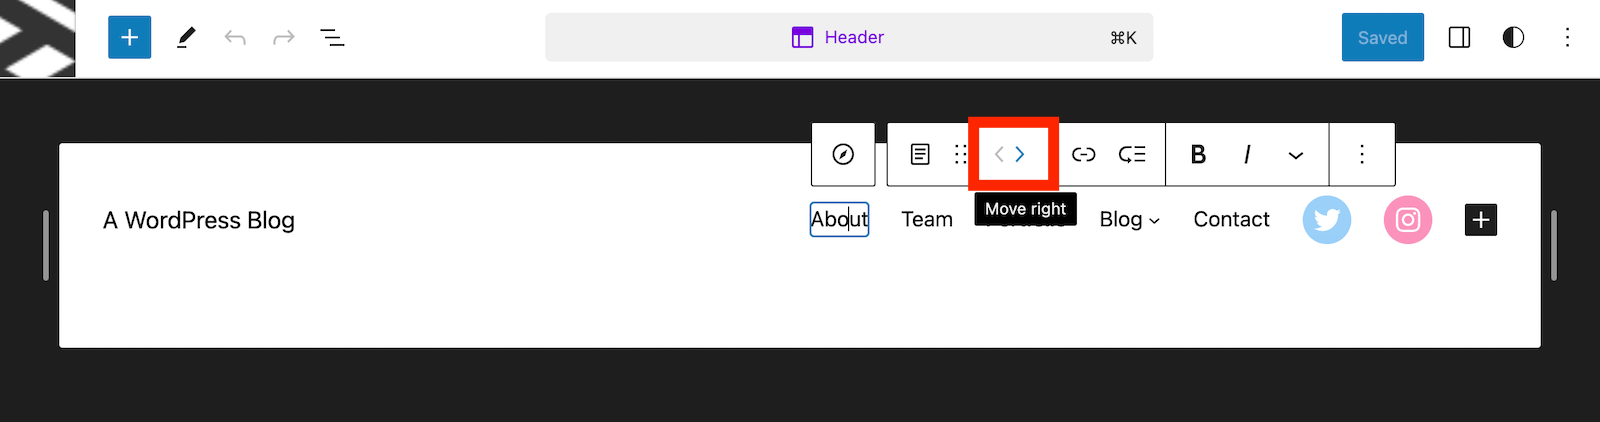
If you’d like to reorder any of the menu items you’ve added just select the item and use the arrows to bump the it to the right/left (or in the case of a submenu the arrows will be for up/down).
Add Dropdown Menus
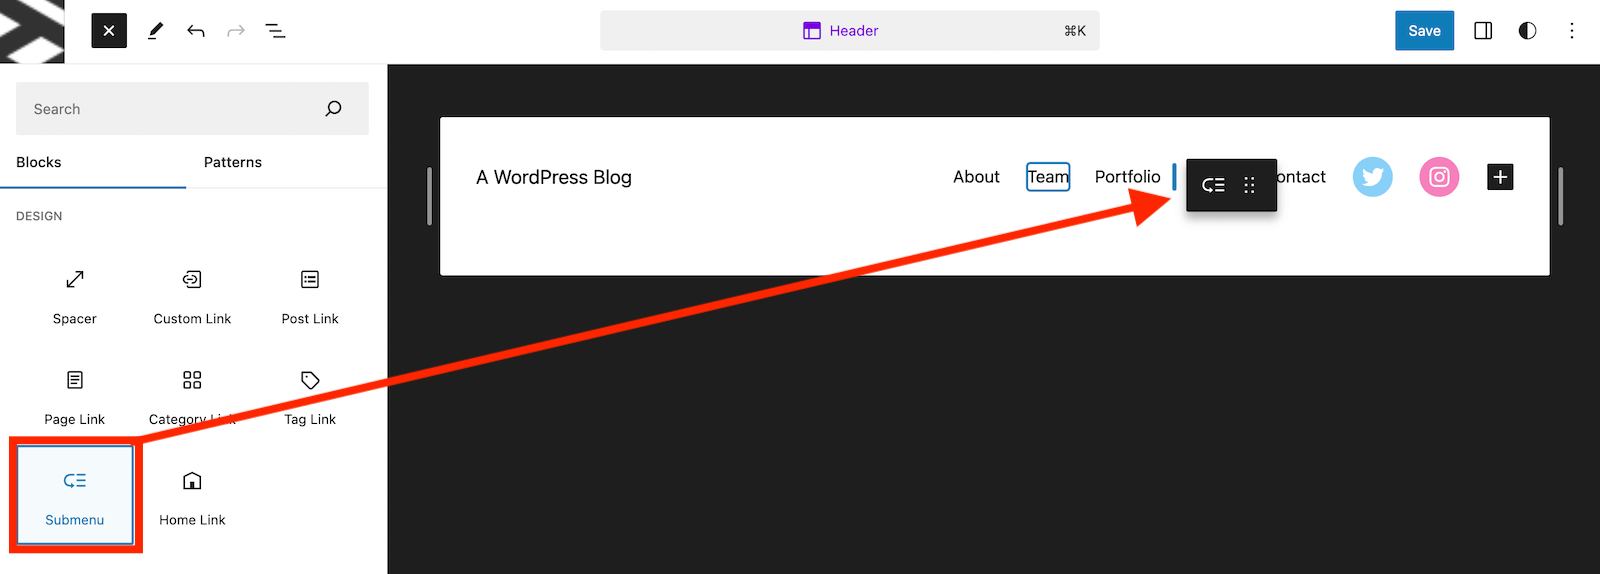
To add a dropdown to your navigation menu, simply add the Submenu block.
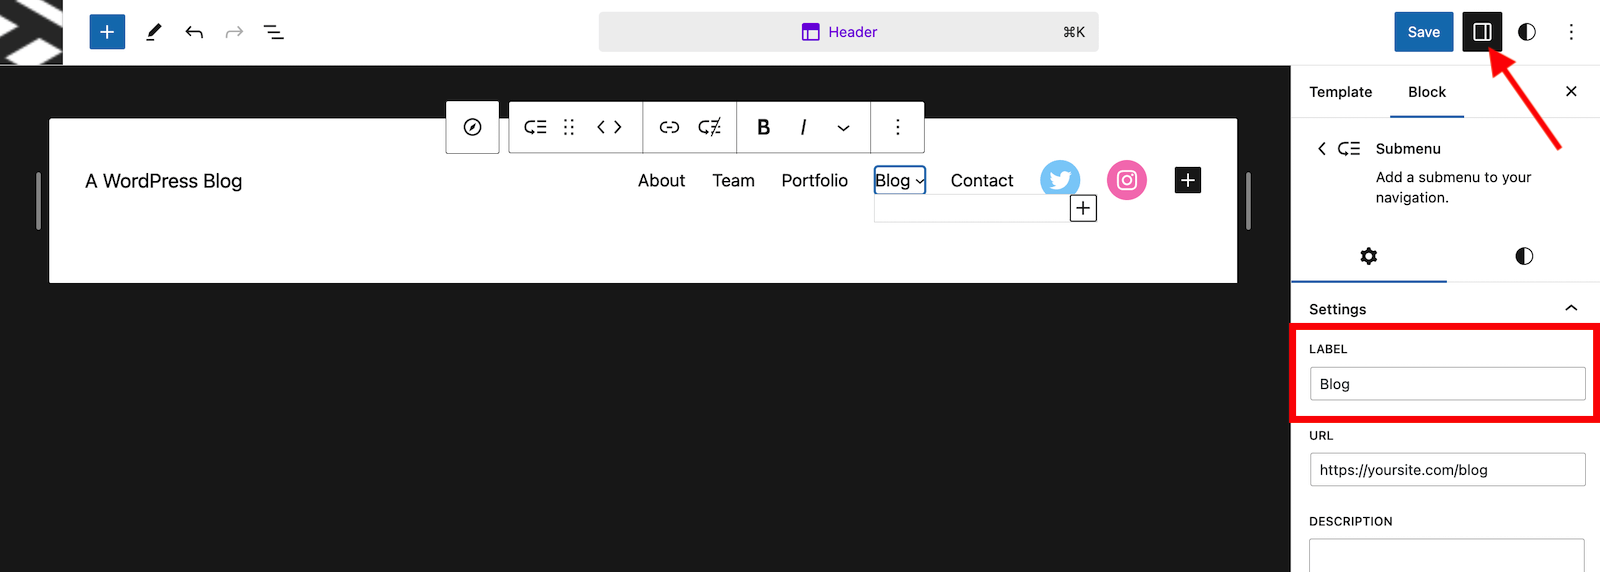
Initially Gutenberg will prompt you to select a page to be the top menu item of your submenu, but alternatively you can click on the columns icon to open up submenu settings and add a label manually (note – adding a link here is optional).
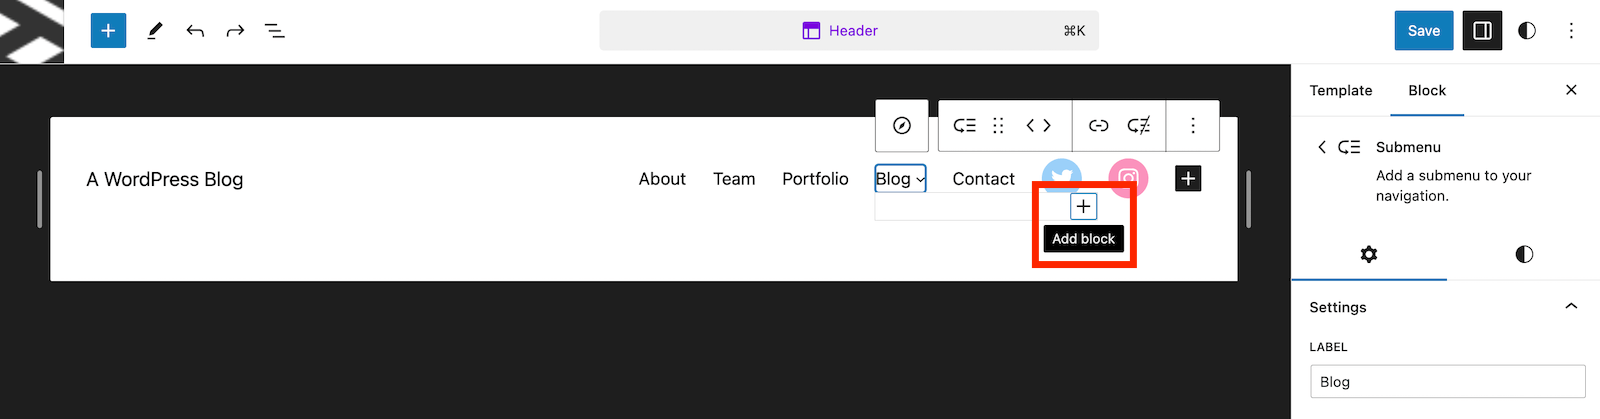
Then to add links to your dropdown click on the white + icon within your submenu.

You can use the window that opens to search for an existing link to a post or page on your site to add, or skip the search and manually add the link label and URL yourself in the right sidebar.
Because Gutenberg is a visual editor you can preview your menu the entire time you’re building it! As a reminder, we’ve used the Header template part for our example but the process is the same if editing a Footer menu, or a navigation block used elsewhere.
How to Create a WordPress Menu in the Main Dashboard
If you haven’t started using Gutenberg, or if you’re using a “Classic” WordPress theme, then you will still have access to the original menu builder. WordPress’s classic menu manager allows you to create simple menus, including drop down menus.
Create a New Menu
Just navigate to Appearance > Menus in your WordPress admin area. This will launch the Menus editor screen. Unlike Gutenberg you will not be creating each menu in the location where it will be displayed. Instead you’ll create your menu(s) first then assign them to a location.
So, if you’ve not yet created a menu or if you click on the “Create a New Menu” link you should see this screen:
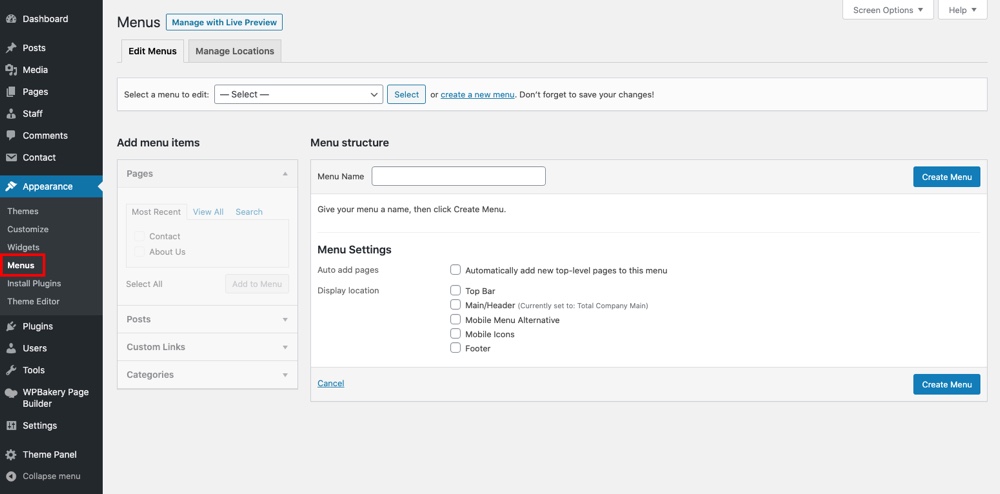
Go ahead, and give your new menu a name. We shall call our example “main menu.” Enter your preferred name, and hit the Create Menu button. This will launch this screen:
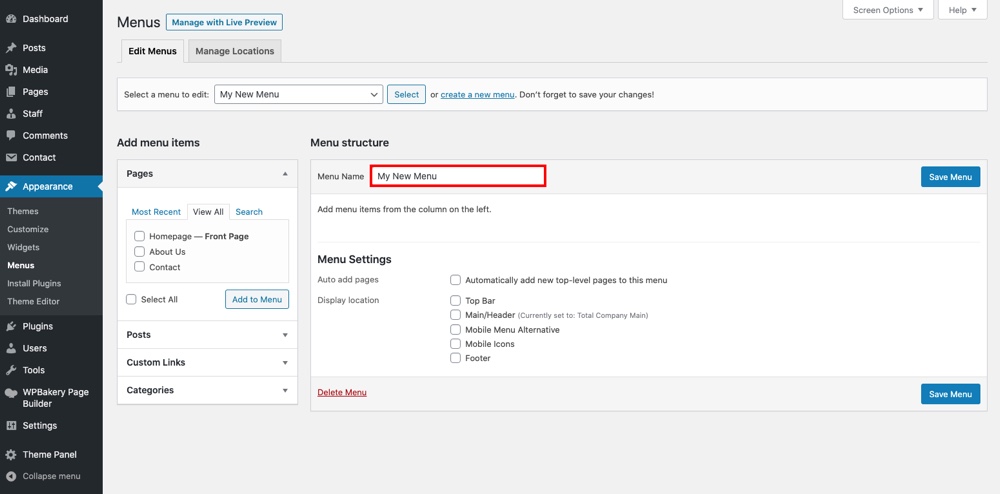
As you can see, there are several options available. To the left, you’ll notice a list of your pages, categories, a custom links tab, and perhaps a couple of other features depending on your theme.
To the right, you have the Menu Structure area where you will edit and order your menu items. You also have the Menu Settings area that allows you to choose menu location, and an option that lets you add new top-level pages to your menu automatically (though for most sites this one can be ignored).
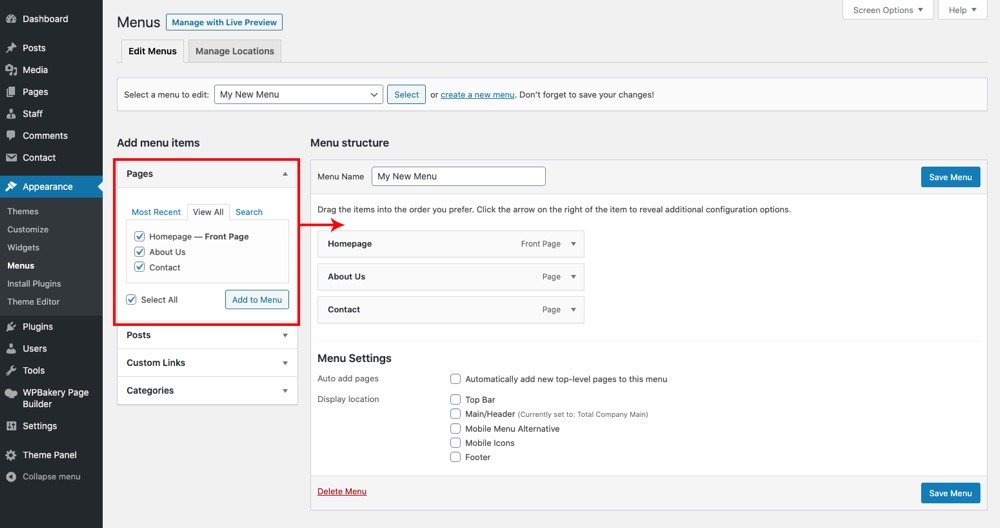
Add Menu Items
All you have to do from here to build your menu is select your pages, categories, or add custom links from the left panel, and then click the Add to Menu button. In a flash, your menu items will appear in the right column, where you simply drag and drop them as you fancy.
Why would you want to add categories to your WordPress menu? If you’ve created posts (e.g. lessons) in different categories (courses), you can group the lessons into courses using this feature. It’s a helpful feature as well if you run a news site. I went ahead and added various categories to my example menu like so:
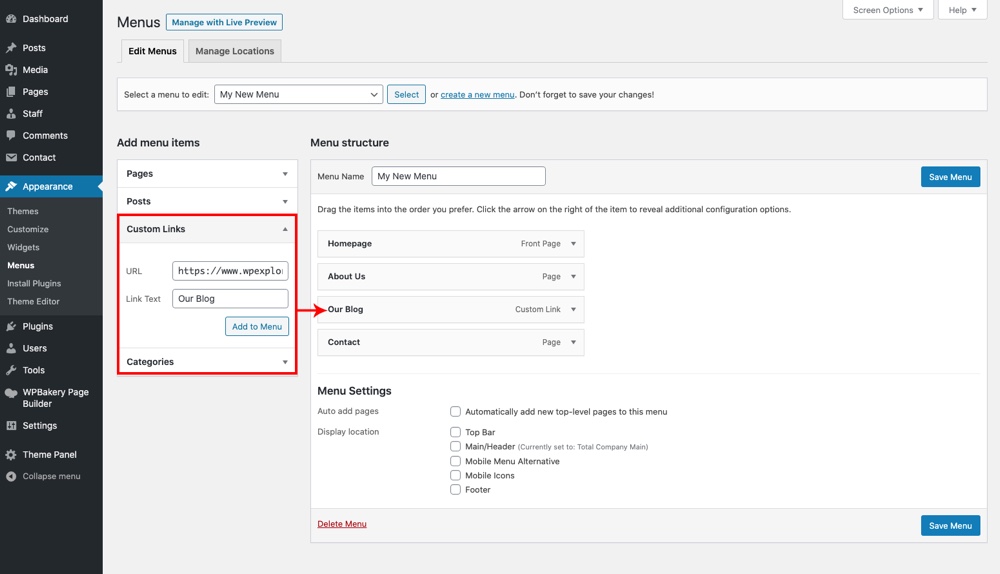
Let’s also add a few custom links to direct visitors to third party sites, or even our very own sites living on sub-domains. Just navigate to the Custom Links tab.
Add your link in the URL text area, and the menu name in Link Text. Then just hit the Add to Menu button. Always include the extension (the https://) or your links won’t work:
Dropdown Menus
So far we only have a few links in our menu, but if we were to add a bunch of link it could get really mess really fast. This is where drop down menus come in handy.
To create a dropdown, first add the sub-menu items you’d like to use. We’ve selected a few blog posts and added them to our menu as an example. Then just drag the sub-menu item slightly to the right like so:
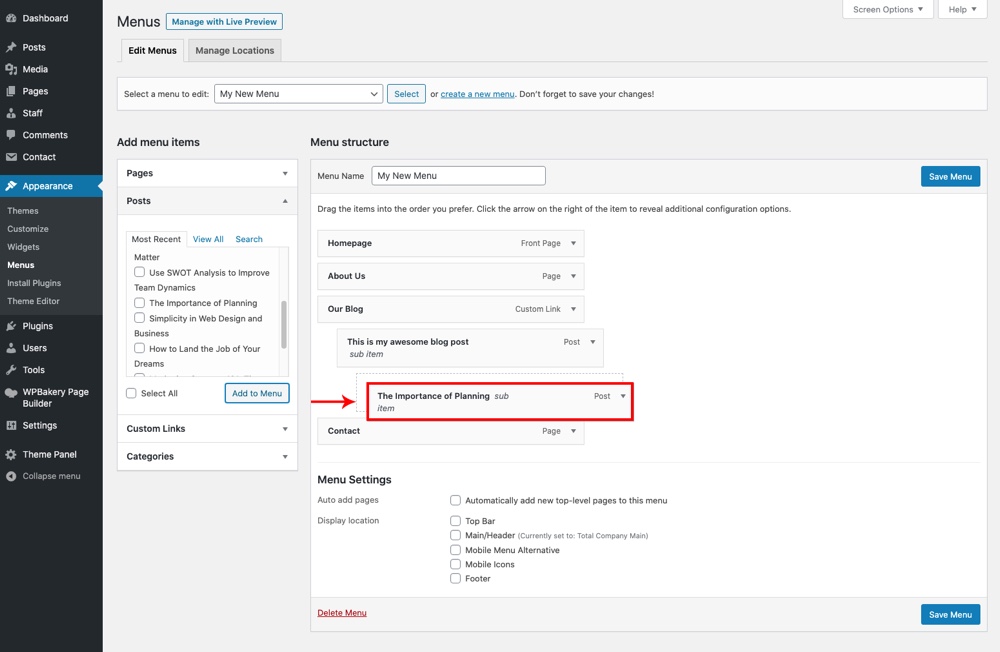
Dropdowns are a great way to make your menus shorter, cleaner and easier to navigate. You can create more sub-menus under existing sub-menus, creating multi-level drop down menus as needed.
Note: Depending on your theme, you may have additional dropdown styling options available in the Customizer or your Theme Panel.
Advanced Menu Properties
Did you know that there are hidden menu options? To enable them, just click the Screen Options tab at the top right of your screen. Then check the Advanced Menu Properties you’d like to enable:
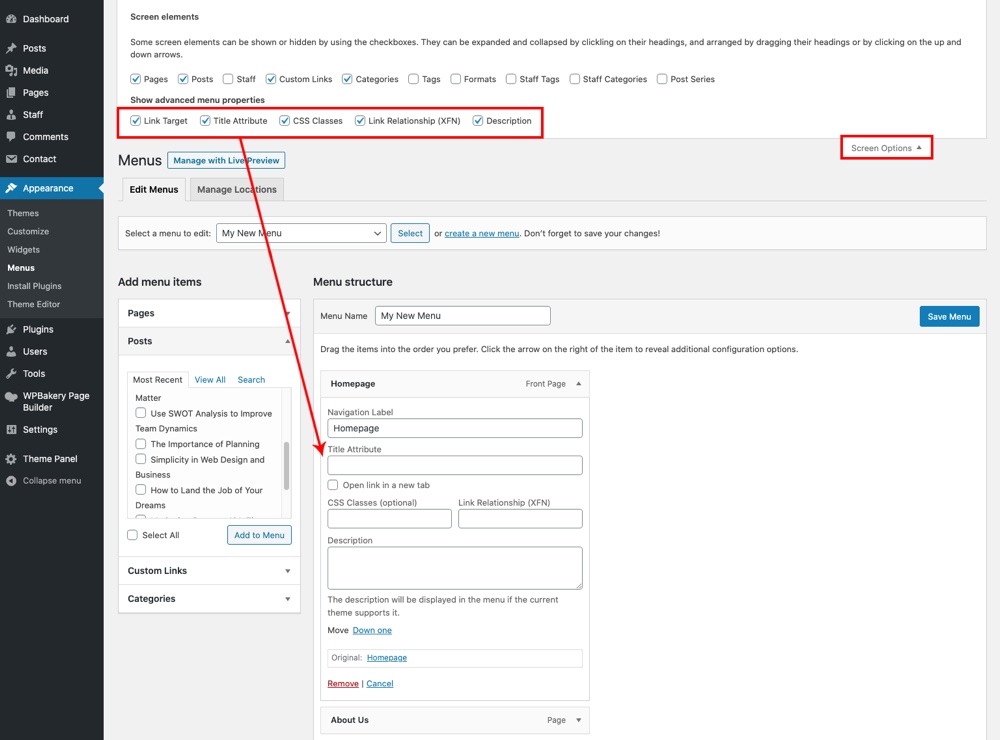
You’ll find the following options, each of which are added to menu items once you’ve enabled them.
Link Target: Check this option to add a target=”_blank” to the link, so your menu item opens in a new tab when users click on it.
Title Attribute: Title attributes can be used to add additional information about a link. This is typically most helpful to search engine crawlers, but is also visible to users as a tooltip when they hover on your menu item.
CSS Classes: This option can be used to add custom CSS stying to individual menu items. This is something you can code yourself, but often theme developers might include an extra option or two. For example, our own Total WordPress theme includes a custom menu-button class that will make the menu item display as a styled button (great for adding a “Buy Now” “Request a Quote” or similar call to action).
Link Relationship: This option is a bit advanced, and to explain quickly it can be used to define how your site is personally related to the link on your menu item. Is it another of your sites? Is it a friend’s site? You can read the official guide if you want to learn more.
Description: Exactly as it sounds, this options allows you to add a more in-depth description to your menu items. Even though this is an option you can enable somewhat easily, it will not be displayed unless supported by your theme.
Menu Location
We’re almost there, but we’re not done yet! You still need to assign the location where you menu will be displayed. Beneath the menu builder you’ll notice a Menu Settings section. This is where you’ll find your Display Location options. Each theme supports a different number of menus, so depending on your theme you may have one or many menu locations. You’ll need to assign a menu to each location you plan on using, however you have the choice to assign the same menu to multiple locations or to create individual menus for each location (it’s up to you).
Note: Alternatively, you can use the Manage Locations tab to control the location for all of your menus in one place.
To assign a menu to a location, simply check the box:
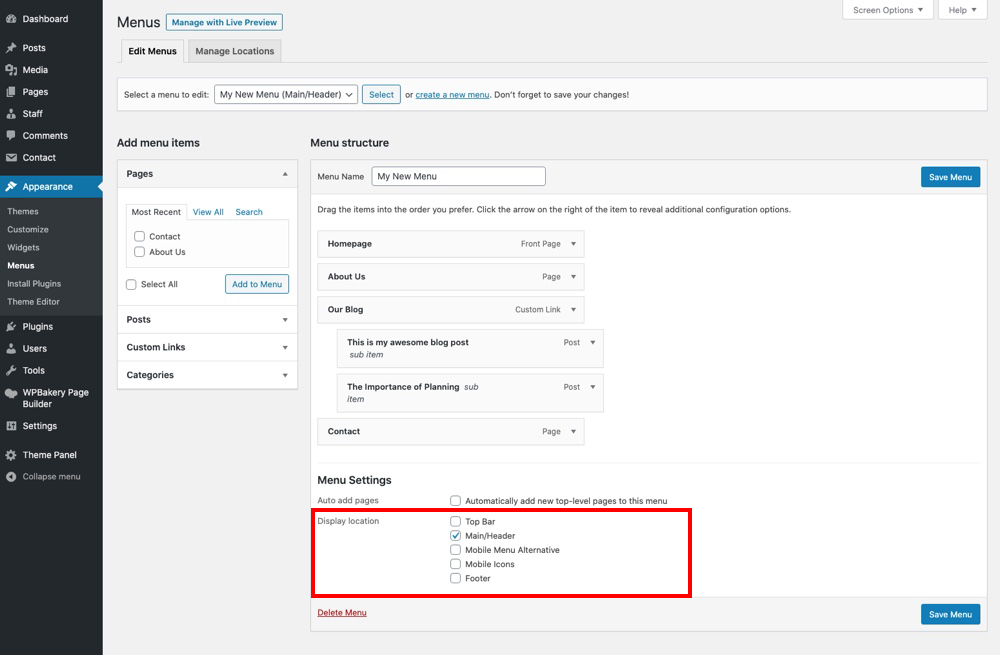
When you’re satisfied with your menu, items, and selected location click the Save Menu button.
Now when you look at your website on the frontend you’ll see your menu. Because we assigned our menu to the Main/Header it’s displayed as the main menu on our demo site:
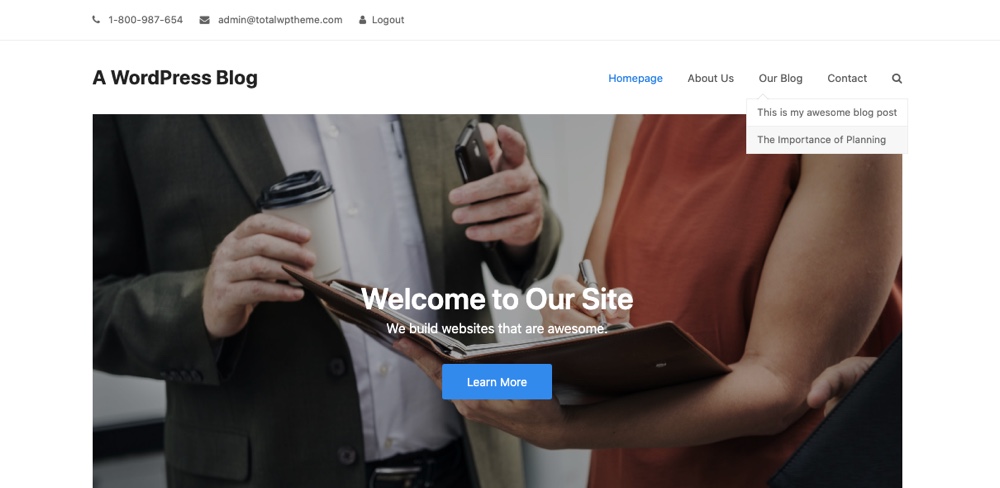
But so far, the classic Dashboard menu editor lets you see the structure of your menus, but you can really visualize them. If you want to see you menus in real time then the Customizer is the right choice for you.
How to Create a WordPress Menu in the Live Customizer
Instead of using the traditional Menu editor in the main WordPress dashboard, some Classic WordPress themes allow you to create menus with a live preview in the Customizer. Many of the options are the same, but we’ll walk you through each step again just so you can be sure.
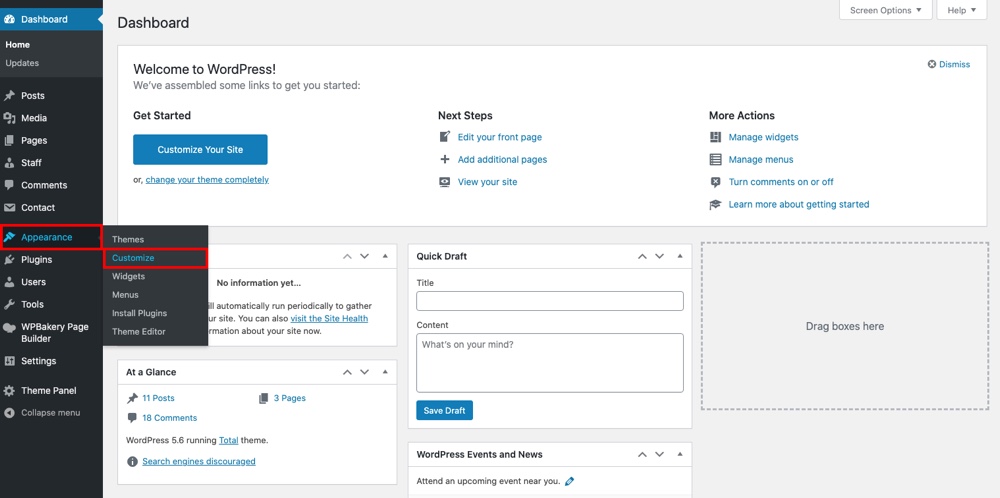
To get started, you’ll need to open up the live Customizer which is located under Appearance > Customize:
Then click on the Menus tab to be taken to the following screen to customize your menus:
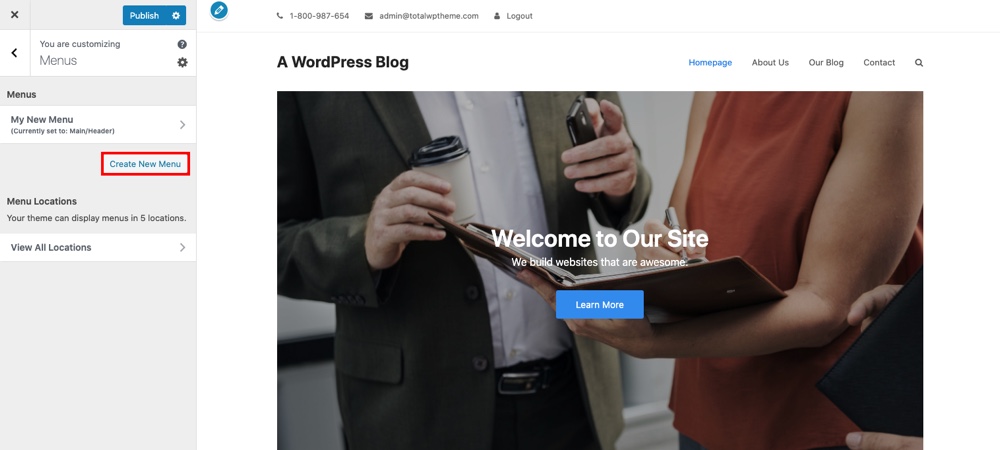
From here you can see your already created menus (like the “My New Menu” we just created in the traditional menu manager), create new ones or view all menu locations. Since we’re showing you the ins and outs of creating menus in the Customizer, we’ll click on the Create New Menu link.
Create a New Menu
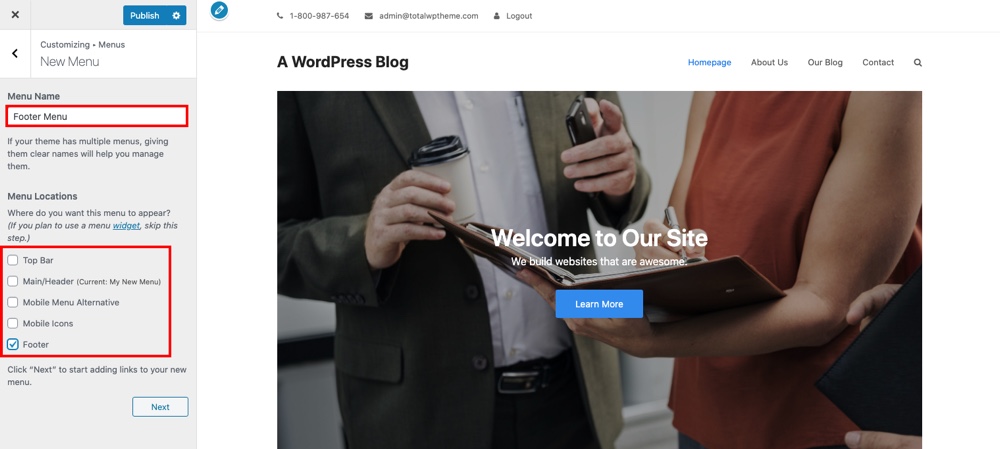
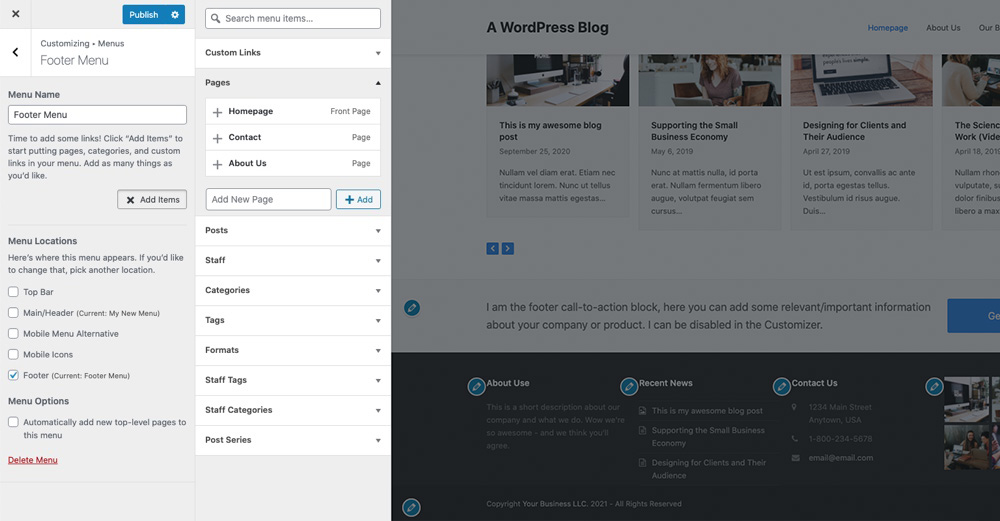
When creating a new menu in the Customizer your first steps are to choose a Menu Name and check a box for the Menu Location. As a reminder, available menu locations will depend on your theme. Because we’re using the Total theme we have a number of locations available, so we’ll select the “Footer” location since we’ve already created a main menu:
Add Menu Items
After naming and assigning your menu you can start building. Click the Add Items button to open up the menu builder:
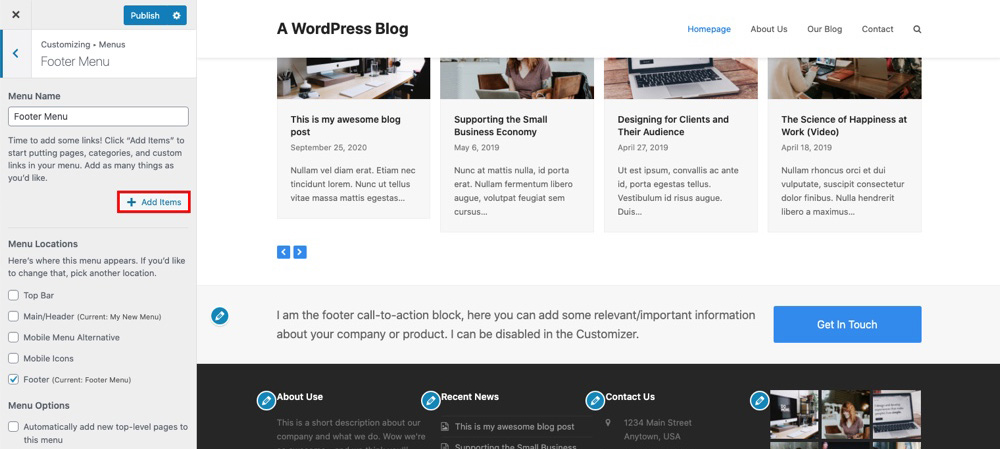
Here you’ll find all the same options to add links as in the traditional menu manager.
To add pages, posts, custom post types or taxonomies simply click the plus + icon next to the item your want to add. It will immediately add the item to your menu and display it on your site’s live preview:
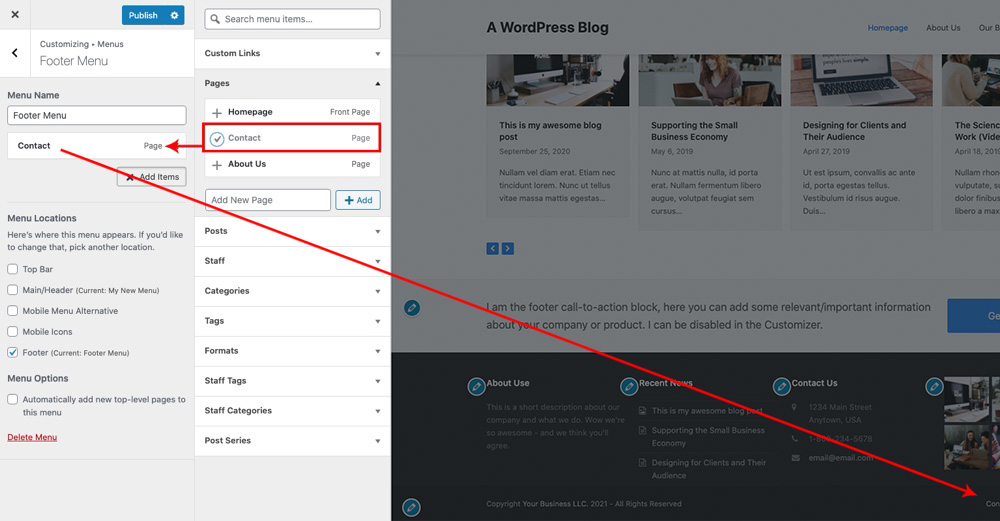
Reminder: We’re creating a Footer menu, so our menu is displayed in the footer. Depending on which menu you location you choose your menu live preview will be different. If you’ve selected a mobile menu location the menu will only be visible on mobile, so you’ll need to click on the tablet or phone icon at the bottom right of the live Customizer to preview your mobile menu.
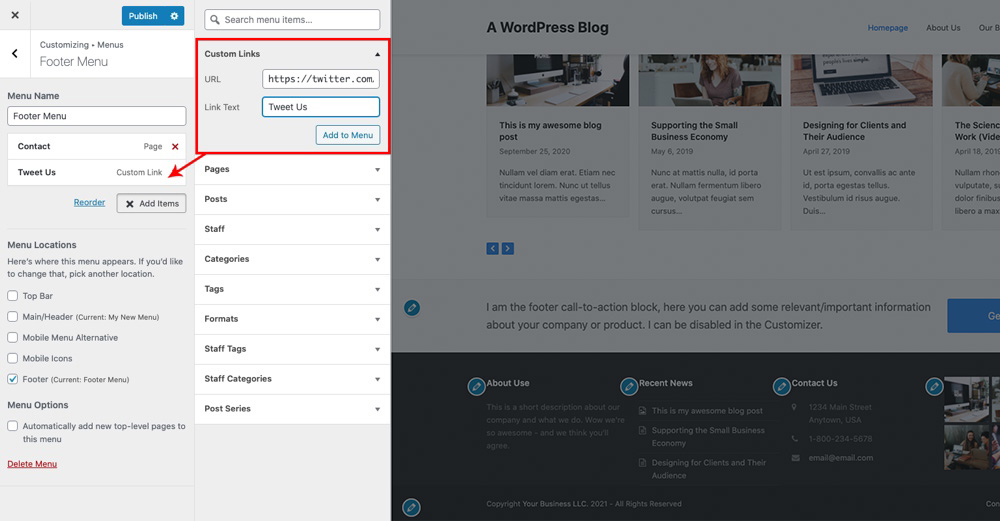
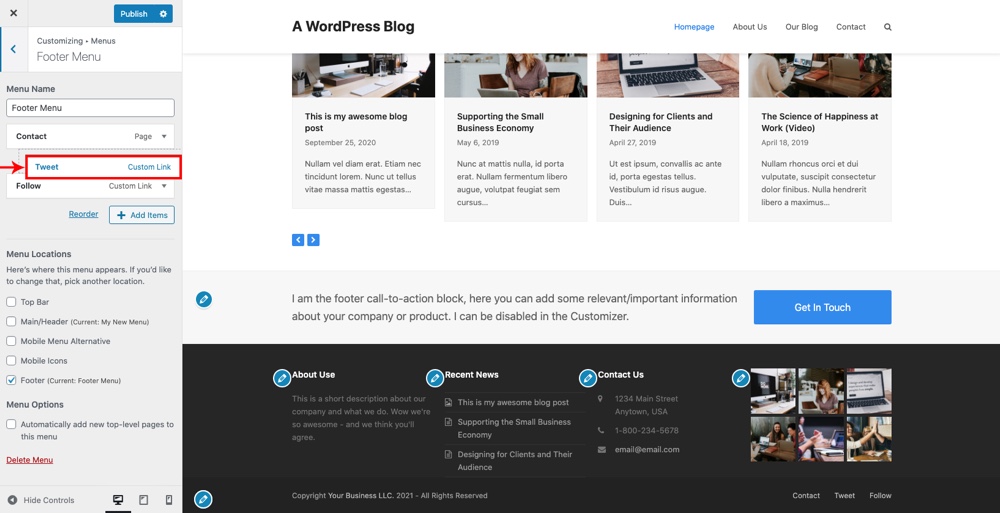
To add a custom link, simply add your URL and link text and click the Add to Menu button:
Advanced Menu Properties
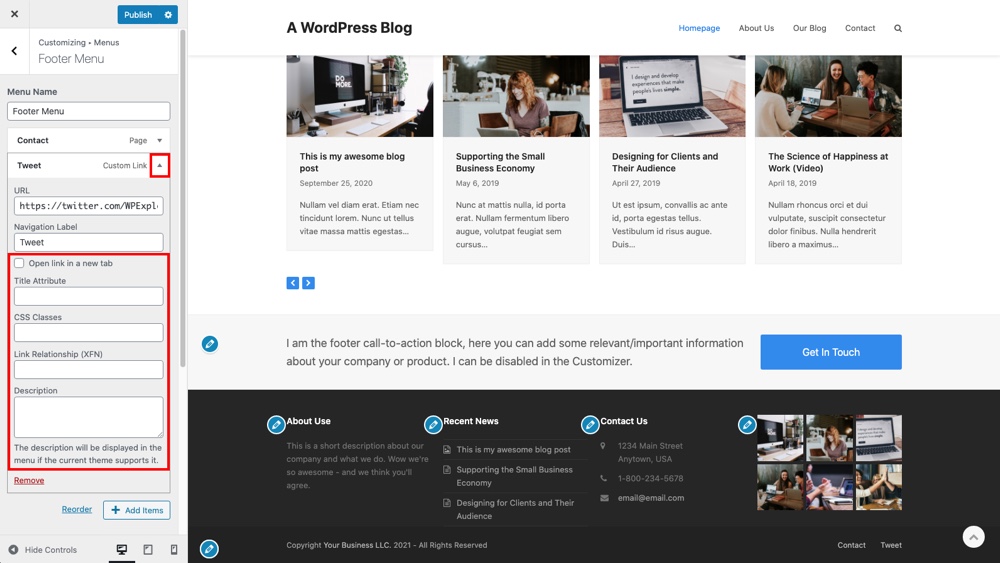
When working in the live Customizer the menu link Advanced Menu Properties are not visible by default. To enable them you’ll need to go back to the main WordPress dashboard menu editor (if you’ve already started building you menu, be sure to Publish your menu first so you don’t lose all your hard work), click on the Screen Options tab at the top right of the screen and check the boxes for the options you’d like to enable.
Then when you head back to the live Customizer > Menus, open your menu and click on the arrow next to menu item you’ll find all of the Advanced Menu Properties you’ve enabled:
Dropdown Menus
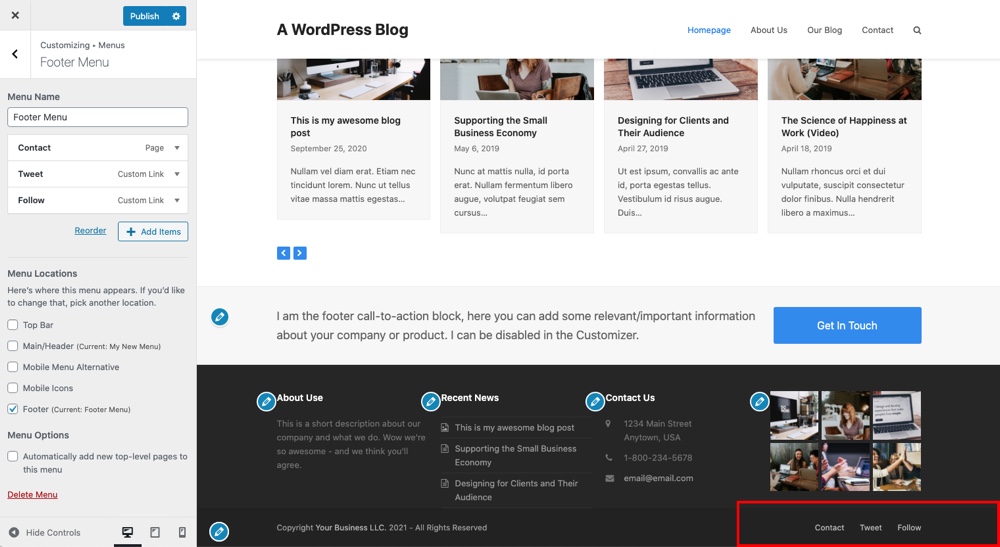
Once you’ve added menu items you might want in your menu, you can create dropdowns. For a dropdown you’ll need submenu items, so simply add your links to your menu then click and drag them to the right. This will create your dropdown:
Menu Live Preview
You’ve probably already noticed as you were building, but the live preview to the right of the Customizer menu updates in real time as you make changes. So as you add menu items, add drop downs, change the location, etc it will be reflected in the live preview. Here is what our footer menu currently looks like:
If you’re happy with your menu be sure to Publish it before exiting the live Customizer. After publishing, you menu will be visible on the frontend of your website:
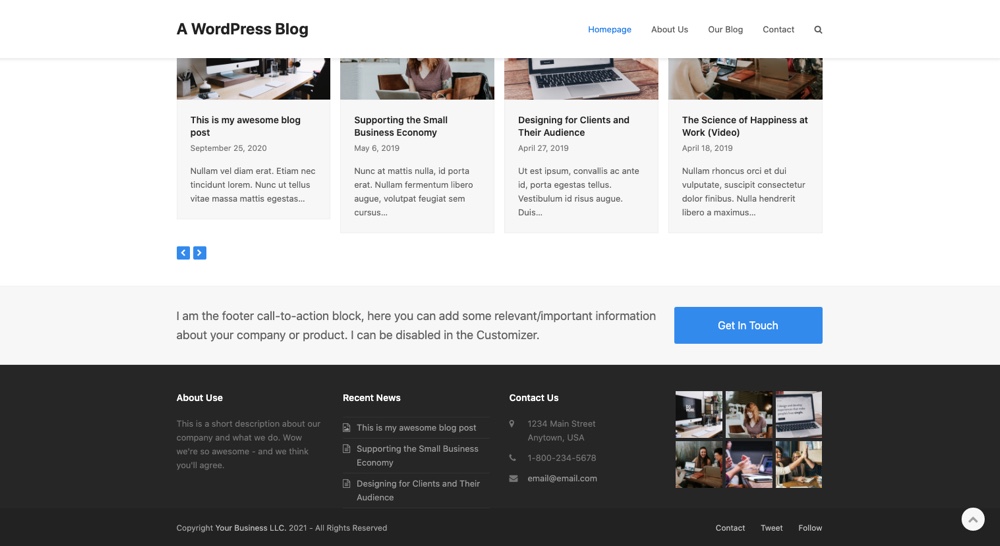
As you can see – looks just like the preview. No surprises here!
WordPress navigation menus are a vital part of your WordPress site. They guide your users allowing them to find the content they’re after. They’re great for improving user experience, and consequently, your conversion rates. The best part is they’re quite easy to implement, so nothing’s to hold you back.
Thanks. A great review of navigation menus and the ways to create them was appreciated.
Nice Review
Thanks for comprehensive guide and great list!
Thanks for very detailed guide. Would love to recommend Mobi too and I hope this will be a great addition on your collection. Works perfect specially on mobile. Thanks!
very valuable article about How to Create a Menu in WordPress very well explain with screenshots.