How to Create a Simple Gutenberg Block Plugin

Don’t we all love WordPress? The platform has enjoyed massive success since its inception, with developers adding new features constantly. One of the most notable features in recent times is the WordPress block editor, codenamed Gutenberg.
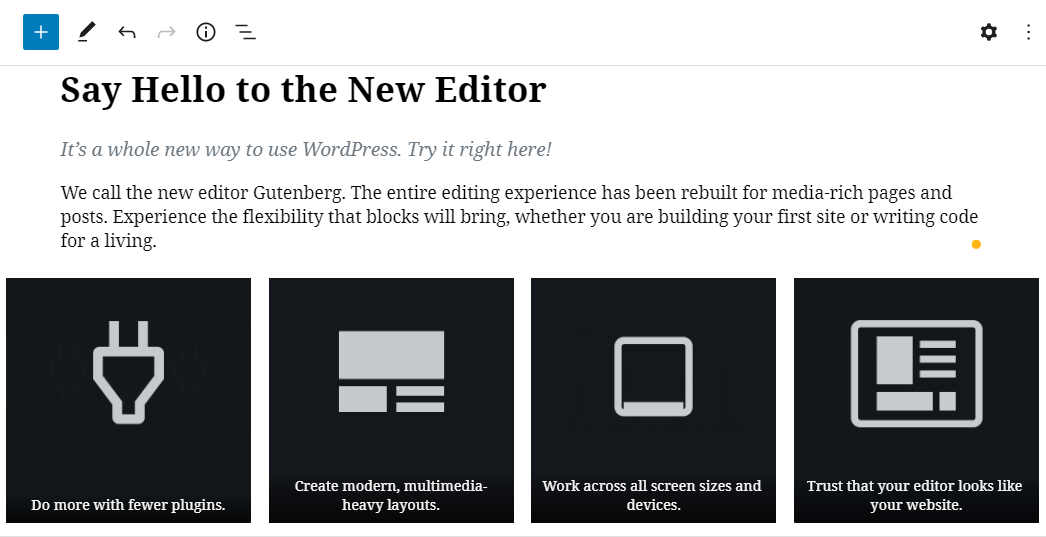
Gutenberg offers WordPress users an exciting new way of publishing content and customizing your site. It is incredibly easy to use, which is great news for beginners and developers alike. If you’re using the latest version of WordPress, you are already family with the block editor and the concept of blocks.
By default, WordPress block editor comes with some blocks that allow you to include text, images, quotes, audio, videos, embeds, and so on. On top of that, there are a ton of Gutenberg add-ons out there that allow you to extend the editor without breaking a sweat.
Still, you might have a specific need that prompts you to create your own custom blocks. Here is where today’s post comes in. In a couple of paragraphs, you will learn exactly how to create custom Gutenberg blocks to suit your specific needs.
Without further ado, let us start since there is a lot to learn.
What Are Blocks, Anyway?
If you’re the perfect beginner, you’re probably wondering what this Gutenberg business is all about. I know, I was pretty much confused when Gutenberg was introduced. But no one is to blame, we were all used to the Classic Editor that making the shift was uncomfortable at first.
Still, the WordPress block editor is here to stay whether we like it or not. It’s precisely why you should learn as much as you can about Gutenberg (and everything that comes with it) to make the most out of it.
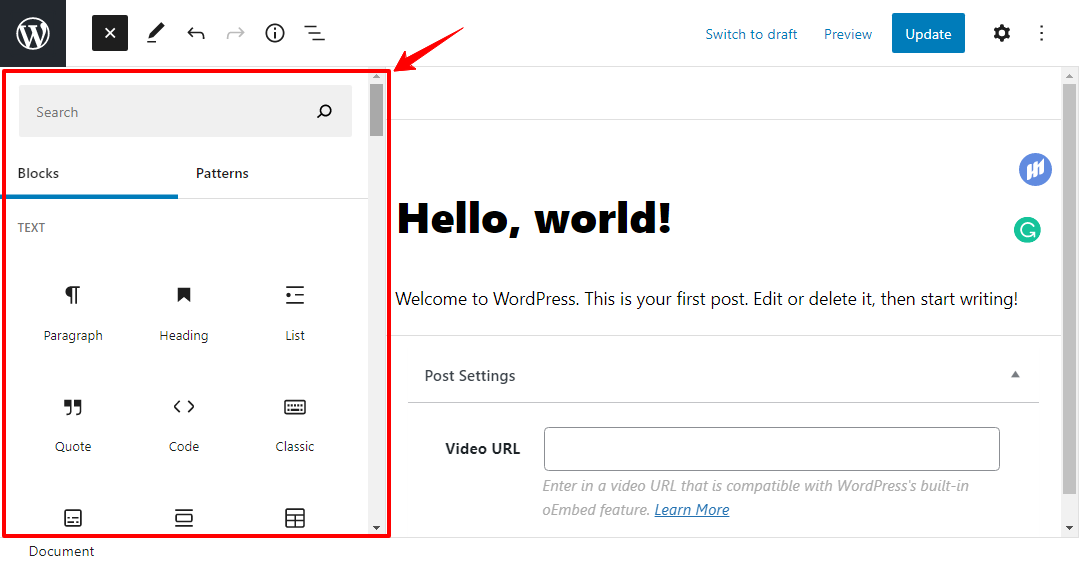
Blocks treat Paragraphs, Headings, Media, and Embeds all as components that, when strung together, make up the content stored in the WordPress database, replacing the traditional concept of freeform text with embedded media and shortcodes. – Block Editor Handbook
In the past, WordPress users relied on freeform text and shortcodes to add content. Gutenberg uses blocks. The new editor allows you to use units of blocks to create rich and flexible layouts that are easy to manage. Currently, you can use the block editor for posts and pages but there are active plans to support full-site editing in the future.
Working with blocks makes creating content in WordPress quite refreshing. Plus, many existing plugins support the new editor and come with ready-to-use blocks that make adding content from said plugins a breeze. The editor allows you to drag and drop blocks onto a page so you can hit the publish button faster.
Just like a page builder built directly into WordPress.
If you’re familiar with visual page builders such as Elementor, you’re probably familiar with the concept of drag-and-drop page building. Gutenberg is an attempt to fully incorporate drag-and-drop site-building into the WordPress core. Feel free to check out our Step by Step Guide to the Gutenberg Builder for WordPress to learn more.
With that out of the way, let us get to the best part of today’s post. Let us learn how to create a simple block. You can do it manually or using plugins such as Genesis Custom Blocks (formerly BlockLab), Lazy Blocks, or ACF. Creating custom blocks is a bit technical, so for the purposes of today’s post, we will use a plugin.
How to Create a Custom Block (Using Genesis Custom Blocks)
Going the plugin route is easier since creating custom Gutenberg blocks from scratch need a good grasp of HTML, CSS, PHP, and, more importantly, JavaScript. You will also need to understand React, which throws beginners a curveball.
For the next section, we will use the Genesis Custom Blocks, which is brought to you by StudioPress and WPEngine, among other developers. The free version of Genesis Custom Blocks is available on the official WordPress repository, which means we can install it inside the WordPress admin dashboard.
Install Genesis Custom Blocks
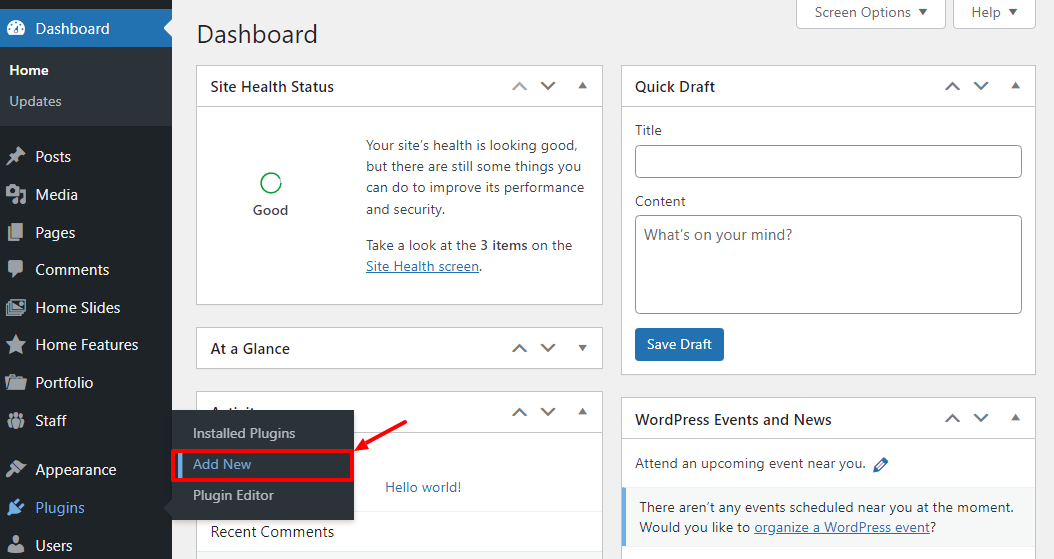
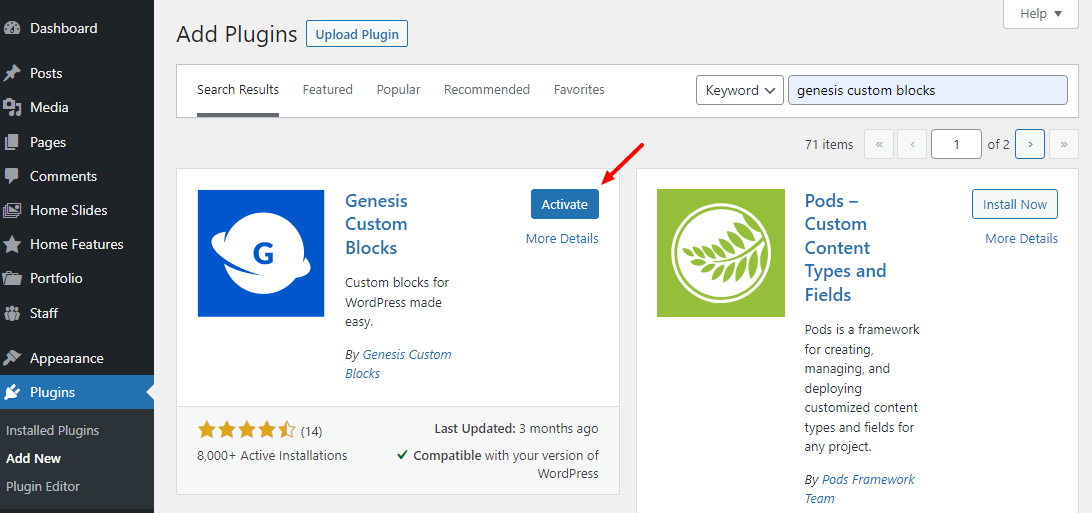
Log in to your WordPress admin dashboard, and navigate to Plugins > Add New, as shown below.
Next, enter “Genesis Custom Blocks” into the keyword search box, and hit the Install Now button:
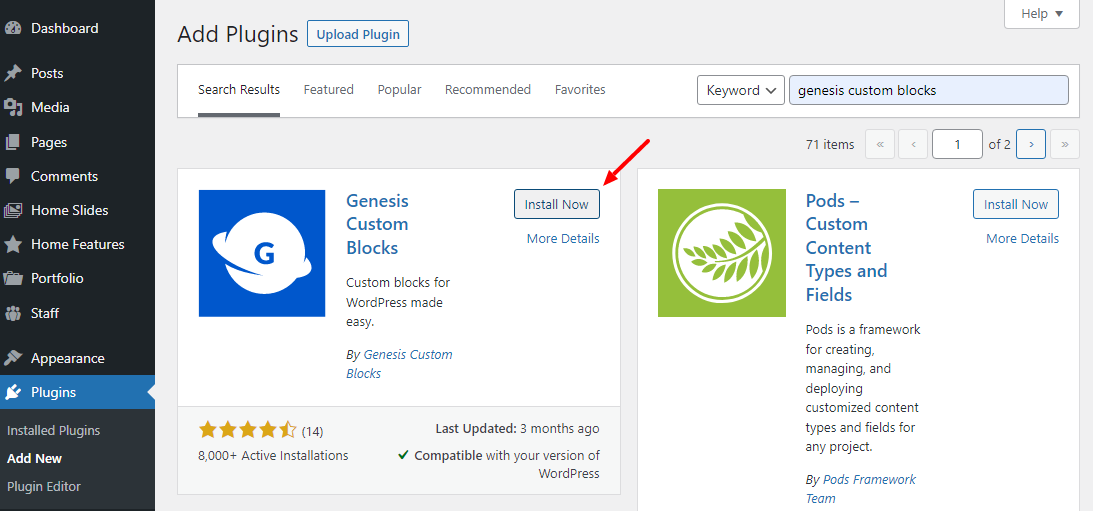
After that, Activate the plugin to get the party started.
You’re doing just fine 🙂
Next, let us create a new custom block. For illustration purposes, let us create a custom Call-To-Action (CTA) that we will add at the end of each post we publish. The best part is you can reuse blocks to save you the trouble of creating the same blocks over and over.
From your WordPress admin menu, navigate to Custom Blocks > Add New, as we highlight below.

Doing so will lead you to the following page where you find all the options to create our custom block (in our case, a CTA):
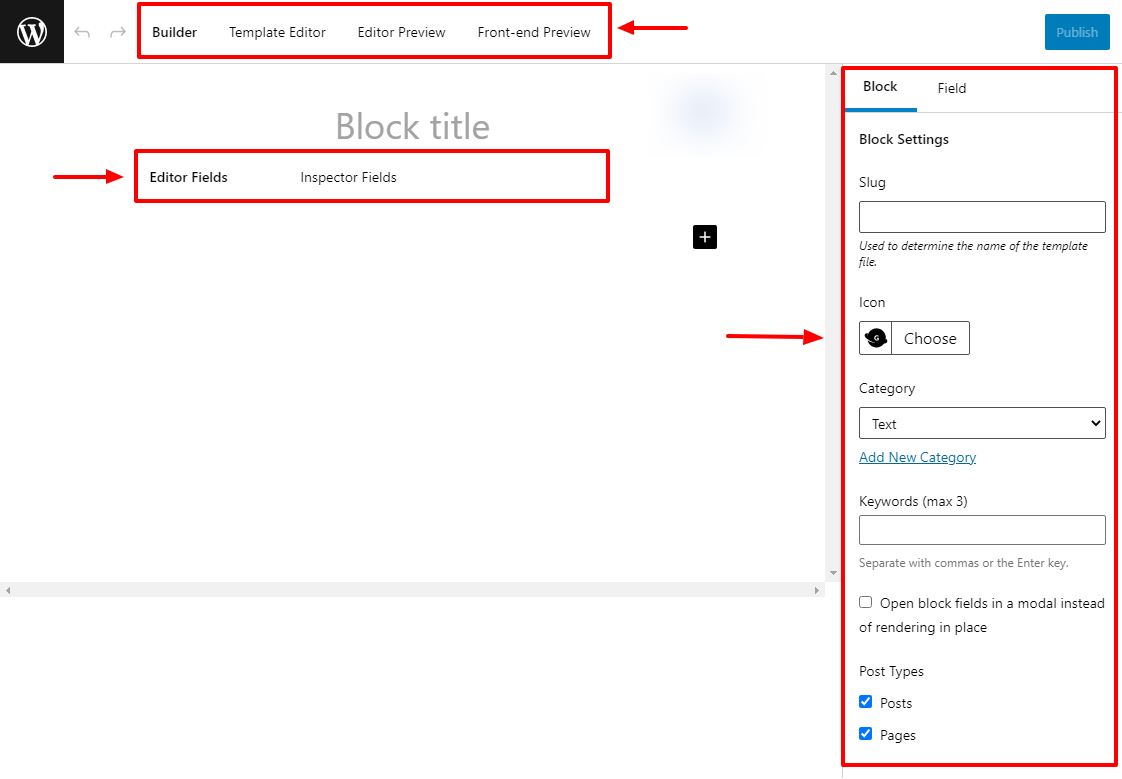
Here are a few words to explain what you see in the above screenshot. Starting from the top, you have.
Main Editing Area:
- Builder – You’ll probably spend a lot of time here designing your custom block. The Builder allows you to add a title, fields, slug, keywords, category, and preview your custom block. You’ll learn how to add fields.
- Template Editor – After designing your custom block (i.e., adding various fields), you will need to create a block template (read, add a little bit of code) in the Template Editor. We will learn more when we design the CTA.
- Editor Preview – This allows you to preview the custom block inside the WordPress block editor.
- Front-end Preview – Here, you can preview how the custom block looks on your site.
- Editor Fields – Will display the fields in the main editing area of a post or page (You know, just like how you see your regular posts inside the WordPress editor)
- Inspector Fields – Will display the field in the right-hand sidebar under the block inspector.
Sidebar Options
- Slug – The slug is auto-filled based on the title you give your custom block. It’s important when creating the block template.
- Icon – This option allows you to add an icon to your custom block.
- Category – This allows you to assign a category to your custom block. You can categorize your custom block using one of the built-in categories, or you can create a brand new category.
- Keywords – Add a maximum of three keywords related to your custom block so that people can find it easily in the block selector.
- Open block fields in a modal instead of rendering in place – Toggle on if you’d like to open fields in a modal. It’s useful if you have a custom block with many fields.
- Post Types – Tick the box(es) to allow your custom block to be displayed on each post type. For example, if you uncheck Posts, the block won’t appear at all on any post.
Creating a Custom Block
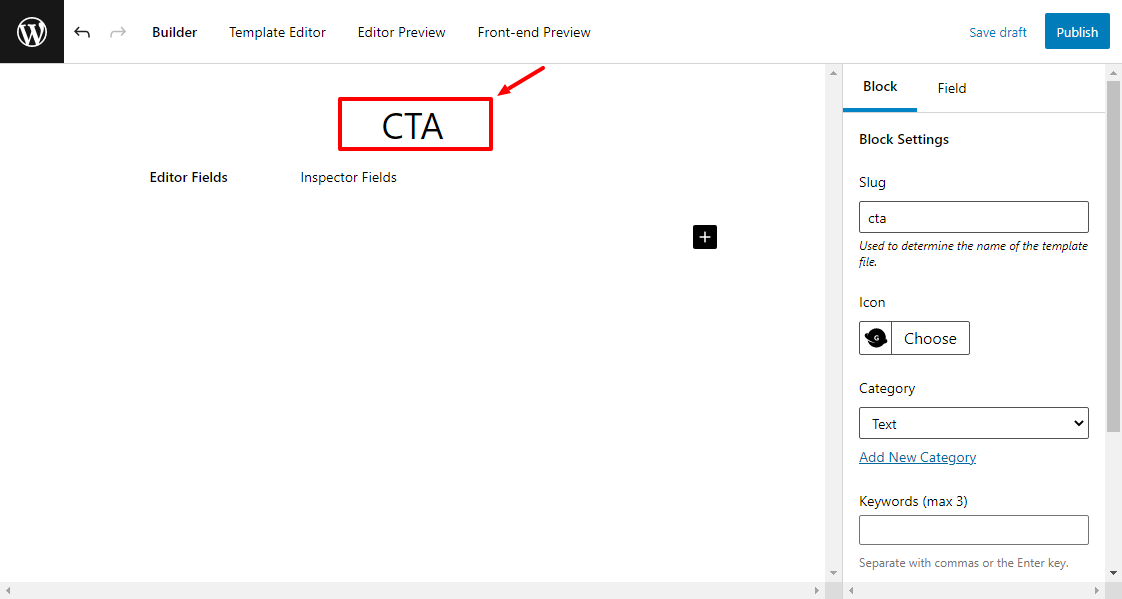
Now that you have a better understanding of the user interface, and what each part does, let us roll up the sleeves a get to work.
In the Builder, give your custom block a suitable title. I’m going with CTA for this one, as shown below.
Before adding new fields, let us add an icon, keywords and choose a category for the custom block, as shown below.
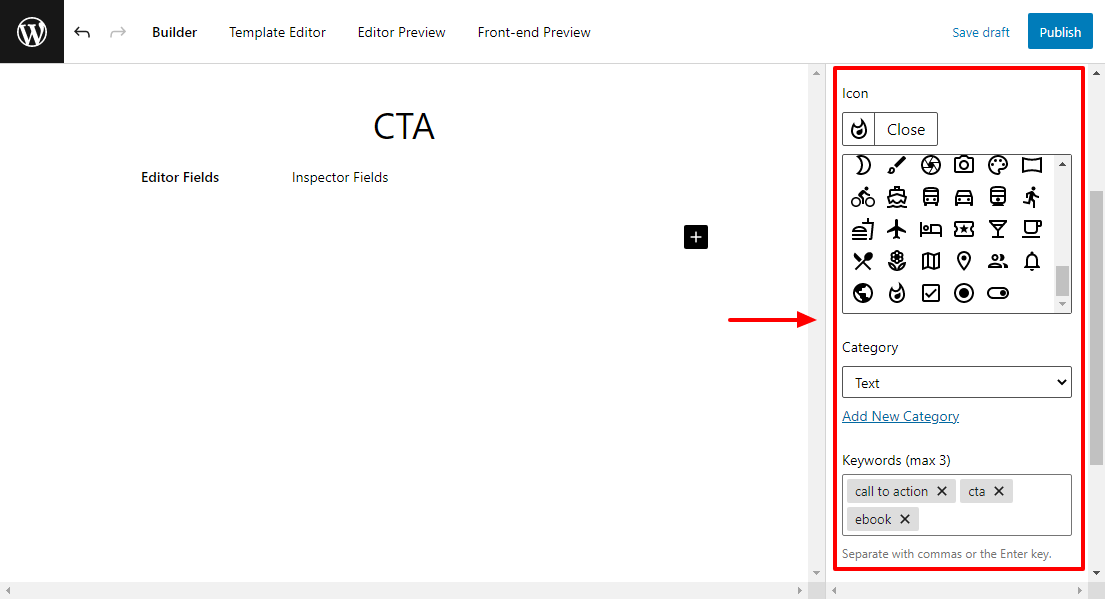
That set, let us add some fields to our custom block. For our example CTA block, we will add just three fields in the following order: an image, some text, and a file field that allows people to download out imaginary ebook 🙂
Adding Block Fields
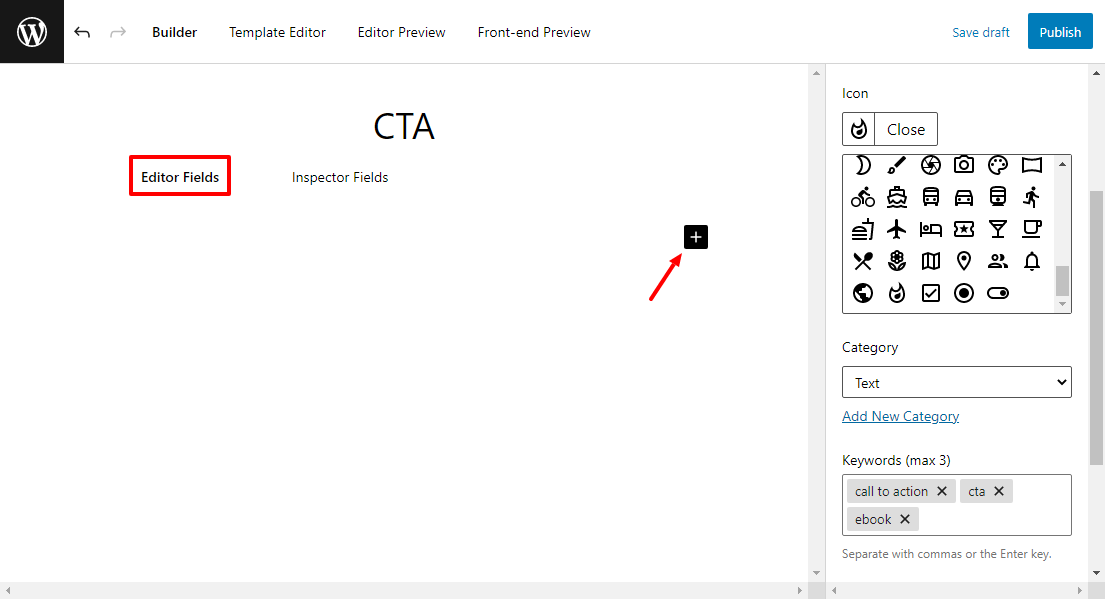
On the Editor Fields section, click the Plus (+) icon to add the first field, as shown below.
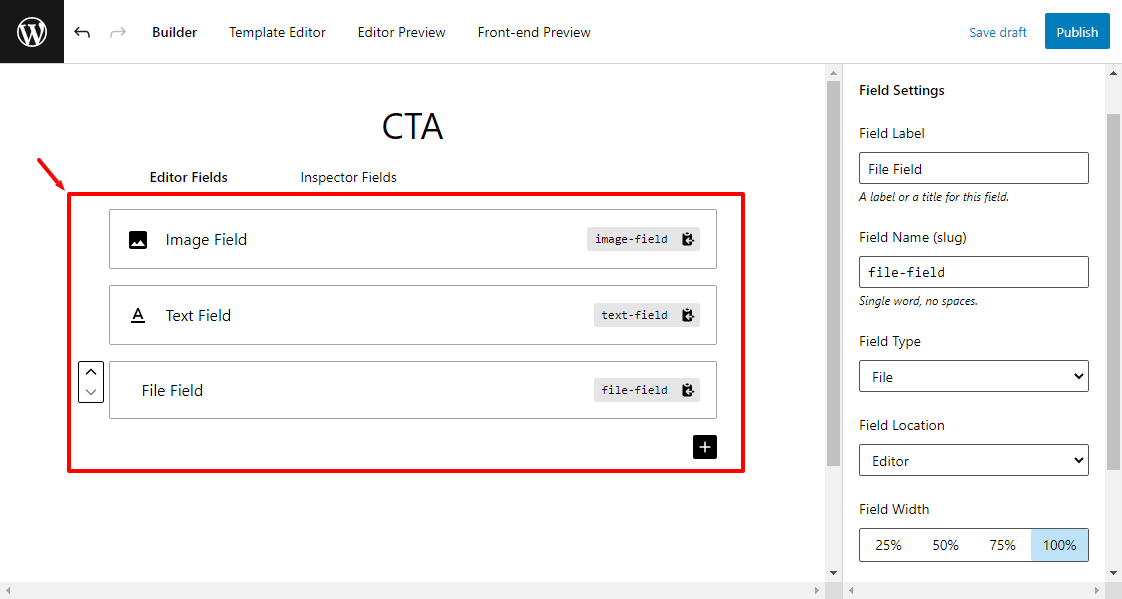
Next, let us add an image field. From the sidebar, set the Field Type to Image and define the other options. Also, take note of the slug (I set mine to image-field) because we will use it when creating the block template. See the image below.

After that, add the text and file fields in a similar fashion.
Don’t celebrate yet, there is one step to go. Switch to the Template Editor > Markup:
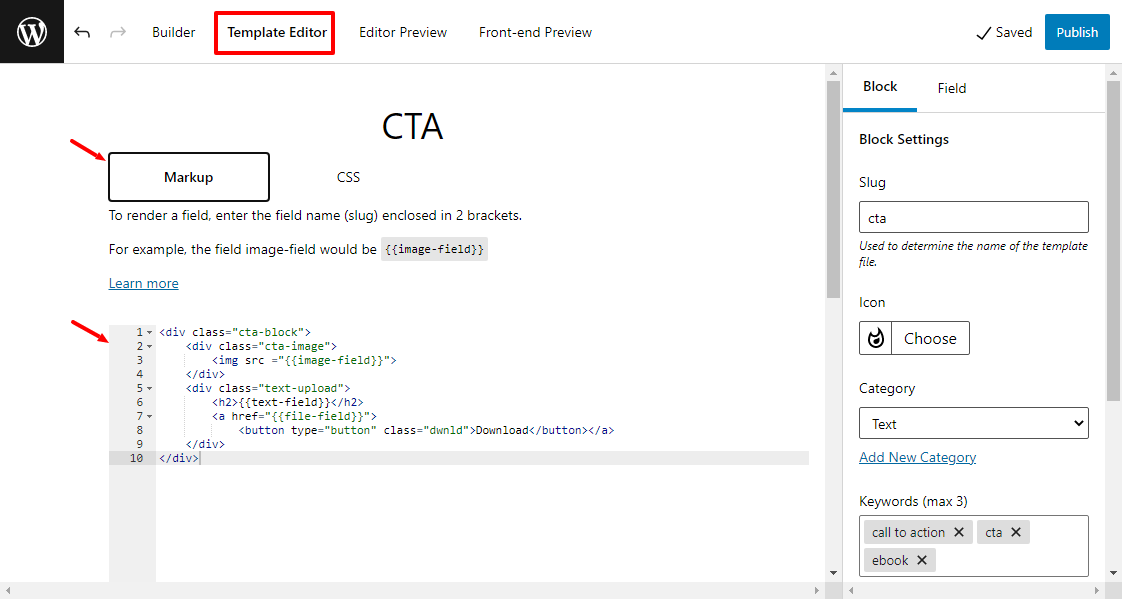
Here, we will design how your custom block looks on your site. The Template Editor accepts HTML, CSS, and the field slugs (which, you must enclose in 2 brackets). If you need to use PHP, you can create the template using the PHP templating method instead.
Don’t worry, it’s easy.
Inside the Template Editor, under the Markup tab (see the above image), add the following piece of HTML markup (code):
<div class="cta-block">
<div class="cta-image">
<img src ="{{image-field}}">
</div>
<div class="text-upload">
<h2>{{text-field}}</h2>
<a href="{{file-field}}">
<button type="button" class="dwnld">Download</button></a>
</div>
</div>
As you write your HTML markup, you’ll notice that the Template Editor auto-completes the field slugs (e.g. {{image-field}} ) for you 🙂
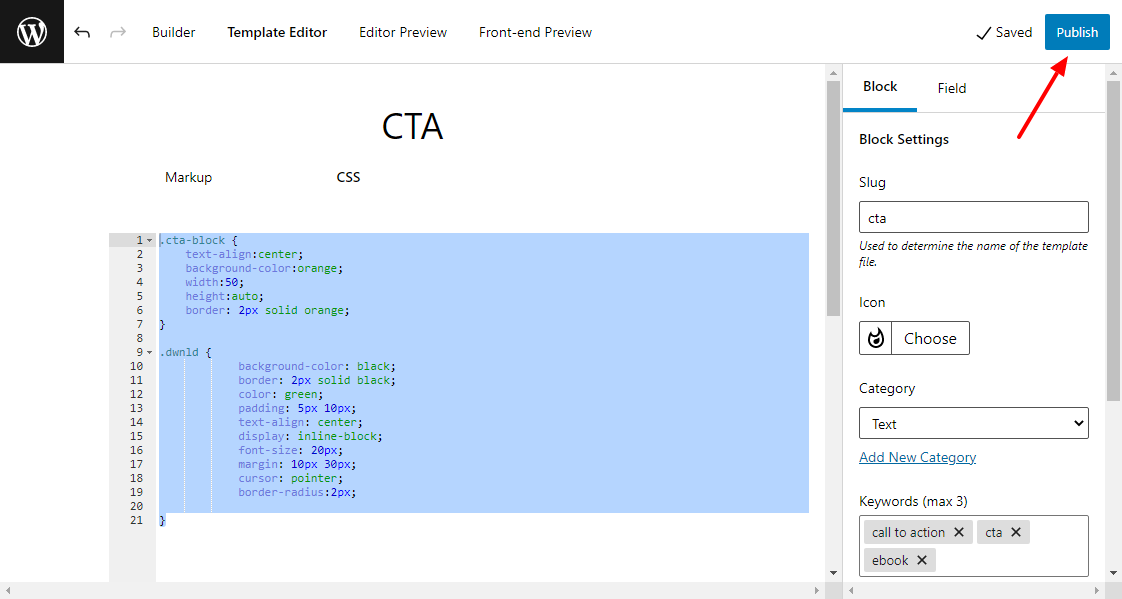
Next, go to the CSS section to add some simple styles.
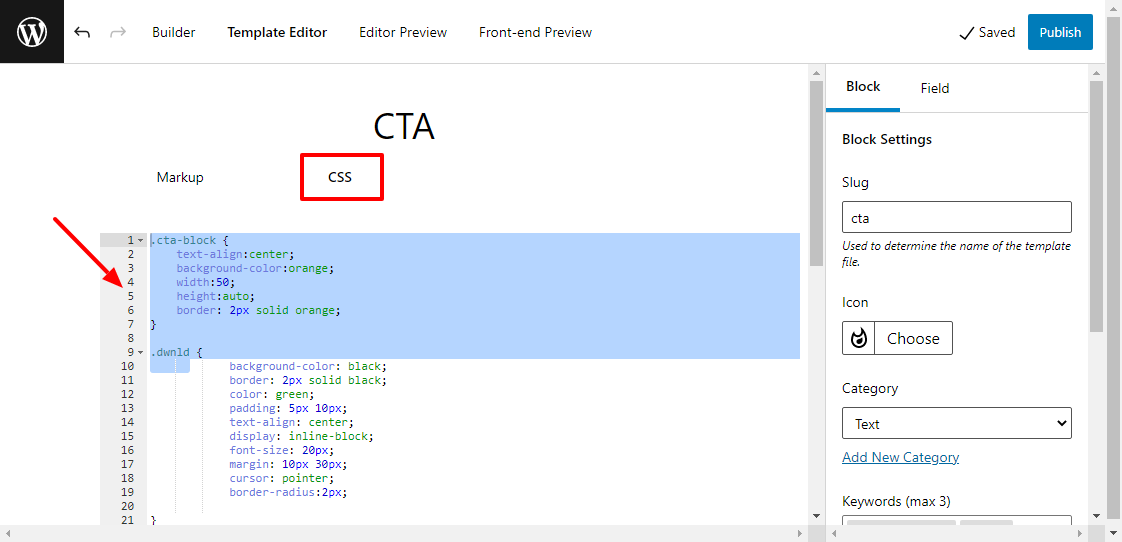
You can add the styles you desire but this is what I’m working with:
.cta-block {
text-align:center;
background-color:orange;
width:100%;
height:auto;
border: 2px solid orange;
}

.dwnld {
background-color: black;
border: 2px solid black;
color: green;
padding: 5px 10px;
text-align: center;
display: inline-block;
font-size: 20px;
margin: 10px 30px;
cursor: pointer;
border-radius:2px;

}
And you’re all set! Click Publish:
To see your new custom block in action, go back to your WordPress admin dashboard and navigate to Posts > Add New (It works with pages, too):
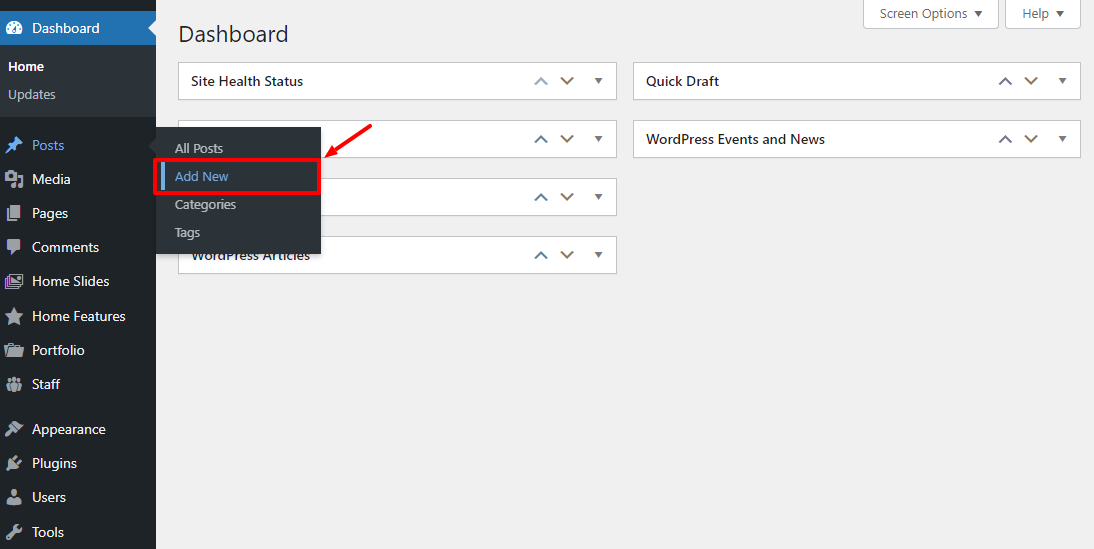
Create a post as you normally do, click the Plus (+) to add a new block, and choose your new shiny custom block, as we highlight below.
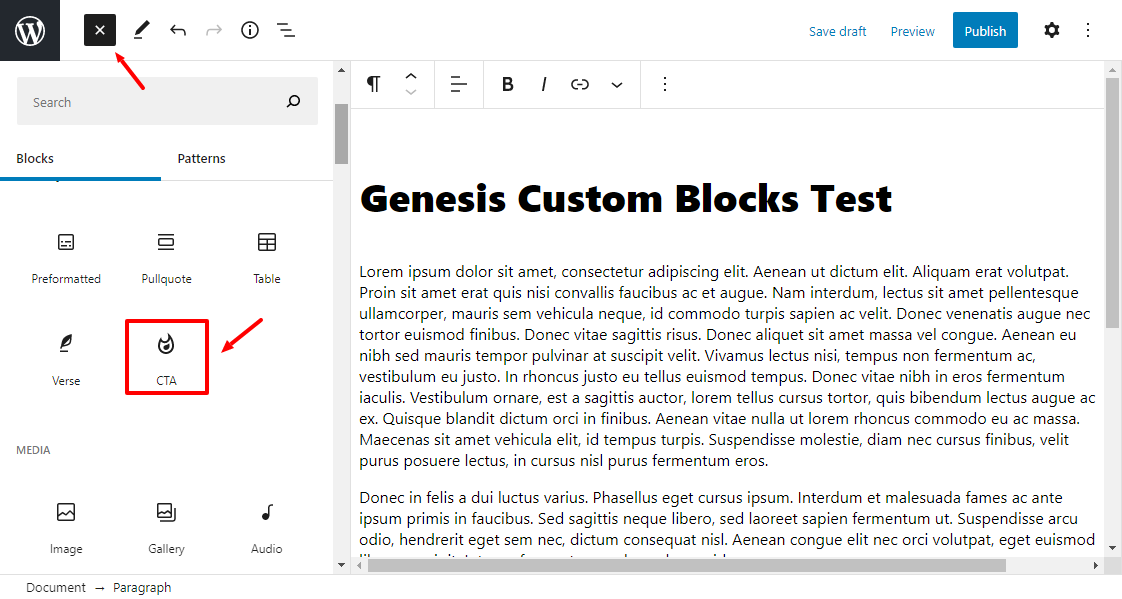
Next, fill out your custom block as desired and publish your post:

Now, if I check out my new custom CTA block on the front-end, I see this:
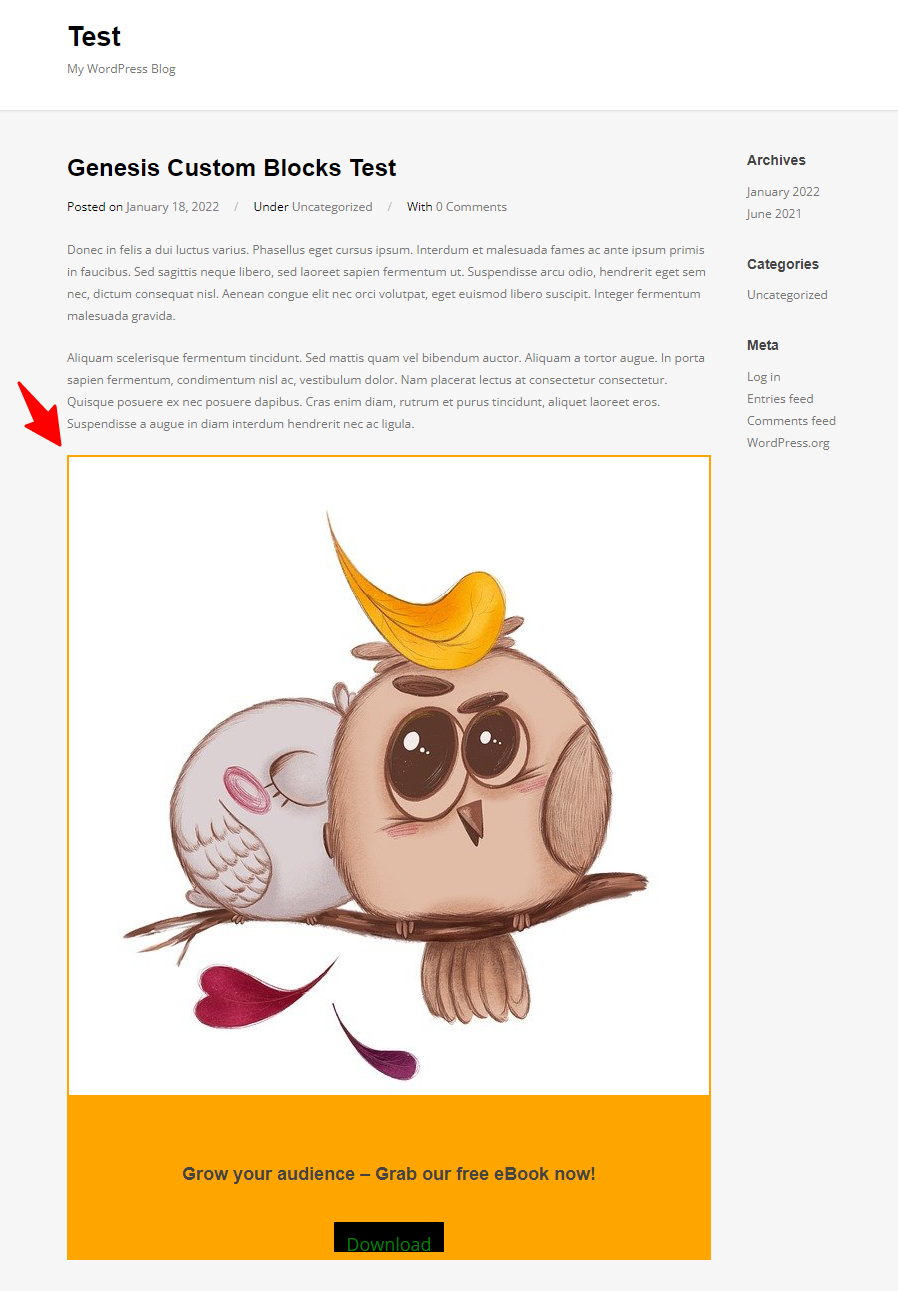
My custom CTA is right there! Please don’t mind my design capabilities – of course in a real life scenario you’ll want to spend some extra time styling your block. But I hope you learned something here today.
Building custom blocks needn’t be a challenging task with tools such as Genesis Custom Blocks and Lazy Blocks, among others. That, plus you can make your custom blocks complex or simple depending on your needs. If you must create custom blocks manually, take up some JavaScript lessons. It will help 🙂
Any thoughts or questions? Please let us know in the comments below.


