How to Add a Language Switcher to WordPress


So, you’re thinking of going multilingual, aren’t you? Congrats on that decision! Growing your potential audience to international clients is always a good idea.
But have you thought about your WordPress language switcher?
Making your site multilingual entails more than just translating your website’s content. Of course, the translation is still the main part of the process, but making sure the translated content is correct, SEO friendly, and easily accessible to your visitors is just as important to the user experience.
Having a good functioning language switcher is essential to the user when working with a multilingual WordPress website.
What is a Language Switcher?
A language switcher is a tiny button with a big impact.
A language switcher is a clickable selector that lets your website visitors switch between two or more languages (that you provide) and choose the one they want to navigate your site into. This is extremely helpful for international websites and makes visitors enjoy a much better experience on the site.
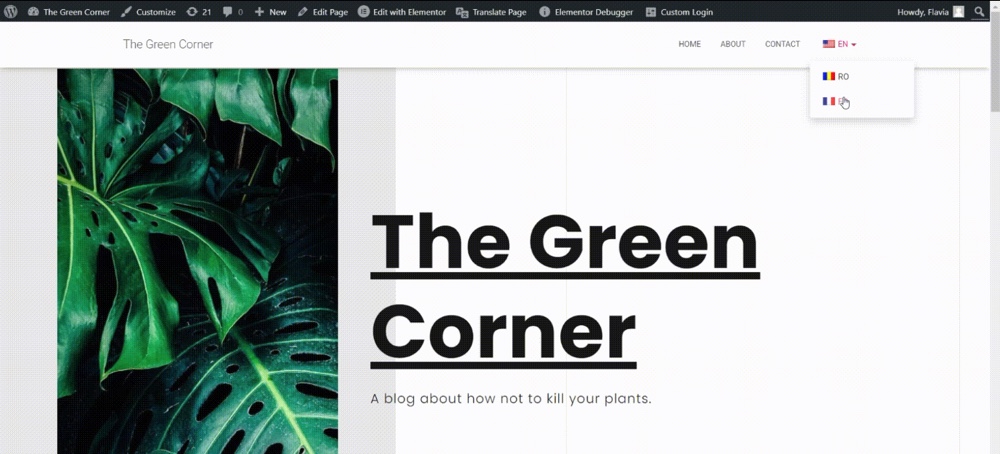
So, let’s say you have a website that can be displayed in 3 languages: English, French, and Romanian. You have your whole content translated into the 3 languages and now all the user has to do is select their preferred language from those provided to display your site. This way, the users can comfortably scroll through your site in a language they know, or maybe even in their own native language.
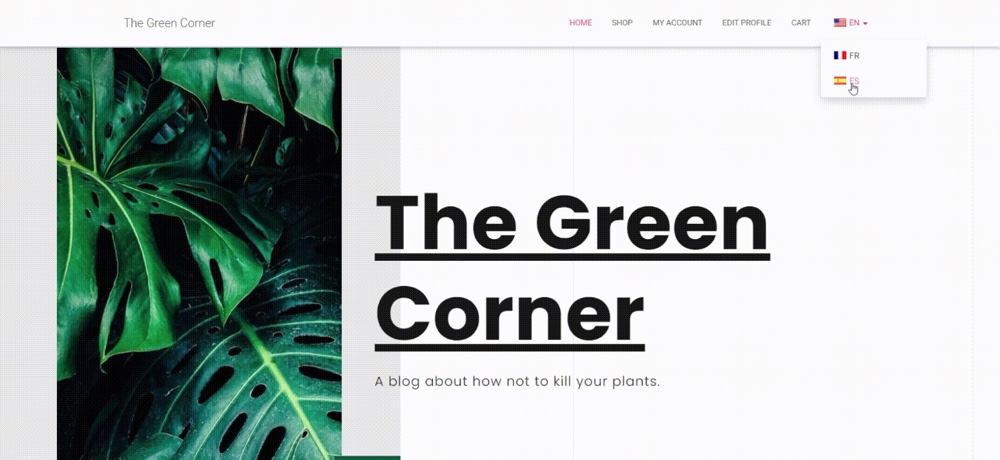
Language switchers are typically displayed in a corner of the website or as part of a menu or a widget. They can also take the form of dropdowns and can display full language names, language codes, or flags.
What Are Your Options?
There are quite a few ways for you to create a multi language website, but not all of the available tools come with the option of easily adding a language switcher to your menu, footer, or any other place you’d like it to be.
Your best options for adding a functional and accessible language switcher in a fairly easy manner are:
1. TranslatePress

TranslatePress is a visual translation plugin, with an easy-to-use front-end translation editor and the capability to translate 100% of a website’s content.
Among many multilingual functionalities and customization options, the plugin offers 3 types of language switchers to display on your site and customize to your needs: a floating language selector that follows the user on every page, a menu item switcher, and a shortcode switcher that allows it to be placed pretty much anywhere on the site (such as in a widget or in the footer).
2. WPML
The WPML plugin is a back-end-based translator for multilingual websites that is compatible with every theme or plugin that uses WordPress API.
Regarding language switchers, WPML offers the user 4 types of language switchers: menu item, widget, footer, and direct links to translations of posts. All of these types can be independently customized.
3. Polylang

Polylang is another popular multilingual solution for WordPress sites that seamlessly integrates with the platform.
It comes with a back-end translation interface and also offers different display options and customization functionalities for the language switcher. Polylang offers a menu switcher and a widget switcher as well, and it also gives the possibility of adding it anywhere on the site using a PHP template tag.
4. Weglot

Weglot is a SaaS solution for smaller multilingual websites, that stores translations on their own servers, opposite to the other options above that provide full control over the translations by storing them on your website itself.
Weglot displays a floating language selector by default, but its position and look can be customized later on. Through customization, the switcher can be moved to the menu, a widget, or any other place that supports a shortcode.
All of these plugins offer good customization options for the language switchers, including where they are displayed and how they look.
How to Add a Language Switcher to Your WordPress Site
So now that you know your options, we want to show you how to actually implement this functionality on your own WordPress website.
To do this, we are going to guide you through the process of adding a language switcher with the help of TranslatePress, the multilingual WordPress plugin. When you’re done, you can also check this post for some tips and best practices when it comes to language switchers.
Step 1: Install the Plugin
To start everything off, you’ll first need to install TranslatePress on your WordPress site.
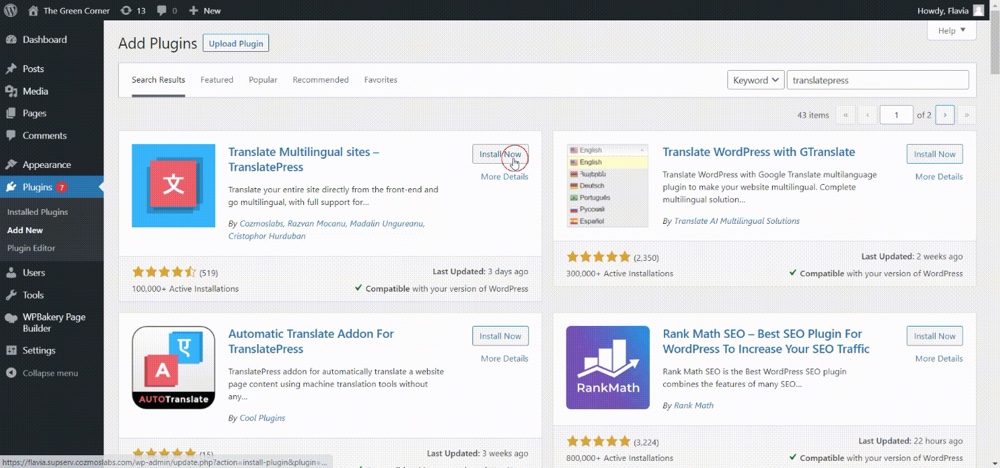
To install the plugin, first go to Plugins → Add New in your WordPress dashboard. Type “TranslatePress” in the search bar (upper right corner) and click Install Now on the first plugin that shows up. Don’t forget to activate the plugin after it has been installed.
Step 2: Add Languages
After the installation is complete and your plugin is up and running you can move on to choosing and adding your languages to the website.
To do this, go to Settings → TranslatePress and, in the General tab, you’ll find the All Languages section. Here you can open the dropdown and choose the desired language to add to your website. Don’t forget to click the Add button after each leach language you select.
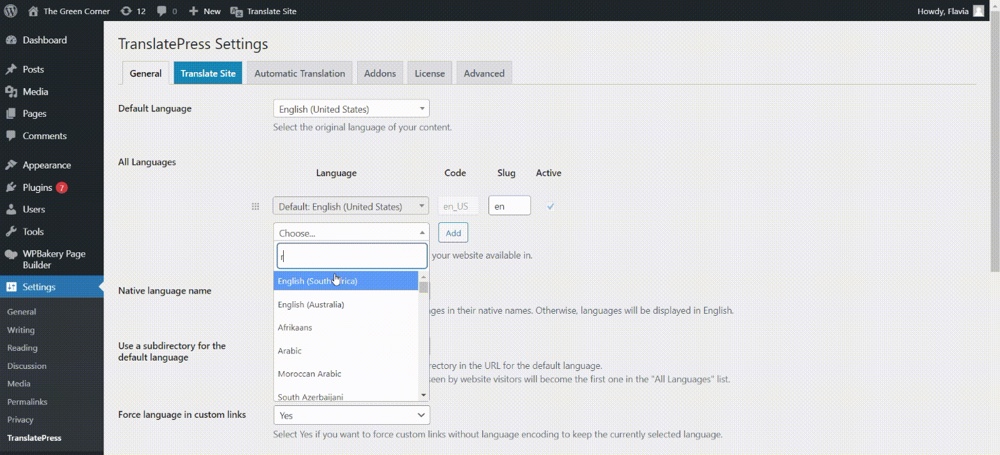
Now Save your changes and let’s go to the next step.
Step 3: Choose the Language Switcher Type
When using TranslatePress there are 3 ways you can display your Language Switcher. You can use all of them at the same time, any combination of two or just one, depending on your preference.
The 3 types of language switchers are:
- Shortcode
- Menu Item
- Floating Language Selector
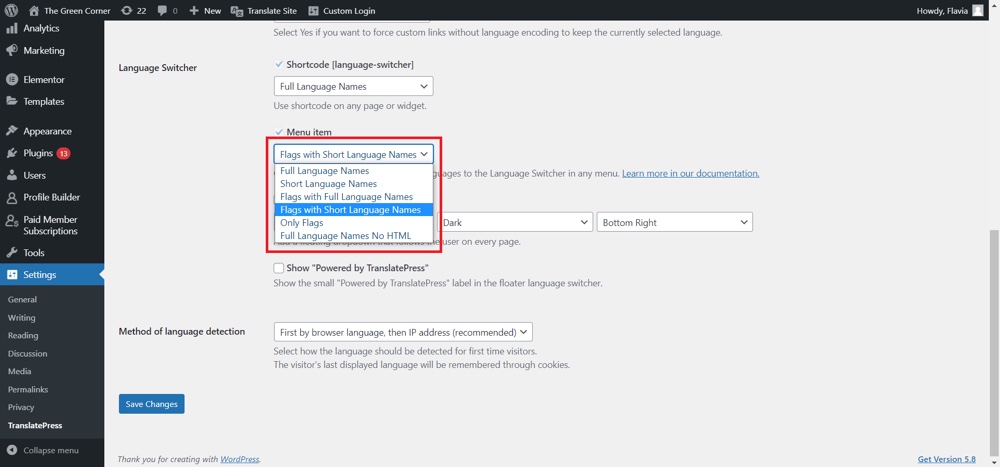
To choose your preferred language switcher go to Settings → TranslatePress and scroll just a little bit in the General tab. Here you’ll see the 3 types of language switchers that you can activate or deactivate by checking/unchecking the checkboxes to their left.

With any of these 3 options, you can choose to display full language names, language codes, flags or a combination of your choice. TranslatePress gives you 5 options to display your switchers:
Now, let’s see how we can make each of them actually show up on the website.
Shortcode Language Switcher
Shortcode – the easiest way to display your language switcher in the footer or sidebar of your website as a widget. Depending on your WordPress theme, you can also use the shortcode to place your switcher in other locations on your website.
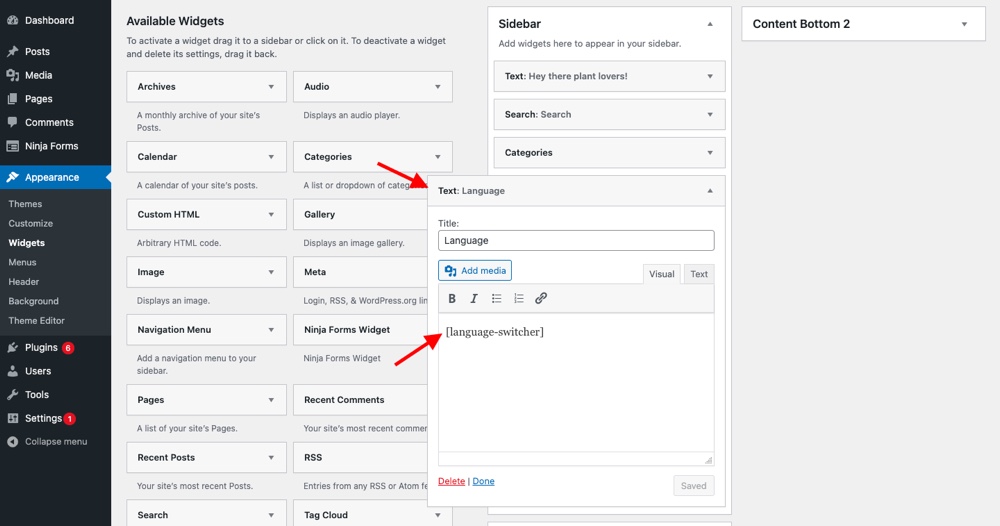
To make your switcher show up on the site, first go to Appearance → Widgets and drag the text widget from the list of Available Widgets to your desired place, be it sidebar, footer, or other.
In the text widget, you’ll have to insert the Language Switcher Shortcode [language-switcher]. You can optionally add a representative title to your switcher, such as “Language”, so users can easily identify it on the page.
Don’t forget to click Save in order for your newly added switcher to show up on your page.
If you’d like to customize the way your switcher looks, you can choose one of the 5 display options available in the General tab of the TranslatePress Settings, as previously shown.
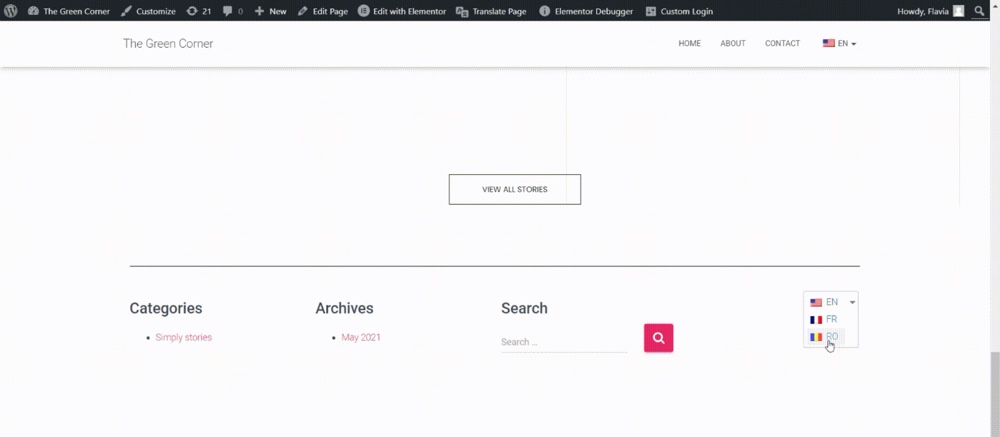
Your language switcher should now appear wherever you chose to put it.
Menu Item Language Switcher
The language switcher can also be displayed in your main navigation menu (or any other menu available on your website), together with all your other menu items.
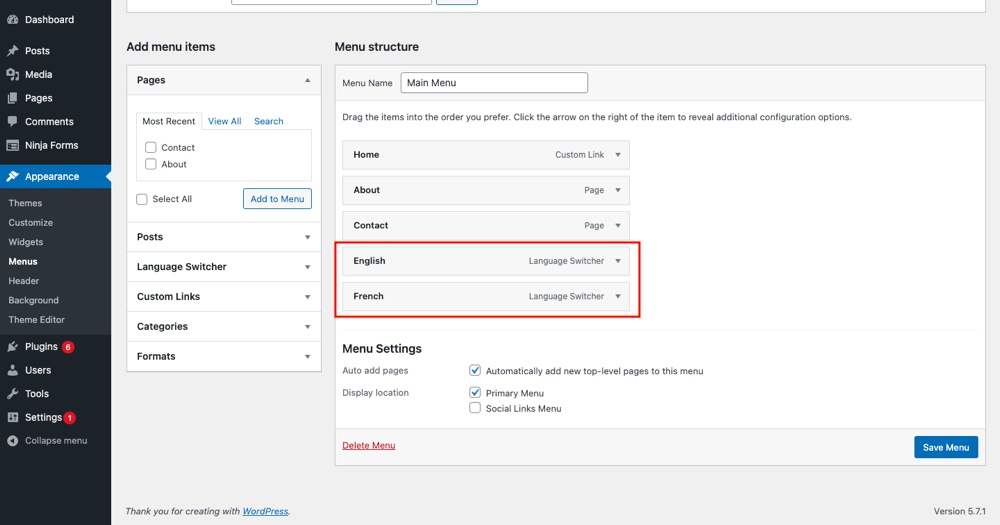
To add this type of switcher, first, go to Appearance → Menus and select the menu you wish to add your switcher to. From the list of items to the left, extend the Language Switcher. Here, you’ll see a list of languages you have added to your website as well as an item labeled “Current Language”.
In order for your switcher to show up in your menu, you’ll have to add all these items to your menu, making sure to place all your Language items under the Current Language item (as sub-items) in order to create a dropdown-type switcher in your menu.
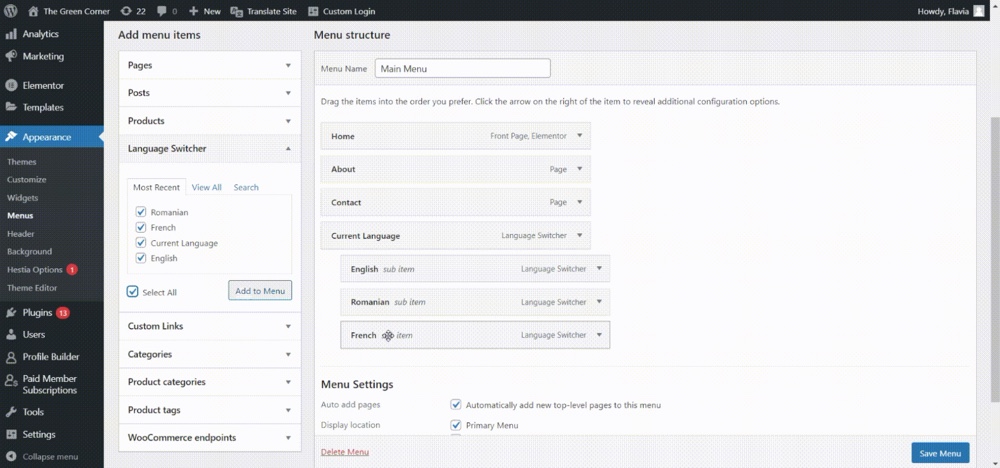
Make sure to hit Save Menu when you’re done. Your new menu language switcher should look something like this:
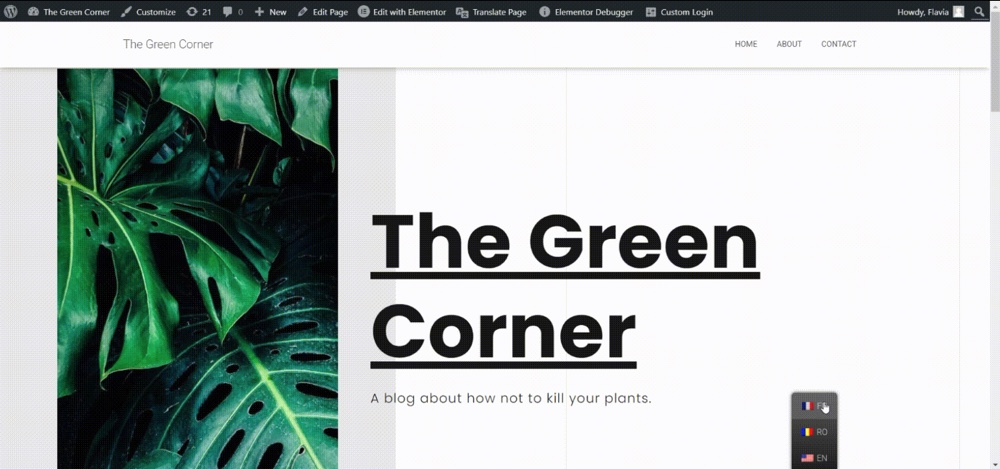
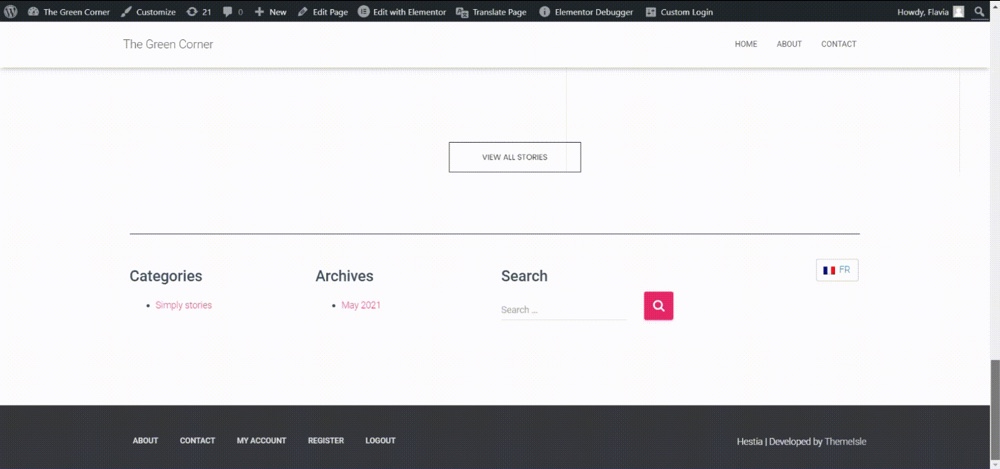
Floating Language Switcher
This type of switcher is particularly helpful if you want your website visitors to be able to switch the language at any time since it is displayed at all times on all of the website’s pages.
First, make sure the Floating Language Selection option is enabled in the TranslatePress Settings → General tab.
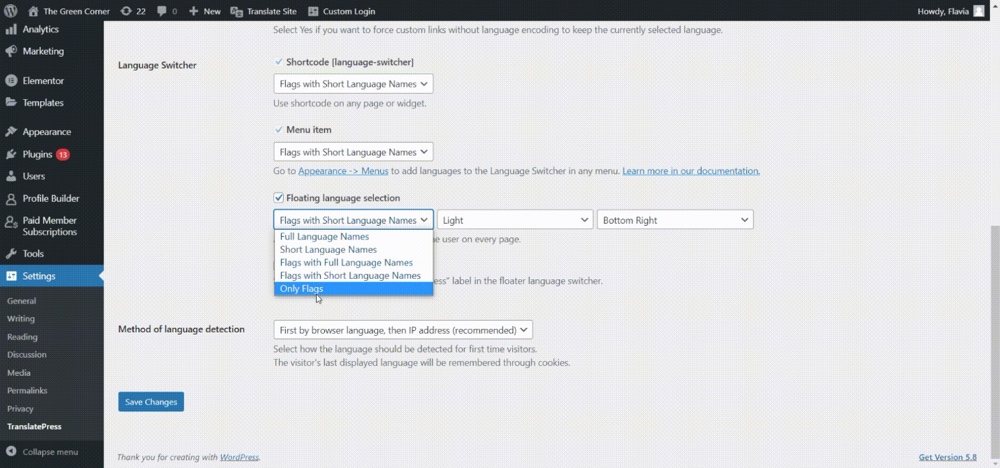
Here, you can customize your floating switcher choosing between the Dark theme or the Light one, and also choose its position on your webpage. Your options for displaying this type of switcher are:
- Bottom right
- Bottom left
- Top right
- Top left
Don’t forget to click Save Changes after you’ve made your selections and that’s it! Take a look at how your brand new floating switcher will look like:
Step 4: Have Fun and Switch it Up
After all the core setup is done, you can go on and discover other customization options available to you. With TranslatePress you can also:
Add a custom language
Sometimes, the language you are looking for may not show up in the dropdown languages menu when trying to add a new language to your website. But don’t worry, you can always create and add a custom language.
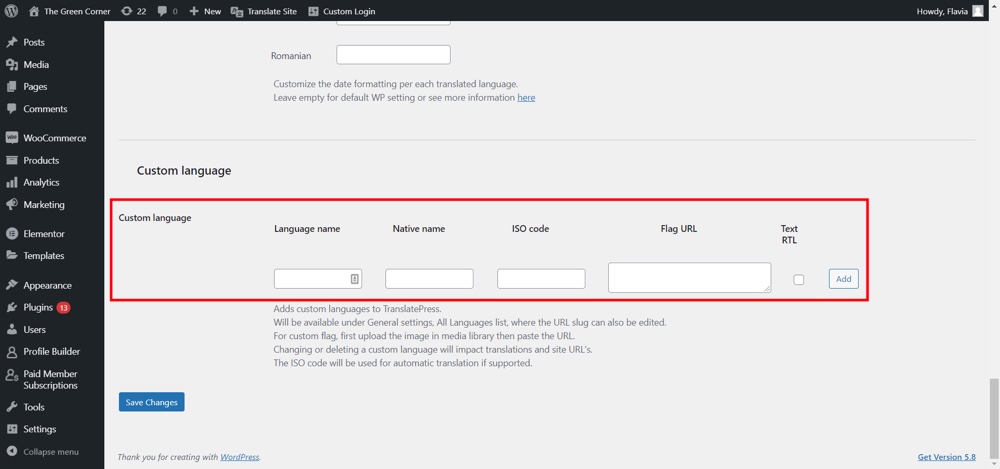
Just go to the Advanced tab in the TranslatePress Settings and scroll down to the Custom Languages section or click the Custom languages button at the top of the section.
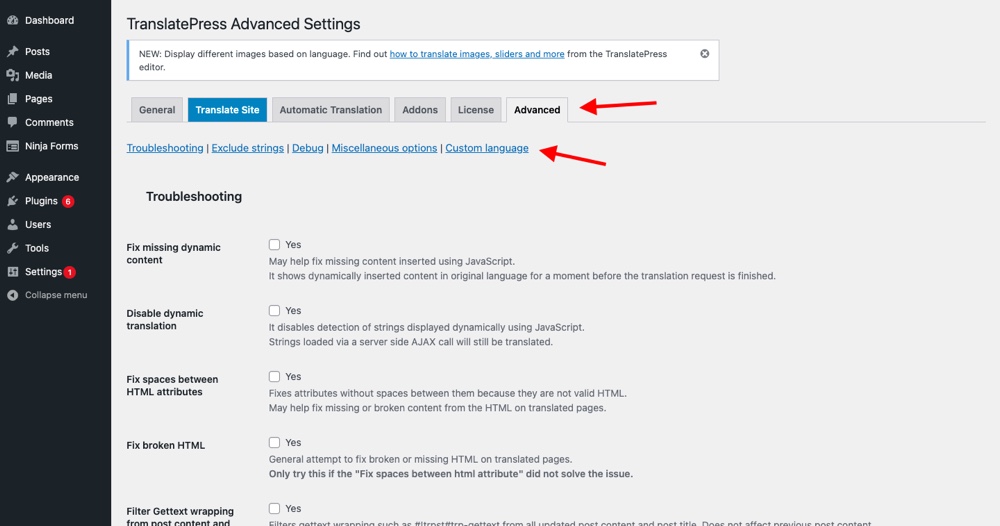
Here you can add any language you want, its native name, ISO code, and custom flag. Don’t forget to save your changes when you’re done.
After adding your new custom language, add it to your website’s languages from the General tab in the TranslatePress Settings so it can actually show up on the website. If you chose the Menu Item Switcher, don’t forget to add that custom language as an item to the menu as well (from Appearance → Menus).
Replace the default flag with your own
If your website has a certain design and the default TranslatePress flags just won’t cut it, you can easily replace them at any time with any other picture you have uploaded to the website.
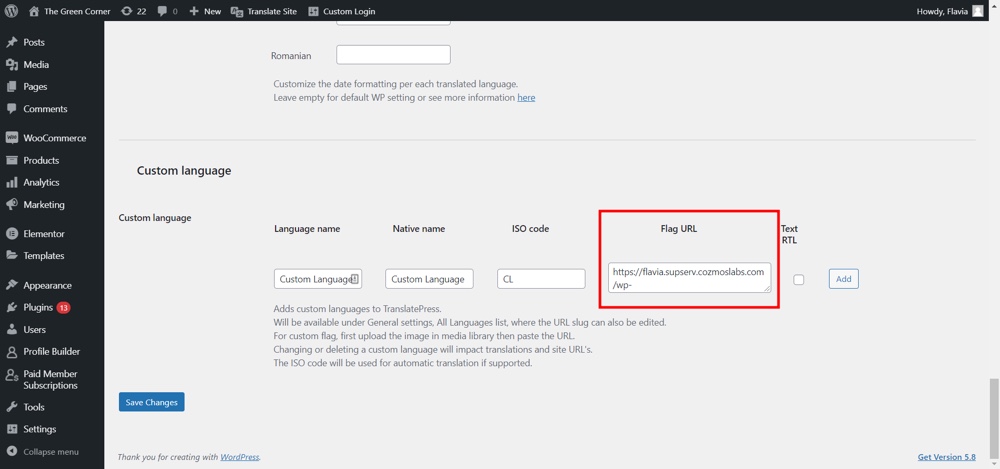
Just go to the Advanced tab in TranslatePress Settings, then go to the Custom Language section and fill in the fields with your custom language’s information and, under Flag URL, paste the URL of any image you have already uploaded to WordPress.
The custom language can be a language that’s already in the dropdown menu when adding languages. But, since you are not going to use the default flag, you’ll have to re-enter it as custom and remove the original one when adding this new custom one to the website.
Don’t forget to add it to the menu as well if you’re using the Menu Item Switcher.
Show the opposite flag in the menu
If your website is bilingual and you’d like for your switcher to always show the opposite language from the one currently displayed, there are 2 ways of doing that, depending on the type of switcher you chose.
Method 1: Shortcode Switcher
In order to show opposite languages with the Shortcode Switcher, you’ll simply have to download the Opposite Language Shortcode plugin.
If your website only has 2 languages added, this is how your Shortcode Language Switcher should look like right after the plugin has been installed:
Method 2: Menu Item Switcher
If you’d like to do the same thing for a Menu Item Switcher, however, you’ll have to follow a few steps. But don’t worry, this shouldn’t take much time either.
First, you can remove the “Current language” item from the menu, leaving only your 2 languages as normal items in the menu. They shouldn’t be sub-items anymore.
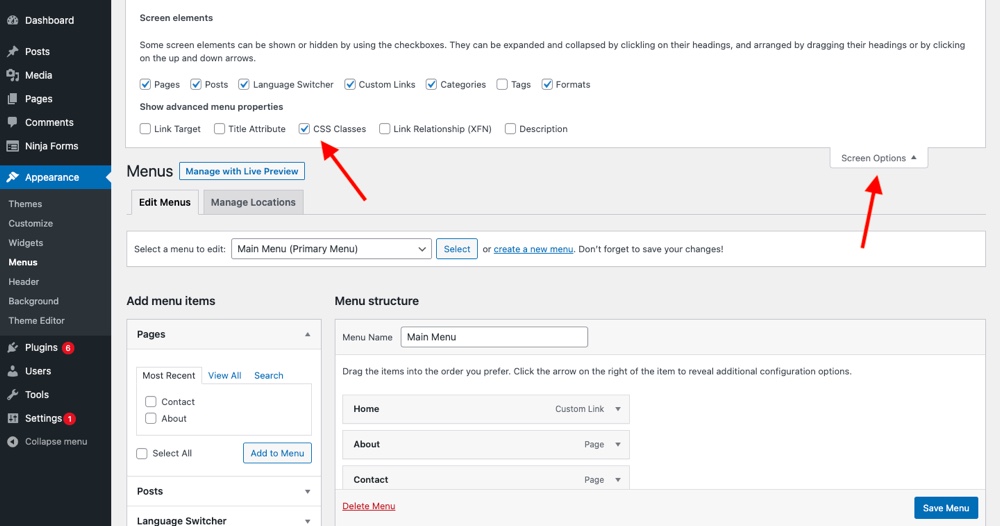
Next, go to Screen Options in the top right corner and make sure the checkbox for CSS Classes is selected.
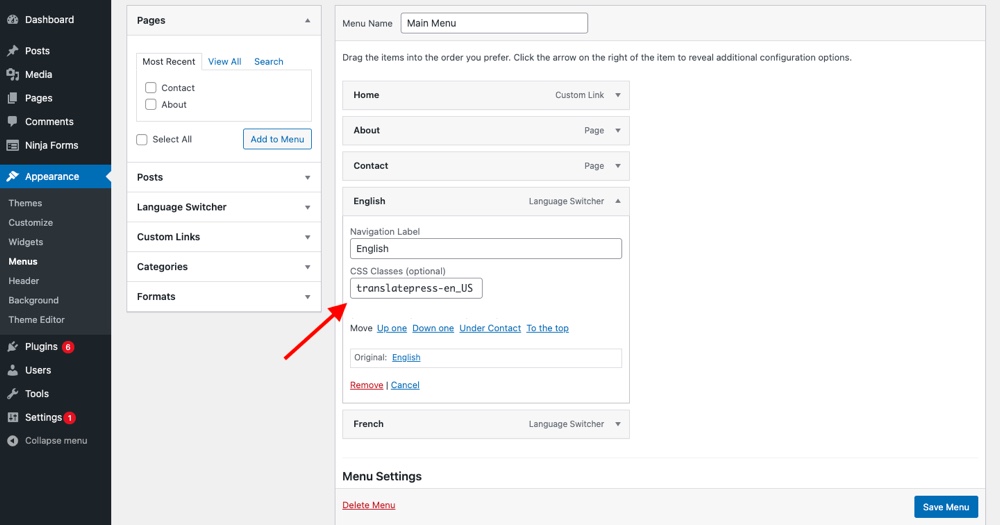
Now, go back to your menu and, in each language’s CSS Optional Class, add the custom CSS corresponding to each language, making sure to replace the last part with your own website’s languages, like so (for English or French, respectively):
.translatepress-en_US .tp_en
.translatepress-fr_FR .tp_fr
Keep in mind that you’ll always have to replace your own languages in the slug, these are just examples.
Do the same for both languages and click Save Menu.
Next, you can go to WordPress → Appearance → Customize → Additional CSS and add some custom CSS like so:
.translatepress-en_US .tp_en,
.translatepress-fr_FR .tp_fr
{ display: none !important }
Here’s how it should work in the end:
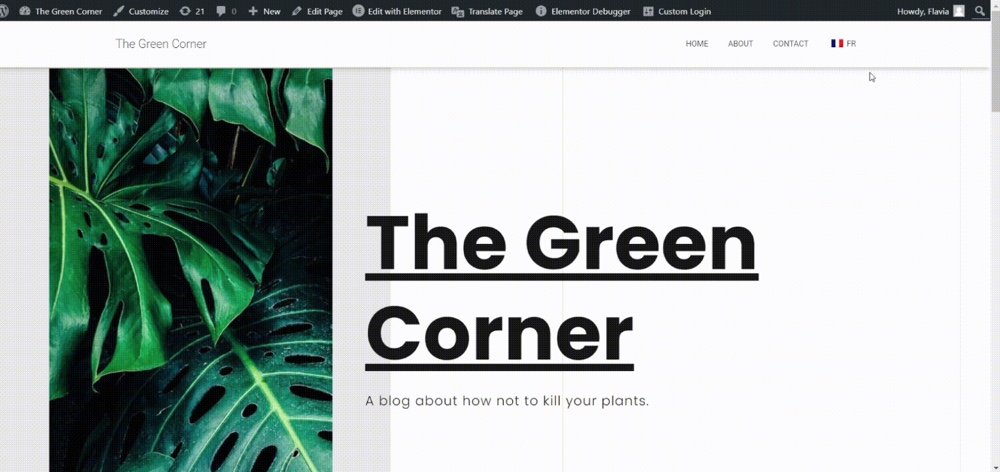
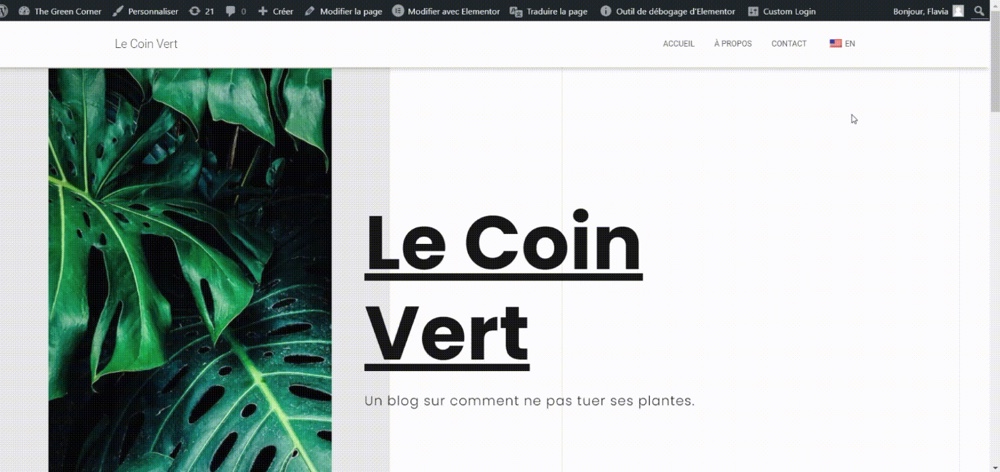
That’s it!
There you have it! You have successfully learned how to add a language switcher to your WordPress website.
Now, all you have to do is start translating (if you haven’t done that already) and give your international visitors the best possible user experience.
Have fun translating!


