How to Create Custom Short URLs for Your WordPress Blog

You are excited to reach more readers on social media among other places. But long URLs are making things hard for you since they aren’t user-friendly or even pretty at all. A custom short URLs, on the other hand, are easy to share on social media and other displays such as print ads or business cards.
Think of Amazon affiliate links for example
https://www.amazon.com/Kindle-Wireless-Reading-Display-Globally/dp/B003FSUDM4/ref=amb_link_353259562_2?pf_rd_m=ATVPDKIK X0DER&pf_rd_s=center-10&pf_rd_r=11EYKTN682A79T370AM3&pf_rd_t=201&pf_rd_p=1270985982&pf_rd_i=B002Y27P3M
How is such a link share-friendly? You need shorter URLs that are shareable, memorable and – if need be – great at masking your affiliate links. Your blog post URLs could also use a little swagging out. If you can get a branded short URL to go with that, you are golden.
Read on to learn how you can create custom short URLs for your WordPress blog without breaking a sweat.
Table of contents
Why Shorten URLs?
First things first, what are the advantages of shortening your links?
- Enhance shareability – It goes without saying that it is easier to share https://wpexplorer.com/short-url than https://wpexplorer.com/how-to-create-custom-short-urls-for-your-wordpress-blog. It gets tiring just to type the longer URL. Besides, it is easier to place short URLs on business cards, pens, t-shirts etc.
- Boost brand reach – Again, the shorter URL is easier to remember no matter where the prospect saw it. Considering you can buy a branded URL, you can ride the shareability potential of custom short URLs to get your brand name in front of more eyeballs. Prospects can reach you on Messenger via m.me/wpexplorerthemes for instance.
- Disguise links – It pays to mask some of your links, more so if they are lengthy and full of tracking parameters. Your readers are more likely to click https://yoursite.com/amazon-book to buy your book on Amazon as opposed to your original Amazon link. Affiliate links too can scare away readers, so jazz them up a bit.
- Analytics – URL shorteners offer you a great deal of data regarding your links; data you can use to improve your overall marketing strategy. After all, you want people to click your buy buttons, so it’s only business savvy to know what prospects are clicking on your site.
- Free service – Shortening links for your WordPress site is free or relatively cheap if you decide to buy a branded custom short URL.
- Improve CTR – Bit.ly(short URL btw), one of the most popular link shorteners on the web, published a study showing that branded short URLs boost click-through rates (CTR) by 34%.
Great examples of custom short URLs by popular brand names include youtu.be, wp.me, nyti.ms, es.pn and fb.me among others. All these are good examples of branded short URLs. I bet you won’t have a hard time recalling these URLs or telling which brands they represent.
That out of the way, let us create custom short URLs for your site beginning with the easiest procedure.
How to Create Short URLs?
In this article, you will learn how to create short URLs in four ways:
- Using a link shortening WordPress plugin
- Activating WP.me shortlinks in Jetpack
- Use a third party link shortening service
- Buy a shorter domain name and configure branded short URLs
Option 1: Using the PrettyLinks Plugin

You can shorten and cloak your links right this minute using a WordPress plugin such as PrettyLinks. Using the plugin, I can shorten an affiliate link such as https://themeforest.net/item/total-responsive-multipurpose-wordpress-theme/6339019/?ref=wpthemeraves to https://wpthemeraves.com/total/.
While my domain name is still long, the second URL is way shorter and easier to remember/share than the first. That, plus the second URL doesn’t look like an affiliate link at all. Well, almost.
On top of that, I can easily see the number of people who click on the link via the Pretty Links admin dashboard. And then some.
Installing and setting up Pretty Links is pretty straightforward a process, I wouldn’t expect you to run into any trouble. But in case you need us to hold your hand, here is how.
Installing PrettyLinks
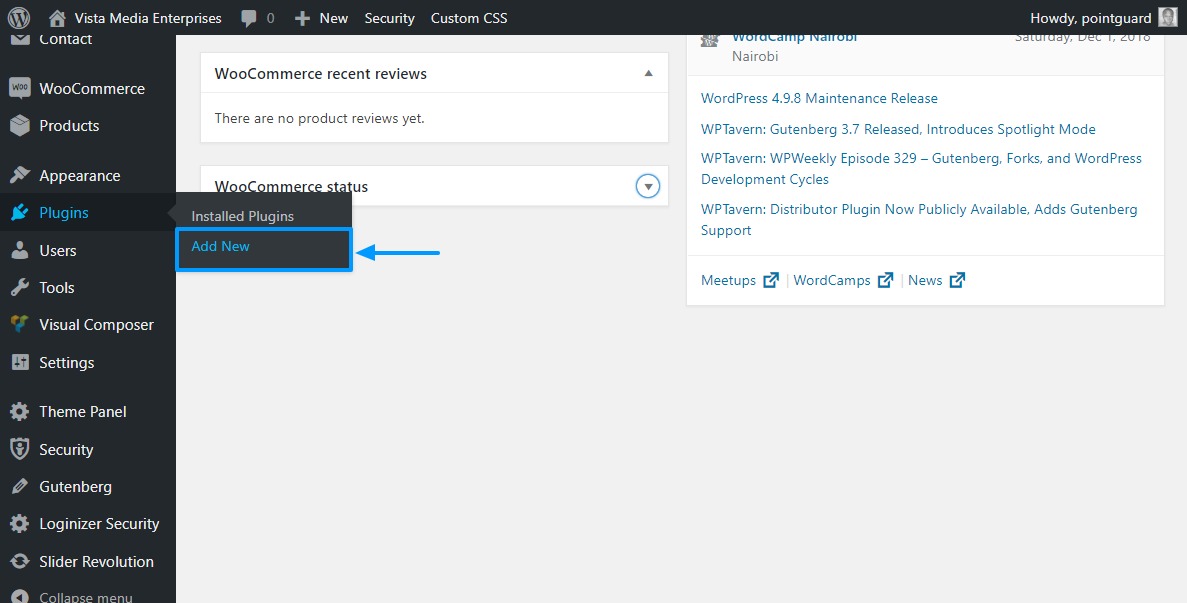
Navigate to Plugins > Add New in your WordPress admin menu as we show you in the image below.
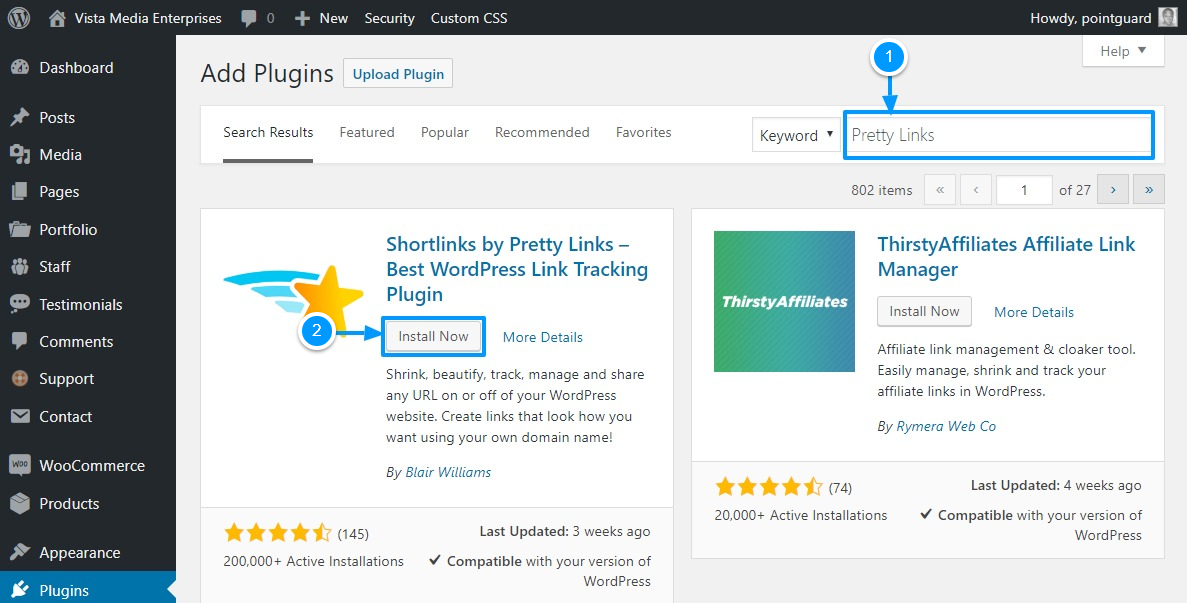
On the Add Plugins page, enter “Pretty Links” in the Search plugins (1) search box. Wait out the Ajax search functionality to bring you the plugin. Next hit the Install Now (2) button, and eventually, the Activate button that comes after installing.
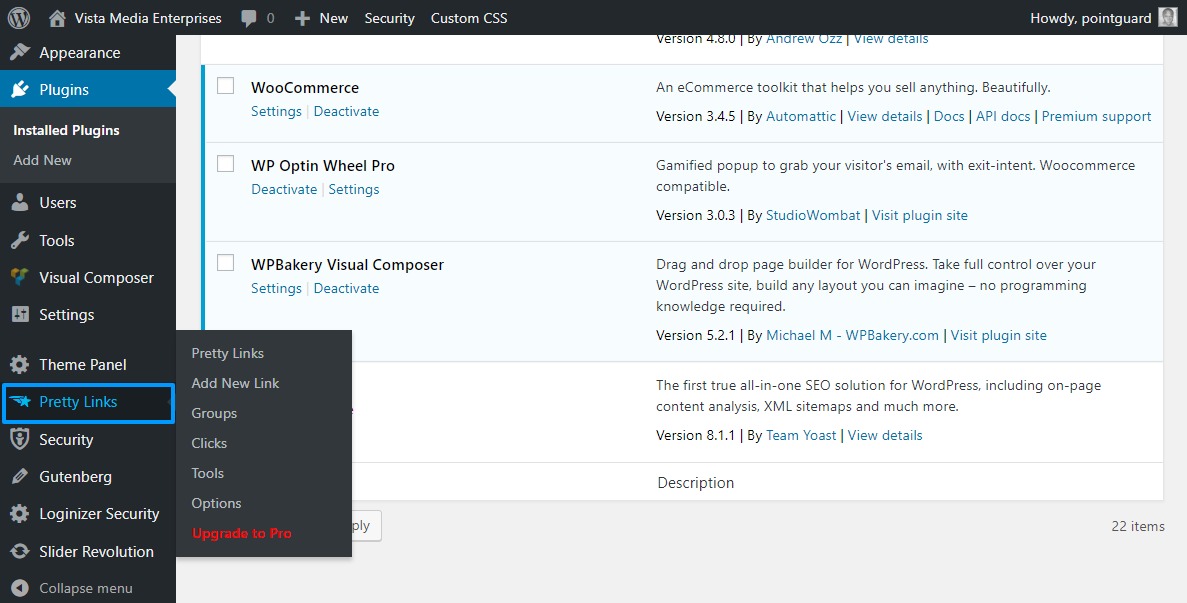
Next, hit the Pretty Links item on your WordPress admin menu as we show below.
Welcome to your Pretty Links admin panel, but since you don’t have any links, it is empty. Aren’t you excited to create your first short URL on your domain? Follow along.
Creating Pretty Links Short URLs
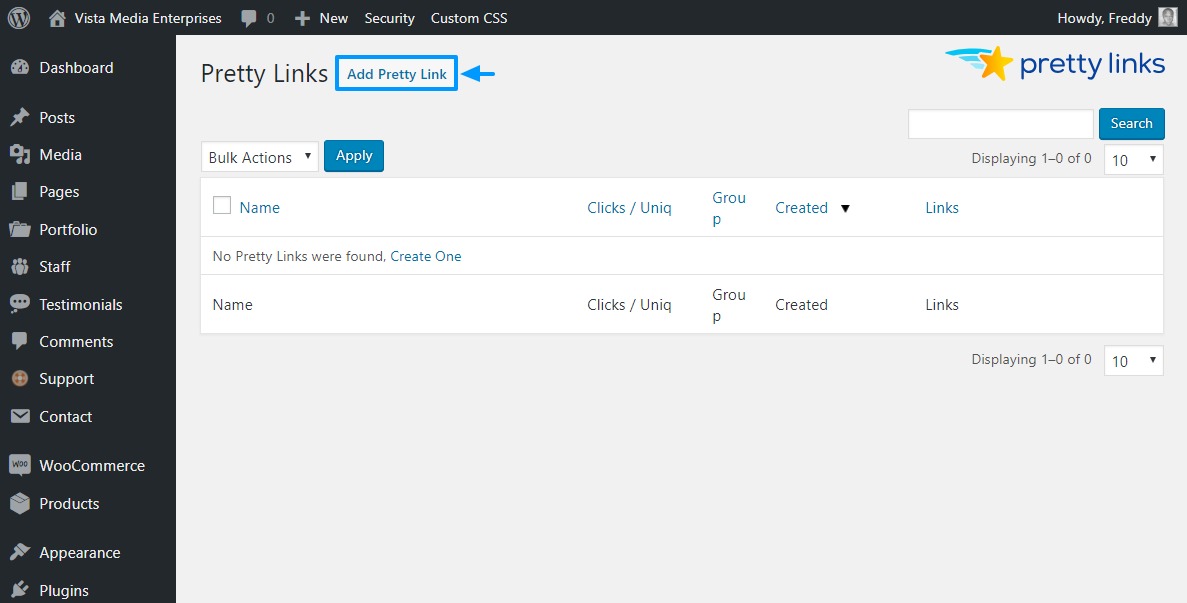
In the Pretty Links admin panel, click the Add Pretty Link button as we highlight in the image below.
On the next screen, add your target URL, pretty link, title, and notes. If I were you, I would leave the Redirection drop-down menu alone unless I know what I’m doing.
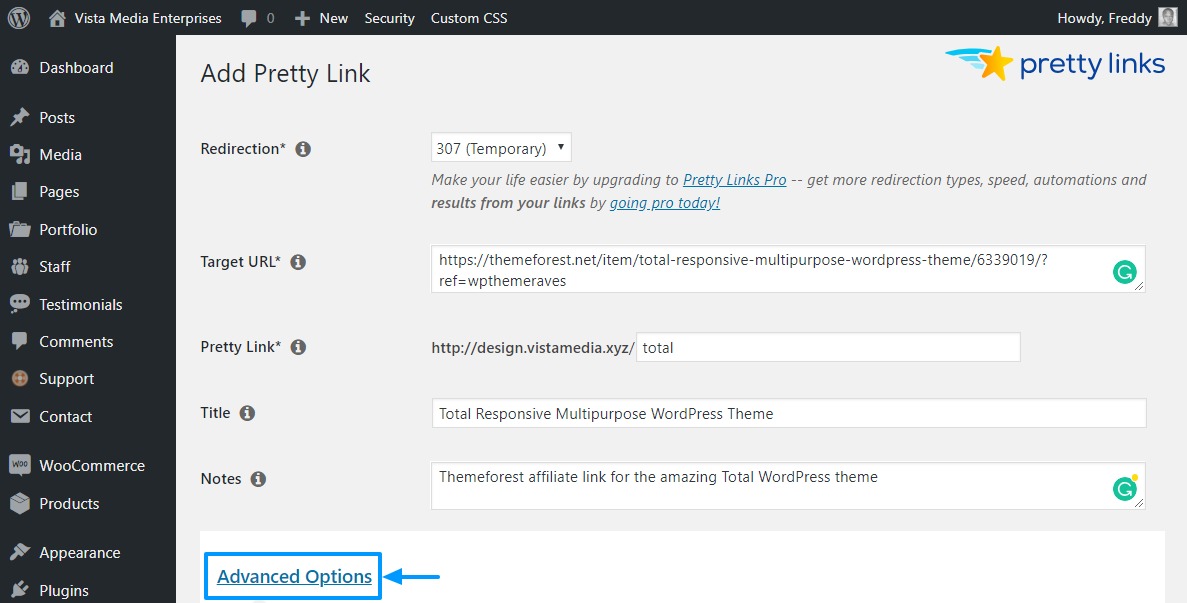
See the Advanced Options link in the image above? Well, click on that to open a couple of nifty options such as link grouping, adding the no-follow tag, parameter forwarding, and link tracking.
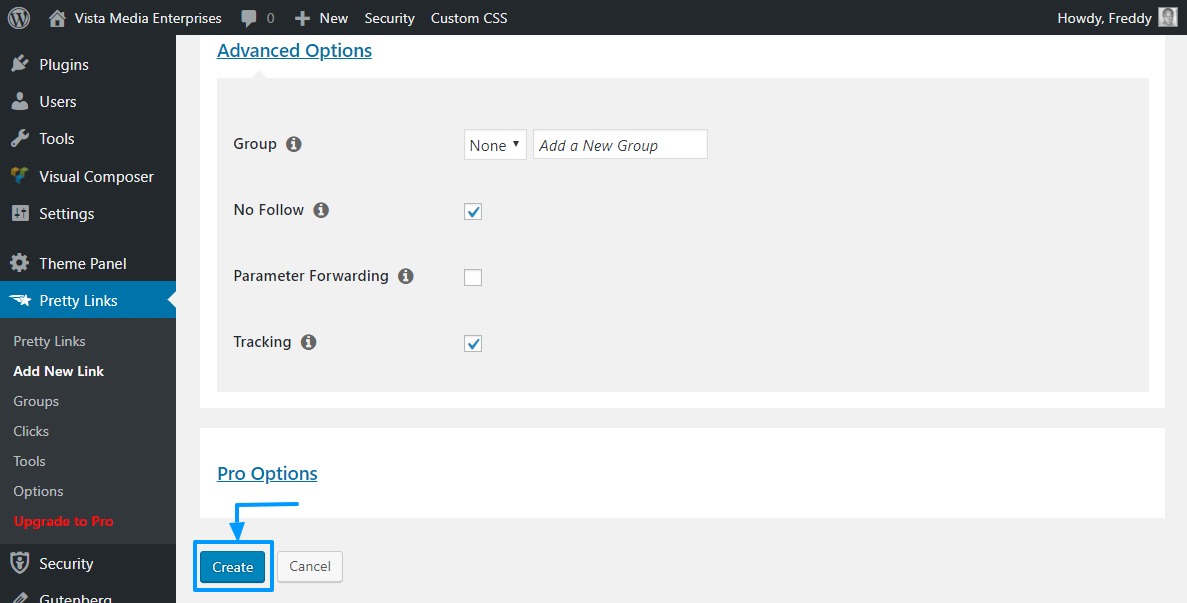
After you’re done choosing your settings, hit the Create button as we show in the image above. Let us see what we have here.
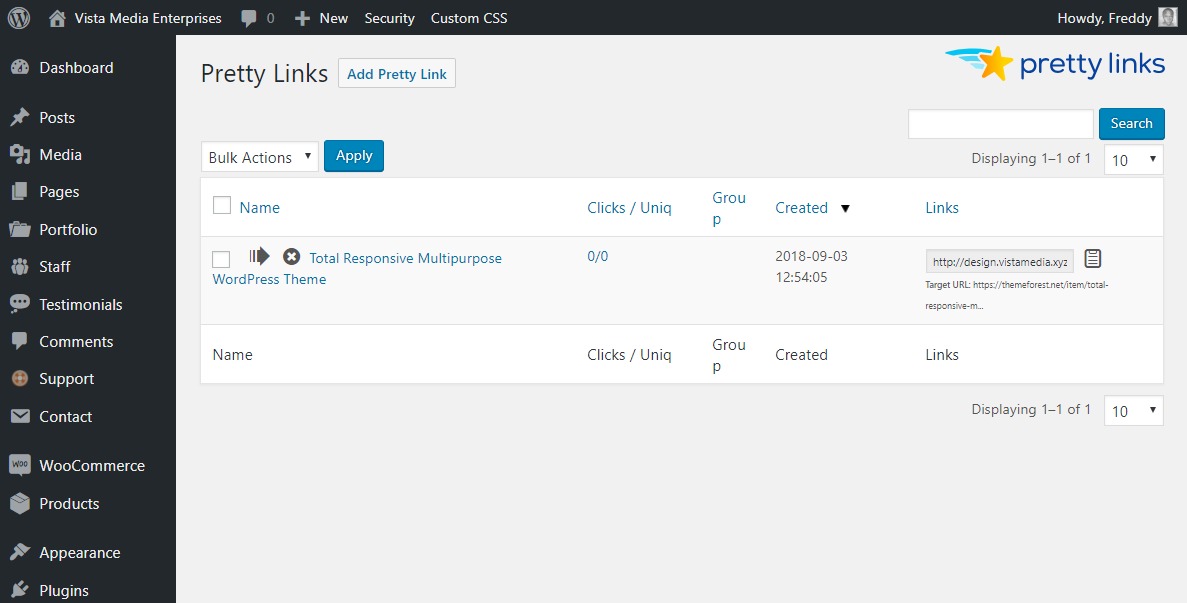
Now my long affiliate link (https://themeforest.net/item/total-responsive-multipurpose-wordpress-theme/6339019/?ref=wpthemeraves) is https://design.vistamedia.xyz/total. Significantly way shorter than the original link, even if I’m using a sub-domain in this second example 🙂
Consequently, I can share my shorter link anywhere I like or add it on any web property easily. When people hit the link, Pretty Links records everything in a tracking report that looks something like this:
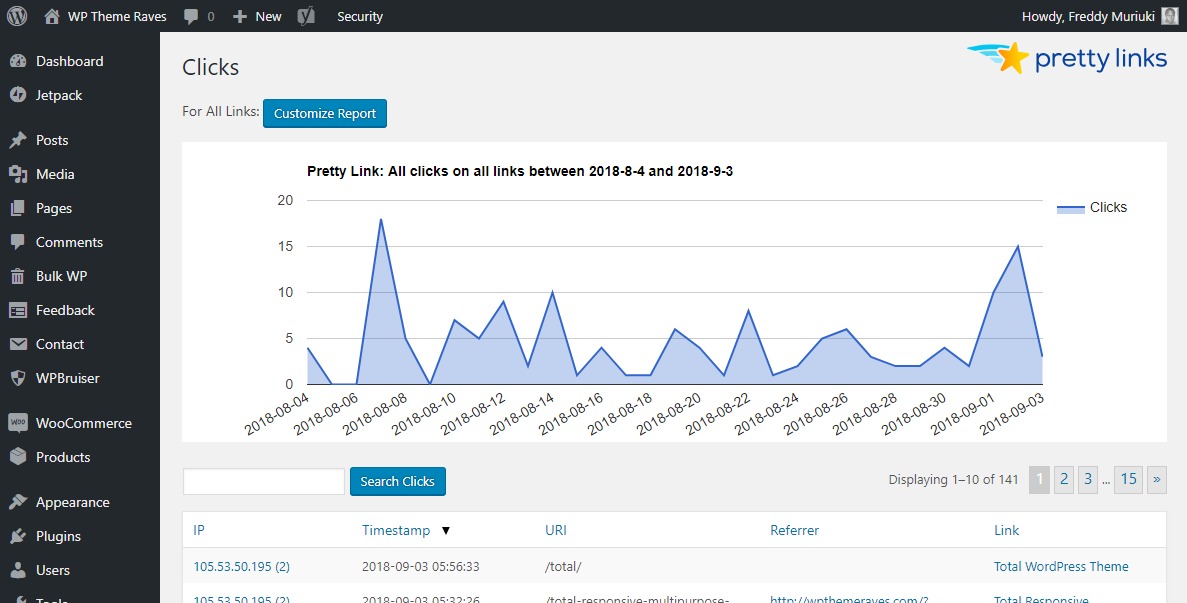
When the need arises, you can view your link statistics by navigating to Pretty Links > Clicks on your WordPress admin menu. The best part is you can customize and download the reports. On top of that, you can see the visitor’s IP address if that helps.
Pretty Links Pro ships with more features including the ability to redirect links based on user location, shorten all links on your site automatically, A/B testing and more redirection types among other things.
Option 2: Using WP.me Shortlinks in Jetpack
Before we are done with plugins, did you know you can create WP.me shortlinks using Jetpack? The only downfall? WP.me shortlinks don’t offer you tracking data.
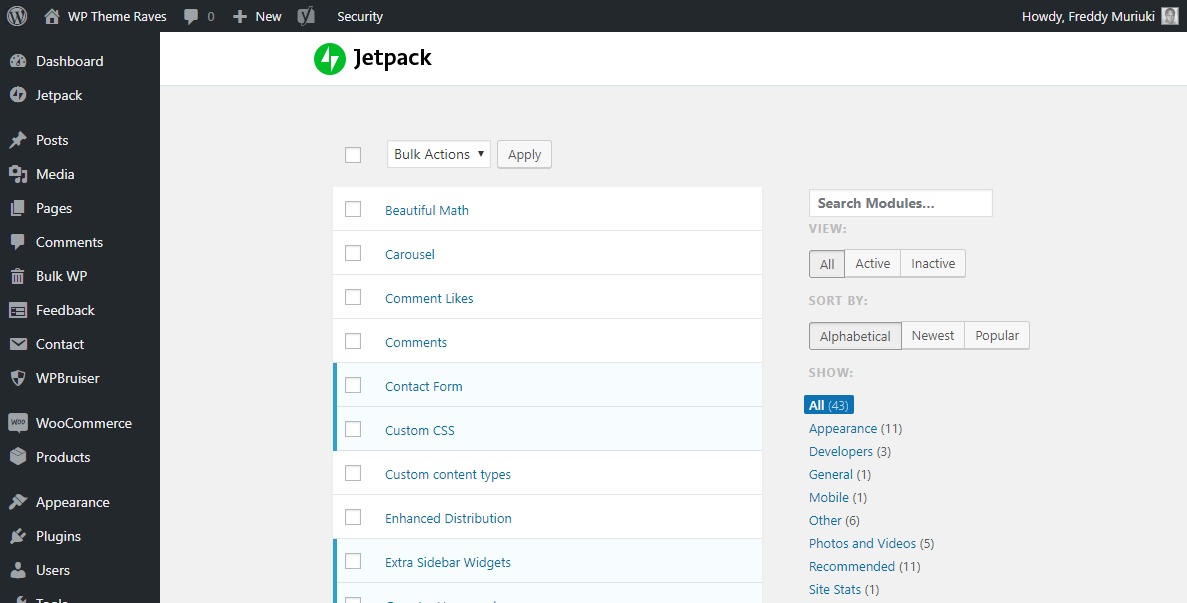
First install and activate Jetpack if you don’t have the plugin already. Then point your browser to example.com/wp-admin/admin.php?page=jetpack_modules, and replace example.com with your actual domain name. If you are having trouble, you can learn more about accessing all Jetpack modules on one page.
That aside, you’re in the right place if you see the following page.
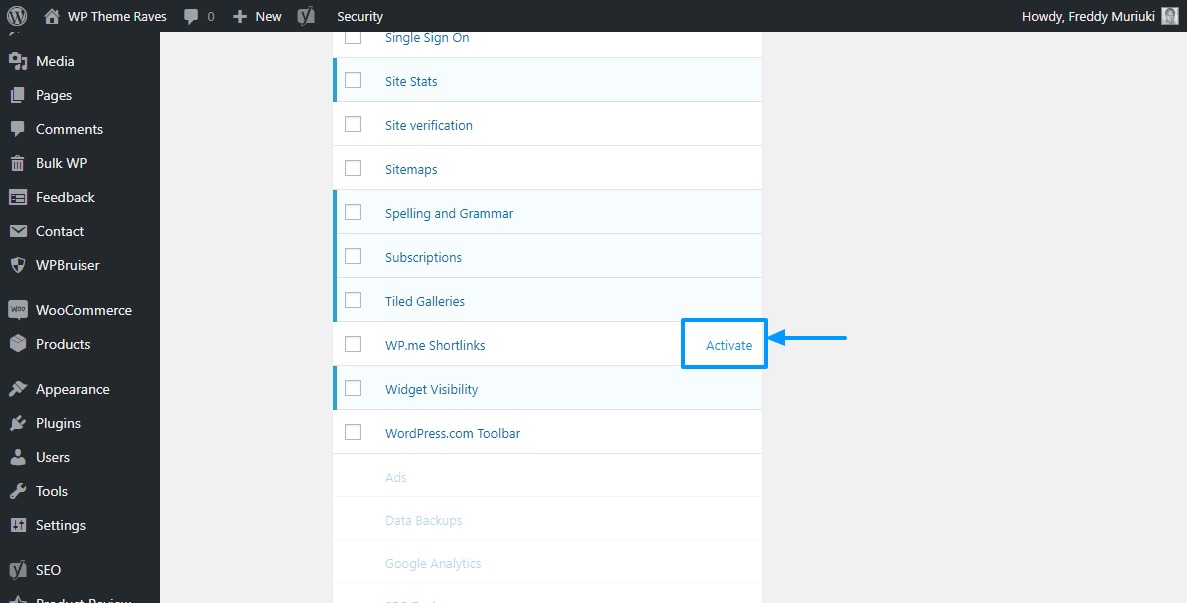
Scroll down, and activate the WP.me Shortlinks module as you can see in the image below.
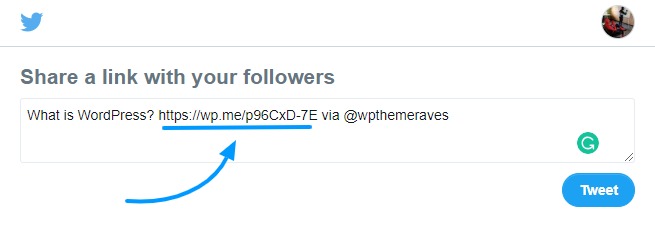
Now what? Whenever a reader uses the Jetpack sharing buttons, your site will automatically create WP.me short URLs such as the one shown below.
Additionally, activating WP.me Shortlinks adds the Get Shortlink button in the classic editor as seen below.
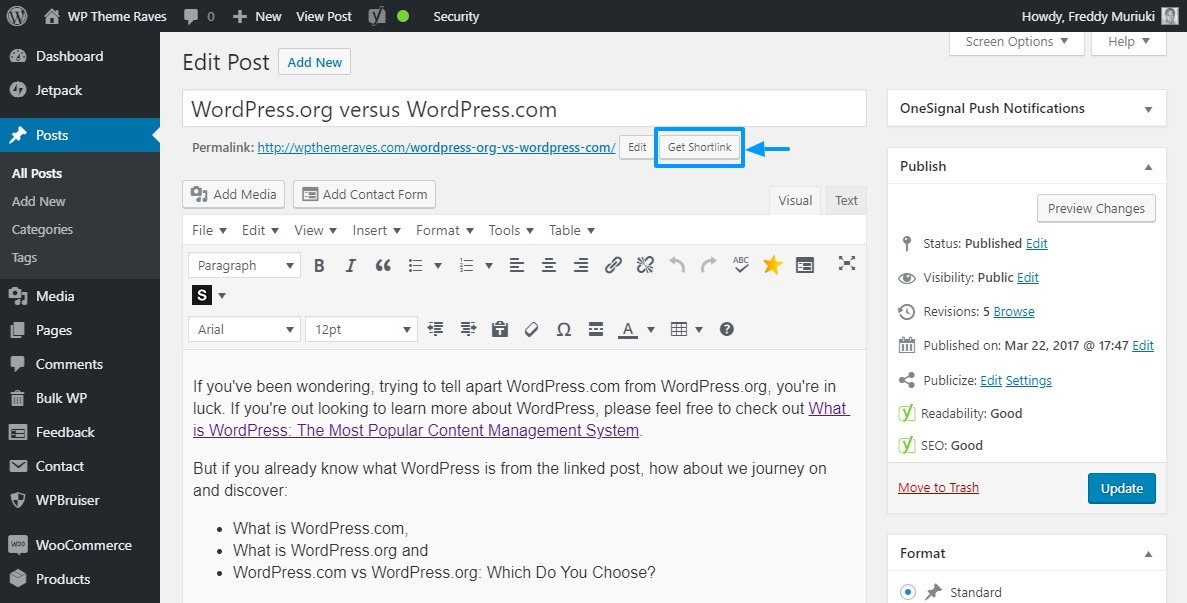
By any means, feel free to copy your WP.me shortlinks and share them wherever you desire. It is just sad you cannot track these links, or can you? Let us know in the comment section.
If you don’t fancy taking the plugin route, you can always leverage 3rd-party link shortening services such as Bitly or TinyURL. Usually, these services are easy to use and most times, you don’t even need to sign up for an account.
Option 3: Using TinyURL.com
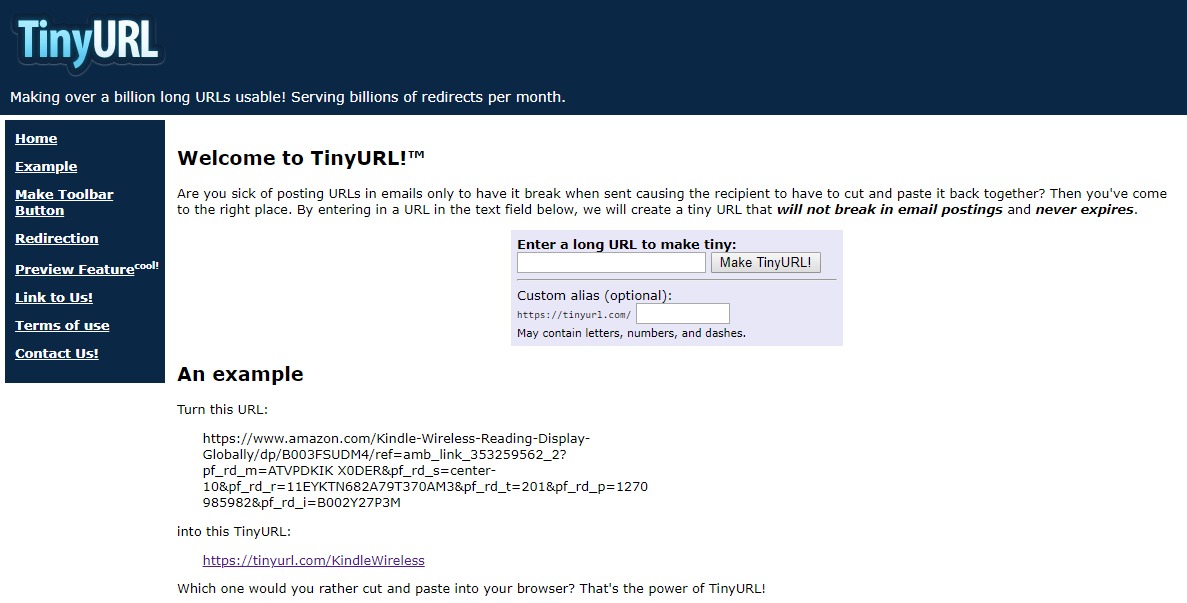
TinyURL is our first non-plugin contender today, and for good reason. The URL shortener serves over a billion redirects per month, meaning you’re in good company. And just like Bitly, you can create short URLs anonymously without creating an account.
The only difference? You cannot create an account at TinyURL. So, how do you keep track of your links? Well, you can’t, which leaves us with just Bitly. But as a link shortening service, TinyURL carries its weight. After all, you just need to paste your long URL and hit one button.
All the same, you can customize the slug that comes after TinyURL.com. For instance, instead of having https://tinyurl.com/yby5eax2, you can customize the slug to look like https://tinyurl.com/woo-marketing, provided the slug is available.
The biggest downside of using third-party URL shorteners is you end up sacrificing your brand. Instead of your domain name showing in your short links, the link features a third-party domain e.g., TinyURL.com/short-url, Tiny.cc/short-url and bit.ly/short-url.
Not to worry though, we can overcome this challenge using our last method; purchasing a branded short URL and configuring it for your WordPress site.
Option 4: Use Bitly for Custom Short URLs
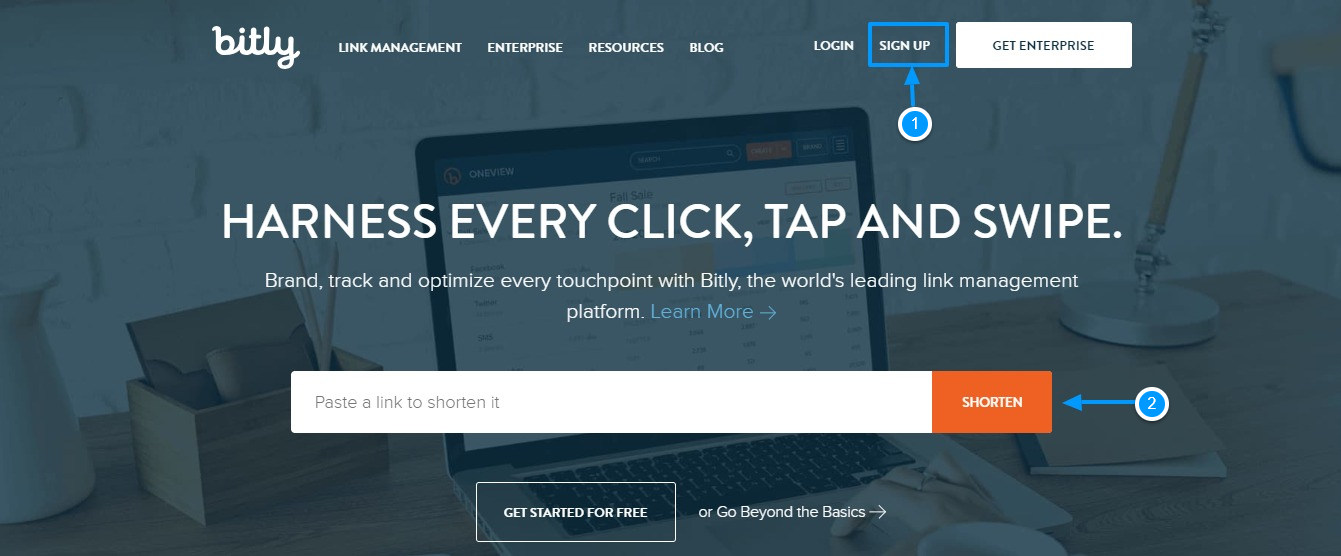
Bitly is one of the most popular and oldest URL shorteners on the internet. The service allows you to create short URLs anonymously. Simply paste your long link in the field we mark with item no. 2 in the image above.
Still, we shall create an account, so hit the Sign Up link in the menu as shown above. Then fill out the registration form or sign up with Google, Facebook or Twitter as we highlight in the image below.
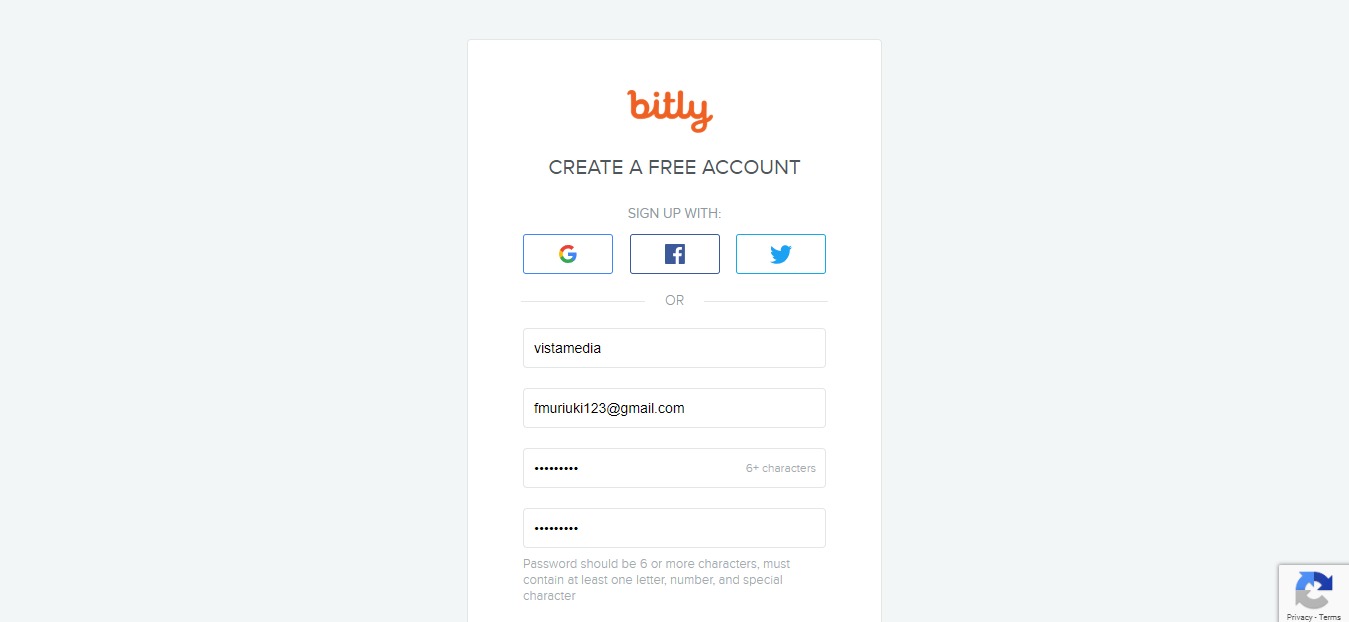
Hit the Create Account button at the bottom and choose how you’d like to use Bitly on the next screen as shown below.
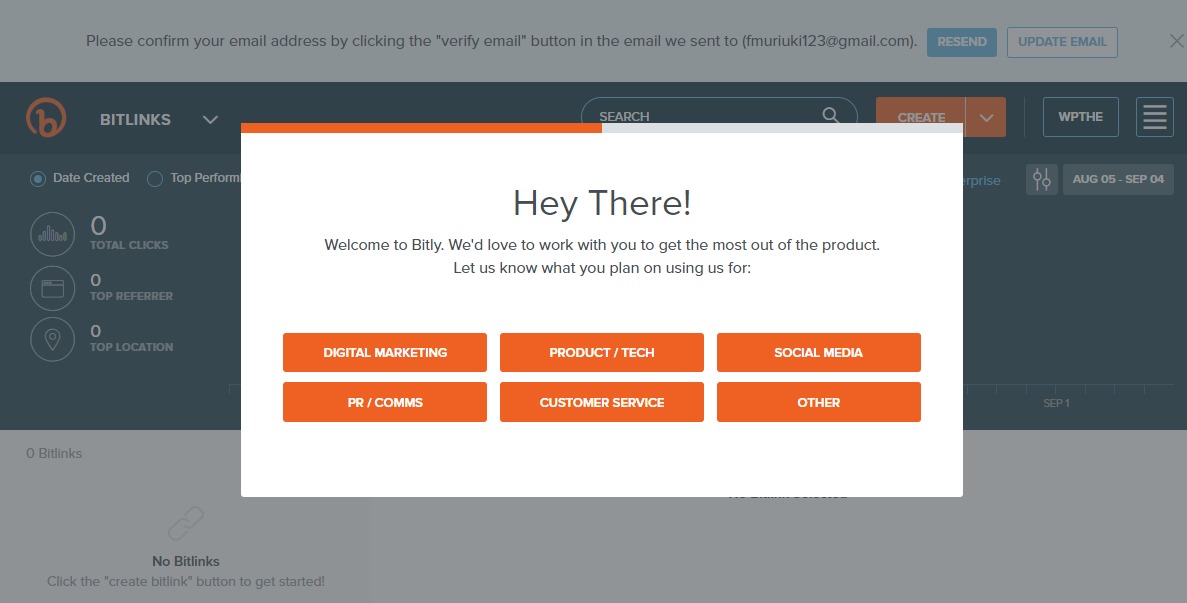
Before you do anything else, log into your email account, and verify your email address.
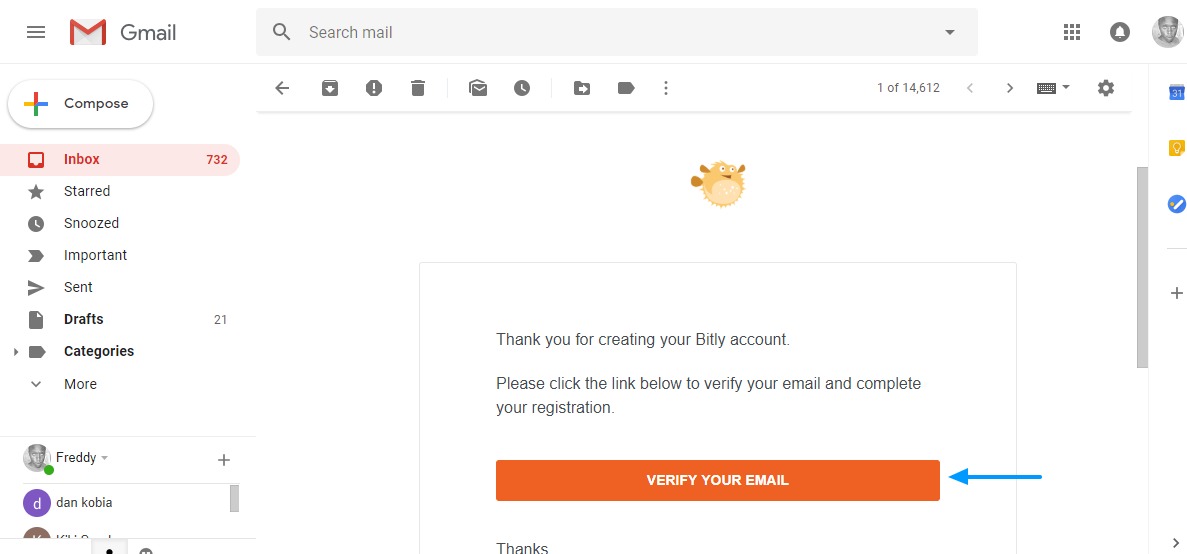
Now your Bitly account is ready.
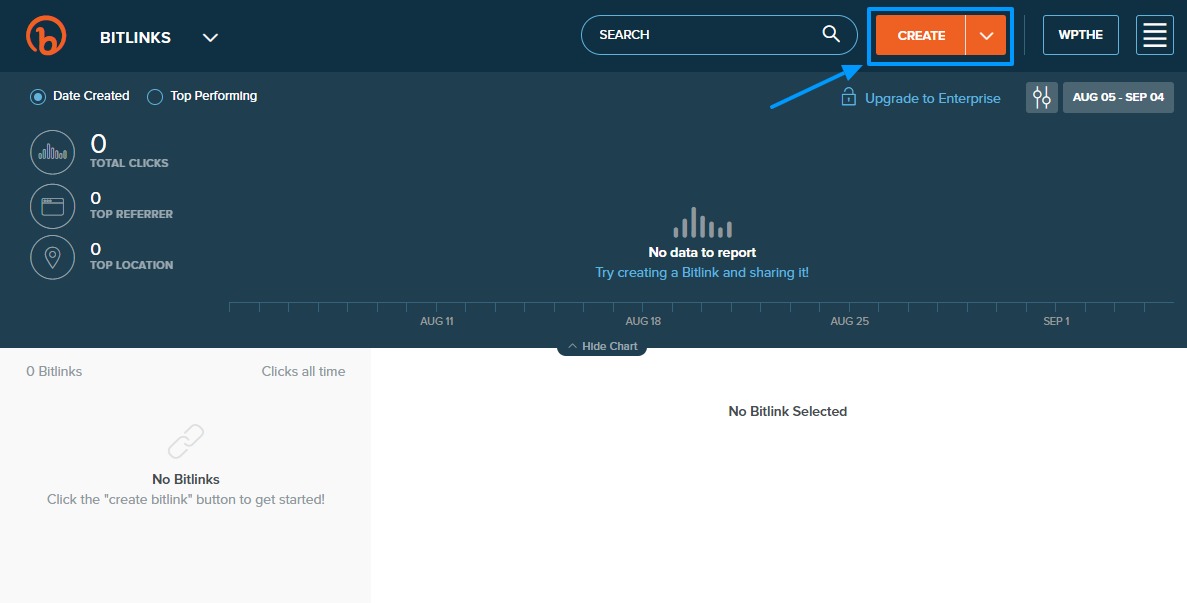
Pretty neat, right? Creating short URLs from this point is a matter of point and click. To create a new short URL within the Bitly dashboard, simply hit the Create button at the top (see image above).
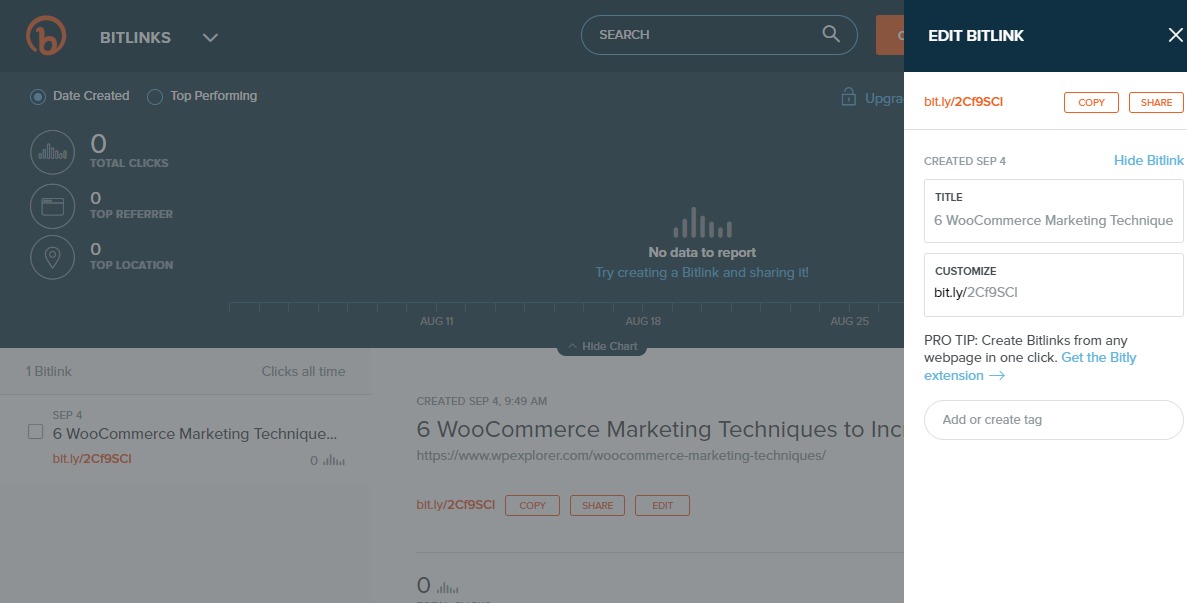
Next, paste your long URL in the slide-in section as we outline in the image below.

After that, customize your link as you deem fit on the next section as shown below.
Further, you can connect your Twitter and Facebook accounts to facilitate easier sharing of short links. On top of that, you can install the Bitly browser extension so you can create short URLs of any web page instantly.
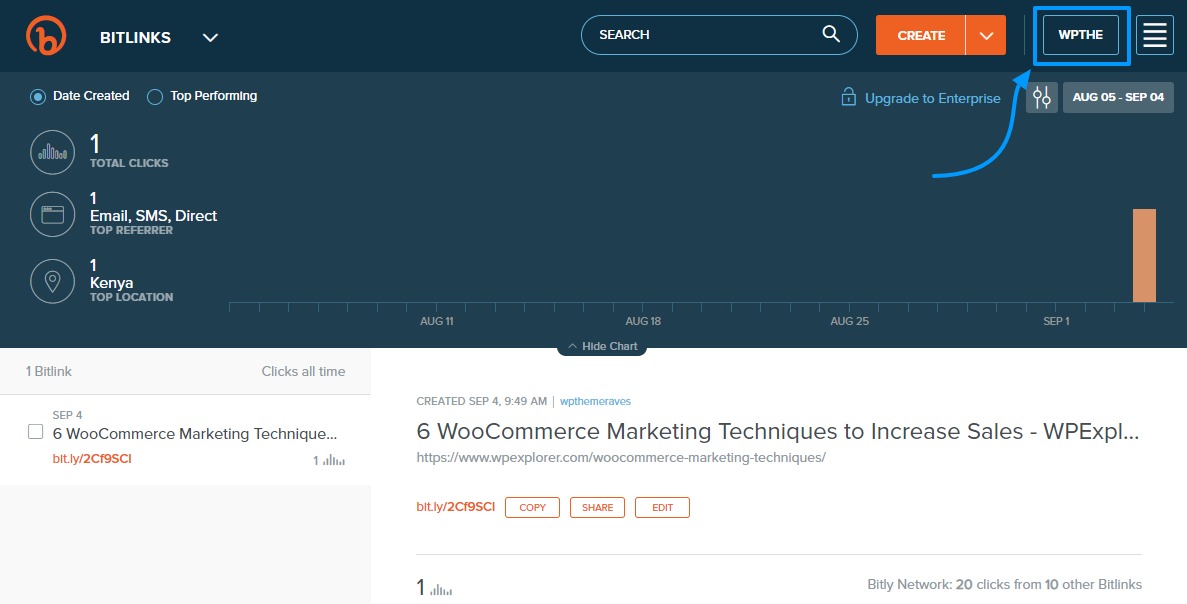
Additionally, Bitly ships with an intuitive tracking chart that shows you the total number of clicks, top referer (email, SMS or direct), and top location among other things. If need be, you can upgrade to the Enterprise package for more features.
Installing & Configuring WP Bitly Plugin
Important: Last we checked the WP Bitly plugin was temporarily closed! So we don’t recommend using it at this time. We’ll keep an eye out to see if it gets updated!
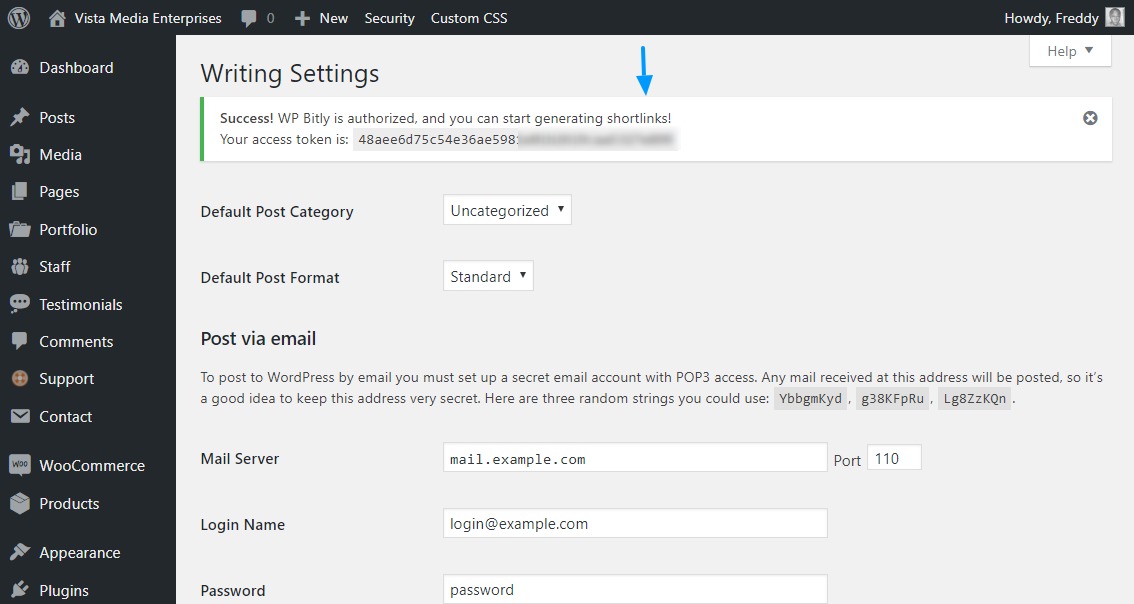
Want to use Bitly from your WordPress dashboard? You can! Install and activate WP Bitly just like we did with the Pretty Links plugin steps above. Next, navigate to Settings > Writing on your WordPress admin menu. Then scroll down until you see WP Bitly Shortlinks as we highlight below.

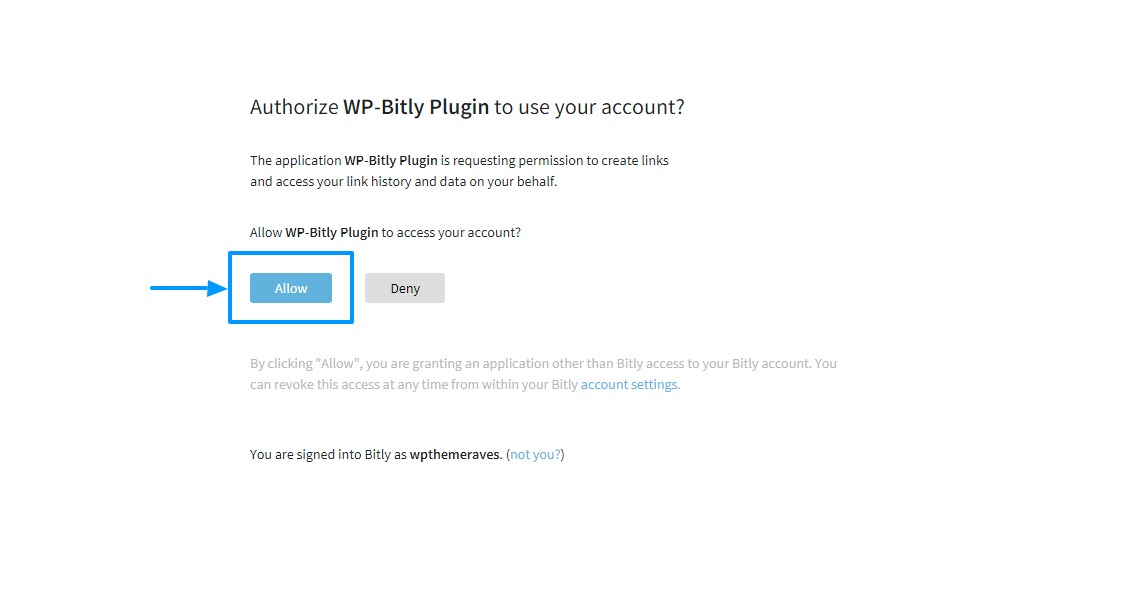
Next, you need to click the Authorize button as shown in the image above. On the next page, click the Allow button as shown below (you must be logged in to Bitly).
If all goes well, you should see the page below.
At this juncture, you are ready to start creating branded short URLs for your WordPress blog. Just open the article in the post editor, and click the Shortlink button on the top WordPress admin menu as shown below.
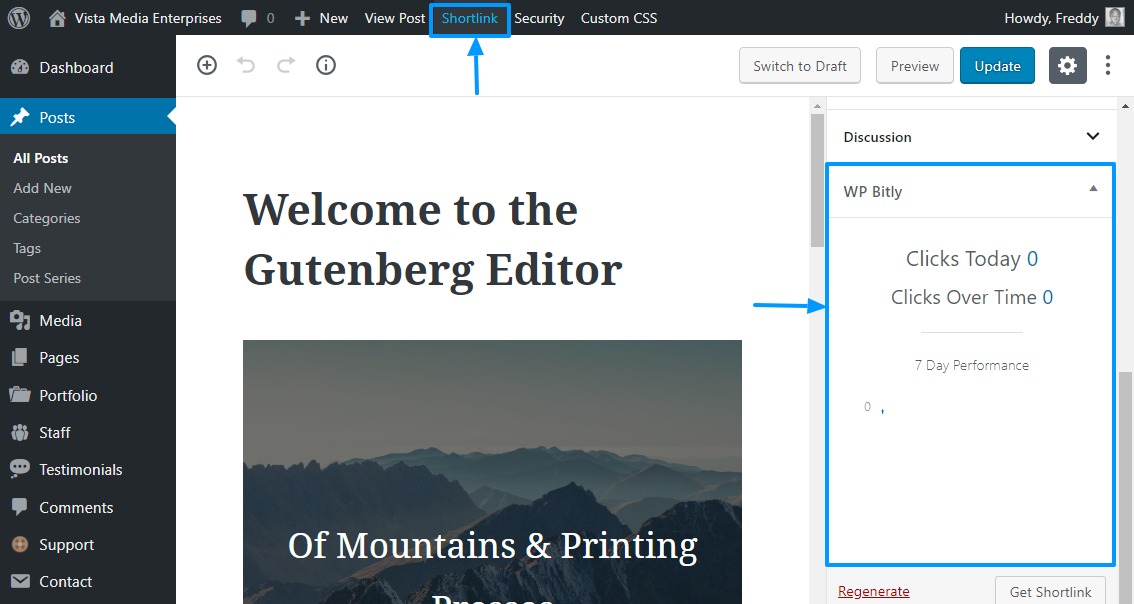
In addition, you can see how your links are performing right from within the post editor as shown in the image above.
Option 5: Purchase & Configure A Branded Short URL
The other methods in this post will help you to create short URLs in a jiffy and without spending a dime. But, there are some downsides to using these methods, which we can overcome in this section.
For instance, the Pretty Links plugin doesn’t do anything to shorten your domain name, and sadly, most of us have long domain names. A link such as wpthemeraves.com/total/ still preserves the brand name, but we can make it shorter by springing for a branded short URL.
And we’ve already mentioned that using WP.me and third-party URL shorteners sacrifices your brand name.
So, instead of wpthemeraves.com/total/, we could go for wprav.es/total/ for instance. A short branded URL carries your brand and improves shareability tenfold compared to other types of short URLs.
For starters, think up your preferred short URL domain or use a domain name generator to find a suitable branded short URL. Be creative and explore different ways of shortening your brand domain.
Purchasing A Branded Short URL
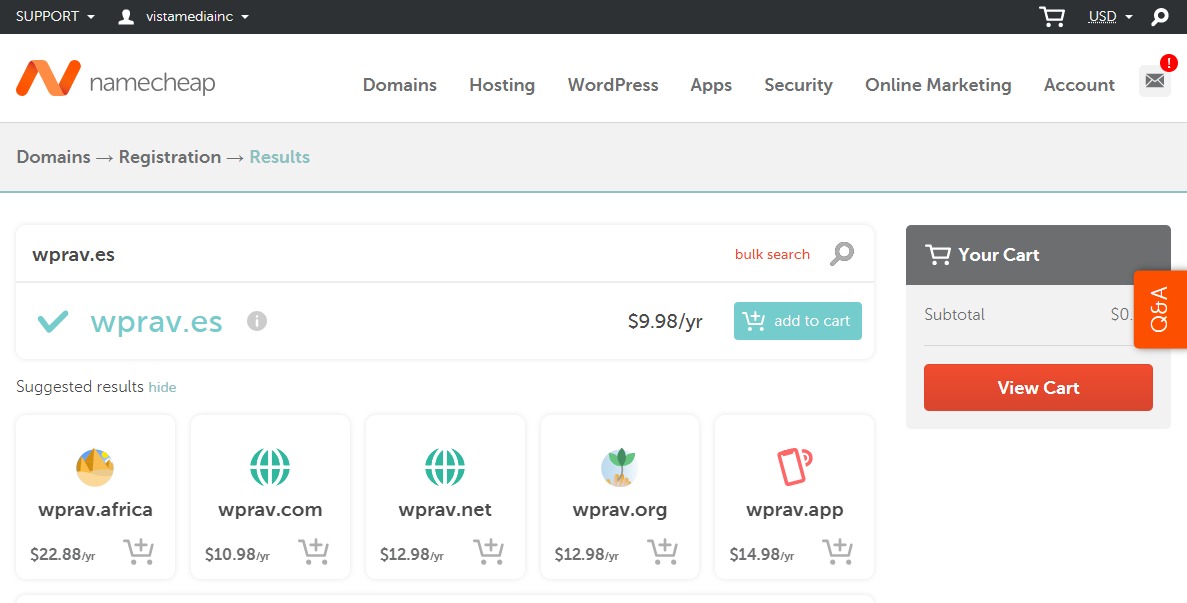
You can buy a branded short URL from your domain registrar, the same way you purchased your existing domain. For this reason, we won’t go into the details. However, if you’re in the market for a great domain registrar, I buy all my domain names at Namecheap (affiliate link).
With a branded short URL in hand, it’s time to configure a couple of things, so that your new short domain can serve short links for your website.
Configuring Branded Custom Short URLs
For this section, you learn how to link your branded short URL with Bitly, allowing you to leverage Bitly to create short URLs on your branded URL. So, instead of using bit.ly/short-url, your short links will look like wprav.es/short-url, for instance.
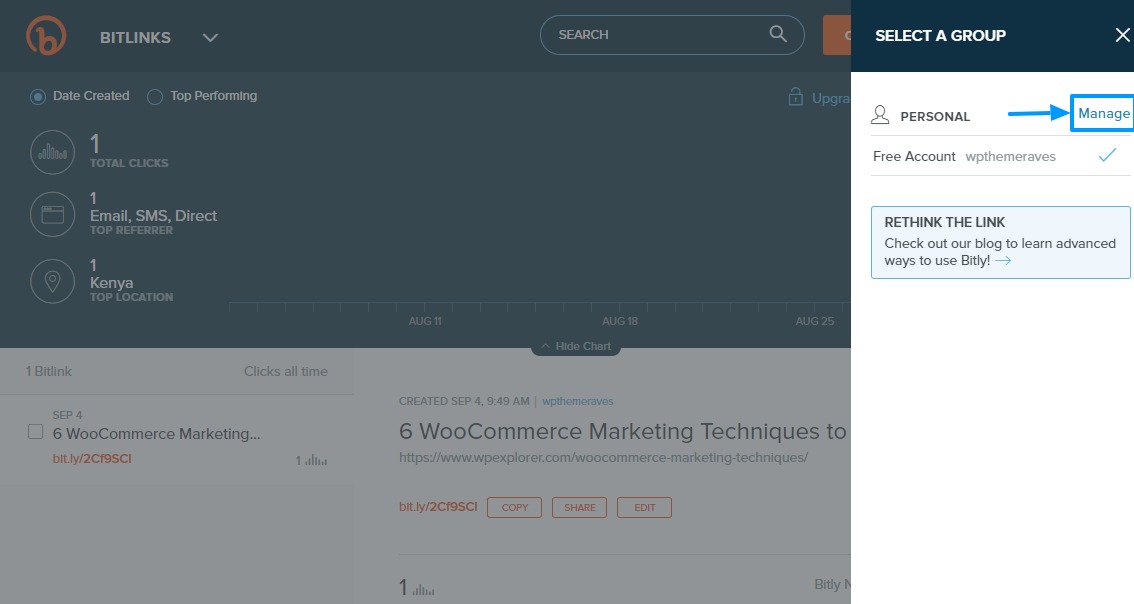
Login to your Bitly account and click your username as shown in the image below.
On the next screen, hit the Manage link:
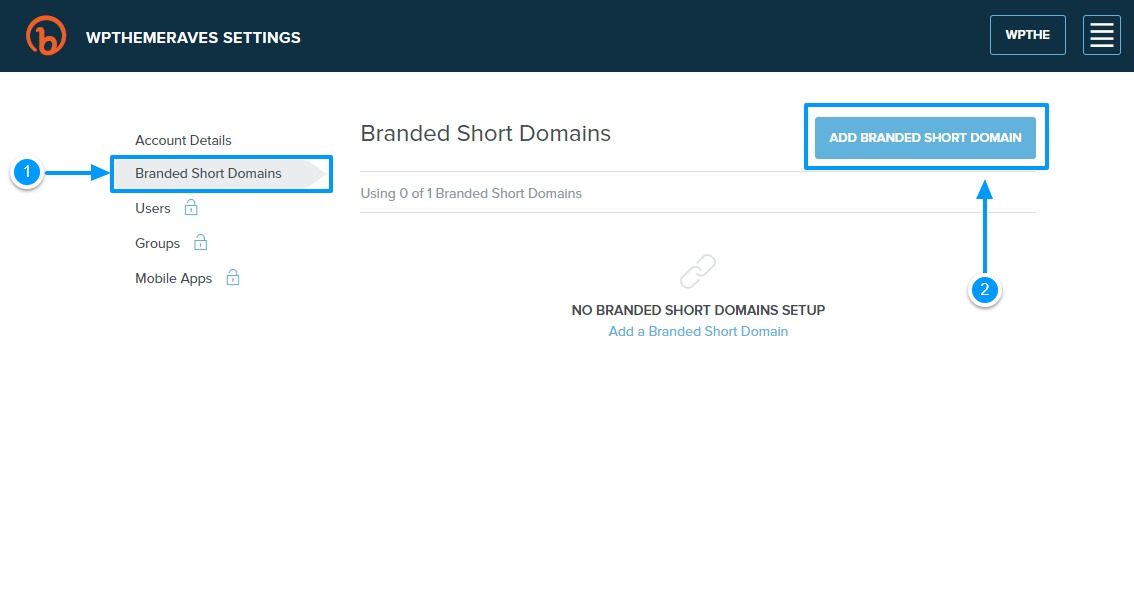
Next, click Branded Short Domains and then the Add Branded Short Domain button as we illustrate in the image below.
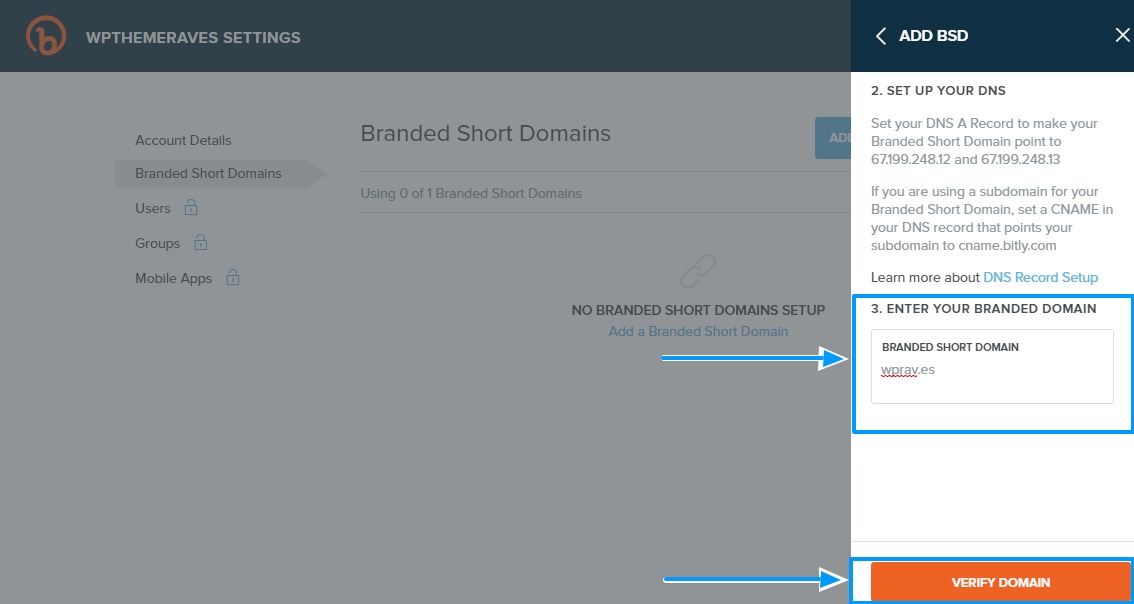
On the next slide-in section, you can add your branded short URL and see the DNS settings you need to link Bitly to your short domain.
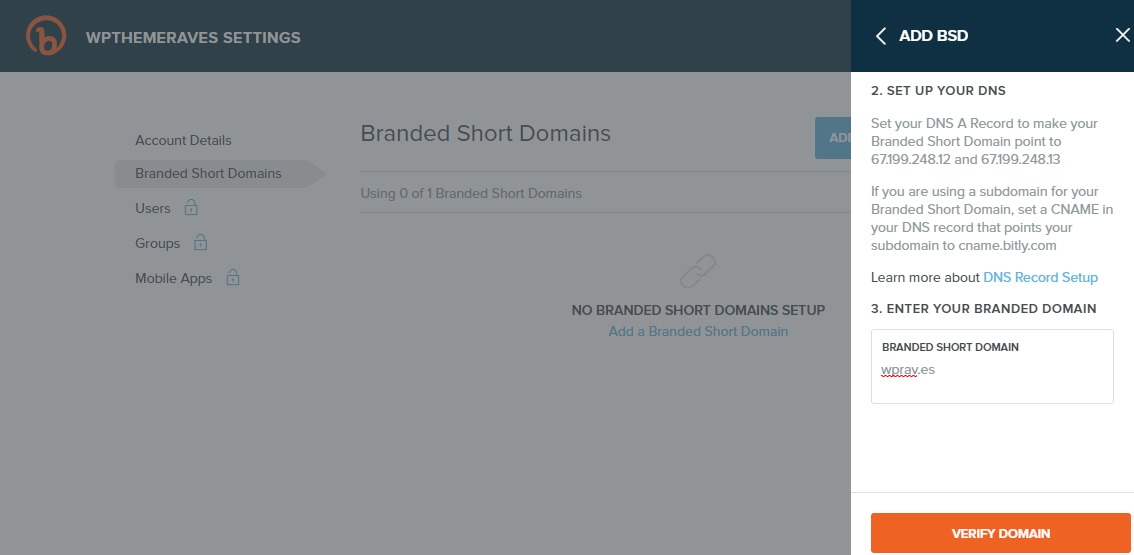
Before you hit the Verify Domain button as shown in the image above, you must log into your domain registrar and make sure your branded short domain points to Bitly.
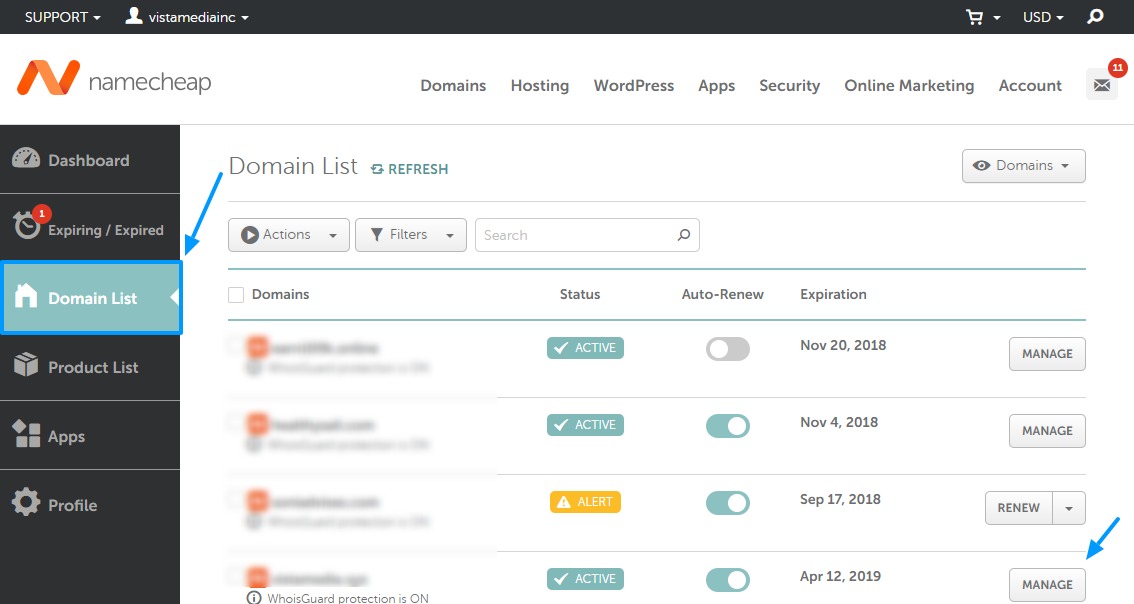
Say you purchased your branded short domain via Namecheap, you just need to log into your Namecheap Dashboard and navigate to the Domain List tab as we show below. Next, hit the Manage button next to your branded short domain:
Next, find the Nameservers section, choose Custom DNS and add the DNS records Bitly offers. Remember to save your changes. Note that DNS changes might take up to 72 hours to propagate, so be patient. Other times, the changes reflect immediately.
Once your branded short URL points to Bitly, enter the domain into Bitly and feel free to hit the Verify Domain button as shown below.
With this out of the way, you just need to install the WP Bitly plugin, so you can manage your short URLs right from within your WordPress admin dashboard.
Conclusion
It goes without saying that short URLs have more advantages than long URLs in the digital world we live in. Whether be it shareability, extending brand reach or simply offering your users a better experience, short URLs carry the day.
That being said, how do you shorten links on your WordPress blog? Did we leave out your favorite URL shortener? Have any questions or suggestions regarding this post? Please don’t hesitate to share in the comments. Cheers!