How to Set Up Pinterest Rich Pins for your WordPress Website
If you use Pinterest to share your articles, images, products and other WordPress content with your audience then you need to be using Rich Pins. Pinterest Rich Pins allow you to add extra information to your pins, helping to make your pins more interesting to your audience.
Not only do Rich Pins give Pinners a richer experience, importantly they also improve user engagement with posts. This consequently helps increase the chances of pins reaching a wider audience, driving traffic to websites, or making sales. So how do you set up Pinterest Rich Pins for your WordPress website?
In this article we are going to look at what exactly Rich Pins are and why you should use them. We will then consider four the different types of Rich Pin available, and go through the process of how to set them up for your WordPress website.
What are Pinterest Rich Pins? (And Why Should You Use Them?)
Pinterest Rich Pins are enhanced Pins that show extra information to go with the image they are displaying. The key to Rich Pins is that they show metadata on the pin itself, independent of the Pin description. This ensures that important information about the Pin is always displayed.
There are four different type of Pin available:
- Article Pins
- Product Pins
- Recipe Pins
- App Pins
So let’s have a look at each pin type in more detail to get an idea of what Rich Pins is offering…
Article Pins
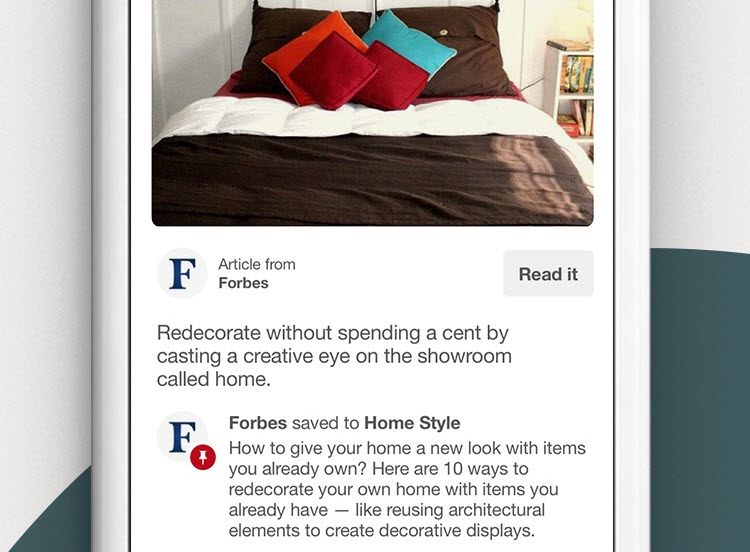
Article Pins are a particularly popular pin type. Ideal for any site that includes a blog, enabling Article Pins will mean that your pins, when shared, will contain extra information including a headline, author, and story description. This empowers pinners with context about the pin, encouraging them to click through to your website to read more of the article.
Product Pins
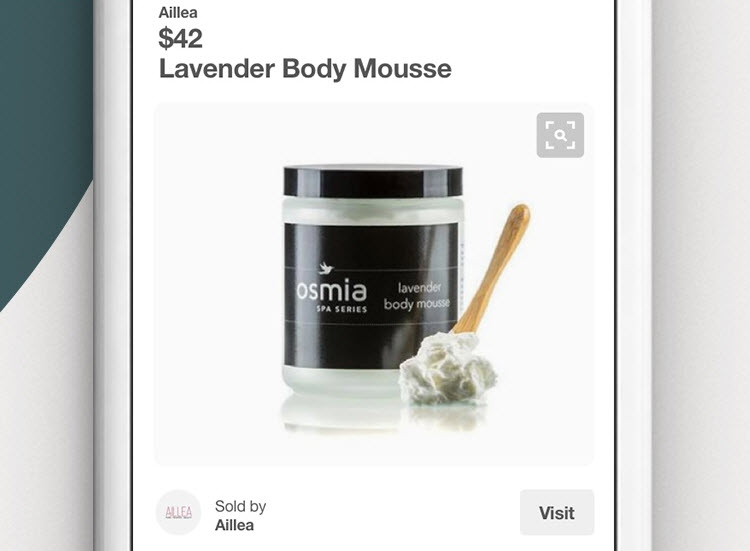
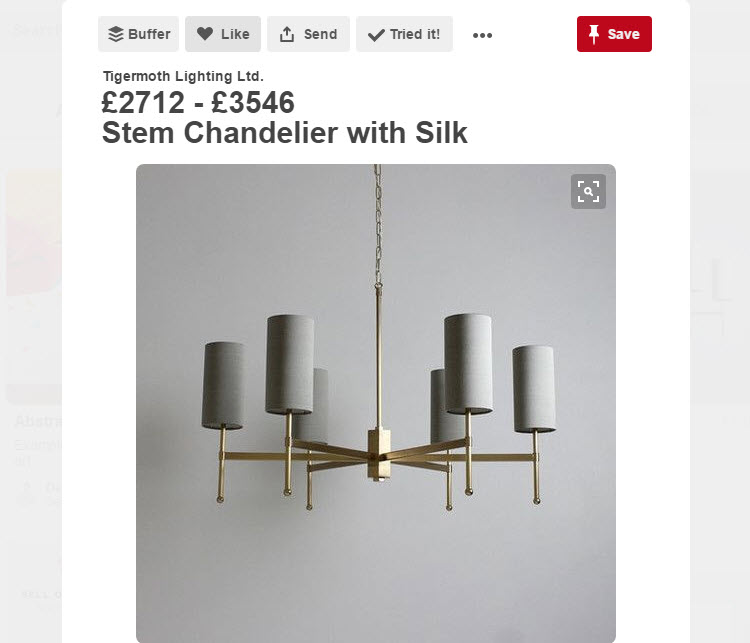
Product Pins are arguably the most effective pin type. These Pins provide all the extra info that those considering making a purchase might need. This includes product price, availability, and buy location. Product Pins link to a product landing page on your website, where the product can be purchased.
Displaying this range of information on a Product Pin helps encourage visitors to consider seriously buying the product. This helps lead to an improvement in click throughs to your product pages, and ultimately an increase in sales.
Recipe Pins
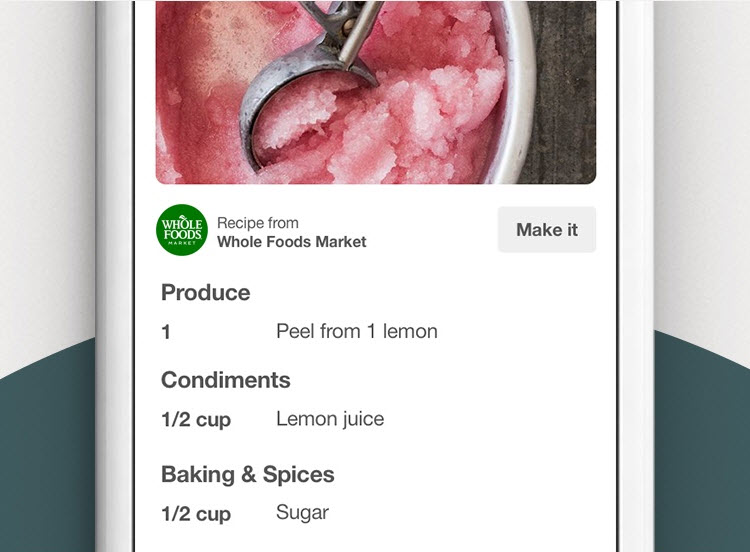
Recipe Pins are ideal for food bloggers, or those who like to share recipe related content on Pinterest. This pin type provides information about the ingredients of a recipe, cooking times, and serving sizes. Sharing this extra info will make your pins much more useful to your pinners and so help increase your fan base.
App Pins
The last of the four options, App Pins, is an extremely impressive pin type. App pins display an ‘Install’ button, allowing pinners to download your app without even leaving Pinterest. Currently, App Pins are only compatible with iOS and US apps, although this may change in the future. Using App Pins is a great way for your app to reach a wider audience, and improve install numbers.
So now we know what types of pins are available, let’s take a look at the Rich Pins set up process…
Create a Pinterest Business Account
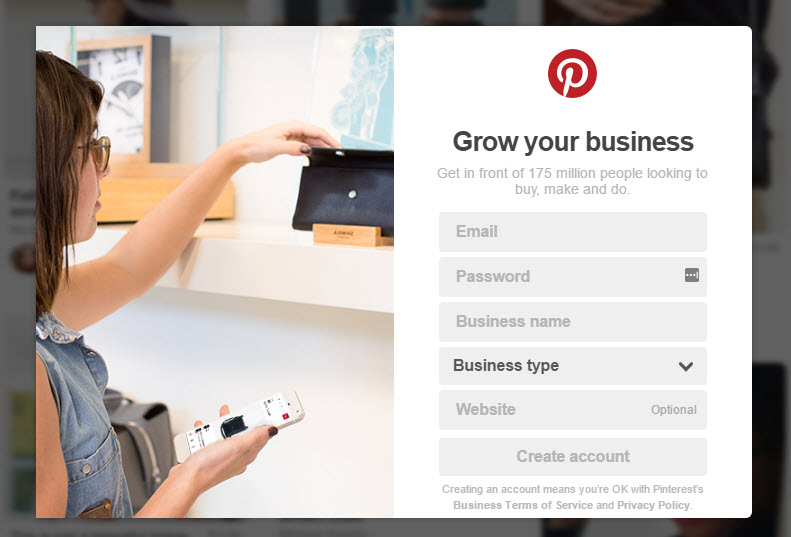
The first step towards setting up Rich Pins for your WordPress website is to create a Pinterest Business Account. If you are new to Pinterest then you can set up a business account from the get go. This is quick and free to do.
However, if you already have a Pinterest account, then you can simply convert to a business account. This is again a free and very easy process, taking less than 15 seconds!
Integrate Your Pinterest Account with Your WordPress Website
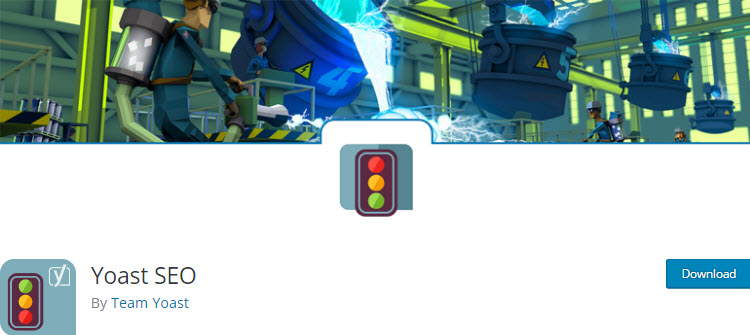
Once your Pinterest account has been upgraded to a business account, it needs to be integrated with your WordPress website. The easiest way to do this is to use the plugin Yoast SEO. This extremely popular free WordPress plugin will help optimize your website for the search engines, as well as social media.
Install Yoast SEO on Your WordPress Website
More than likely you are already using Yoast SEO. However, if you are still to get on board with this plugin, here’s a quick rundown on how to install it on your WordPress website…
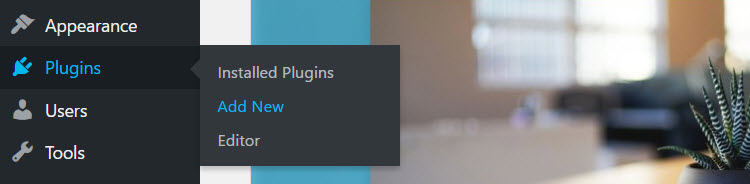
Within your WordPress dashboard, select ‘Plugins > Add New’ from the menu.
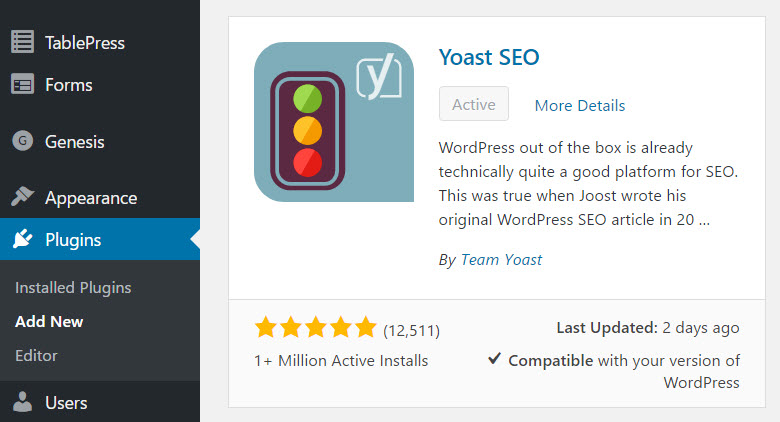
Search ‘Yoast SEO’ in the plugins search box, then click ‘Install Now > Activate’.
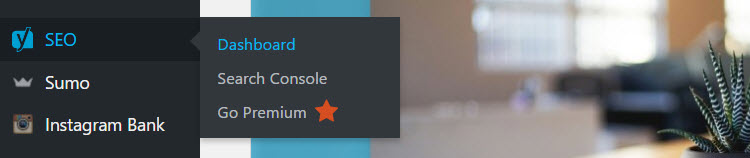
Yoast will now be installed on your website and you will find it in your WordPress menu under ‘SEO’. To enable Social Settings, which you will need to set up Rich Pins on your website, select ‘SEO > Dashboard’.
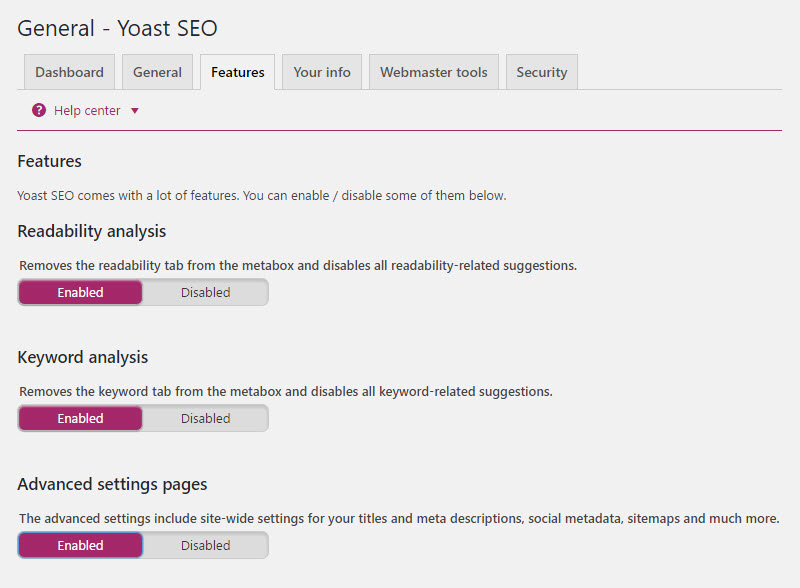
Click on the ‘Features’ tab. Scroll down the page and under ‘Advanced Settings Pages’ select ‘Enabled’. Then click ‘Save Changes at the bottom of the page.
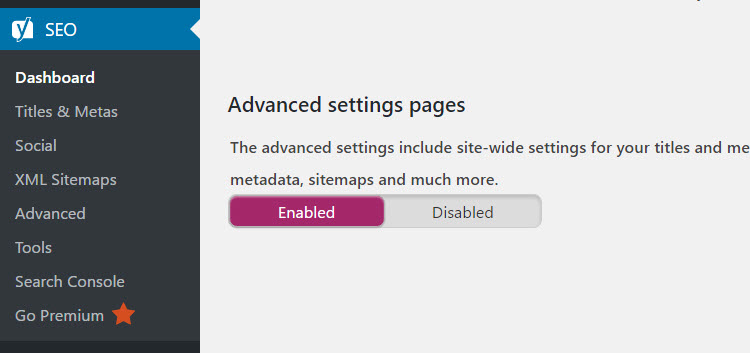
You will now see that extra settings have been added under ‘SEO’ in the WordPress menu, one of them being ‘Social’, which we will need shortly.
Confirm Your Website with Pinterest
Once Yoast SEO has been installed on your WordPress website, you will need to integrate and confirm your site with Pinterest.
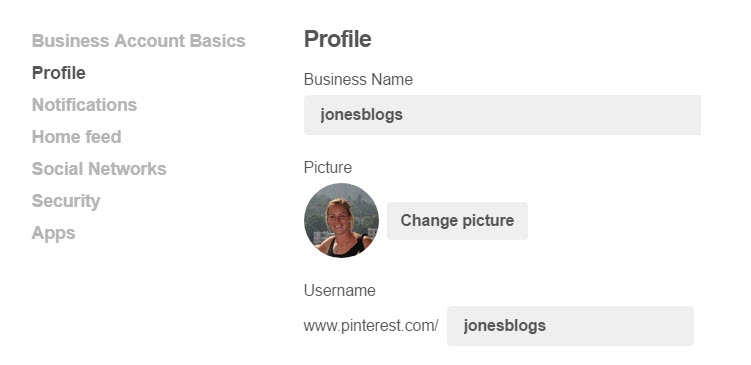
Within your Pinterest account select ‘Settings > Profile’.
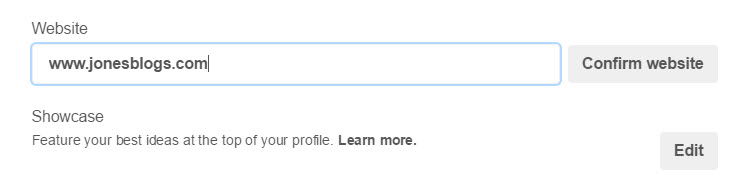
Scroll down and under ‘Website’ enter your site’s URL. Then click ‘Confirm Website’.
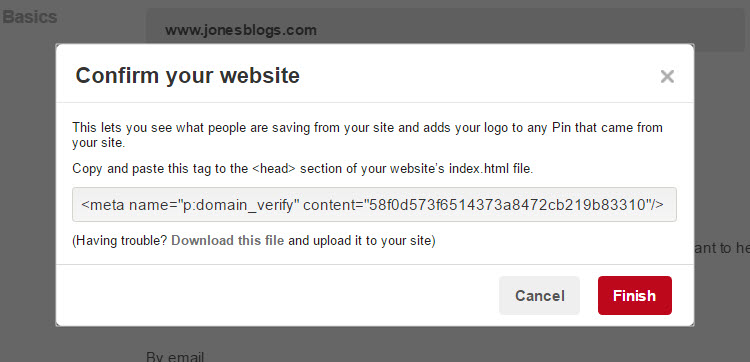
Pinterest will now display a meta tag code that you will need to copy and paste into your website.
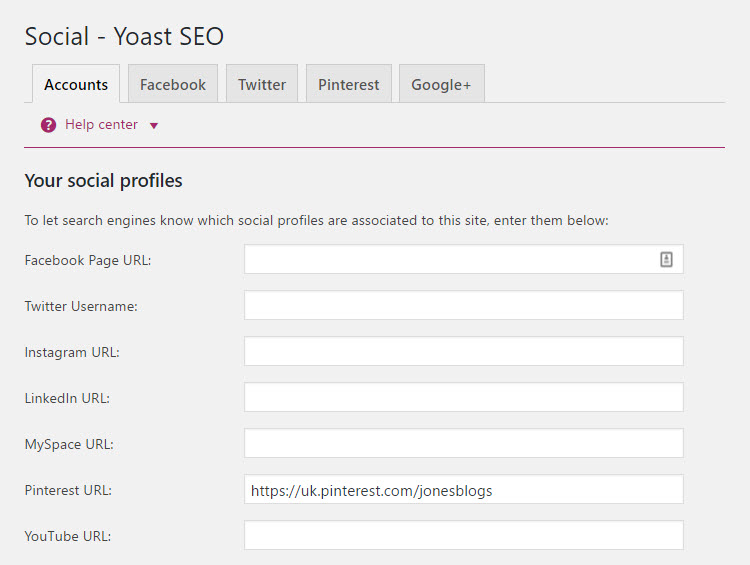
Once you have copied the page, switch back to your WordPress dashboard and select ‘SEO > Social’. In the ‘Accounts’ tab, enter your Pinterest URL, which is www.pinterest.com/ followed by your Pinterest username. Mine, for example, is www.pinterest.com/jonesblogs. Then click on ‘Save Changes’.
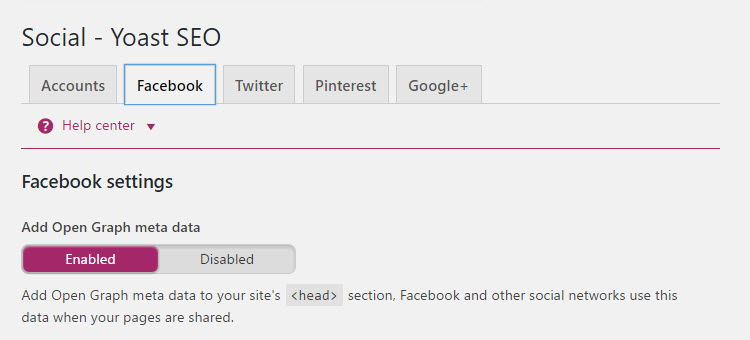
Next switch to the ‘Facebook’ tab. Here simply check that ‘Add Open Graph Meta Data’ is switched to ‘Enabled’.
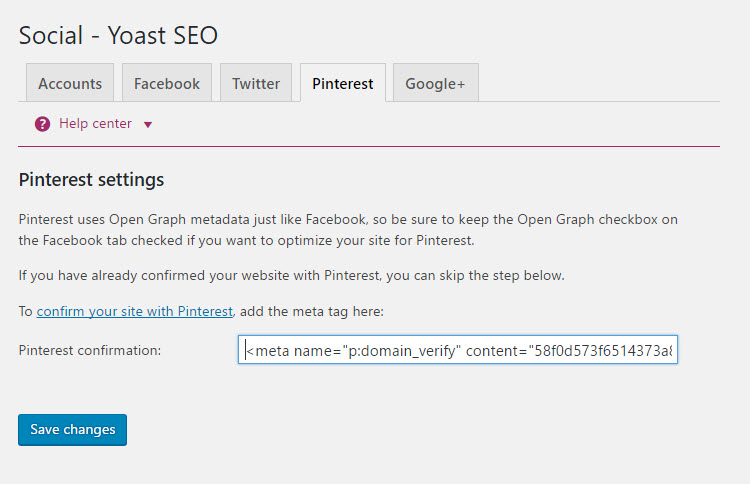
Lastly, click on the ‘Pinterest’ tab. Paste the Pinterest confirmation meta tag code into the box and select ‘Save Changes’. Then switch back to your Pinterest account and click ‘Finish’. Pinterest can take up to an hour to verify your website, but on the whole, accounts are confirmed instantly. Your WordPress website and Pinterest Business account are now integrated, and you are ready to set up Rich Pins.
Setting Up Article Rich Pins
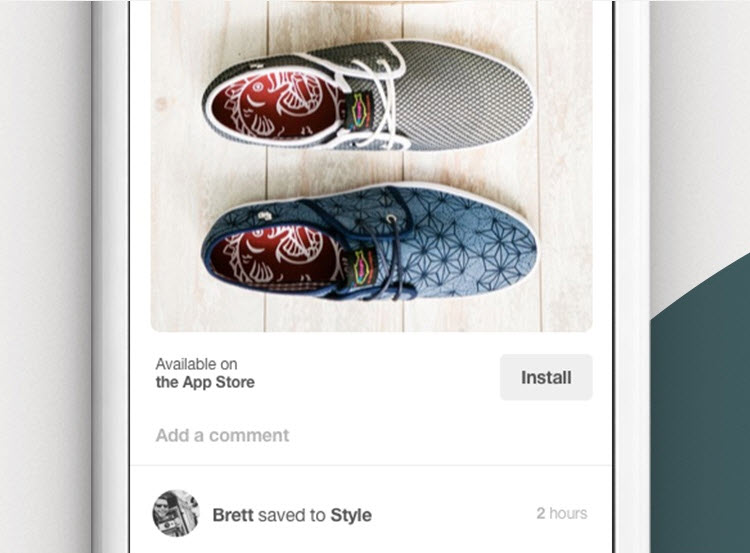
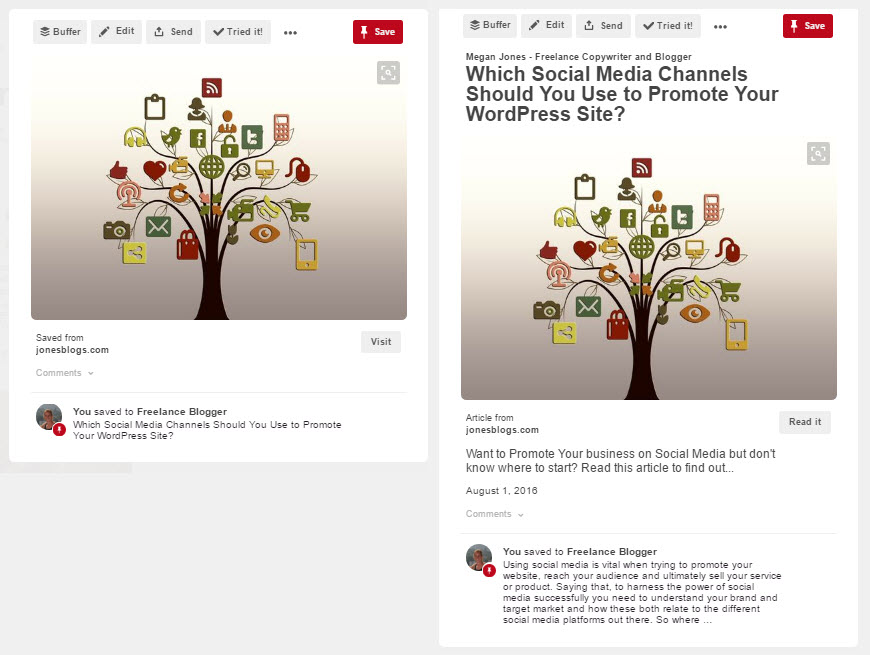
As mentioned earlier, Article Pins are extremely useful for blogs and websites that are content heavy. If you have visitors that Pin images from your articles and pages, then Article Pins are a must for your site. Here is a great example of the difference between a bog standard Pin and an Article Pin…
So let’s find out how to set Article Pins up…
Adding Metadata to your WordPress Website
Rich Pins work by using the metadata that you have added to your website. However, if you aren’t confident adding metadata using Schema or Open Graph tags to your WordPress website, this might seem a daunting task.
Even if you are a confident coder, the process of having to mark up every page and post to make it ‘Rich Pin’ ready, can be time-consuming. Don’t worry, Yoast SEO actually uses Facebook Open Graph metadata (a setting we previously looked at how to activate). So using the WordPress plugin Yoast SEO greatly simplifies the task of adding Article Pin metadata.
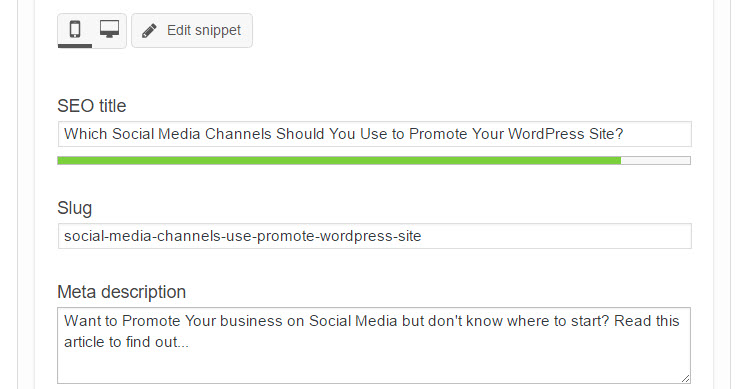
To help your Article Pins appeal to your audience and grab your viewer’s attention, you want the metadata added to make an impact. Own the title and description added to your Article Pins by filling out the Yoast ‘meta description’ and ‘SEO title’ under each post or page.
Writing a successful meta description is important so take this opportunity to explain why people NEED to click on your pin and read your post. If you leave the Yoast meta description blank, your Article Pins will just display the first couple of sentences of the post, which could be a missed opportunity to engage with your audience.
Validating Pinterest Rich Pins
Now all that is left to do is to apply for Rich Pins. Do do this, open the Pinterest Rich Pins Validator page.
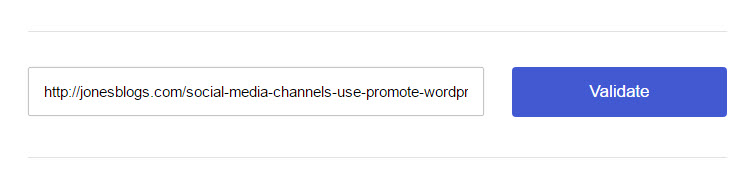
Choose any page from your site that you have added metadata to, then copy and paste the URL into the validator and click on ‘Validate’.
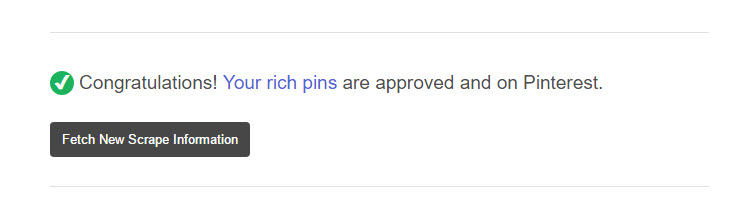
Pinterest will then validate your Rich Pins. This process only needs to be completed once, turning all your website’s pins into Article Pins. Every time one of your pins is saved on Pinterest, the extra information will be saved with it, ensuring your pins are consistently labeled and engaging.
Setting Up Recipe Pins

If you are looking to set up Recipe Pins on your website, this again can be done quickly and efficiently using a WordPress plugin. WP Recipe Maker allows you to add recipes to any post or page, creating automatic schema.org/JSON-LD metadata for your recipes.
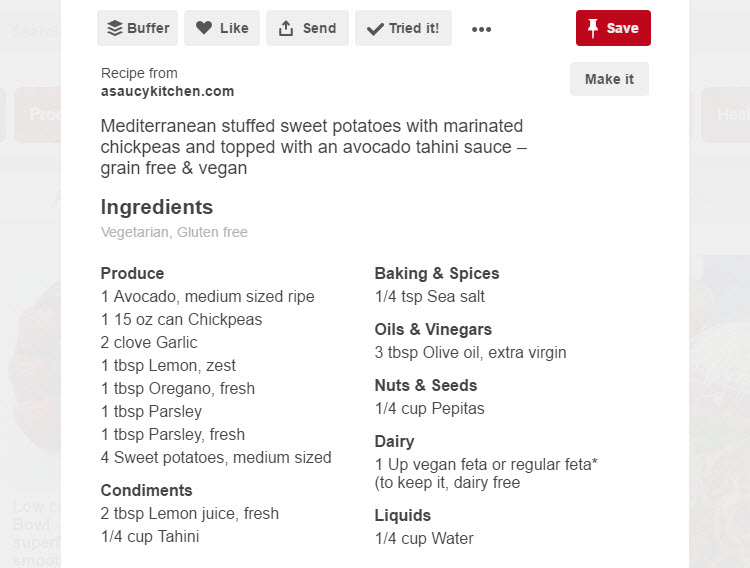
Once you have published recipes using WP Recipe Maker, validate your website with Pinterest. Pins from your posts and pages will then be displayed on Pinterest showing the marked up data. This includes ingredients, cooking times and serving information. Using Recipe Pins is a great way to get your recipes out there and attract interest.
Setting Up Product Pins
Shopify is well integrated with Pinterest, making Shopify the number one platform for promoting and selling products through Pinterest. If you are looking to add Rich Pins to your Shopify store, follow these simple steps…
- Select a URL of one of your product pages.
- Paste the URL into the Pinterest validator.
- Add .oembed to the end of your URL.
- Click ‘validate’.
- Your product pins should now become Rich Pins within the next 24 hours, although it may be quicker.
If you are using a different eCommerce platform other than Shopify, then you will need to mark up your pages using Open Graph, Schema.org or oEmbed. For more information on how to do this, visit Pinterest’s Product Pins page.
Final Thoughts
Pinterest has great supporting documentation on how to enable Rich Pins for your WordPress website. So if you need more details, or if you are looking to set up App Pins, then check out their Help Pages. Rich Pins is an impressive way to add extra information to your pins, helping to cater for the needs of your audience and improving the chance of your website converting against its goals. So make the most of this free service and upgrade your pins today.
Which type of pin will you be enabling for your WordPress website? Please share your thoughts in the comments below…


What image I must put to my website for rich pin? If i put 735 to 1000 px it is too long for article if I put small image it will be too small for my rich pin, when I pin it to pinterest from my website
One easy option is to add a long image at the end of your post specifically for Pinterest sharing.
Thank you for your perfect instructions. I have been looking for days for someone to be able to talk me through this in simple language. All done, thank you again.
Great article, thank you for sharing. I’ve been having issues setting up Rich Pins and the reason was that I was putting my Home Page URL into the Rich Pins Validator box! The validator only seems to work when you put in any URL other than your Home Page URL. Thanks again, Megan.
I’ve been so daunted by rich pins because so many of the posts I’ve read have made it seem so confusing. I can’t believe it was this easy! Thank you so, so much for writing this awesome article.
Hi! Thanks for the great information. Do you have any tips when you set up rich pins and then the WHOLE blog post is included in the description under the pin. Something isn’t right and I can’t figure out how to fix it. Thank you!
Sounds like you might be missing an meta description for your posts. We use Yoast SEO, but most of the top SEO plugins should add a “meta description” field below the post editor where you can add a short 1-2 sentence excerpt for your post.
pinterest is defiantly an underused social network and can drive a lot of traffic and revenue if done correctly
great tips and ones which I will be using for sure!
setting up rich pins is now complete!!
This helped me a lot with understanding rich pins. Explained very simply what I need to do – so I went and installed Yoast on my site. Thank you for the tips!
Yoast definitely makes connecting your site to Pinterest and setting up rich pins for WordPress so much easier. Glad our WordPress Pinterest guide could help you get your site setup!
Hi Kyla
First of all, a big thank you, its a very excellent post. I am Anuradha, a homemaker. In November 2020 recently I have launched my website wishesatavya. I am new to all these things. I have some doubts regarding Rich pins. Mine is a daily wishes website. which page URL i have to give while applying for rich pins in Pinterest? I think i have to choose product pin right?
Please guide me if you find a little time.
Thank you
Anuradha.
If your wishes are something your sell then yes a product format would be best because the pin will show your price and products name. But if your wishes are blog posts, the I would suggest using the article format.
Thank you sir great artical very helpful to set up rich pin issue on my pinterest account