Jetpack Modules To Level Up Your WordPress Website


It’s hard to describe Jetpack – calling it a mere plugin would be doing it an injustice. Let’s just say that Jetpack is a bunch of plugins bundled into one. It adds many benefits that a WordPress.com account holder normally enjoys to your website. For a self hosted WordPress website, this is akin to buttering your toast on both sides – you have the flexibility of a WordPress.org install, and at the same time, you enjoy many of the benefits of a WordPress.com account for free, simply by activating Jetpack modules on your website. And, since the plugin is made by Automattic, you can expect it to be perfectly compatible with WordPress.
Currently, Jetpack offers more than 35 modules that greatly enhance the functionality of your WordPress. These cover security, traffic and SEO, creating beautiful content with images, and videos that can display on galleries and carousels. As a bonus, Jetpack can also improve site speed and save bandwidth (if you activate the Photon module). While most modules are free, you’d have to sign up for a WordPress.com account to use the plugin.
It’s not necessary for you to activate all the modules. You can activate just the ones that are needed for your site by visiting Settings under Jetpack.
These are the modules that I’d pick for my site,
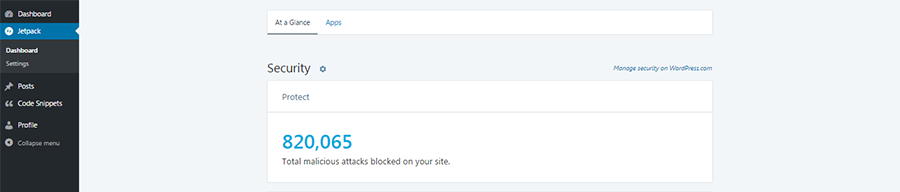
Protect
The Protect module is one of many security features that come with Jetpack. WordPress users familiar with the Brute Protect plugin will recognize many of the functions that are now incorporated in the Jetpack plugin (Brute Protect has been acquired by Automattic).
This Jetpack module works by keeping track of the failed login attempts from any IP into any Jetpack powered website. Making use of this cloud-stored data, Jetpack blocks login attempts into your website from this malicious IP. The IPs are blocked for varying periods of time. This way, your website stays safe from break-in attempts. You can read more about protecting your site from break-ins in our earlier post. For more effective spam protection, you’ll need to activate Akismet.
Another reason you’ll be happy to activate Protect is because it gives you the option to whitelist your own IP. With this module activated, you can be sure that you’re not locked out of your own site.
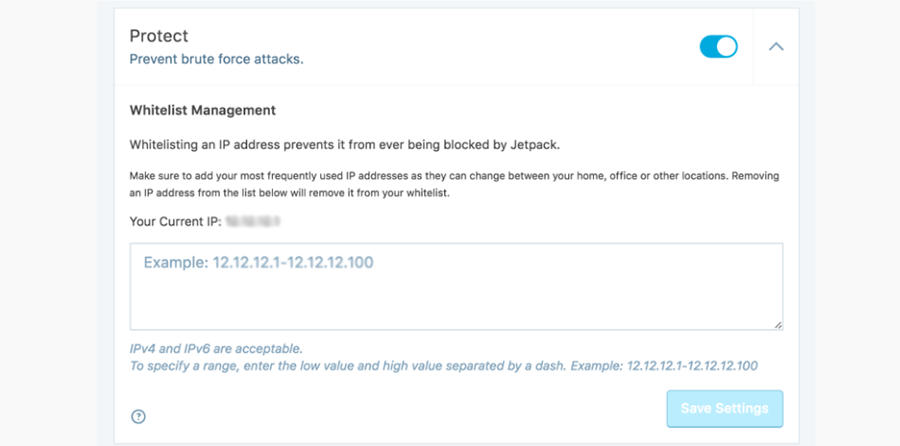
To activate Protect: Jetpack > Settings > Protect
Photon
One surefire way to improve site speed is to use a CDN (Content Delivery Network) to store static files like images, in remote servers. The Photon module uses the WordPress.com cloud to cache images from the posts and pages of your website. It can fetch, resize and serve up any .png, .gif or .jpg image.
For Photon to work on your website, it’s important that your server uploads the image within ten seconds, otherwise you risk being timed out and the image will appear broken.
To activate Photon: Jetpack > Settings > Photon
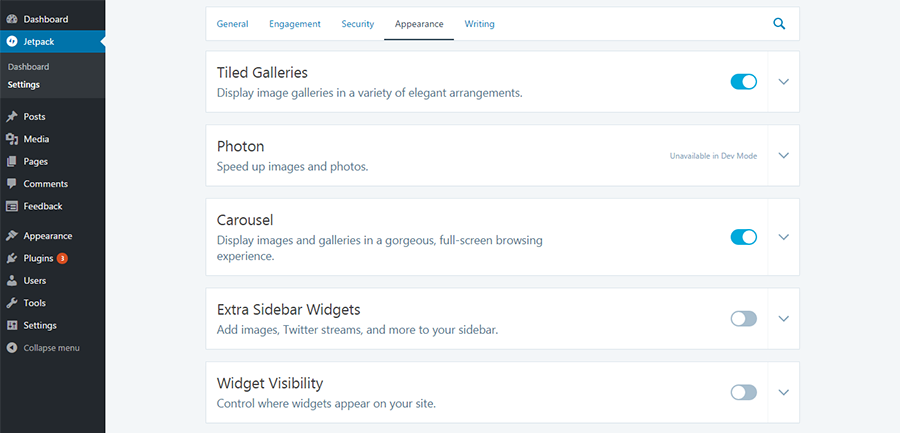
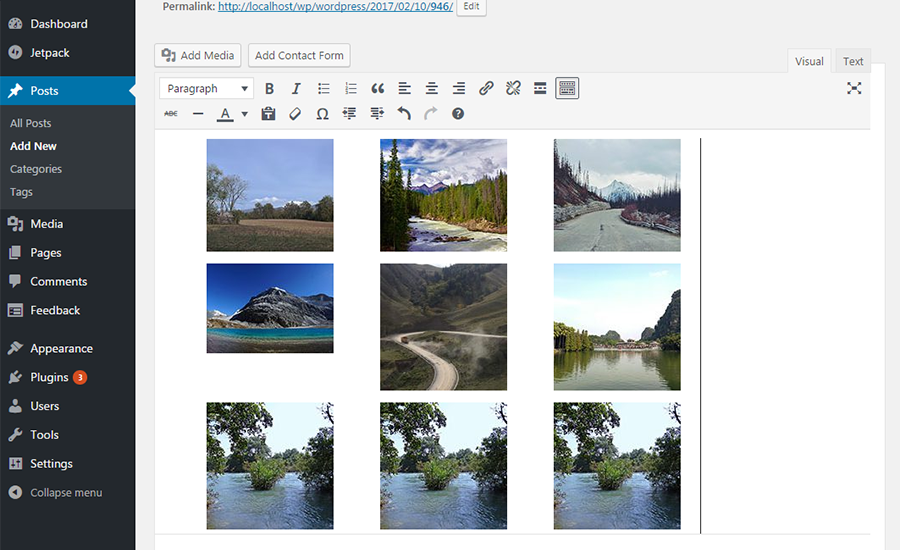
Tiled Galleries and Carousels
Create beautiful galleries and carousels with the Tiled Galleries and Carousels Jetpack modules active on your site. Galleries will appear in a tiled format that can be rectangular or square or as a circular grid. You can design these formats by creating a gallery in the normal way using the Add Media setting. But now you’ll find a new option “Tiles” which you can use to choose the layout option of the gallery.
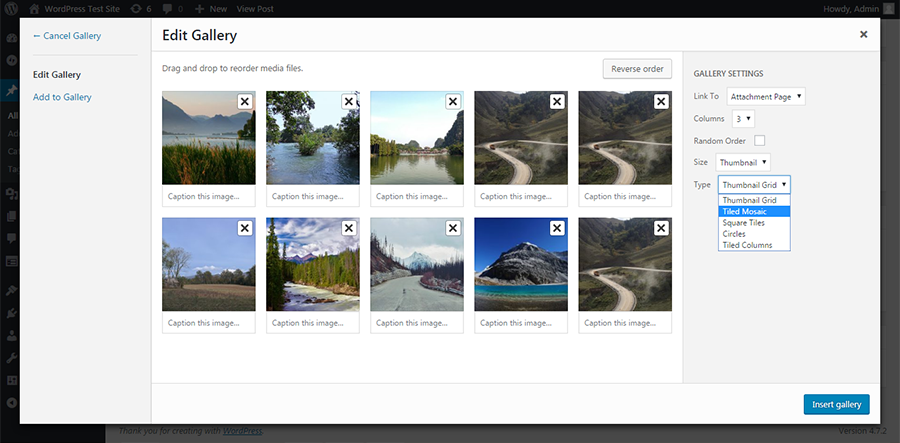
The default width used for the images is 500px. However, if your theme specifies a content width, the images will resize to fit that specification. As these gallery images need to be processed further, they are served up from the WordPress.com cloud. This module will work, even if you’ve not enabled the Photon module.
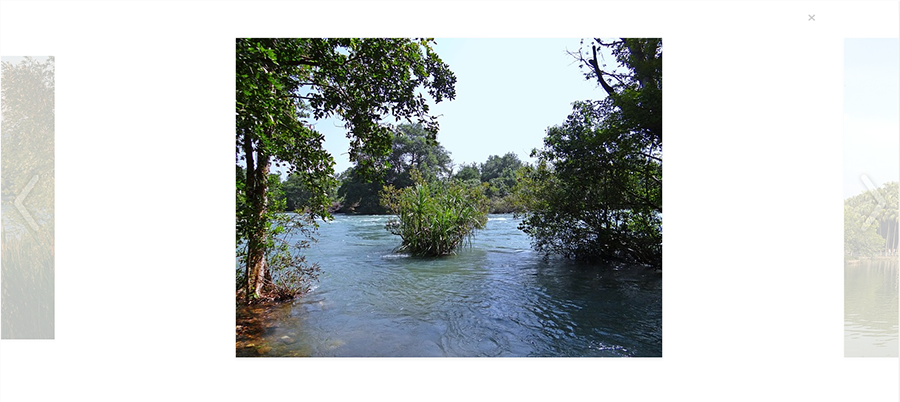
If you activate the Carousel module, it instantly converts any gallery on your website into a full screen carousel. Besides, you can select a white or dark background for the carousel under options in Settings > Media.
Monitor
Monitor is one module I’d recommend to all users. Jetpack tests if your website remains accessible by pinging it every five minutes, once you activate this module. If the HTTP response is not good or if there are too many redirects, the plugin will tentatively mark your site as down. Subsequently, it’s pinged from three different geographical locations for confirmation. If all 3 checks fail, you’ll receive an intimation in your WordPress.com account.
An hour later, you’ll receive a second intimation, if your website is still down. And then you’ll be notified once the website is up and running again.
To activate Monitor: Jetpack > Settings > Monitor
Contact Form
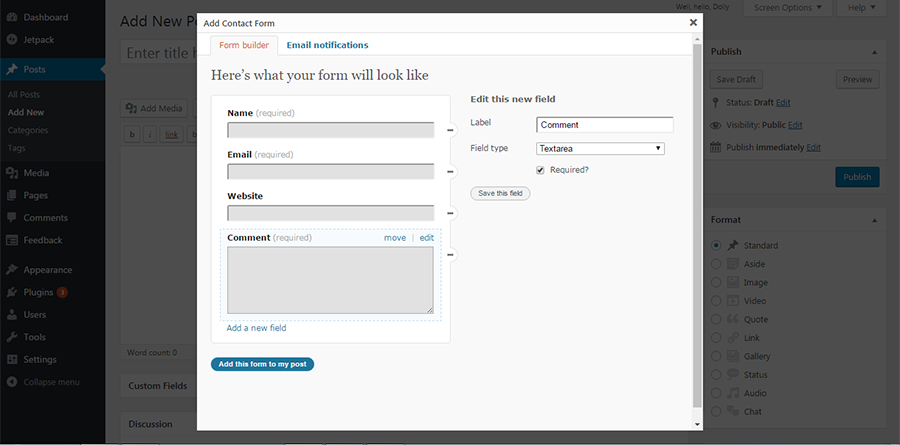
A Contact Form is an important ingredient in many web pages, and Jetpack includes a module for this as well. Activating the module is a super easy way to add a contact form to any post or page on your website.
An Add Contact Form option appears in the Post / Page editor. Click on it, and a popup will open, which you can edit by adding, or reordering fields. If you wish, you can even style the form’s appearance using CSS and change the text that will appear in the Submit button.
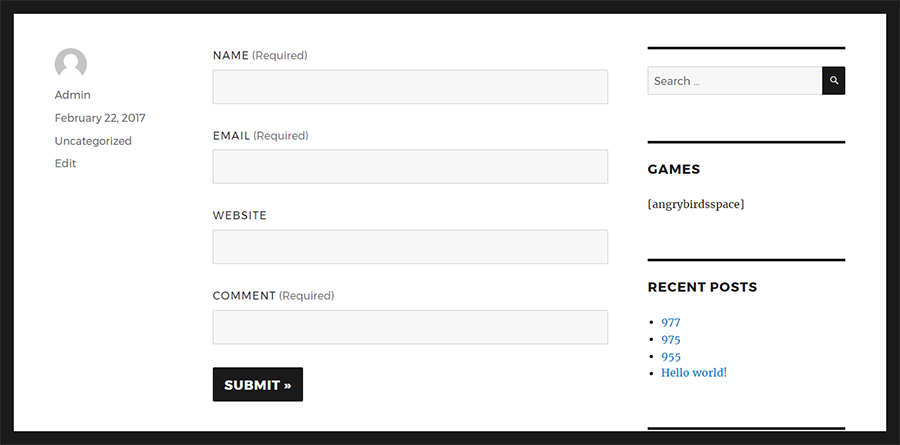
And this how my Contact Form appears from the frontend – quite basic, but gets the job done.
For any response received on the form in the frontend, you’ll receive an intimation by email. You can view these mails conveniently on your WordPress Admin area, under the Feedback section. If you happen to be an Akismet subscriber, the responses will be filtered for spam as well.
To activate Contact Form: Jetpack > Settings > Contact Form
Related Posts
A neat way to keep visitors longer on your site is to suggest other posts that they may find interesting on your site. This is possible when you activate the Related Posts module.
This module scans your content for posts that are related to each other in a contextual manner. It picks out appropriate content that is likely to hold the reader’s interest and displays it beneath each post. All the backend work of pulling out related posts is carried out in the cloud, and so there’s no load on your site or server.
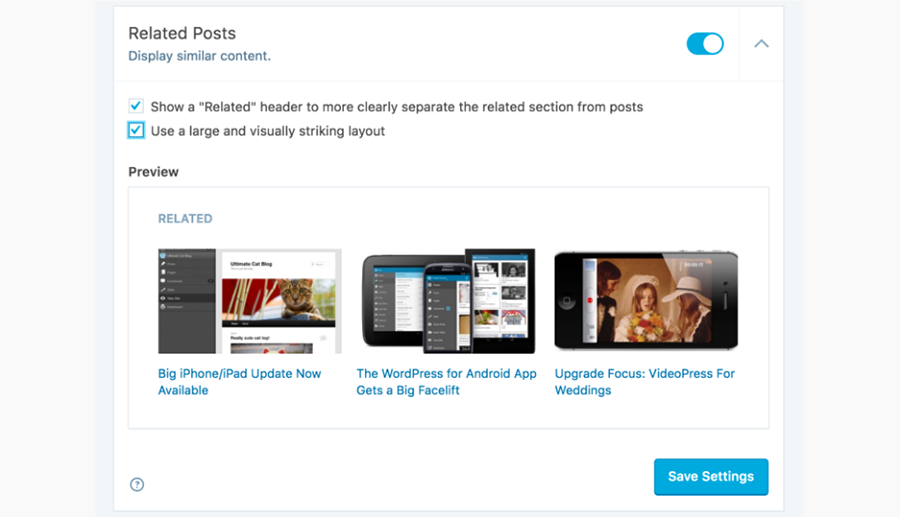
You can configure the display of the Related Posts by adjusting the settings to add a header or thumbnails. This module will locate related posts based on context or categories or tags. It will only display if there are atleast three posts that it can list.
To activate Related Posts: Jetpack > Settings > Related Posts
Enhanced Distribution
Enhanced Distribution is a module that can help to get better visibility for your content. Any content that is not restricted for viewing is automatically added to the WordPress firehose and becomes available for public viewing on WordPress.com.
What is firehose ? Well, companies and just about anybody interested in accessing information can view a stream of information that passes through WordPress.com. If it happens that they use the content from your blog to display on their websites, they must link back to your content. Activating this module can add readers to your blog.
To activate Enhanced Distribution: Jetpack > Settings > Enhanced Distribution
Publicize
Publishing your posts on social media can help to bring your content before the right audience. The Publicize module will automatically push content to the social media that you select.
To configure this module, visit Settings > Sharing and click the Connect button against the selected social media options. Once you login to the social accounts and authorize the connection, you’ll see these forums in the Post Editor near the Publish option. When you hit Publish, these posts automatically appear on selected social media.
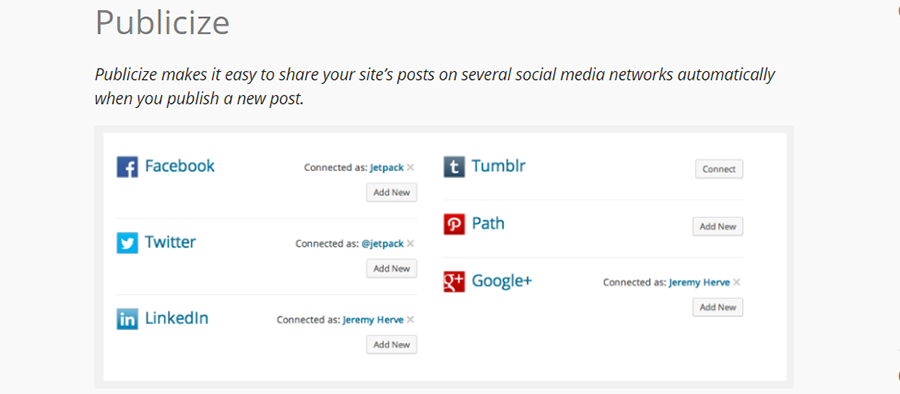
The list of media options can be changed on a per post basis using the Edit button. Publicize also works for scheduled posts, they are automatically pushed to social media at the scheduled dates and times. The option works only for new posts and for Administrator, Editor and author roles. It can also be customized using a bit of code or additional plugins.
Widget Visibility
Widget Visibility module allows you to control the visibility of each of your widgets on different pages. You can set visibility so that a widget appears on particular pages and not on others. You can control this on the basis of 5 aspects – page type, category, tag, date, and author.
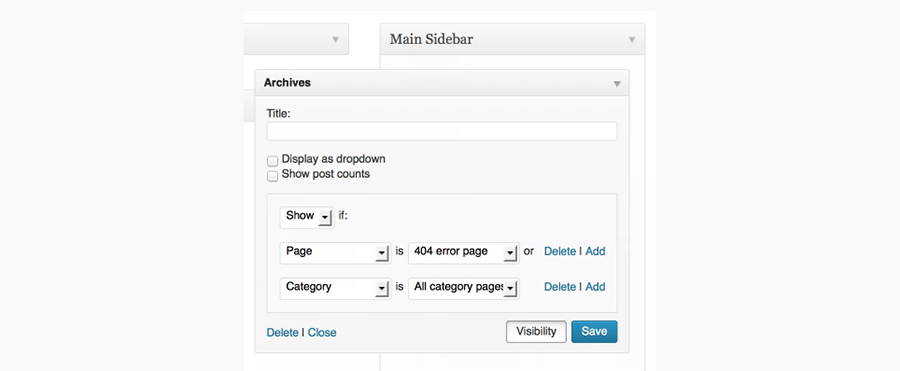
Each aspect works independently, and you cannot adjust visibility to apply to any particular combination of aspects, say pages belonging to a particular category and author.
Gravatar Hovercards
To convert your gravatar into some kind of online business card, enable the Gravatar hovercard. Information about you is then visible to others and they can find you more easily online.
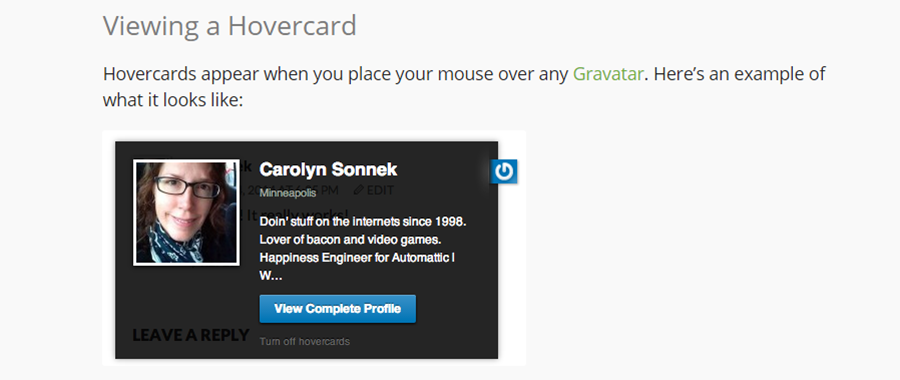
When you activate this module, the hovercards appear when the mouse hovers over your gravatar.
Site Verification
In order to enable webmaster tools to verify your site, we normally add a “meta tag” or change the DNS entry. If you want Jetpack to do this for you, activate the Site Verification Module.
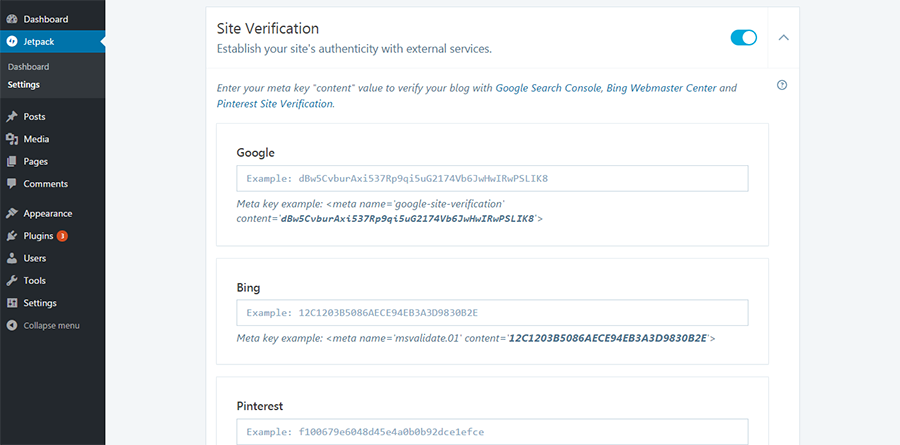
You’ll need to configure the settings for each service like Google, Bing or Pinterest. The instructions for configuring these services are provided here.
Last Words
Many users perceive Jetpack as bulky and as a plugin that slows down your site’s response time. Well, look at it this way – it’s carrying out the task of multiple plugins, it’s totally compatible with WordPress, is free (mostly) and you can activate only those modules that you need.