How to Add Custom Styles to the WordPress Classic Editor

Take a look at your WordPress visual editor. There are some standard options for formatting and styling your content, but not much in terms of customization to make your posts and pages look a little really fancy.

Now, you may know that you have the ability to jump back and forth between the Text and Visual editors in WordPress to throw in some CSS for creating things like buttons and text blocks, but this is a pain, and if you don’t have much experience editing code the Text editor seems a little intimidating.
Wouldn’t it just be easier if you could create your own custom styles, place them in a dropdown menu in the WordPress editor and choose to use them whenever you need them? Yes, it’s much easier, so we want to outline how to do that here. Keep in mind that although we are trying to make this process as simple as possible, it helps to have a bit of CSS knowledge if you want to discover the full benefits of custom styles.
Let’s take a look at how to add custom styles to the WordPress visual editor.
Add Custom Styles to WordPress Classic Editor
This first option requires you to know a little about how to incorporate and modify CSS, but I’ll give you a little walk through to help you learn the basics so you can use this knowledge in the future. This is a nice option if you don’t want to weigh down your site with a plugin.
The point of this is to add a new dropdown menu which includes custom styles in your WordPress visual editor, which gives you the ability to select elements in your editor and then apply custom styles to them. If you are developing a new theme locate your functions.php file and place the code below into that file or if you are working with an already built-theme paste this code in a child theme’s functions.php file.
function myprefix_mce_buttons_1( $buttons ) {
	array_unshift( $buttons, 'styleselect' );
	return $buttons;
}

add_filter( 'mce_buttons_1', 'myprefix_mce_buttons_1' );
Go back to the editor in one of your WordPress posts and now you should see a new “Formats” button in the top row of the editor. Notice how we hooked into the “mce_buttons_1? This places the formats menu button in the first row of the mce editor. You could also use the “mce_buttons_2” filter to place it in the second row or “mce_buttons_3” to place it in the 3rd row.
So, now that you have enabled the menu item, it’s time to add your custom styles to use within your posts. Take the code listed below and paste it into your functions.php file which will add 2 new styles to the Formats dropdown – “Theme Button” and “Highlight”.
/**
 * Add custom styles to the mce formats dropdown
 *
 * @url https://codex.wordpress.org/TinyMCE_Custom_Styles
 *
 */
function myprefix_add_format_styles( $init_array ) {
	$style_formats = array(
		// Each array child is a format with it's own settings - add as many as you want
		array(
			'title'    => __( 'Theme Button', 'text-domain' ), // Title for dropdown
			'selector' => 'a', // Element to target in editor
			'classes'  => 'theme-button' // Class name used for CSS
		),
		array(
			'title'    => __( 'Highlight', 'text-domain' ), // Title for dropdown
			'inline'   => 'span', // Wrap a span around the selected content
			'classes'  => 'text-highlight' // Class name used for CSS
		),
	);
	$init_array['style_formats'] = json_encode( $style_formats );
	return $init_array;
}
add_filter( 'tiny_mce_before_init', 'myprefix_add_format_styles' );
You can change the titles to show different names in your dropdown menu, add/remove items from the array, etc. You can modify just about anything in this code to reveal your own custom format styles, be sure to check out the WordPress Codex for a more in-depth explanation of the accepted parameters and return values.
Now that you have new styles, you can highlight content in your editor and apply them. Notice, how the “Theme Button” format has a selector parameter? This means that the style can only be applied to that specific selector (in this case the “a” or “link” tag). The second format we added “Highlight” does not have a selector parameter but rather an “inline” parameter which tells it to apply the style to whatever text you have highlighted in your editor and wrap it in a span with your unique classname.
Adding CSS to Target Your Custom Styles
You can now use your custom formats, but they won’t look any different until you’ve added some custom CSS to your site to style them. You should locate the stylesheet for your theme (if building your own) or child theme and paste the following CSS code in the file.
.theme-button {
	display: inline-block;
	padding: 10 15px;
	color: #fff;
	background: #1796c6;
	text-decoration: none;
}
.theme-button:hover {
	text-decoration: none;
	opacity: 0.8;
}
.text-highlight {
	background: #FFFF00;
}
Now, this is going to add styling to your new formats for the front-end so when applied you can see them live. Yay! But wouldn’t it be nice to also see your styles in the actual editor when they are being applied? To do this you will need to make use of the “editor stylesheet” function in WordPress.
If you are building your own theme then you will want to create a new css file in your theme called “editor-style.css” (you can name it whatever you want just be sure to edit the snippet below accordingly) with the custom CSS added for your formats and then add the function below to load it in the backend.
function myprefix_theme_add_editor_styles() {
    add_editor_style( 'editor-style.css' );
}
add_action( 'init', 'myprefix_theme_add_editor_styles' );
If you’re working with someone else’s theme, you’ll need to add this to your child theme. Make sure to give it a unique name to avoid conflicts with the parent theme. Alternatively, if the parent theme already includes a CSS file for the editor, you can simply copy that file into your child theme (without needing the PHP code mentioned above). Then, you can add your custom CSS. WordPress will prioritize the child theme’s CSS file over the parent theme’s, so it will load the editor styles from the child theme first.
Add Custom Styles to the Classic Editor With a Plugin
If you don’t have time to play around with code, or you can’t fathom figuring it out yourself, there’s good news. There is a plugin that lets you complete exactly what we just did above without having to screw around with the code.
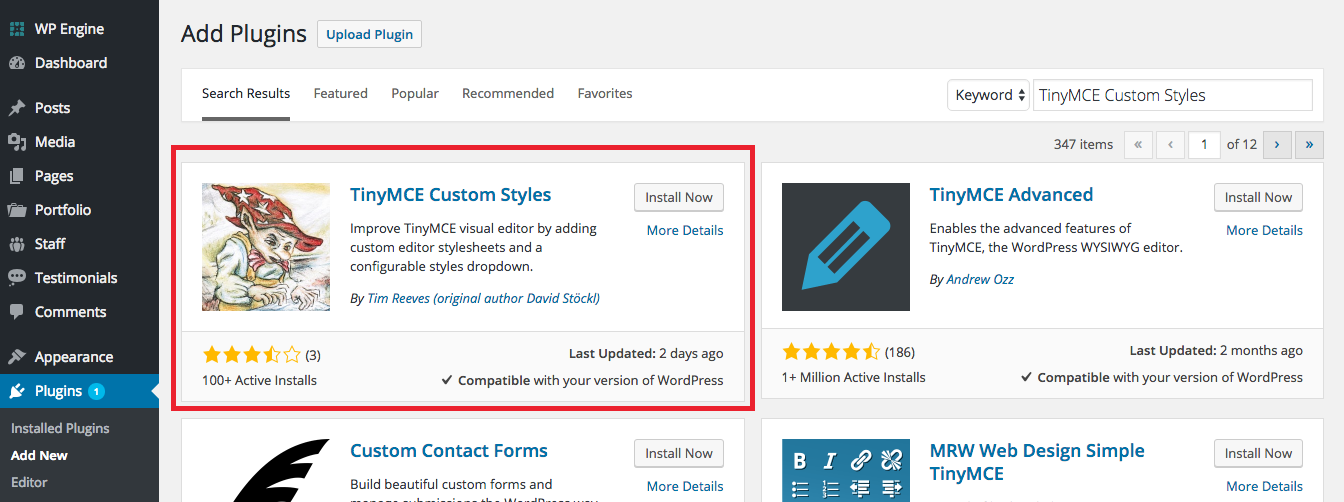
Simply search for, install and activate the TinyMCE Custom Styles plugin and activate it on your WordPress site.
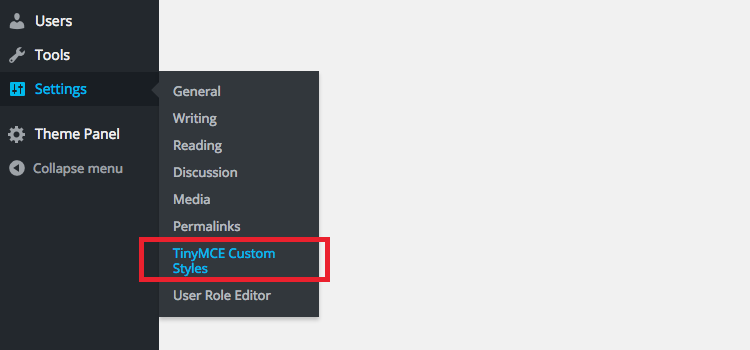
Go to Settings > TinyMCE prof.styles on the left hand side of your WordPress dashboard. This is where you modify your settings for the plugin.
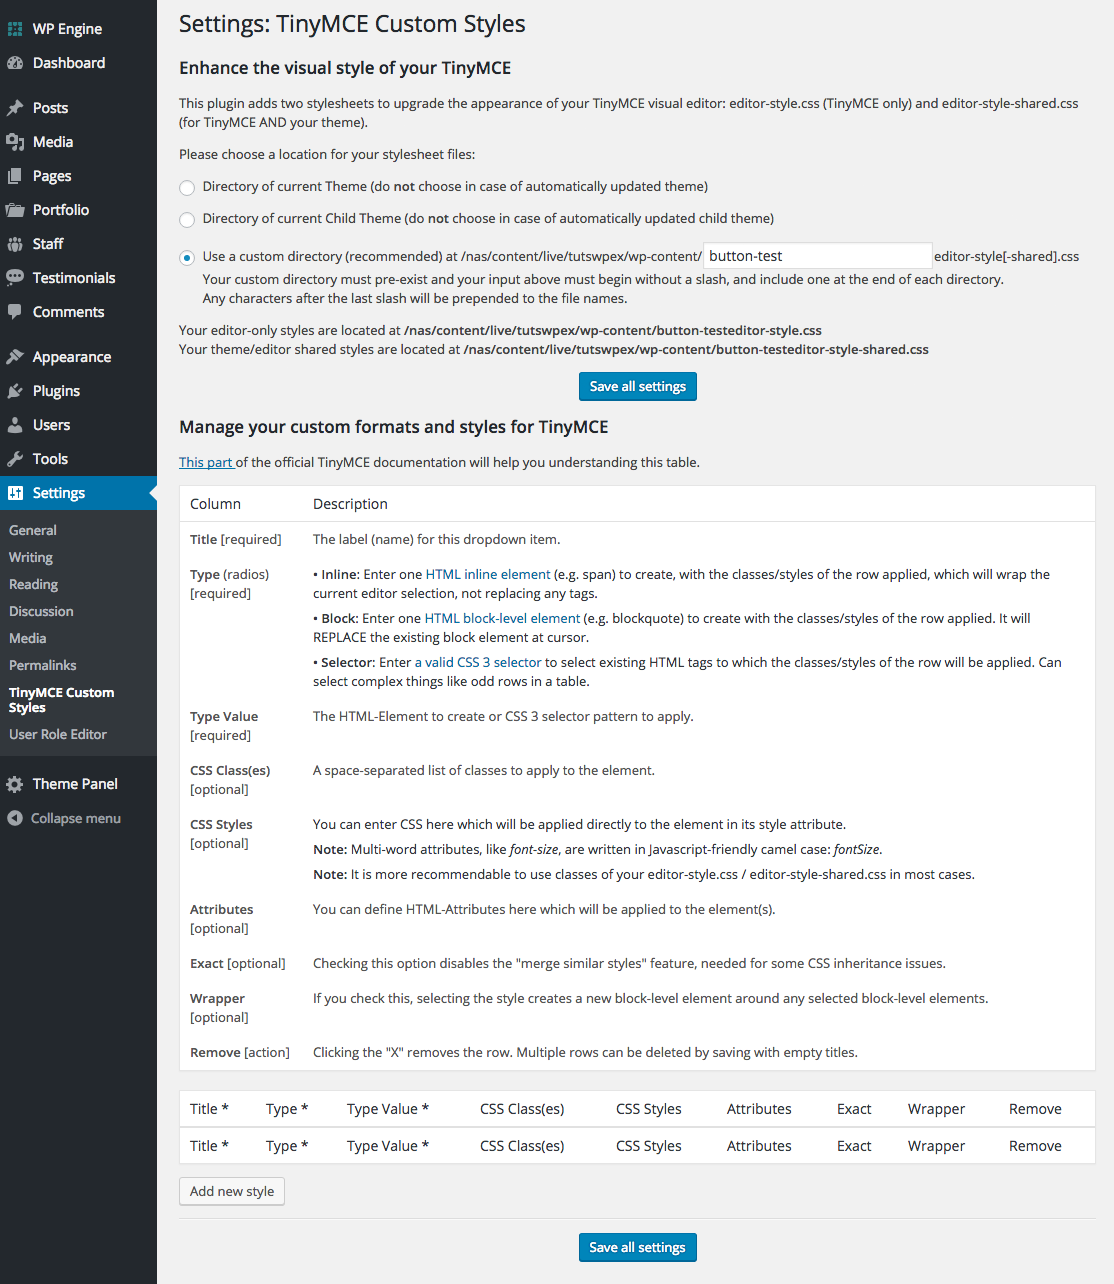
The plugin lets you choose where your stylesheets are, or where you want to place them. It’s recommended that you create a new custom directory. Select the third option and give your directory a name, then move down the page to click your Save Settings option before proceeding onto the next step.
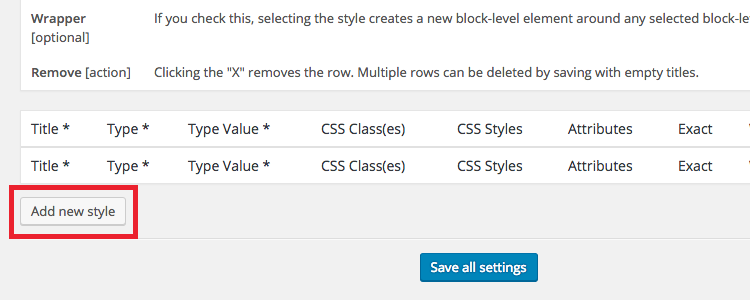
Once you save the settings, scroll down to select the Add New Style button.
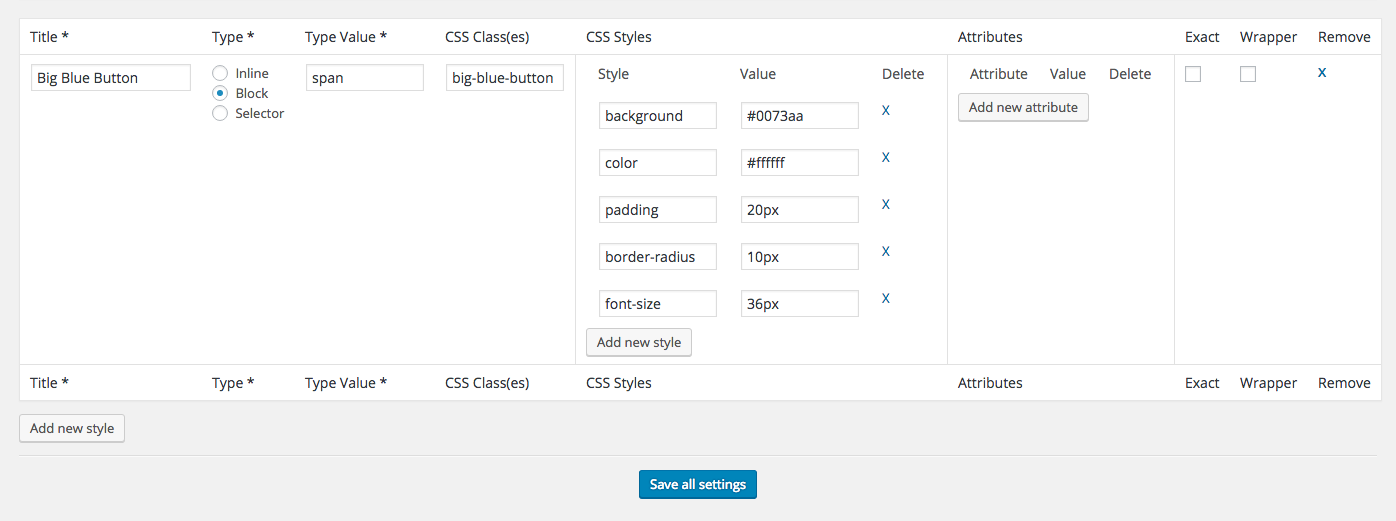
This is where you customize what you want your custom styles to look like. It’s basically a simple web-based editor that generates the CSS code for you. Type in a Title for whatever you want to show up in the dropdown menu. Choose whether you want a selector, inline, or block type. Feel free to use the screenshot above to fill in the CSS classes and styles, or create your own depending on what you plan on using the dropdown menu for. Once done, click on Save Settings at the bottom of the page.
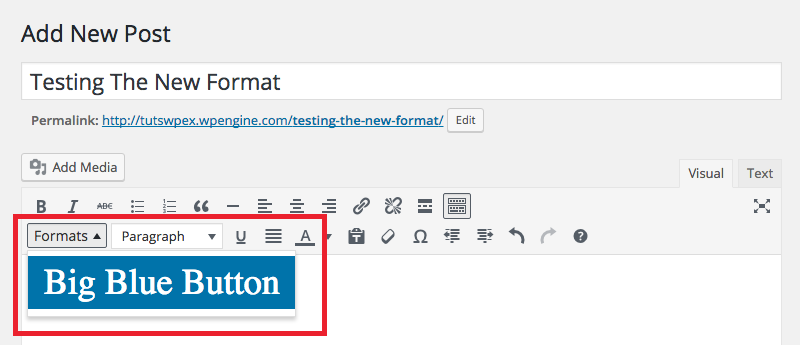
Now it’s time to see how the new custom style looks in your editor. Open up a new post or page and locate the Formats dropdown menu on the left hand side of the Visual editor. It shows up in the second line. Once you click on the dropdown menu it will reveal the new style you just created.
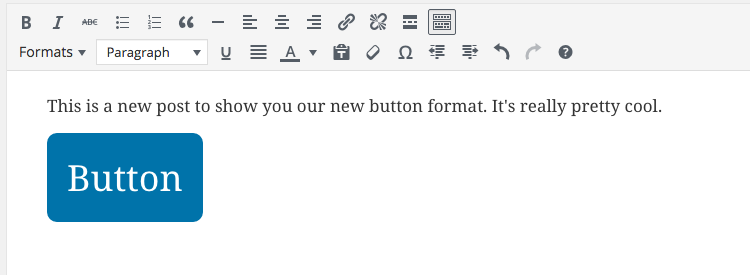
Click on the Big Blue Button option, or whatever you created, to see it revealed in your editor. To use it simply highlight the text you want formatted, then click on your option and voila!
Conclusion
That’s all for now! You can always learn more about how to use new stylings by checking out the WordPress codex page dedicated to this topic.
Let us know in the comments section if you have any questions about how to add custom styles to the WordPress visual editor. And feel free to share any unusual styles you have created to make your site look a little nicer!


Pretty good post. I just stumbled upon your blog and wanted to say that I have really enjoyed reading your blog posts. Any way I’ll be subscribing to your feed and I hope you post again soon.
Thank you for this. Nice weekend project coming up.
Wow! Really nice. Precise and clear. Thanks for this useful post. WPExplorer always share useful stuff.
if somebody don’t work and if don’t display format’. Check this
[code lang="php"]
function wpb_mce_buttons_2($buttons) {
array_unshift($buttons, 'styleselect');
return $buttons;
}
add_filter('mce_buttons_2', 'wpb_mce_buttons_2');
[/code]
Hi, thanks for this post. I am adding the codes to function.php however FORMAT dropdown does not appear in text editor. I am using genesis child theme, can you help?
Many thanks
It could be an issue with Genesis (I don’t have experience coding Genesis child themes, I’m not a huge fan of the framework to be honest). But most likely it’s just an issue with how the code was added, can you double check it was pasted correctly (I’ve already confirmed the code above is still correct and working) or that a 3rd party is breaking things. Oh…or try changing “mce_buttons_1” to “mce_buttons_2” or “mce_buttons_3” to see if it works (this will place the dropdown on the second or 3rd line of the editor toolbox).