vCita Easy Business Management & Booking for WordPress

Running a service-based business such as a studio, law office, fitness center, pet care, and other small businesses is no easy task. There are a million and one things to tick off your checklist every day.
If you’re not scheduling appointments, you’re dealing with invoices. If you’re not marketing your business, you’re sending out a ton of follow-up emails to your customers. And then you must track your finances, stock up on supplies, and so on.
Managing a business can quickly become overwhelming even for the best among us. It can drive you up the wall and push your endurance to the breaking point, especially if you don’t have the right tools.
If you’re looking to create a business you’re proud of and manage it like a pro, you’ll be happy to learn about vcita Business Management App. A tool that’s great for small businesses, and the subject of today’s review.
In the upcoming sections, we cover vcita, its impressive list of features, pricing, and support. After that, we test-drive the plugin to give you a glimpse of what to expect. As usual, we will have fun, so read to the end.
Without further ado, let us start since there is so much to cover.
What is vcita?
vcita is a nifty business management app for small businesses. It’s the perfect business management system for all service-based businesses. Plus the WordPress plugin makes integration with your website easy.
Thanks to vcita, your business can accept bookings and payments on autopilot. On top of that, you can create services, appointments, schedules, and manage your clients from one centralized dashboard.
You don’t have to manage your business the archaic way anymore; vcita offers you the tools you need to automate business management and boost your revenue tenfold.
It’s an ideal business management app for business consultants, personal trainers, therapists, beauty salons, gyms, online classes, lawyers, marketing, sales, event planners – virtually any service-based business under the sun.
vcita business management app saves you a lot of the time you spend on daily administrative tasks, allowing you to focus 100% on doing what you love.
Instead of wasting countless hours on back-and-forth emails, invoicing, client management, and whatnot, you can now channel your efforts towards growing your business.
With a remarkable set of features, vcita makes business management as easy as A, B, C. It’s exactly the tool you need to level the playground and get more out of each day.
Whether you’re skirting across town, on holiday, or offering services at your workplace, vcita allows you to manage your business like you have a world-class team. And if you have a team, vcita provides you the tools to manage your workforce like a Fortune 500 company.
In the following section, we highlight the features that make vcita the business management tool of choice for hundreds of thousands of businesses.
vcita Business Management App Features
You’re already busy as is and don’t need a business management app that clogs your workflow with unnecessary features. vcita knows you need a business management tool that makes your work easier and not harder.
That’s why they’ve packed the app with all the tools you need without the feature-bloat that’s characteristic of many other apps. You have an incredible suite of features to take your business to the next level without anything getting in your way.
The vcita app spots a modern user interface that’s ridiculously easy to use. You’ll wonder why you didn’t find the tool sooner. It is indeed one of the best business management systems for 2021 and beyond.
Here’s what to expect.
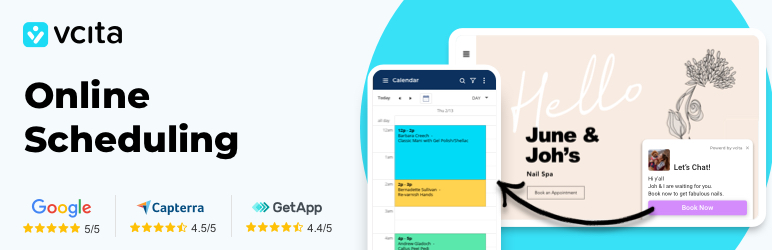
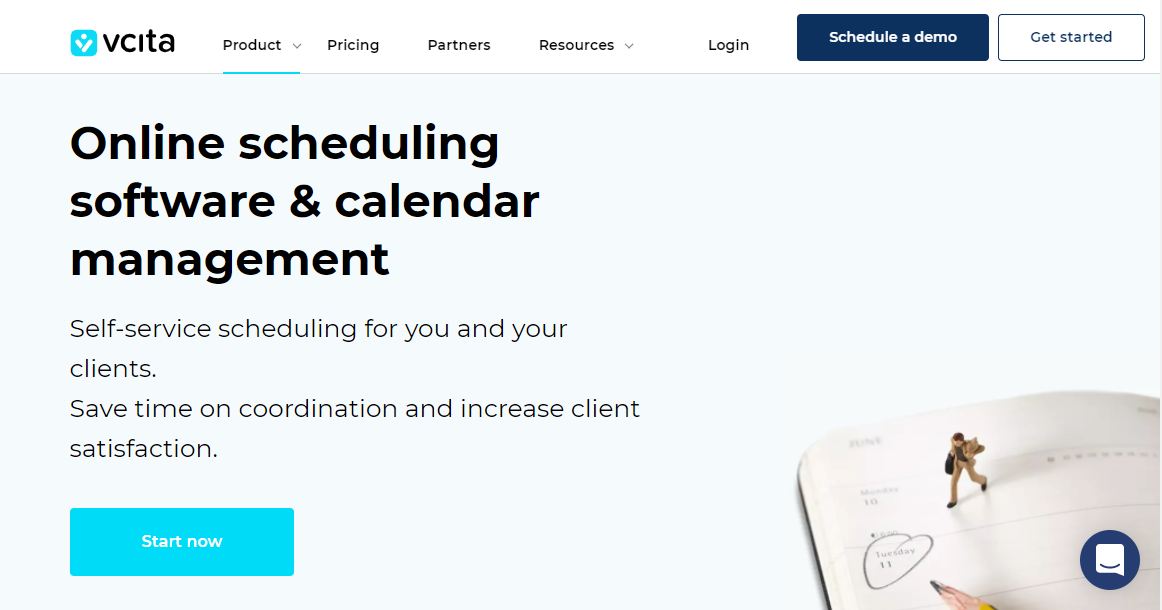
Scheduling Software & Calendar
Taking appointments, and scheduling is one of the most arduous tasks for any service-based business. If you’ve been at it for a while now, you probably know booking appointments can eat up a lot of time and drive you crazy.
Whether it is the back-and-forth emails to confirm details, the three days (or so) it takes to schedule a single appointment or burning the midnight oil following up with leads, booking a client is no easy task.
Unless, of course, you have a tool such as vcita by your side. With vcita scheduling software and calendar, you take the hard work out of booking appointments. Instead of three days, you can now schedule appointments in 30 seconds!
Instead of wasting time sending emails back and forth, you can leverage that time to triple your income and make your clients happier. You can also regain your freedom and build the perfect work-life balance, which is one of the reasons you decided to ditch the 9-to-5 grind.
What’s in store for you?
For starters, vcita allows your clients to book your services from anywhere. Your clients can schedule appointments on your website, Google Business listing, Facebook, vcita landing page, client’s service portal, a scheduling link via email, and much more.
Secondly, you can offer your clients the best experience when it comes to booking appointments. Thanks to online scheduling, your prospects never have to pick a phone anymore. They can schedule online and conduct video calls via Zoom.
Thirdly, vcita allows you to schedule appointments, whether you’re a one-person show or manage a team of employees. The best part is you can easily view your employees’ calendars and assign staff to appointments and services.
Fourthly, you don’t need to have any technical knowledge to integrate vcita’s scheduling software with your online assets. It’s all a matter of point-and-click and takes less than five minutes to set up.
Wait, there is more…
The online scheduler and calendar work on autopilot. Now you can confirm client scheduling requests automatically based on your availability, which saves time on back and forth coordination.
I was able to triple my income because I had given clients the ability to book their own appointments. – Patrick Osei, Hot Money Studios
And that’s just one of the guys singing praise for the vcita business management app. Patrick has integrated the vcita app with his website, making self-scheduling as easy as pie. I would know because I tried it!
That’s right; now clients don’t have to call you to schedule a meeting. Your clients can self-schedule and cancel appointments at their convenience – anytime, anywhere, and on any device.
With vcita scheduling software, you can schedule any type of one-time or recurring event. Other than that, you can easily customize the registration form and confirmation email to suit your business.
Further, you can:
- Sync your existing calendar with your work calendar
- Include the location, pricing, and duration of each service you offer
- Provide a branded client portal to boost customer engagement
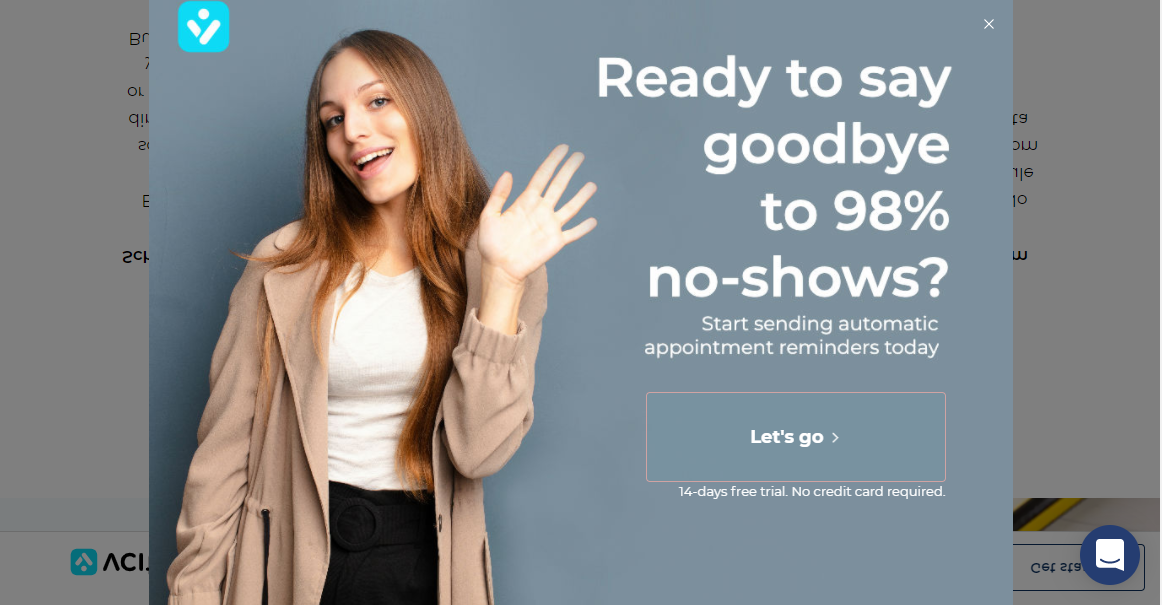
- Set up automatic reminders via email or SMS
- Send follow-ups to encourage repeat business.
- Receive real-time mobile notifications whenever your client books an appointment
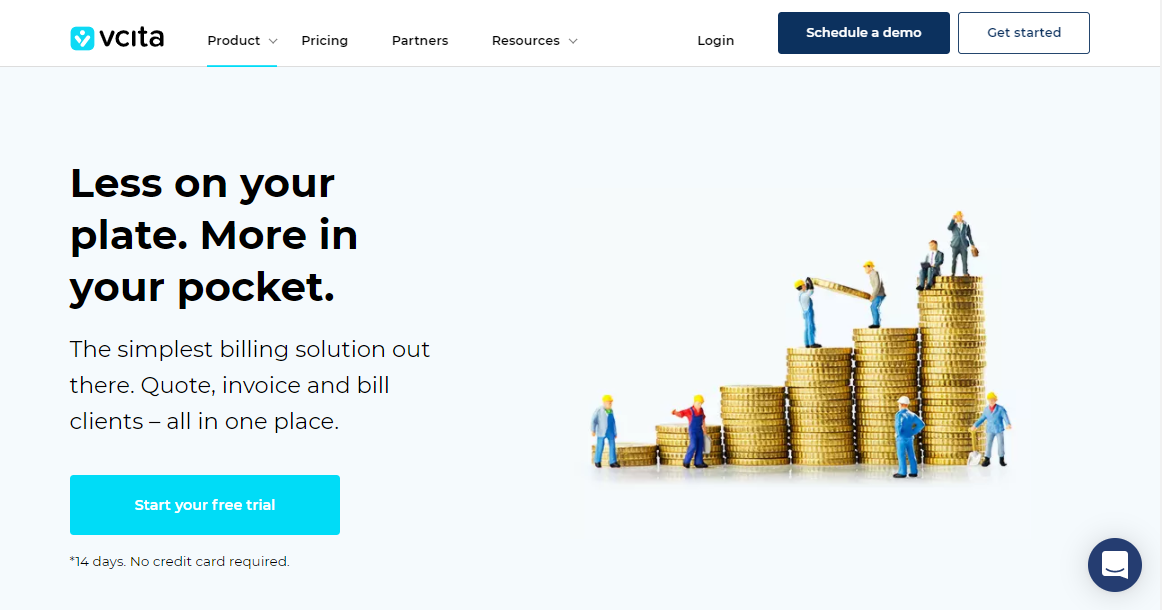
Billing and Invoicing
Did you know that, on average, you waste 11 to 15 hours a month on billing and invoicing? Well, that’s a lot of time. The problem is you spend more than 15 hours per month on accounting if you do it manually.
That’s time you can dedicate to other vital parts of your business, like customer care, research, and improving your services.
And thanks to vcita, you can save a lot of time and get paid 60% faster than the industry average. And you get to manage your billing and invoice from one easy-to-use dashboard.
For starters, vcita helps you to create estimates, green invoices, and receipts in a matter of seconds. Additionally, you can add a payment button to your estimates and invoices, allowing clients to pay online via credit card or PayPal.
Secondly, vcita allows you to track client balances and payment history. On top of that, you can easily view pending and overdue invoices.
And worry not, you won’t have to send out reminders for late payments. vcita comes with automatic payment reminders without extra charges or hidden fees.
I’ve been using vcita for over a full year now and my records have never been better. – Victoria Meyer, Marry Me In Indy!
vcita offers you plenty of tools to stay on top of your payments. On top of fully customizable invoice templates, you have in-depth reports and the features to eliminate slow-paying and unreliable clients. On top of that, you can easily integrate vcita with Zapier and accounting software such as Quickbooks.
Client Management Software
Earning a new lead is no easy task. You must do a lot of work beforehand to drive prospects to your business. But if they land on your business website and bounce, all your work will be for nothing.
That’s not even the worst of it. Imagine running a business blindly, without actionable insights about your clients? Now that wouldn’t work.
You must have a rock-solid customer relationship management system to stay on top of things – and vcita offers you just that.
vcita CRM allows you to store your contacts in one place, meaning you’ll never lose important contacts again. The CRM helps you to keep, manage, and label your leads like a boss.
vcita CRM offers you a birds-eye view of your clients, which allows you to know your customers inside and out. You can view your client’s history – appointments, conversations, documents, invoices, payments, and more—all in one centralized dashboard.
It doesn’t matter what you’re doing or where you’re in the world; the vcita CRM mobile app allows you to run your business on the go. You’ll have all the vital information anytime and anywhere.
Further, the vcita CRM helps you to easily collaborate with your team, assigning appointments, clients, and incoming requests to employees effortlessly. What a way to boost your team’s productivity without breaking a sweat.
It is very convenient that I can look at my client list and it’s all right there. – Naomi Janzen, EFT Trainer & Practitioner
Growing customer relationships has never been more comfortable with the vcita user-friendly self-service client portal. Thanks to automatic meeting reminders, you can cut no shows by 50%. Custom follow-ups allow you to send post-meeting messages that boost repeat business, while you manage it all like a pro in a powerful and easy-to-use CRM.
Marketing
Who would have thought your business management app would throw powerful marketing tools into the mix? Certainly not me, but vcita is changing the game entirely.
vcita ships with a robust email marketing engine that rivals the big names in the industry. Now, you needn’t go looking for a 3rd party email marketing provider.
vcita has your back with a user-friendly system that drives results. Or as they aptly put it, “Hit send. Get results. It’s that simple.”
vcita offers you a ton of pre-built email templates that you can customize until you drop. That means you can design gorgeous and mobile-friendly marketing campaigns in minutes, even if writing copy isn’t your thing.
That’s not all; vcita offers you SMS marketing, so you can reach your customers on their phones no matter where they are. When you combine SMS with email, you can reach 100% of your clients in less than three minutes.
Other than tools (e.g., CTAs, ready text, professional templates, etc.) to design the perfect email campaigns, you also get client segmentation and personalization tags to improve your click-through rates instantly.
Before I would have to go through my email and manually contact clients, now I can do it all in one fell swoop using the campaigns tool. – Samuel F. Reynolds, Unlock Astrology
To boot, you can turn on automated email campaigns to run your marketing machinery on autopilot. And you won’t run blindly; vcita offers you detailed reports on how your marketing campaigns are faring in one sweet analytics dashboard.
Now that you know what to expect, let us cover the pricing aspect. Is vcita affordable? How are their plans? Read more below.
vcita Pricing Plans
You might be wondering how much you pay for vcita. The plugin itself on WordPress.org is free, but to have access to all vcita has to offer you’ll really want to signup for a plan.
The company offers varying plans for solopreneurs and teams, but there is a free 14-day trial (no credit card required). If you run a one-person show, you have four pricing plans:
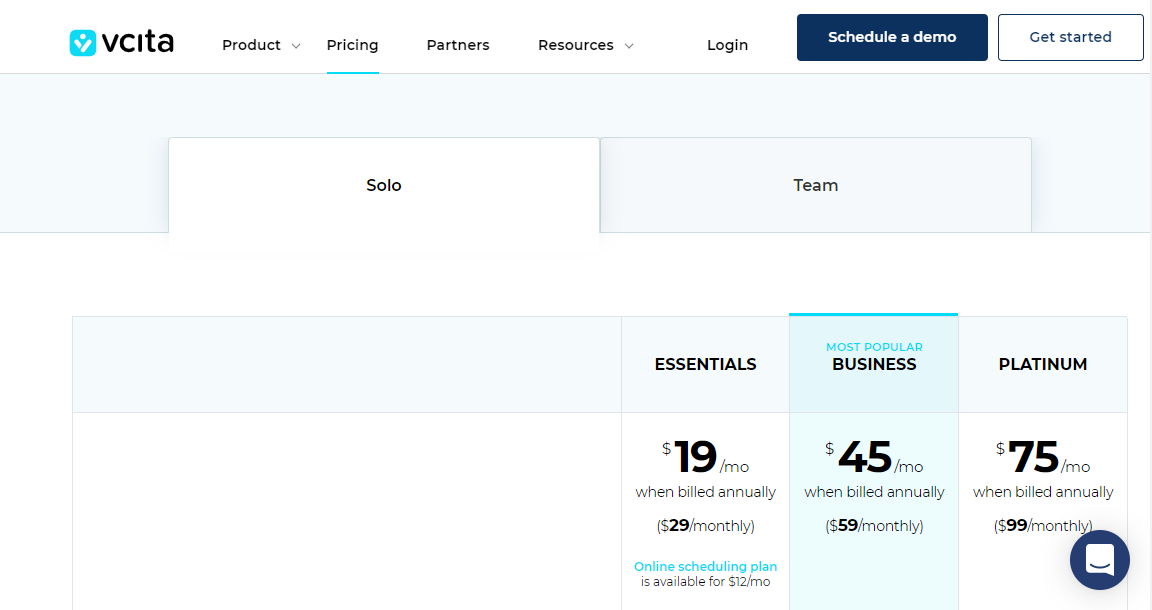
- Essentials – $29 per month ($19/month when billed annually. The plan offers you all business management features but minimal marketing and automation. It’s perfect for freelancers starting a new business. Offers support via email only. No campaign recipients and only 100 SMS credits per month.
- Business – $59/month ($45/month when billed annually). The plan offers you the best value for money and is perfect for starting and mid-size companies. You get all features save for customizable email templates. You get support via email and phone. It’s their most popular plan with 5,000 campaign recipients and 250 SMS credits/month.
- Platinum – $99/month ($75/month when billed annually). You get every feature there is, and priority support. Perfect for growing businesses. 10,000 campaign recipients and 500 SMS credits/month.
- Online scheduling plan – costs just $12/month for up to 300 clients and offers email support. Great for absolute beginners. If you need more features, you must upgrade to high-tier plans.
For teams, vcita offers four powerful packages:
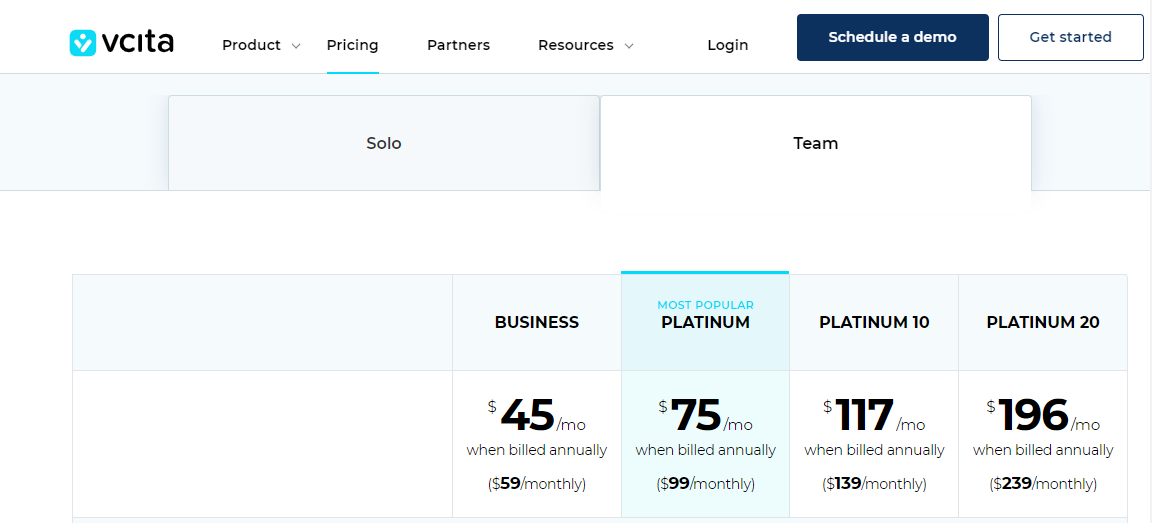
- Business – $59/month ($45/month when billed annually). The plan offers you all the features save for customizable email templates. It’s perfect for a team of two. Support is via phone and email. 5,000 campaign recipients and 250 SMS credits/month.
- Platinum – $99/month ($75 monthly when billed annually). The plan offers you all features and is perfect for a team of five. You also have priority support and two 45-minute setup and installation sessions. 10,000 campaign recipients and 500 SMS credits per month.
- Platinum 10 – $139/monthly ($117 a month when billed annually). The plan comes with all features and is ideal for a 10-member team. You get priority support and full onboarding. 20,000 campaign recipients and 1,000 SMS credits/month.
- Platinum 20 – $239/month ($196/month when billed annually). All features, priority support, full onboarding, and perfect for a team of 20. You get unlimited campaign recipients and 2,000 SMS credits per month.
I think the team plans are better than solo plans, especially if you plan to expand or hire employees in the future.
vcita Support
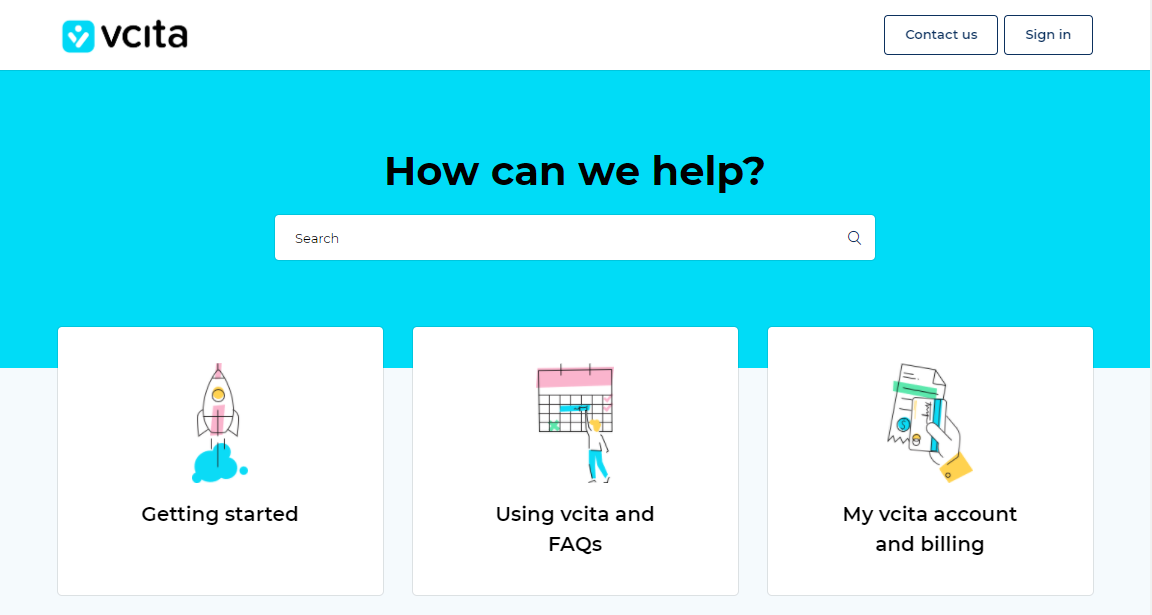
vcita is best known within the industry for timely professional support. They offer a regularly updated blog with tips and tricks.
On top of that, they have an extensive knowledgebase packed with helpful guides that answer most of your questions. They also have a moderated group on Facebook that allows you to interact with others and ask questions within the community.
Other than that, you can contact customer care via phone or email. All in all, vcita offers you good support options to solve your most pressing issues professionally and on time.
Now that we have the basics out the way, let us set up the vcita WordPress plugin and test things out.
Here we go.
How to Set Up vcita on Your WordPress Site
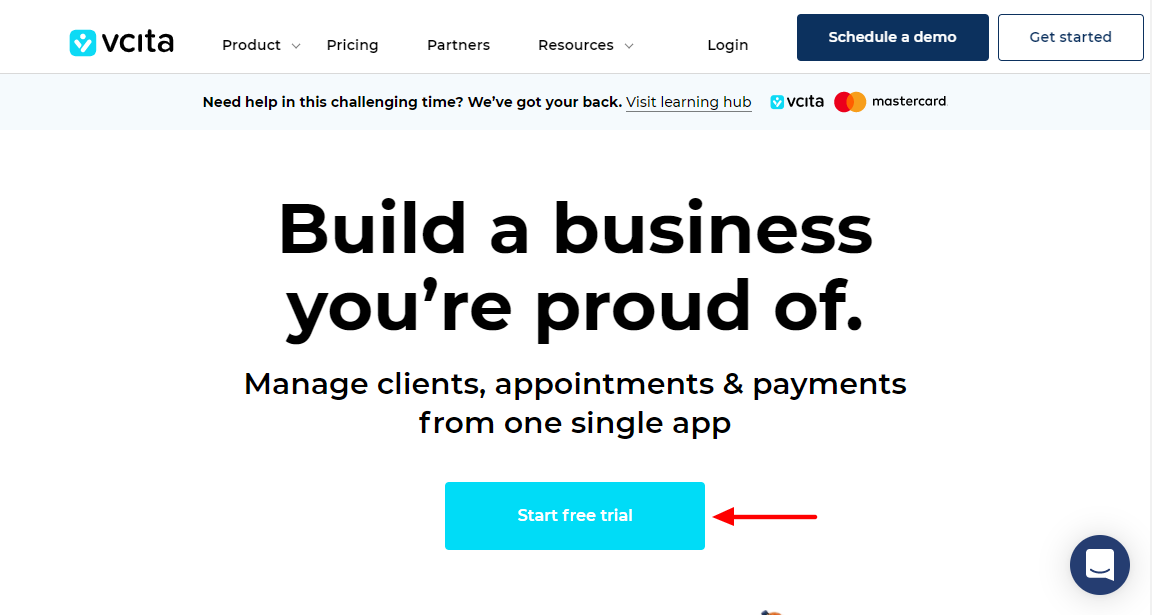
Before anything, visit vcita.com to start your free 14-day trial (no credit card required):
Next, enter your email address, business name, and password. Click Let’s Go:
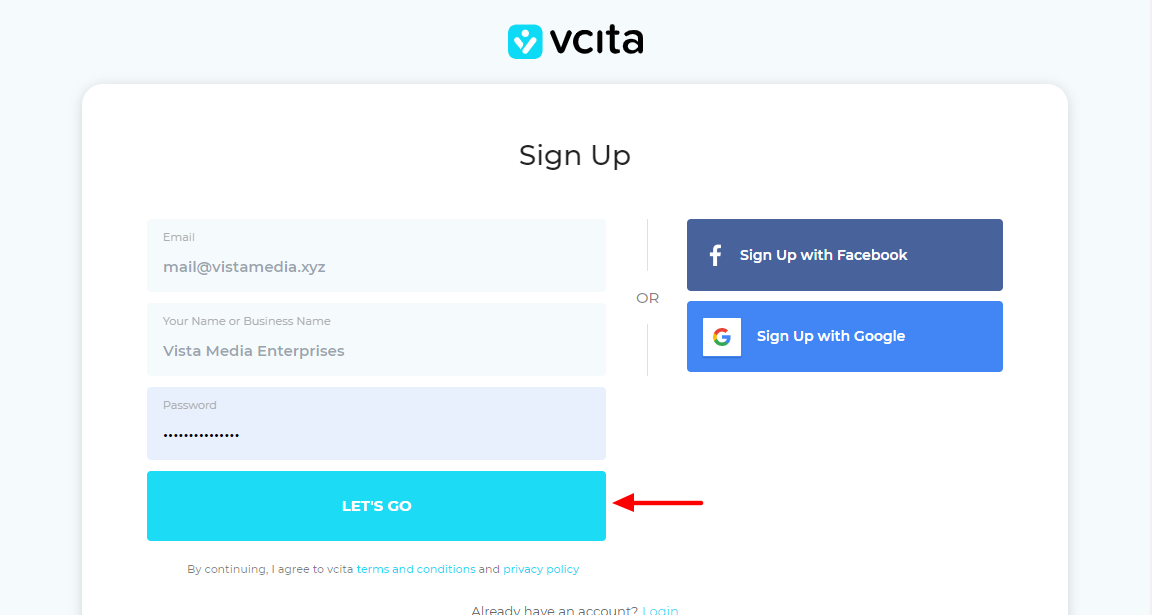
Alternatively, you can use social login to sign up with Facebook or Google.
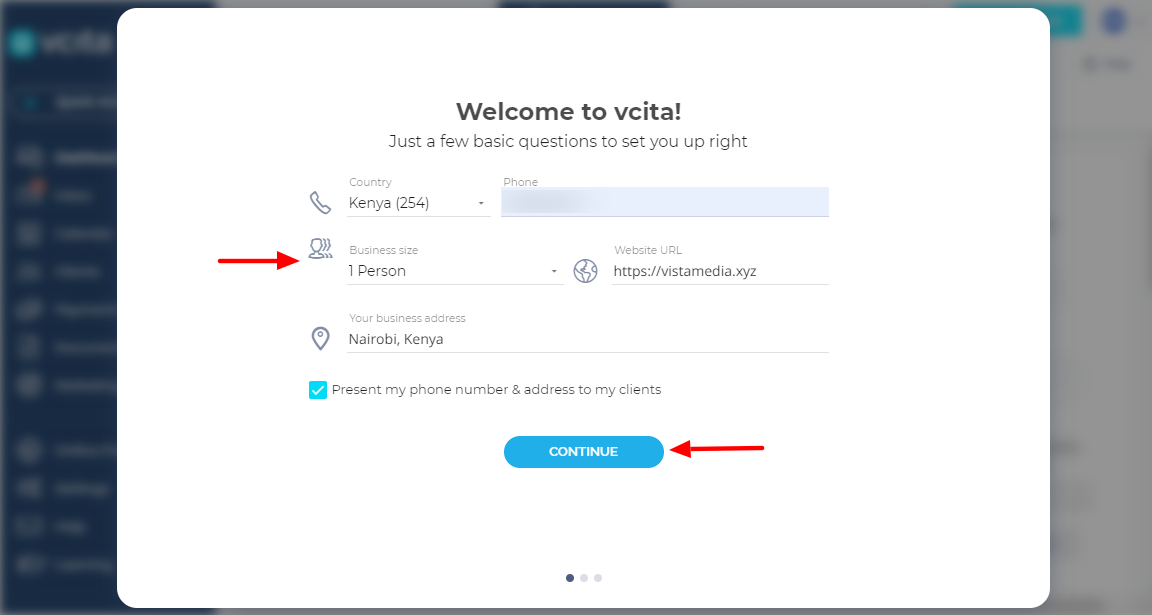
After that, you’ll be redirected to the initial onboarding process. Enter your details and click Continue, as shown below:
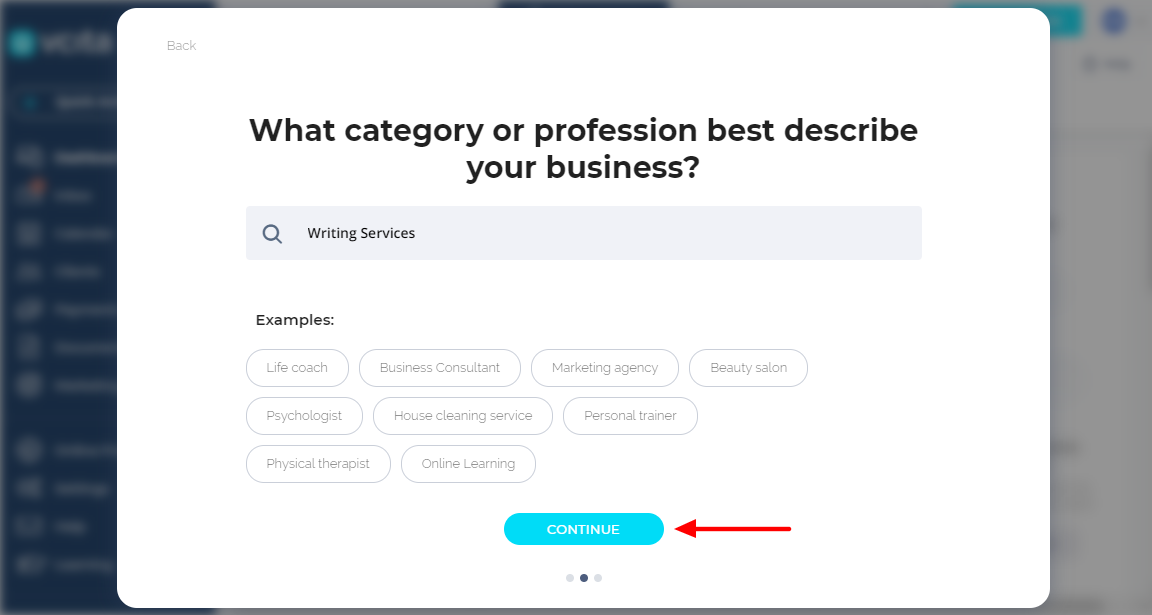
Next, choose your category or profession, and hit Continue:
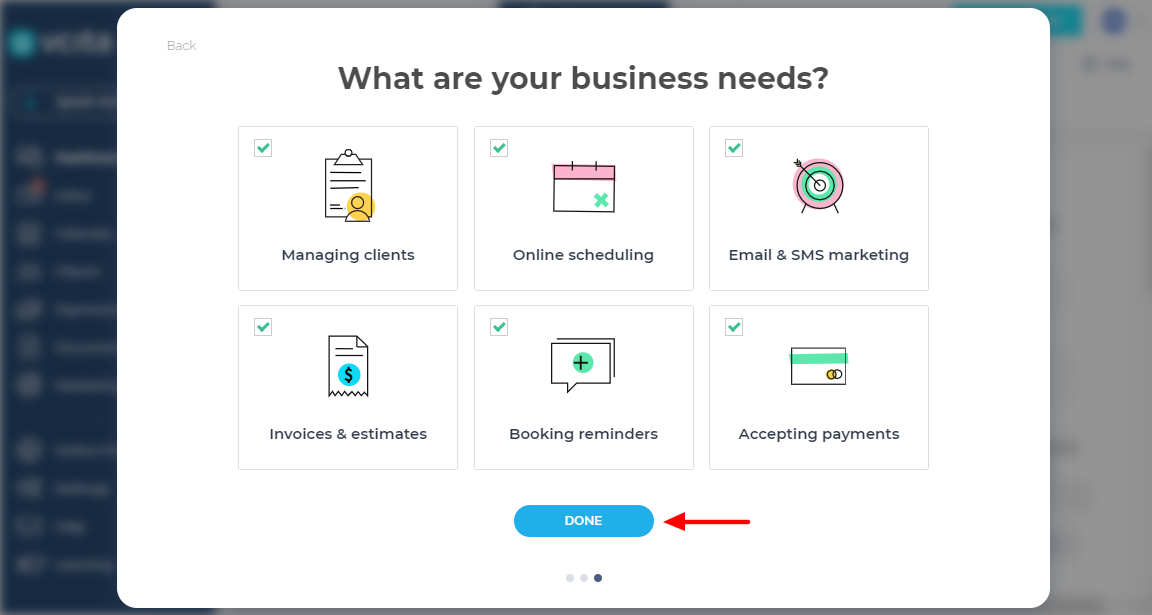
On the next page, choose your business needs and click Done:
Next, you can either choose a free product tour or hit Go to launch your vcita dashboard/onboarding steps:
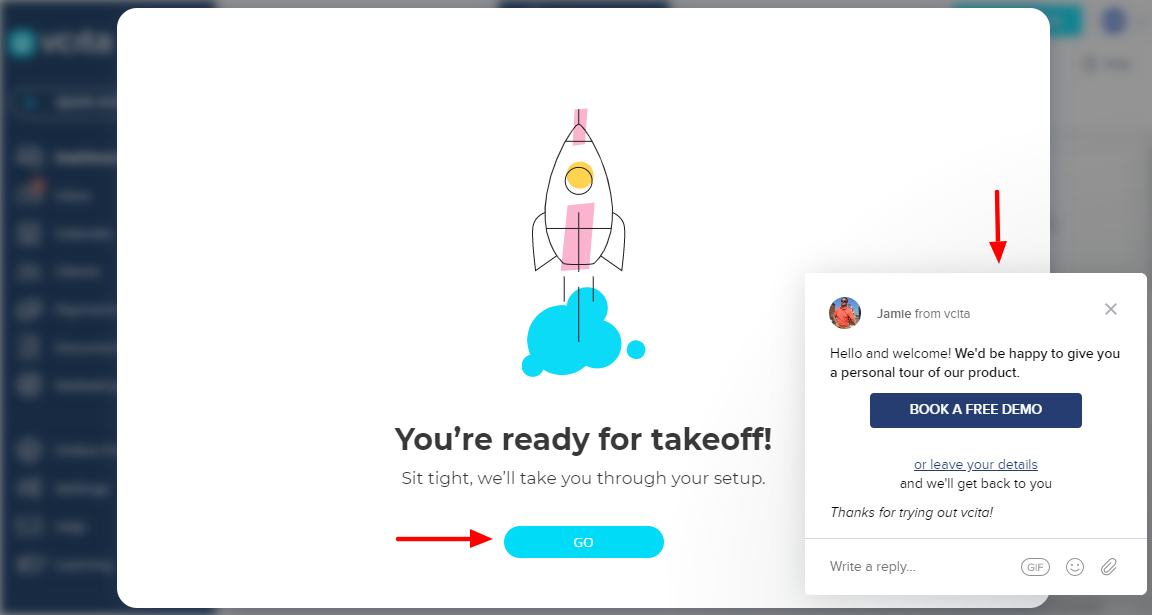
I couldn’t wait to see what’s next, so I clicked GO. Next, you have the chance to personalize your vcita experience from the onset:
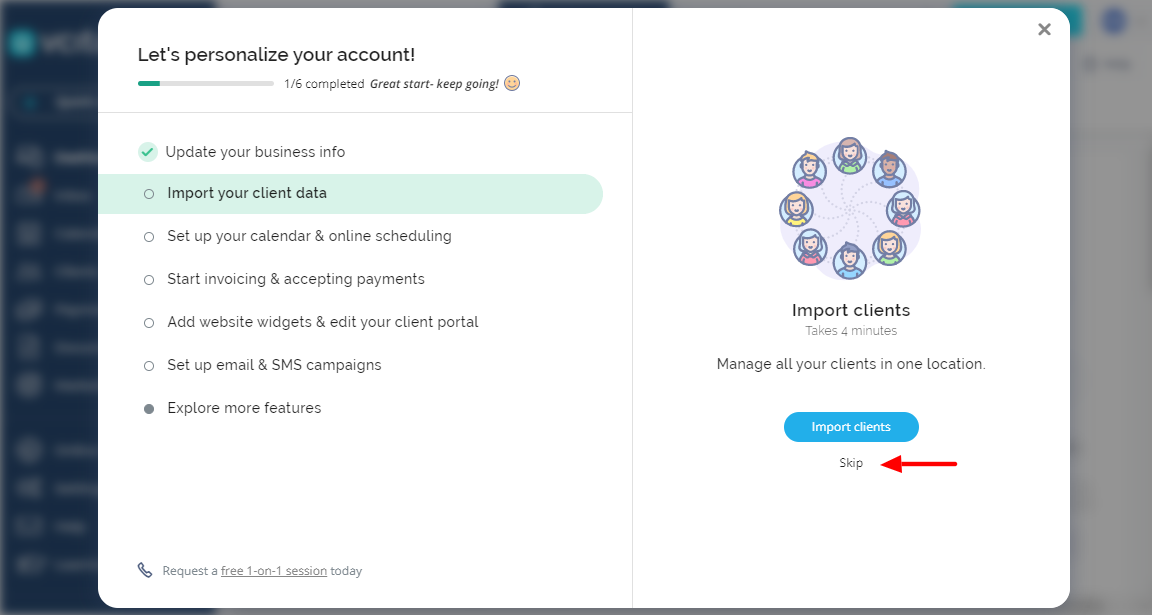
So I quickly did my personalized setup, which means I skipped everything until later. Here is how my vcita dashboard looks currently:
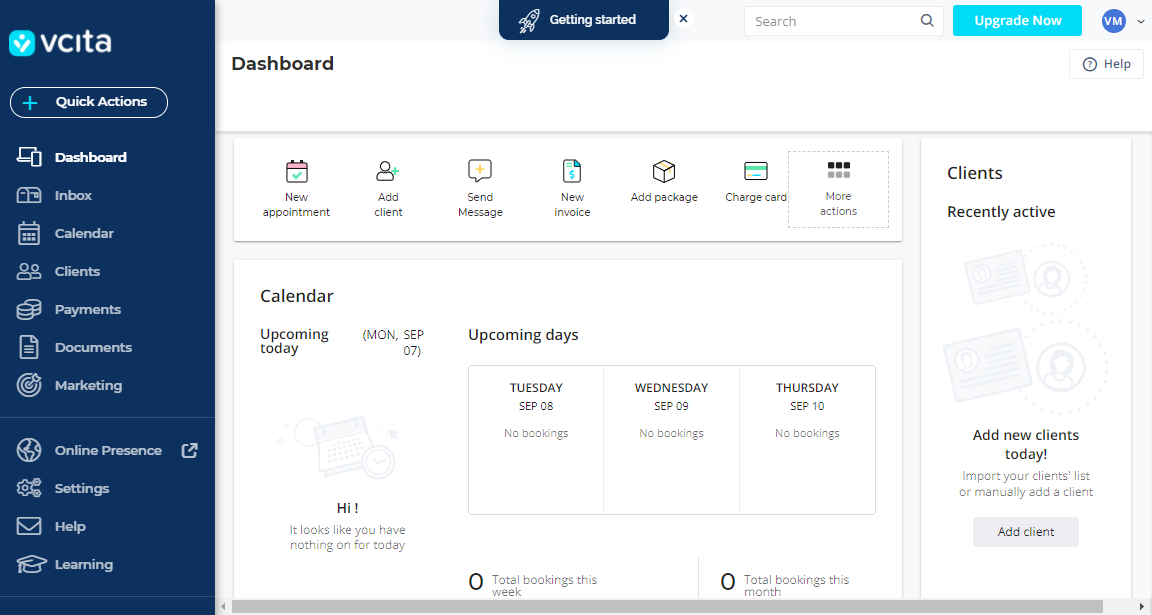
It’s empty because I haven’t created any services or added any staff members, which we will do after installing the plugin on your WordPress site.
Note that you can integrate vcita with many platforms other than WordPress.
What next?
Let us install the WordPress plugin and test-drive the whole thing.
How to Install vcita WordPress Plugin
For WordPress users, vcita is available as a free online booking & scheduling plugin on WordPress.org. That means you can install it inside the WordPress admin dashboard.
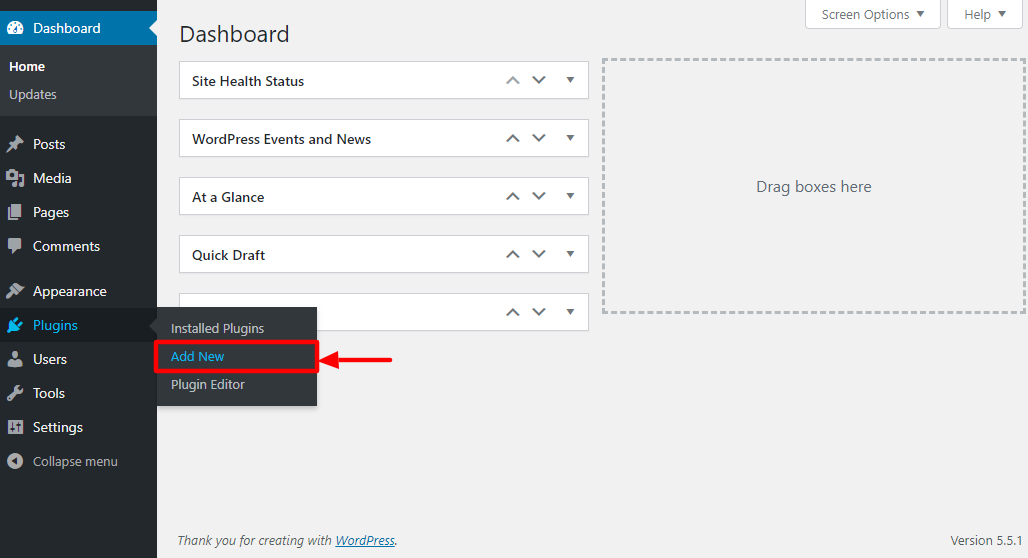
Log in to your WordPress admin dashboard and navigate to Plugins > Add New, as we highlight below.
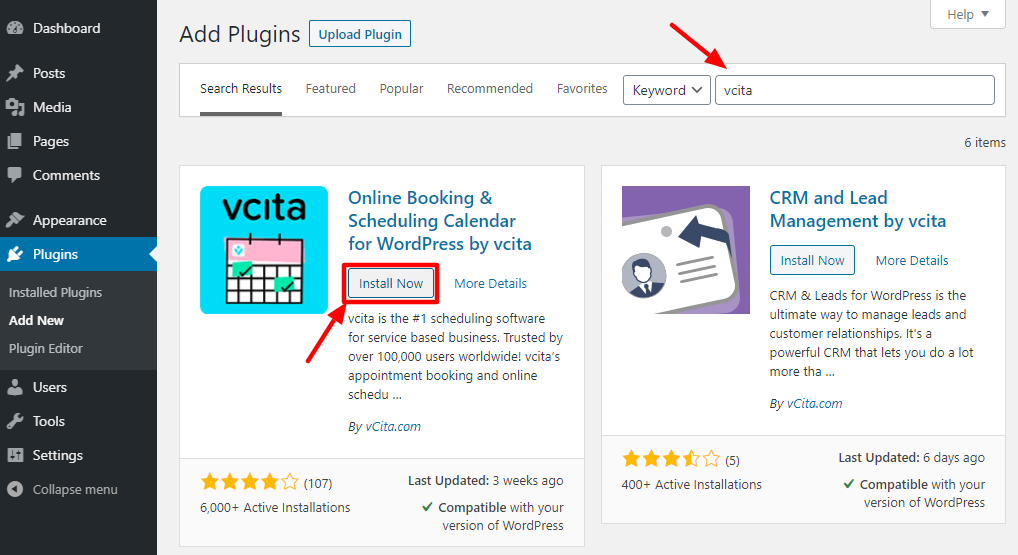
Next, enter “vcita” in the search box and click Install Now:
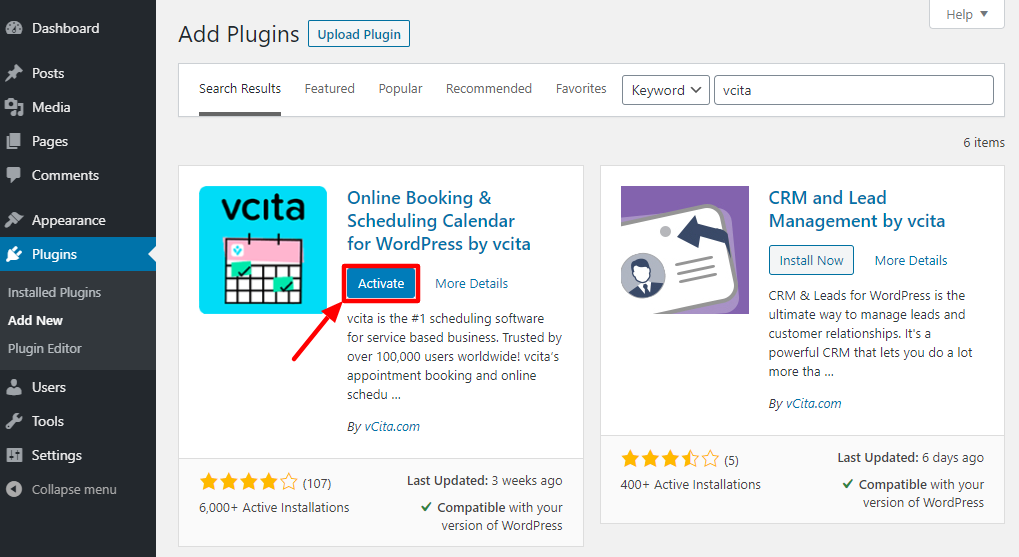
After that, activate the plugin:
Next, click the Connect to vcita button, as shown below.
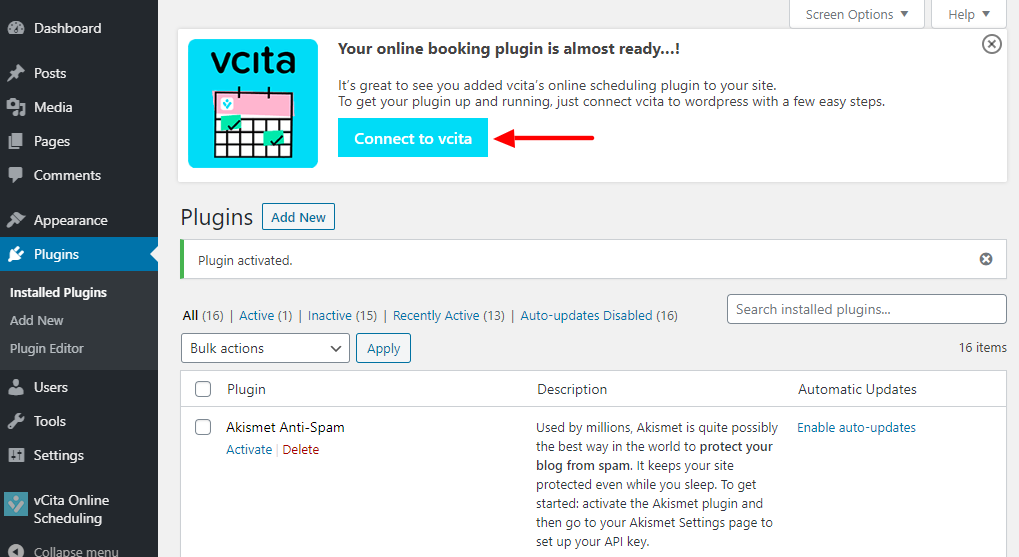
vcita will connect with your WordPress site automatically if you’re logged in to your vcita account. If the connection is successful, you should see the following page.
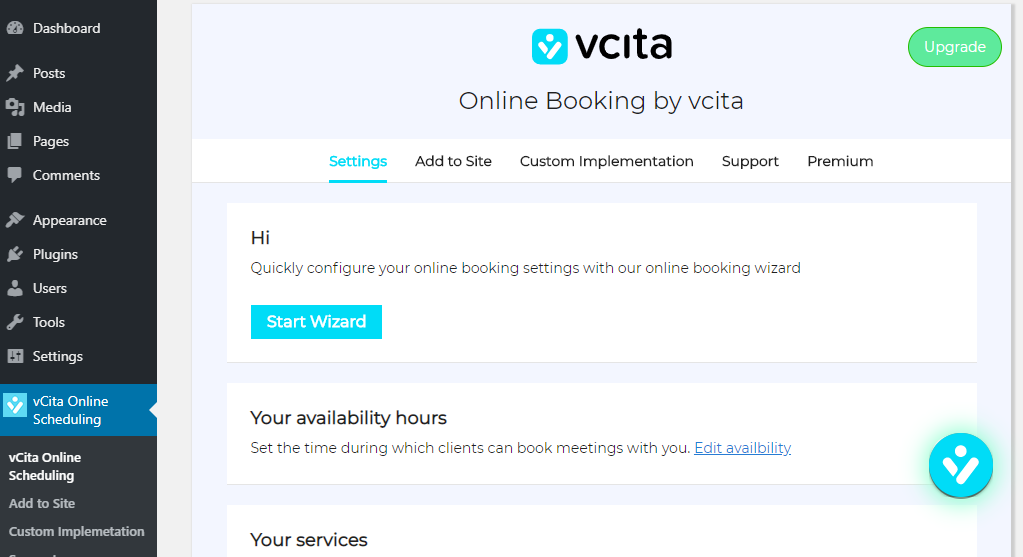
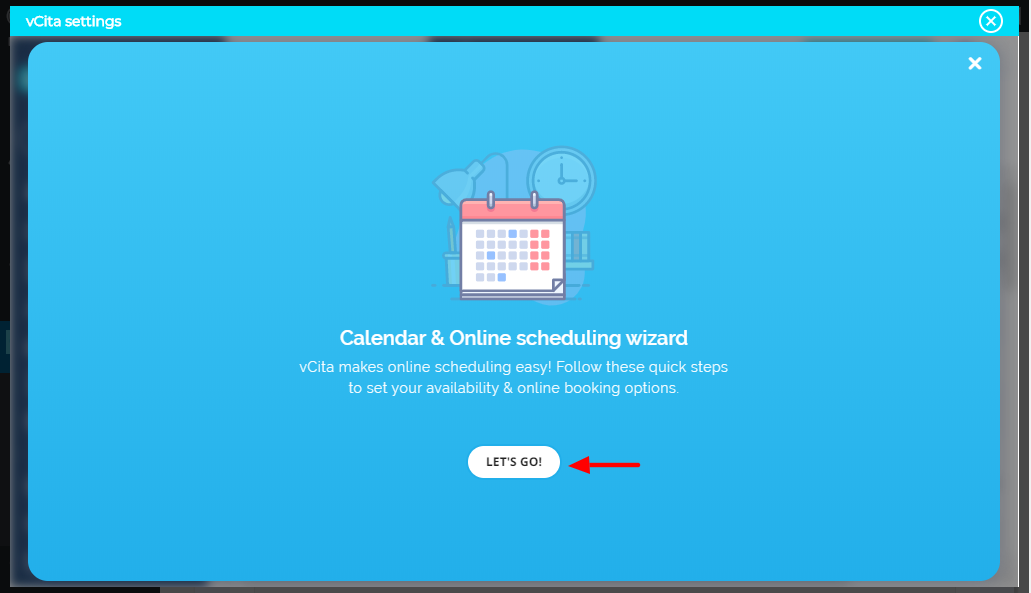
From the above dashboard, you can add your availability hours, services, sync your calendars, and do much more. Click the Start Wizard button to get the show started. Doing so leads you to the following page. Click Let’s Go, as shown:
On the next page, add your services and click Next:
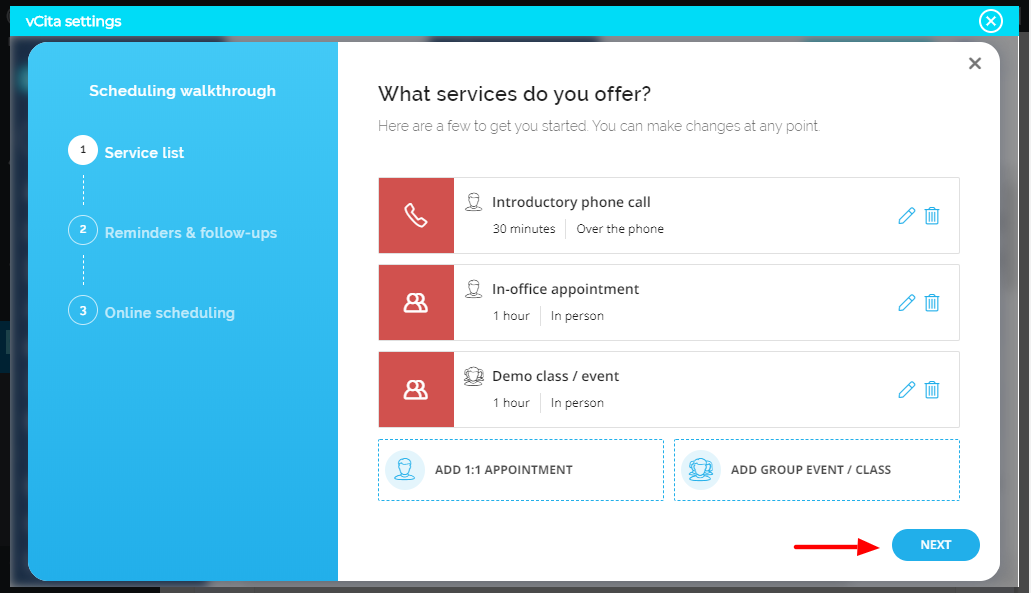
Notes:
- You can add as many services as you want
- You may add 1:1 appointments or group events/classes.
On the following page, choose the reminders you’d like to send your clients and click Next:
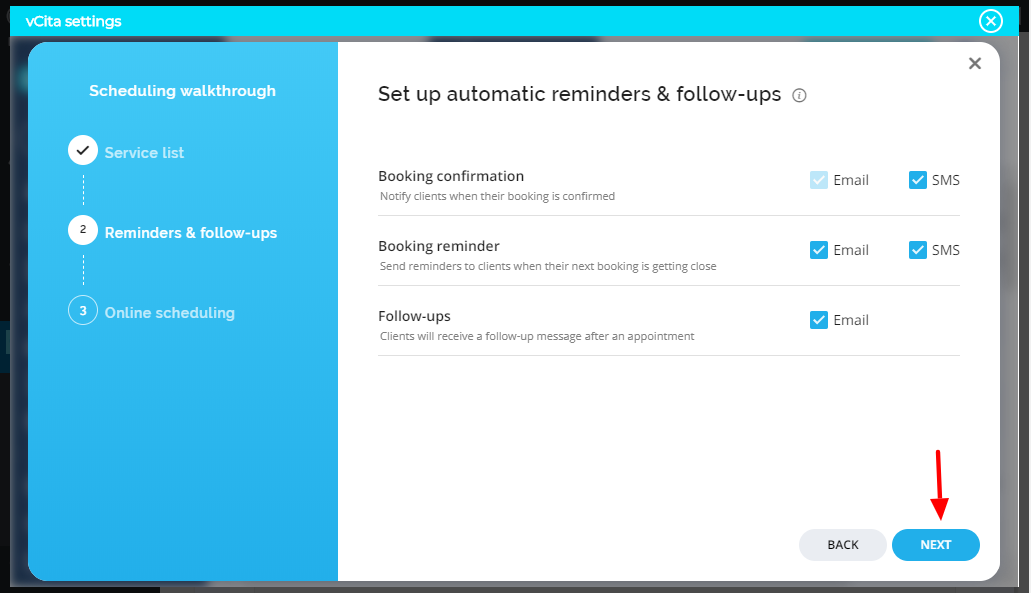
You can later edit the client messages from the Auto Client Messages tab on your vcita settings page.
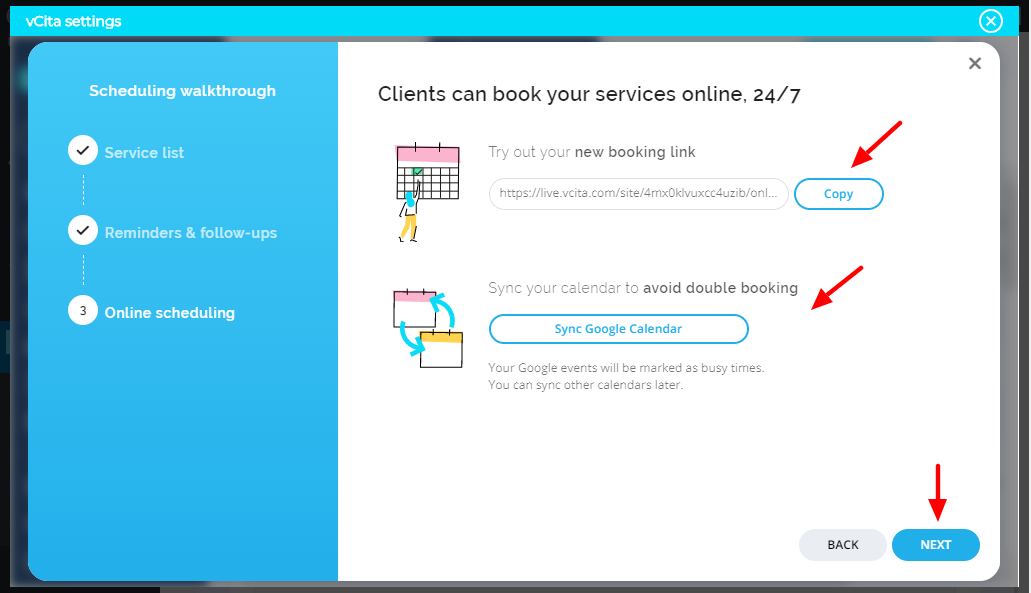
On the next page, you already have a live booking link that you can share with clients (if you don’t have a live website or domain name). You can also sync vcita to your Google Calendar. When done, click Next:
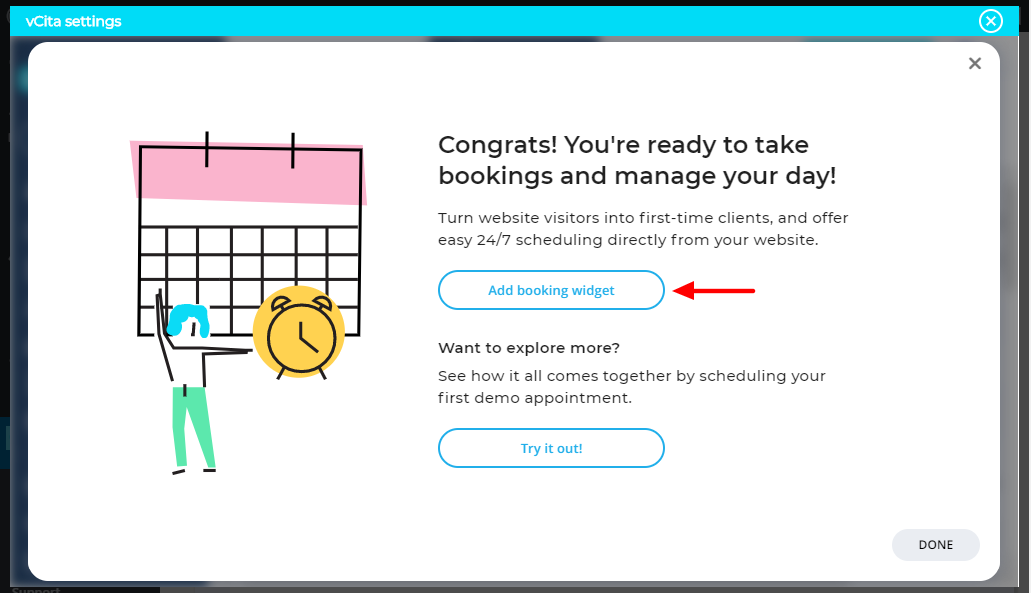
On the next page, you can either add a booking widget to your website or schedule a demo appointment to test the waters. Let us add a booking widget first. Click the Add booking widget button:
On the next screen, you have the vcita widgets. Go ahead and activate the first widget, i.e., Client Portal Widget by clicking the Add To Website button. You will receive instructions on how to activate the widget on several platforms.
The booking widget is activated automatically in WordPress once you install and activate the plugin and complete the setup wizard.
You can add the other widgets later on, or when the need arises.
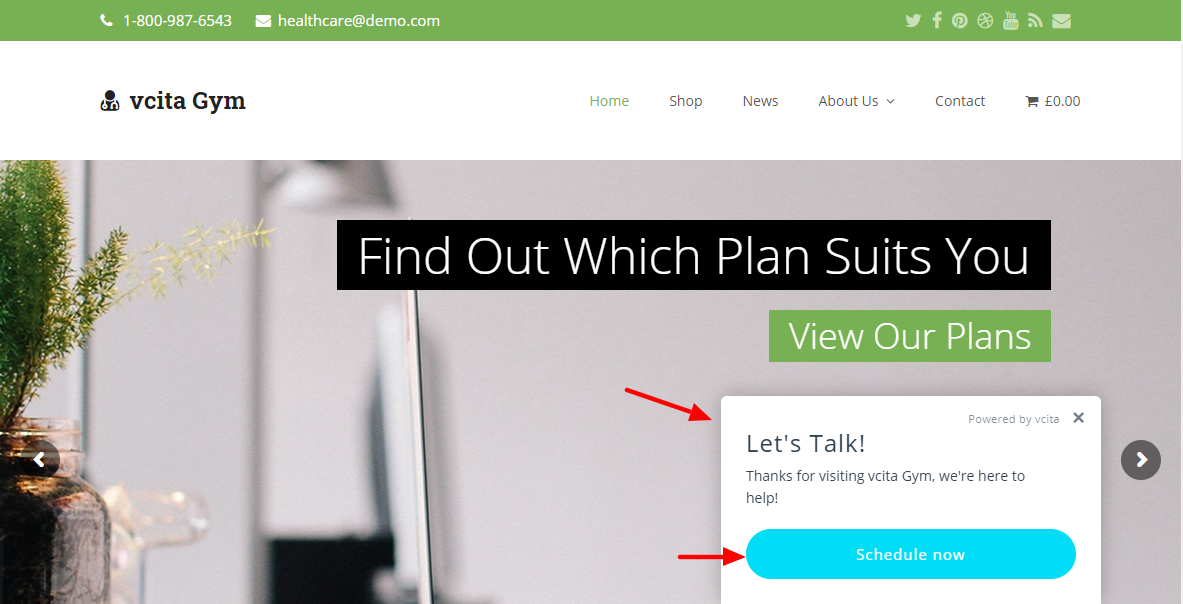
Now, if I view my test website on the front-end, I see the booking widget on the bottom-right side:
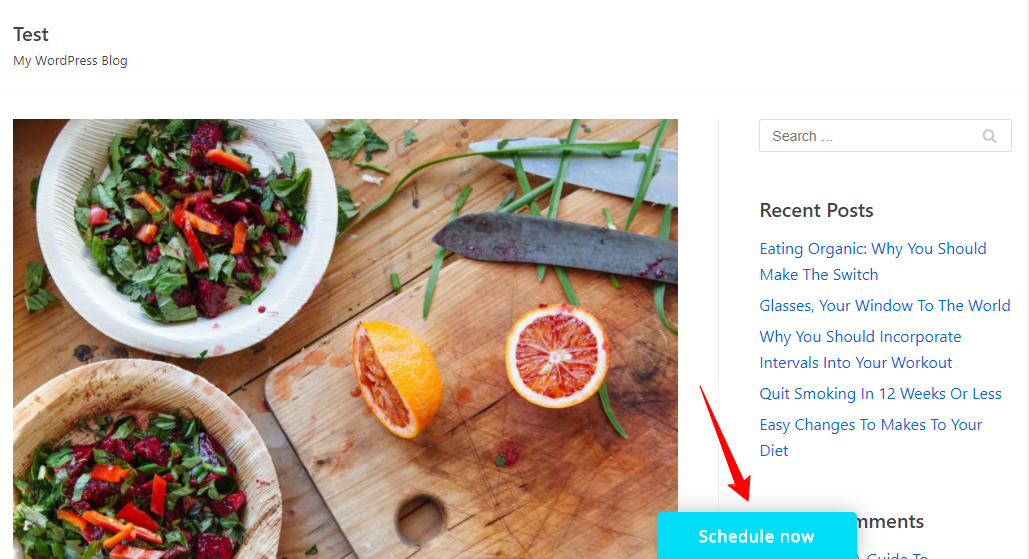
If I click on the Schedule now button, I see the following pop-up window:
Looks good, right? Mind you; I haven’t created custom services or set my availability hours. What you’re seeing is the demo that comes with the plugin by default. Now, let us explore the features that help you to add services, add staff, and so on. At this point, your WordPress website is connected with vcita.
vcita Settings
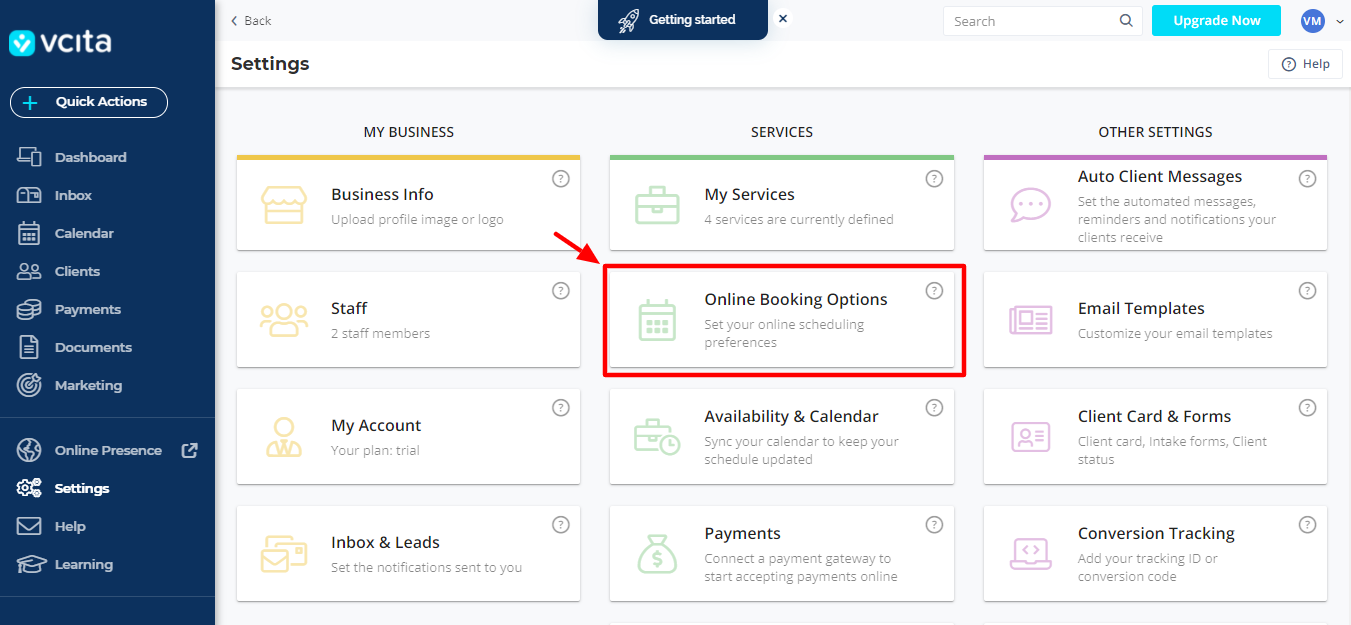
In the following section, we cover all vcita settings. Log in to your vcita dashboard and navigate to Settings:
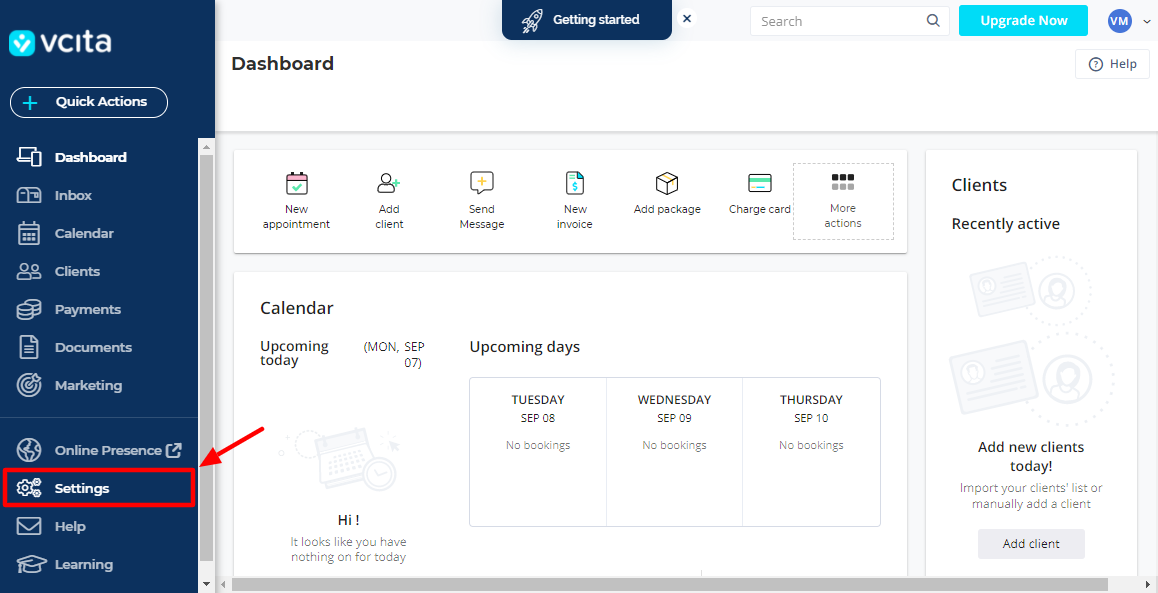
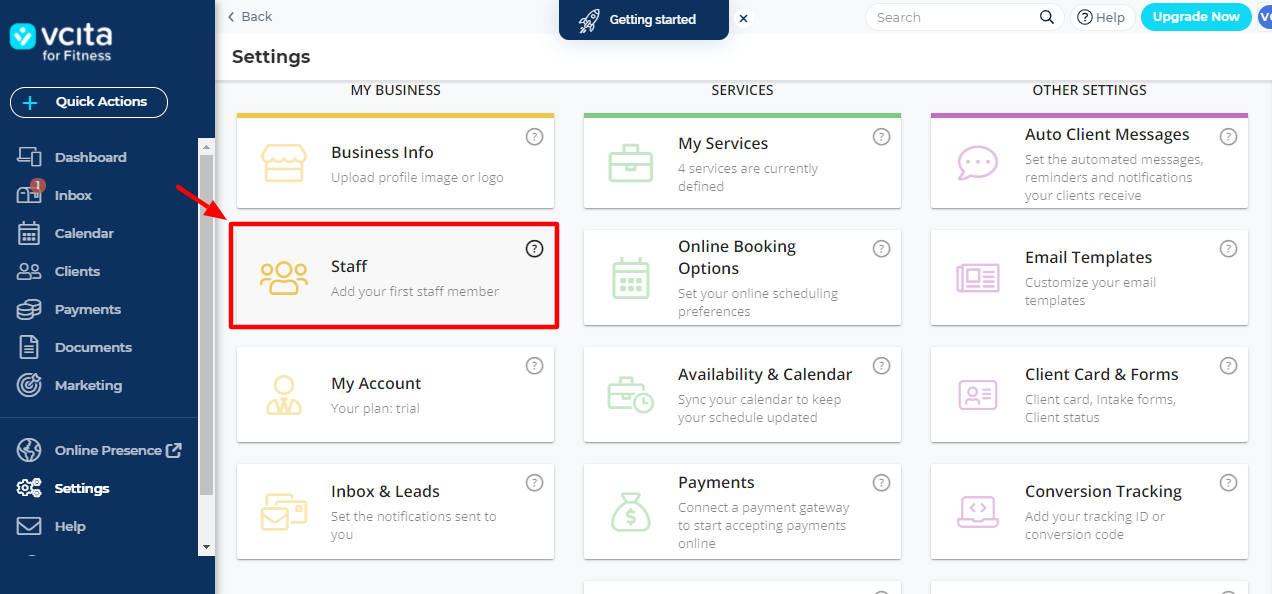
Doing so leads you to the Settings page, where you can view all the tools you need to start managing your service-based business:
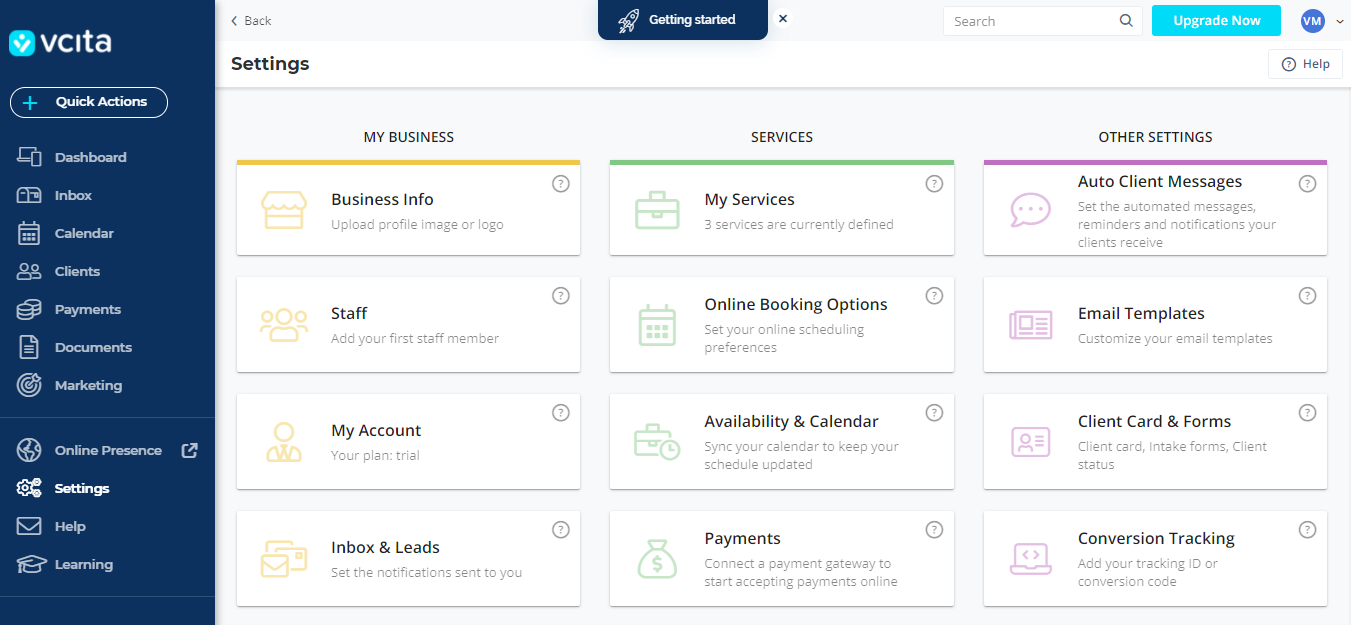
In the following section, we will go over each tab briefly. Let us begin with the “My Business” column.
Business Info
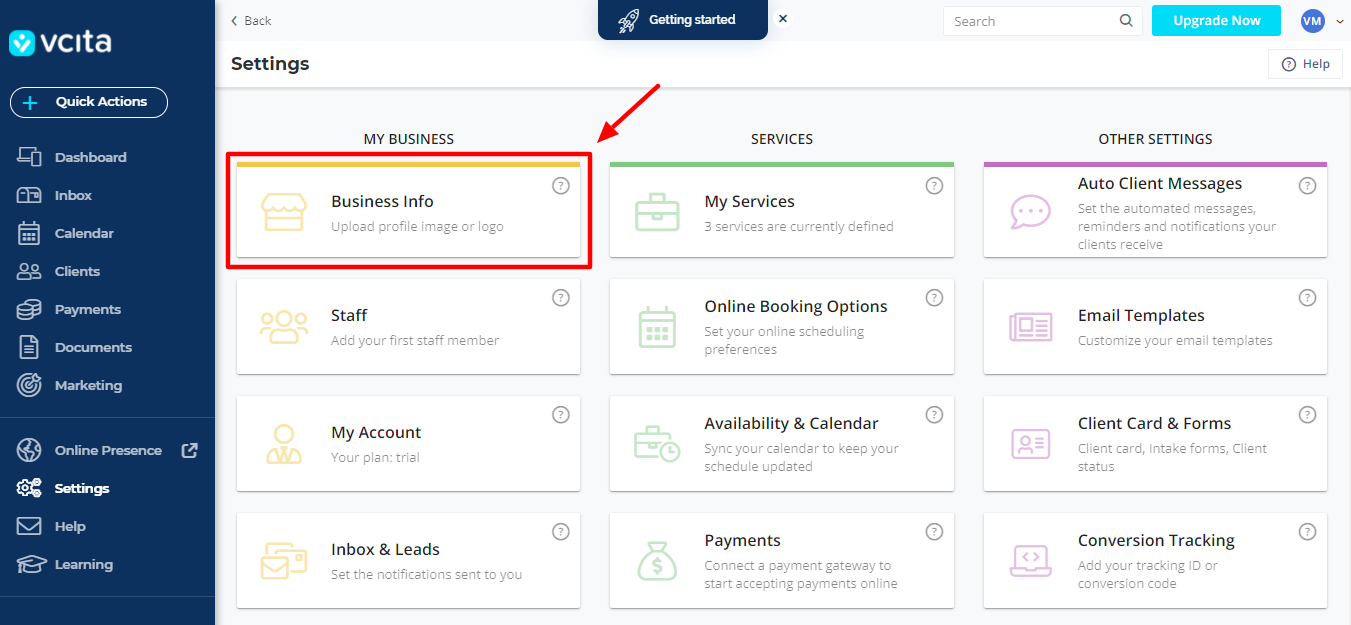
The Business Info tab allows you to edit your business info and upload a custom profile picture or logo. Clicking the Business Info tab leads you to the following page.
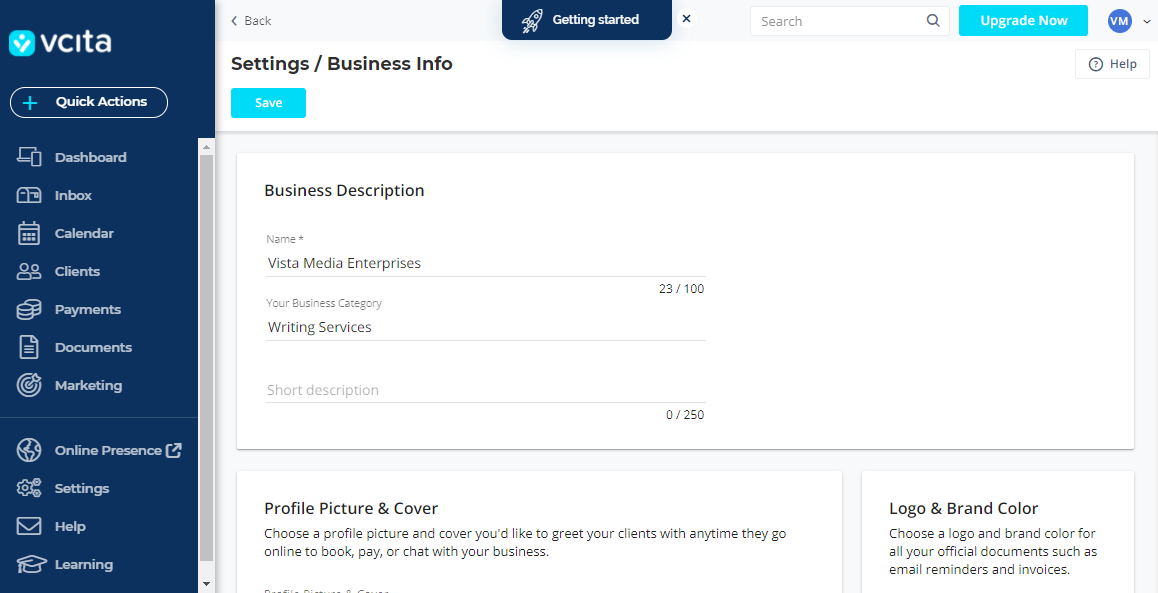
Everything on the above page is self-explanatory; we don’t need to dwell on it. Let us move on to the Staff tab.
Staff Tab
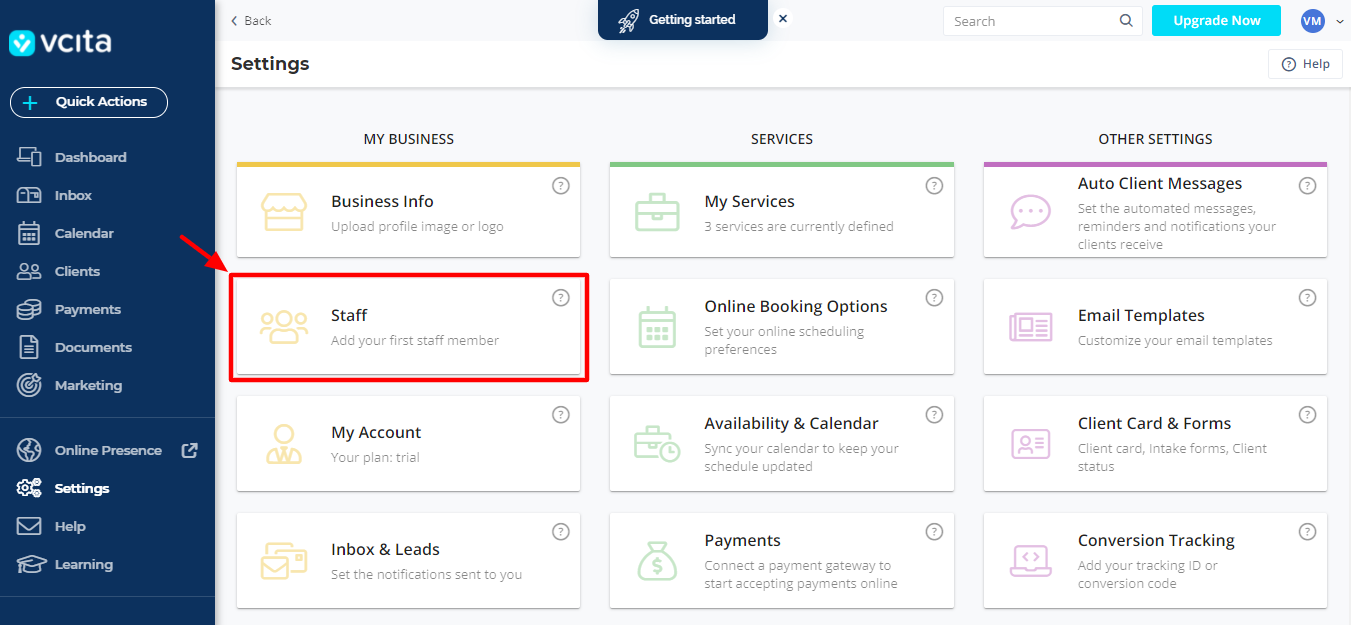
By default, you’re the only staff member in vcita. All new requests and appointments are automatically assigned to you unless, of course, you add a new worker. To add employees, click the Staff tab, as shown in the image above.
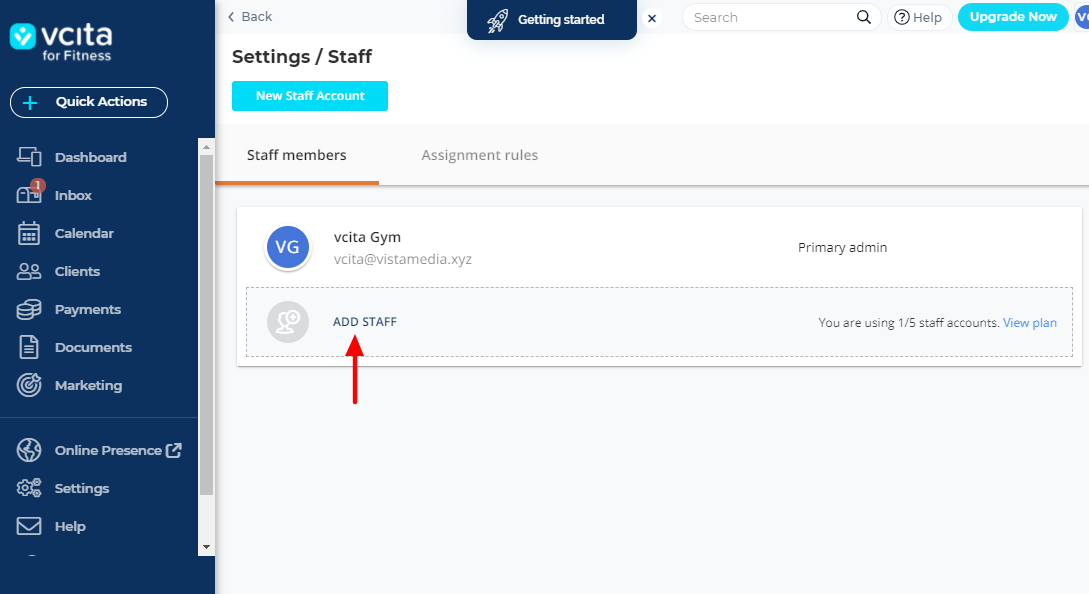
Next, click the Add Staff button, as highlighted below.
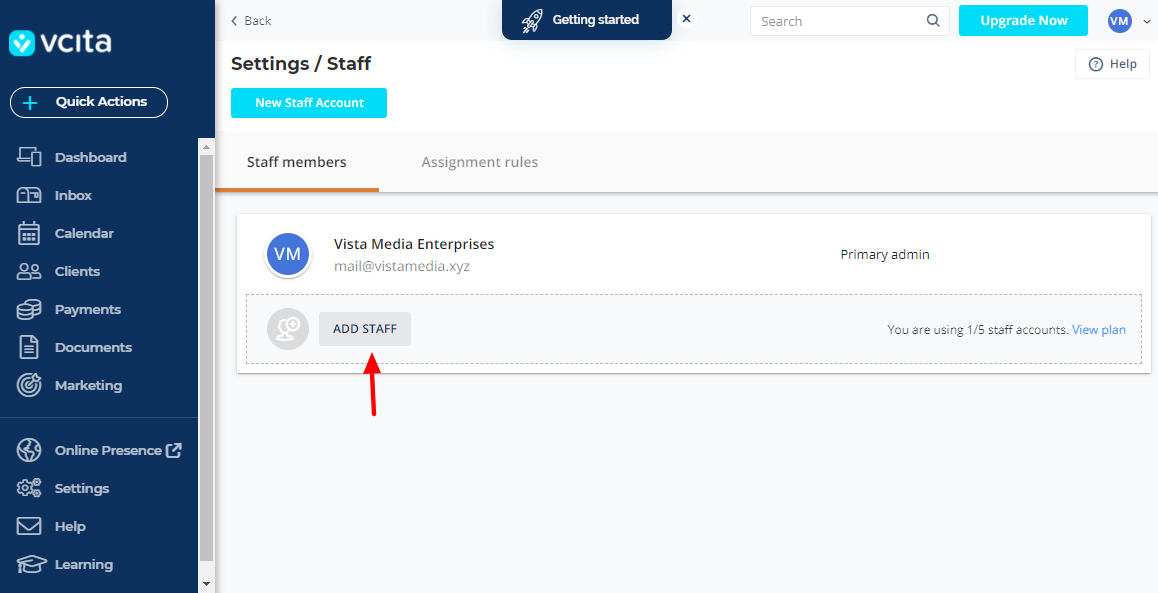
As you have probably noticed, the free trial offers you up to five (5) staff accounts, which is sufficient for illustration purposes.
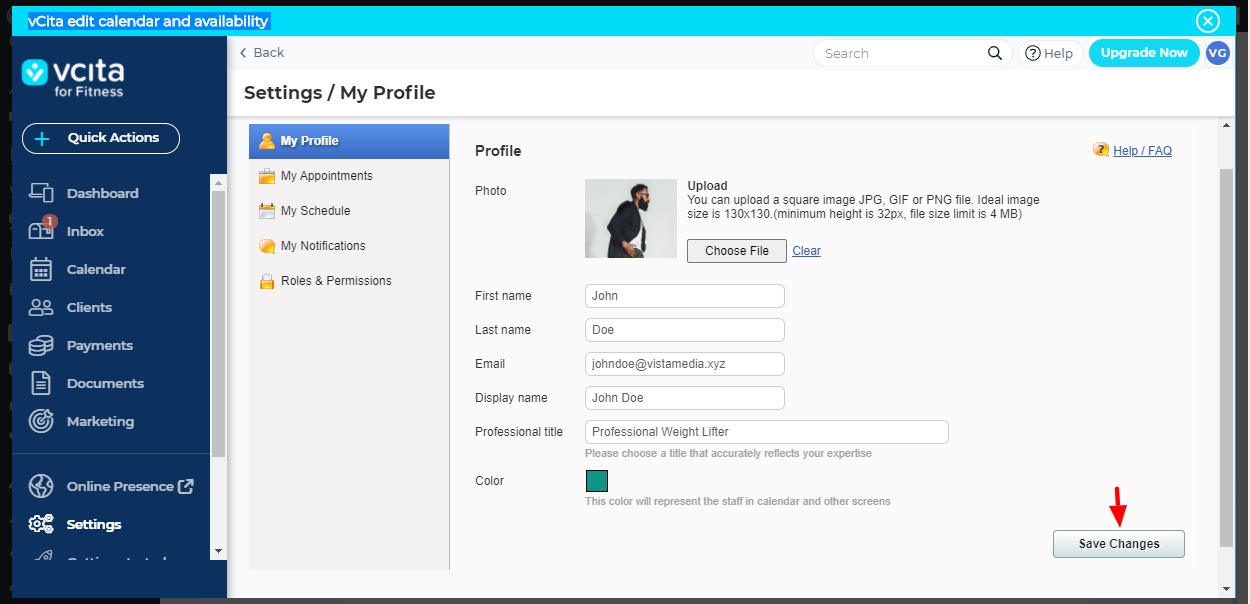
Next, enter the employee’s name, email address, choose a service (don’t worry, you can always assign staff to services later), and click Advanced:

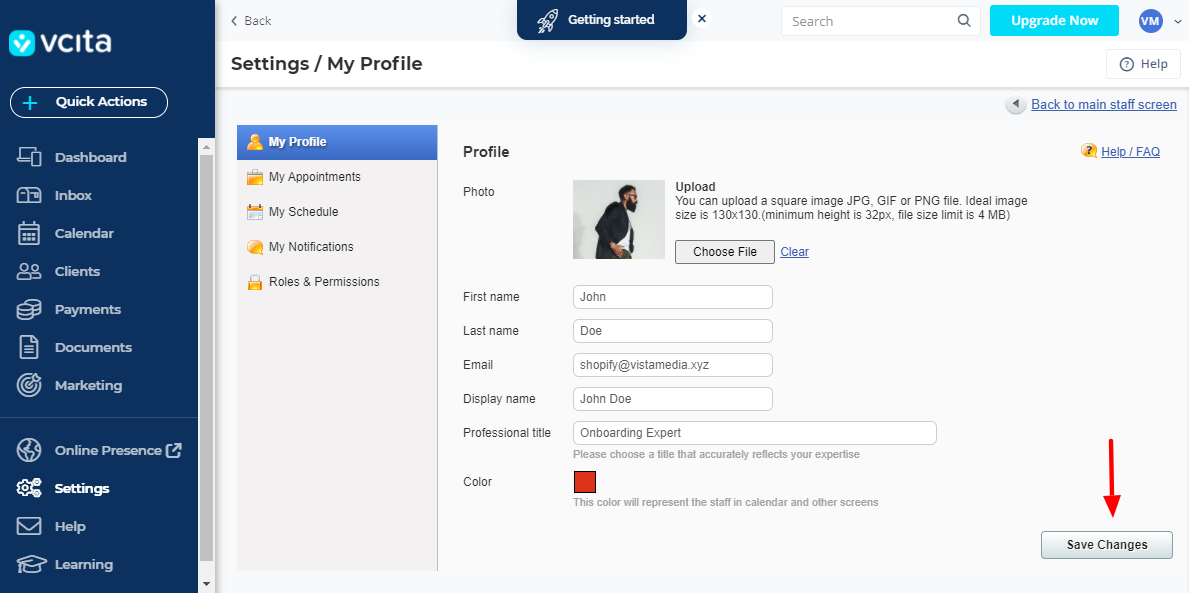
On the next page, you can add a lot of advanced details about your employee:
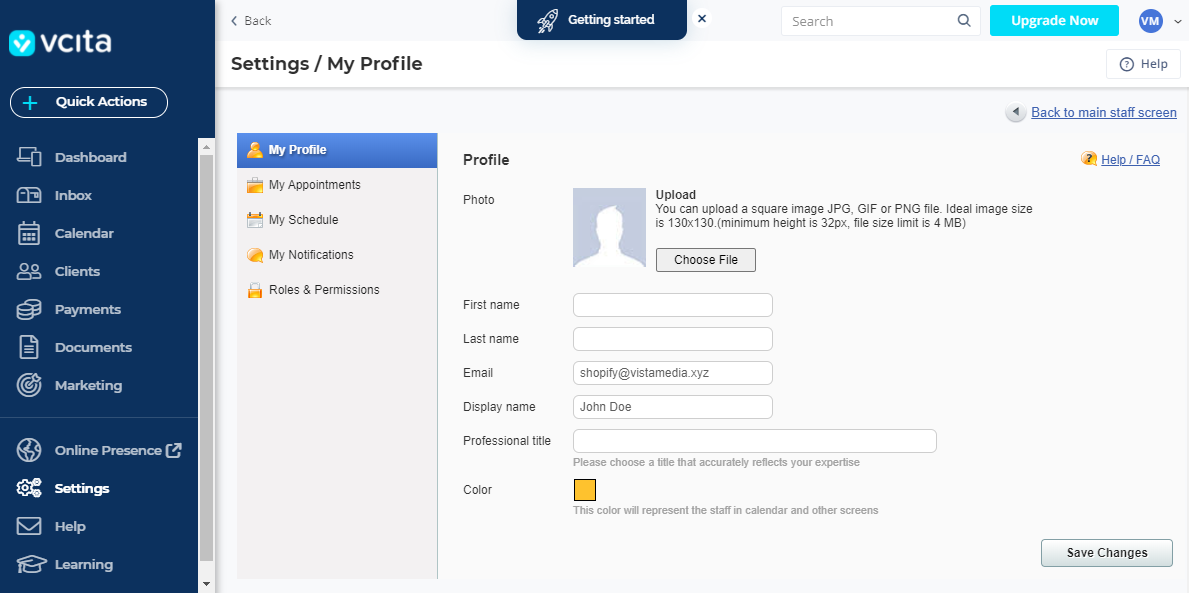
Available options:
- Employee profile picture
- Full name
- Professional title
- Custom color to represent the employee on the calendar and other screens
- Assign services to the employee
- Create schedules for the employee
- Set up notifications
- Configure the roles and permissions employees have
Whenever you change anything, always remember to click Save Changes:
Now you know where to go if you want to add a new staff member. Let us head back to the Settings page and check out more tools.
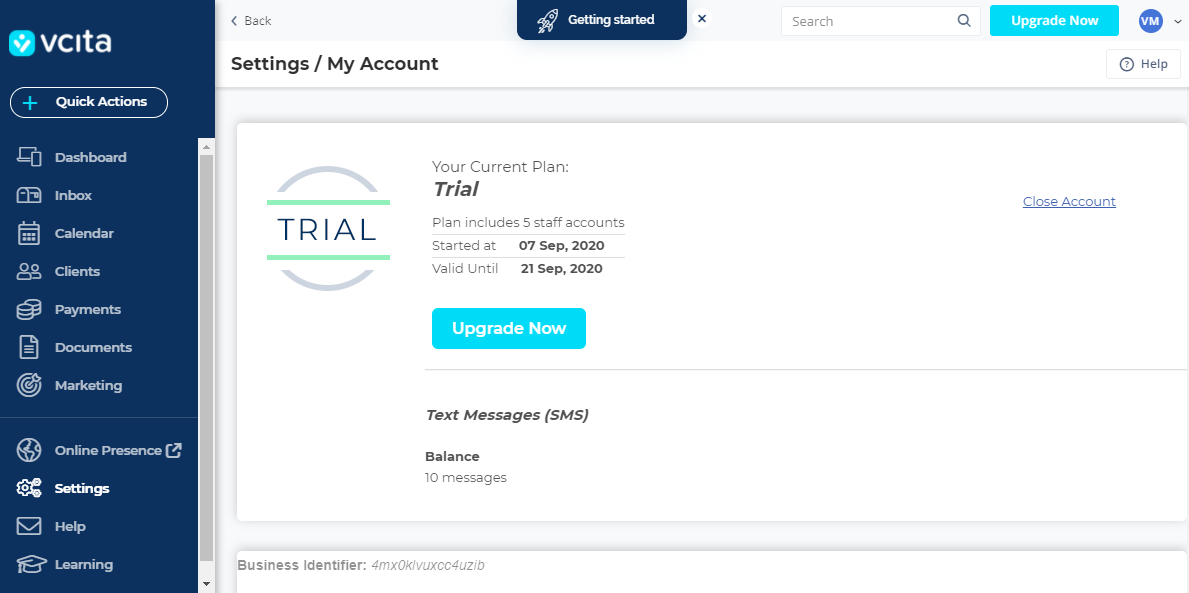
My Account tab:
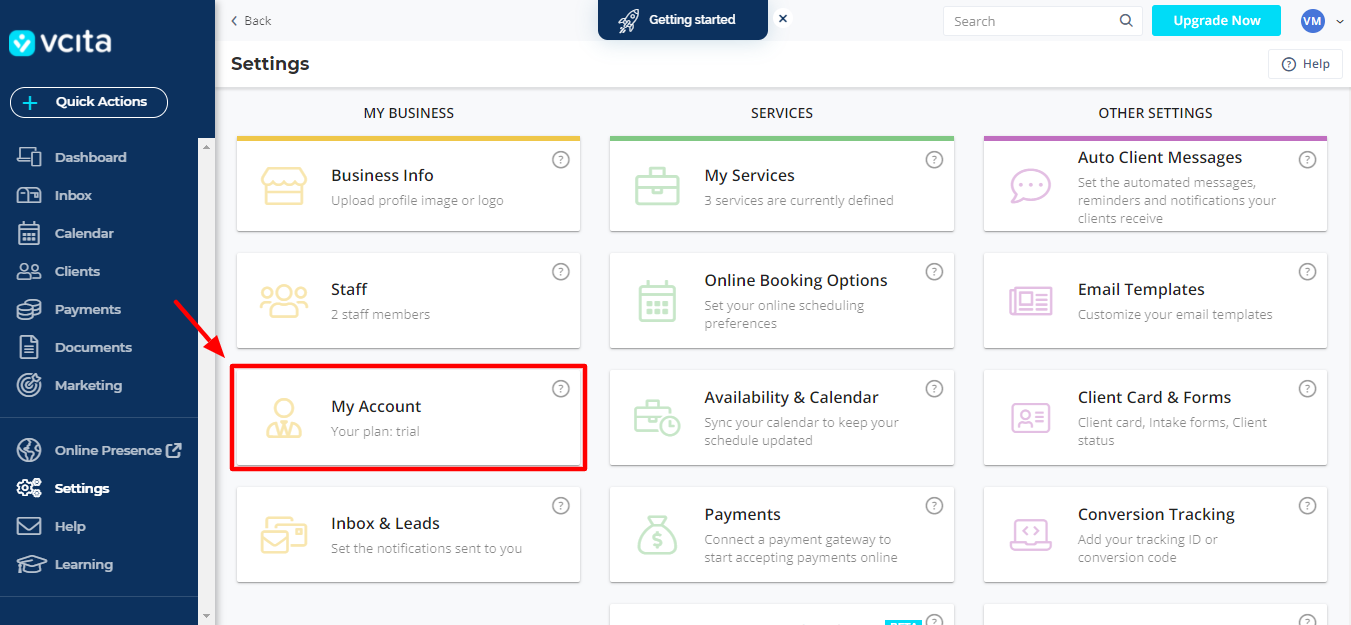
The tab leads you to your vcita account settings. Here you can view your current plan, check balance, download HIPAA Business Associate Agreement, or delete your vcita account:
Moving on swiftly, we have the…
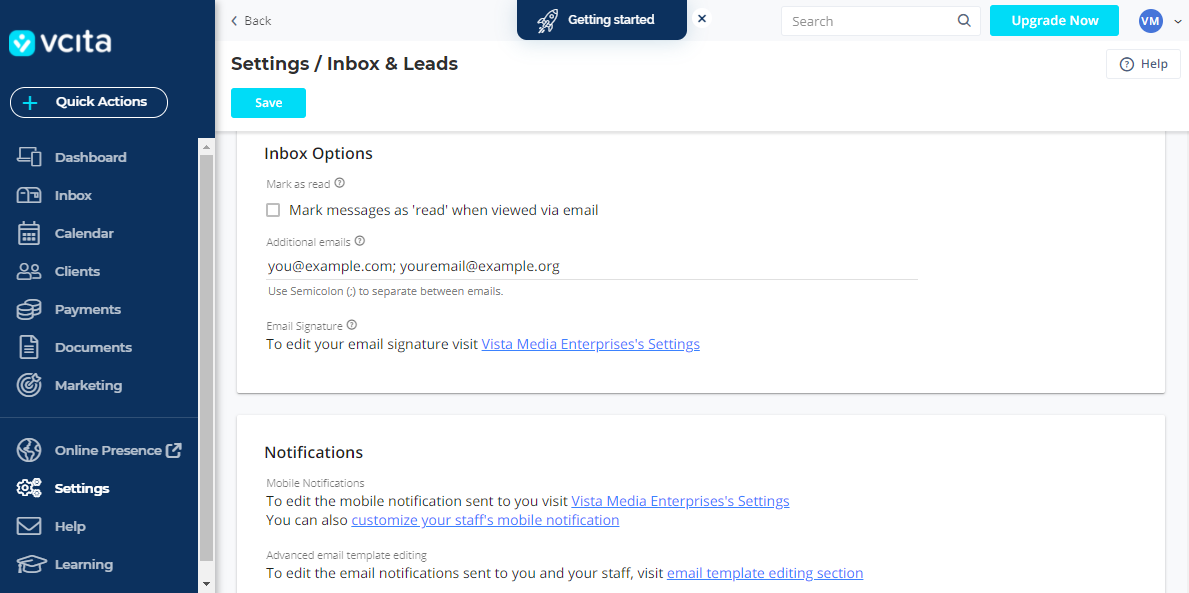
Inbox & Leads tab:
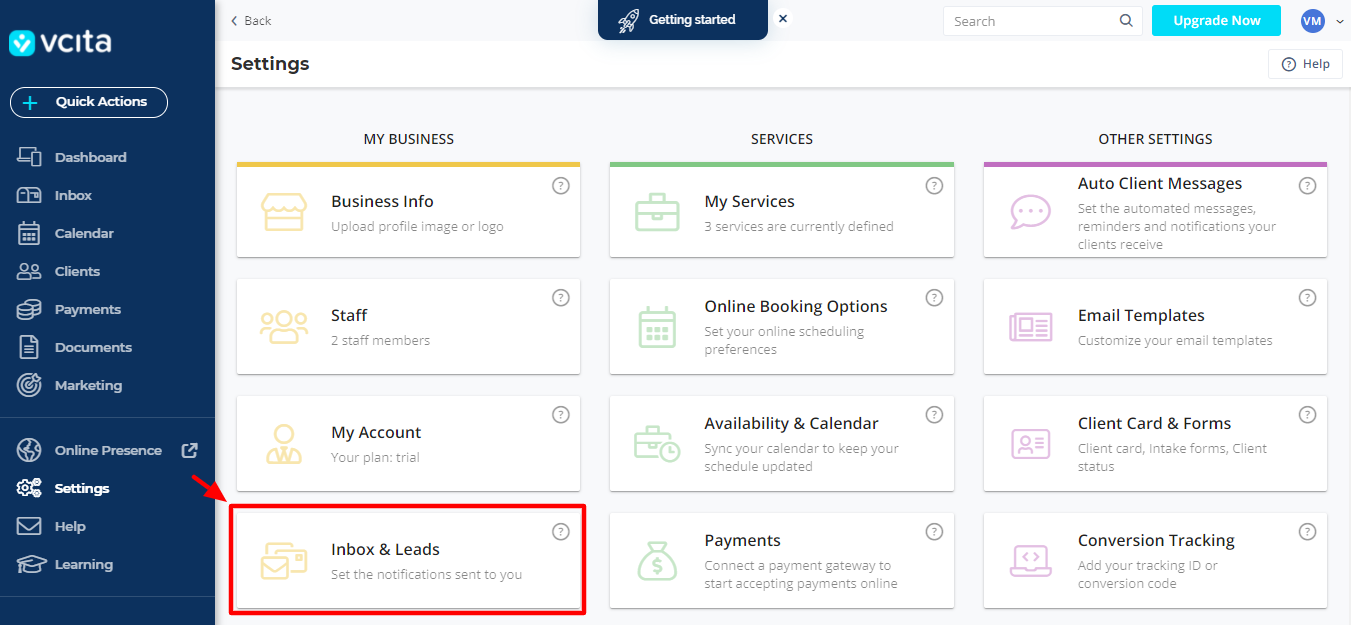
Unlike what you might think at first, the tab does not contain your inbox or leads. It’s where you go to set notifications sent to you. You can add additional email addresses where you’ll receive notifications. The page also has links to edit your email signature, mobile messages, and notifications sent to your staff:
Next, we have the Services column. At the top, we have the…
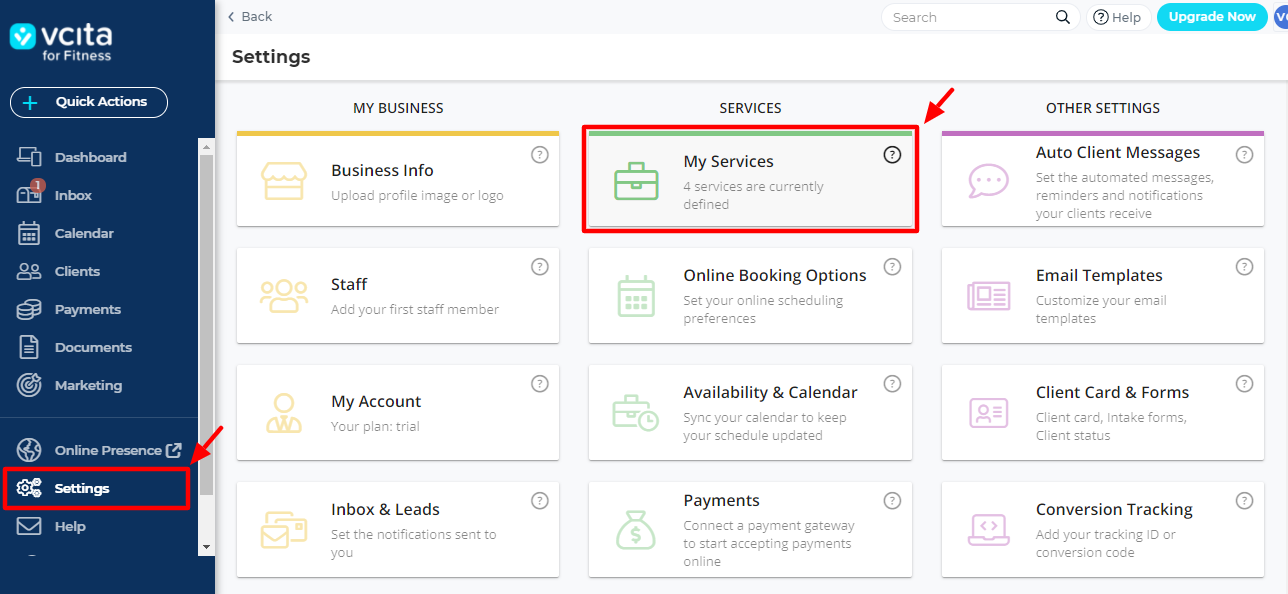
Services tab:
…which allows you to define your services:

Clicking on the tab leads you to the following My Services page.
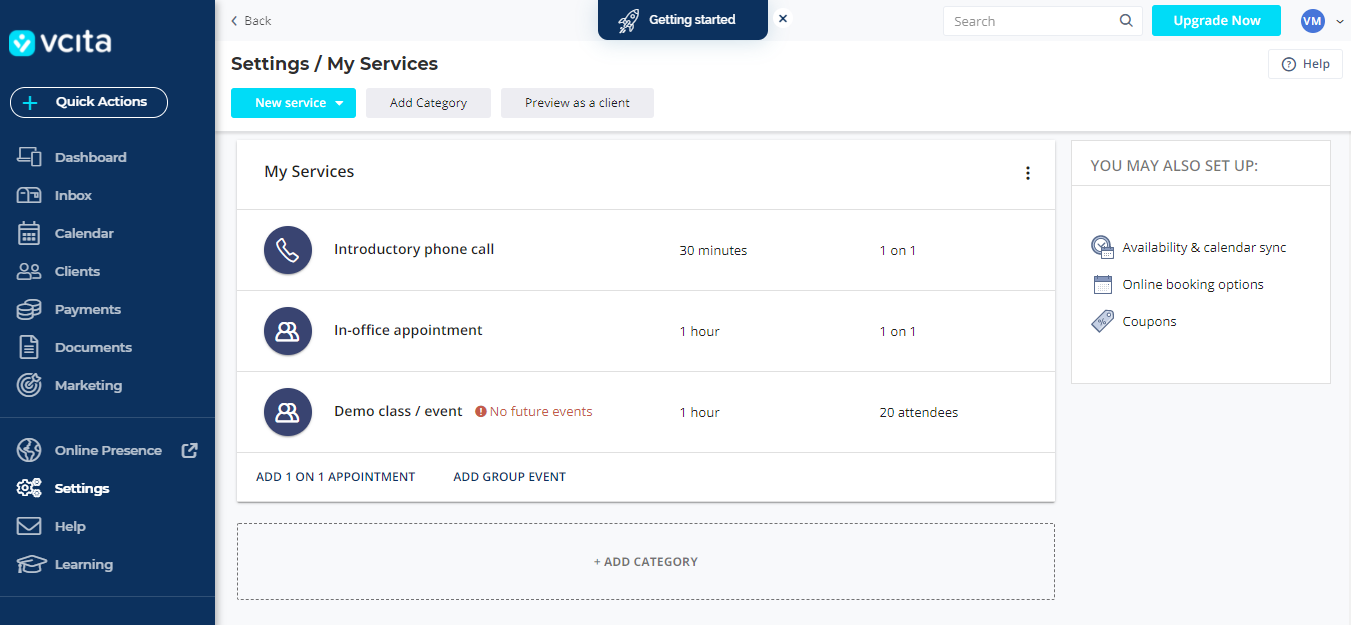
On the above page, you can easily add your services, which could be a one on one appointment, e.g., a therapy session, or a group event such as a gym class. You can set service duration and even add categories for your services. It’s so easy to create services in vcita you’ll be up and running in no time.
Away from services, next, we have the Online Booking Options tab:
On the Online Booking Options setting page, you have plenty of options to customize your online bookings in multiple ways:
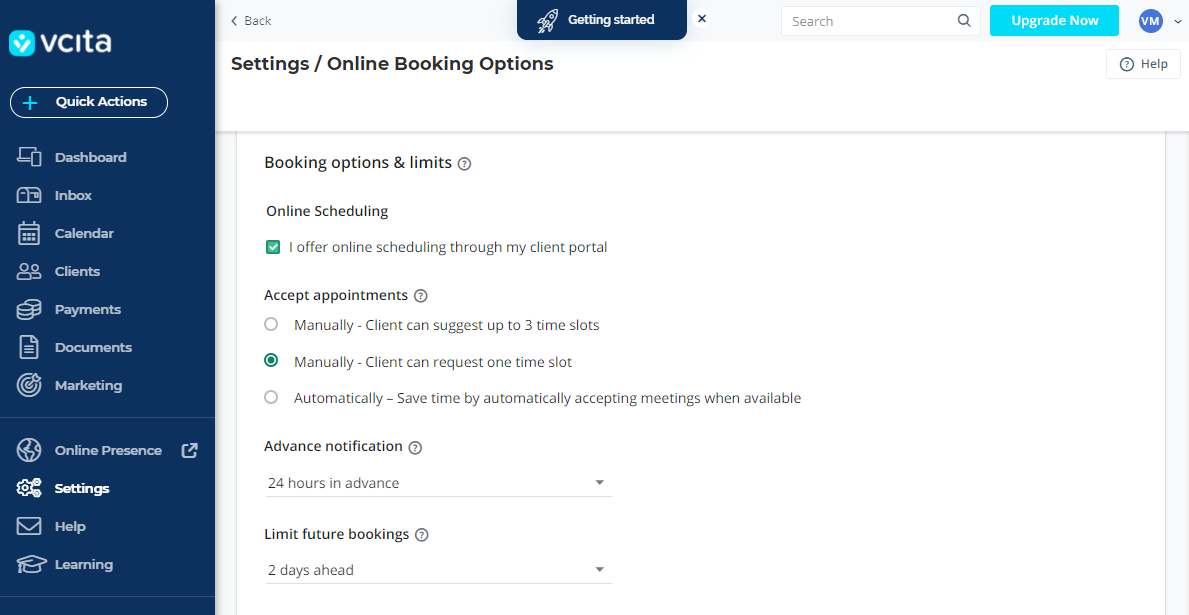
You can:
- Choose to offer online scheduling via your client portal.
- Accept appointments manually or automatically (based on your availability)
- Avoid “last minute” scheduling by defining a set time, after which the appointment cannot be scheduled.
- Set a limit to how far ahead a client can arrange an appointment with you
- Allow clients to reschedule or cancel appointments.
- Add booking policy text and request clients to accept your terms of service.
- Choose to display service categories, packages, service menu titles, time-slots, and scheduling order.
Plenty of options for your online bookings, I must agree. Everything is straightforward all the same; it’s just a matter of point-and-click, and your work is done.
Back to the main Settings page. We have the Availability & Calendar tab:

There is nothing much to see on the Availability & Calendar page, just a couple of options:
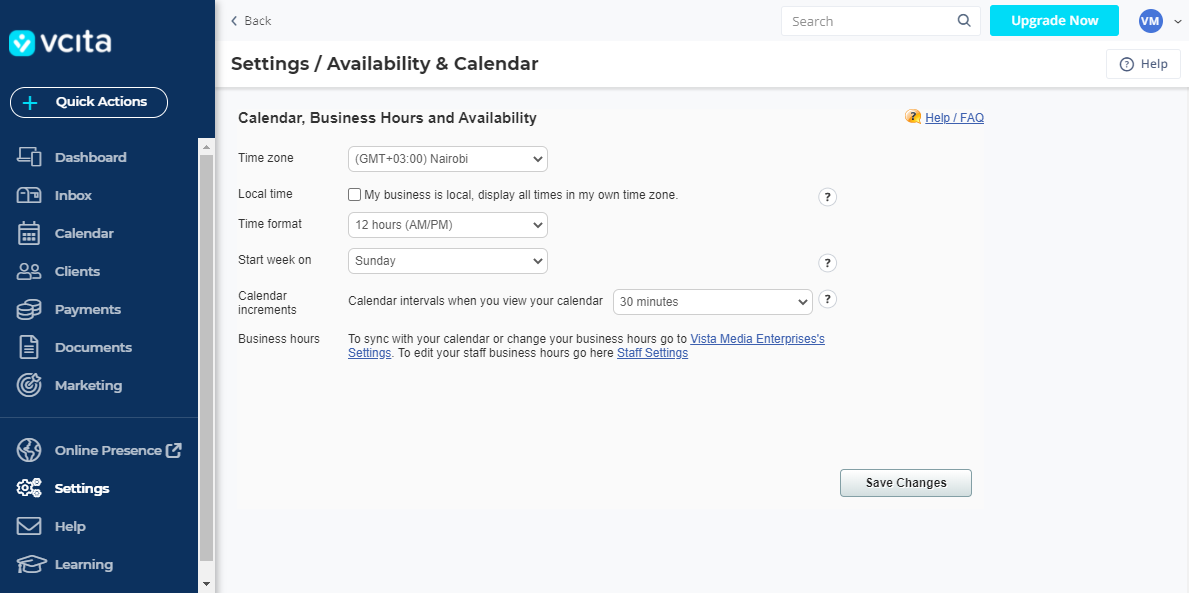
On the above page, you can choose your time zone, time format, and decide to use local time if your business is local. Additionally, you can set when your business week starts and calendar increments, e.g., 30 minutes. You also have links to change your and staff business hours.
Next, we have the Payments tab:
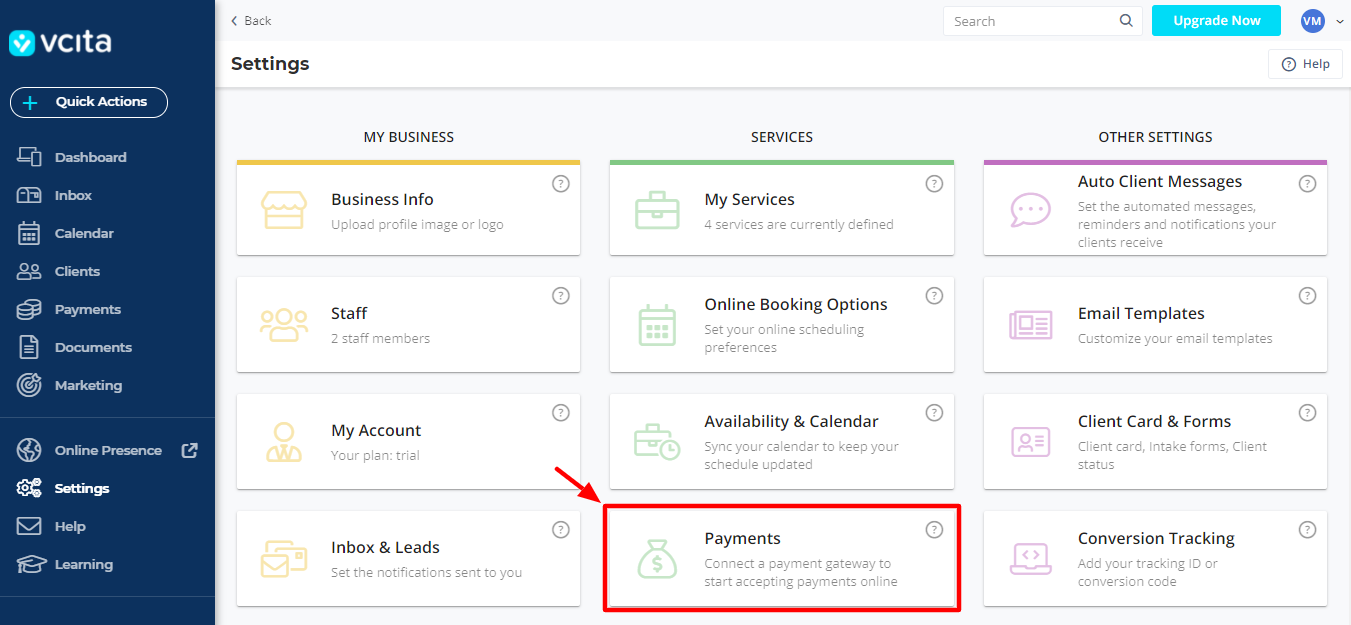
Clicking the Payments tab leads you to the Payments page, where you can choose your currencies and seamlessly connect vcita to a payment gateway. Linking a payment gateway is easy peasy and allows you to receive online payments from your clients.
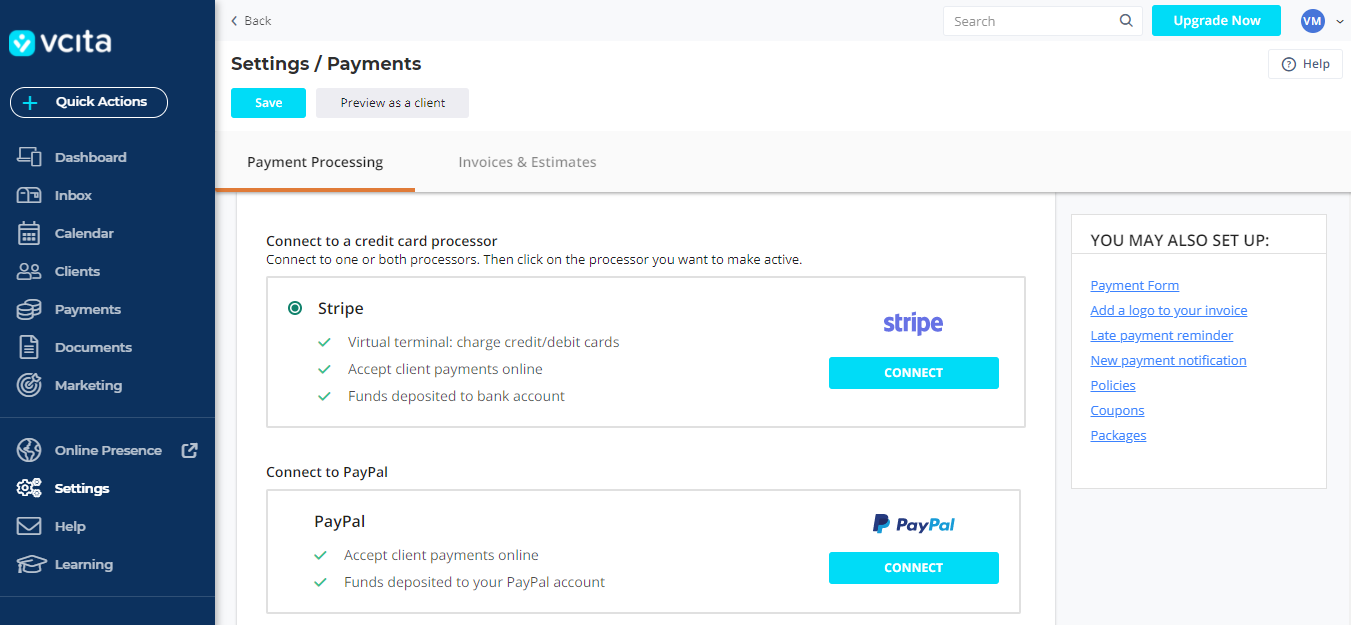
Additionally, you can enter billing and business info for your invoices. Further, you can define your invoice terms and conditions as well as enable partial payments. It’s all so easy to implement; you don’t need any technical skills whatsoever.
And there is more…
Say a big hello to the Coupons and Packages feature:
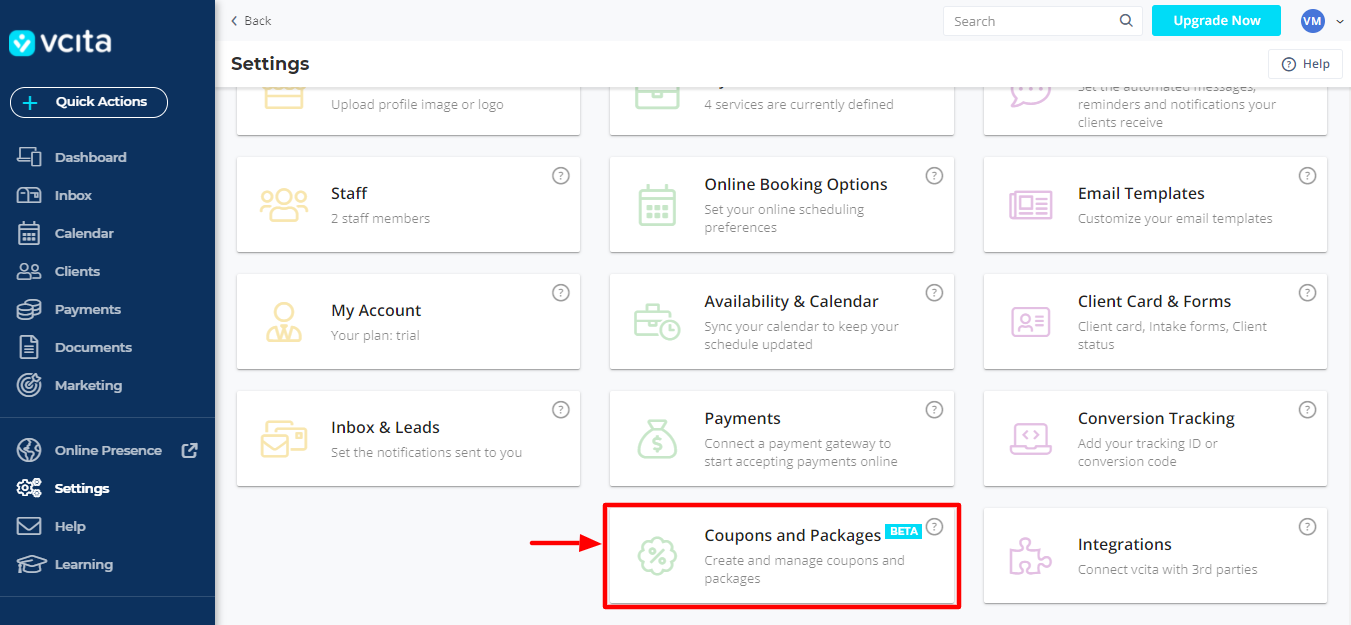
Give it a wild guess? What do you think the tab is about? Well, you guessed it right coupons and packages! Now, you can offer your clients coupons to attract more business.
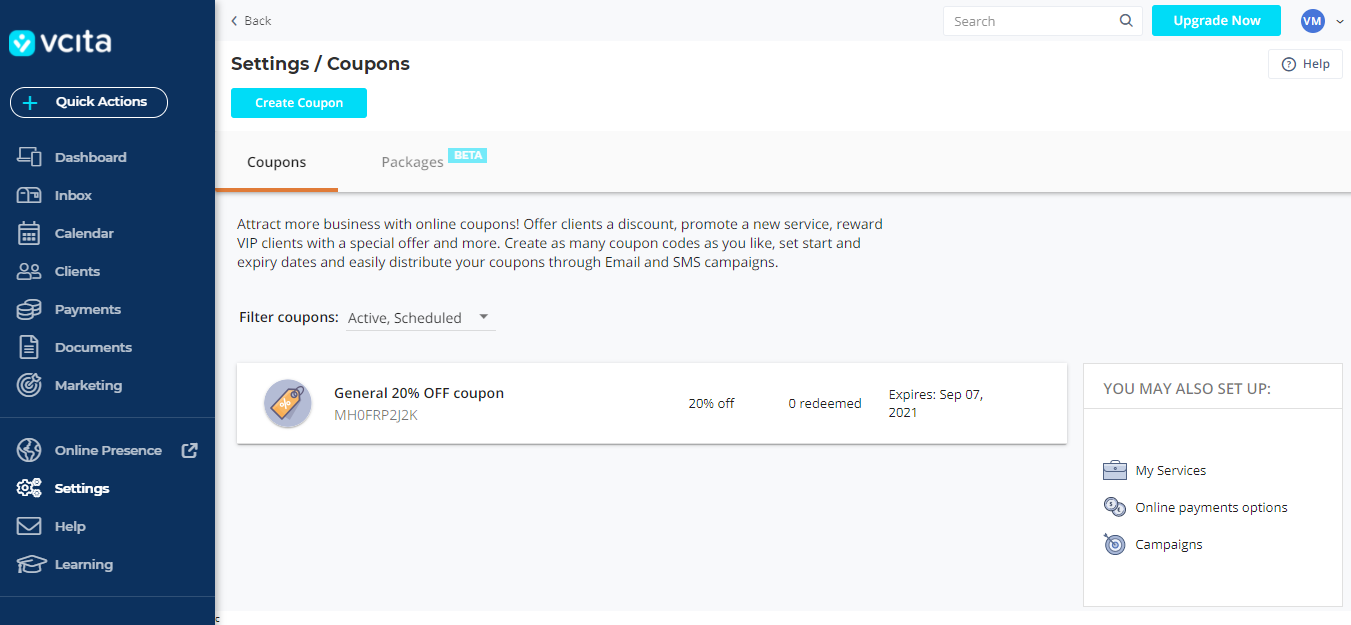
It’s the perfect tool to reward VIP clients and promote new services. You can create as many coupons as you like and distribute them via email and SMS campaigns.
Packages, on the other hand, allow you to bundle your services that you then add to a client card, sell online, or send via a direct link. Service packages are a great way of boosting your revenues.
Finally, we have the third column; Other Settings. The column carries extra settings to supercharge vcita. Let us start at the very top.
Auto Client Messages:
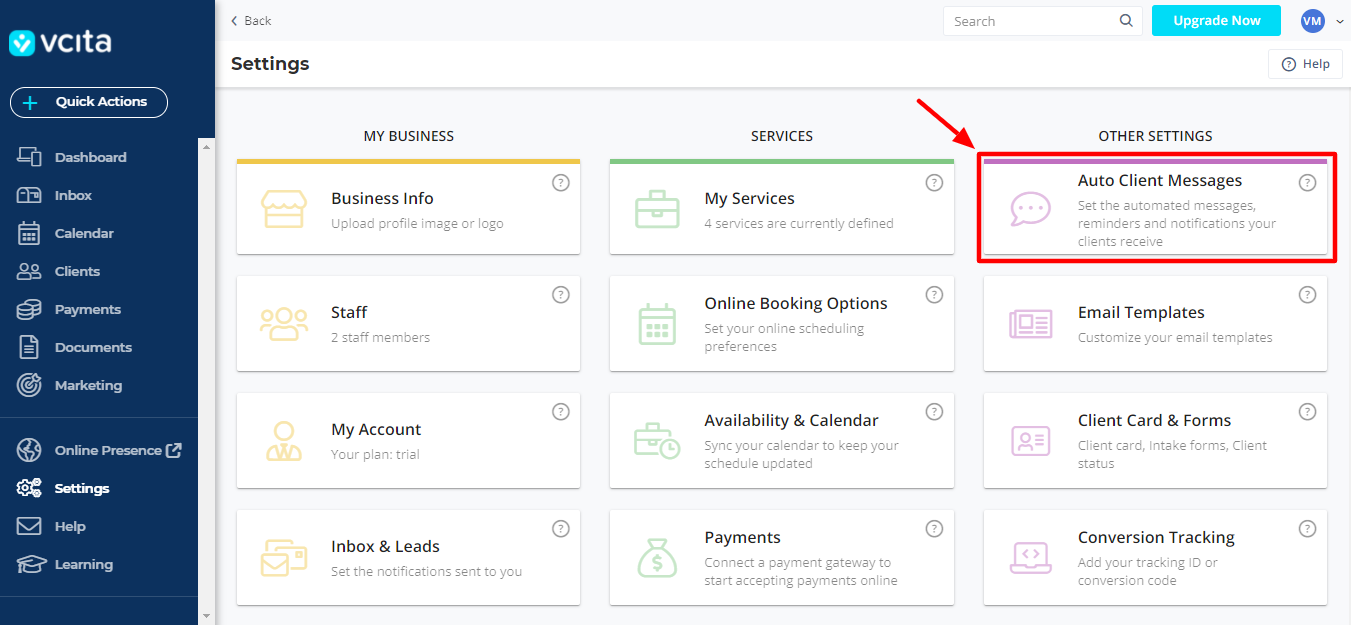
The tab takes you to the Auto Client Messages page, where you can customize the messages and notifications you send to your customer either via email or SMS:
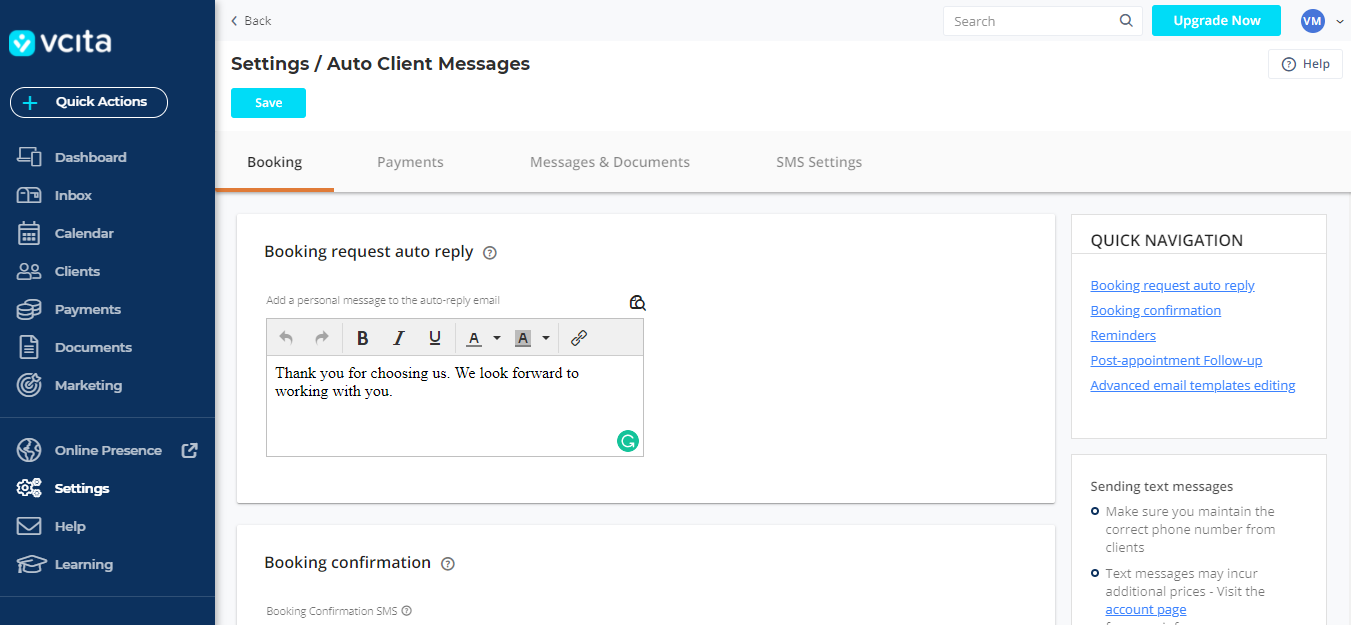
You can:
- Customize the auto-reply email clients receive after booking an appointment
- Define the email and text message your client receives after confirming the booking
- Set up reminders and post-meeting follow-up
- Find a link to email templates.
- Customize SMS and email the client receives when estimates and invoices are sent.
- Enter a custom sender name for outgoing SMS notifications
It’s brilliant, this thing, and makes keeping the client in the loop a breeze. Next, we have the…
Email Templates tab:
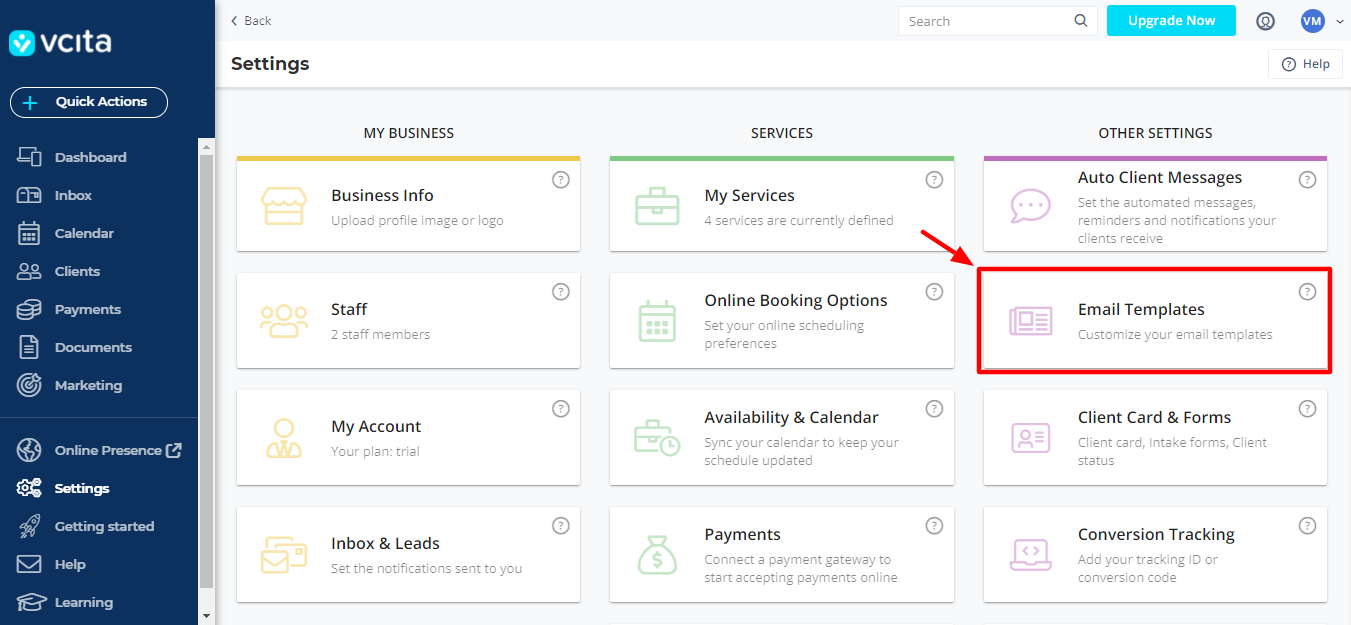
Under the tab, you find the Email Templates page, where you can view, edit, and preview a ton of email templates brilliant for all uses you have in mind. vcita offers you a lot of variables to customize your email templates as you deem fit.
After that, we have the…
Client Card & Forms:
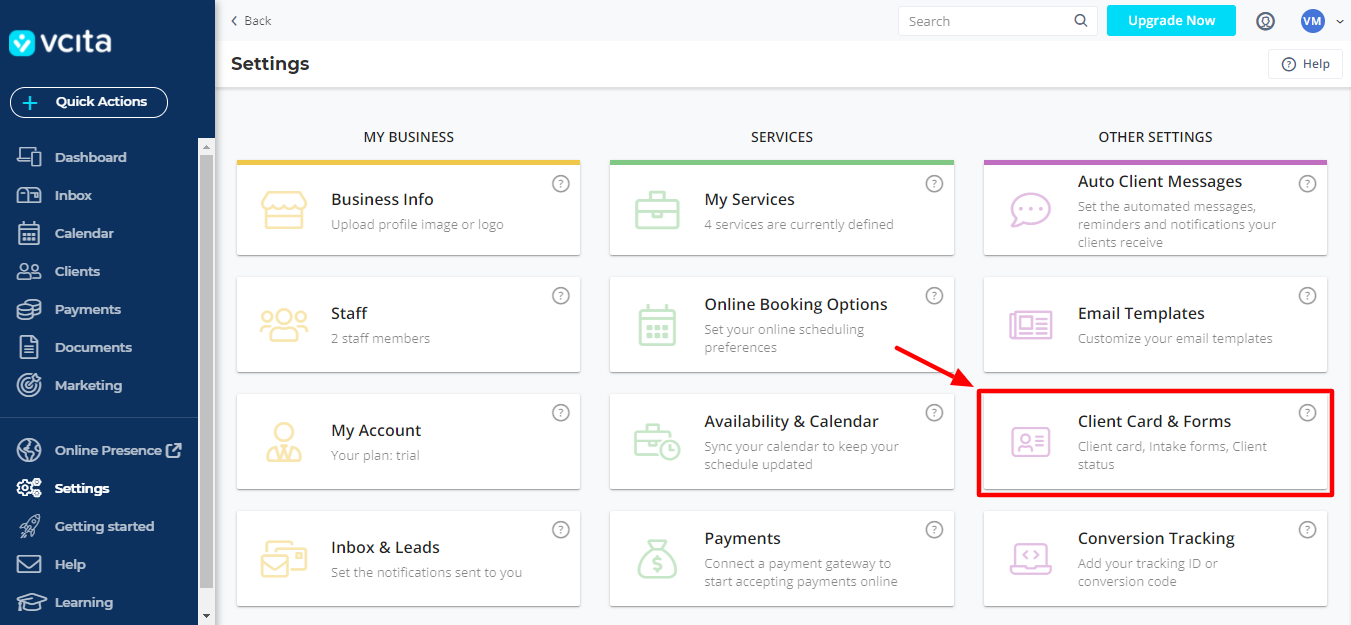
A vcita client card allows you to have a birds-eye view of your client at a glance. You needn’t dig deep to have the information you need, especially when you’re managing your business on a mobile device. So, where does the tab lead?
Here, the Client Card & Forms page:
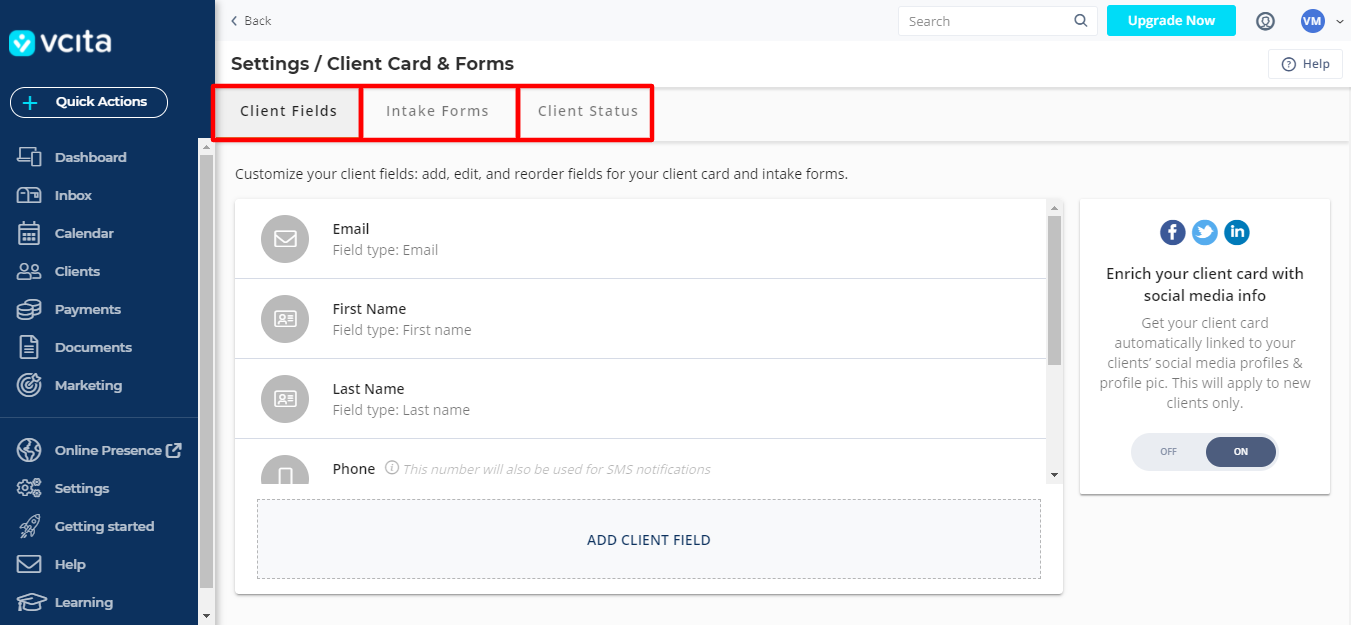
As you can see, we have three prominent tabs: client fields, intake forms, and client status. Let us go over each quickly.
- Client Fields – Here, you can customize the fields that appear in your client card. That means you can add more fields to show as much info as you’d like. You can even link the clients’ cards to their social media profiles.
- Intake Forms – Here, you can customize your leave details, scheduling & payment forms. Don’t worry; you can preview your forms before saving your changes. Additionally, you can populate your CRM with all the info you need using the POWr Form Builder Integration.
- Client Status – Set custom statuses for your clients. For example, you can label a new/potential client “lead,” active client “customer,” and most valuable customer “VIP.” The best part is you can instruct vcita to change “lead” to “customer” automatically based on conditional logic. For example, when the client makes the first payment.
Let us move on.
Conversion Tracking Tab
![]()
Then we have the Conversion Tracking tab because you have to stay on top of things. You need insights as you run your business, and vcita won’t relent. The tab leads to a simple Conversion Tracking page:
![]()
Look at that! Now you can easily track your conversions via Google Analytics. How sophisticated? Honestly, these guys are not kidding; they have outdone themselves. Plus, if you look closely, there is a nice little box at the bottom that allows you to track Google AdWords, Facebook Pixel, and other custom ad campaigns.
Integration tab:
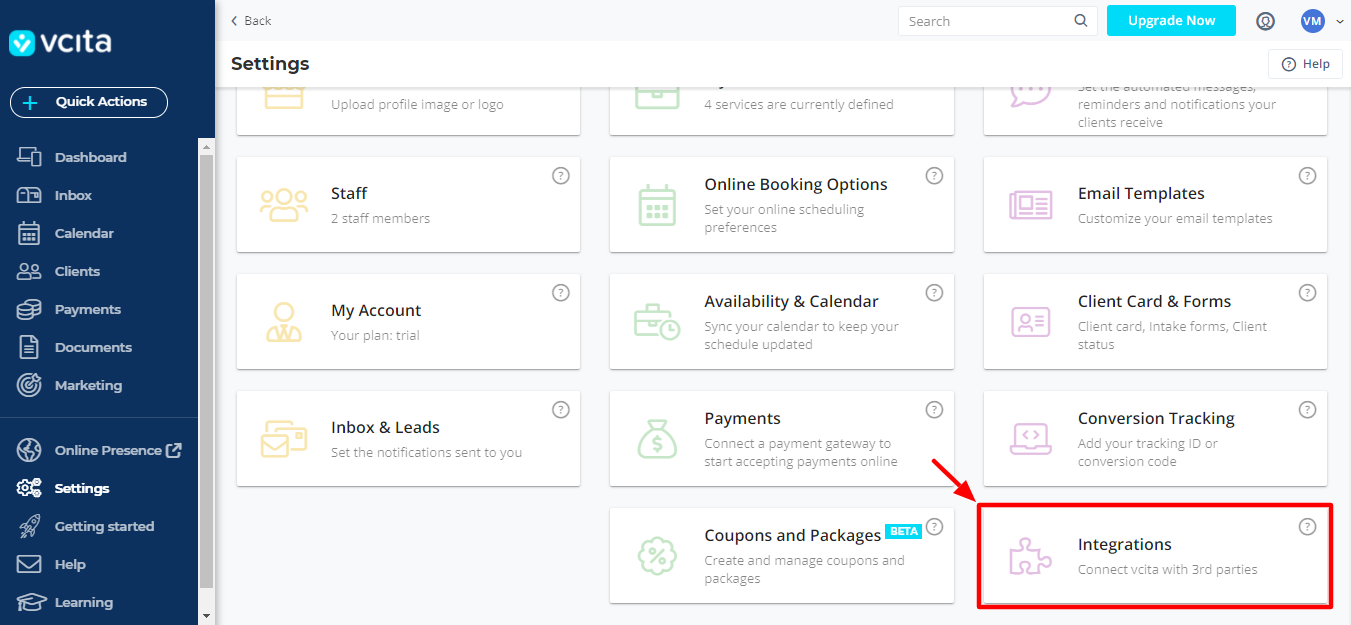
Who doesn’t love integrations? That way, you can extend your business management app, however, you desire. With integrations comes more power to achieve your business goals. You can virtually automate your entire business, and vcita wants to push you in the right direction what with a horde of fantastic integrations:
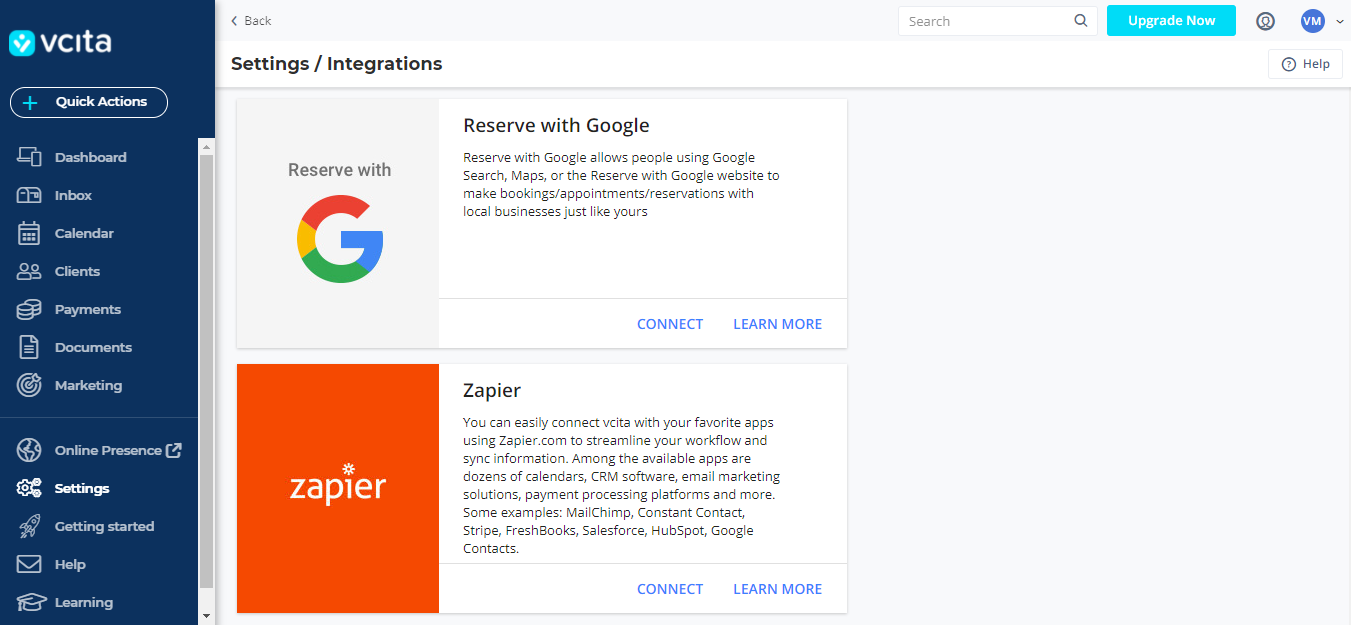
Integrations Galore!
You can easily integrate vcita with Zoom for seamless video calls. Then you have POWr Form Builder, Quickbooks, and Reserve with Google. But that is not nearly as exciting as the integration with Zapier, which allows you to connect vcita with 1,000s of your favorite apps. Plus, vcita works with webhooks too, which is great if you’re the tech-savvy type, so it’s a win-win for everyone.
And that’s all there is to vcita settings panel. Need to add services? We showed you just the tab. Need to add a new staff member, you know where to go. Want to customize your email templates and client notifications? Come on; you know now what to do.
Now that you know where to find exactly what you need, let us see the plugin in action!
How to Configure vcita Booking System
Now, let us create a sample booking system with vcita. For illustration purposes, I will create a booking system for a gym with two trainers, offering several services. I’m also using the Healthcare demo that’s part of the Total WordPress theme.
If you haven’t already, click the Turn on Widget button at the top of the WordPress admin dashboard:
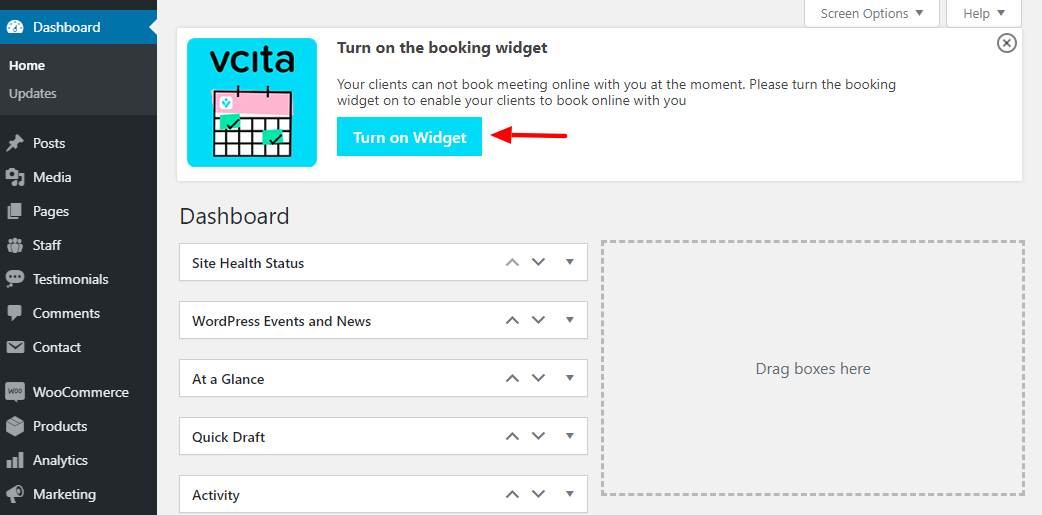
That should get rid of that notification. Next, make sure your website is connected to your vcita.com account. Before anything else, let us set your available hours in order to enable online bookings.
Editing Available Hours
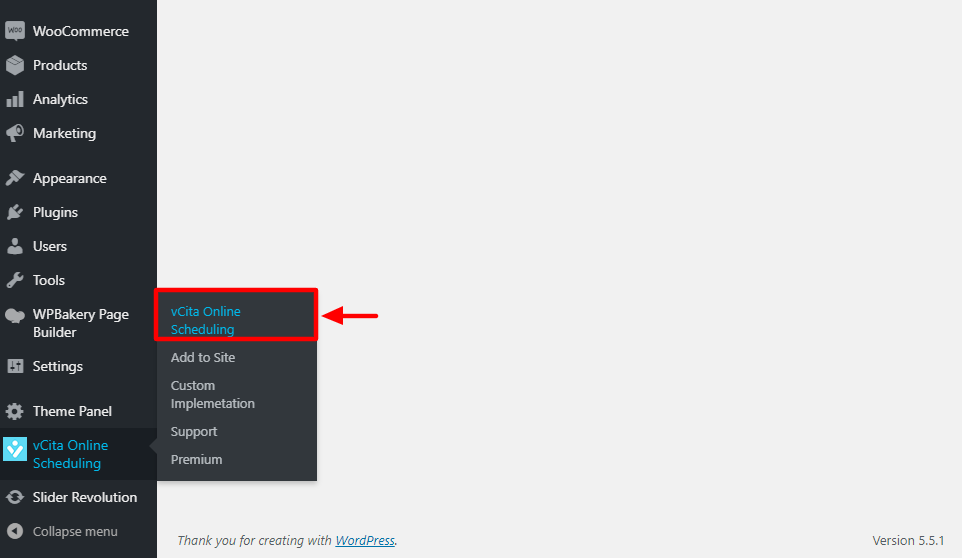
Click vcita Online Scheduling in your WordPress admin:
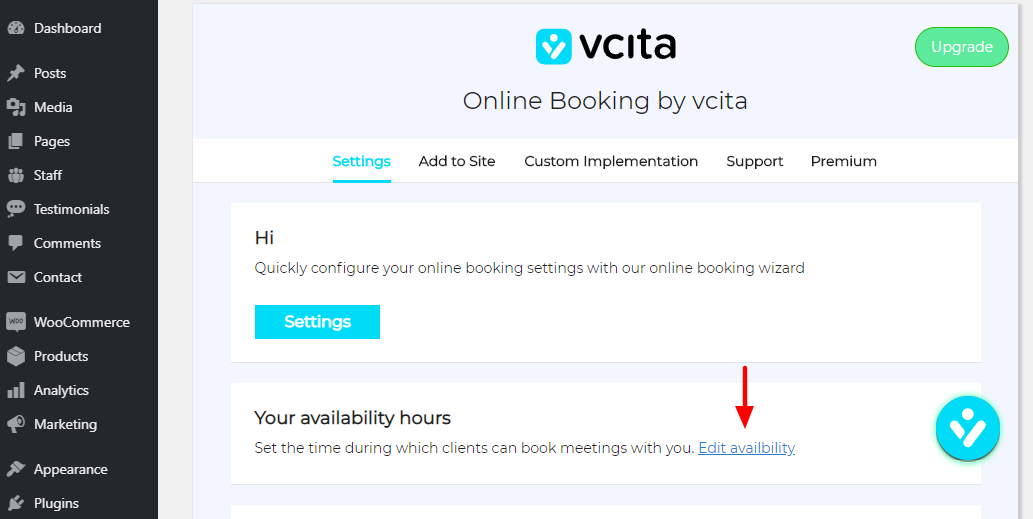
Next, click Edit availability, as shown below.
On the next screen, set your available/unavailable hours, as shown.
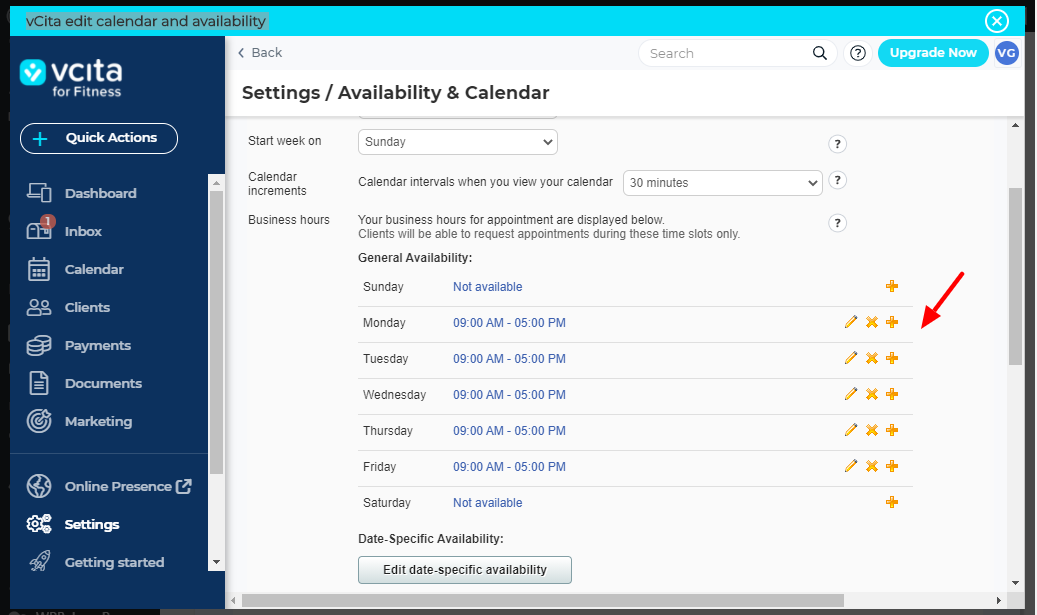
My sample gym is open five days a week nine to five. We are closed on the weekends, but this is just an example. After that, scroll down to the bottom, and click the Save Changes button.
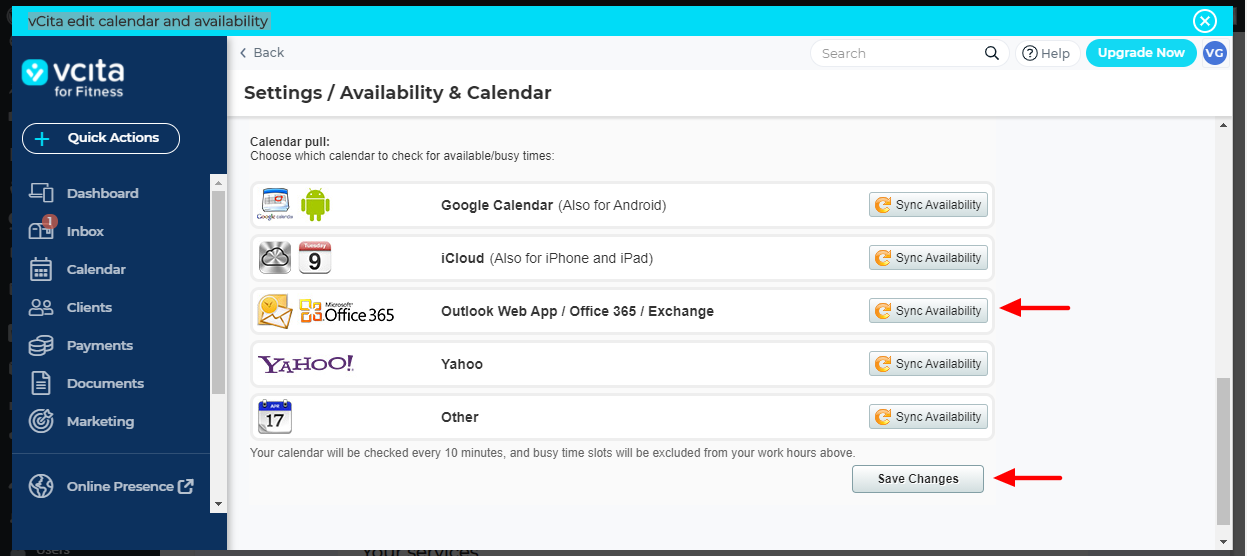
From the above screengrab, note that you can also sync with existing calendars, which is a nice feature to have. Once you’ve saved your changes, let us move on to the next part and add some services.
Adding Services
In your vcita dashboard, click Settings and then click the My Services tab:
On the next page, click the blue New service button and choose either “1 on 1 appointment” or “Group event.” I went with the former since I would like to add aerobics training and not an event.
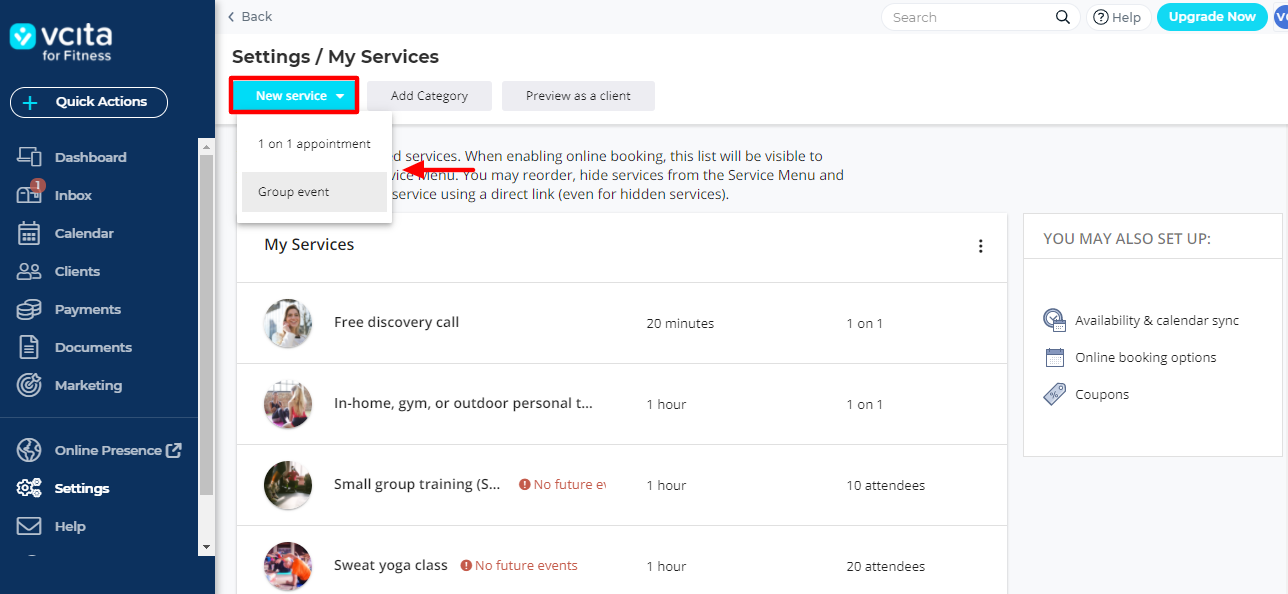
Also, notice there are several other services on the page. These were added by vcita by default during the onboarding process.
On the popup that appears, add your service info, location, duration, price, and then click Create:
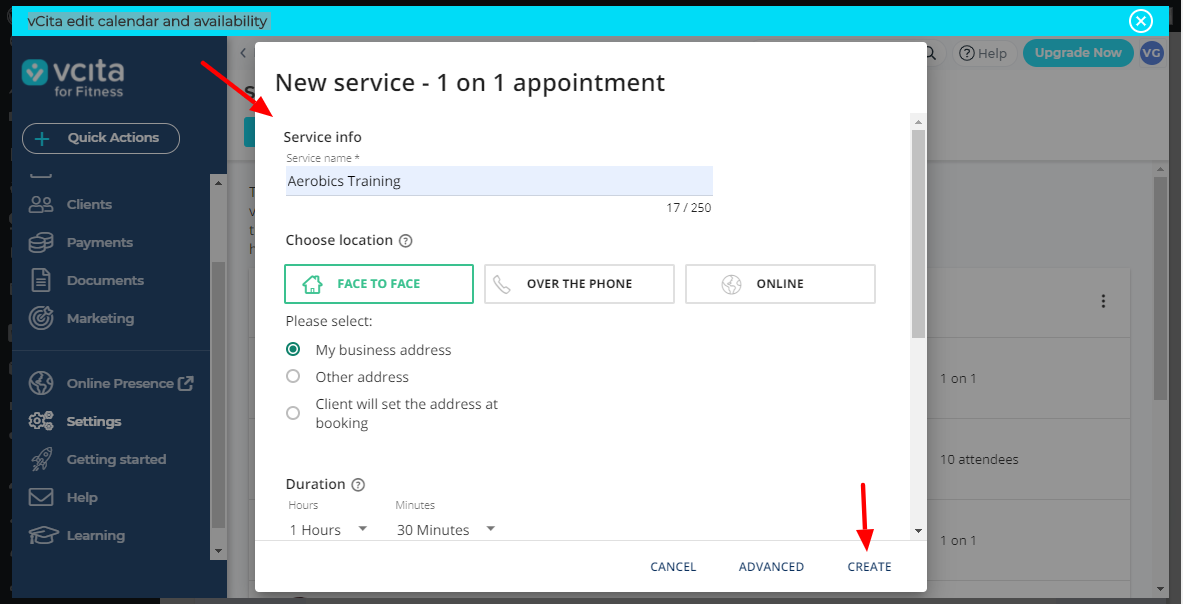
Clicking the Advanced button that’s next to Create launches an extended service page, where you can enter more details, add service image and description, etc.:
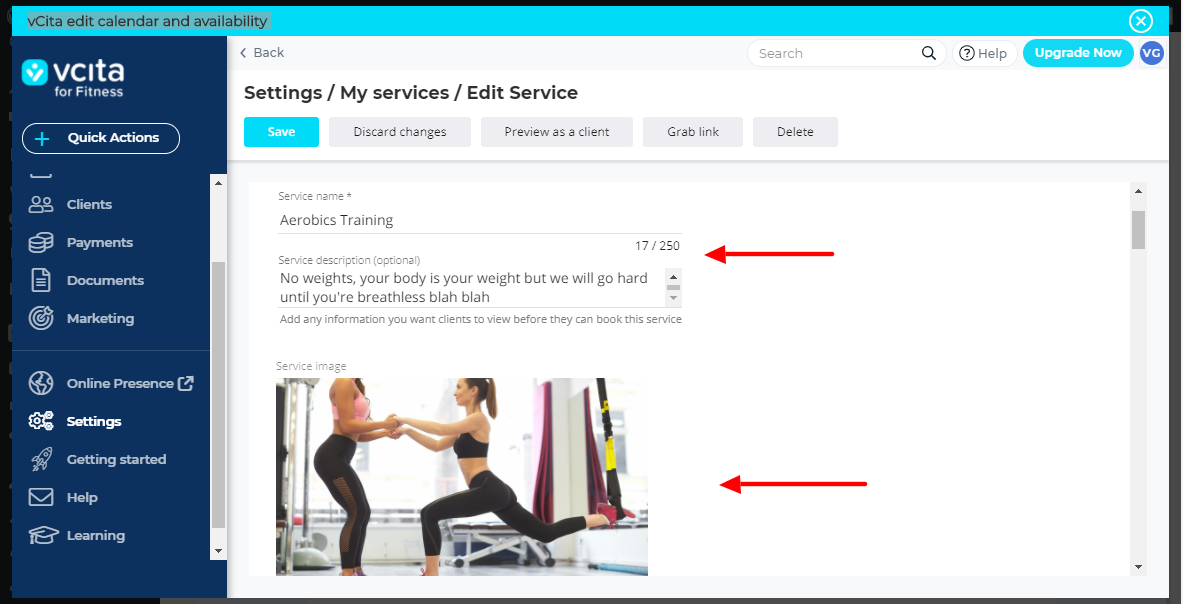
By the way, if you click the Service image tab shown in the above image, it opens up this nifty popup that allows you to choose an image without leaving vcita:
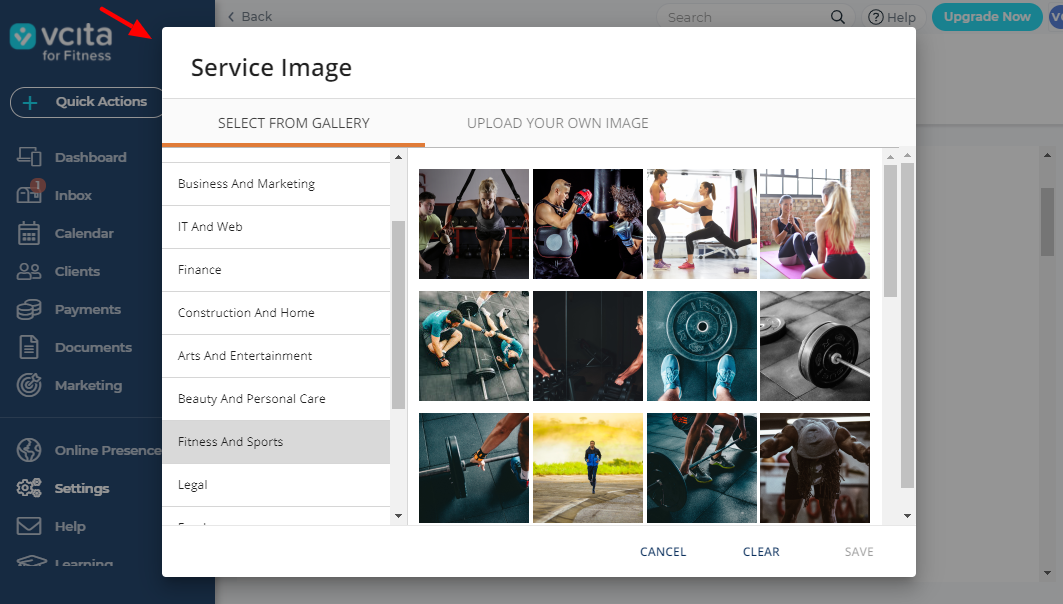
That’s cool, guys 🙂
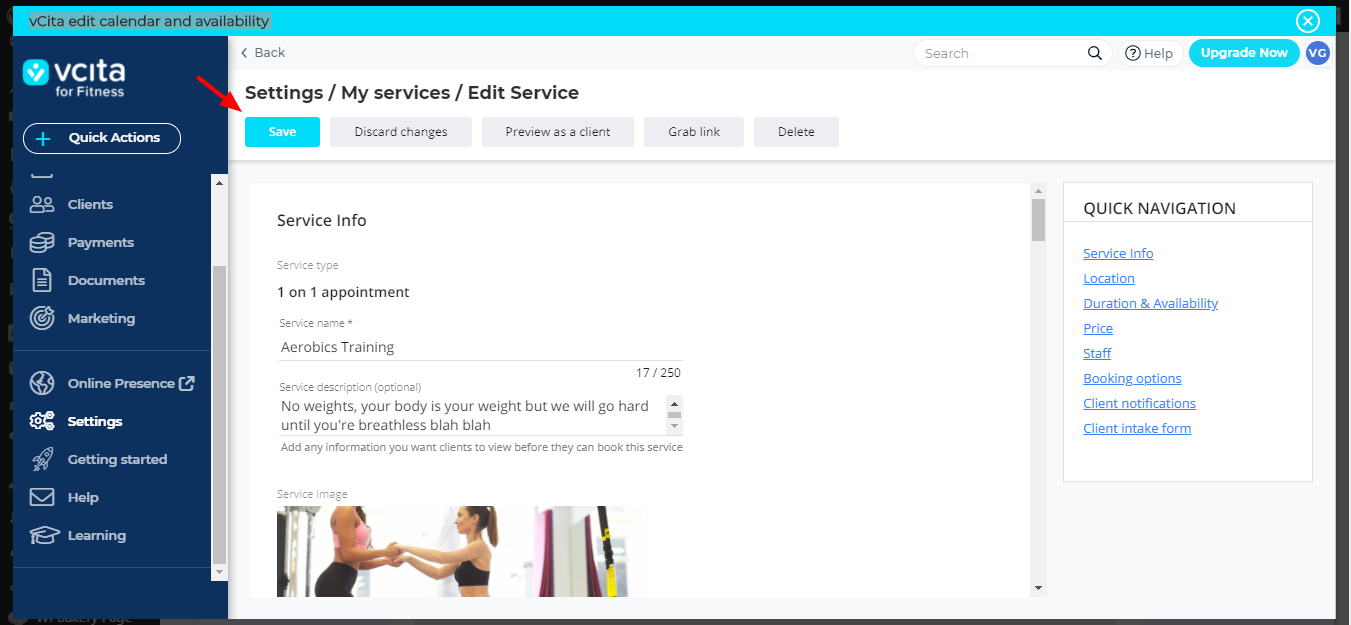
Don’t worry, you can still upload your images from the same popup. After entering all the required service info, click Save:
We will assign Aerobics Training to Jane Doe. I went ahead and created a 1 on 1 Appointment service for our friend John Doe. He will be helping people lift weights 🙂
Now that we have two services to work with, let us add some staff members. I will add Jane Doe and John Doe for some variety, but the process is easy as it gets.
Adding Staff Members
Go to your vcita dashboard and click Settings:
Next, hit the Staff tab:
After, click Add Staff:
On the popup that loads, enter basic employee details and then click Advanced:

On the Advanced Staff Editing page, you can add more staff details including profile pictures, schedules, assign appointments, set up notifications, and more. Click Save Changes at the bottom after entering your details:
I did the same for Jane Doe, and now we have two staff members and both are assigned to our services. Next, I viewed my new vcita Gym website on the frontend, and I was impressed:
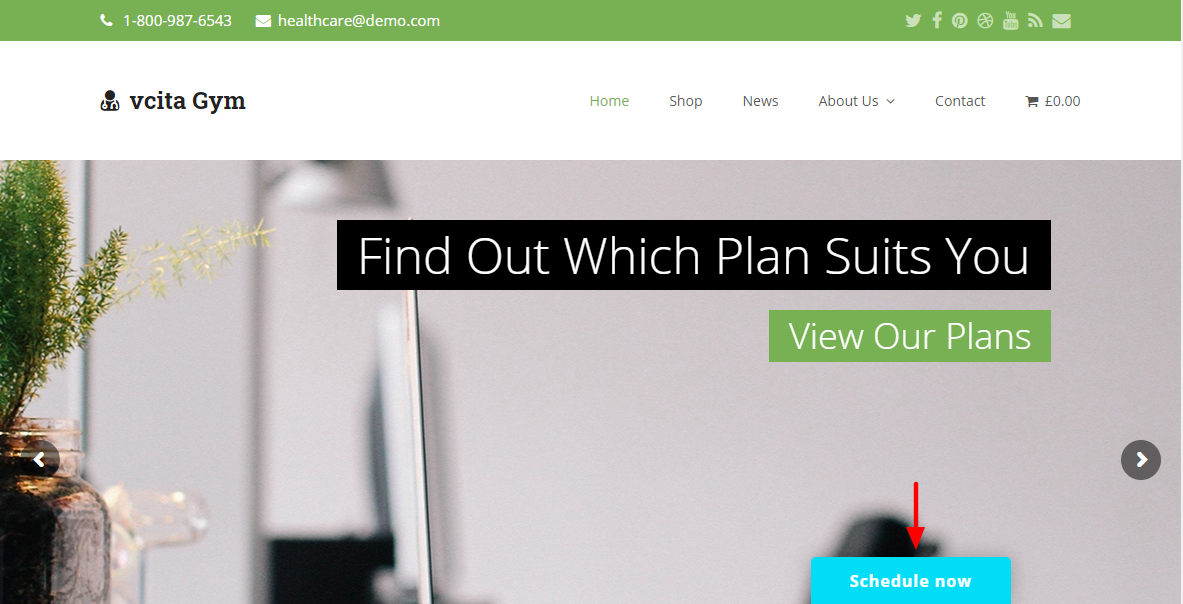
Let us go ahead and click the Schedule Now widget at the bottom, as shown in the image above. Doing so leads us to the following widget:
So I clicked the Schedule now button, as shown in the above image, which led me to the following popup:
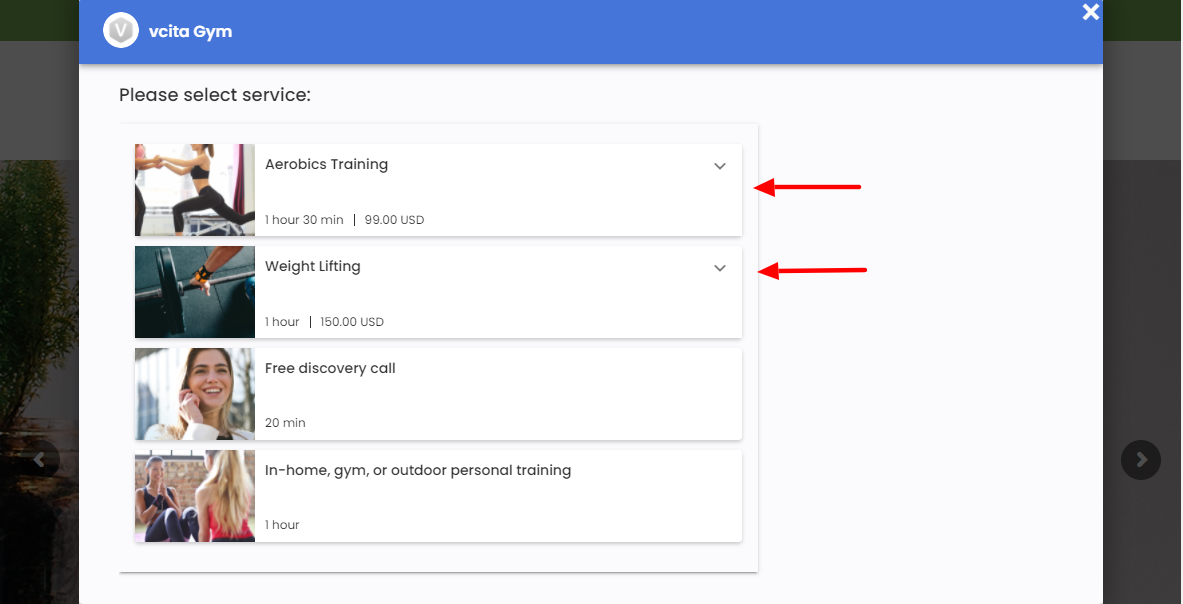
Won’t you look at that!
Our two services are there, looking all snug and ready to make us some money. Let us test out the booking process. I went with Aerobics Training because Jane Doe comes highly recommend, and I don’t lift weights. Hehe.
So, I clicked Aerobics Training and then Book This Service, as shown below.
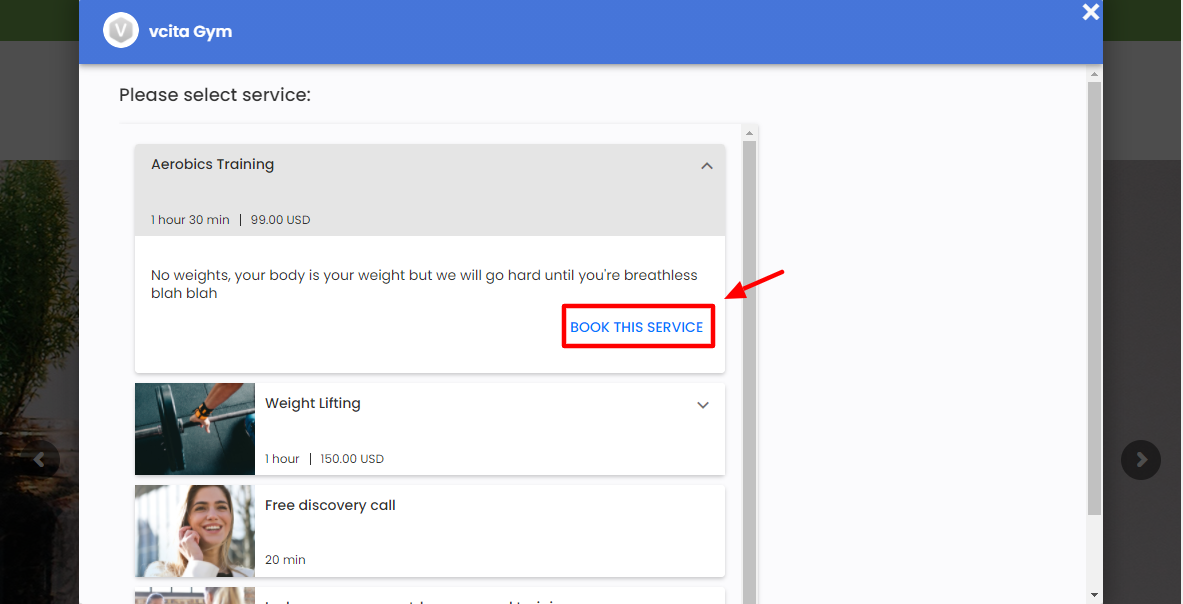
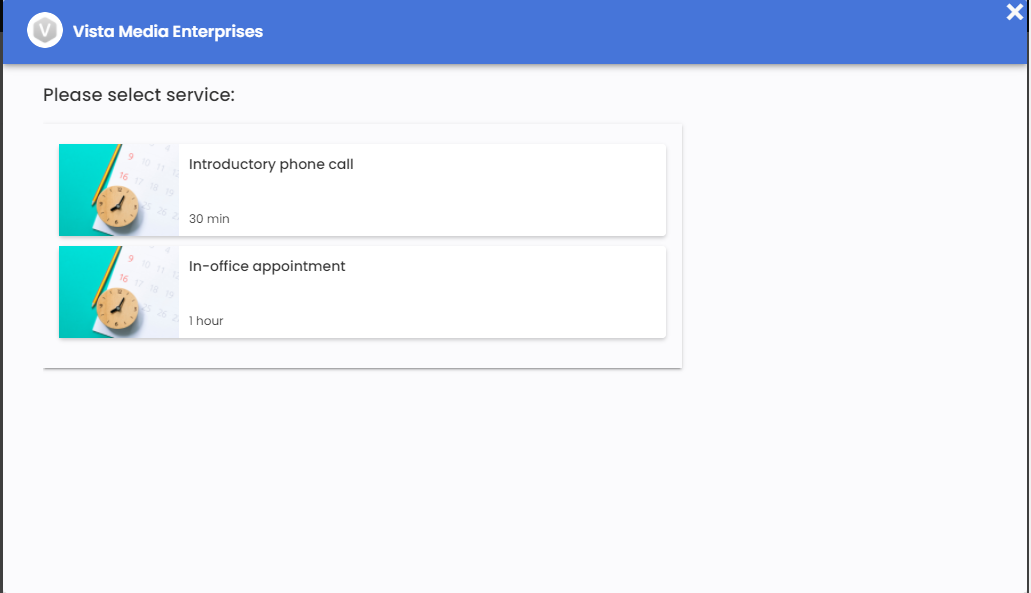
Which led me to this nifty screen:
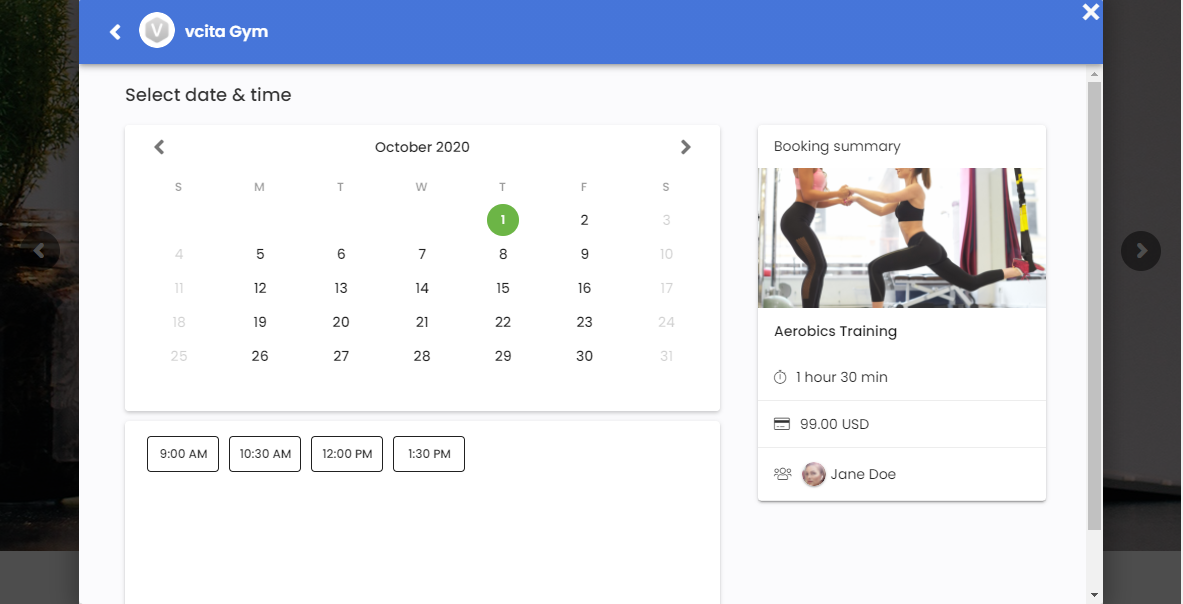
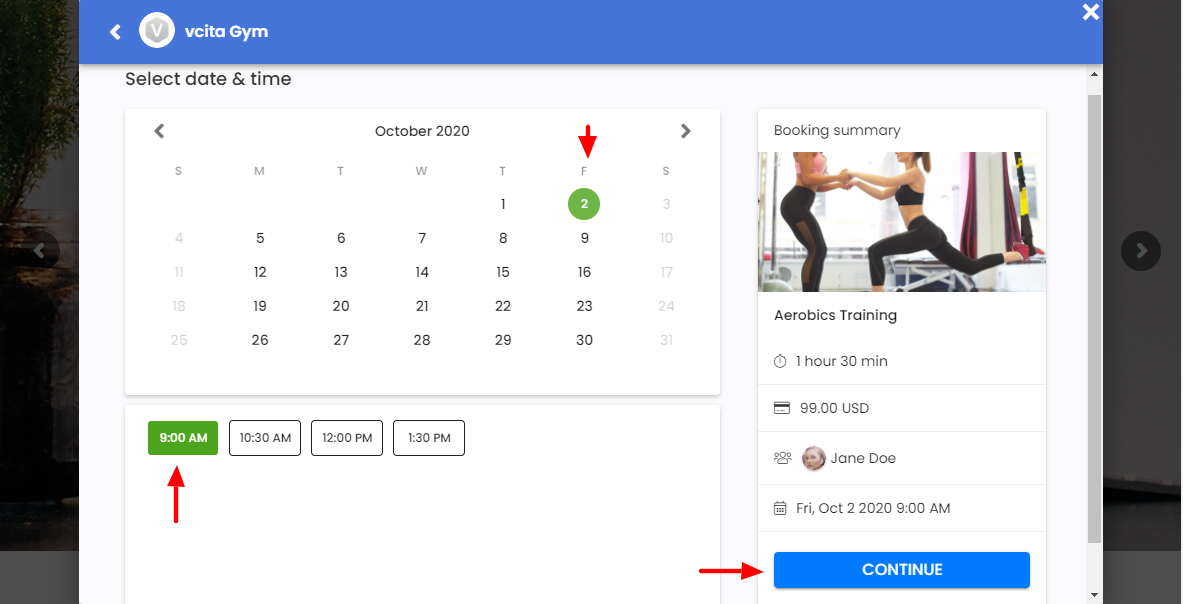
Notice our gym remains closed on weekends and the booking calendar reflects that. Visitors can’t book on Saturdays and Sundays. Also, We have four time-slots because each Aerobics Training session takes 1 hour 30 mins. So I went with Friday, Oct 2nd, and 9 AM and clicked Continue:
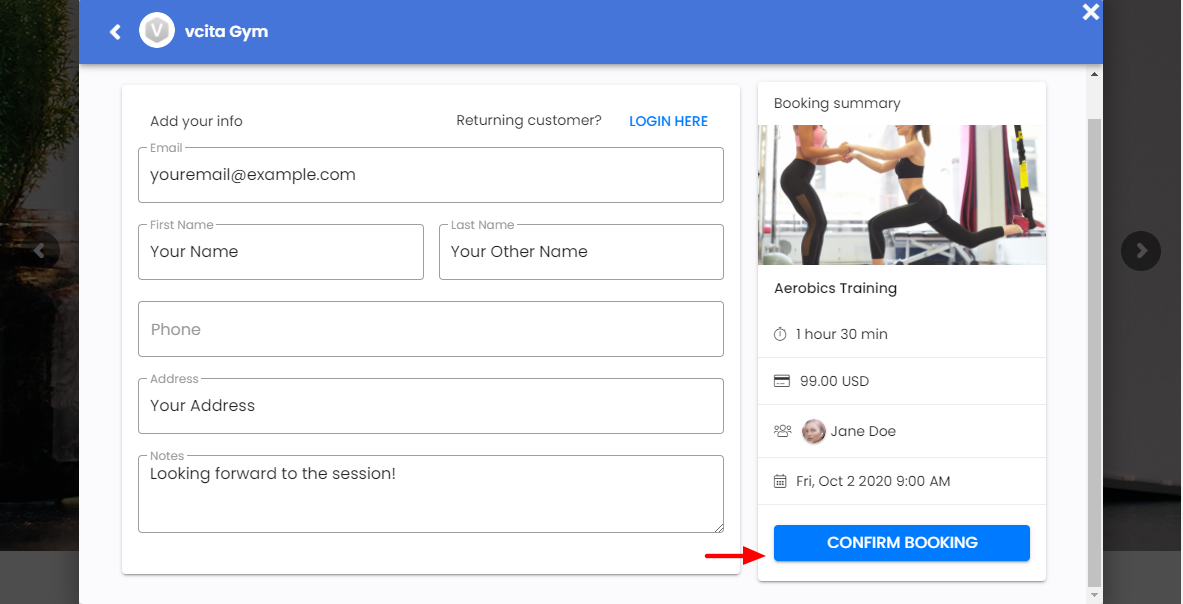
On the next page, you have a beautiful booking form. Fill out the fields and click Confirm Booking:
And Houston, we have lift-off. Here’s a successful booking:
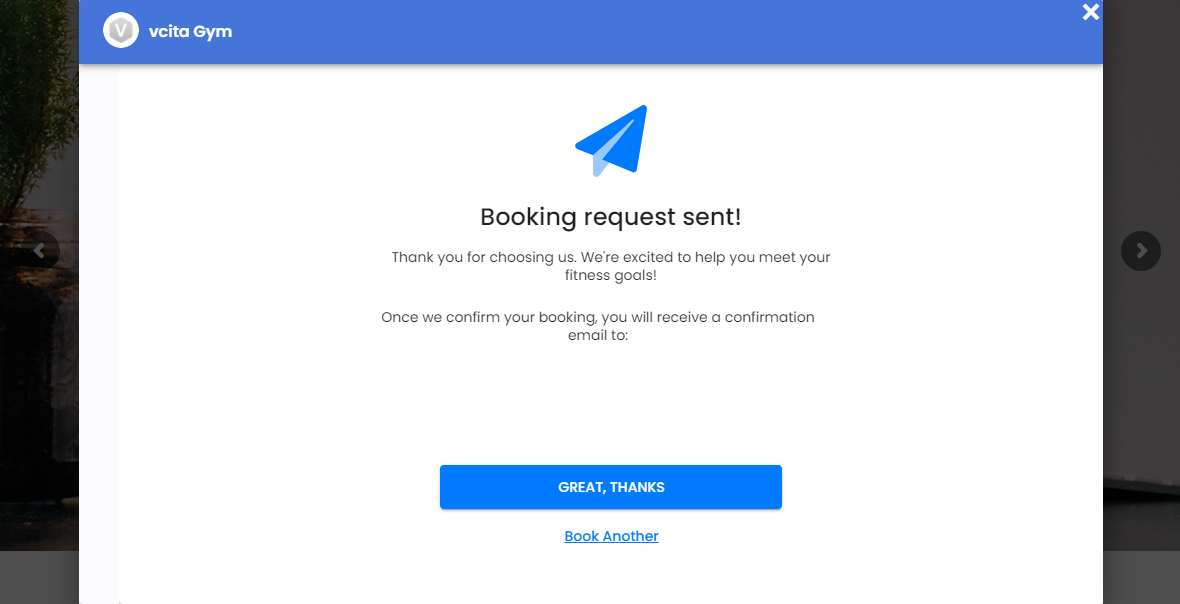
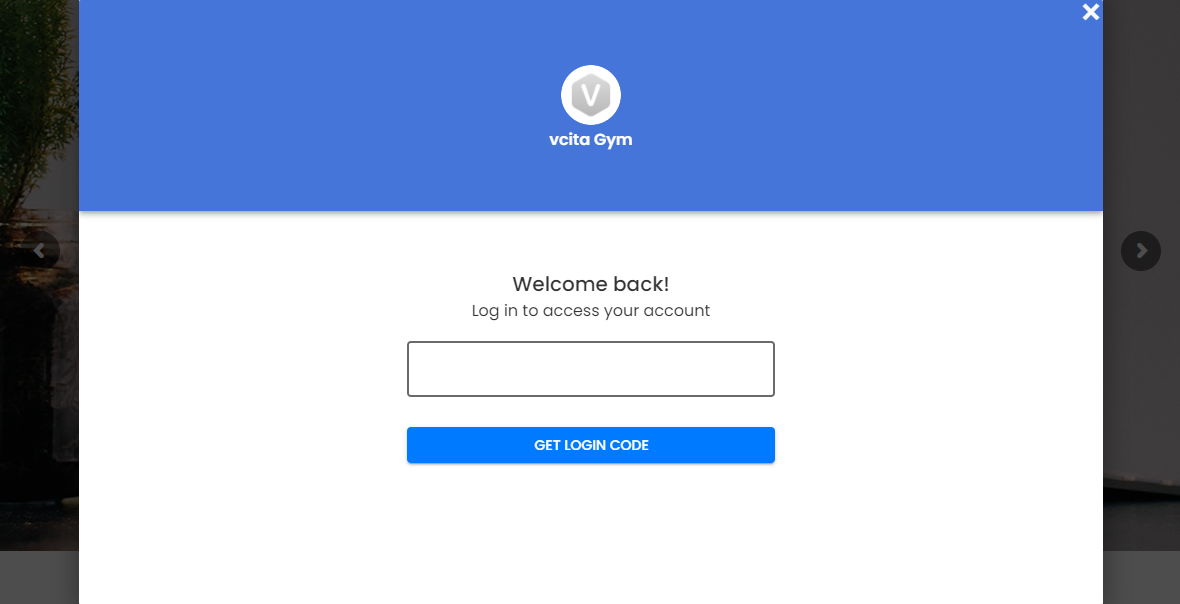
Your client can choose to Book Another service or click Great, Thanks to return to your website. If they choose the second option, they will have a chance to generate a login code to access their account:
How sweet?
As soon as I entered my email address and clicked Get Login Code, I received a login code to my phone via SMS!
I used it and was able to access my client dashboard on the frontend:

I also got this nice notification in my mailbox:
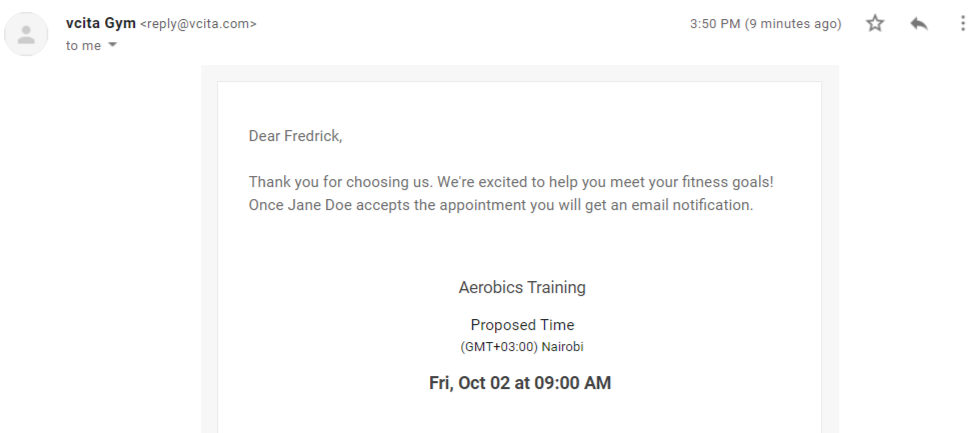
And yes, it didn’t go to spam 🙂
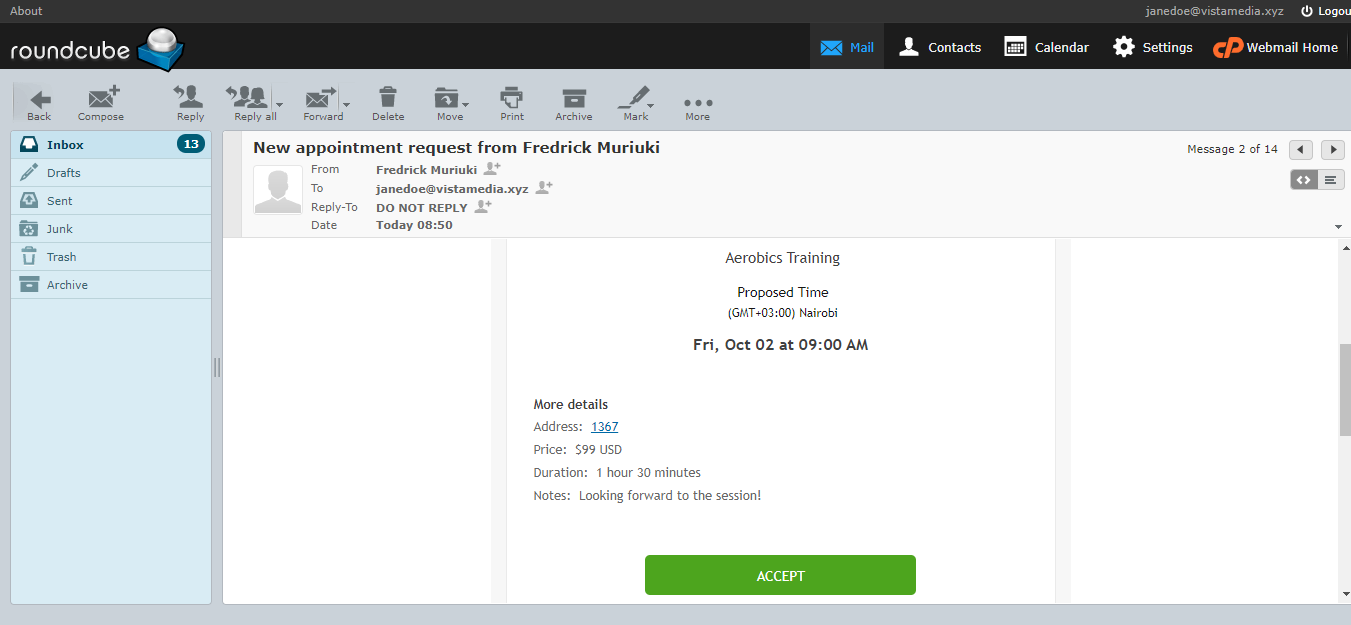
I also checked to see if our employees are getting notifications for new booking requests, and sure enough, it was working:
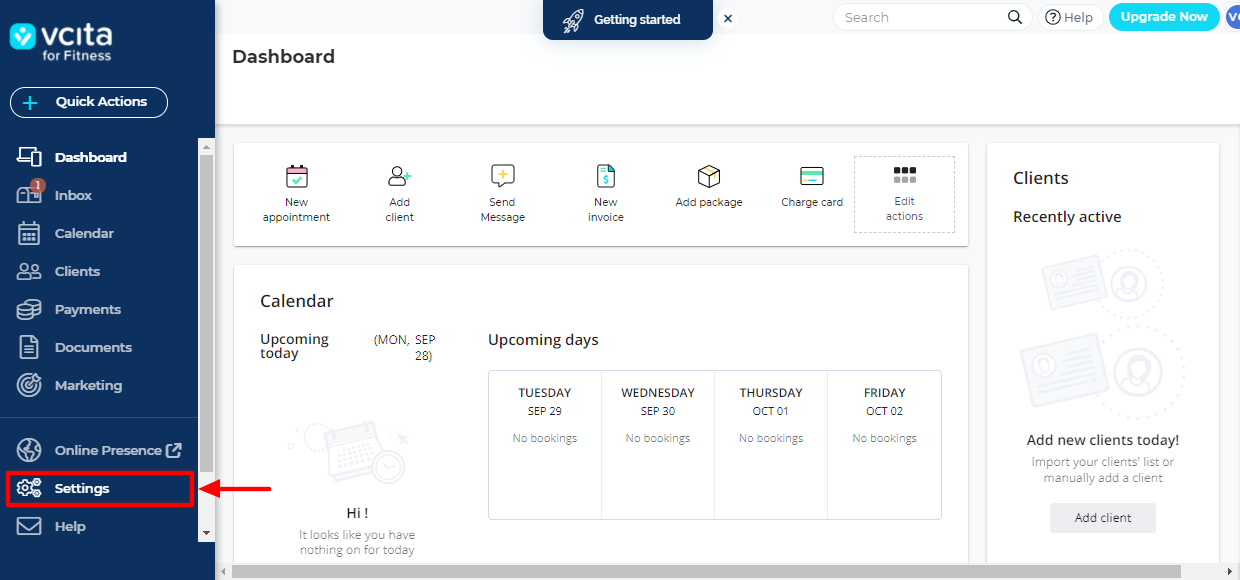
So I decided, let me check my dashboard and see if we’ve booked any appointments. I went back to vcita, and clicked Dashboard and look at that.
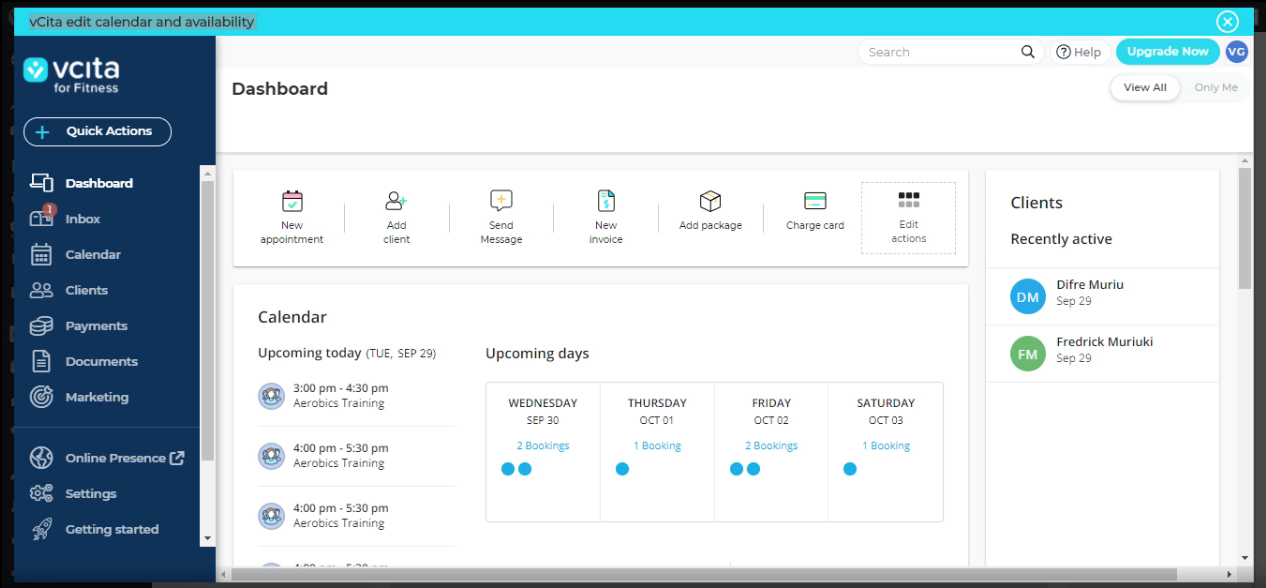
And there you have it, everything is there in one central dashboard. Mine is a basic example. You can bend vcita however you like and this bad boy won’t break. There are a ton of features to manage any service-based business you have in mind, no matter your needs.
Final Thoughts on vcita
vcita is quite a powerful management app for small businesses. The tool offers you plenty of options to perform administrative tasks without a hefty price tag.
It is easy to configure; you’ll be up and running in less than 10 minutes. Just create a vcita account, install the WordPress plugin, and manage away! For sure, you will save plenty of time and money. I guarantee you.
Did we miss something? Have a question or suggestion? Please let us know your thoughts in the comments.


Thank you for sharing.
No problem! I’m glad you like the review!