TranslatePress WordPress Translation Plugin Guide
I think you will agree with me when I say creating a multilingual website is no easy task. Especially for a beginner.
Which translation plugin do you choose? Do you translate your website manually or automatically? Do you hire a professional translator? Does translating your website affect your SEO rankings?
All these (and more) are pertinent questions to ask yourself as far as translating your WordPress website goes.
Turns out you can easily translate your WordPress website into more than 200 languages using the TranslatePress plugin.
And in this guide, we show you exactly how to install and translate your website with one of the best WordPress translation plugins of 2019 and beyond.
Read on to learn how you can use the TranslatePress WordPress plugin to offer your content and products to visitors from all over the world without breaking a sweat.
What is TranslatePress?

Before we get lost in the impressive suite of features, let us first learn more about this multilingual WordPress plugin.
What is TranslatePress? TranslatePress is a nifty WordPress translation plugin handcrafted by the same awesome guys who brought you Cozmoslabs. It is loaded to the brim with all the features you need to translate any type of WordPress website, including WooCommerce-powered estores. (yes, you can even translate WooCommerce Products).
TranslatePress is incredibly easy to use thanks to an intuitive interface that makes translating all the content on your website as easy as A, B, C. The best part is you can translate your website on the front-end.
According to a speed test for translation plugin performance carried out by Razvan Mocanu, TranslatePress is the fastest WordPress translation plugin on the web.
That is seriously good news if you want to provide super-fast translations to your readers. Keep in mind that page speed is one of the most important Google SEO ranking factors.
If you’re in the market for a WordPress localization plugin, we are confident you will love TranslatePress. The main plugin is free. You will, however, need premium addons to unlock the full power of the TranslatePress WordPress multilingual plugin. Luckily for you, we have our hands on the full premium package, so get ready to have fun.
That being said, let us cover a couple of key features to give you a taste of what to expect when you install the plugin on your beloved WordPress site.
TranslatePress Key Features
What’s the use of a WordPress plugin that promises you heaven but delivers hell in terms of features? TranslatePress ships with an awesome list of features that make translating your WordPress website a breeze.
We are talking about features such as:
- Ability to translate your entire page, including content from shortcodes, forms and page builders
- You can translate dynamic strings that are added by WordPress, plugins and themes
- Seamless integration with the Google Translate API, which means you can accelerate the translation process. You just need a Google Translate API key and you’re golden
- TranslatePress is GPL and self-hosted meaning you own your translations forever. This also means you can serve your translated pages in a faster manner because they are stored locally, and not on 3rd-party translation servers
- You can translate your website on the front-end using an easy-to-use interface, which makes your work easy
- 221 languages at the time of writing meaning you are primed to take over the world without any hiccups
- The plugin is SEO-friendly seeing as you can translate the page slug, SEO page title, description as well as Twitter and Facebook social graph info. Besides, the plugin supports the Yoast SEO sitemap
- TranslatePress works out of the box with WooCommerce, all WordPress themes, site builders and custom post types
- Translator accounts that allow users to translate content without admin access (add new translator account by navigating to Users -> Add New and choose Translator as the role)
- Automatic user language detection
- A Browse As feature that lets you see your site like your users see it
- Customizable language switcher
- World-class support
How to Install the TranslatePress Plugin
We are working with the premium version of TranslatePress for this guide. As such, you need to buy a license from Translatepress to fully enjoy this post.
They offer three price packages namely Personal at $89 bucks per year, Business that costs about $157/year and Developer that will set you back $225 annually.
Choose a package that works for you. For this guide, we went with the Business package to offer you the full picture.
That aside, let us install the TranslatePress plugin and test the translation process.
Installing TranslatePress WordPress Plugin
By the way, you can install the main plugin from the WordPress plugin repository. Then you’ll have the option to upgrade to the premium version using addons at a later time.
After purchasing a license from the official website, you will receive an email with your download links.
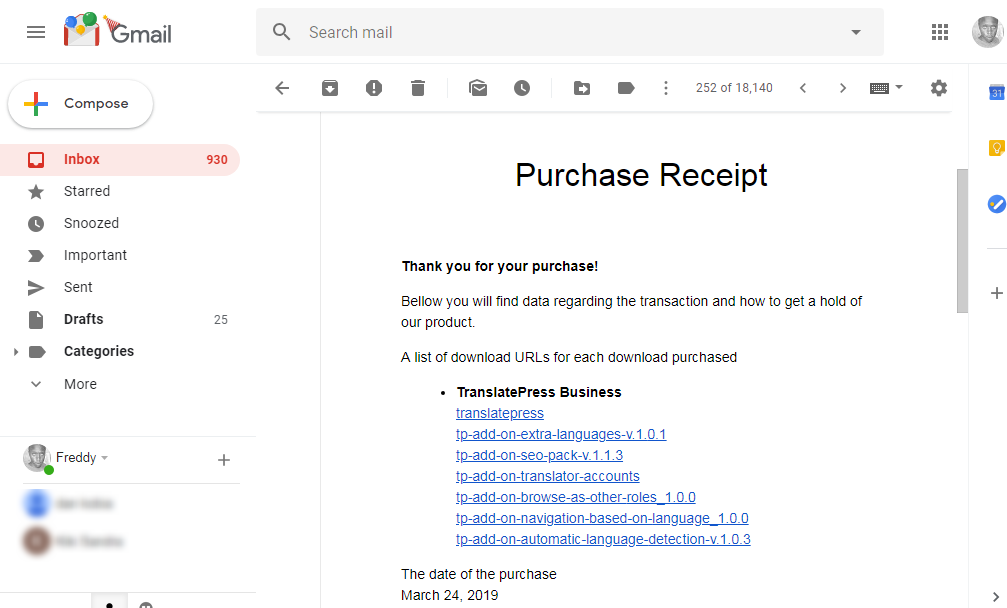
Alternatively, you can download the main plugin and the addons (as well as view your license key) from your TranslatePress account as shown below.
![]()
Go ahead and download the main plugin ZIP file to your computer by hitting the Plugin Download button as shown above. Download the addons as well using the Addons Download button.
Note: You must install the main plugin first, then the addons.
Installing the Main TranslatePress Plugin
Navigate to Plugins > Add New, then click the Upload Plugin button as shown below.
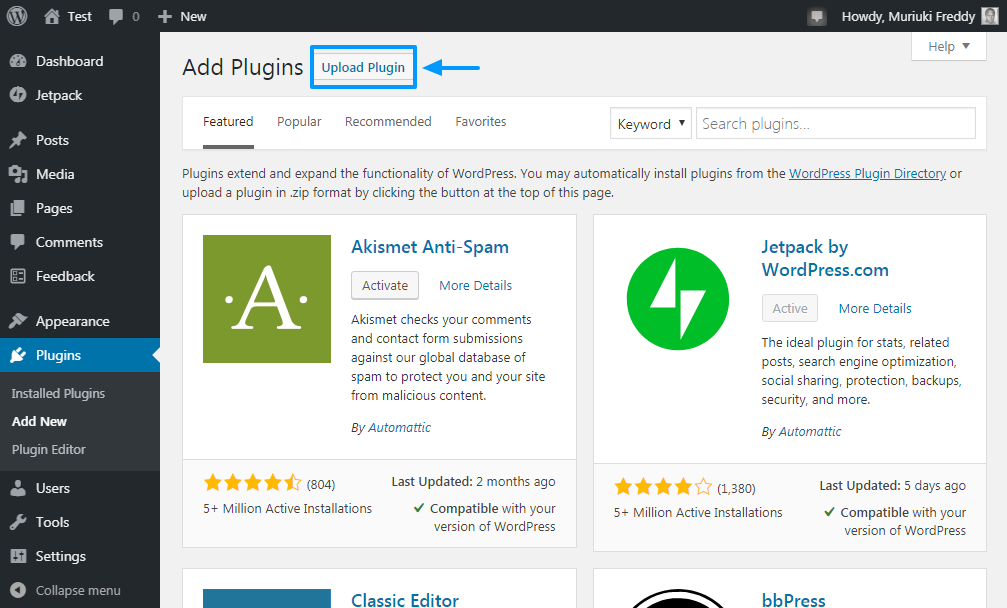
Choose the main plugin zip (translatepress-multilingual.1.x.x) and click the Install Now button as we detail in the image below.
![]()
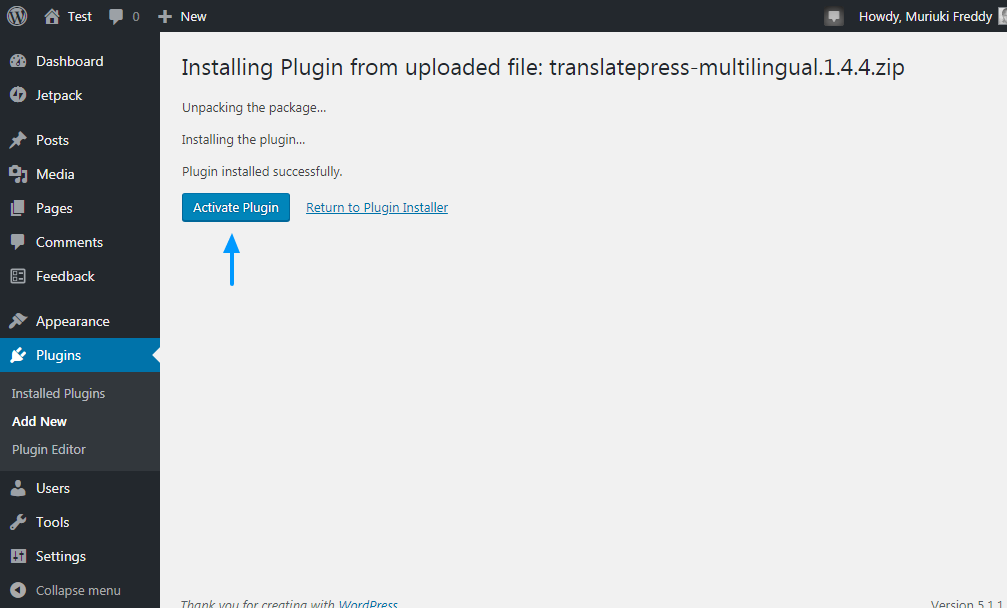
Wait until the installation process to complete and then hit the Activate Plugin button to get the ball rolling. See image below.
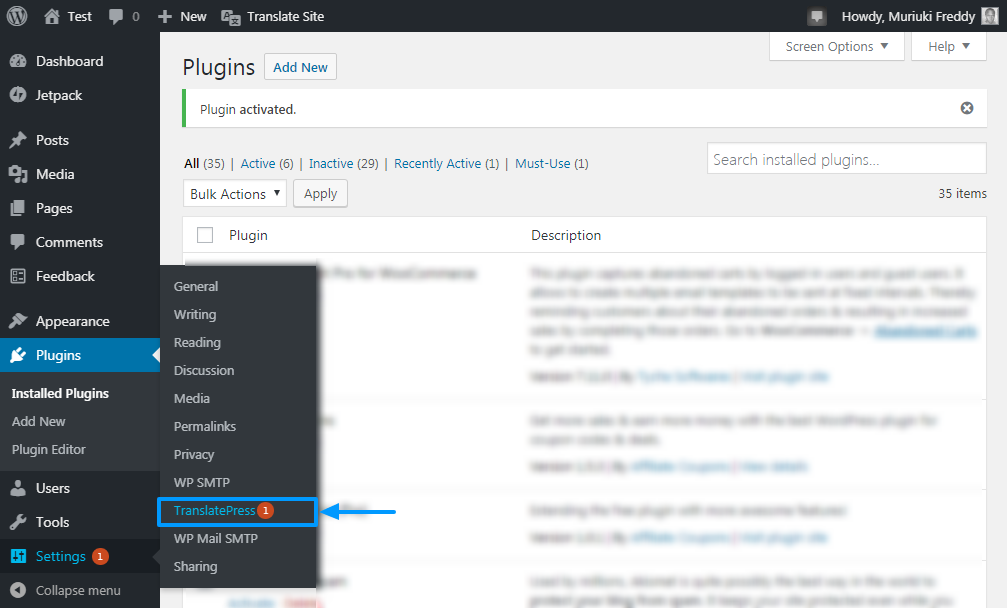
Now, your main plugin is ready to use. Navigate to Settings > TranslatePress to access the options page as we highlight below.
And here is how the TranslatePress options page looks like at the time of writing.
Before proceeding further, you need to activate your license. Don’t fret none, the process is simple.
To begin with, you need to install and activate one of the paid addons to activate the License tab on the TranslatePress settings page.
Go ahead and install and activate one of the paid addons you downloaded earlier (follow the same process we used earlier to install the main plugin).
Since I have a thing for WordPress SEO, I installed the SEO Pack add-on. Now, our TranslatePress settings page has the license tab as shown below.
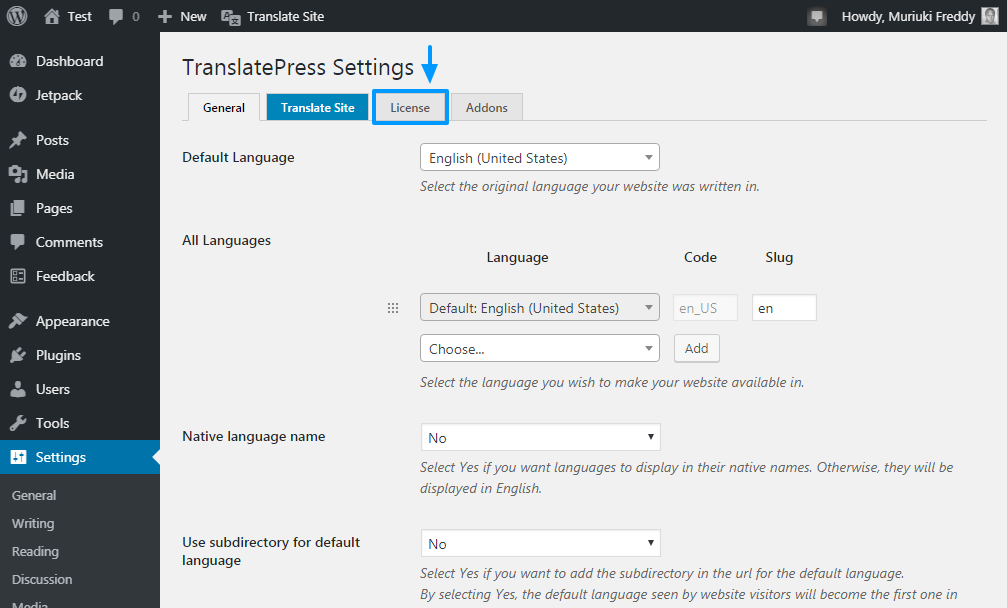
Now let us activate the license. Navigate to Settings > TranslatePress and click the License tab.
Next, copy/paste your license key from your TranslatePress account into the License Key field and hit the Save Changes button as shown in the following screenshot.
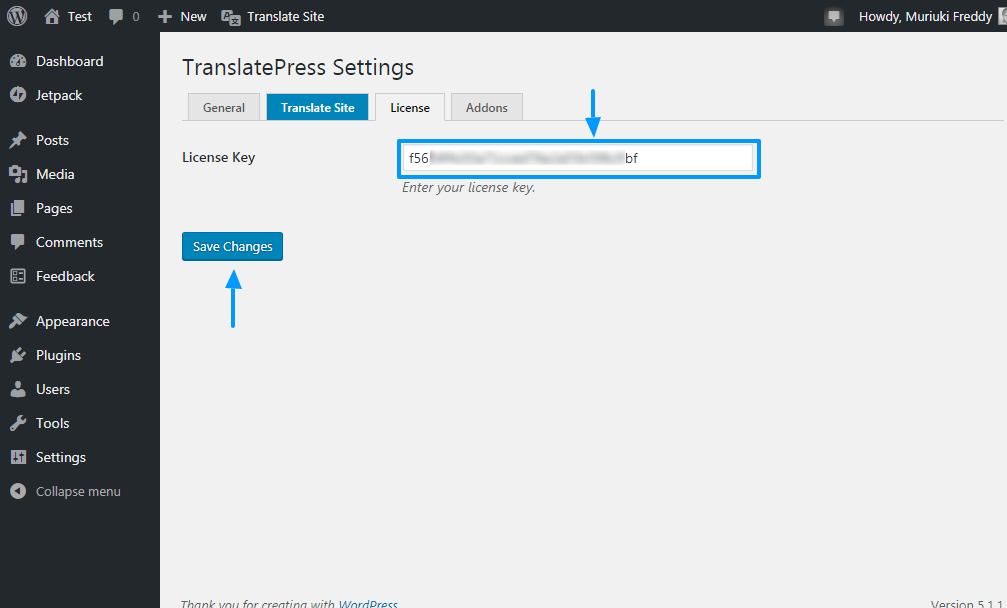
Next, hit the Activate License button that appears as shown below.
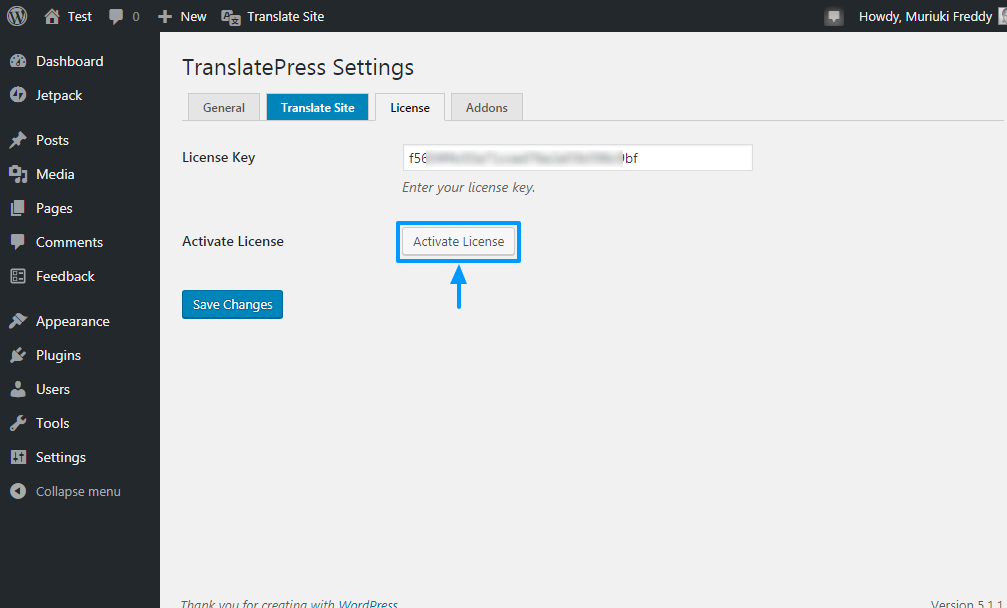
At this point, your license is active and you’re ready to rock the party. You can install and activate all the other addons as we did.
They do look good – all those addons, right? Moving on swiftly.
TranslatePress Settings
With the plugin and addons installed and the license activated, it’s time to see the options available in this great translation plugin.
To access the settings/options page, navigate to Settings > TranslatePress on your WordPress admin menu as we did earlier.
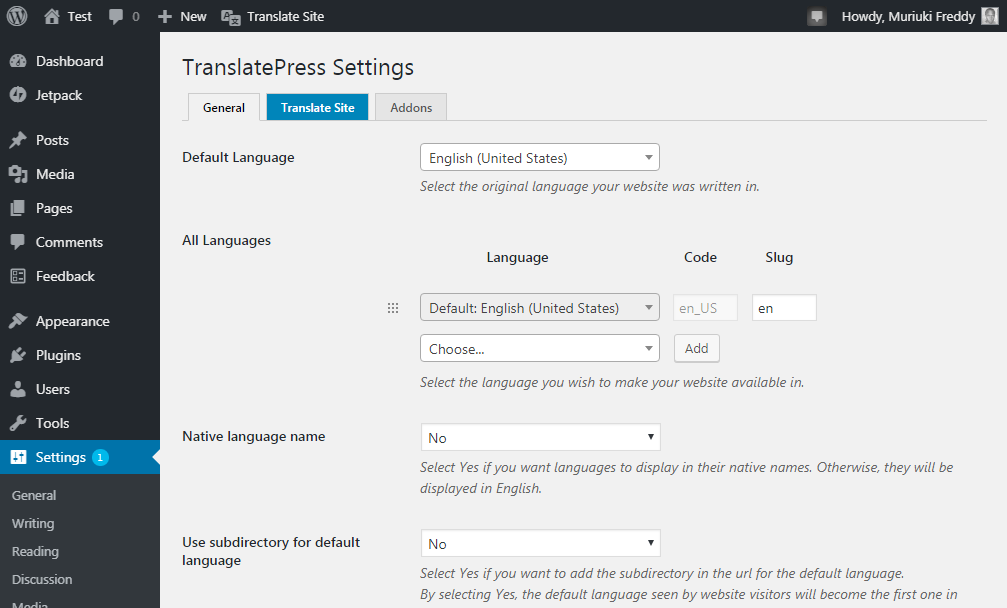
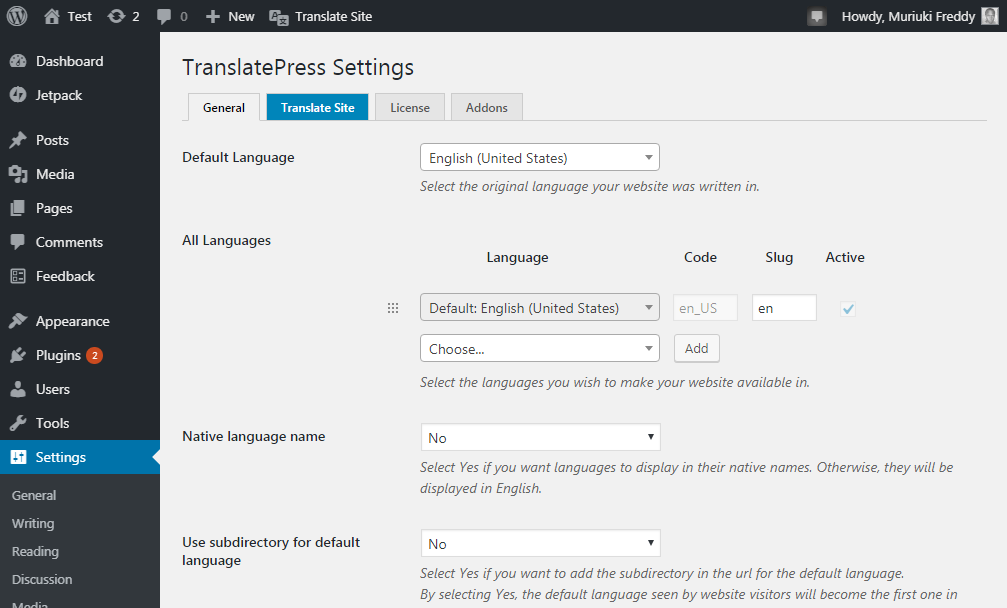
The options page (aka the General tab) is home to a couple of settings that help you to hit the ground running.
On the General tab, you will find an option to select:
- Default website language, which is the original language your website was written in. For our guide, we chose English (United States).
- All languages you wish to make your website available in (Remember, you have access to 221 languages at the time of writing).
- To display languages in their native names. If you choose No, they will be displayed in English. I went with YES.
- If you would like to force custom links without language encoding to keep the currently selected language.
- To activate Google Translate.
- Add a language switcher on your menu or on any page via shortcode.
- Method of language selection for first time visitors.
- And so on…
Once you choose your general options, don’t forget to click the Save Changes button at the bottom of the page. With the general options set, let us translate your website.
Translating Your Website with TranslatePress
Translating your website with TranslatePress is as easy as 1, 2, 3. Things get even easier because you use the visual editor shown in the screenshot above.
To translate your WordPress website, click the Translate Site tab as shown below.
![]()
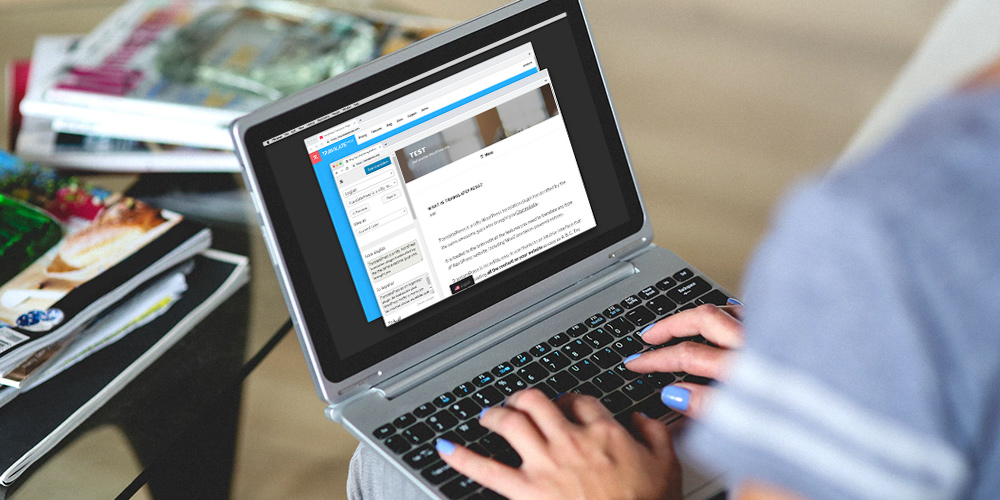
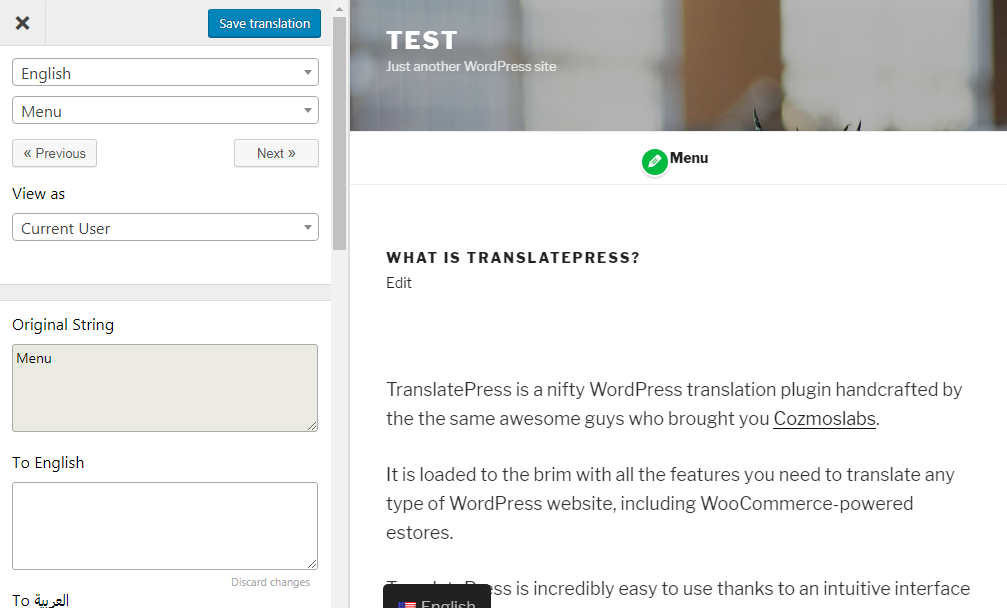
Doing so will redirect you to the TranslatePress visual editor in a new tab. Using the visual editor is the stuff of fourth graders. Really, it’s a matter of point and click.
TranslatePress Visual Editor
![]()
All you have to do on the visual translator is:
- Choose the section you want to translate
- Provide the translation manually (automatic translation is only possible after you activate the Google Translate API)
- Hit the Save Translation button at the top of the screen
You will agree that’s pretty straightforward.
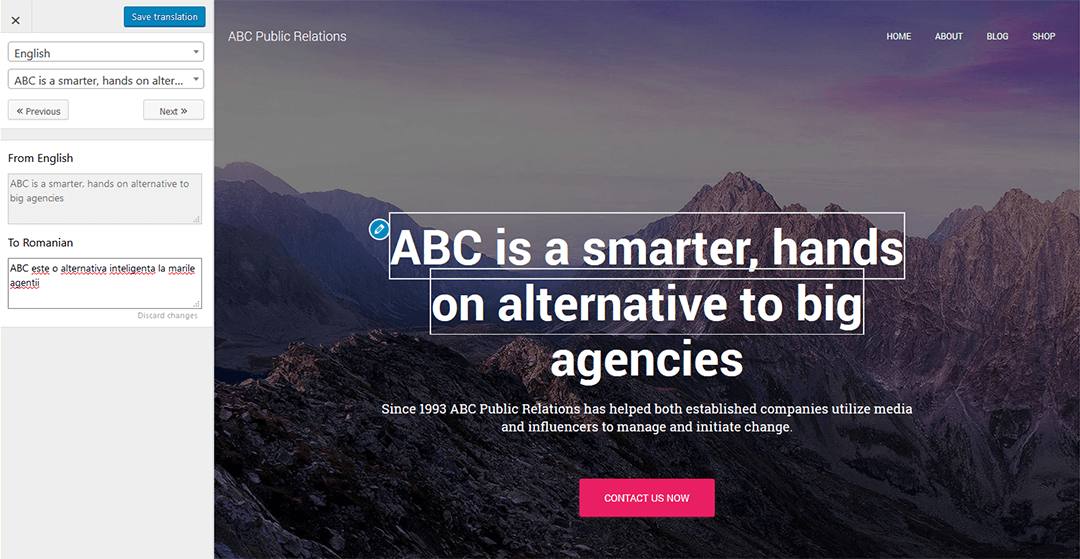
Let us translate our sample shown below from English to Spanish.
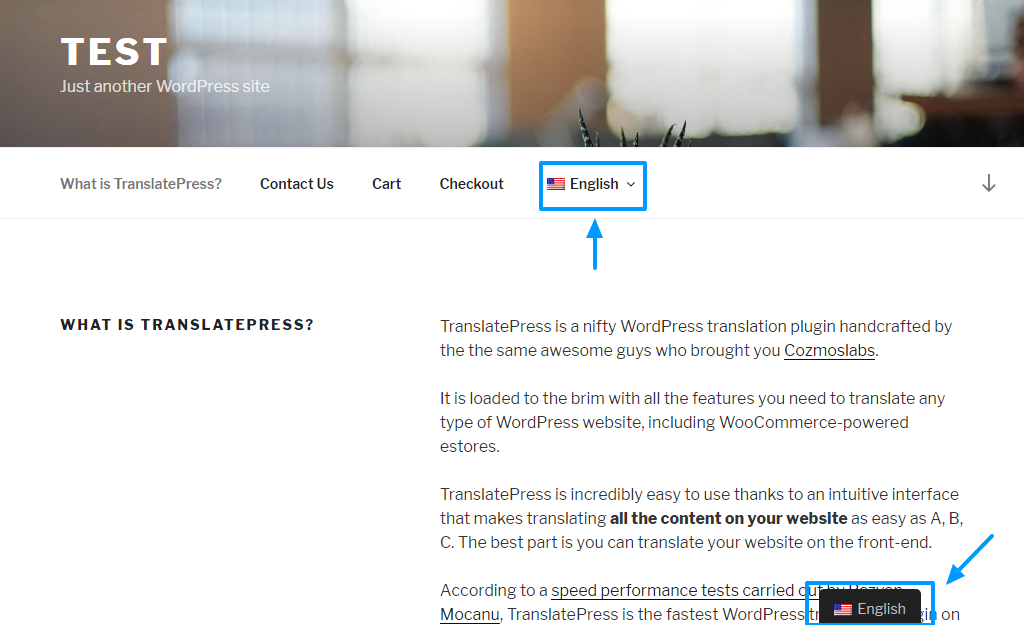
From the image above, notice the highlighted language switcher I added to the top menu. The one at the bottom of the page appears automatically. You can activate/deactivate the language switchers from the General tab.
How to translate our sample page?
Well, I selected each section I wanted to translate (you can choose all elements on the page, but I went with the body of the page for this guide), provided the translation via the left panel and hit the Save Translation button. See image below for the steps in order.
![]()
See? It is so simple to translate your WordPress website with the TranslatePress plugin. After translating my sample page, this is what I got when I switched the language to Spanish.
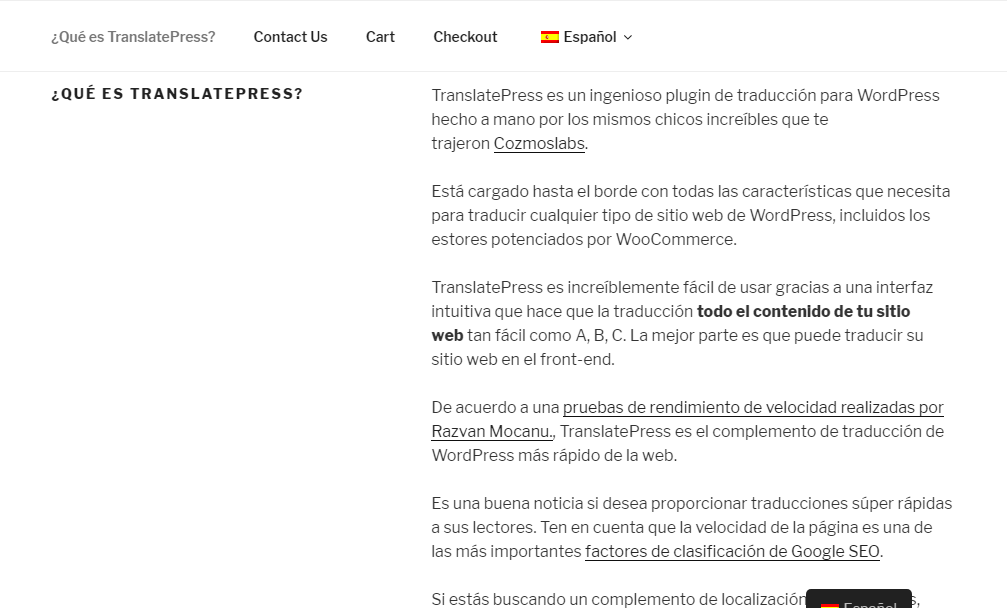
Wow! So easy 🙂
To translate your website to other languages, you follow the same process. To translate the website automatically, you need the Google Translate API. After automatic translation, you can always check your results to ensure everything is okay.
Conclusion
Translating your WordPress website with TranslatePress is so easy you needn’t look for another solution. The plugin is easy to configure and extend, plus everything you need is in one central options page.
Other than that, the visual editor makes translating your website incredibly simple you’ll be smiling every time you need to translate your website.
Still not sold? TranslatePress even provides a detailed WordPress translation plugin comparison of free and premium options. This is a great way to compare the most important features for a multilingual plugin, and to see how TranslatePress compares to other popular solutions.
Did we leave something out? Have you ever used TranslatePress in the past? Which is your favorite WordPress translation plugin? Let us know your thoughts in the comment section.
Happy translating!


Hi Freddy.. Thank you for the valuable information. I’ve never used Translate Press nor any before… But I’ll give a try now because my blog deals with helping Content Marketers succeed.
Thanks once again!
Hey Godwin, thank you for passing by and the compliment. I’m glad you found the post useful. Please do try TranslatePress and share your findings. We would highly appreciate it 🙂
Hi, many thanks for your post.
I have a problem and can’t find the solution. When I click save changes it get stuck on saving translation and nothing happens. It never says saved. I read that I have to be sured that I’m on HTTPS, and I am. Do you know what could be the problem?
Thanks!
Try using the TranslatePress troubleshooting guide or their FAQs – if you can’t find a solution there you may need to reach-out to the developers.