Yoast SEO Installation & Setup Guide for WordPress
SEO or Search Engine Optimization is the key to make your website and blog profitable. SEO can make or break your blog. It helps to determine your site’s relevancy for key search terms and where you belong in search results. This means that the better your SEO, the easier it is for new visitors to find your content which could result in an improvement in your traffic. One of the easiest ways to improve your WordPress site SEO is with the free Yoast SEO plugin.
The Yoast SEO WordPress plugin is one of the best SEO plugins around to help optimize WordPress blogs, plus it’s completely free. With more than 10 million downloads and counting it’s a great choice for any WordPress site.

Although there are many guides for setting up Yoast SEO around the web we wanted to walk you through the steps and show you the options we think are most important within the plugin. So without waiting any long, let’s get into installing Yoast SEO to get the most out of it for your blog.
Yoast SEO Plugin Installation & Setup
First of all, you need to install the plugin. Yoast SEO installs just like any other free plugin from WordPress.org so the following steps should be somewhat familiar to you:
- Log into your WordPress installation
- From the Dashboard, navigate to Plugins > Add New
- Search for Yoast SEO – it should be the very first result (the one with a stop light logo)
- Click the Install Now button
- Once the plugin is downloaded and installed, click to Activate Plugin
And that’s it! You’re installed and ready for setup. You should see a new menu item titled SEO towards the bottom of your Dashboard. Click on the SEO link to get started!
Note: Though the settings may vary based on your own individual requirements, the following are basic options most WordPress blogs will want to take advantage of.
Yoast SEO Dashboard
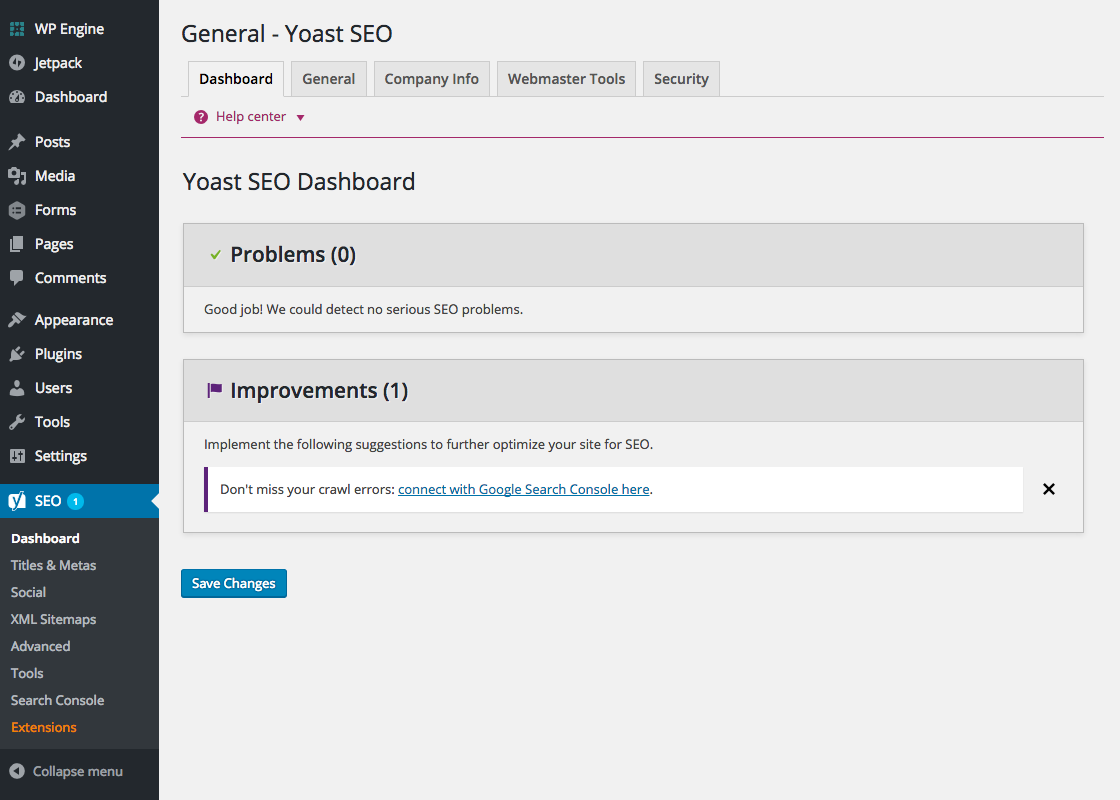
The very first screen you see should be the Dashboard. Your Yoast SEO dashboard is a great place to start after installing the plugin. There are five tabs in this section, all with important features and options to consider.
- The main tab within the Dashboard will show any SEO problems or recommended improvements the plugin has found for your site. This is a quick and easy way to stay on top of your onsite SEO.
- Under the General tab you’ll find an option to reset Yoast SEO to its original settings. After installing any plugin many users like to test or try options, and this offers a simple way to get back to where you started so you can enable only the most useful options for your site.
- The Company Info tab is just what it sounds like, basic information about your website. We recommend at least setting your website name, whether you are a company or a person and your company/personal name. There are added options for an alt name and logo, but that’s up to you.
- Use the Webmaster Tools tab to verify your site on major search engines and to enable your OnPage.org indexibility check.
- Lastly, the Security section offers the option to enable the advanced Yoast SEO meta box. This is an option that most users won’t need since it’s mainly for noindexing posts and dealing with canonical content.
Yoast SEO Titles & Meta

Moving on, the next step is to setup your Titles & Meta. This is an important one, since you’ll be setting up the options for how your page and post titles are displayed in search results.
- Starting with General, first make sure to choose your preferred separator to be used for all of your titles. We recommend the – (dash) or | (pipe) as these are common and familiar to most users, but which you choose shouldn’t have any effect on your SEO.
- Next go to the Homepage tab and set your homepage title and meta description. This is very important and is what will appear when your website shows up in search results. Make sure what you write is relevant to your website as a whole, but also be sure to use keywords you hope to rank for.
- The Post Types, Taxonomies and Archive tabs all offer similar options to set your preferred title templates and meta description templates for various pages throughout your site.
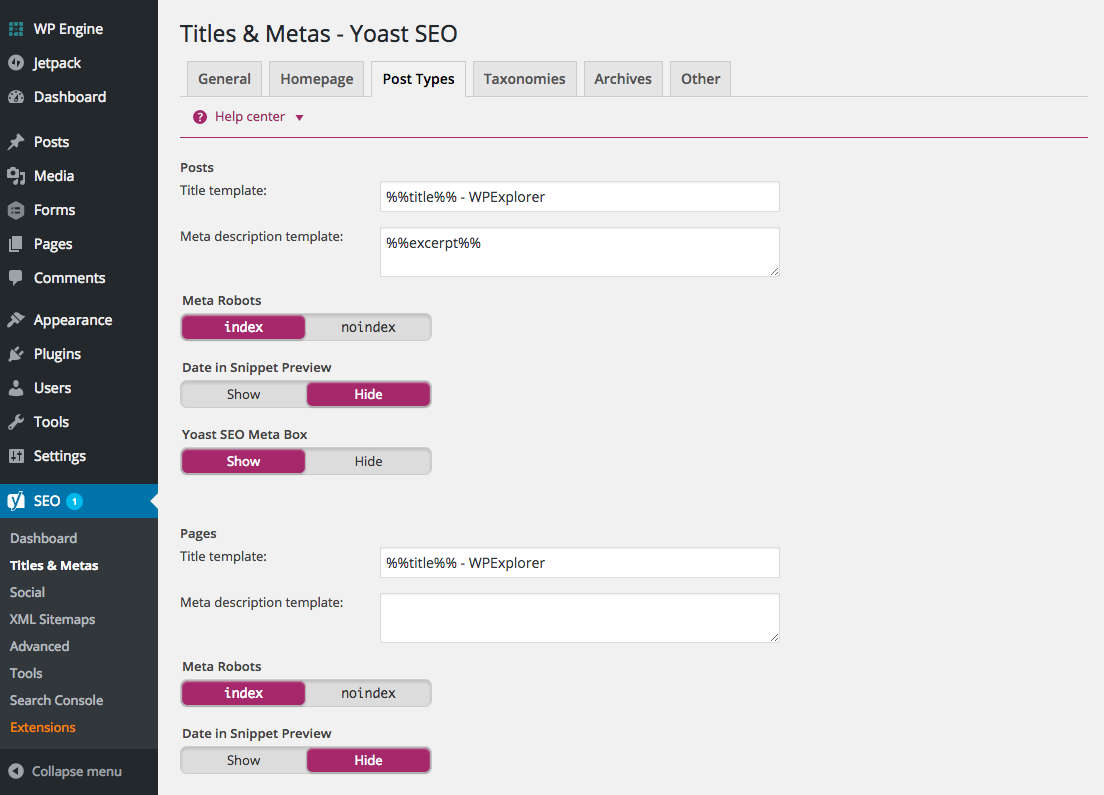
Notable settings include options to noindex your tags (which if you’re not using them it’s a good idea to set this to noindex) and the ability to disable date based archives (because most of your readers will be searching based on context, not date). - The final tab for Other is where you will find sitewide meta options. Most users will have these options disabled, but if you really want to index your archive sub pages, enable meta keywords tags or prevent search engines from using default description snippets in your results you can.
Yoast SEO Social
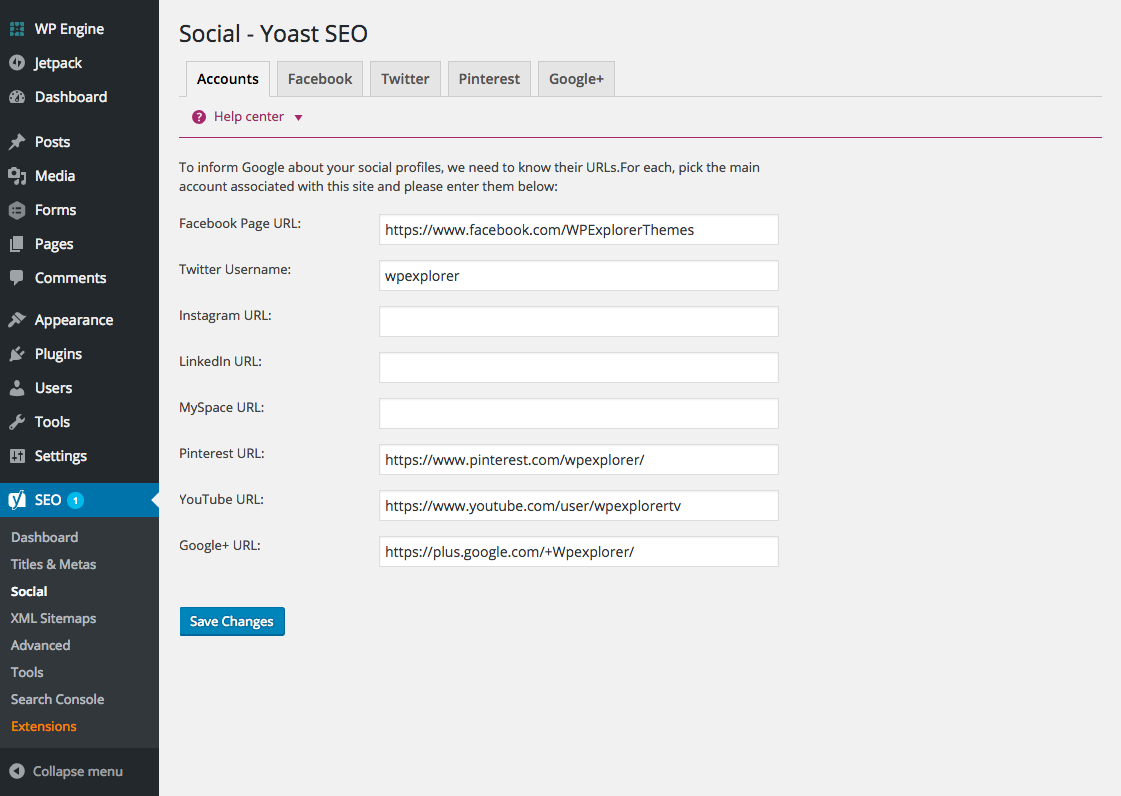
Yoast makes integrating your social networks with your SEO simple. All you need to do is paste in your relevant social profile links under the Accounts tab and save your changes. If your interested, under the added social tabs there are options to enable your Open Graph metadata for various networks as well as link directly to your Google+ company page.
Yoast SEO XML Sitemaps
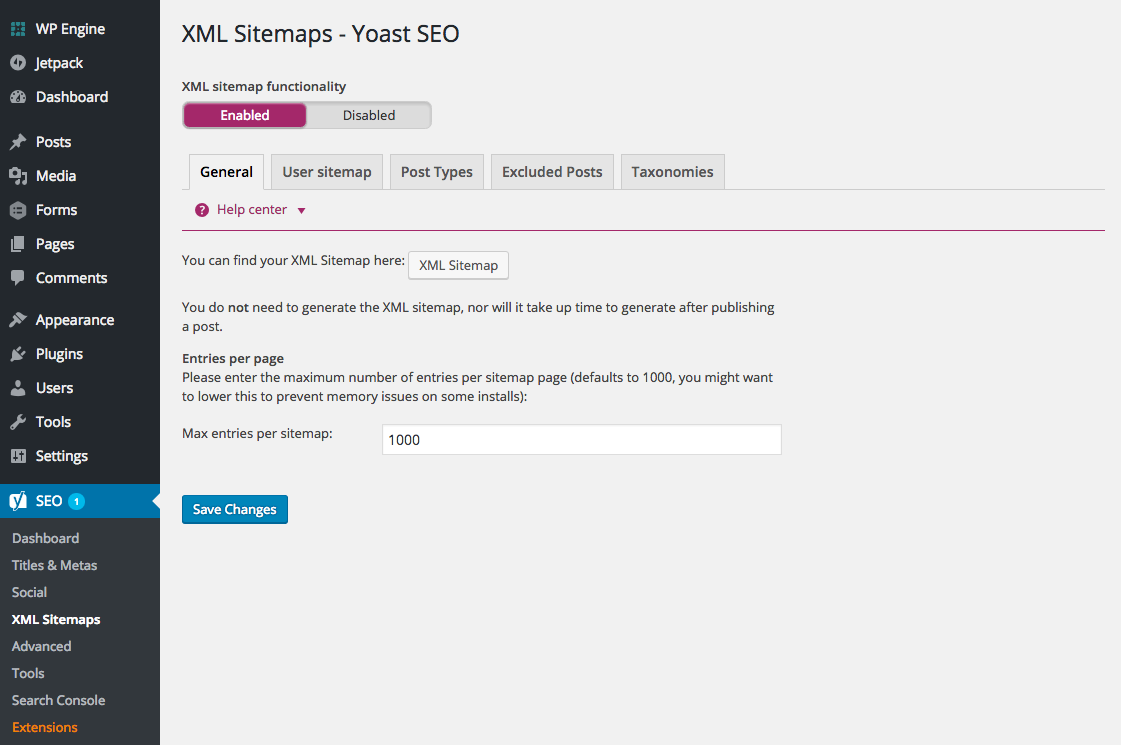
If you aren’t using the Google XML sitemaps plugin, I suggest you to enable the Yoast XML sitemaps option. It helps to create a clear sitemap structure for Google to crawl. Choose what you want to display in sitemaps and save.
Yoast SEO Advanced Options
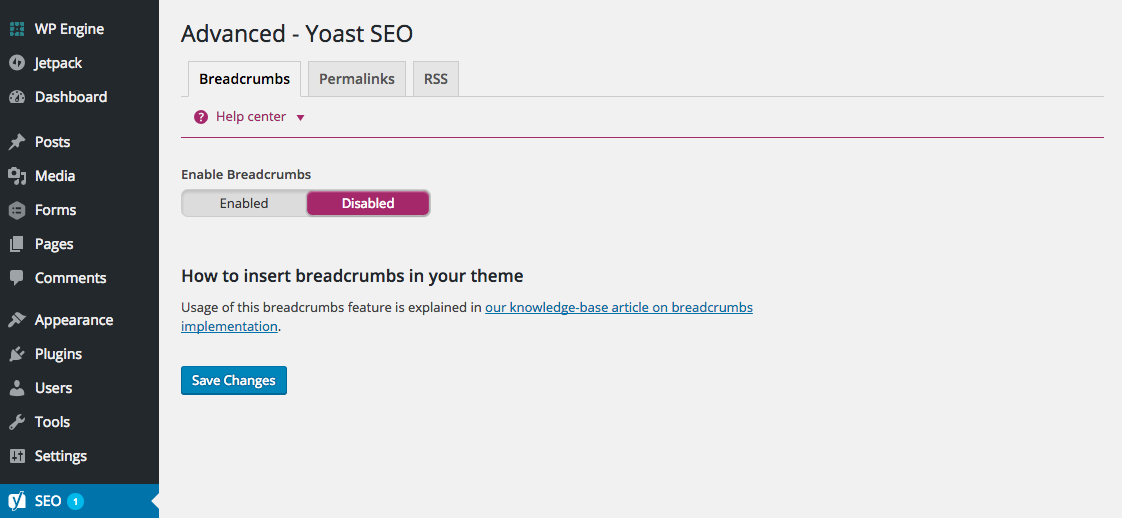
The Advanced section of Yoast SEO offers three very important options groups you won’t want to forget – breadcrumbs, permalinks settings and your RSS feed.
- Breadcrumbs show the path to the page a user is currently on (often shown as home > category > post-name or something similar) and are essential to every website. Your theme must support the Yoast SEO Breadcrumbs function in order for it to display. Alternatively you can follow Yoast’s guide to add the custom code.
- Under the second tab you’ll find options for your Permalinks to improve your site link structure. Options we recommend include stripping your category base from URLs, redirecting your attached media URLs to their parent post and removing stop words from URLs to create cleaner post link. Also be sure that you have the options to “redirect ugly URLs” disabled. You should really be creating a clean URL structure from the beginning.
- The RSS tab offers options to optimize your feed for your readers by adding content before or after your posts. Use this to add author, post, blog and blog description links into your RSS feed so even if scrapers are pulling your feed links to your site will still appear along with the content. Another interesting use of this feature would be to monetize your feed. You could add a 728 x 90 advertisement banner with HTML to prepend or append or posts where your readers will see it, but this will depend on what it is you’re writing about. If your blog is all about one product an ad for that product might make sense, but please don’t spam your readers (they’ll be more inclined to stop following your feed completely).
Yoast SEO Tools
Tools offers option for bulk title editing (which edits the Yoast SEO post title for search engines) and file edits (like your robots.txt and .htaccess – but we recommend leaving these sensitive files alone unless you know what you’re doing). But most importantly it includes an Import/Export feature. This is very handy when transitioning to Yoast SEO from another SEO plugin. It helps import your old options into Yoast SEO (although you should definitely do a recheck after importing), as well as export all of your settings for use on other websites you might have.
Yoast SEO Search Console & Premium Extensions
These last two tab are there if you need them but aren’t crucial to Yoast SEO setup. The Search Console is used to enter your authorization code to fetch your Google Search Console info which can be a helpful resource for monitoring your rankings and performance. It’s an easy way to see if Google can access your site, see what you’re ranking for and see who’s linking to you.
The last section for Extensions lists the premium add-ons Yoast offers for their Yoast SEO plugin. As of date they offer four extensions for a premium upgrade, video optimizations, Google News SEO and local (geographically speaking) SEO. None of these are required to use Yoast SEO, but if you find yourself needing more from your SEO plugin the extensions are easy to find.
Yoast SEO Post & Page Options
In addition to the options for the plugin itself, Yoast SEO adds helpful SEO settings to your posts and pages. These are best seen when you create a new post. Here’s a look at the backend for this article.
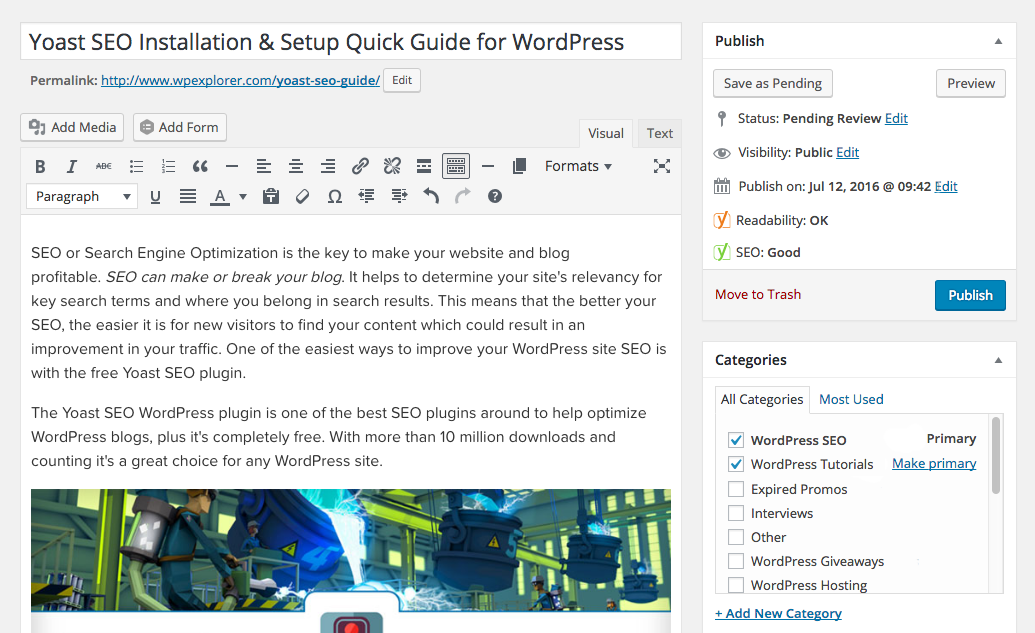
At the top of the page you’ll see some extra SEO options and helpful hints added by Yoast SEO. The first is an at-a-glance look at the Flesch Readability and SEO score for your post. Green is good, Yellow could use improvement and Red is bad.
You’ll also see an added Primary Category option if you’ve placed your post in more than one category. This way you can choose which category is more important and should be shown in the Yoast SEO breadcrumbs.
If you scroll down to the bottom of your post you’ll find a Yoast SEO meta box. This is the source of the scores you saw at the top of your post and holds a handful of usedul options for optimizing your post.
Yoast SEO Post Snippet & Keyword
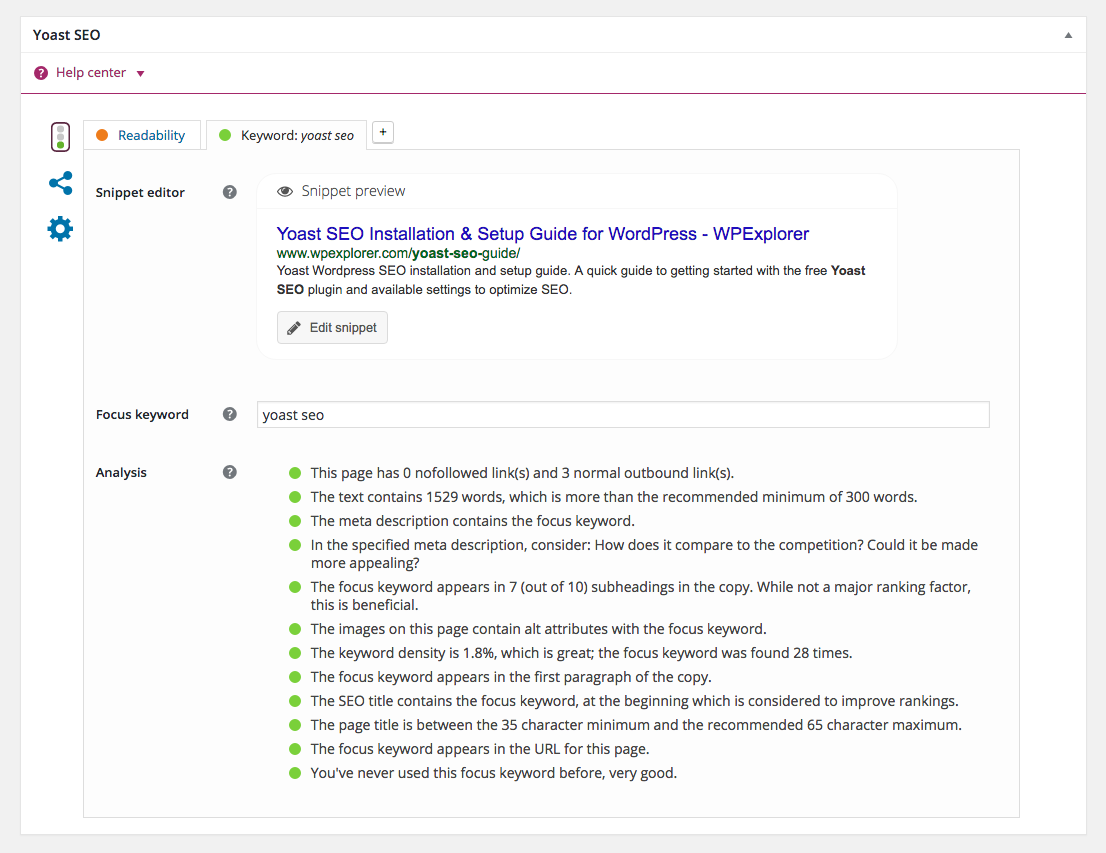
The Keyword tab includes a section where you can type in your main keyword and see a full analysis of your post’s SEO for that particular keyword. This isn’t required and it doesn’t mean you’ll instantly rank #1 in search engines for the keyword you select. All it does is review your post and give you helpful tips for improving your SEO based on keyword usage. You can also edit your post title and snippet with the Snippet Editor to customize what is displayed when your post appears in search results.
Yoast SEO Post Readability
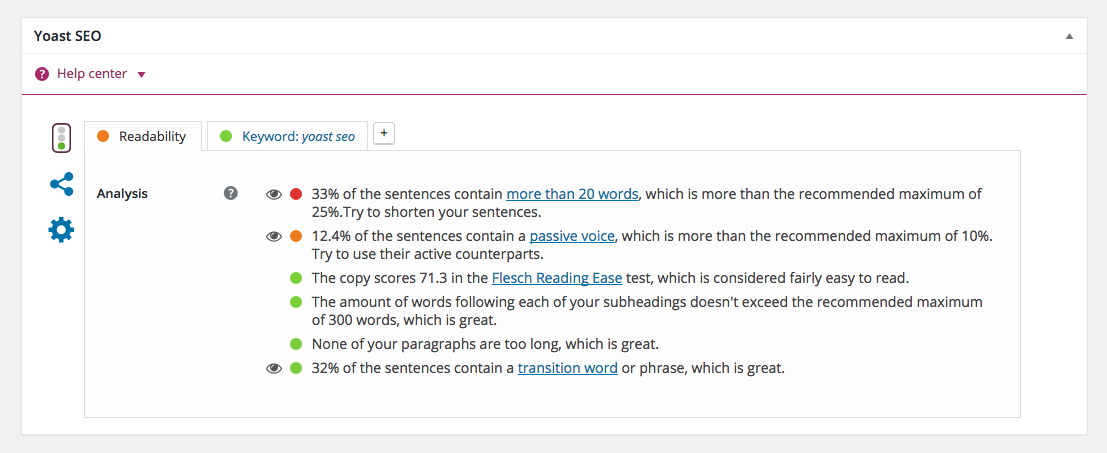
Moving on, when you click on the Readability tab you’ll see an analysis of the content of your post based on various standard reading tests. Again, this is just to help you fine tune your post. Also take the scores here with a grain of salt. For example, a technical scientific article with long sentences and large words might receive a red score for word count, Flesch Reading ease and paragraph length. This doesn’t mean it’s unreadable, it just means that it doesn’t fit into the cookie cutter scoring system. Just use your best judgement before editing your post based on readability.
Yoast SEO Post Social Settings
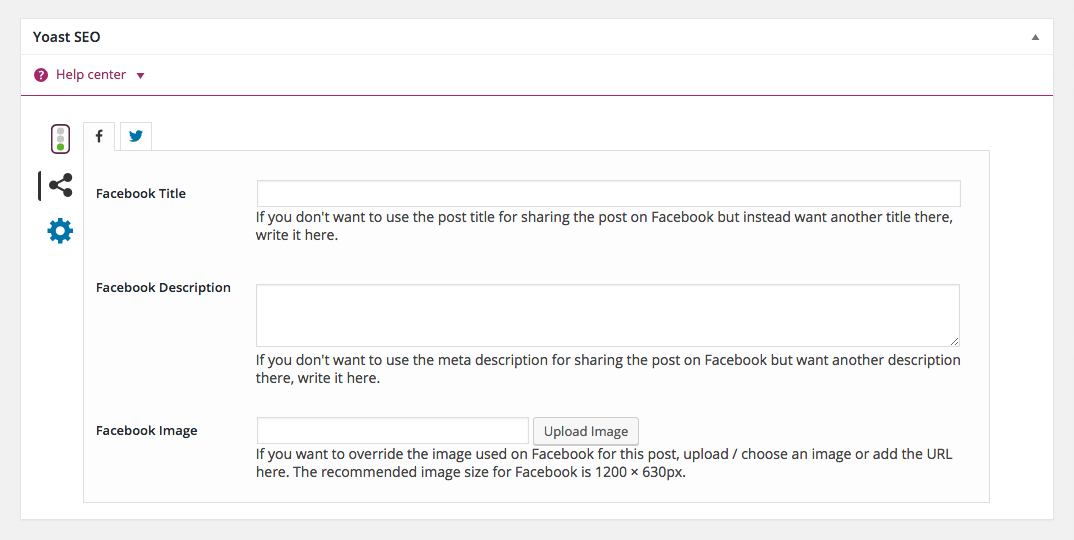
If you click on the social sharing icon on the left of the Yoast SEO meta box you’ll open the tab for adding custom Facebook and Twitter titles, descriptions and images. This is a great feature if you’re concerned about how your post content will look when shared on social media. Facebook and Twitter are consistent no matter who shares a link on their site. Images shared on Facebook should be 1200×630 pixels while those shared on Twitter should be a maximum of 1024×512 to look their best. With Yoast SEO you can upload custom images for your post to be displayed on the corresponding social network. While we wouldn’t recommend doing this for every post (that’s a lot of extra media!) it does make sense for posts you’ll be spending extra money to promote with Facebook and Twitter ads.
Advanced Yoast SEO Post Settings
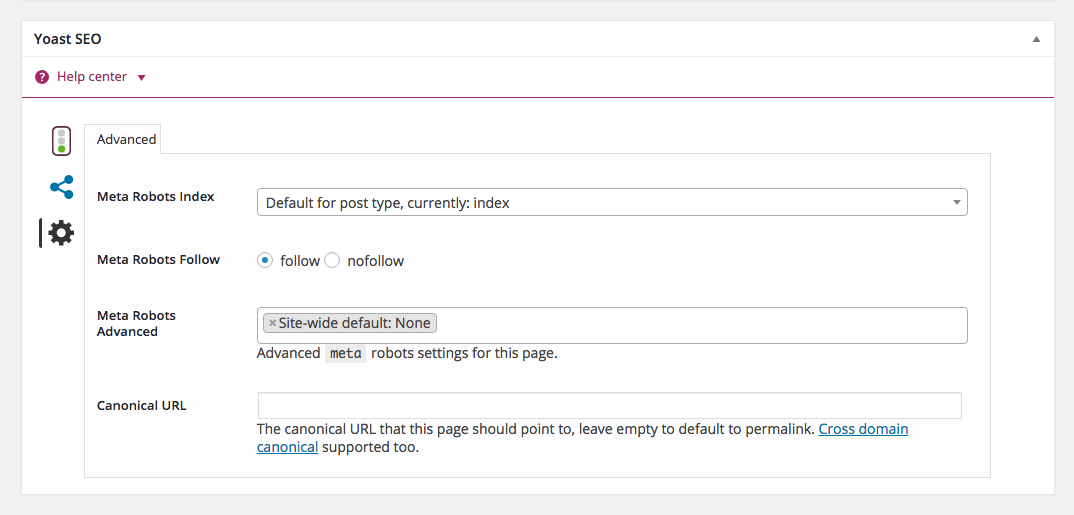
The last section we wanted to cover is the Advanced tab. Just click on the gear icon to open up the advanced Yoast SEO options for your post. This section will only be visible to admins and only if the advanced options via the Security tab under the main Yoast SEO Dashboard were enabled. From here admins can noindex, nofollow or point canonical URLs on a post by post basis.
If you want more options like a URL redirect manager, multiple focus keywords support, social meta previews and premium support then you should consider Yoast SEO Premium. Starting at just $69 for one site it adds useful extras you might want (or need) for your blog or business.
Endnote
We hope this guide helped you all get your SEO options setup correctly. Yoast SEO really is one of the best free SEO plugins available for WordPress, and with the right options enabled you just might see a huge improvement in your SEO. Let us know if you have any additional Yoast SEO plugin tips or questions in the comments below!


Hi Kyla,
Thanks for sharing this post. You giving the best guide about Yoast Plugin. Yoast SEO is the most complete WordPress SEO plugin. It handles the technical optimization of your site & assists with optimizing your content.
Thanks, for a detailed explanation Kyla, it looks pretty clear now. Saw in the post as far as I can see they are proposing to install it for their customers. It isn’t so hard to do, but a lot of tricky nuances to consider.
Yoast SEO only counts which shows in Visual Editor, it don’t count text added by shortcodes like tables added by tablepress.?
What do you mean by “only counts”? You mean the word count? It so, I believe not.
Really great post you explain step by step to setup Yoast SEO plugin in WordPress. this is very useful post to learn WordPress thank you for sharing.
I am searching on google for yoast plugin guideline and I find your post. And after reading your content, hopefully, now we can use yoast plugin easily. Thank you!