WordPress Website Pre-Launch Checklist
Setting up and launching a website is a momentous affair for any business. A lot of time and effort goes into ensuring that our website is designed just right and fulfills our business needs.
Even so, there are a number of oversights that can play spoilsport on the launch day. You can minimize the chances of that happening by ticking off the boxes in this handy checklist for new WordPress websites.
Lets get started!
1. Check if Your Hosting Plan Supports WordPress
This one may seem obvious, but as this is a checklist, I’ll include it anyway. Make sure the server host supports WordPress. If possible, go with a host who offers a newer version of PHP and WordPress auto-installer.
Or even better, choose a managed WordPress hosting plan. We personally use (and highly recommend) WP Engine which has always been fast, offers tons of server space for all of our websites and they have a fantastic support team.
2. Optimize Permalinks for SEO
As of version 4.2, by default, WordPress generates permalink structures that contain the post name and are SEO friendly. On my WordPress install, the default permalink is a combination of the day and name. This may be suitable for some websites like newspapers and magazines, while it may not be suitable for others.

Right at the very beginning, every website must select the permalink structure that’s ideal for it’s SEO purposes. The Post Name option will work fine for most websites. Being short and pretty, it is SEO friendly as well. Bigger websites that need categories and tags to reflect in the URLs, may want to opt for the Custom Structure option.
Changing the permalinks sometime in the future is not a smart SEO move. Over time, you’re likely to build back links, and you stand to lose these links if you make changes to permalinks after a while. Else, you may have to add 301 redirects.
Save yourself some work by creating pretty permalinks right at the start. Head to Settings > Permalinks where you’re most likely to see the Plain Radio Button checked by default. Instead, select the option that you need and Save the changes.
While at it, make up your mind whether your URL must include www or not. Having some URLs with www and some without can confuse search engines.
3. Decide if Your Email Address Will Be Tagged to the Website
Way too often, we tag our email accounts to our websites, and both are serviced by the same hosting provider. Now, if you conduct your business primarily by email, you can see the disaster that’s waiting to happen. You’re not going to be able to access your email if your website is experiencing downtime.
You can easily avoid this situation by having different hosting providers for your website and for your email. This will also spare you the hassle of changing your email whenever you change hosts. Or signup for a G Suite account to create and manage custom email accounts for your business with Google.
So, if email is critical to your business and you want to play safe, you probably want to separate your mail id from your web hosting.
4. Check That Emails Are Correctly Displayed
Ensure the email addresses are all displayed correctly. You can correct any errors in Settings > General. Check all Admin ids including the plugin settings.
Sure, you can always correct emails at a later date. However, you may miss out on email traffic that’s likely to hit your inbox as a result of any offline buzz you create concerning the website launch. A quick run through all the email addresses can prevent this mishap.
5. Delete Dummy Content
Every WordPress installation comes with some dummy content such as Hello World or This is your first post, and Sample Page to boot. likely a Besides, we also import dummy content while building our website to test fonts, colors, spacing and more.
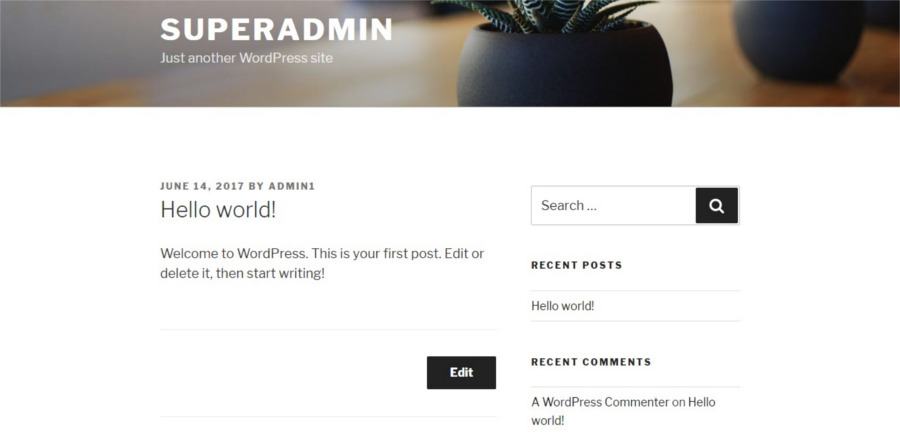
Now, imagine you hit the Launch button on D day and a Just Another WordPress Site flashes prominently on the screen.
To avoid this, take care to delete all dummy content before going live with the website. Remember, search engines take time to update, so any correction you make on your website may not have an immediate impact on search results.
6. Create an XML Sitemap
An XML Sitemap is a document file that lists all the URLs of your website. It is an easy navigation map that you submit to search engines to help them move within your website more intelligently and find appropriate content. While this does not directly affect the SEO rankings of the website, it helps search engines find and index your pages more easily.
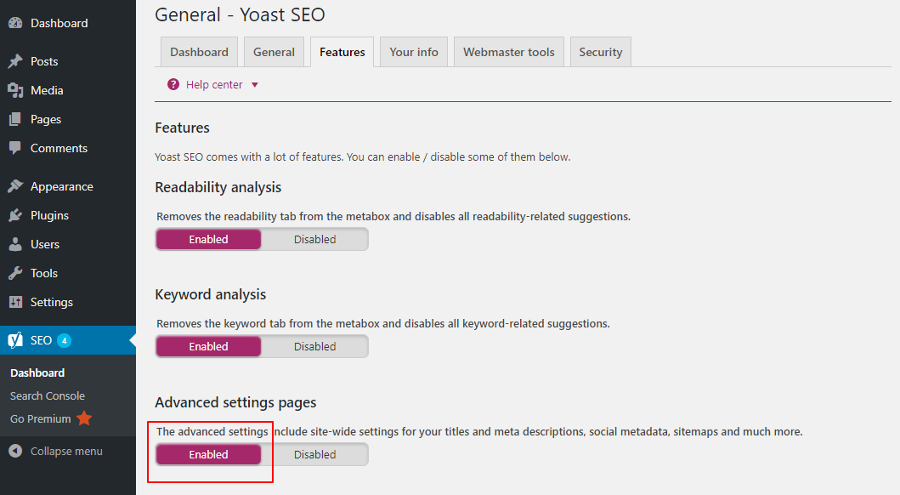
XML sitemaps are particularly important for new websites since these sites do not have any back links that can direct traffic towards them at the start. So make sure that you create an XML Sitemap and submit it to Google. This is not too difficult if you’ve installed the Yoast plugin. Enable the Advanced settings in the plugin to generate a sitemap for your website.
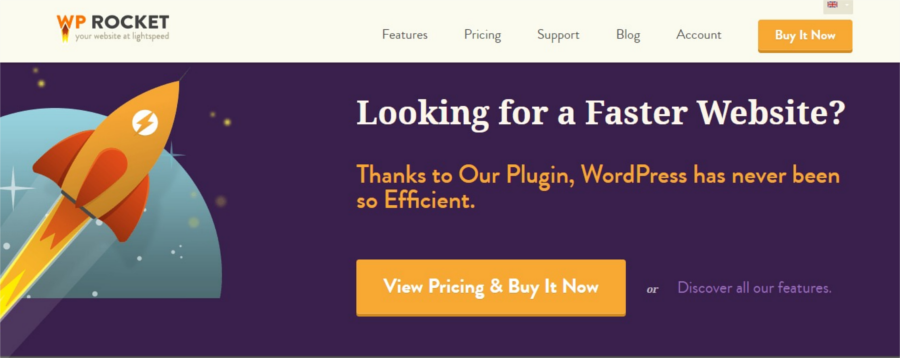
7. Improve Your Website Loading Speed
Slow websites are a big turn off for internet users, and you’re probably aware that there are many things you can do to speed up your website. One of the most important being, adding a caching plugin like WP Super Cache or WP Rocket.
Other speed improving measures are selecting a good hosting service, installing CDNs, enabling lazy loading and optimizing images.
8. Setup Website Backups
If you’re building the site on a local host or staging environment, make sure you migrate the database to the live server cleanly. Moving a site can get tricky, so be sure to have a backup of your site before attempting to move it. Check that the new site uses the live URLs in all the correct places.
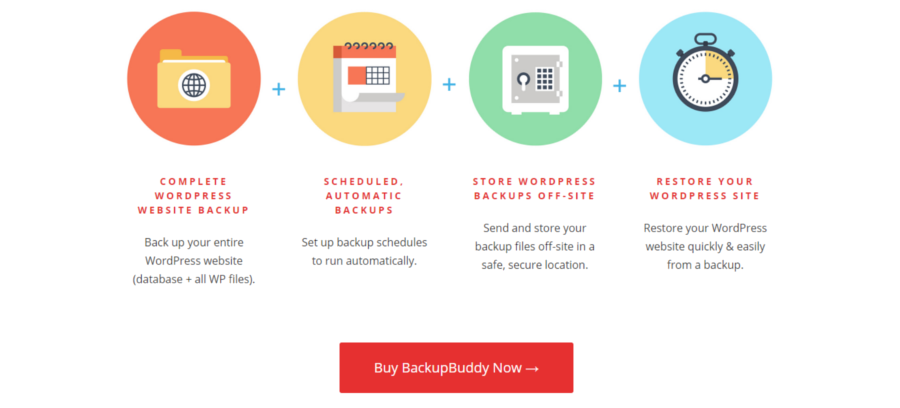
My favorite plugin for backup is Solid Backups. It not only helps to backup your website, but can also be used to restore and migrate your WordPress website.
9. Uncheck the Box for Search Engine Visibility
At the time you set up WordPress, you’ll find an option for search engine visibility in the Settings panel. We usually check this box while the website is under construction so that search engine will skip indexing the default WordPress content or any other work-in-progress content.

Just before launch, enable search engine visibility by visiting Dashboard > Settings > Reading and unchecking the “Discourage search engines from indexing this site”.
10. Run a Mobile-Friendly Test
Today, the traffic from mobile devices is starting to take over desktops. If you want to be in the radar of these hand held devices, you must ensure that your website is responsive. Most WordPress themes are responsive and so this should not pose any problem. You can cross check mobile phone visibility by running your website through Google’s mobile friendly Test.
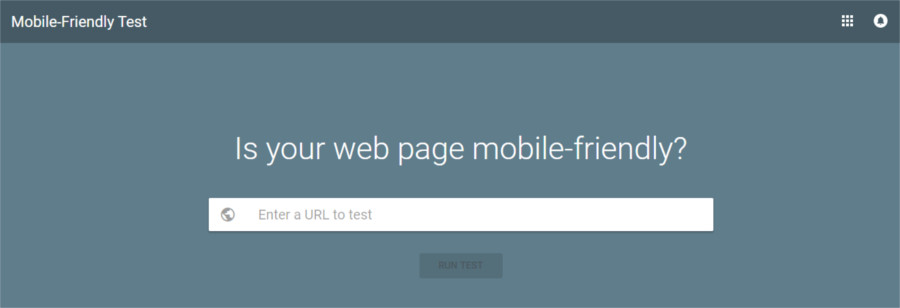
With Google moving towards a mobile-first search strategy, this is an important check that you cannot afford to overlook.
Further, if you’re creating Accelerated Mobile Pages, you’ll need to adjust the URLs accordingly.
11. Setup Google Search Console
Immediately on launching your site, one of the first things you should do is to let Google know about the existence of your website. The Google Search Console helps to submit your sitemap directly to Google. You can test whether Google can successfully understand your content. You’ll also know about any security issues affecting your site.
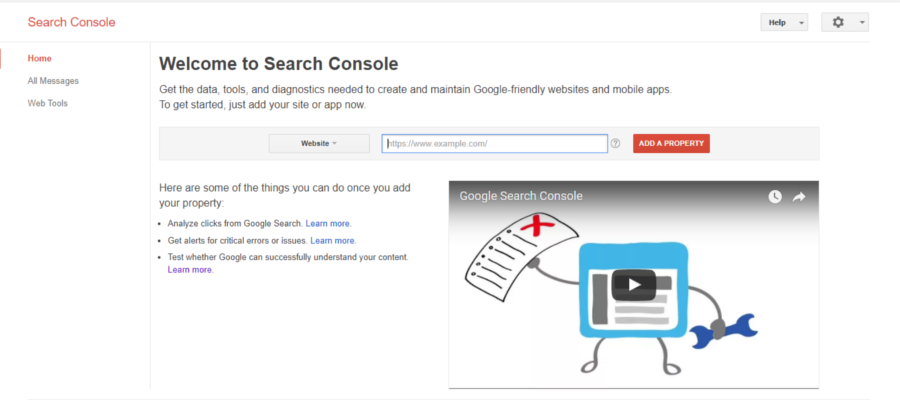
Access the Google Search Console, enter your website details and proceed as per directions. The Search Console also has many other features like HTML improvements, AMP version and search analytics which can help you enhance site visibility.
12. More to Think About
Well, here’s more that you might want to add and later cross off your list (depending on your specific website needs):
- Design a homepage for your website (we like the Visual Composer page builder)
- Check code quality of your theme
- Create and add a custom favicon
- Design a custom 404 page
- If you’re relaunching your old website, make sure to add 301 redirects
- Setup your WooCommerce store
- Add a q&a, customer or open forum
- Create an online portfolio to showcase your work
- Verify that images are included with proper attribution or free for commercial use
- Include a Privacy statement and terms of use, as well as legal disclaimers if needed
- Proof read every bit of your content
Yes, that sounds like a lot of work, but you’ll be glad you took the trouble. So, run through the checklist and have a wonderful launch day!


Before launching a website it really necessary to check the above points. Thanks for the checklist.
Nice tips. Made a best practice WordPress checklist myself that covers setup, theme design, and coding as well:
I have just started my digital agency website and these points have really helped me a lot. thanks