How To Create A WordPress Blog Post, From Idea To Publish
So you want to be a blogger. That’s awesome! But what if you’re new to this whole blogging business, and you don’t know the first thing about writing a blog post? Maybe you already have writing experience, or maybe not. All you know is that you have things to share with the rest of the world. In this article, we will help you get started by walking you through writing your first post and publishing it with WordPress.
Start With an Idea
As any experienced writer will tell you, writing is hard – especially getting started. But don’t be intimidated! All it takes to begin is an idea. If you’ve already got an idea, or even several, that’s great! If you don’t, this section will help you start brainstorming ideas of things to write about (and maybe inspire some more for those of you with ideas already).
First, you need to answer some questions. What is the purpose of your blog? Is it intended to be about anything and everything, or is it just filling a particular niche in the blogosphere? Identifying your goals for the blog will help you come up with post ideas.
Part of coming up with post ideas is having a reason for posting. Why are you writing the post? What are you intending this post to do, if anything? The reason could be as simple as “I’m posting just because I can”, but here are some more questions to get you thinking (which, by the way, could also relate to the purpose of the blog and not just the post):
- Are you writing tutorials?
- Sharing recipes?
- Informing the masses about a cause or important topic?
- Sharing your thoughts and opinions?
- Providing expertise?
- Updating friends and family about your life?
Whatever you decide to write, the important thing is that you’re writing about what you want to or what you care about. Writing for your blog isn’t the same as writing for hire – you can pick your topics without having to get them approved or reviewed by anyone. Maybe it’s a rant about a controversial issue. Maybe it’s advice or a tutorial that you wish someone had given you. Maybe you really enjoyed a meme, or recipe, or book, or movie. Maybe you’re just reblogging a post someone else wrote that you liked. You’re only limited by what you can come up with.
Writing Your Post

There’s really no right or wrong way to write a blog post, but there is a basic process most writers follow: Brainstorm. Outline. Draft. Revise. Proofread. Publish.
After you have listed some ideas and chosen a topic, it can be helpful to plan out what you want to write. An outline serves as a guide for what your post will say. But not every post will require an outline, so don’t feel like you have to have one every time.
What if, outline or not, you just don’t know what to say? That’s okay. Just write. The act of getting words down on the page will get more words flowing, and before you know it you’ll have written several paragraphs, maybe even several pages. It doesn’t matter if what you’ve written is enough or too much or good or even publishable – this is only the first draft. (Granted, sometimes you can get it right on the first go – but don’t expect to!)
The next step is revision. As with outlining, this is not a step you must take every time; you can choose to simply publish your first draft as is. But depending on who your readers are and how professionally you’re presenting yourself, it may be beneficial to do at least one revision. You can look at what you have written, decide what’s important and change what’s incorrect or doesn’t make sense.
Proofreading is important. Autocorrect does a lot for you spelling wise, but it can’t check the context of the words you’re typing. So just remember to do a little proofreading to make sure you’ve used good English and don’t have any typos. If you want someone to look over your post for you before you write, grab a friend or colleague you trust.
WordPress Search Engine Optimization
Because your blog is on the internet it’s important to remember SEO as you’re writing your post. There is tons to learn about SEO (there are entire blogs dedicated to it, like Yoast and Moz), and we’re not going to be able to cover everything about WordPress post SEO in this post. But one of the most important SEO points to remember when writing your post is keywords.
Keywords are the focus of your post, and you’re probably going to use the same keywords over and over again as you write more posts for your blog. Search engines (like Google or Bing) will notice when you add content regularly and when the same words or short phrases keep popping up. This will help you rank in search results for those terms, making it easier for new readers to find you. To help with your post SEO, you might also consider a free plugin like Yoast SEO or All In One SEO that adds SEO options right on your post page.
You now have the basics of how to write a blog post. If you still want or need some writing help, there are plenty of other resources available. But for now we’ll move on to publishing your post.
Creating A Post In WordPress
Now, there are a couple of ways you can get your draft into WordPress to be published. The first, and easiest, is to write it right in WordPress. Simply log in to your site and add a new post, which you can do one of three ways:
- Click the plus sign icon in the header.
- From the WP Admin dashboard, go to Posts in the sidebar menu and click Add New.
- Also from the WP Admin dashboard, use the Quick Draft widget.
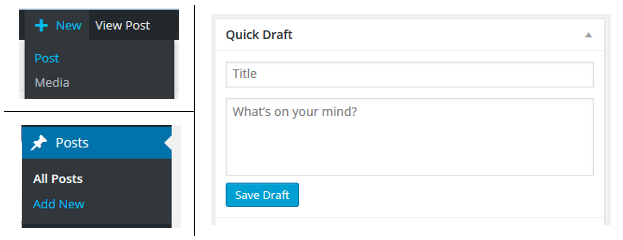
Whichever option you go with, click into the text editor box and start typing. If you aren’t publishing it right away – for example, if you have to stop in the middle of writing, or you want to revise it later – click the Save Draft button. This will save your draft so that you can go back to it later, even if you log out.
And don’t forget to SEO optimize your post title. Try to choose something catchy that people will want to click. You should also add in some keywords so that you’ll hopefully show up in search results.

The second way to add your draft to WordPress is to write your post in a word processing program and copy and paste it into the text editor in WordPress. This can be tricky because sometimes the formatting will change or cause problems when you copy and paste it, so if you want to go this route we recommend using a basic editor like Notepad or TextEdit.
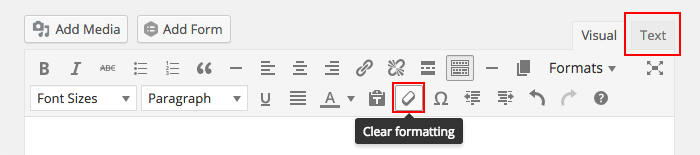
If you really want to use Word or Pages, then just make sure to paste your content into the “text” tab when creating your WordPress post. If you forget, and paste your content in the “visual” tab you can use the “clear formatting” button to remove text formats (bold, italic, strikethrough) – but you will still have to click over to the text tab to look for any spans or tags.
Formatting Your Post
Once you’ve created your content, you can make it better by adding formatting. WordPress has tons of great options built into the post editor to help make your content more readable, both for actual human readers and for search engine bots. To see them all, click on the “toolbar toggle” to open up the kitchen sink.

The Basics
Some important options that you’re likely to use should be obvious from the button icons. Bold, italics, underline, bulleted and ordered lists should all be familiar. These are important tools to help increase the readability of your blog posts, and to emphasize your keywords for search engines.

Adding Links To Posts
When creating your post, you might want to add in links to related content. This is great! Linking out makes your content more valuable to your readers, plus search engines like it when you link to reputable sources. Just highlight the text you want to add a link to (called the anchor text) and click on the insert/edit link button. Make sure when inserting your links to check the box to open your link in a new window or tab, this way your readers will still stay on your site.

Another link tip is to add a title attribute in the “text” side of the editor (and if you don’t want to do this, or don’t know how, we’ve created a simple plugin that will automatically add title attributes for you). Link titles are important since they let readers know where you’re sending them, as well as for SEO since you can add a better description (with keywords) for your link as opposed to relying on the anchor text.
Adding Headings & Subheadings
You should add headings to pretty much every post you write. These might even be the same headings you used when originally outlining your post. Headings help your readers navigate your content and follow your flow of thoughts. For SEO, your heading structure tells search engines which content is the most important (so don’t forget those keywords).
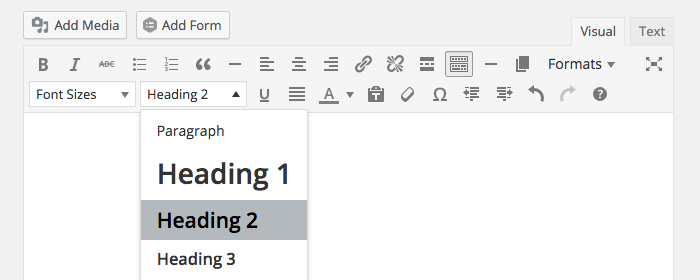
Just click on the dropdown box to select your headings. Typically your blog post title will be an Heading 1 (which uses the H1 formatting tag), meaning that it is the most important phrase on the page. After that you should use H2 headings for your main sections of content, followed by H3 subheadings below. You can keep going (H4, H5, H6) but unless you’re dealing with very detailed content it’s usually overkill, and after your H3 headings you can simply use bolded text instead.
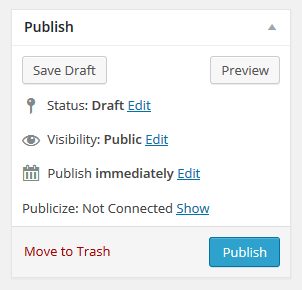
Publishing Your Post
WordPress includes a few options for when you’re getting ready to publish your post. You can choose if you want your post to be public or password protected5, and whether you want to publish it immediately or schedule it to be automatically published at a future date and time. There’s also a button for previewing your post so you can see what it will look like live.
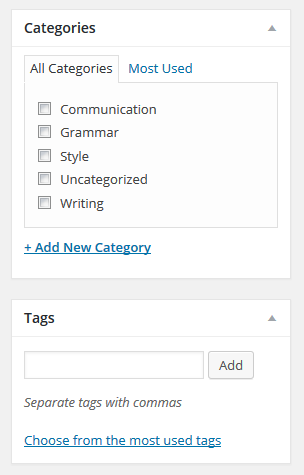
WordPress Categories & Tags
You also have the option of adding categories and tags to your post, which we recommend doing before you publish. Categories are more broad, and should be the general topics that your blog covers. For example, here at WPExplorer our blog categories include WordPress Themes, Tips, Reviews, Giveaways and a few others. Tags are more specific, and should be very focused. If tags were added to this post they might be blogging, writing, beginner, blog SEO or something similar.
As you can see, categories and tags are very important for your website SEO, and once you have several posts you should add one or more category and tags to each one. will help keep them organized for future reference, and help readers as they browse your posts.
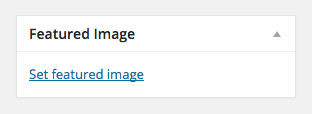
WordPress Images
The very last option you might want to add is a featured image. You can insert all kinds of media into your WordPress post, but the featured image is selected using the option to the right of your content.
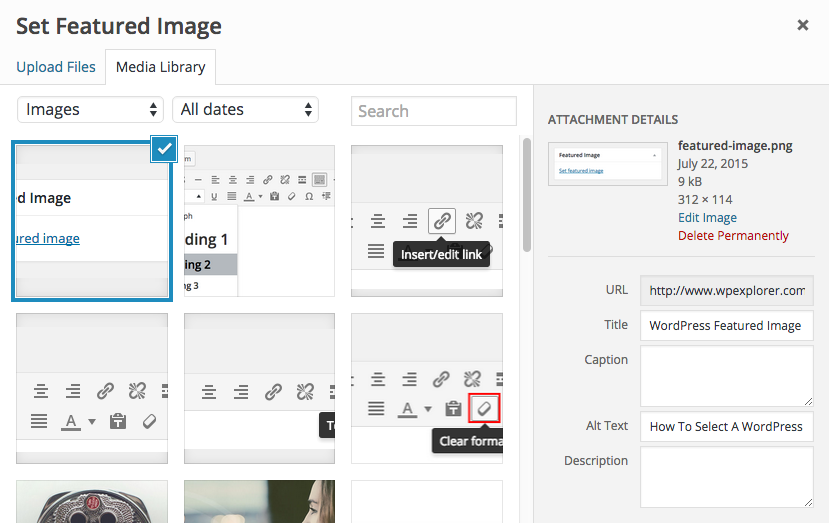
Featured images are a great tool since they will appear in image search results. When you upload a new image, remember to give your image a good, SEO ready title and alt text. The image title is more for accessibility, and will be used by screen readers while the alt text is what search engines will see.
With all of these options set, you are finally ready to publish your post! Just click the Publish button, and you’re done. Click the button to take your post live, where people and search engines can find it!
Need To Make A Change?
If you ever feel the need to go back and change anything, or if you realize you’ve made a mistake, you can go back edit published posts at any time. You can do this from the “Your Stuff” widget on your dashboard, or from the “All Posts” screen.
Conclusion
Writing your first blog post can be scary, but it doesn’t have to be! Follow the tips in this article for how to write and publish a blog post on WordPress, and you’ll soon be blogging like a pro. What was it like writing your first post? How did you feel when you clicked Publish? Share your stories in the comments below!


Hey, this has to be one of the most in depth posts on how to create a WordPress I have ever seen, good job!
Hello Tom,
I appreciate the process, you described through this blog, Those who are new to WordPress, or looking for blog promotion through WordPress will be helpful.
Thanks!!
Hi, Tom!
Thanks for sharing! You’ve done a lot of work by making all those screenshots!
I’m brand new to blogging but want to try. Everything that i found so far is WordPress oriented. Why WordPress? What are its advantages over other platforms?
thanks
Oh my goodness – the list goes on and on! Almost 25% of the internet runs on WordPress, and I think it’s mostly because WordPress is quick and easy to get started with – it’s provided as a 1-click installation by every major webhost, and there are literally more than 40,000 free plugins and 1,900 free themes on WordPress.org alone (that’s not counting the thousands of free themes & plugins from people like WPExplorer) plus thousands more premium options. And the second reason is because WordPress is so flexible. You can build anything with WordPress – blogs, stores, portfolios, landing pages – plus if you add a page builder, you can create completely custom websites without learning php and css. You can always start with a free blog from WordPress.com to try it out and see for yourself, but self-hosted is really where it’s at 😉 Good luck with your blogging adventure!
Thank you for sharing. I am freelance writer and thinking about starting my own blog, thanks to your article I’ve found so much useful information here. Maybe you can also suggest good text editor?
WordPress has a default text editor build right in. When adding a new post you can toggle between the Visual or the Text editor by using the tabs in the top right-hand corner. Personally I prefer the Visual editor since you can see your formatting, but if you prefer to see the HTML code just click on the Text tab and you’re ready to go 🙂
Fantastic article, highly logical structure for figuring out what to do with your new blog post. I’ve only been doing a few of these, so I have you to thank for increasing my knowledge!
Fantastic article. You covered everything in detail – from thought to post like you said. Absolutely loved this. If you love to write, you should start it immediately!
Hi Tom,
First time I am trying to create a blog using WordPress. The blog is published. However when I shared the link to my friends it is showing as site “Coming Soon”. Can you please guide me what is the setting which I need to change?
Make sure you don’t have any Coming Soon plugin enabled or any Coming Soon function enabled from your active theme or hosting. Also make sure to clear any site cache, usually coming soon functions only display when you are logged out, so you can always log out and double check to make sure the site is rendering correctly.
Appreciate you so much for your time. Your article will definitely be used and assist us in thinking future blogs in the future.