How to Sell Music Online with WordPress (3 Easy Steps)
Creating and running an online store takes some work – there’s no sugar-coating that fact. However, if done right, you can turn your online store into a viable business. In order to achieve this level of success you’ll need to design your store to match the type of product you’re selling, and if you intend to sell music online there’s a bit more to consider.
For instance, your store will need to be set up differently to offer products such as music, as opposed to clothing or electronics. You’ll need a way to easily sell digital files on your store, such as the popular WooCommerce plugin, as well as a method for displaying your music in a clear and organized way.
While you can always sell your tunes through iTunes or BandCamp, it’s a great idea to offer your own music, bonus tracks or even limited edition memorabilia (like custom vinyl records) in your own store. In this post, we’re going to show you how sell music online with WordPress. Specifically, how to use WooCommerce and the WooCommerce Product Table plugin to sell your own music online. Let’s get to work!
1. Install & Setup WooCommerce to Sell Music Online
Before we get started, we’ll be assuming you have a WordPress site set up and ready to go. WordPress is both powerful and flexible, and can be easily used to create a thriving e-commerce store.
With this out of the way, the next task is to add WooCommerce to your site. This simple but feature-rich plugin transforms your WordPress site into a functional storefront adding easy options for you to actually sell music online with WordPress:

To get started, navigate to Plugins > Add New in your WordPress dashboard. Use the search field to find “WooCommerce”, and click on the Install Now button:
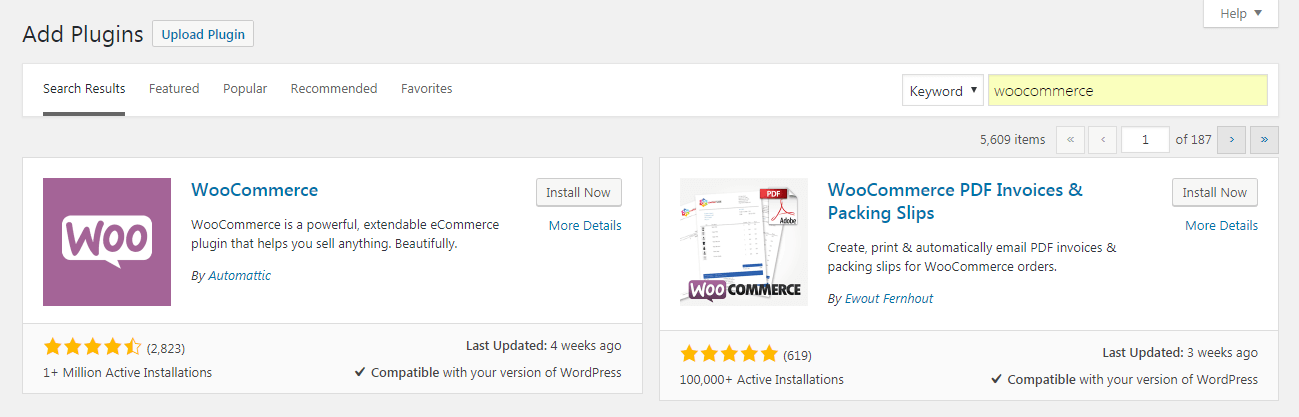
After a moment, a new button labeled Activate will appear. Select that as well, and WooCommerce will be fully set up on your site!
At this point, you’ll be taken to a brief setup wizard:
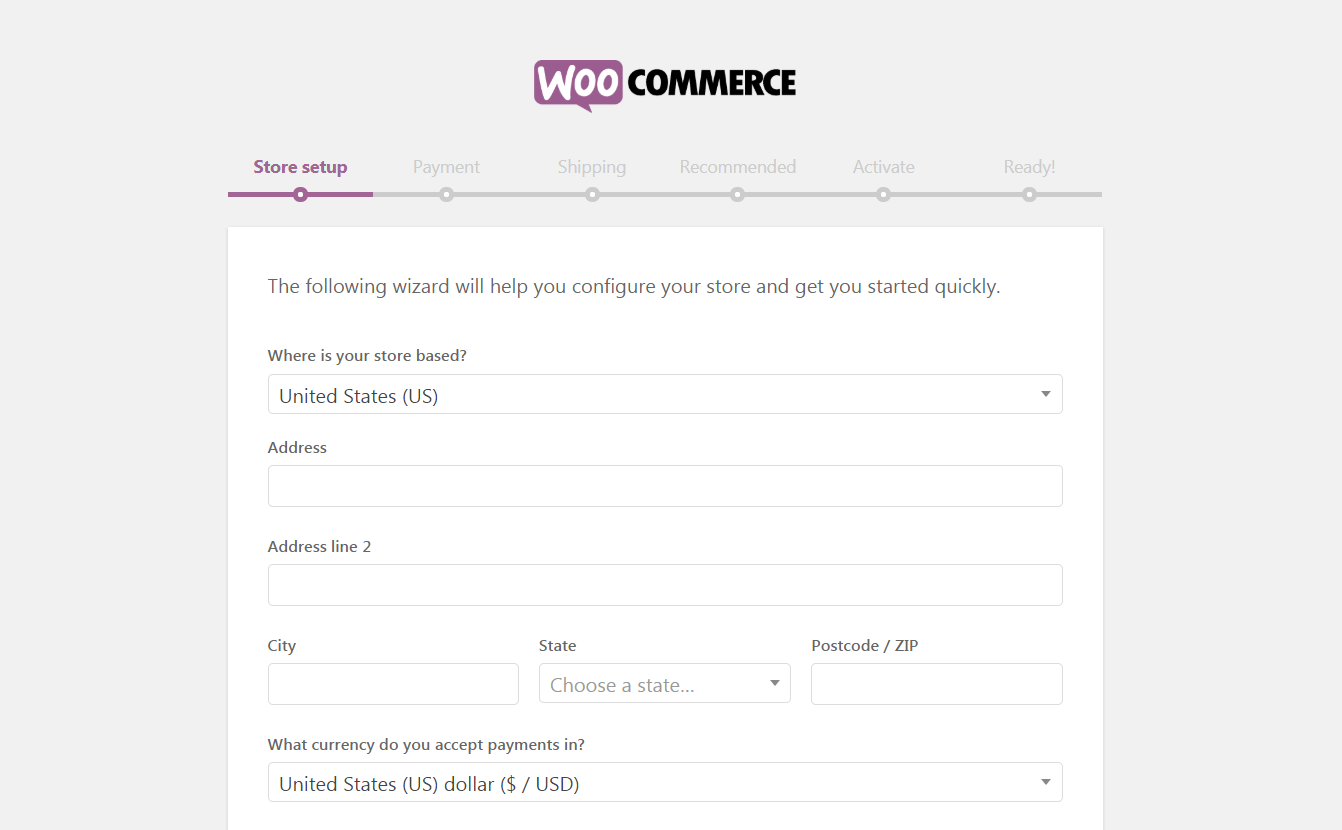
We highly recommend going through these few short screens. They’ll help you configure your new store, establish important pages and set up key elements such as shipping prices. For more information, see our complete guide on how to install WooCommerce.
2. Add Your Music to the Store
Once you’ve installed WooCommerce and gone through the setup wizard, you’ll have an empty store on your hands. This means it’s time to add products.
WooCommerce provides a special WordPress custom post type to make adding products east. Custom post types are similar to adding blog posts, just with different options specific to the post type (other post types might include portfolio, testimonials, staff or events calendar). To add a new WooCommerce item from your dashboard, go to Products > Add New:
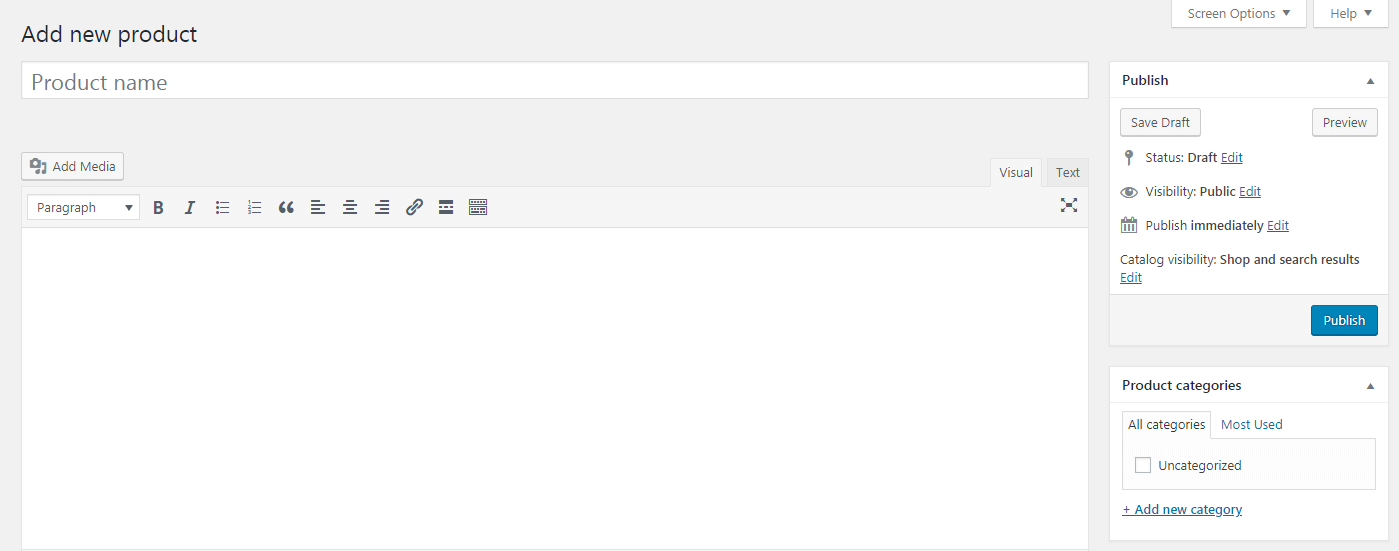
Here, you can create your first product. You’ll want to start by giving it a title and description using the first two fields. In the right-hand sidebar, you can also assign the product to one or more categories, give it some descriptive tags, and even upload images.
However, the ‘meat’ of WooCommerce is found in the Product data section:
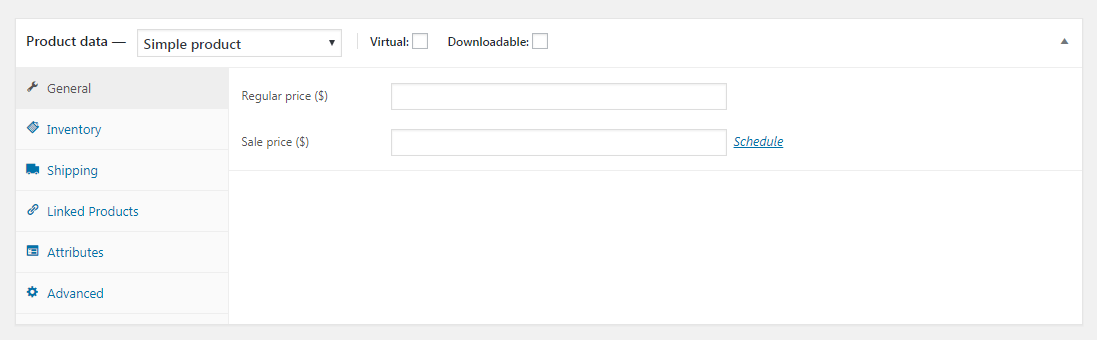
This is where you’ll add all the vital information about each item. Since your goal is to sell music online, the first thing you’ll want to do is check both the Virtual and Downloadable boxes at the top. This will change the options you see slightly, to account for selling music files online rather than physical products:
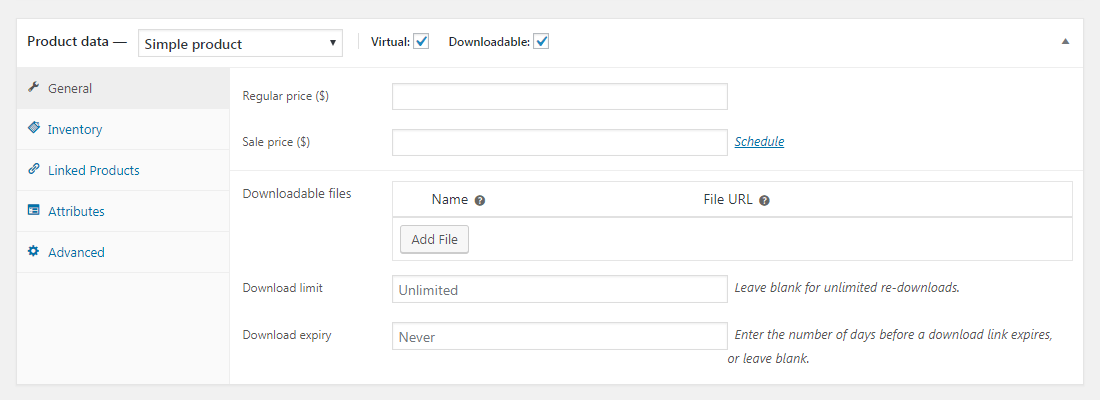
Then, you can proceed to enter in a price for the item, and upload the file(s) customers will receive upon purchase under Downloadable files. You can also configure whether there should be a limit to how many times the files can be downloaded, and if they’ll expire.
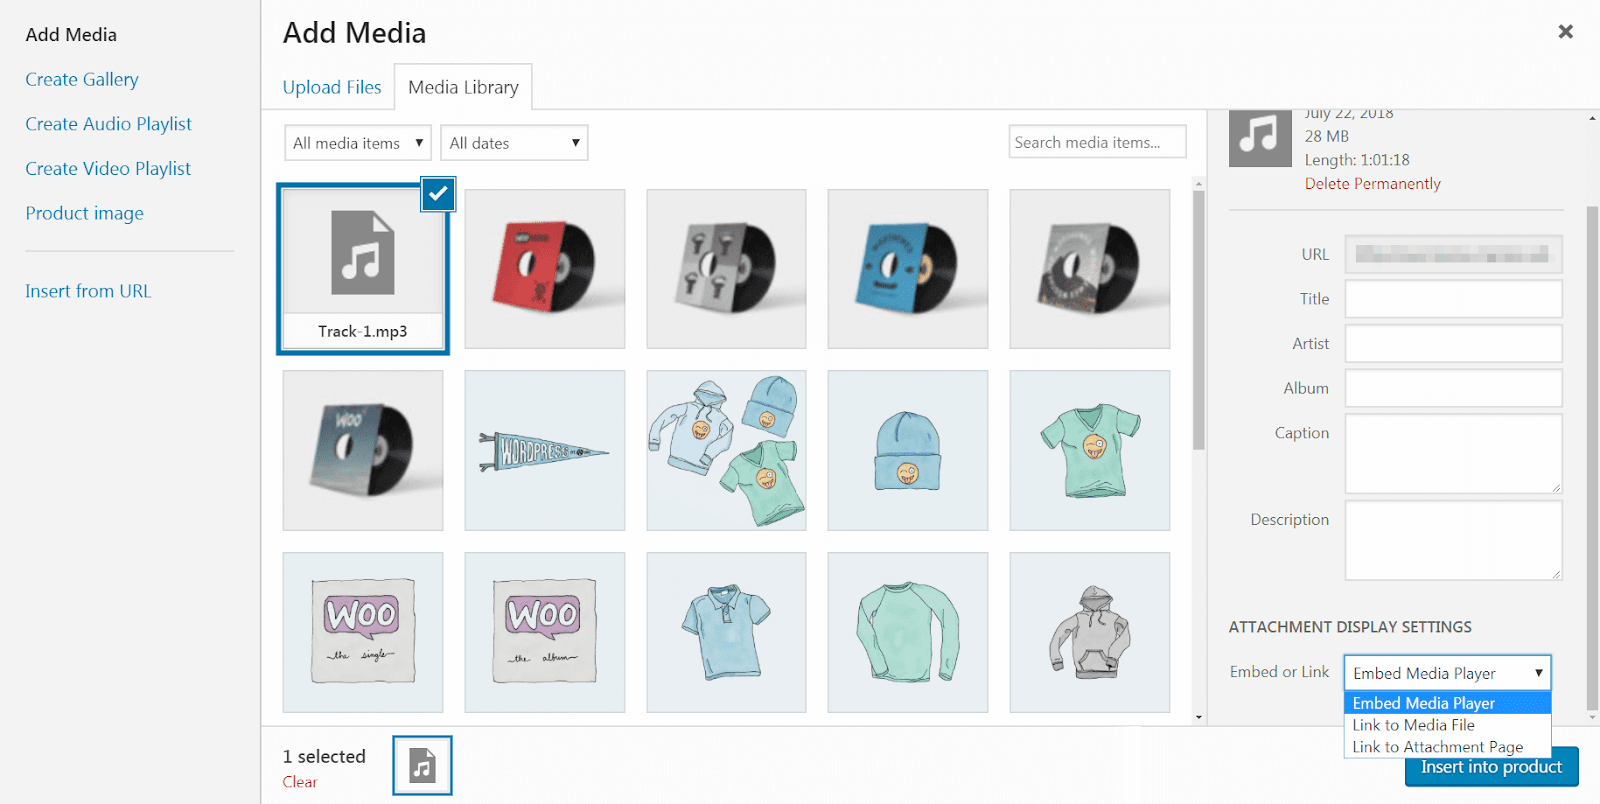
The rest of the settings in this section are optional, although you may want to look through them anyway. In addition, check out the Product short description field right below. There, you can add embedded audio players, so customers can hear what your music sounds like.
To do this, click on Add Media. Upload the audio file from your computer, fill in its details, and make sure to choose Embed Media Player under Embed or Link:
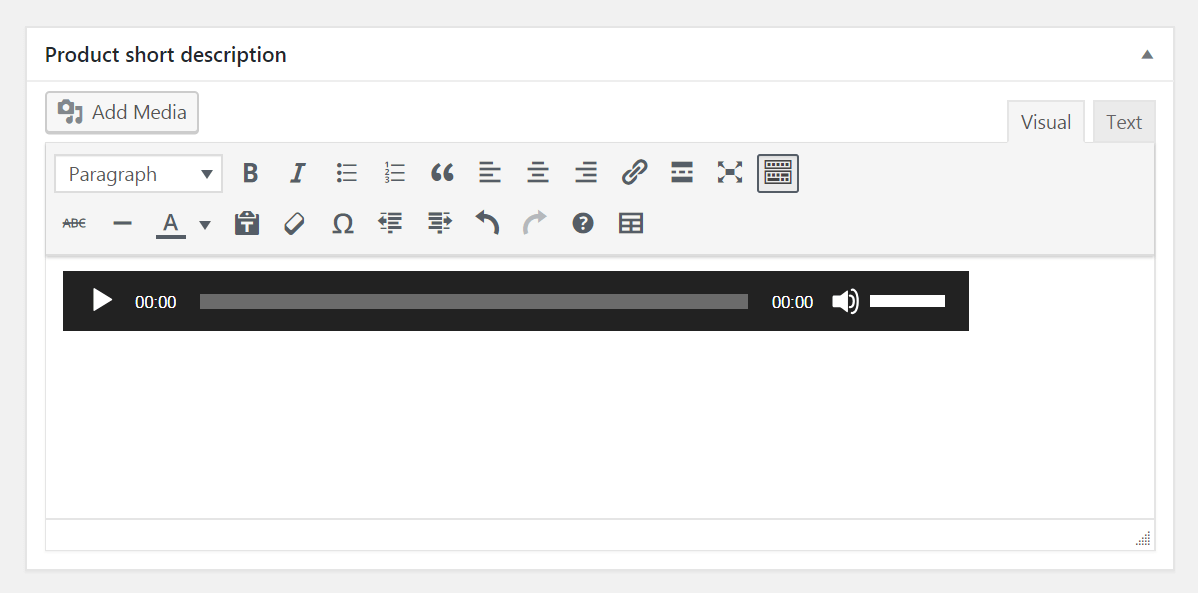
This will add a simple audio player to the short description field:
Once you’re done setting up your first product, click on the Publish button to make it live on your store. Then, repeat this process until you’ve added all the songs, albums, and so on that you’d like to sell.
3. Create a Product Table to Display Your Music
Technically, the first two steps are all that’s required to get your store up and running. However, a traditional WooCommerce setup is not necessary the best way to sell music online.
If you leave things as they are, customers will need to navigate to each individual product page in order to check out all your music, listen to sample tracks, and order what they want. This slows them down considerably, which can lead to lost sales. What’s more, music files typically don’t need a lot of complex description or large images, and the default WooCommerce layout draws extra attention to these elements.
Instead, you can show off everything you have to offer on a single page using a product table. This is an organized, visually-appealing way to display your music. Customers can see everything available in your store at once, and you can provide all the key details while not overwhelming them with information. Plus, they can add everything they want to their carts right from this page. You can even embed sample audio players directly into the table for each product.
To set up a page like this, you’ll need the WooCommerce Product Table plugin:
This tool is optimized to work smoothly with WooCommerce, and lets you customize exactly what your product table looks like and how it works. After purchasing the plugin, you can install it like any other third party plugin. Go to Plugins > Add New and select the plugin file you downloaded. Activate the plugin, then, go to WooCommerce > Settings in your dashboard. Navigate to the Products tab, and select Product tables to enter your license key:
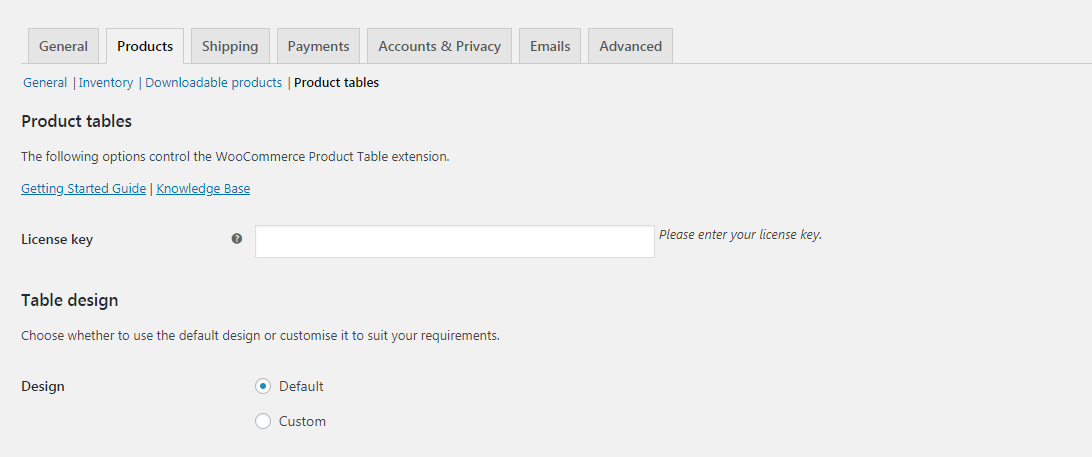
The many settings on offer here enable you to tweak how your product table works. For instance, under Columns, you can customize exactly what information will be displayed:

Make sure to include an image for each item, as well as short-description (so your media players will be included).
Filter dropdowns is another crucial setting:

By enabling this, you’ll place drop-down menus above your table, which will let customers sort it by key attributes such as categories. This makes it easy for them to find what they want quickly.
Finally, check the box labeled Shortcodes in table. This is required if you want your embedded media players to work properly:

For more information on all the settings you can modify, you’ll want to take a look at the plugin’s documentation.
Save your changes when you’re done, then open up a new page (via Pages > Add New). Click on the Toolbar Toggle icon, then select Insert Product Table. This will place a shortcode on your page:
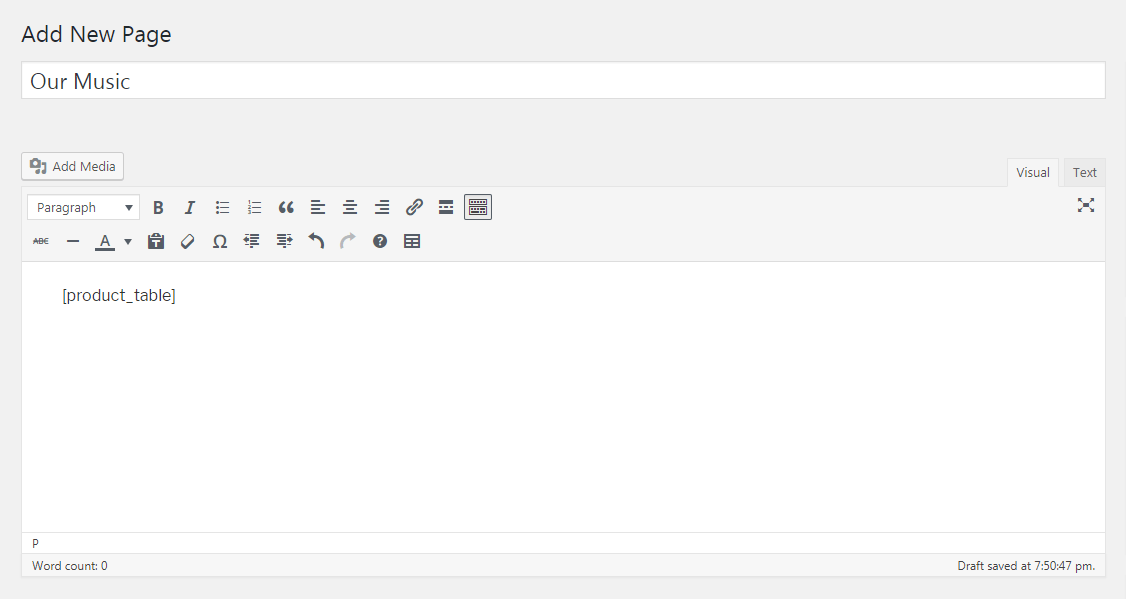
This shortcode pulls in all of the settings you just customized, and sets up your product table automatically. You can see what it looks like using the Preview button:
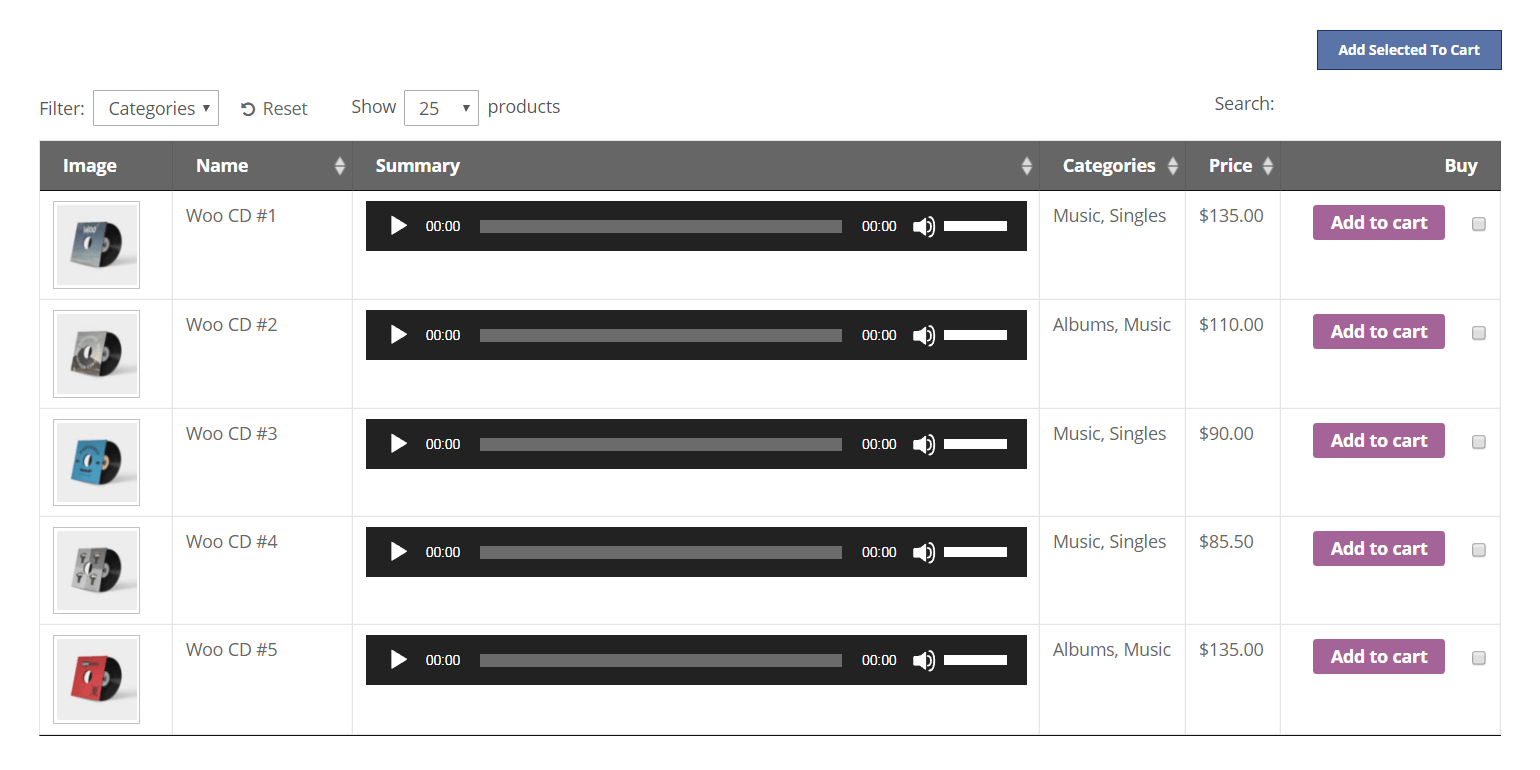
If you like, you can continue to tweak your product table until it’s just right. Then, go ahead and publish it! You’re ready to sell music online. Customers can then use it to see all the music you have available and make purchases easily.
Conclusion
The best stores are optimized to match the type of products they offer. For instance, you’ll need to design your store carefully when you’re aiming to sell music online with WordPress. WooCommerce is an excellent starting point, but you’ll also want to provide customers with a streamlined way to explore your music and make selections as well as add other WooCommerce extensions for more features and functionality.
Do you have any questions about how to set up your WooCommerce items or design your product table? Ask away in the comments section below!


Hi,
I am working on a website for my podcast/music. I can’t seem to find the answer to my question and I hope you can help me out. My question is about selling music on a WooCommerce website. If a customer purchases a song, can they download it straight from your website to their phones music library? Like how it is down when purchasing music through the iTunes app on iPhones. Any help would be greatly appreciated.
Kevin
I did a quick Google search, and I’m not completely sure. From what I’ve read it sounds like you can accomplish this on Android devices consistently (since they use a traditional file system) but not necessarily on iOS due to the way apps work (Apple doesn’t really like users downloading anything that they didn’t o.k.). If you find a better answer I’d love it if you share – I’m curious myself!
Hello, how do you protect customers from downloading for free with software/extensions?
Hmmm I’m not sure. Our guide recommends using WooCommerce to put the audio files behind a paywall… I would suggest leaving a comment on the plugin page to check with the developers about any security features they might have to block similar software.
You should have one file with a “sounding water mark” for the previews and one clean one with the final track.
Hi guys,
I want to build a shop for podcasts. After paying a fee for a single or multiple casts the customer can hear his podcasts as long as he wants or for a specific time-frame. No download! Woocommerce! Is previewing with a specific time amount ( e.g. 30/60/90 seconds) possible? Thanks for answering, John
there’s a plugin for almost everything – including WooCommerce audio products sample mode. Checkout the Woo Audio Preview plugin, I think it might be what you’re looking for.
Hi, do you have to pay for a particular WordPress membership to use WooCommerce?
For self-hosted WordPress (which is what we always recommend) you can use any hosting you like, install WordPress and use WooCommerce – no special plan required. However, for WordPress.com (which is the WordPress equivalent of Wix/Squarespce/etc) I don’t believe they allow e-commerce on their free plan so you’d likely have to upgrade.