Add Beautiful Slides with the MotoPress Slider

MotoPress are well known in the WordPress community for their page building content editor WordPress plugin. Since their launch last year, MotoPress have added more products to their portfolio including plugin add ons and WordPress themes.
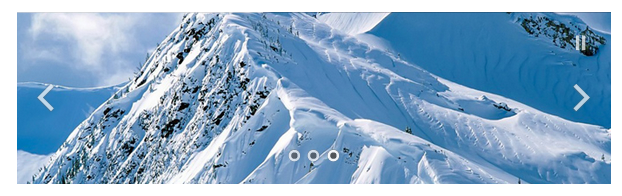
In February this year they released MotoPress Slider; their second major WordPress plugin. The plugin is responsive so the slides it helps you create look great on any device. Let’s take a closer look at what MotoPress Slider can do.
Configuring a New MotoPress Slider
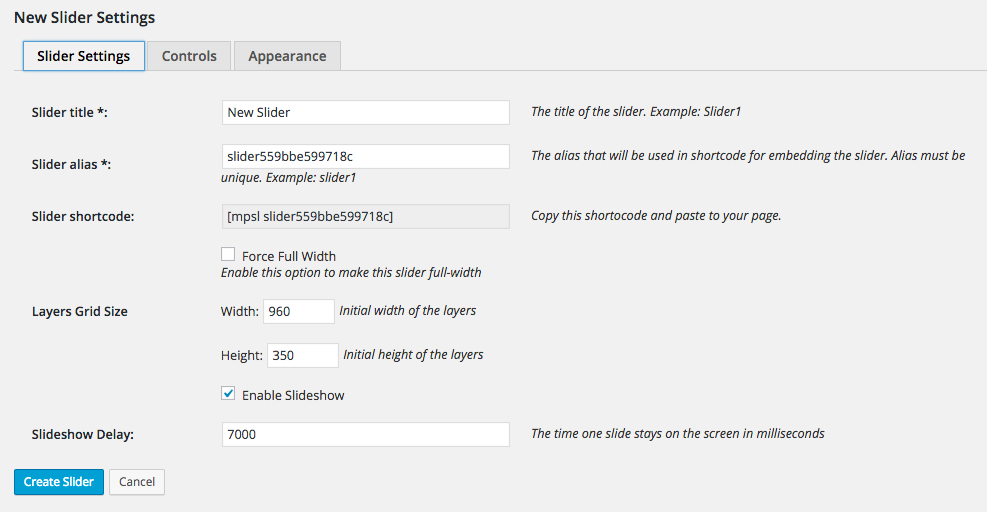
MotoPress Slider is incredibly easy to set up. When you choose to create a new slider, you are presented with three short settings pages. There is a tab for slider settings, controls, and appearance.
In the slider settings tab you can name your slider and the alias that is used for the slider shortcode. The slider can be made full width or you can define the default size of the grid. The slideshow delay can be set in this area too. If you prefer, the slideshow can be disabled.
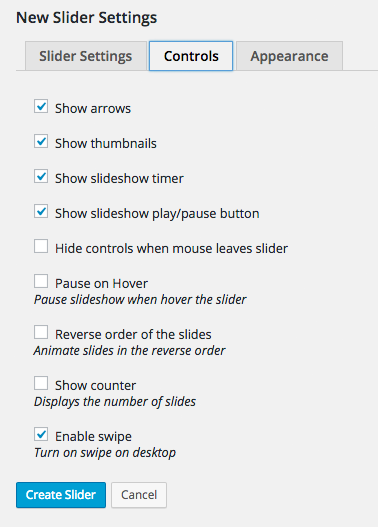
Nine slider controls can be enabled or disabled in the next tab. You can configure controls such as arrows, play buttons, counters, and more.
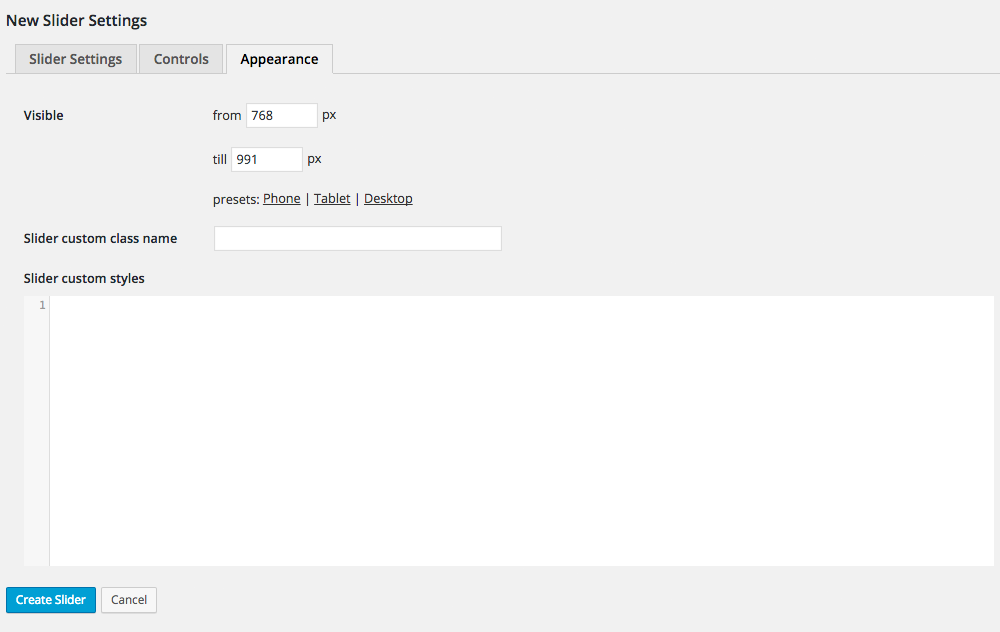
In the appearance tab you can define the default pixel size for phone, tablet, and desktop displays. The original settings are anything up to 767 pixels is displayed using the phone layout, anything between 768 and 991 pixels uses the tablet layout, and anything over 992 pixels uses the desktop display.
A custom CSS class can be applied to your slider. There is also a box in which you can add custom CSS code.
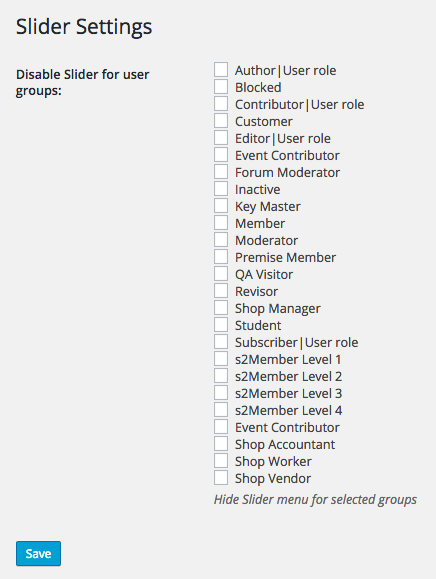
A separate settings page is located in the MotoPress Slider admin menu that allows you to disable the slider for specific user groups.
Do not worry too much about your slider settings. The default values should be fine for most of you and there is a button at the bottom of the slider creation area that allows you to return and modify settings at any time.
Adding Slides to Your New MotoPress Slider
In the next area you can add slides to your slider. You can see a screenshot of this area below. It may seem a little daunting at first glance, however it is very easy to understand once you know where everything is.
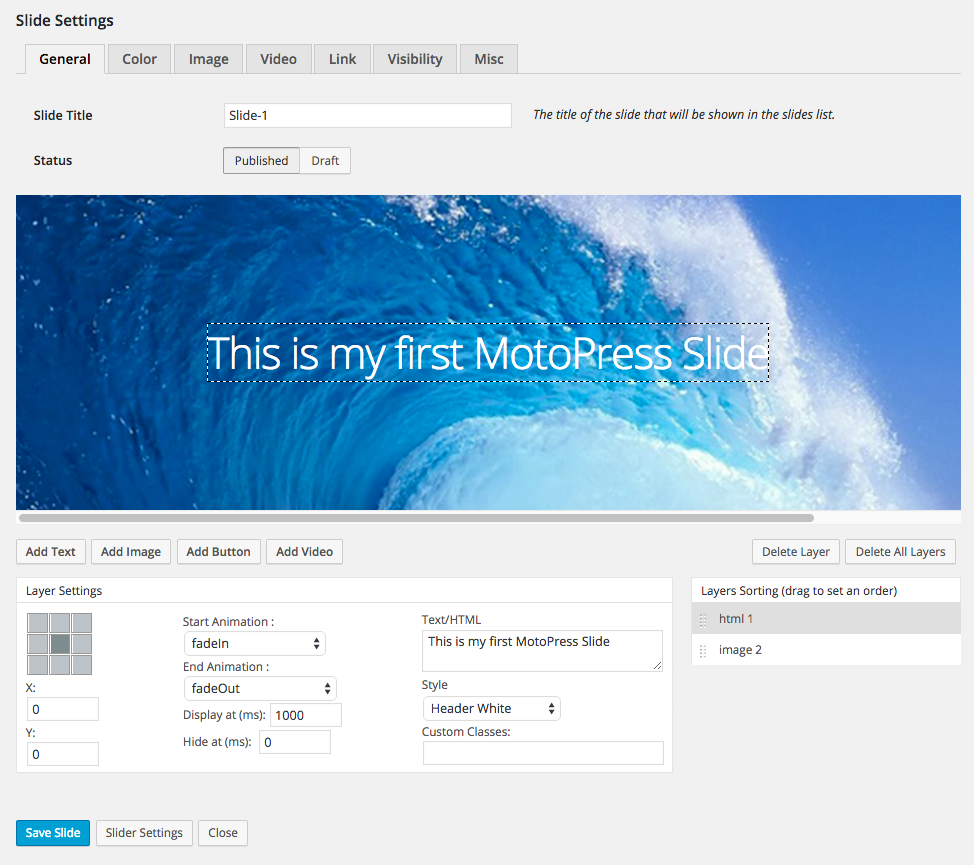
At the top are seven tabs: General, color, image, video, link, visibility, and misc. A preview of your slider dominates the heart of the page and underneath you will find options for adding text, images, buttons, and videos. Each type of content is known as a layer and these layers are displayed at the right hand side of the page.
You can rearrange the order of layers using drag and drop. Layer placement works in the same way as it does in graphical applications such as Photoshop with priority given to the layer at the top. In my example above, I have two layers: Image and text. If I had to position the HTML layer after the image, the text would not be visible.
The interface works really well. When you select a layer in the main canvas area, the settings for that layer will be displayed underneath. Clicking delete on your keyboard will remove the layer from your slide. Two delete buttons are available too: One deletes the layer you have selected, the other deletes all layers.
Layers can be dragged around in the canvas area. When you do so, you will see the X and Y coordinates change. This is useful as it means you can position layers across multiple slides in the exact same position (which is very useful for positioning content such as text). A nine box grid can also be used to position layers e.g. top left, center, bottom right, etc.
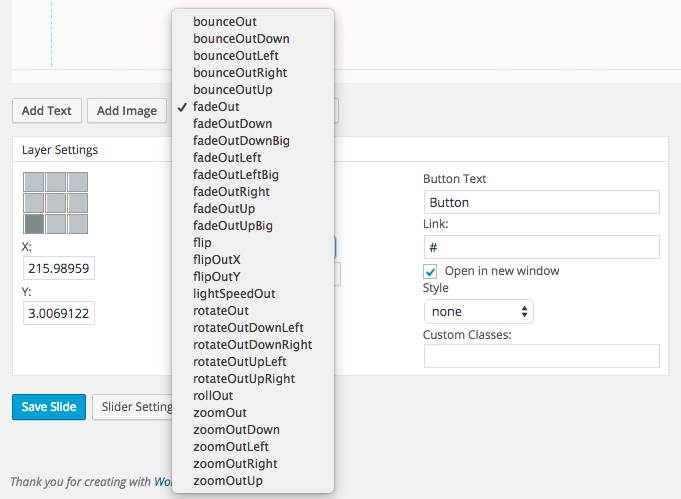
Dozens of animations can be used for fading in and fading out layers. This includes fades, zooms, flips, and bounces. Layers can be displayed and/or hidden at a particular point of time (in milliseconds). This is, in my humble opinion, one of the best features of the plugin as it allows you to display layers exactly when you want them displayed.
Predefined styles are also available, but if you prefer, you can define custom CSS classes for a particular layer.
In the general tab, you can name your slide and choose whether your slide is published or saved as a draft. This way you can get creative and save your slides before going live with them.
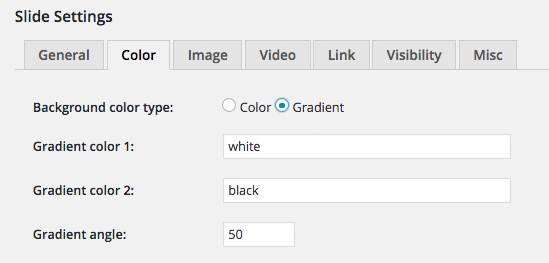
The color tab lets you select a color or gradient for your slide background. One thing that annoyed me was that there was not a color wheel for selecting colors. You have to input the hexadecimal code manually. Hopefully this is something they will address in a future version of the plugin. The gradient option lets you define two colors and the angle at which the gradient is applied.
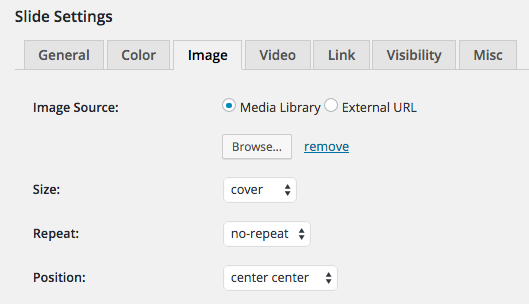
If you do not want a solid color or gradient background, you can use an image. You can select an image from your WordPress media library or define an external image URL. Size, repeat, and position attributes, can all be defined.
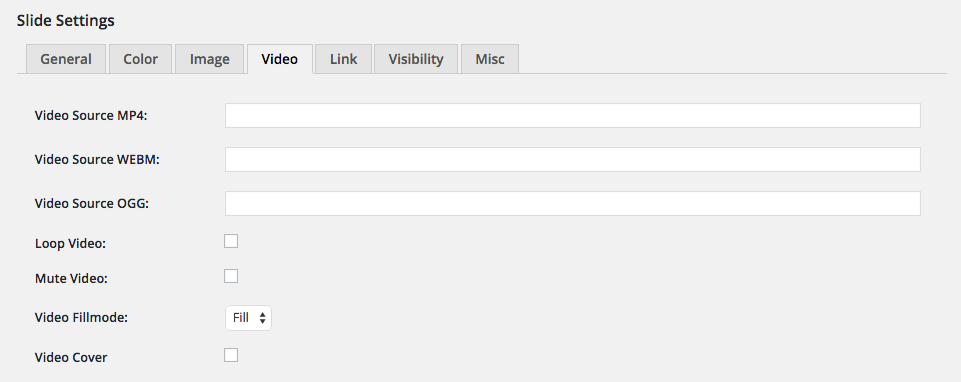
MotoPress Slider supports video backgrounds too. If you prefer, videos can be inserted into your slides using layers. You can display videos from YouTube, Vimeo, your media library, or an external URL.
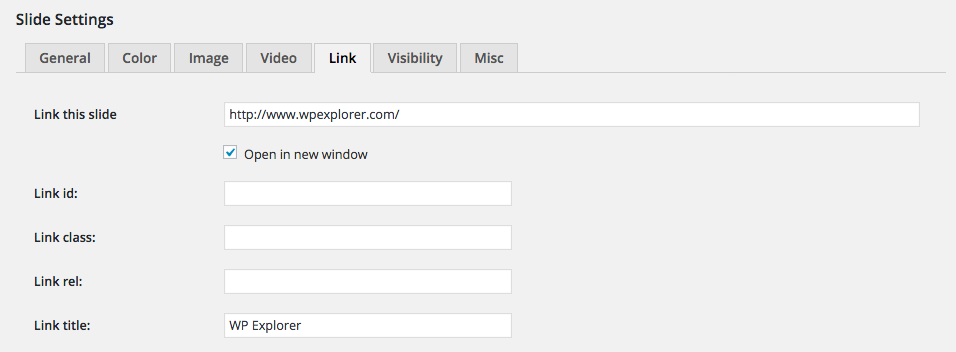
Slides can be made linkable. You can set the link ID, class, rel, and title attributes. When a visitor clicks on the slide in question, they will be taken to the URL you defined. Since links are configured on a slide per slide basis, you can make make some slides link to external websites and not others.
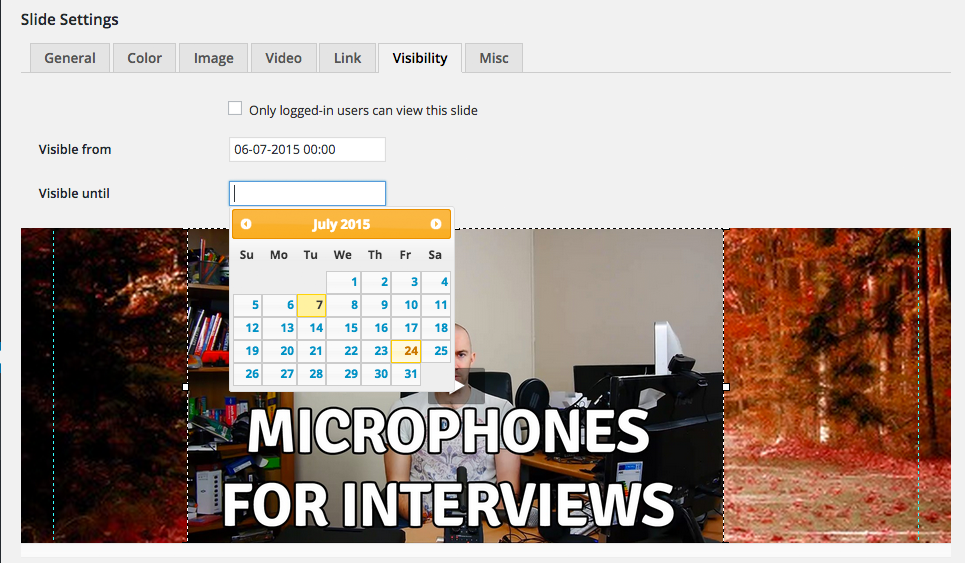
Slides can be restricted to logged in users. This could be used to only display slides to registered users. You can also make slides active during a specific time period. This could be used for a variety of uses. For example, you can create slides to promote a competition during the first week of December.
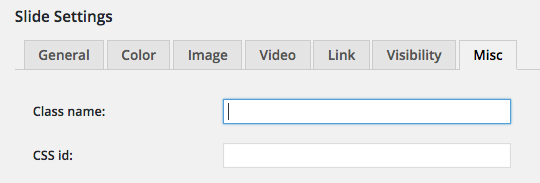
In the last tab you can define a CSS class name and ID for your slide. As I noted earlier, you can also style individual layers within your slide using custom CSS classes.
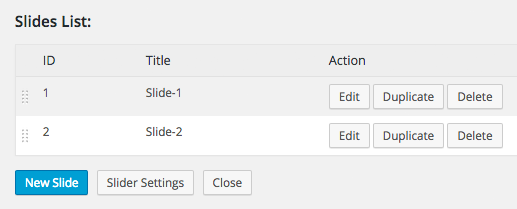
Once you have created your slide, you can save the slide using the save button at the bottom of the page. Clicking the close button will take you to the slides list i.e. all the slides you have created for that particular slider.
You can edit, duplicate, or delete, existing slides. Duplicating a slide is a handy option if you want to create a similar slide. If not, you can create a new slide from scratch.
Finally, you can insert your completed slider into your website using the shortcode alias you defined for your slider.
The MotoPress Slider
They say that beauty is in the eye of the beholder, however I was very impressed with what MotoPress Slider could do. It does not take long to insert custom backgrounds, text, images, buttons, and videos.
If you visit the main information page for MotoPress Slider, you will see a great example of what can be achieved using the plugin. It highlights how layers, and delaying the loading of layers, can be used to create professional sliders in minutes. The way that layers appear over time during a slide gives the impression that you are watching a video presentation (even when videos are not being used). It’s a simple effect that really transforms slides.

Pricing
MotoPress have adopted a fair pricing scheme for their slider plugin. Their personal license retails at $19 and offers one year of support and updates for one website. Retailing at $49, the business license increases the website limit from one to five websites.
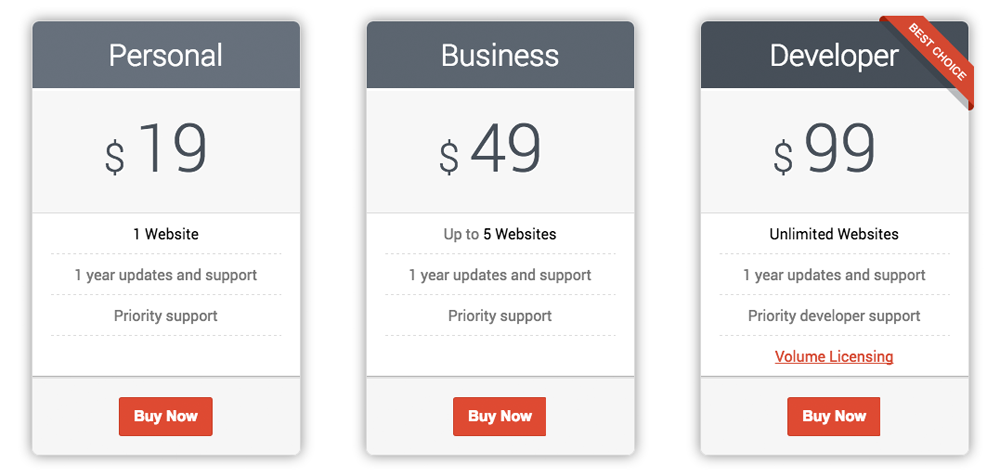
The developer license retails at $99. It offers priority developer support and gives one year of support and updates to an unlimited number of websites. Volume licensing is also available if you wish to package MotoPress Slider in a product of your own.
MotoPress Slider is 100% GPL. A license is required to get automatic updates and support for the plugin, however the plugin is still fully usable if this license key is not entered.
Final Thoughts
All WordPress slider plugins have a learning curve and MotoPress Slider is no different. You need to spend at least twenty or thirty minutes playing around with slides until you begin to understand what the plugin is capable of.
After a short period of using the plugin, I had a couple of “Aha” moments when I started to understand how everything worked. The first is when I understood how to get the most out of layers. The second is when I learned how animations can be used to fade in and fade out text, buttons, and images. However, the feature that really made me appreciate the potential of MotoPress slider was the option to delay layers appearing. This allows many cool presentation tricks to be used, such as drip feeding text to website visitors and popping up images and buttons at key points of the slide.
Once you have mastered these simple techniques, I am confident that you will be able to create professional slides using MotoPress Slider. If you need inspiration, I recommend checking the slider that is displayed on MotoPress as it highlights what can be achieved using simple text and image layers.
I hope you have enjoyed this look at MotoPress Slider. If so, I encourage you to subscribe to the WPExplorer newsletter to receive free updates of our latest articles and great WordPress tips, tricks, and offers.
Thanks for reading.
Kevin


Comments
No comments yet. Why don't you kick off the discussion?