Beginner’s Guide to MailChimp with WordPress
Email or newsletter subscription is one of the best ways to build your website’s traffic. In this tutorial, we’re going to show you how to setup and integrate MailChimp for WordPress.
MailChimp is free for upto 12,000 emails per month, or 2000 newsletter subscribers.
MailChimp is one of the best and easy-to-use email newsletter services. We’ve specifically chosen MailChimp because of its simplicity and most importantly – it doesn’t cost a penny for beginners.
Are Email Lists Really that Awesome?
Why yes! Email newsletter lists is one of the the best ways to build your website’s credibility and build traffic in the long term perspective. I use the phrase “long run” because just like proper white-hat SEO techniques, building an email list takes time, and depends on your quality of content, presentation style, layout and a lot of other factors.
Step 1 – Signup for MailChimp
The signup process couldn’t be simpler, really. The signup process requires no credit card information, so you can get started for free right away!
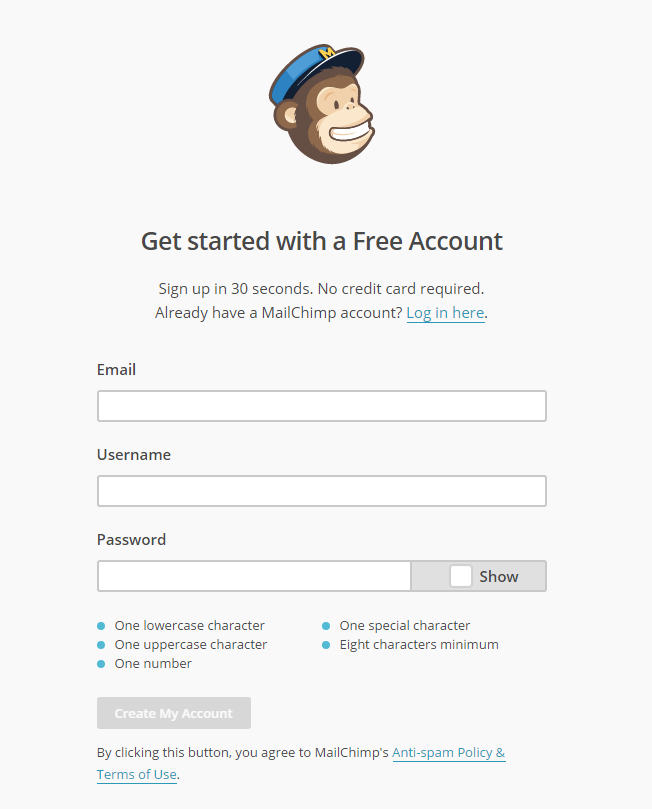
The MailChimp Signup Form
You’ll be sent an account activation email. Upon activating your account, you need you setup your profile – which is kinda important. Take a look at the screenshot below which lists the various fields that you need to fill in order to setup your MailChimp account.
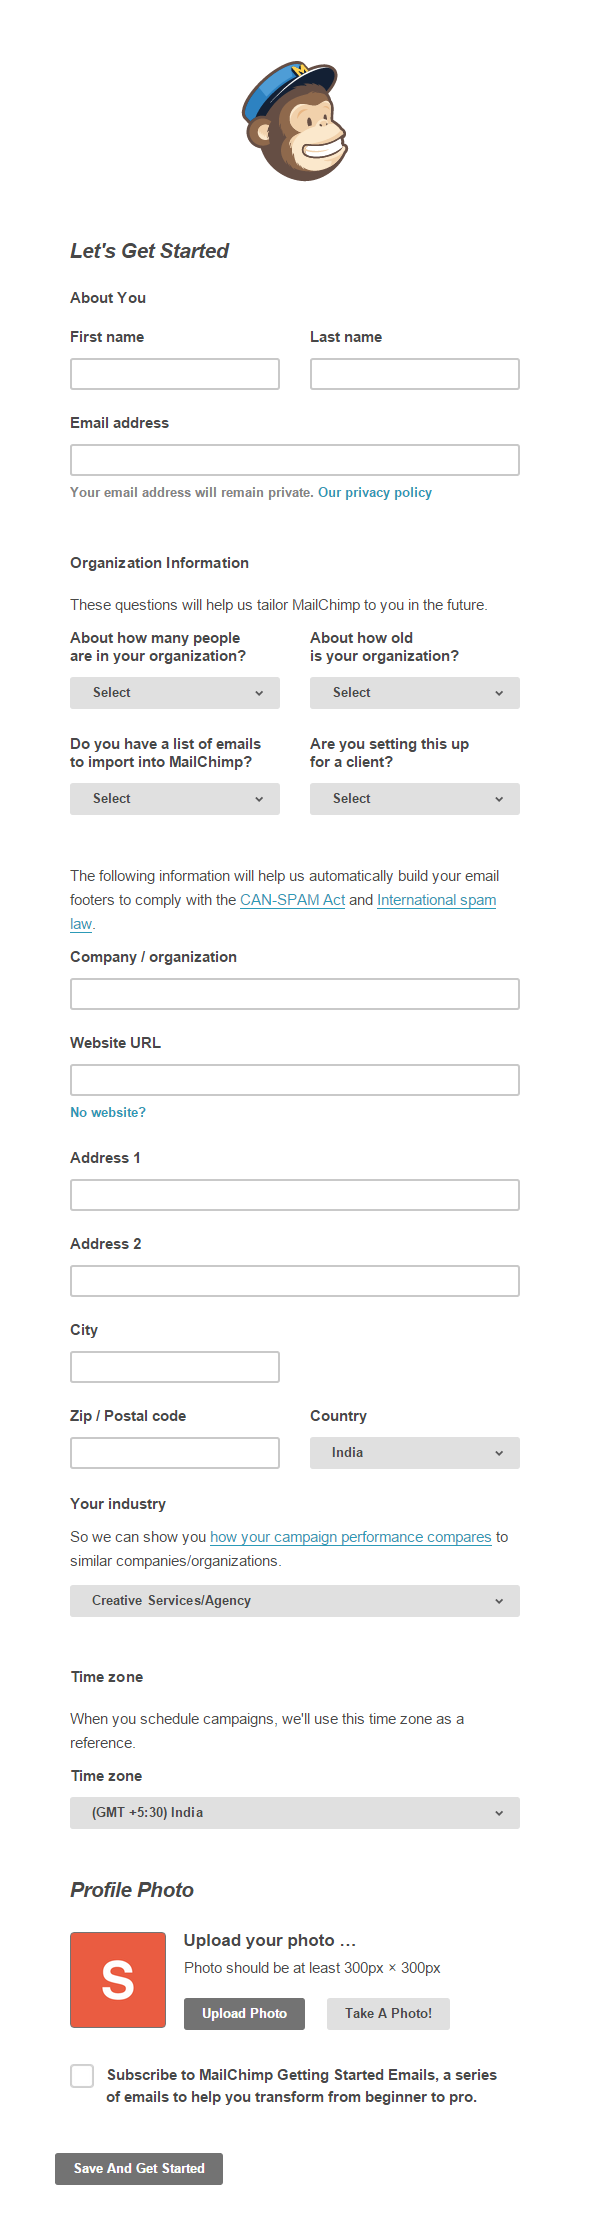
MailChimp Account Configuration
Once you’ve configured the account, it is time to get started with building your email list with MailChimp.

Getting Started With MailChimp Resource Guide
I’d like to mention that it is quite helpful to read MailChimp’s official Getting Started Guide. The guide isn’t only available in a web version, but also as a PDF, ePub and Kindle friendly format for you to read on the go.. The folks at MailChimp sure put a lot of effort into this guide and I think’s it best to give it a glance, at the least!
Getting Started with MailChimp in WordPress
Okay, so we’ve gone through our initial MailChimp configuration, and now we’re ready to get our hands dirty!
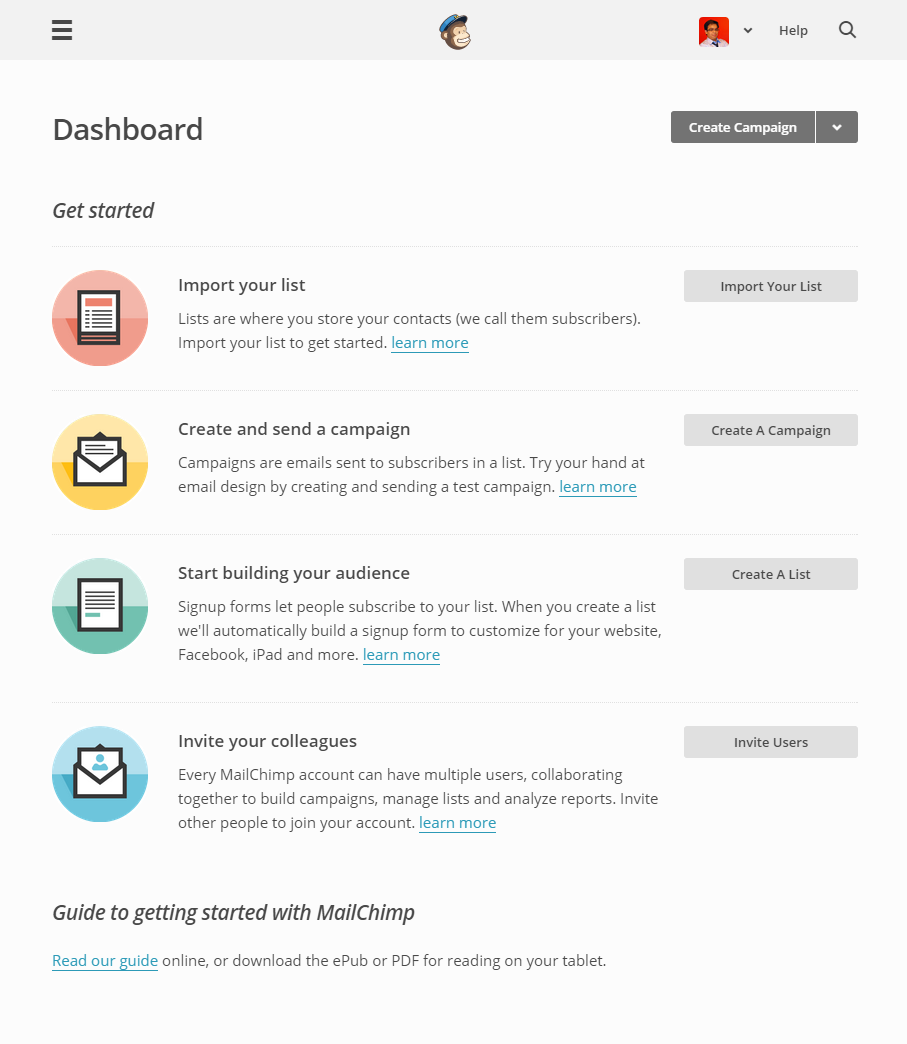
The MailChimp Dashboard
As you can see from the dashboard, you get started in multiple ways.
- If you’re shifting from another email service you probably have a list of email addresses (called a mailing list) ready. In this case, you can import all your contacts to the list.
- However, if you’re starting out like me in this tutorial, we’ll simply go ahead and Create a Campaign
I’m going to highlight each step with a screenshot so it’s easier for us to follow!
Create A Campaign
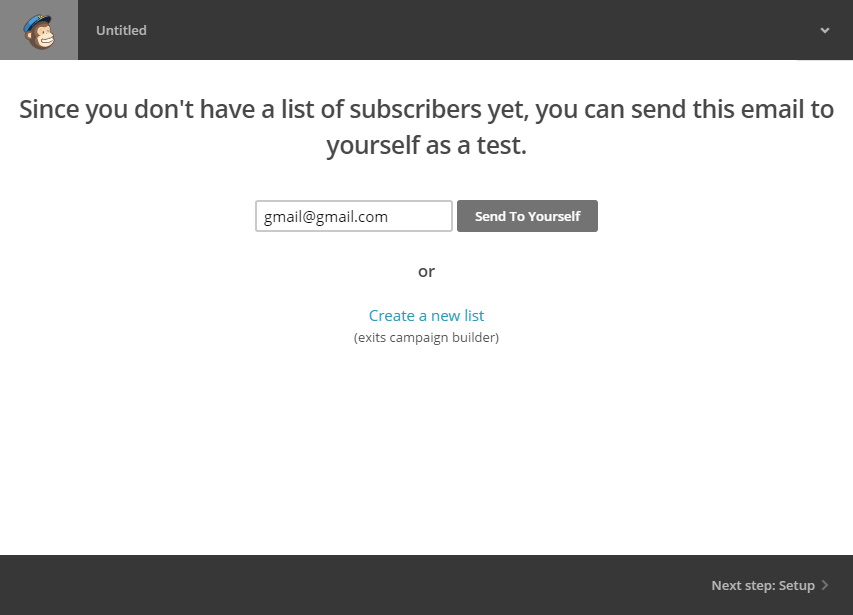
Step #1: Since we do not have an email list setup, I can simply send the email to myself. (That’s simple, and it works.) I would recommend doing this the first time, even when you have a mailing list ready. This avoids mistakes and keeps things clean.
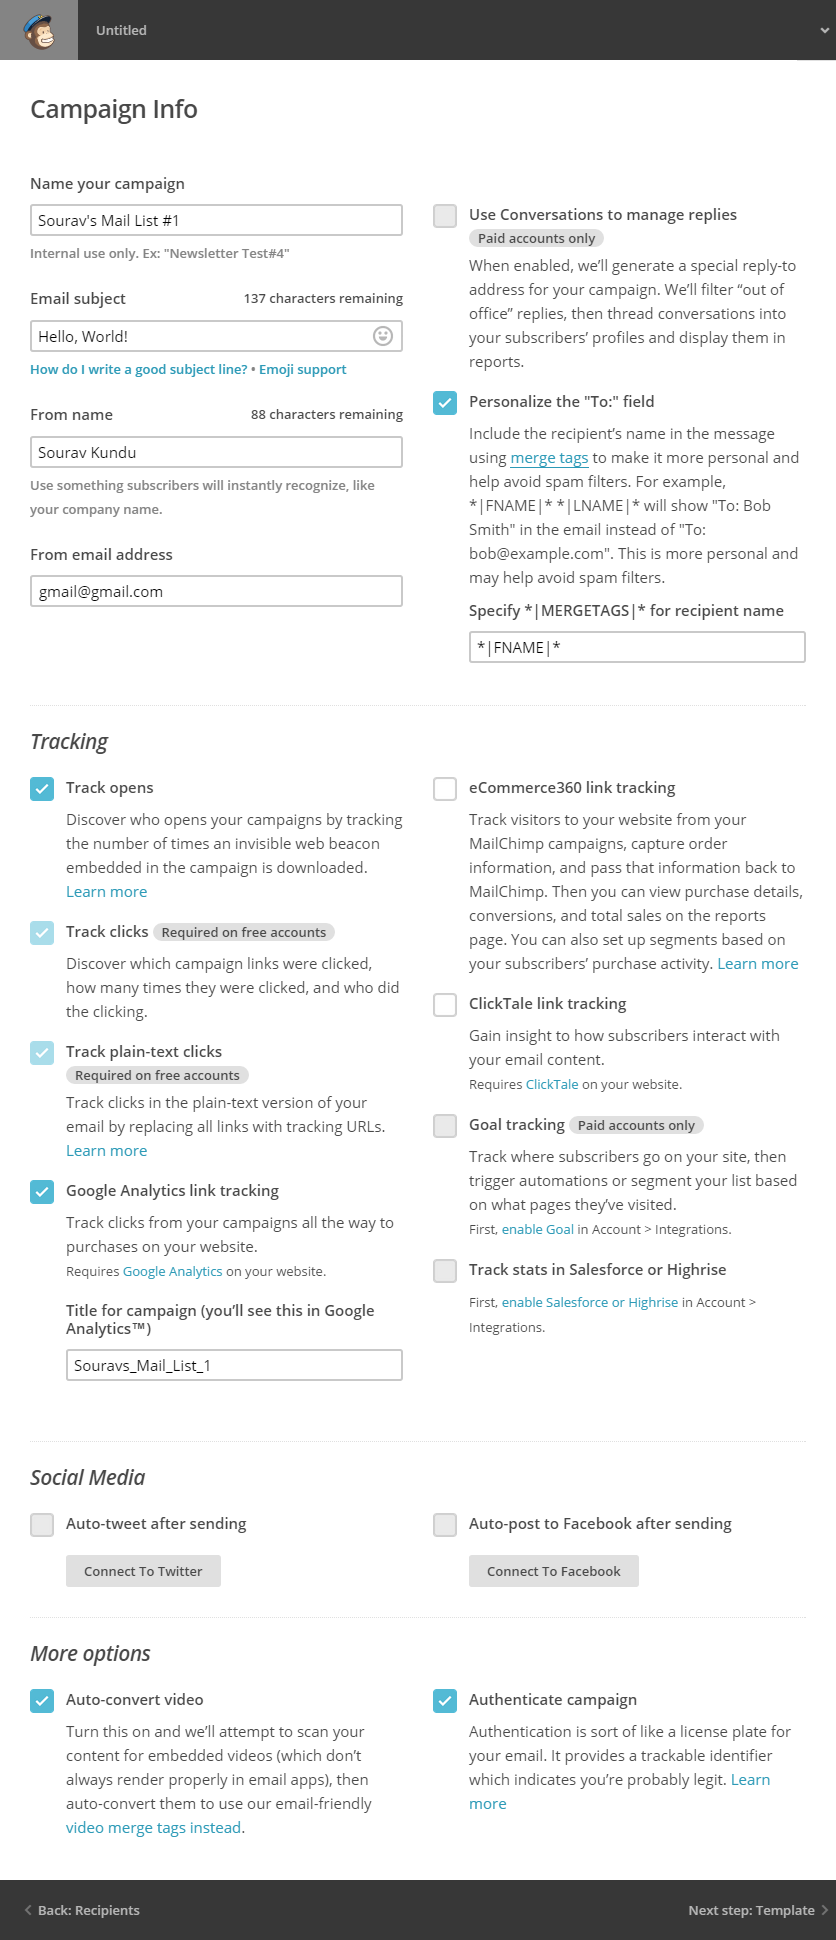
Add Campaign Information
Step #2: The campaign configuration page contains tons of amazing intuitive options (really!). It’s really simple to configure – kudos to MailChimp for such a brilliant workflow process!
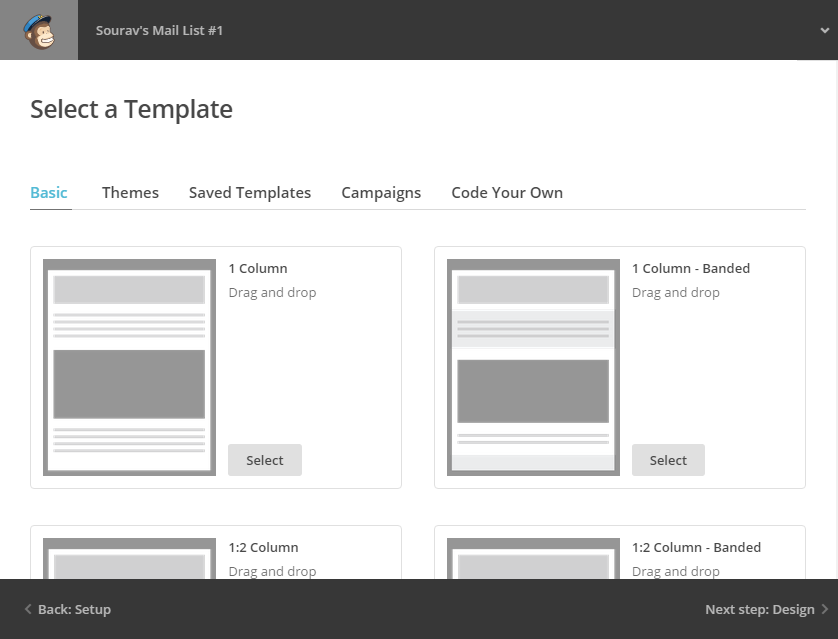
MailChimp Templates Basic Layouts
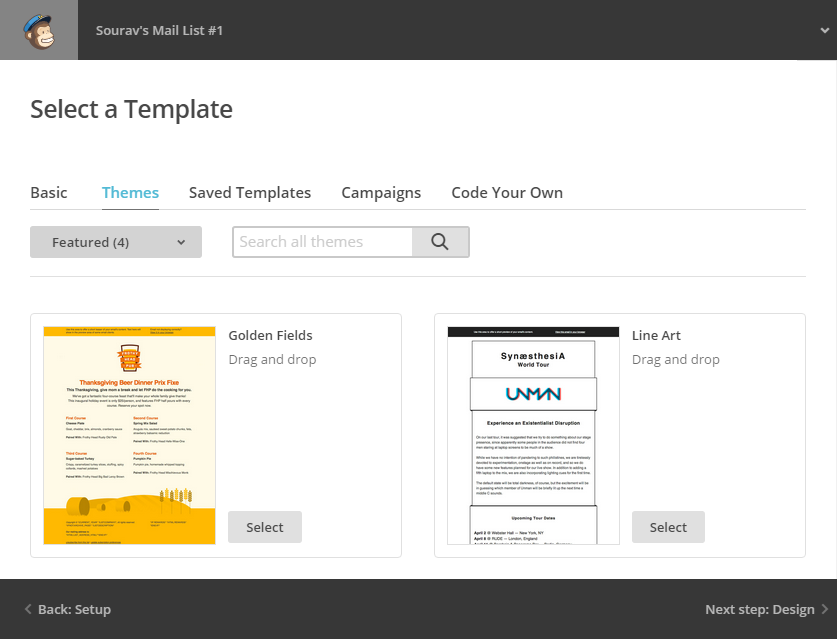
MailChimp Template Themes
Step #3: This is where you select the template for your email newsletter. There are loads of templates available ranging from basic layouts, to ready-made brilliantly designed themes. You can also use your custom code to design the email template. Or you can purchase an awesome looking template from marketplaces such as Themeforest or Creative Market. Choose any one you like to get stared.
PS: For this guide we selected the Modernist theme under Featured Template.
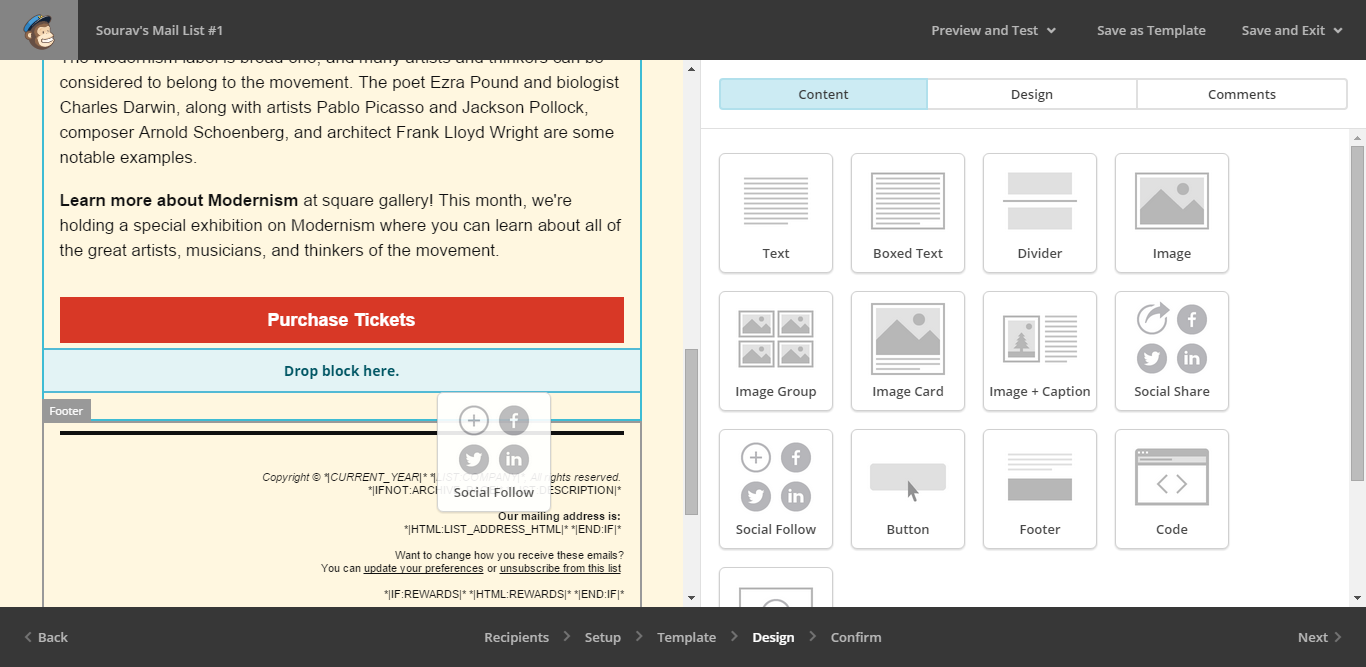
MailChimp Drag & Drop Template Designer
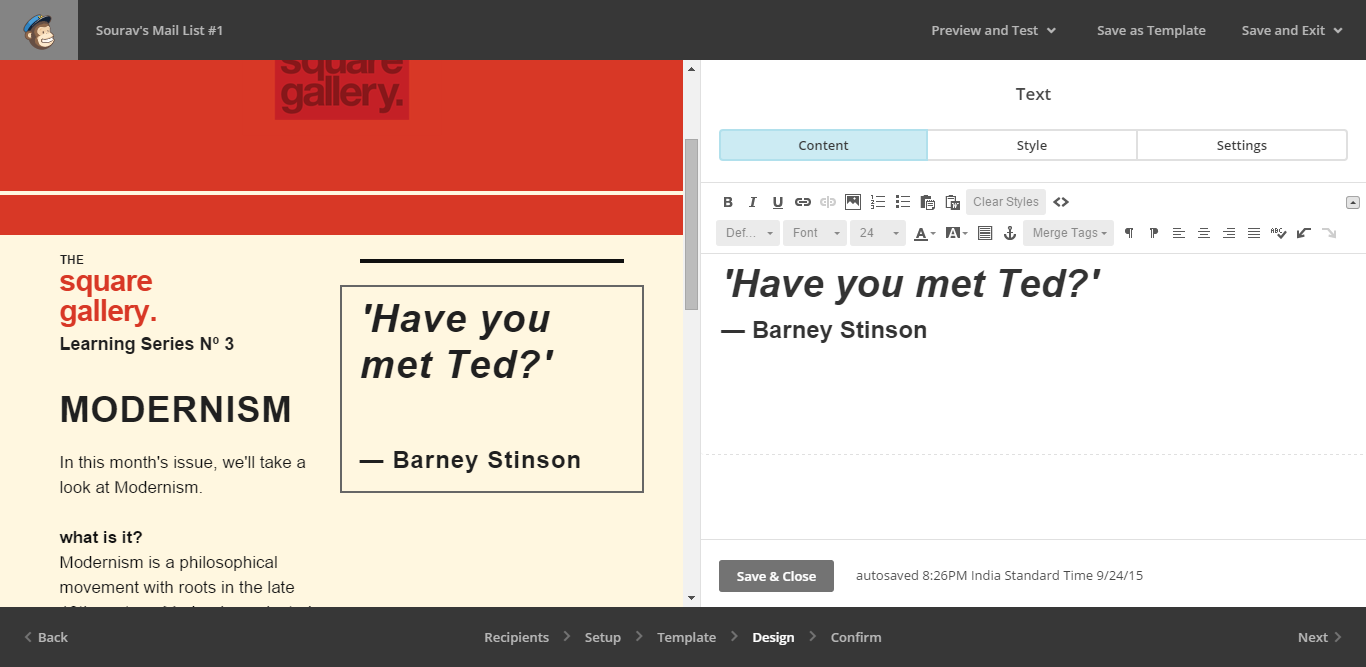
MailChimp Email Template Designer Live Editor
Step #4: Design the email template to your heart’s content. When you’re ready, hit next.
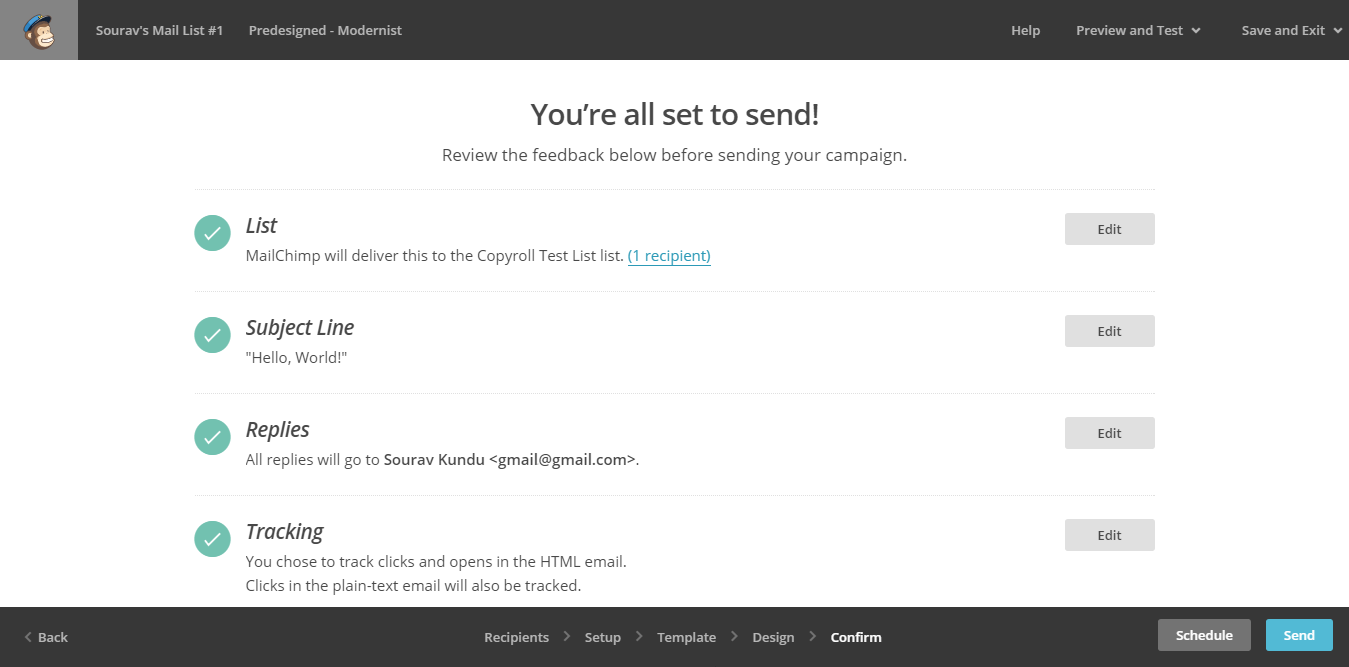
Campaign Review Page
Step #5: At the end of the day, you should have something like this after you’ve designed your email form.
Now that the form is ready, you can send it to your mailing list. For our tutorial, we have only one subscriber at the moment (my email). We’ll be sending out the email to check if everything works.

The final Send Now button
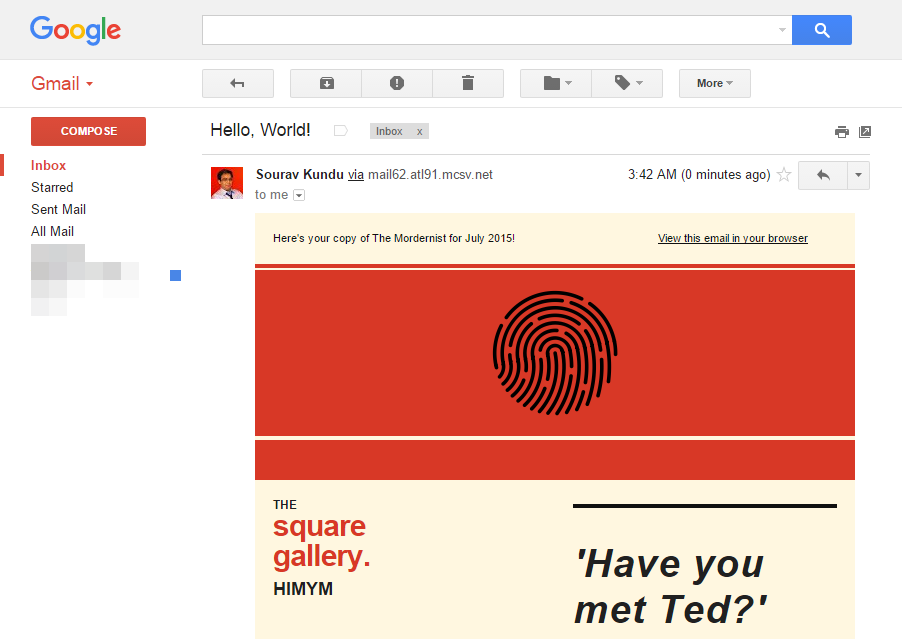
Picture-perfect newsletter delivered to my inbox!

Here’s a view of the MailChimp Email Analytics (free version)
Integrating MailChimp with WordPress
Now that we know how to setup and configure MailChimp, we can go ahead and start to explore it’s WordPress specific features. You can directly embed the MailChimp signup form’s (sometimes called subscription box) code into your WordPress sidebar using a widget. This makes it possible to embed a signup form anywhere in the theme with a widgetized area. Common widgetized areas include the header, in between posts, after post, footer and the sidebar.
Method #1 – Using the MailChimp HTML Embed Code
In this method, we’ll be generating the newsletter subscription box code using MailChimp’s embedded code generator.
- First off, you’ll need to create a List. To do this, simply visit your MailChimp dashboard, and click on Lists.
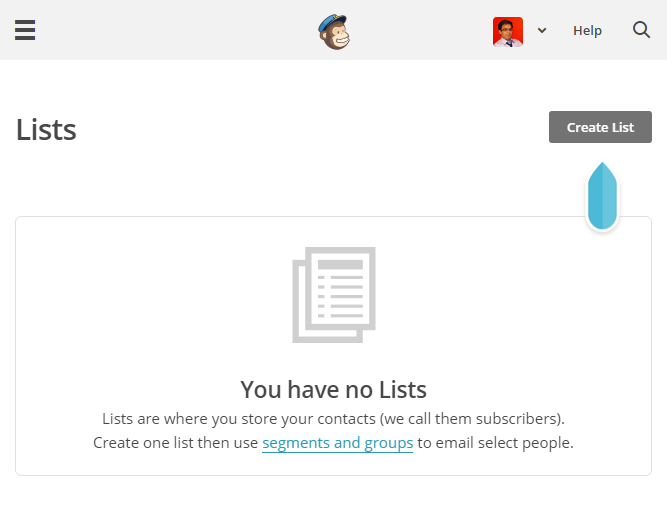
Lists in Mailchimp
- Chances are that you will not have any list created. Don’t worry, creating a list is very simple. You’ll only need to add a few parameters to create the list. For our tutorial, we’ve creating a list called Copyroll Sample Newsletter.
- Once you create a list, it’ll be available under MailChimp Dashboard > Lists > [List Name]
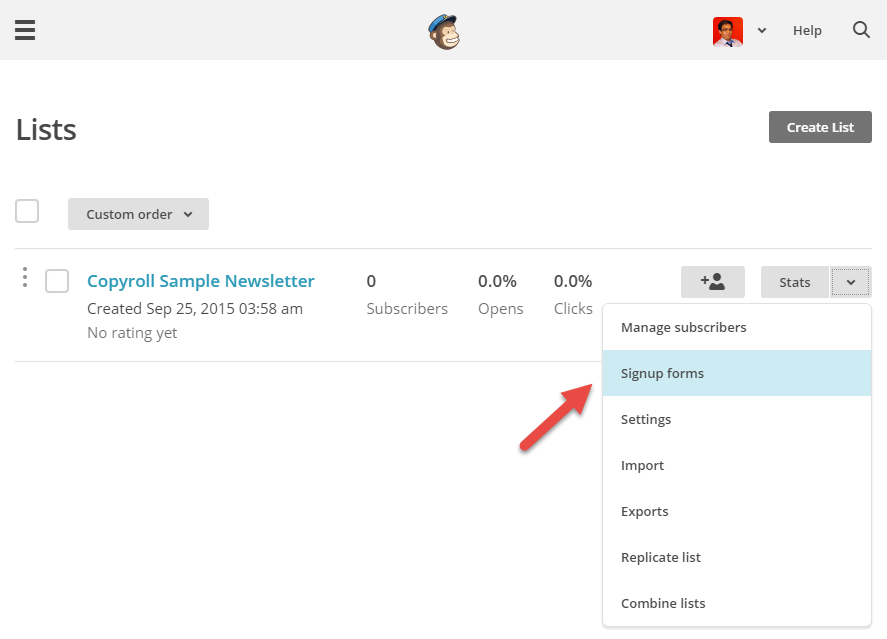
Generate A List Signup Form
- Next, you need to create a Signup Form for that list. You can design the signup form or use the default one. Each list has a discrete signup form design.
- You can access the signup form for a list by opening the List’s dashboard, followed by Signup From. Ultimately, you should reach the following page:
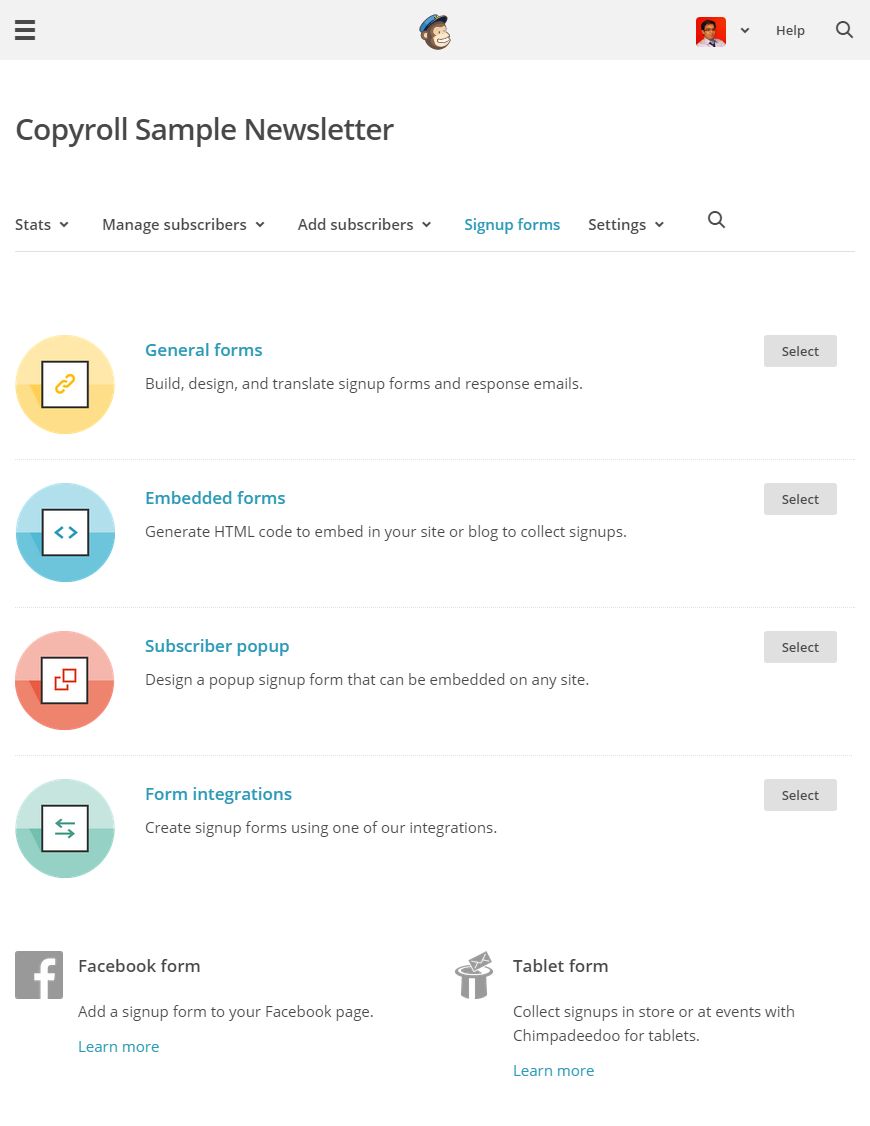
Types of MailChimp Signup Forms
For our purposes, we’ll be using the Embedded forms option. Embedded forms allow us to design the form and the HTML code is automatically generated, so that we can embed it in our websites, blogs, etc.
The following screenshot shows the Classic layout of the embedded forms.
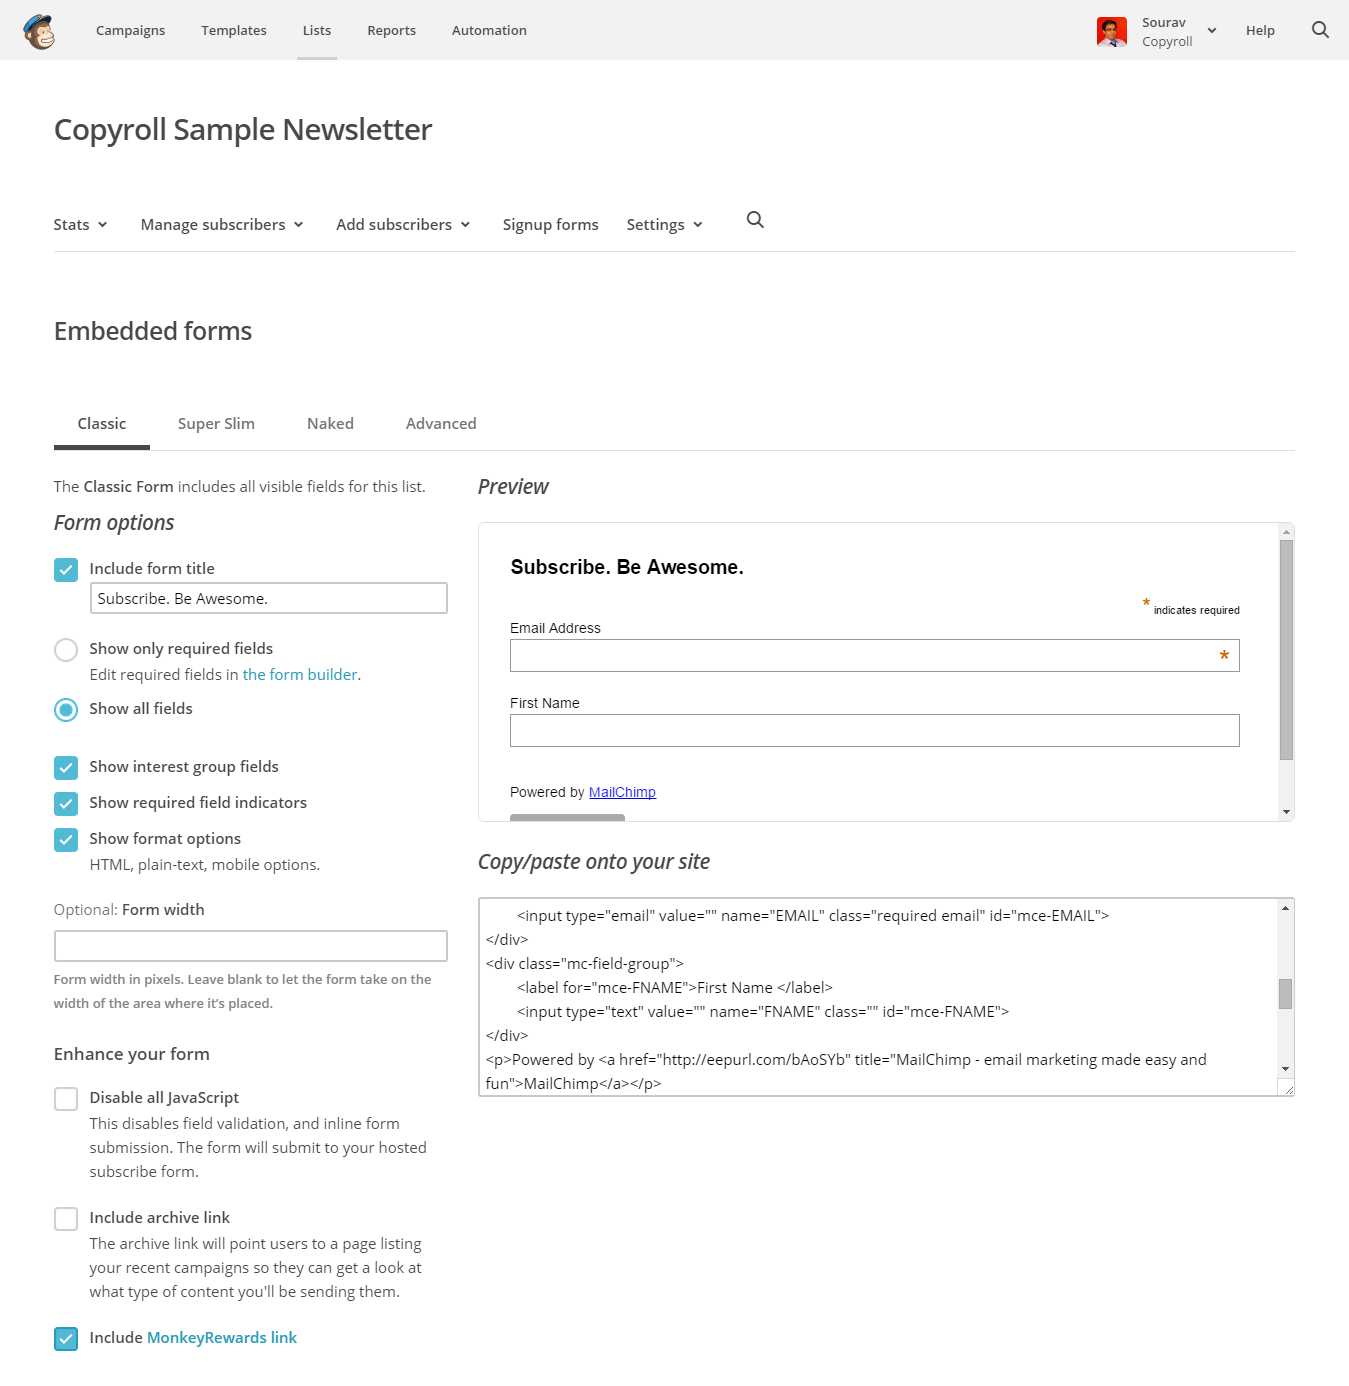
Embedded forms in MailChimp
Once you’ve designed your signup form, copy-paste the code in a widget in WordPress.

Sequence of steps to embed MailChimp signup form in a widget in WordPress
- Go to WordPress dashboard > Appearance > Widgets
- Drag and drop the Text widget to your first available sidebar. (We’re using the Twenty Fifteen theme, so we have only one sidebar)
- Give a title to your widget (optional)
- Paste the code and hit Save.
The change should be immediately reflected in your site.
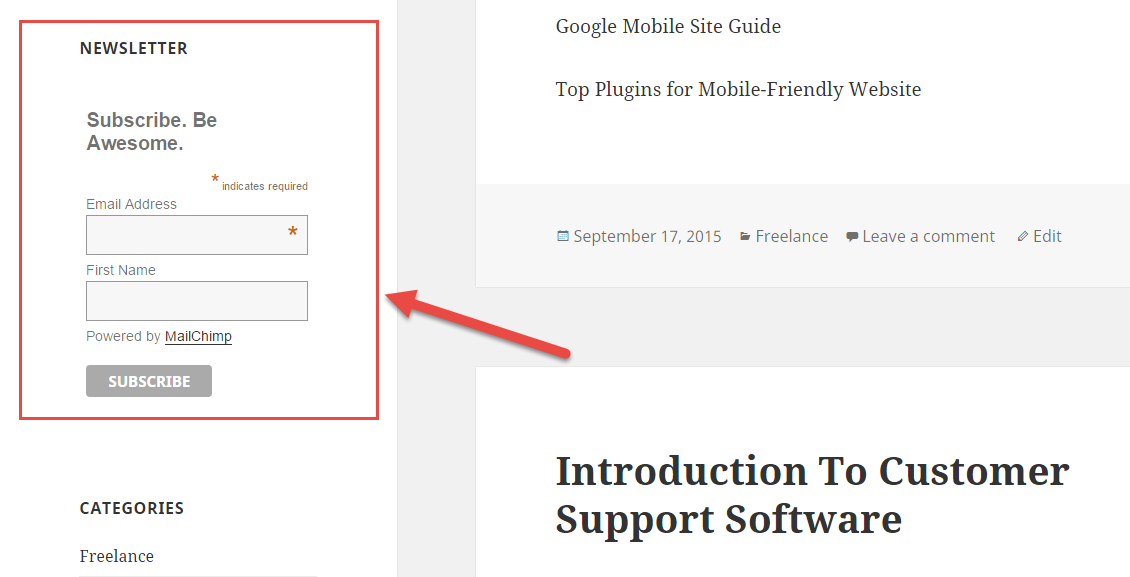
A very basic (default) MailChimp embedded signup form using WordPress widgets
The beauty of this method is that you can use this on any HTML website. It is not necessary that you’ll have to use WordPress or any specific CMS. Now let us take a look at another WordPress-centric method.
Method #2 – Using List Building Plugins
There are multiple email list building plugins available in the WordPress repository. I’ve also gone through MailChimp’s official WordPress integration directory in search of plugins. Here’s what I found:
- MailChimp recommends the Integral MailChimp for WordPress plugin for which they have a dedicated tutorial. However, this is a premium plugin starting at $99 for a single site license.
- MailChimp also recommends a couple of other plugins like MailOptin, Coming Soon Pro, and GoalWP.
- You also have the MailChimp Widget plugin that creates a ready-made widget for you. We’ve used a similar technique in Method 1, but this makes our work easier.
- You could also try out any of the popular dedicated list building plugins like OptinMonster, and SumoMe List Builder that will leverage every nook and cranny of your webpage to squeeze in an email signup form, ensuring maximum signup efficiency. They use advanced techniques like double-opt ins, exit-intent technology, multiple unobtrusive popups and much more.
Method #2 – Example – MailChimp for WordPress

I tried out the MailChimp for WordPress plugin to see how it works. The process was very simple:
- Signup for a MailChimp account (duh!)
- Download and install the plugin
- Generate an API key (link available in the plugin’s settings)
- Integrate it – and done!
Screenshots:
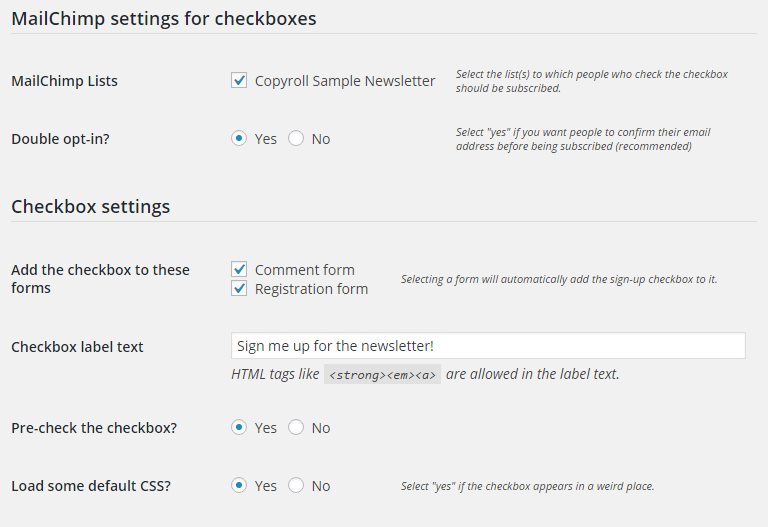
MailChimp for WordPress – Checkboxes option page
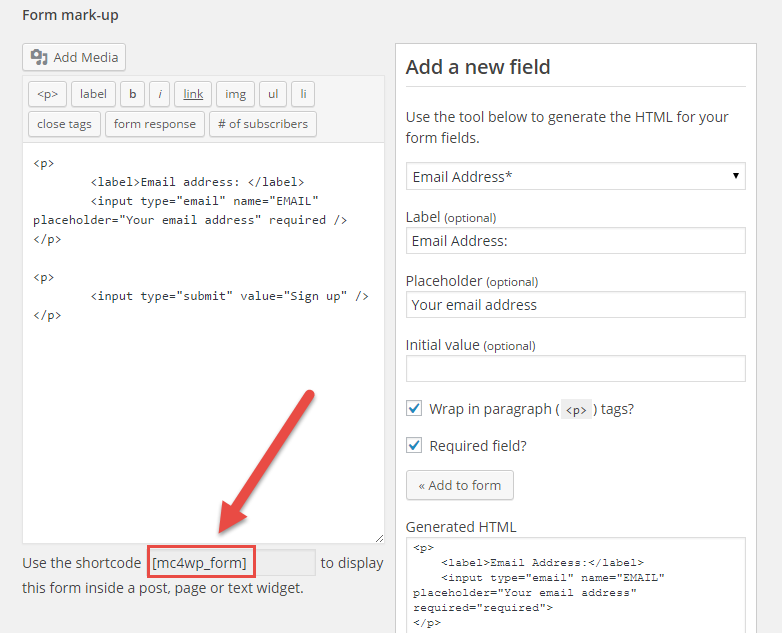
MailChimp for WordPress – Forms (builder) option page
This plugin creates a widget which you can directly add to your sidebar. Moreover, you can design forms using your MailChimp data, and play around with advanced options like Checkboxes, etc. The form builder automatically generates shortcodes for the signup form, which can be used in any part of your WordPress site including widgets, posts and pages.
Conclusion
Email lists gives you an on-demand source of traffic at your fingertips. Think about it – all the folks who signup for your list, do so voluntarily. Your email subscribers want to hear what you have to say. Thus, it is your responsibility to present them with top-notch content and not misuse their email list. Remember that if you spam your subscribers they’ll likely unsubscribe fairly quickly.
If you have any questions or suggestions about the tutorial, please feel free to use the comments section below, or tweet me at @souravify. Thanks for reading and happy list building!


Hi,
Great article to help beginners get started with MailChimp. We’ve developed a MailChimp plugin which allows for an unlimited number of forms, unlike MailChimp for WordPress.
Many of the WordPress plugins have severe limitations on what can be achieved in the free version. MailChimp for WordPress has limitations that make it unusable for any serious marketing effort, thus why we spun up our own plugin Easy Forms for MailChimp – which has many of the features and functionality of MailChimp for WordPress – and then some.
Surprised you didn’t mention it here as we’re really starting to build up a solid user base around the plugin.
https://wordpress.org/plugins/yikes-inc-easy-mailchimp-extender/
Evan
Awesome! Thanks for sharing!
Hey Sourav – that was a good read! I’ll be sharing this with my followers. How about the Bloom plugin from Elegant Themes – VERY user-friendly.
We actually did a full Bloom optin plugin review a while back. But you have to have your MailChimp setup and configured before you can explore optin plugins 😉
Thanks for sharing!
Hi Sourav. Good one helped a lot.
thank kyla ..my problem is solved this tutorial
Hi all
It is good article explaining how wordpress blog can be integrated with mailchip. But Chimpmate integrate wordpress with mailchimp – it’s a MailChimp based email marketing plugin for wordpress. It is a lead generation newsletter plugin that let you to convert your readers into subscribers. It is a fully customizable plugin with professional design. The plugin offers easy installation of lightbox, slider, widget, addon, topbar and flipbox.
Raju