How to Setup Cloudways WordPress Cloud Hosting

There are literally hundreds of hosting options on the web, each with tons of different hosting options. Shared hosting. Managed WordPress hosting. VPS. Dedicated server. And of course there is cloud hosting. When you search for managed cloud hosting Cloudways is one of the first to appear, and with good reason. Since their inception in 2011 Cloudways has provided one of the top managed cloud hosting services and today we wanted to show you what they’re all about.
An Overview of Cloudways Hosting
Cloudways is one of the top providers of cloud hosting. What is cloud hosting? It’s pretty much exactly what it sounds like – hosting via the “cloud.” Basically a huge number of real world servers work together as one system to provide stable and secure hosting for virtual servers. This means higher performance with less downtime at a lower cost, and with even greater web hosting flexibility.
What Makes Cloudways Different
Cloud hosting is available from a number of well-known hosting companies, but Cloudways has taken it to the next level. They’ve improved upon the traditional cloud to bring you several managed cloud hosting options with standout features.
First off they use the latest servers and systems (Nginx, Redis, MySQL, Varnish, Memcached and Apache to be specific) as a part of their performance stack. In addition they pre-install their helpful Breeze Cache Plugin which includes features for file exclusion, grouping and minification, as well as Gzip compression for optimized file sizes. This incredible combo is what makes Cloudways hosting fast and reliable.
The other great part about Cloudways as opposed to some of their competitors is that they provide managed server-side security with all of their plans. They use multiple layers of protection (such as firewalls, 2-factor authentication, and IP whitelisting) along with auto-updates to keep all of the servers on their platform up to date.
Plus you’ll be hard pressed to find another host that allows you the variety of platform choices (your pick of DigitalOcean, linode, VULTR, Amazon, Google), unlimited installations, team collaboration, easy server scaling and an amazingly easy to use account console (which you’ll see plenty of snapshots of later) and free SSL certificates via Let’s Encrypt.
Cloudways Managed Cloud Hosting Plans
Now that you know what it is Cloudways does you should have a look at their plans. One of the best features of Cloudways is that they offer a variety of hosting options to suite any website’s budget or data needs.

You can choose from cloud servers starting as low as $10 per month, contact them for a custom built plan or choose one of the other server plans in the middle. All of their mange cloud hosting plans allow you to add as many website installations as you like, so if you’re a developer you can easily create a number of staging sites for clients without a hitch. And if you’re not a developer and just want to move your blog to Cloudways you’ll be happy to know that they’ll even help you migrate one site to your new server for free.
Cloudways WordPress Hosting Guide
If Cloudways sounds like the right host for your website (or if you just want to get an inside look at what their hosting has to offer) then our setup guide is the perfect next step. will walk you through the steps of getting your cloud server setup with Cloudways. Are you ready?
Signup for a Free Cloudways Account
To get started go to the Cloudways homepage click on the link to get started for free. You’ll be taken to the main Cloudways signup page. You can choose to login with your LinkedIn or Github account but we prefer to sign in the old fashioned way with email.
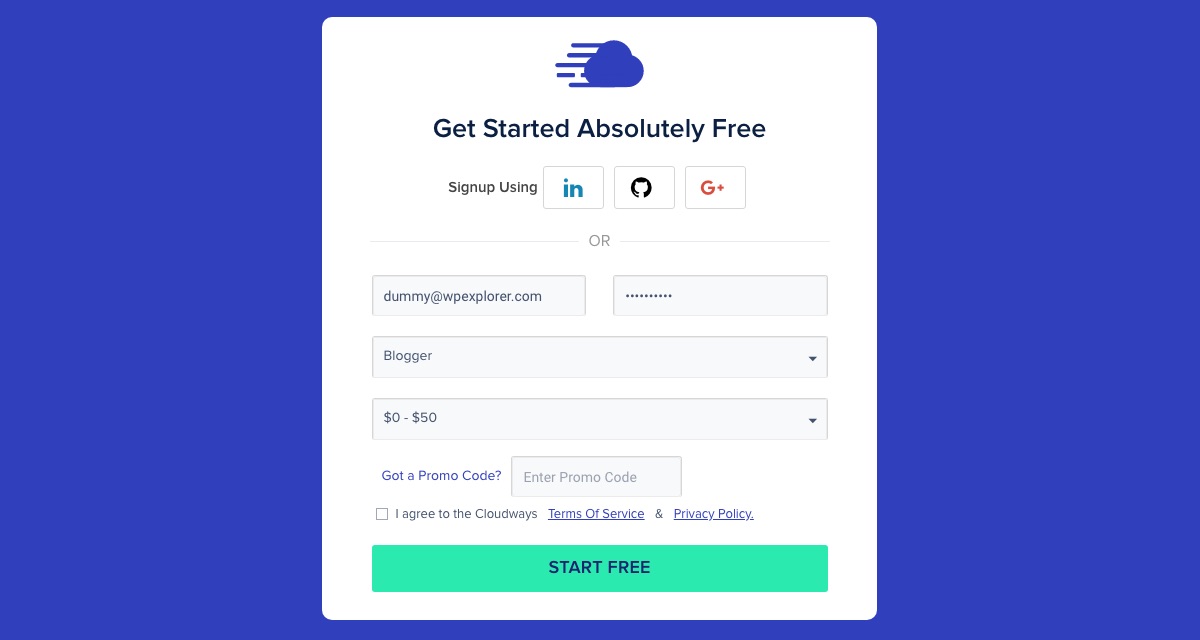
Simply enter your email address and a password. You should then get an activation email in a few minutes.
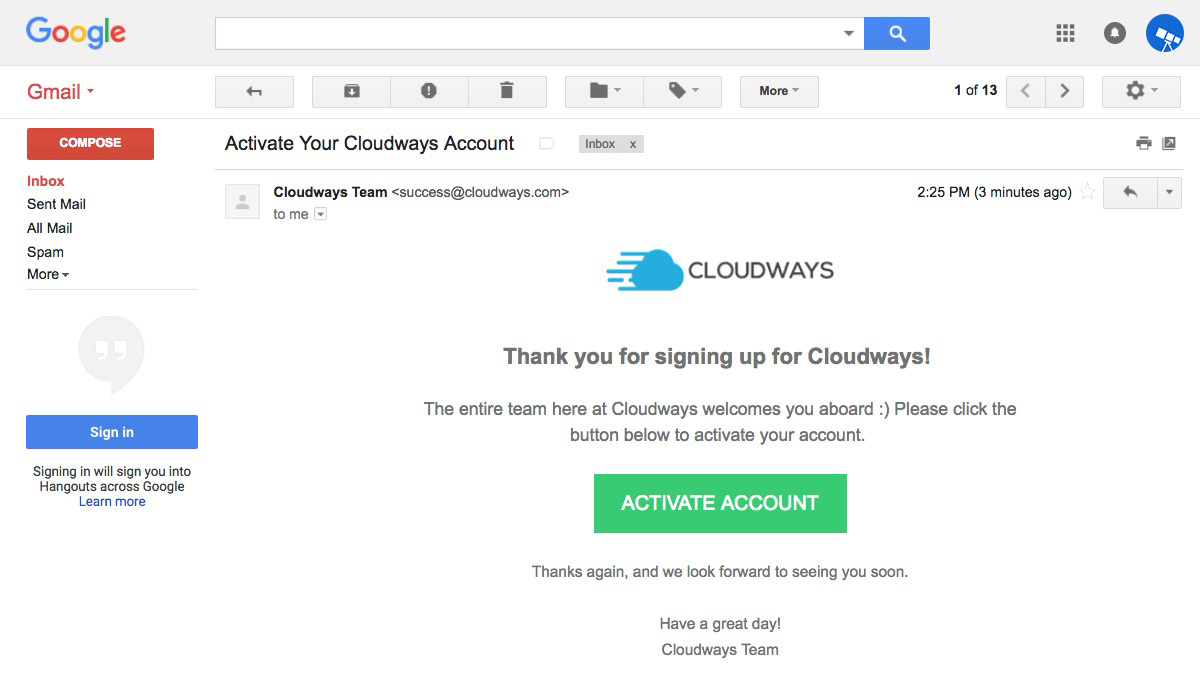
Once you receive your activation email click on the big green button to activate your account now.
Note: If you see an error when signing up or if you don’t get the verification email right away don’t worry. Simply open up the 24/7 customer support chat box in the lower right corner of any Cloudways page. A Cloudways support tech should be able to help.
Setup Your Cloudways Hosting Server
Now It’s time to get started actually setting up your server to host your website (or websites). After clicking on the “Activate Account” link in your email, you should see the following screen.
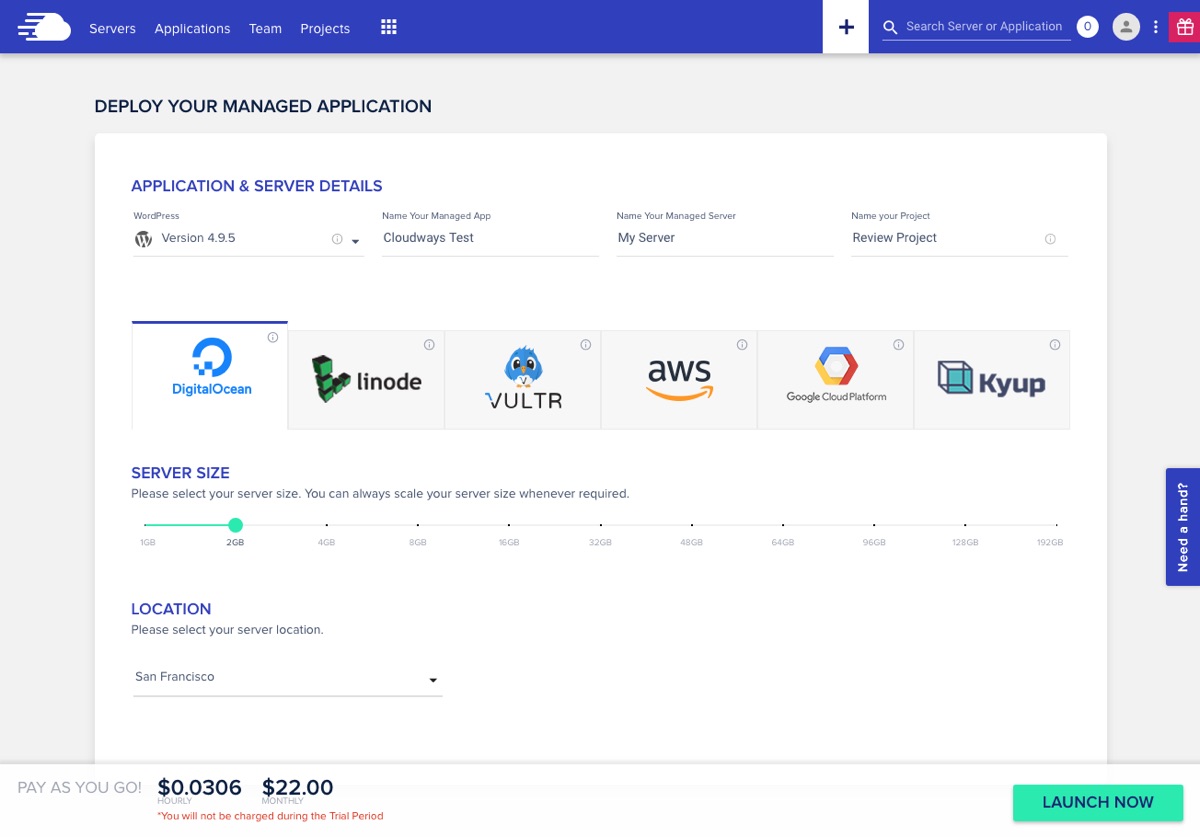
First you’ll select your application. Cloudways knows that WordPress is one of the most popular web platforms around so they’ve conveniently put it right at the top. There are four options to choose from:
- Standard WordPress
- WordPress Plus WooCommerce
- WordPress Multisite
- Clean WordPress (no Cloudways optimizations)
Choose the option that fits your needs. If you’re not sure just go with the first option for standard WordPress. It’s easy enough to add WooCommerce later on or even enable multisite at a later date (we have a guide for enabling WordPress multisite if you need some help). Plus we think the Cloudways optimizations are pretty handy.
Next, add your own custom names for the app, server and your project. This is for your eyes only so pick something that will help you remember which website you’re setting this up for.
Then after making your app selection you’ll see available options for your cloud provider, server size and datacenter locations. All plans offer a free 3 day trial to give you a chance to test their hosting. Currently, the available provider options include:
- Digital Ocean: SSD based storage with 7 datacenters in 3 countries
- linode: cloud provider with 8 datacenters in 3 regions
- VULTR: SSD based storage with 13 datacenters worldwide
- Amazon EC2: configurable disk size, 8 datacenters in 6 countries
- Google Cloud: 4 locations in 3 continents, designed specifically for large businesses or resource intensive websites
All of Cloudways’ cloud platforms offer similar services with the biggest difference being price and reliability. Digital Ocean and VULTR offer nearly unlimited bandwidth for your sites at a lower cost, making them great options for developers on a budget. Amazon & Google on the other hand provide bandwidth on a pay-as-you-go basis, meaning your monthly charges will likely be higher but you get the piece of mind that your site will never be throttled since you’re paying for every resource you use.
When it comes to choosing a server size do your best to pick the plan you estimate will meet your needs. If you’re not sure which to choose go with a smaller plan – you can always add more resources to your server at a later time as needed. Cloudways makes it easy to upgrade your server plan at any point in time right from your server console (which we’ll show you later).
Once you’ve set you provider and server size the last step is to select a server location. We recommend choosing a server close to your main audience. So if most of your traffic comes from the USA then choose a server location in that country.
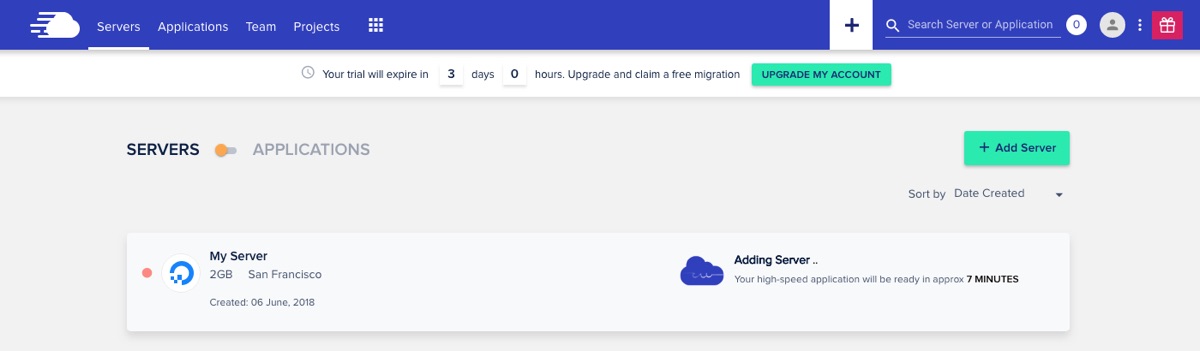
With that done you’re ready to launch your server! You should be taken to your console where you will see an estimated wait time for your server to be setup (our estimate was 7 minutes, and for us installation took approximately 8 minutes – so pretty close!). While waiting you can complete your account profile with information about your company.
Once your server setup is complete you can move forward to managing it. Click on your primed server to open up the console.
Managing Your Cloudways Server
The first time you open your Cloudways server console it will have a walk though guide open to teach you about your server summary, navigation bar, available actions and details.
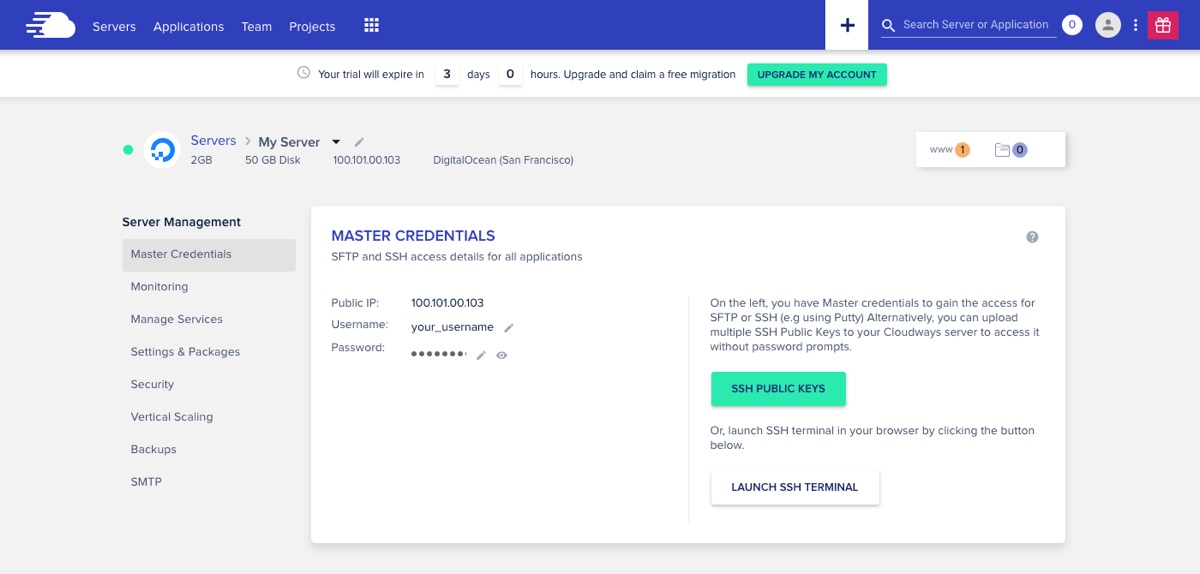
By default your console will be open to your Master Credentials. From here you can edit your username and password, manage SSH keys, and view your IP address.
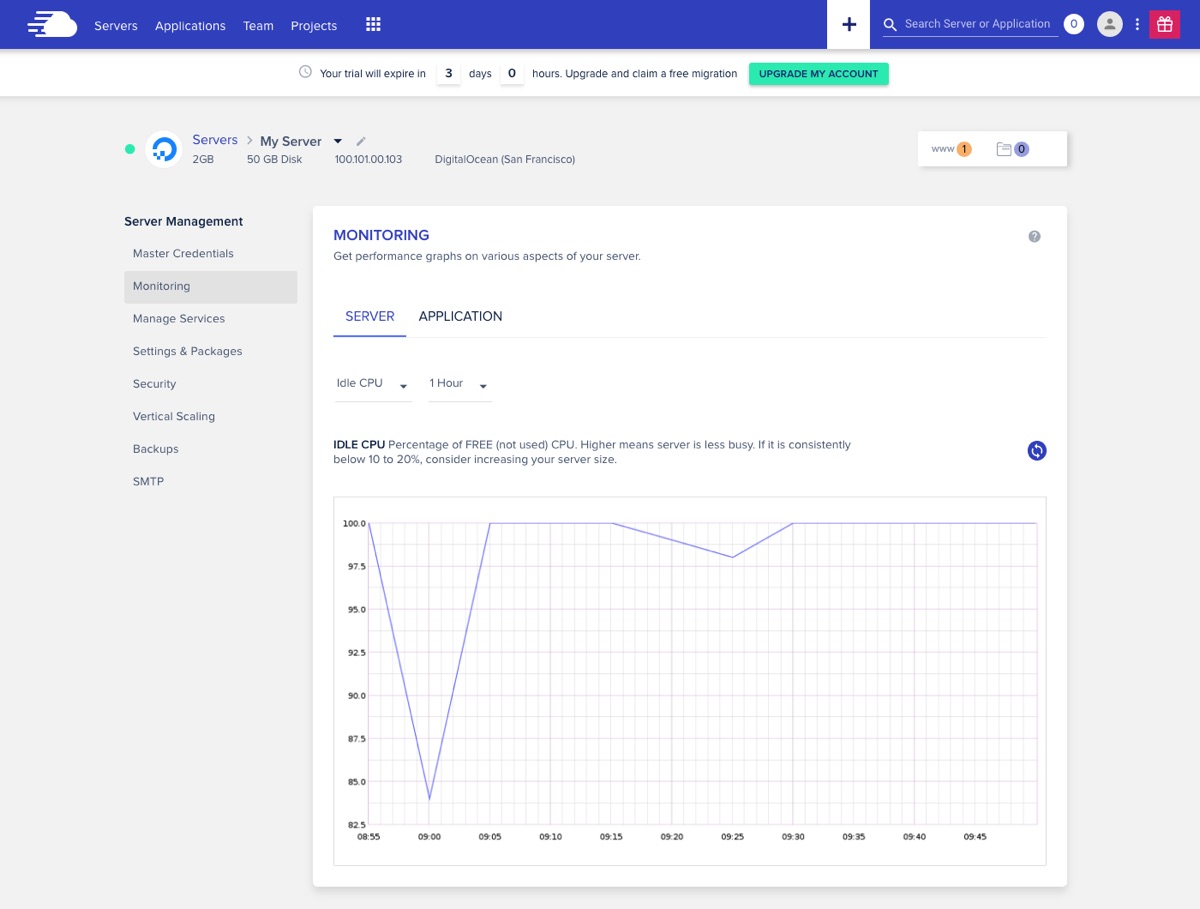
Next up is the Monitoring tab. There are a ton of different graphs and options for monitoring your server and applications, however there are two key server options to keep an eye on. The first is your Idle CPU. You can see in our graph that the server is mostly in the 95-100% range of free CPU which means there is plenty of room for our website to operate at the moment. If the graph was reversed and there were a significant number of instances where our free CPU was at 0% then it would be time to scale up to a larger server plan.
The other monitoring graph to check is your Free Memory. Small server plans can operate perfectly fine with just 15-50MB of free memory, but if your business has purchased a plan with 4GB or more your free memory should consistently be above 100MB. If it’s not this could be another sign that it’s time to scale up your plan.
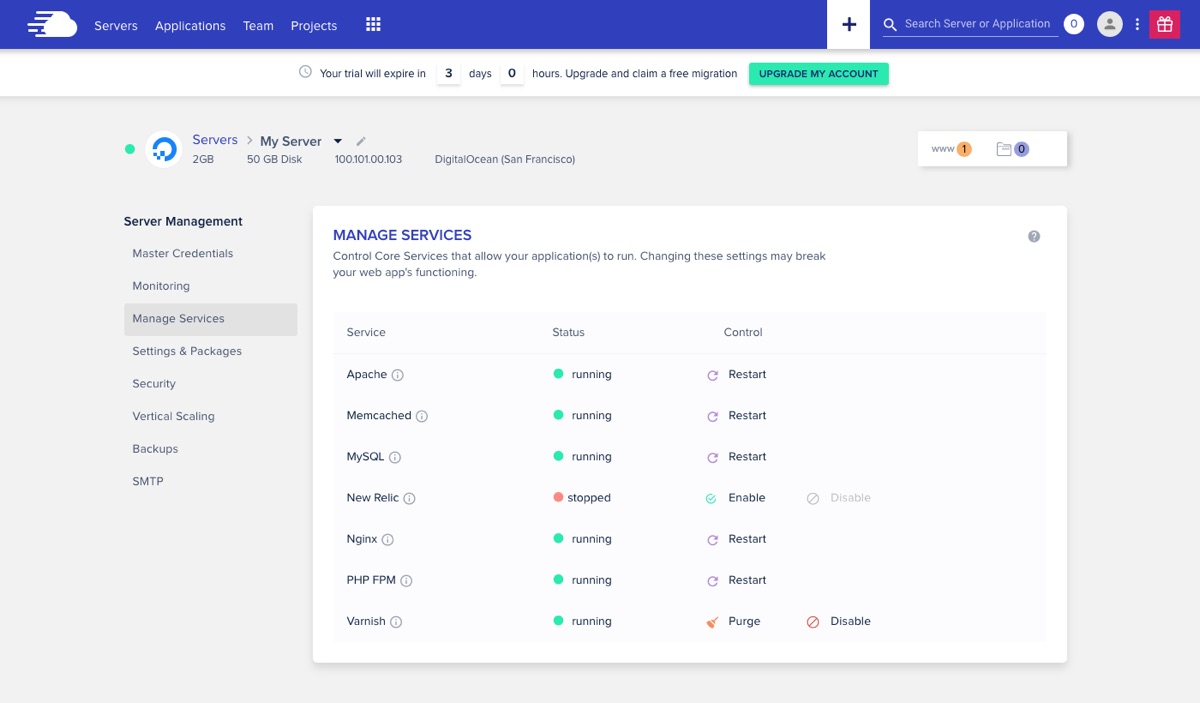
After Monitoring you’ll see a Manage Services tab where you can see the various core Cloudways services that keep your server running. This includes Apache, caching, database and optional application monitoring (via New Relic) services. From here you can restart your various services as well as purge your cache.
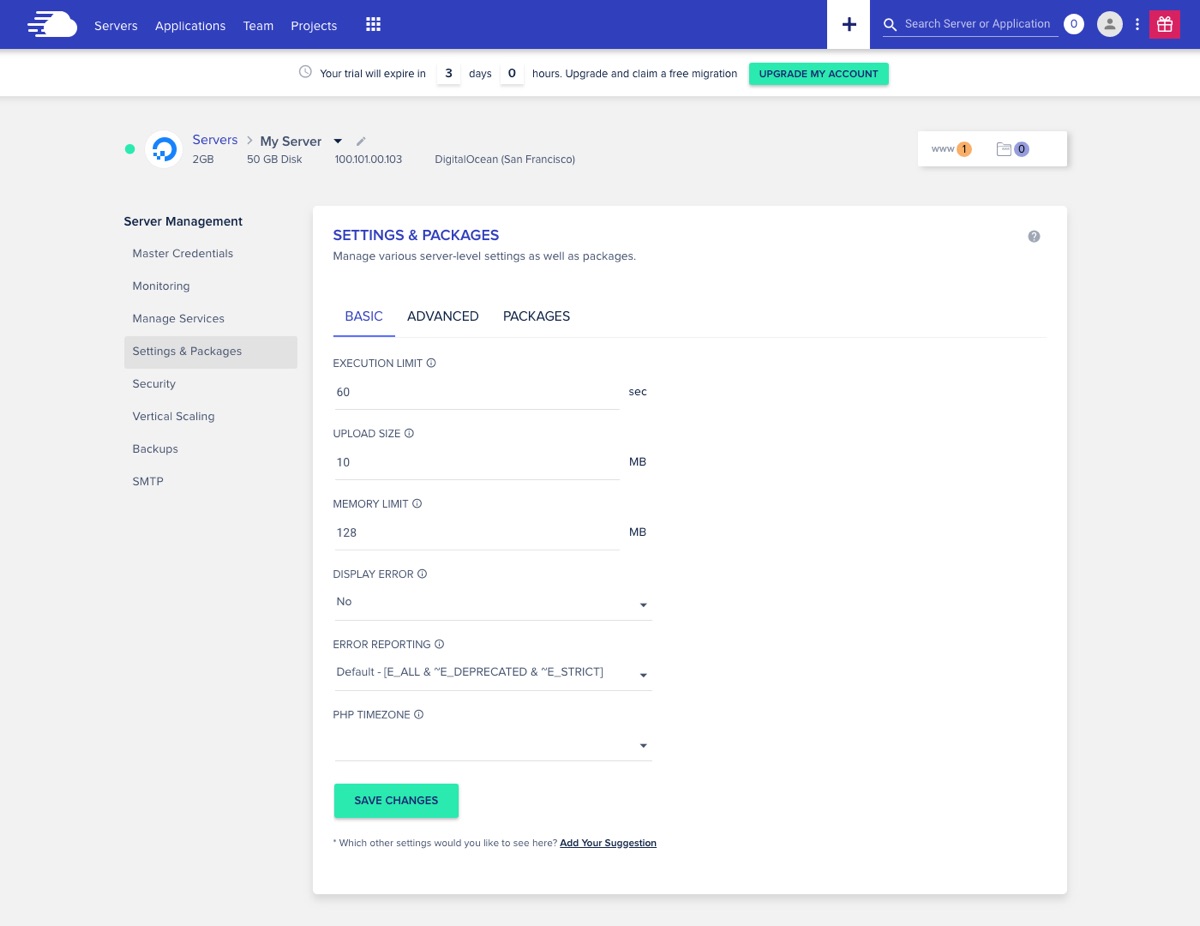
Since you’re using WordPress you may need to adjust some of your server settings to be able to upload a specific file or install a large plugin or theme. All of these server settings and more can be found in the console Setting & Packages tab. Just be sure to save your changes.
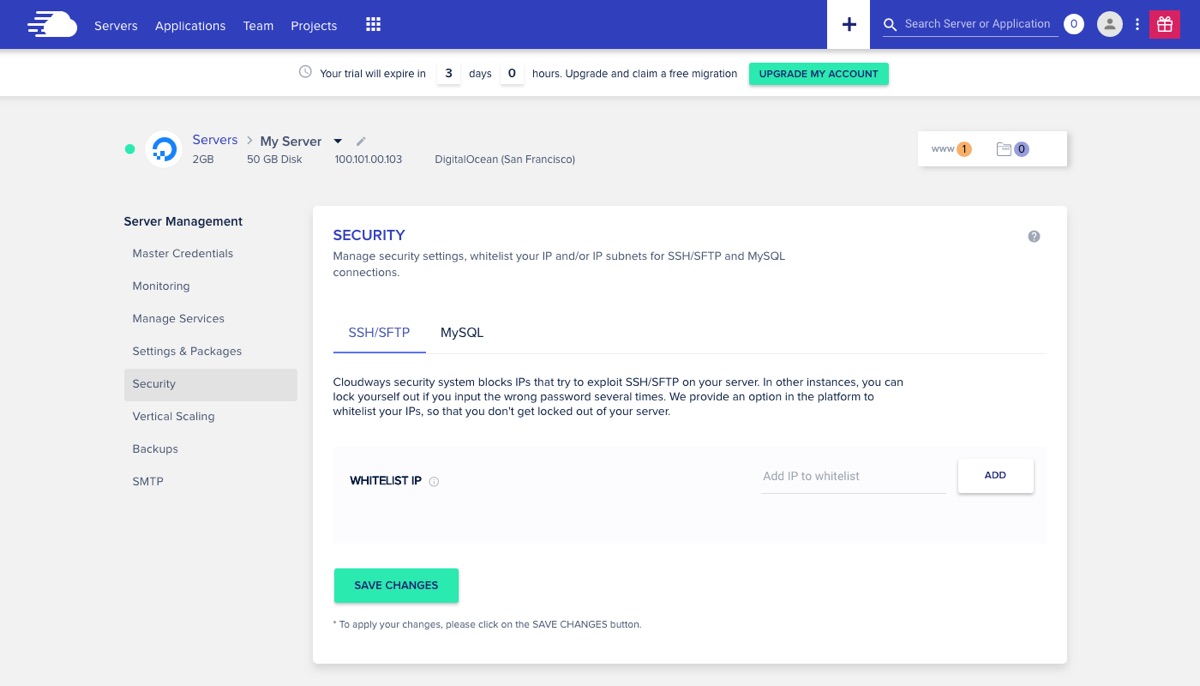
Security if of the utmost importance for any website, and Cloudways help makes server security easy. Cloudways maintains firewalls and implements server patches regularly to hep keep your installations safe. They also monitor suspicious activity on your server. So if you have multiple failed login attempts because you forgot your password you could get locked out of your account. One way to prevent this is to edit the Security settings within your server manager to whitelist your own IP address. This is completely optional and most users can skip this section.
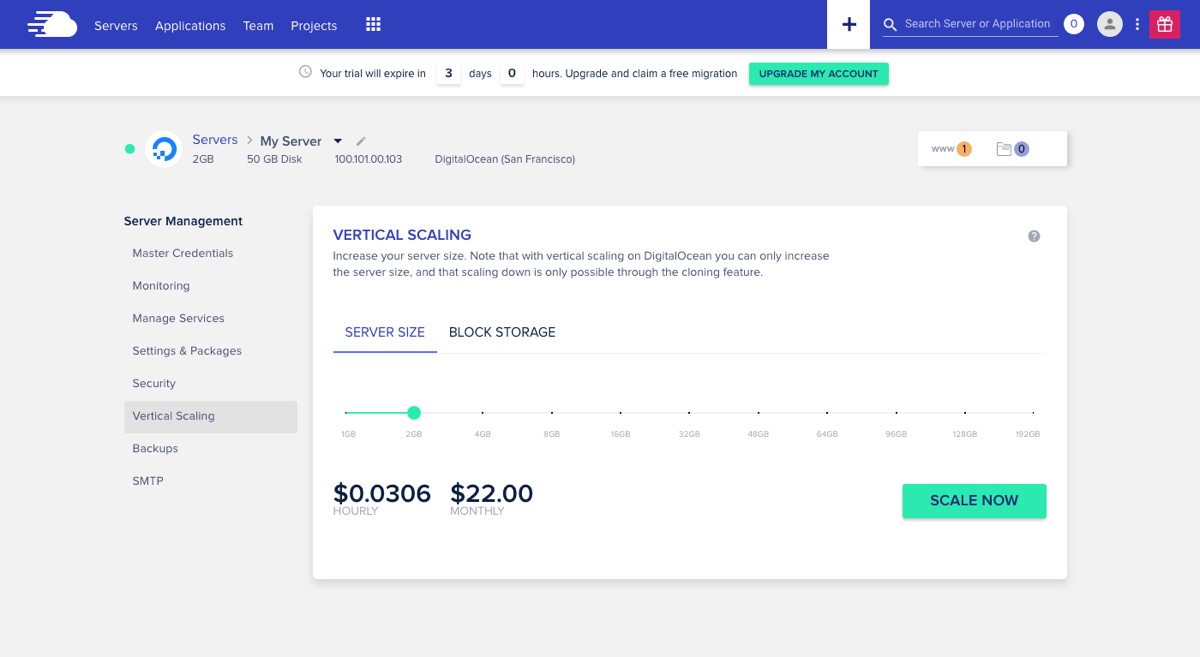
If you find that you need more server space you can easily increase your Cloudways plan at any time from the Vertical Scaling section. Select the increased server size you need and click to apply your changes (which will be reflected in your next monthly charge).
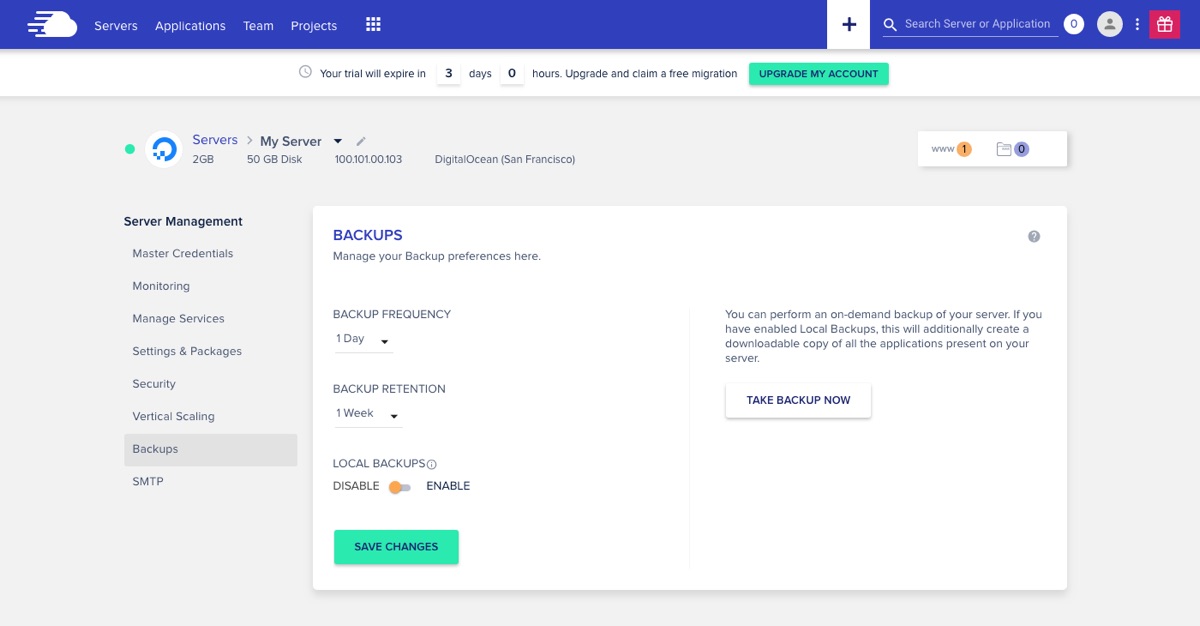
Backups are also built into Cloudways server options and taken daily by default. From this tab you can enable backups to be taken as often as every hour or just once a week. You can also enable Local Backups which makes a copy of your most recent backup available for download via SFTP/SSH so you can store your own backups on your computer.
Even though the included backups are great, we still recommend using a service like VaultPress to ensure you always have a complete copy of your website at your finger tips.
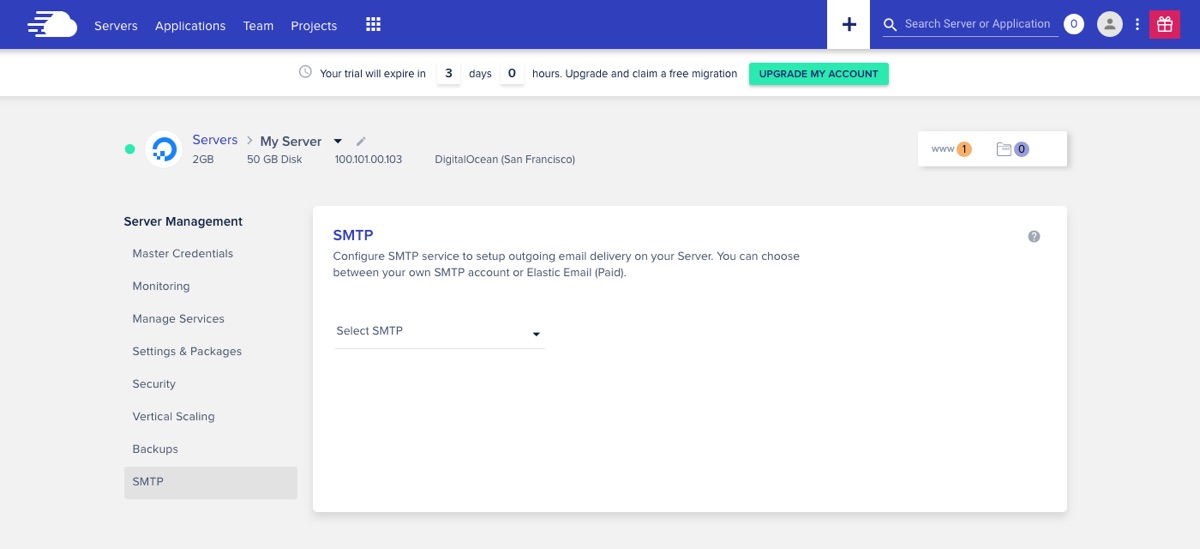
SMTP is the last section under your server manager. This is a built-in feature for you to use a third party email service as a gateway to deliver emails from your server. Simply click to choose your own SMTP then add and configure your email provider, or enable elastic email from your add-ons (which we’ll get to next).
Cloudways Add-Ons
Cloudways does offer a handful of helpful Add-ons that can be access via the server manager. To activate add-ons just click on the grid icon in the main menu.
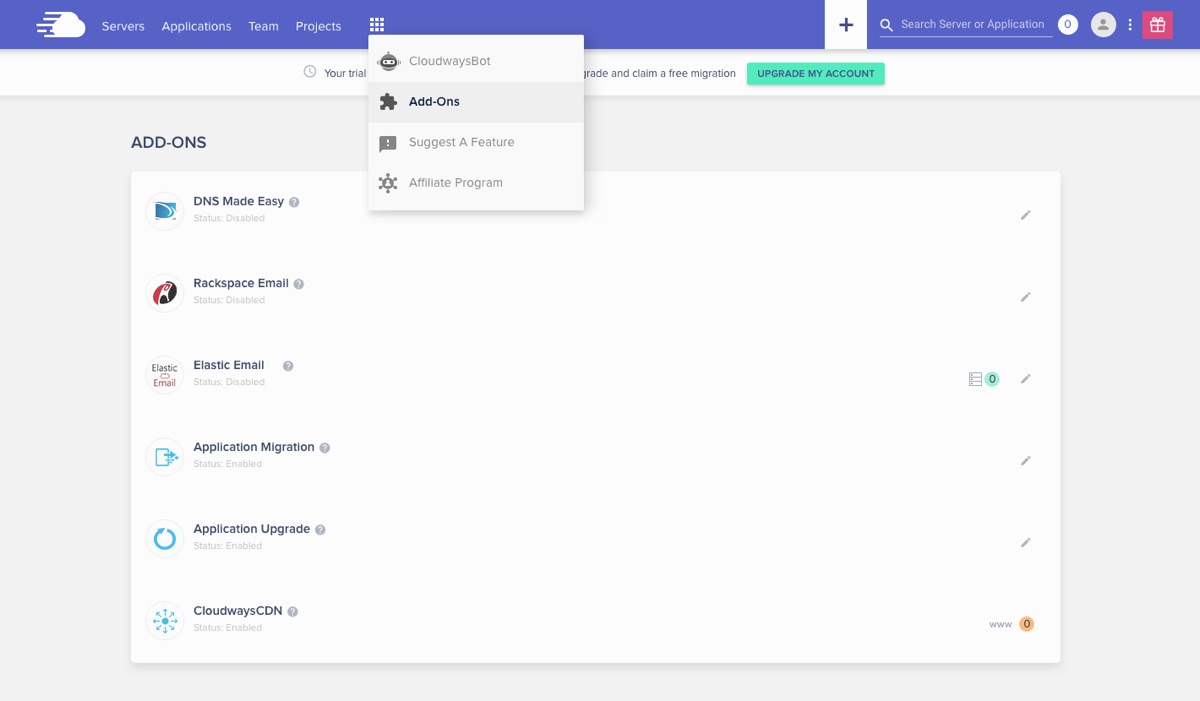
There are six add-ons currently available, with the last three options adding configuration options to your server after activation:
- DNS Made Easy: Cloudways does not offer domain name system (DNS) to manage your domain names by default, instead they allow you to use your own third party DNS (like GoDaddy) or you can subscribe to their DNS Made Easy service. This add-on starts at $2.50/month for up to 5 domains. This add-on does require manual activation by Cloudways, so once enabled the add-on will be set to pending until a support member can approve your change.
- Rackspace Email: To add an email service to your website you have the option of enabling the Cloudways Rackspace add-on. This service is just $1/month per email. This add-on also requires manual activation by the Cloudways tech support team, so when you activate the add-on it will be pending until a support member contacts you to complete your mailbox setup.
- Elastic Email: To send a high volume of monthly emails you might want to consider the Elastic Email add-on since it provides a fast and easy way to contact your mailing list. Plans start at $0.10/month for 1000 emails (with discounts applied for higher volumes), and all you need to do is activate the add-on and wait for the Cloudways support team to confirm that your subscription has been enable. This add-on is also managed via the Server Management Add-Ons section.
- Application Migration: If you want to move your WordPress site over from another host this add-on is is the easiest way to start your migration to Cloudways. The first migration is free after all, with any additional moves priced at $25 (or $49 if multisite)
- Application Upgrade: Want a specific version of WordPress installed? Use this premium service (starting at $50) to have a Cloudways pro manage your upgrade for you.
- CloudwayCDN: If your plan includes CloudwaysCDN, this is where you can check which of your WordPress installations are tied to it. CDN’s are a great way to speed up your WordPress website – so if you do have the CloudwaysCDN on your plan we recommend using it.
Once you’ve throughly explored your Server settings and services you can move onto you Application settings!
Managing Your WordPress Installations
If you click on Applications in the main menu you’ll be take to your application manager. From here you can access all of your server installations (WordPress as well as any others you might have).
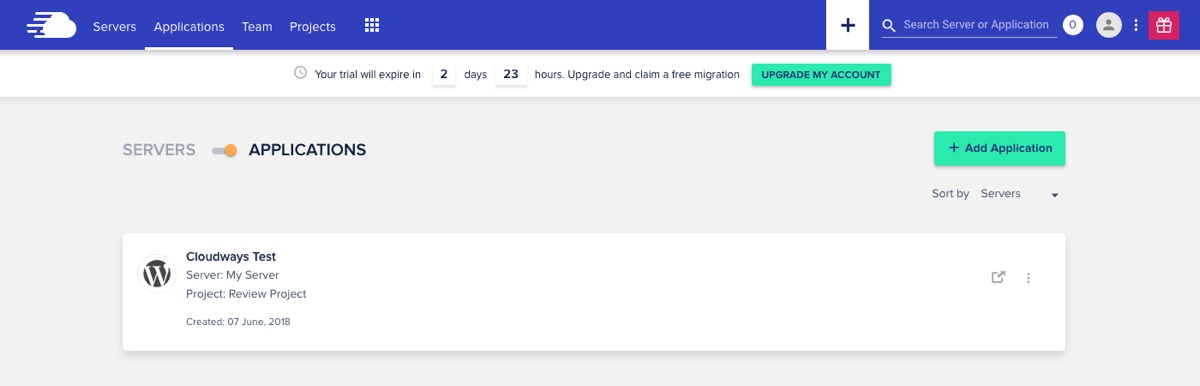
Simply click on one of your installed applications too see the related details and settings.
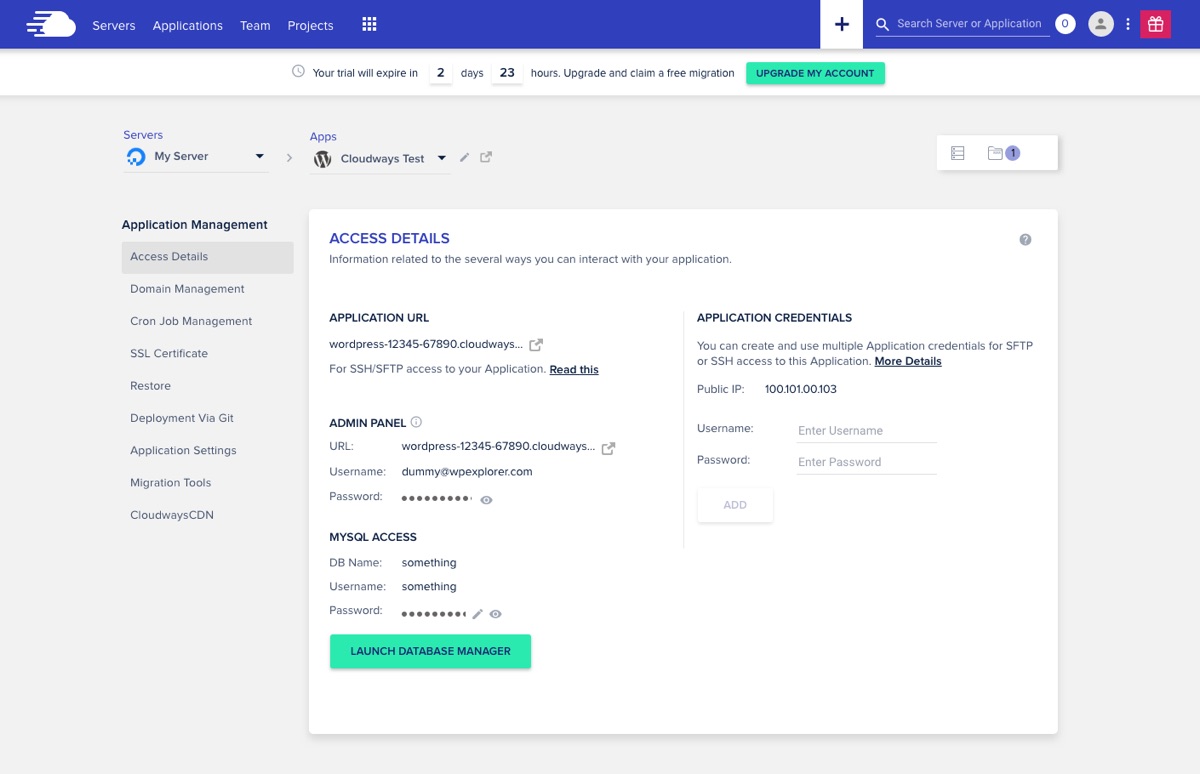
After clicking on one of your installations you’ll be taken to the Access Detail screen. This provides all of the basic information about your install like your temp URL, Admin login credentials for your site and MySQL information.
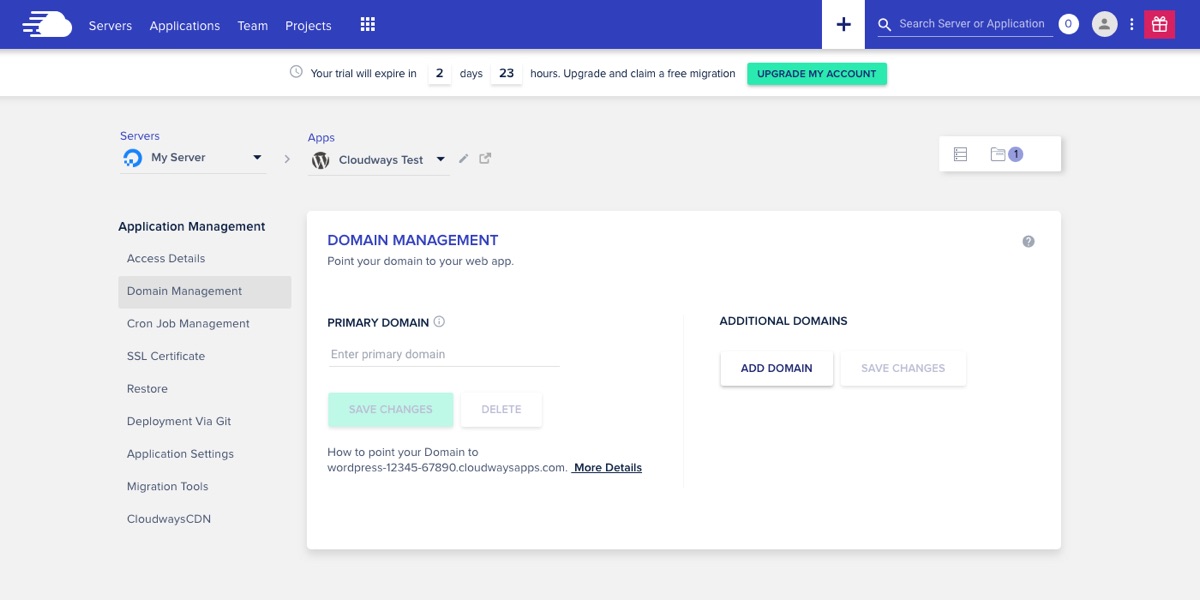
When you first get started with your Cloudways server your installations will be setup as staging sites on the main cloudwaysapps site. When you’re ready to move to a live site you’ll need to go to the Domain Management tab to add your URL (just remember to point your domain over).
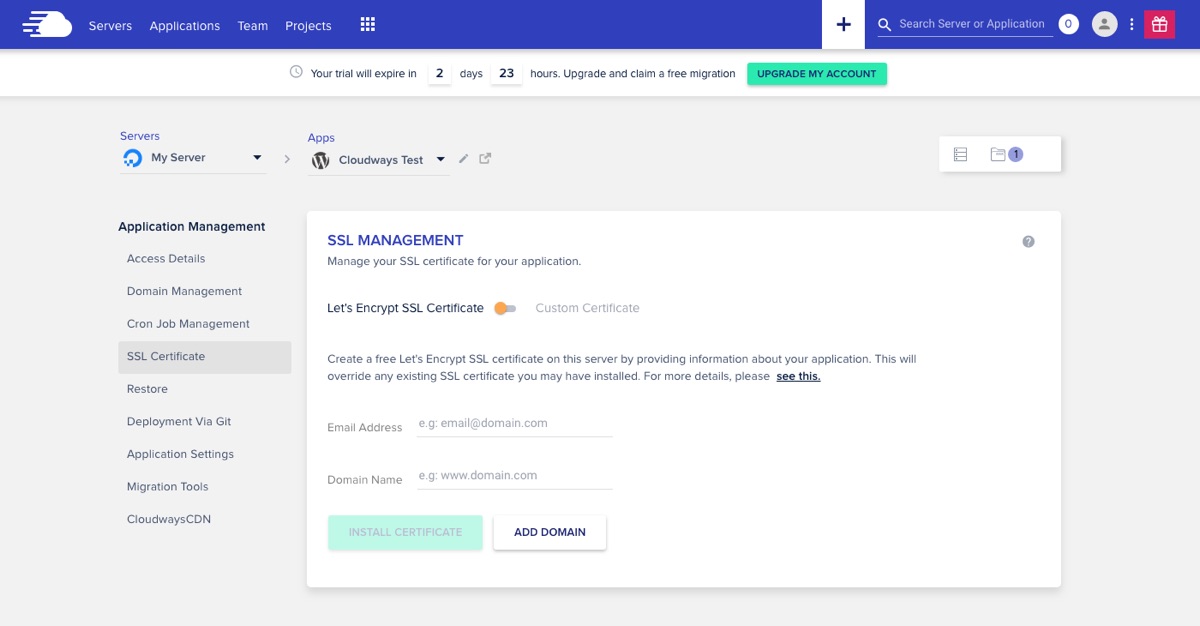
SSL is becoming a necessary feature for blogs and websites. This added security layer tells visitors that the access their browser has to your server is encrypted so any information or data passed between them and you is safe. To add this security to your Cloudways hosted website simply go to the SSL Certificate section of your Application Manager and use the built-in tool to create a free SSL certificate using Let’s Encrypt. Simply add in the requested information and follow the onscreen prompts.
Alternatively you can toggle the SSL option to upload your own custom certificate. For this option you’ll need to create and download a Certificate Signing Request, create and purchase a SSL certificate via a third party service, then install it on your server.
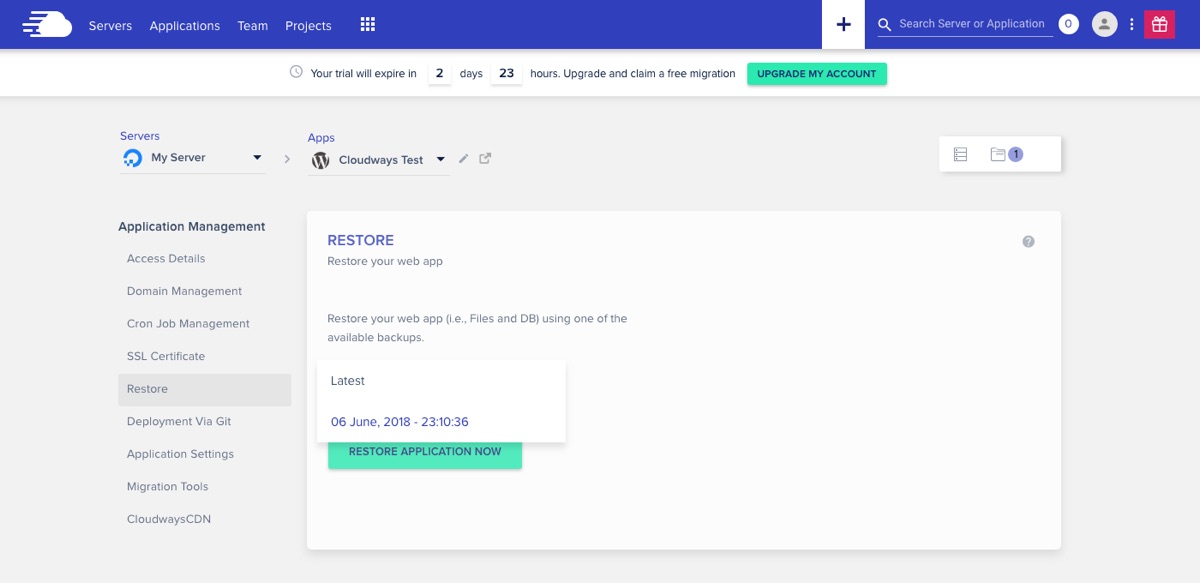
The other two sections most users will want to make note of are the Migration Tools and the Restore tab. Both of these are fairly self explanatory. When you first get started with Cloudways you can use their free migrator plugin to help move your website from your old host to your new Cloudways server (although your first assisted migration is free, so if you’re only moving one website you might as well let Cloudways handle it). Later on down the road, if something ever happens to your website and you want to restore it to the way it was simply go to the Restore tab. From here you can select a backup from the drop down and then click the button to upload.
If you’re a developer you might also be interested in a few more of the the built-in tools Cloudways has put at your finger tips. The Cron Job manager makes it easy to add scheduled tasks (like deleting temp files or sending our email notices) to your installation. There’s also a tab for Deployment via Git that makes it easy to generate your SSH key needed to connect to your repository, and an Application Settings tab with options for switching off Varnish caching while testing/staging.
Before moving on to your WordPress installation there are just a couple other options in the main Cloudways account console that we want to share with you.
Adding Team Members To A Cloudways Server
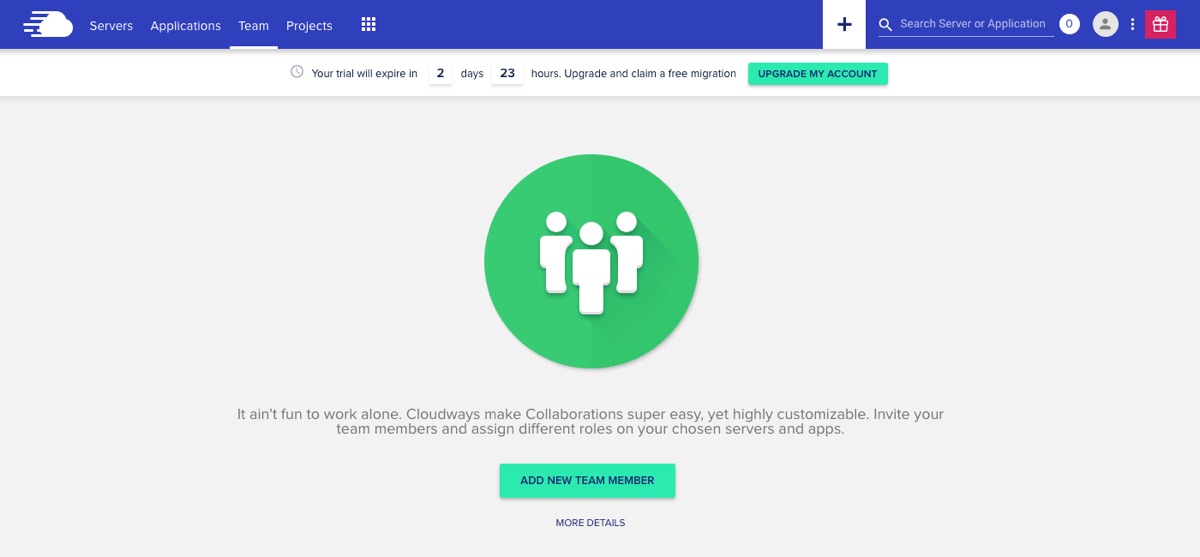
If you’re working with a team and on multiple projects then you’ll definitely want to take advantage of all the options the Team module has to offer. From here you can add your team, edit their access to specific servers or applications and restrict the operations with servers that they have access to (for example, it’s probably best that only the master admin has access to scale or delete servers).
Managing Projects With Cloudways
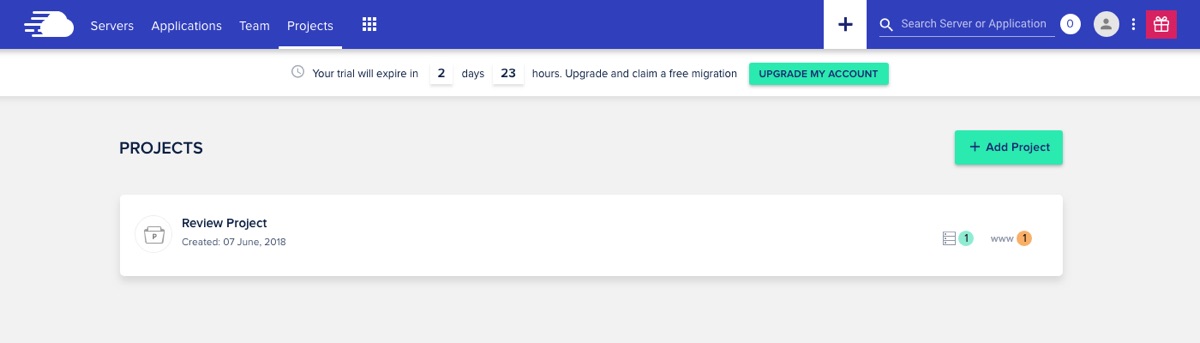
The last console section to have a look at is the Projects management page. from here you can see a quick snapshot of all your live projects. Just click on a project to view the related applications or to change the project name. This feature is mainly to help you keep all of your installations organized so you can see at a glance what belongs to which client, etc.
WordPress Quick Start Guide
Now that you’ve seen the most important options within your Cloudways console it’s time to move on to your actual WordPress site. Navigate back to your Application manager, click on the WordPress installation you’d like to work on and copy the Admin Panel username and password provided to you. Now click the link to go to your WordPress admin.
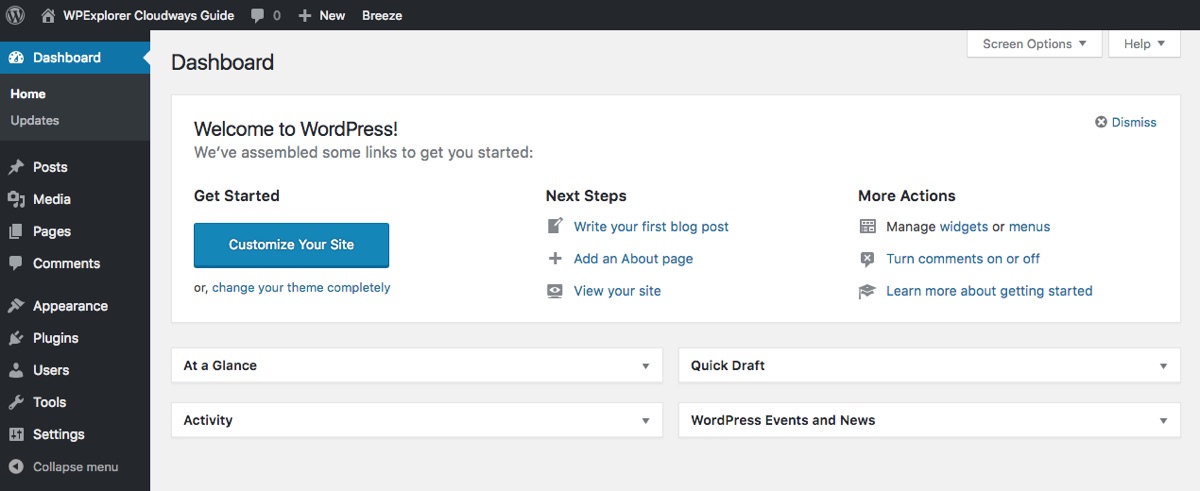
When you login for the first time with your credentials your dashboard should look something like the image above. Cloudways installs the latest version of WordPress as well as their Breeze Cache plugin for you (note: if there is another caching plugin you’d rather use be sure to deactivate and delete Breeze to prevent any plugin conflicts).
Your first priority should be to cleanup your install and get it ready for a theme and your content. Here are the first steps we recommend.
- Go to your Posts and Pages to delete the sample post and page already on your site.
- Navigate to Settings to edit your General site title and tagline, as well as your Permalinks (we recommend using the post name option).
With your site cleaned up a bit now you can install your WordPress theme and any additional plugins you might want.
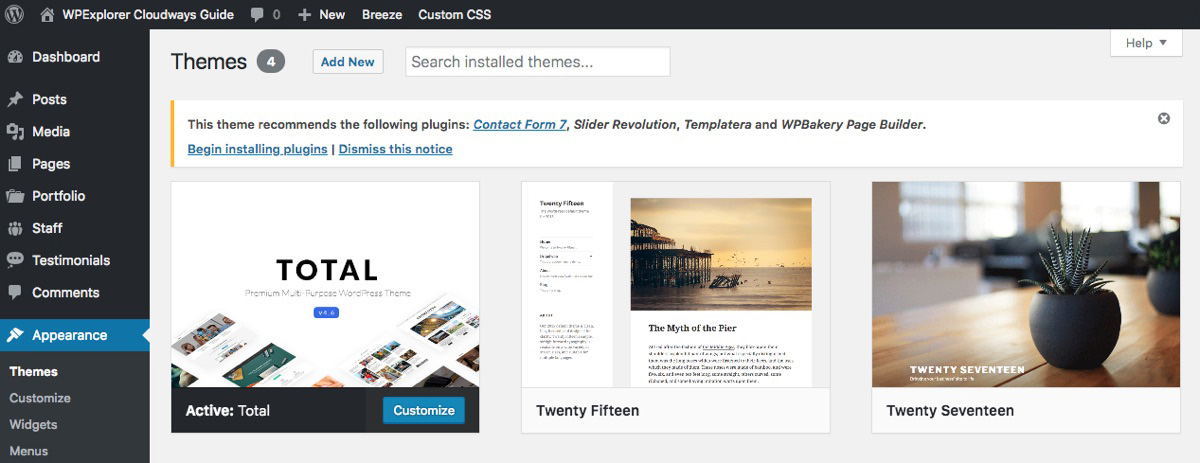
How To Install A WordPress Theme
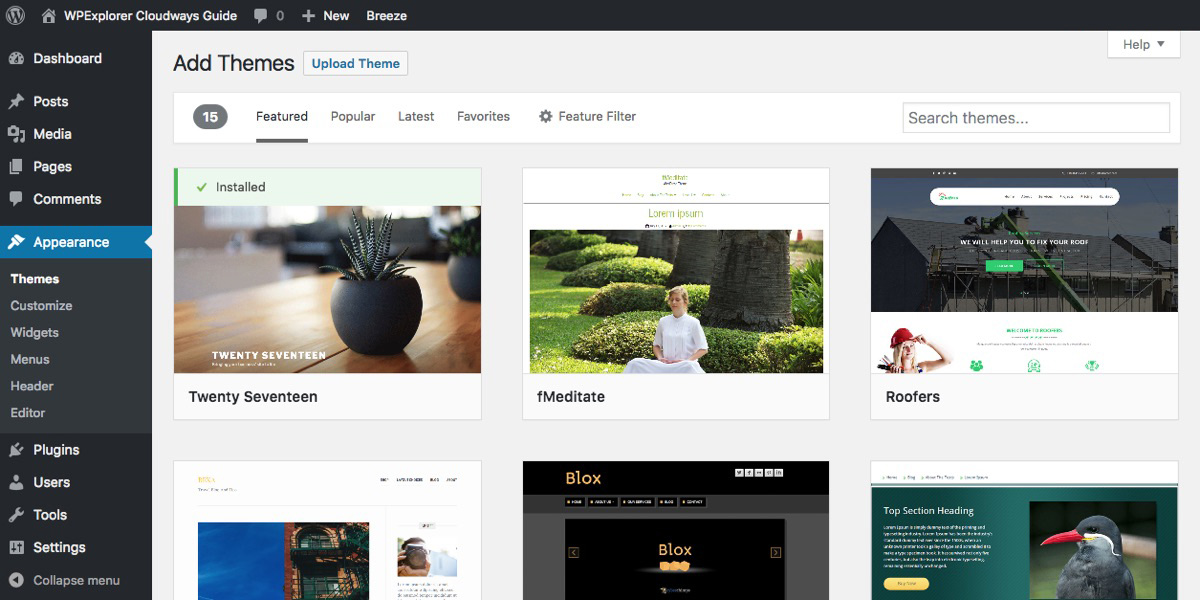
Installing a theme is very easy with WordPress. All you need to do is navigate to Appearance > Themes and click on the button to Add New. From here you can browse free themes available from WordPress.org or you can click the Upload Theme button to add your own WordPress theme.
There are tons of great WordPress theme options on the web, and it can be a bit overwhelming when choosing a WordPress theme. For ideas of what theme you might want start with this collection of some of the best WordPress themes, or give some of our free WordPress themes a try.
Once you find a theme that is right for your website (for example we love our Total multipurpose WordPress theme personally) you can install it. When you upload your theme the installable WordPress file should be in a .zip format.

Simply click the button to Choose File and browser for you theme zip, then click Install Now.

Depending on how large your theme file is you might see a 413 error like the one above. Don’t worry! This simply means that the file you tried to upload is larger than the max upload size your server is currently set to.
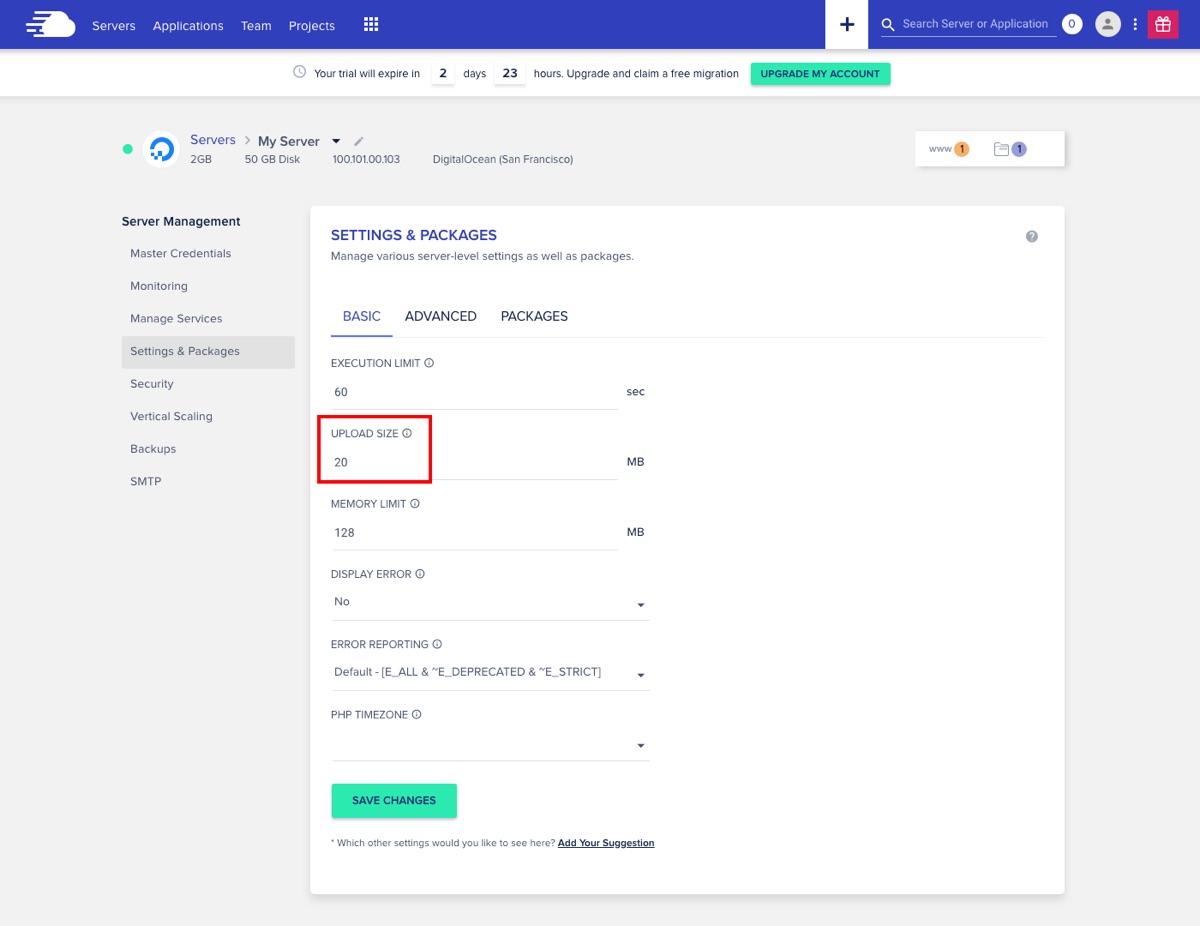
To fix this simply log back into your Cloudways account, click on the Servers section, select the server you’re using and click on Settings & Packages. Then just bump up your file upload size to 20 MB and click save.
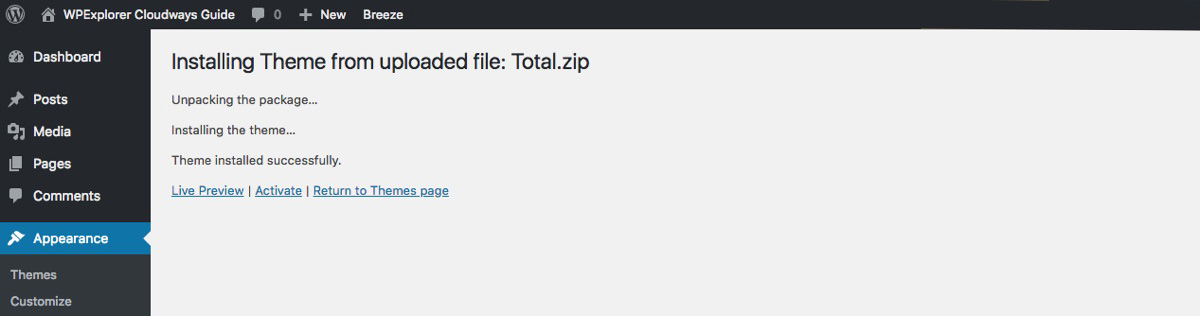
Now go back to your WordPress installation, re-upload the theme zip file and click Install Now. Everything should go smoothly and you should see the theme confirmation page like the one above. Just click to activate the theme! With a new theme in place you can start adding content or you could install a few handy WordPress plugins.
How To Install WordPress Plugins
WordPress plugins are installed much like WordPress themes and they can add a ton of great functions and features to your website.
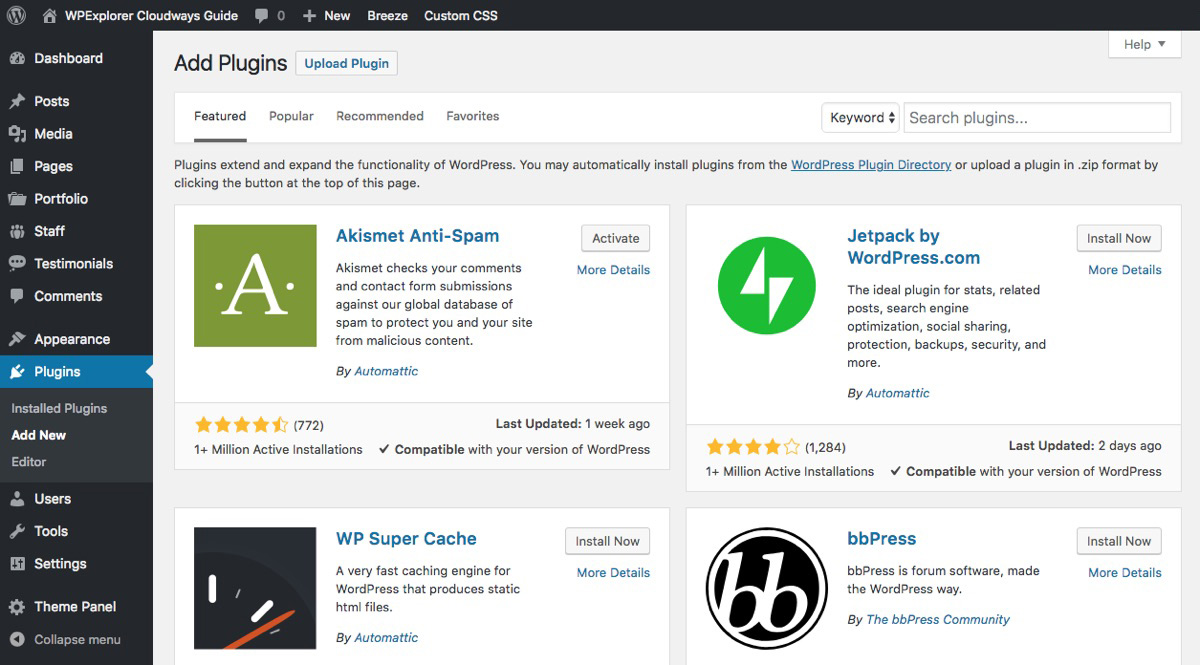
From your dashboard go to Plugins > Add New to browse all of the free plugins from WordPress.org. Just like themes there are plenty of free and premium plugins available around the web. Here are a few recommendations from our authors to help you get started:
- 50+ of the Best WordPress Plugins
- 15 Plugins to Supercharge Your WordPress Comments
- Best Translation Plugins to Make Your WordPress Site Multilingual
- Top 9 Best Free WordPress Slider Plugins
- 10+ Best Anti-Spam Plugins for WordPress
- Best GDPR Compliance WordPress Plugins
And of course if your premium theme comes bundled with premium plugins (like how Total includes the powerful WPBakey page builder) you’ll want to follow any onscreen prompts or messages for install those plugins.
Building Your WordPress Site
With your theme and plugins installed and activated you can start building your website. If your theme came with sample data you might want to upload that (just go to Tools > Import > WordPress to upload the sample .xml file that came with your theme).

Or, if you’re using a theme like Total with over 40+ sample demos available via the built-in demo importer you can use the theme’s options to import your favorite demo. In Total, this is under the Theme Panel > Demo Importer.

When uploading sample data your server might time out before it finishes. To avoid this simply increase the max execution time for your server. To do this log back into your Cloudways account, go to your Server and click on the Settings & Packages to adjust your Execution limit to 300 seconds (just to be safe).
You might want to also checkout the styling options for your theme and plugins under Appearance > Customize as well as any other options via a custom panel in your dashboard. Once you’ve got your website looking good you can start adding your content.
Blogging Tips
Depending on what your website is about there are tons of great tips on the internet for blogging, finding your own writing style, monetizing your blog and more. Here are some tips from our authors to get you started – but a quick Google search will turn up thousands of other great articles:
- WordPress Blogging Tips To Make Your Blog A Success
- 10+ Tips to Increase Trust and Credibility of Your WordPress Blog
- How To Make Money With A WordPress Blog
- Content Marketing Tips for Small Businesses Using WordPress
- How To Become A Successful Blogpreneur And Make Money With WordPress
Wrapping Up
Hopefully after reading through all the information above you have a better idea of what Cloudways has to offer WordPress users and how to actual get started with WordPress using Cloudways managed cloud hosting.
I was very impressed with their easy to use server console and quick WordPress setup. I personally I give them a solid 5/5 as a host. With tons of great built-in features for server scaling, SSL, teams and more Cloudways has positioned themselves as a great option for brand new users or small businesses, as well as for experienced design agencies that might be managing hundreds of client sites.
To learn more head over to the Cloudways website. You can get started with your own 3 day trial simply by signing up with an email (no credit card required).
And if you have any questions about Cloudways WordPress cloud hosting, their features or our experience using it just leave us a question in the comments below. Or share you own Cloudways experience – we’d love to hear what you think!


Was looking for this. Thank you so much.
Hi Emily,
Thanks for showing interest in Cloudways.
If you have any questions feel free to ask. I work at Cloudways.
Thanks Kyla for a detailed review of the new Cloudways platform. I hope you and your readers love what we have built 🙂
When you start with Cloudways, you choose to start for free, which means you have to choose a Monthly/Hourly package when the trial ends. Also when you are creating an infrastructure (as they call it), say I picked Vultr, i can choose the server space among other things and there is a monthly/hourly fee to paid for that too. I understand that the invoice will be one but my question is, does that mean I will have to pay twice to enjoy cloud hosting?
You only pay once 🙂 For example, we have a Digital Ocean plan through Cloudways we use for development and we selected the Monthly plan. Each month we are charged the same fee for our plan, just once. With hourly I think your charges would change based on usage, but you’d still only pay once. Hope that helps!
Great review. I recently switched to CloudWays from a shared host and found it a bit difficult to get things done (ofc, I love the simplicity of CPanel)
Thanks to your article, I got my doubts cleared.