How to Add Google AdSense to WordPress
Making money with a WordPress site often involves affiliate marketing, ads, or eCommerce. Sometimes it even involves selling memberships, creating job boards, or hosting events.
Many people think that advertisements are old news in the money-making world, but that couldn’t be further from the truth. Ads are particularly useful for monetizing online magazines, blogs, and websites where you’re not directly selling a physical product.
Since sponsored posts are often seen as grimy by users, and affiliate marketing can also raise red flags depending on how it’s presented, we keep circling back to advertisements. And seeing how tools like AdSense make it so much easier than it used to be to implement, it’s no surprise ads aren’t going anywhere anytime soon.
What’s most interesting is that AdSense doesn’t cost you any money to implement, so you can at least test the waters and see if you can make any money off of it. In addition, this gives you an opportunity to see if your users think ads are annoying. In order to ensure your users don’t get annoyed, it’s important to learn how to use AdSense effectively for WordPress. But before we talk about how to setup ads, let’s learn a little about Google Adsense and see how to get signed up.
What is Google AdSense?

A popular website monetization program, Google AdSense is a great option for beginners and professionals alike.
Google AdSense is a program from Google that enables marketers (referred to as publishers within the program) to seamlessly display advertisements on their websites and blogs. Its main purpose is monetization, and you can use it to make money with WordPress by simply placing specialized ads on your website.
If you’re a marketer, there are a few similar programs you can choose instead. However, AdSense offers a couple of unique benefits:
- Credibility: As a world-renowned company, you can’t get any more more credible than Google.
- Versatility: AdSense offers a variety of ad types, including text, image, rich media, video, and audio.
- Flexibility: This program works with a variety of platforms and other tools, including WordPress and Blogger.
Before you jump right in, AdSense does have a number of policies you’ll want to review. There are also a few requirements for its advertisers. For example, you must have a well-established website (at least six months old), and you have to be 18 years of age or older.
If you’re ready to get started with AdSense, you’ll be glad to learn that the process is simple. In fact, it can be completed in just three steps.
Step 1: Sign Up for Google AdSense
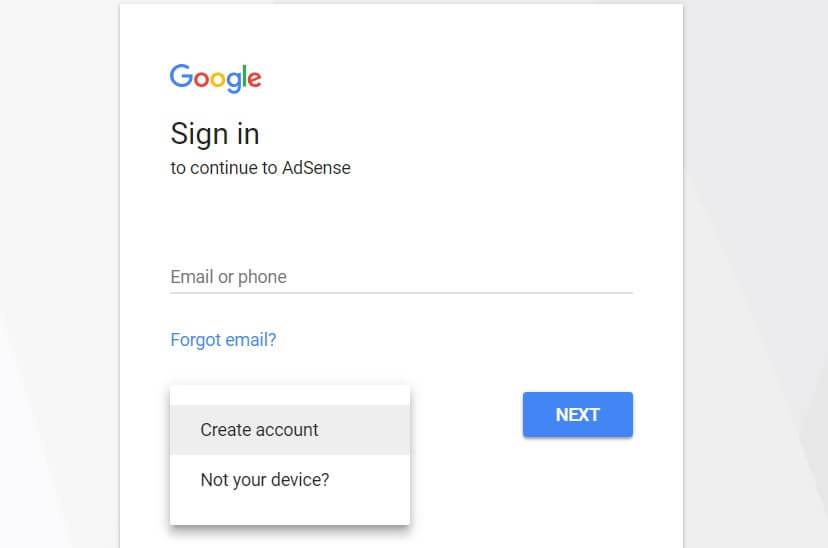
Since AdSense is a program on the Google platform, all you need is a Google account to get started using its variety of features. When signing up for Google AdSense, you have two options. You can log in with an existing Google account, or you can create a new account.
Both of these actions can be performed from the sign-in page. If you have an existing account, simply add your login credentials and click Sign In. If you need to create an account, click on More Options, and select Create account from the pop-up menu:
Once you’ve signed in (or completed the sign-up process), you’ll be brought to the next step in the program.
Step 2: Complete your AdSense Program Application
As with any affiliate program, you will be required to fill out an application. Fortunately, the process is straightforward and can be completed within minutes.
We recommend that you start by reading through and understanding AdSense’s policies and terms. While this is a step you may be tempted to overlook, it’s important to know exactly what Google expects from its users. This is because you’ll be required to follow all policies and guidelines if you’re approved as a publisher.
Next, you can fill out the three-part application. You’ll first need to enter some basic information, such as your website URL. Then you’ll be asked to provide your payment address details (so AdSense can send you payments and important account information). Finally, you’ll be required to verify your phone number.
Once those three application pages have been completed, there is just one more step before Google reviews your site. You’ll be asked to add an HTML code to your website, which will be provided in the format shown below:
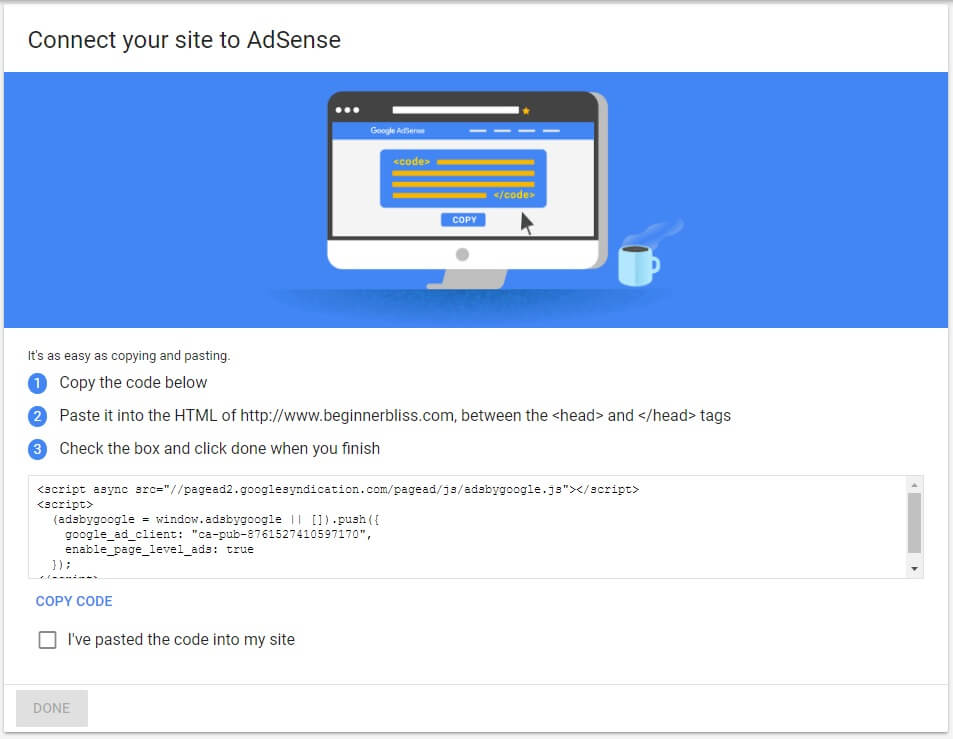
Once the code is added to your site, check the box that confirms the action has been completed, and click Done. Now, all you can do is wait patiently. The review of your application can take anywhere from 48 hours to two weeks, and you’ll receive an email once the decision has been made.
Step 3: Create Google AdSense Ads
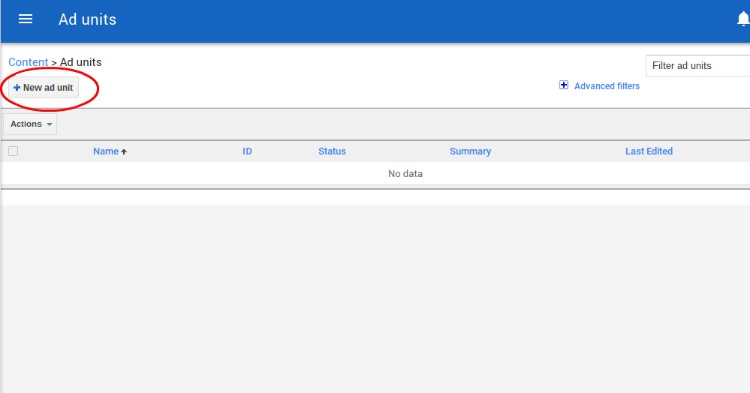
Upon completing the application, you can sign in to AdSense to get the ball rolling. The AdSense dashboard reveals several tabs on the left hand side, but the only one you need to worry about right now is the My Ads tab. Click on this to proceed.

If you’ve never created an ad before you’ll see an empty page. Click on the New Ad Unit button for generating an ad and editing it to fit your website.
The first step is to name your ad. This isn’t going to show up on your site so you’re mainly naming it for your own reference. After that they show the recommended sizes for your ads. Feel free to choose the one you think is most appropriate.
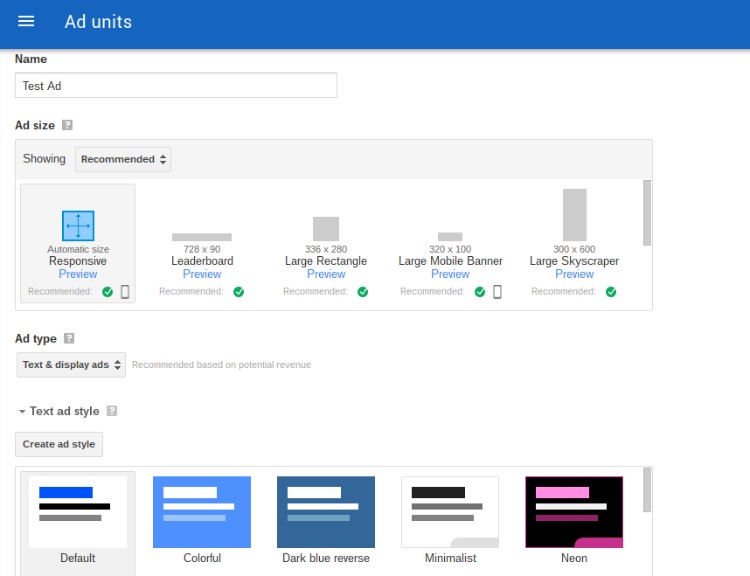
You also must specify if you’d like a text and display ad or only one or the other. Text ads don’t have any imagery included, so pick carefully.
Next, you’ll be asked what you’d like the design to look like. I generally opt for the Default styling since this is known to convert rather well. However, some of the other colors and designs may look better on your own website. What’s nice is that they have a Preview button to see what it’s going to look like.
Google AdSense offers several pre-built styles, but you can still adjust every design element on an ad, as seen in the screenshot below. For example, it lets you change the title color, URL color, border, and font family.
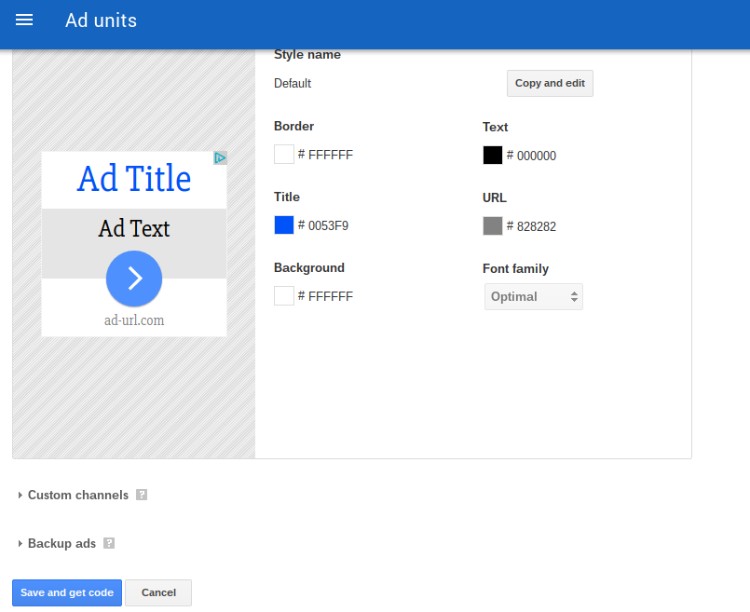
If you’d like to group multiple ad units together (for tracking purposes,) feel free to open the Custom Channels area to make that happen. You also have the option to make Backup Ads. Basically this refers to the fact that AdSense shows a blank ad if it can’t come up with something relevant. If you’d rather see a default backup ad, this is the place to create it.
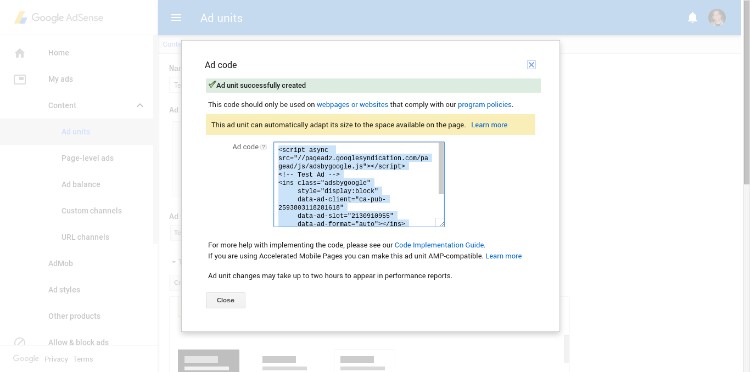
After this process, click on the Save and Get Code button.
Pro Tip: Google AdSense now has an option to choose a completely responsive ad module, making it much easier for your ads to respond to mobile devices and differently sized screens. Personally, I’d go with that every time. However, the 336×280 and 300×260 dimensions are also known to work well in terms of fitting your site and converting.
Step 4: Implement AdSense On Your Site
Although there might be some other less efficient ways, there are essentially three ways to add your Google Adsense ads to your WordPress site:
- Inserting ads by copying and pasting your ad unit code into widgets, pages, and posts.
- Buying a WordPress theme that supports Google AdSense.
- Downloading and activating a plugin that integrates Google AdSense.
Ideally, the second two are the easiest, since many themes and plugins don’t require you to keep copying and pasting code to widgets. Not only that, but some themes have preset modules that make the ads look beautiful and more likely to be clicked. But let’s take a look at each.
Method 1: Copy & Paste Your Google Adsense Code into a Widget
The first method is good old copy and paste. The code revealed in the previous section is used for copying into your website, so start by copying that code from AdSense.
Next open your WordPress dashboard. Go to Appearance > Widgets.
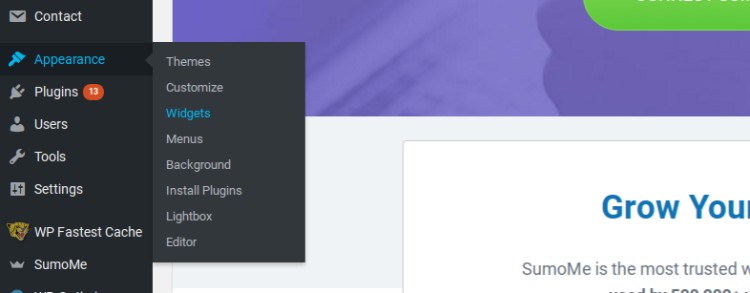
You’re most likely going to insert an ad in the sidebar or above the header. For this example I want to put the ad in the sidebar. Therefore, you can drag the Text widget to that sidebar area and paste in the code you copied before.
There’s no reason to fill in the Title field since this is an advertisement.

After that, you can refresh your website to see relevant new AdSense ads showing up on your site.
Method 2: Use a Theme with Adsense Areas

Although I’m not going to recommend specific themes, you can start by searching for “AdSense WordPress themes” in the ThemeForest library.
You’ll also have luck at the following places:
Although you could just our very own Total theme, of course. It’s SEO optimized and offers tons of great page building features that you can use to insert Google Ads on your posts and pages. And we’ve even developed a helpful snippet to insert and ad banner above or below blog posts (Total docs).
Method 3: Install a Google Adsense Plugin
Utilizing a widget for AdSense is the most basic of all the methods, and a theme won’t give you a ton of flexibility when placing your ads. However, a plugin might serve as a better solution if you’d like additional features for your advertisements. For example, some of the plugins remove the need to copy and paste code, while others generate reports and have settings for things like time period selection.
Many Google AdSense plugins have come and gone in the past, but let’s take a look at the most promising ones today.
Ads Pro
If you want the most tools to create, manage and track your advertisements then the Ads Pro Plugin is your best bet. This premium plugin offers tons of features for ad styles, popups, social integration, scheduling, geo-targeted ad campaigns, online statistics and more. So not only can your monetize your website with Adsense, but you can sell you best converting ad spots to specific clients at a higher price.
Advanced Ads (Free)
The Advanced Ads plugin works nicely for grouping ads into a slider, selling ads on your website, and setting dates for when to publish new ads. AdSense integrates seamlessly with the plugin.
WP Pro Adning System

Here’s a plugin that supports all sorts of advertising tools. It has a multitude of locations for placing your ads, along with popup ads that integrate with AdSense.
WP Simple AdSense Insertion (Free)

This plugin certainly lives up to its name, as it makes WordPress AdSense Insertion ads simple and painless. This plugin saves one to three Google AdSense codes and litters them throughout your site, allowing you to focus only on a few ads. Its main feature is its shortcode functionality, which enables you to insert ads by copying and pasting plugin-generated shortcodes almost anywhere on your site.
AdSense by WP QUADS (Free)

A plugin with a few more advanced features, this is an excellent choice for anyone looking to fully customize their ad placements. Notable features include full responsiveness, and the option to set visibility conditions.
Whether you choose to use a plugin or not is based on your preferences. Still, it won’t hurt to give one of the above plugins a try!
Using AdSense effectively for WordPress doesn’t take much time to master. In fact, the AdSense interface is extremely user-friendly and the plugins, themes, and widgets are all easy to manage.
Do you have any questions about using or inserting AdSense into your WordPress site? We’ll do our best to help in the comments below.


How much can I earn in a month with Adsense?
That’s going to depend on your traffic, ad clicks and your site content (as Adsense is not allowed on adult content sites). At first you might only make a few bucks, but as your site gets more popular you could easily be making a few thousand a month.
My blog is new and when can I make money with Google Adsense and how long will it take. Please Reply Your Comments
I’m pretty sure you can add Adsense to your site right away, but how much money you make will depend on your site traffic. Ads are either CPC (click) or CPM (view/impression) based, so you need a good amount of people on your site to generate a steady income just from Adsense.
I am new in blogging field and Adsense, thanks you for sharing this valuable content.
This is great google adsense information and i like your article writing style keep it up or keep continue your work 5 star from my side